
Effortless Instant Pot Stuffing: Your Ultimate Holiday Side Dish Guide
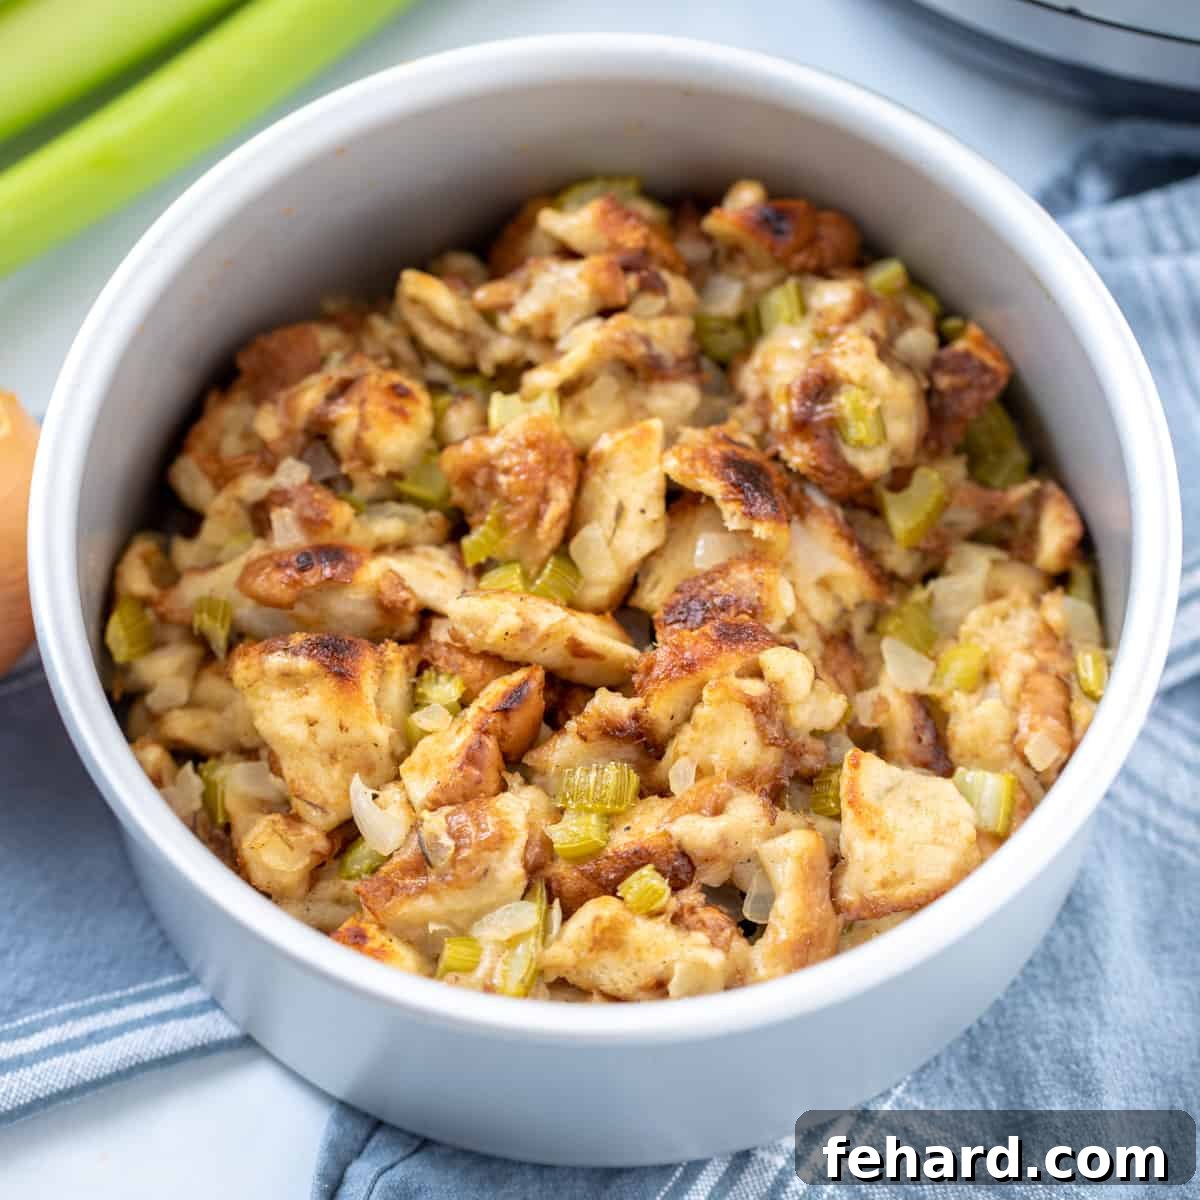
Imagine a holiday meal where your oven isn’t crammed, yet you still serve a perfectly moist, incredibly flavorful stuffing that tastes just as if it was cooked inside the turkey. This dream becomes a reality with **Instant Pot Stuffing**. This revolutionary method leverages the power of your pressure cooker to deliver a buttery, savory, and wonderfully tender side dish, freeing up precious oven space for your turkey, casseroles, and pies.
For those juggling a full festive menu and limited kitchen real estate, the Instant Pot is a true game-changer. Our Instant Pot Stuffing recipe ensures a consistently moist, rich, and aromatic result, evoking all the nostalgic flavors of a classic bread stuffing without the traditional fuss. Get ready to impress your guests and simplify your holiday cooking with this ingenious approach!
Why Choose Instant Pot Stuffing for Your Holiday Table?
The Instant Pot isn’t just for quick weeknight meals; it’s a secret weapon for holiday cooking. When it comes to preparing stuffing, pressure cooking offers several distinct advantages that make it an ideal choice for your festive spread:
- Oven Space Freedom: This is arguably the most significant benefit during the bustling holiday season. By delegating the stuffing to your Instant Pot, your conventional oven remains open and available for roasting the centerpiece turkey, baking various casseroles, or keeping other crucial side dishes warm. This strategic move drastically reduces kitchen congestion and holiday stress.
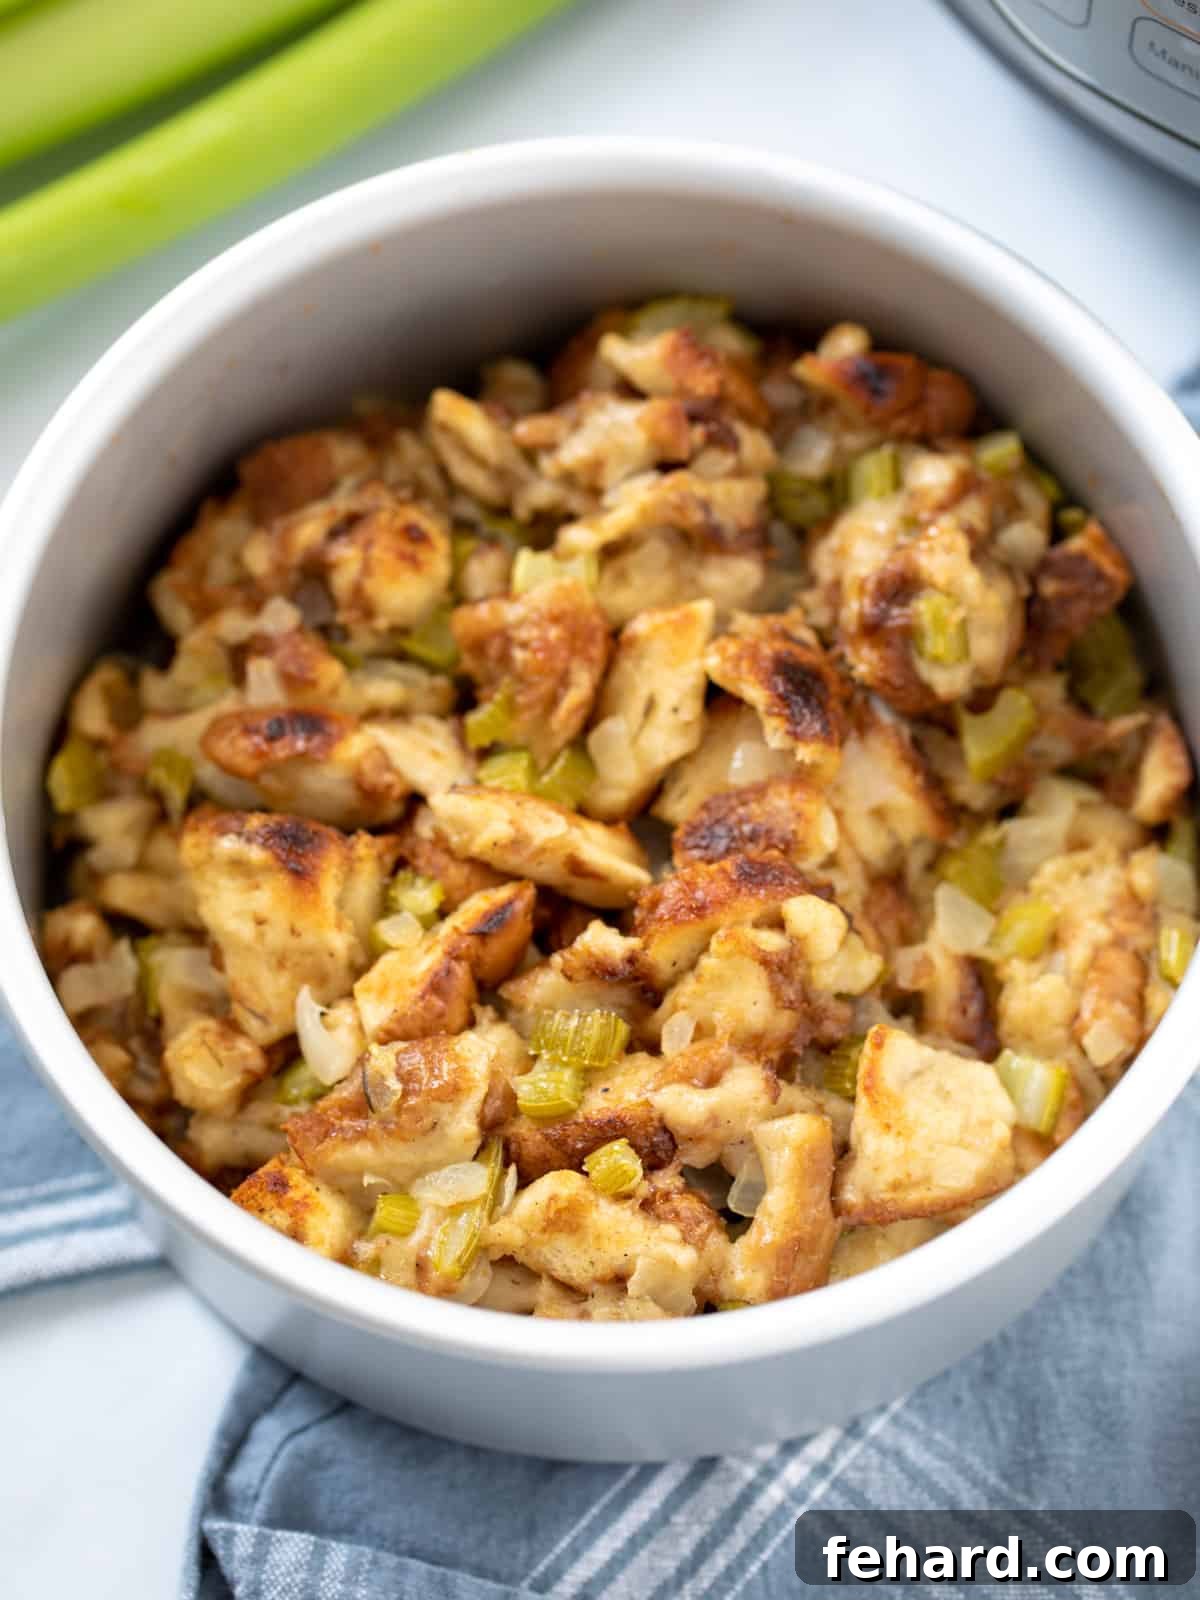
- Unmatched Moisture and Tenderness: The sealed, high-pressure environment of the Instant Pot naturally locks in moisture, creating an intensely steamy atmosphere. This unique cooking method results in stuffing that is consistently soft, incredibly fluffy, and never dry or crumbly. It truly achieves a level of moistness comparable to, if not exceeding, stuffing cooked directly inside the turkey.
- Hands-Off and Effortless Cooking: Once your stuffing is prepped and assembled in its pan, the Instant Pot takes over. This largely hands-off process means no constant checking, stirring, or worrying about over-browning. You’re free to devote your attention to other elements of your elaborate feast, enjoying a more relaxed cooking experience.
- Deep Flavor Infusion: Pressure cooking facilitates a deeper and more thorough infusion of flavors. The savory notes from the butter, aromatic vegetables, herbs, and broth are intensely absorbed into every single bread cube, creating a profoundly delicious and cohesive stuffing that tastes richly developed.
- Speed and Efficiency: While drying the bread is an important preparatory step that takes time, the actual pressure cooking cycle for the stuffing itself is remarkably quick. This efficiency is invaluable when time is of the essence on a busy holiday cooking day.
Expert Tips for Perfect Instant Pot Stuffing
Achieving outstanding results with your Instant Pot stuffing is straightforward when you keep a few critical points in mind. Follow these expert tips from Kristen to ensure your stuffing turns out incredibly flavorful, perfectly moist, and boasts the ideal texture every time:
- Select the Right Bread: The foundation of any truly great stuffing is the bread itself. For classic flavor and texture, opt for plain white bread varieties such as standard sandwich bread, Italian bread, or a mild sourdough. These types of bread possess the ideal crumb structure to absorb liquids beautifully and hold their shape during cooking. It’s best to avoid breads with prominent seeds or strong multigrain profiles, as these can inadvertently distract from the delicate savory flavors of the stuffing and introduce an overwhelming texture.
- Crucial Step: Thoroughly Dry Your Bread: This step is genuinely non-negotiable for achieving a superior stuffing texture. Properly dried bread acts like a perfect sponge, eagerly soaking up the rich buttery broth and savory seasonings without becoming mushy. If your bread isn’t adequately dried, it will absorb too much moisture too quickly, turning soggy and resulting in a dense, unappetizing texture. You have two excellent methods for drying:
- Overnight Air-Dry: Dice the bread into 1-inch cubes and spread them evenly in a single layer on a large baking sheet. Leave it uncovered or loosely covered with a clean kitchen towel at room temperature overnight.
- Oven Drying (Quicker Method): Spread the bread cubes on a baking sheet and toast them in a preheated 300°F (150°C) oven for approximately 10-15 minutes, tossing them once or twice, until they are lightly golden and firm to the touch.
- Don’t Skip Sautéing the Aromatics: The savory base created by sautéing onions and celery is fundamental to building deep, complex flavor in your stuffing. This quick sauté step can be done directly in the Instant Pot’s inner pot using its Sauté function, which is incredibly convenient and eliminates the need for an additional dirty pan. Sautéing softens the vegetables, allows their natural sugars to caramelize slightly, and helps their sweet and savory notes to develop fully, creating a rich and aromatic foundation that elevates the entire dish. This pre-cooking also prevents any raw vegetable taste and contributes to a more cohesive and tender texture in the final product.
- Utilize the Pot-in-Pot Method: Stuffing contains relatively little free liquid, making it unsuitable for direct pressure cooking on the bottom of the Instant Pot, which would almost certainly result in a “burn” notice. The pot-in-pot (PIP) method is therefore essential. This involves placing your stuffing in a separate, heat-safe dish (a 7-inch round baking dish or Bundt pan works perfectly) that then rests on a trivet above a small amount of water in the Instant Pot’s inner pot. This setup creates a gentle steaming environment, ensuring even heat distribution and that coveted moist texture without any risk of scorching or uneven cooking.
- Adjust Broth Levels Carefully: The precise amount of broth required can vary depending on several factors, including the type of bread you use and how thoroughly it has been dried. Always start with the recommended amount (1½ cups), but be prepared to add a little more, typically a quarter-cup at a time, until the bread cubes are uniformly moistened. The key is for each cube to feel soft and absorb liquid, yet still clearly hold its distinct shape without becoming soggy or swimming in liquid. This careful balance is crucial for preventing a dense, waterlogged stuffing and ensures every bite is flavorful and perfectly textured.
How to Make Instant Pot Stuffing: A Detailed Step-by-Step Guide
Whether you’re an experienced Instant Pot enthusiast or just learning how to use your Instant Pot, this detailed section will guide you through each stage of the process to ensure your stuffing is perfect every time. Follow along for moist, flavorful results that will undoubtedly be a highlight of your holiday spread.
Step One: Prepare and Thoroughly Dry the Bread
Begin by dicing your chosen bread (approximately one pound) into uniform 1-inch cubes. Consistency in size is important for even moisture absorption. The next, and most critical, step is to dry out the bread thoroughly. Spread the cubed bread in a single layer across a large baking sheet. You have two effective methods for drying: For air drying, simply cover the baking sheet loosely with a clean kitchen towel and let the bread sit out at room temperature overnight. For a quicker alternative, preheat your oven to 300°F (150°C), then place the baking sheet with the bread cubes in the oven for 10-15 minutes, tossing them gently halfway through, until they are lightly toasted, firm to the touch, and completely dry. This crucial preparatory step prevents the stuffing from becoming soggy and allows the bread to perfectly absorb the rich buttery broth.
Step Two: Sauté the Flavor Base in the Instant Pot
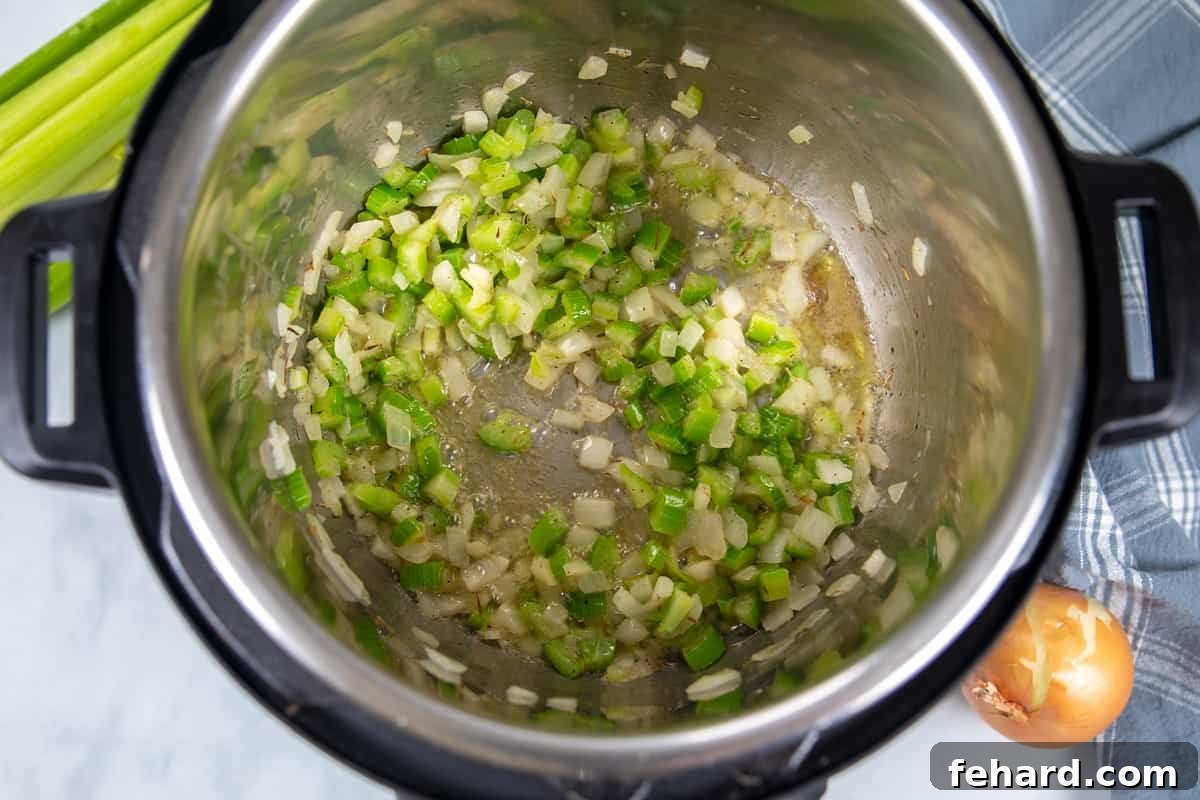
Turn on your Instant Pot and select the Sauté function (usually the Normal setting). Add 4 tablespoons of unsalted butter to the inner pot and allow it to melt completely. Once the butter has melted and is gently bubbling, add the minced yellow onions (about 1 cup, or roughly 1 large onion) and the diced celery (about 1 cup, or 2-3 stalks). Sauté the vegetables for 5-6 minutes, stirring occasionally, until they have softened and become translucent. This vital step is essential for building a deep, aromatic, and savory flavor base for your stuffing. It also contributes to a more pleasant texture in the final dish, ensuring the vegetables aren’t crunchy. Next, stir in ½ teaspoon of kosher salt, ½ teaspoon of black pepper, and ½ teaspoon of dried thyme leaves (ensure you’re using dried leaves, not ground thyme, for superior flavor and texture). Sauté for another minute or two to lightly toast the spices and release their fragrant oils. Finally, turn off the Sauté function.
Step Three: Combine Ingredients and Moisten the Bread
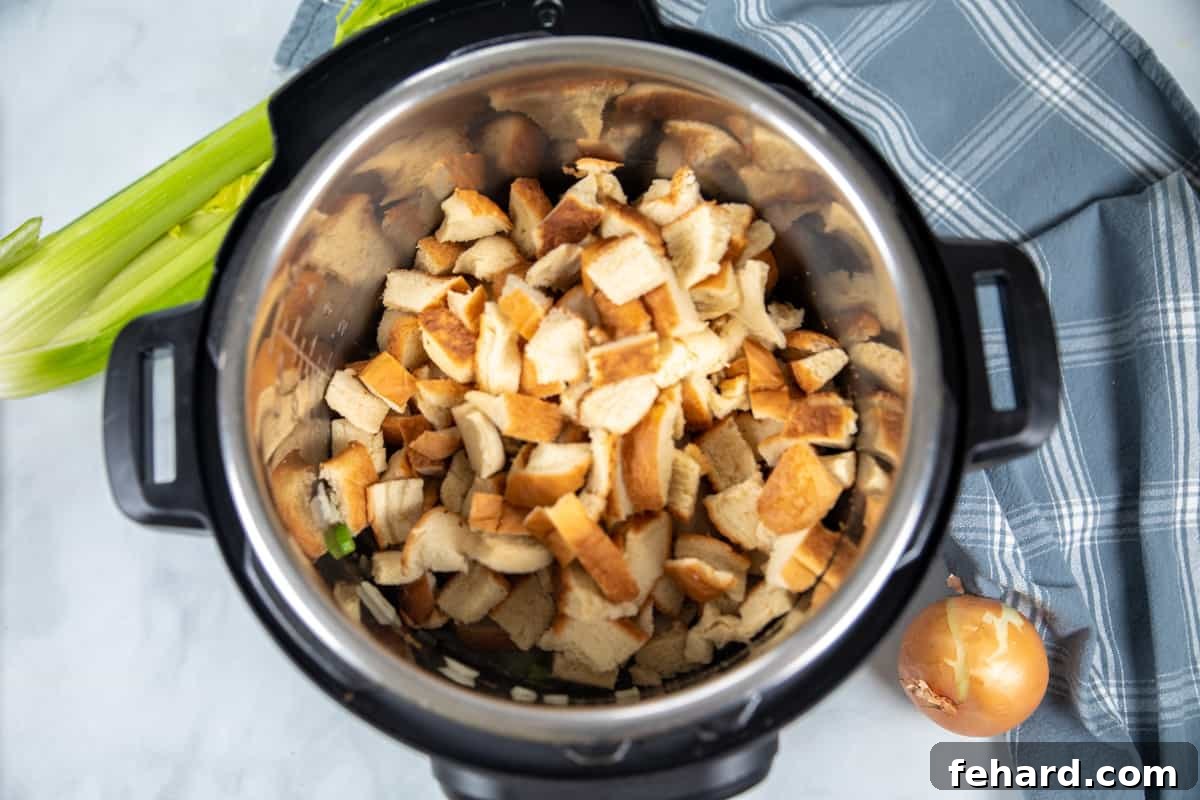
Before adding the bread, pour about 1 cup of low-sodium chicken stock into the inner pot. Use a wooden spoon or a sturdy spatula to carefully scrape up any browned bits that may have accumulated on the bottom of the pot during sautéing. This deglazing step not only adds another layer of flavor but is also crucial for preventing a “burn” notice during the pressure cooking cycle. Now, add your thoroughly dried bread cubes to the inner pot, along with the sautéed aromatics and spices. Gently fold all the ingredients together until they are well combined. Begin adding the remaining low-sodium chicken stock (you’ll need between 1½ to 2¼ cups total for the recipe, including the initial cup) a little at a time, usually a quarter-cup increment. The objective is to lightly moisten every single bread cube so that it absorbs the delicious flavor without becoming waterlogged or soggy. Keep in mind that different types of bread and varying degrees of dryness will require different amounts of broth, so adjust carefully. The cubes should feel soft and hydrated but still distinct and holding their individual shape. This careful balance ensures a flavorful and perfectly textured stuffing.
Step Four: Prepare for Pot-in-Pot Cooking
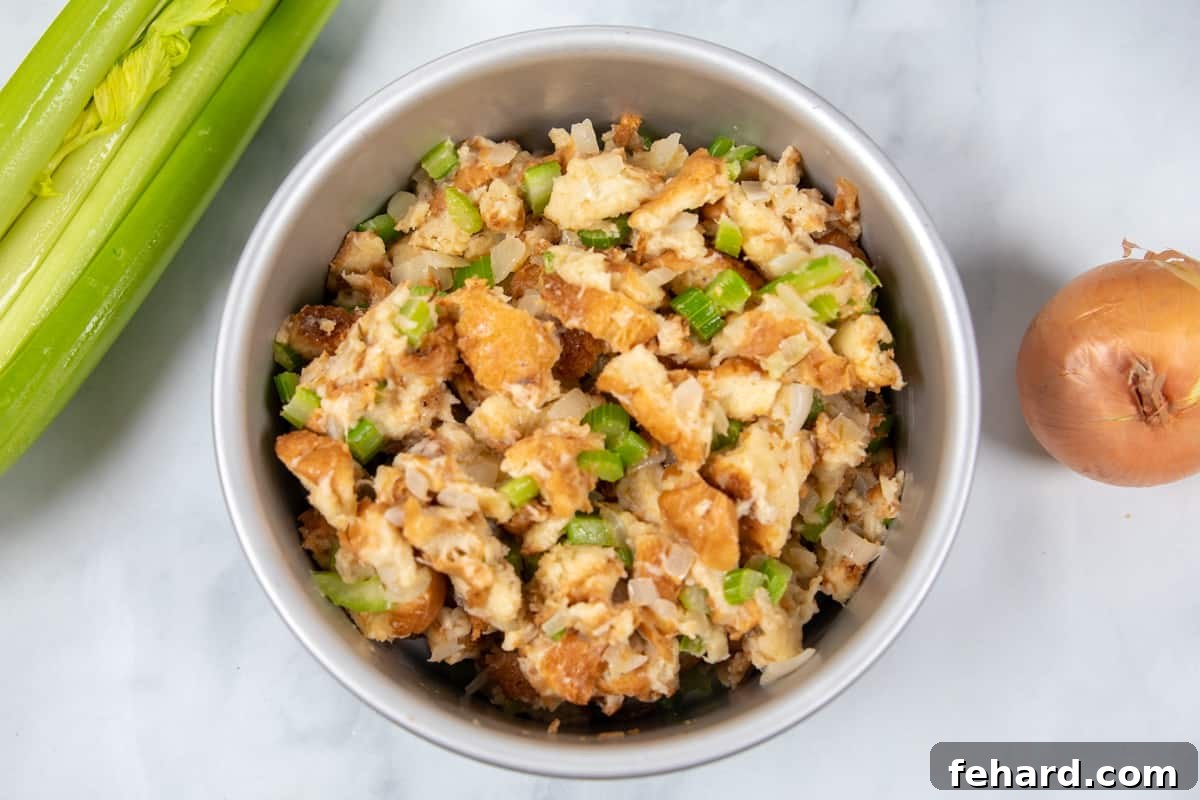
Generously grease a 7-inch heat-safe baking dish (a round cake pan or a Bundt pan works exceptionally well for this recipe) with additional butter. Carefully spoon the moistened stuffing mixture into the prepared pan, gently pressing it down to create an even layer. It is absolutely crucial to cover the dish tightly with aluminum foil. This foil cover serves a dual purpose: it prevents excess condensation from accumulating on the surface of the stuffing during pressure cooking, which could lead to a watery or mushy top layer, and it helps to maintain a consistently moist and evenly cooked interior.
Step Five: Assemble the Instant Pot for Pressure Cooking
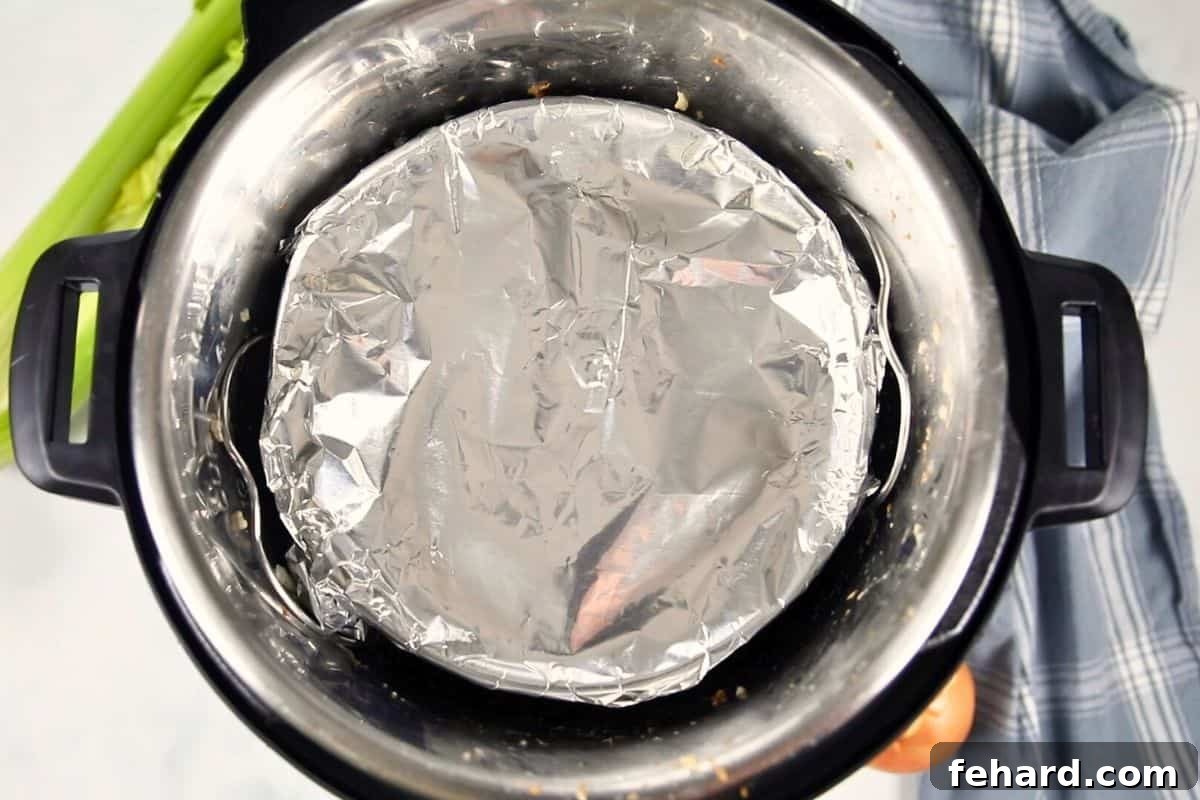
Pour 1.5 cups of cold water into the inner pot of your Instant Pot. This precise amount of water is essential for generating the steam required for effective pressure cooking. Next, place the metal trivet (the steamer rack that typically comes with your Instant Pot) into the inner pot, ensuring it rests securely at the bottom. Carefully place the foil-covered pan containing the stuffing onto the trivet. Double-check that the pan is stable and centered on the trivet. This meticulous setup allows for the essential “pot-in-pot” (PIP) cooking method, which ensures the stuffing cooks gently and evenly with steam, preventing any direct contact with the heating element that could cause scorching or uneven cooking.
Step Six: Pressure Cook to Fluffy Perfection
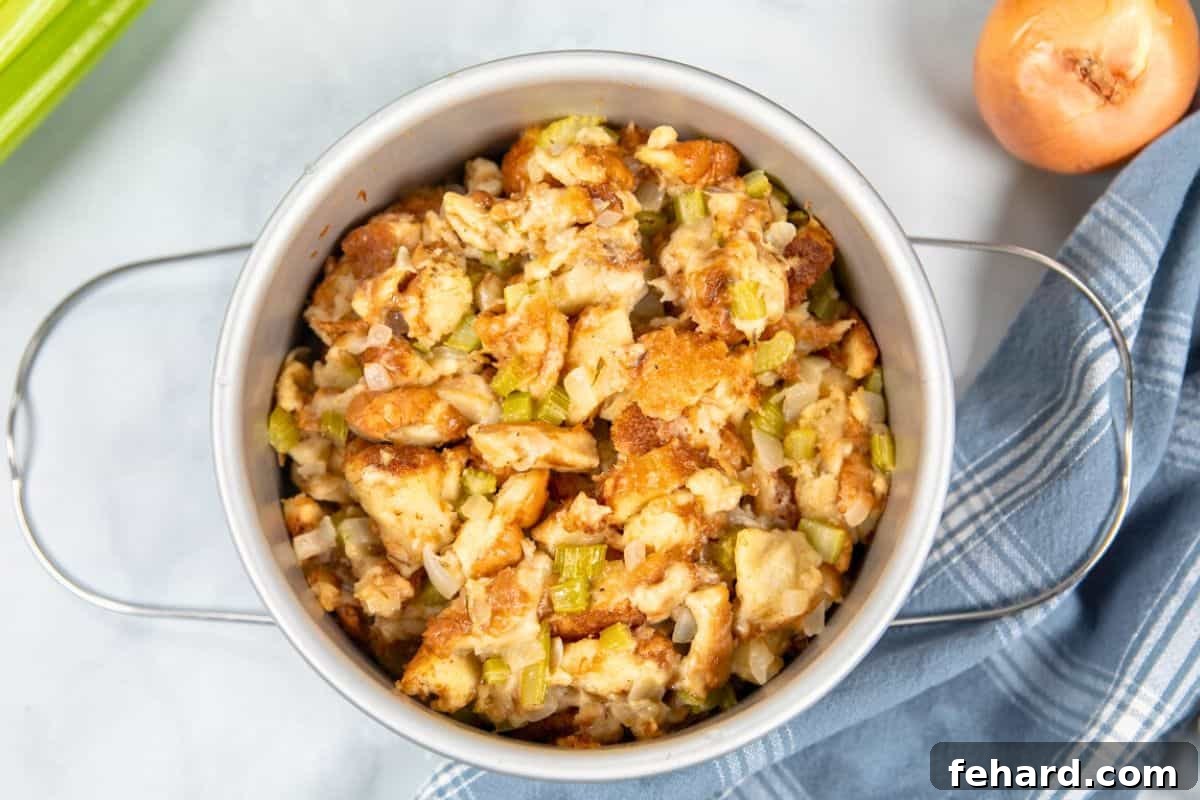
Secure the lid on your Instant Pot, making sure that the sealing ring is properly seated and the lid is fully locked. Turn the steam release valve to the “Sealing” position. Select the “Pressure Cook” or “Manual” setting on High Pressure. Set the cooking time as follows: if you are using a 7-inch cake pan, cook for 20 minutes. If you are using a 7-inch Bundt pan, which allows for slightly faster and more even heat distribution due to its hollow center, cook for 15 minutes on High Pressure. Once the cooking cycle has completed, allow the pressure to release naturally for 10 minutes (Natural Pressure Release, NPR). After this 10-minute period, carefully switch the steam release valve to “Venting” for a Quick Release (QR) of any remaining pressure until the float valve drops. This controlled, two-stage release ensures the stuffing remains wonderfully soft, fluffy, and perfectly moist.
Step Seven: Achieve Golden, Crispy Edges (Optional)
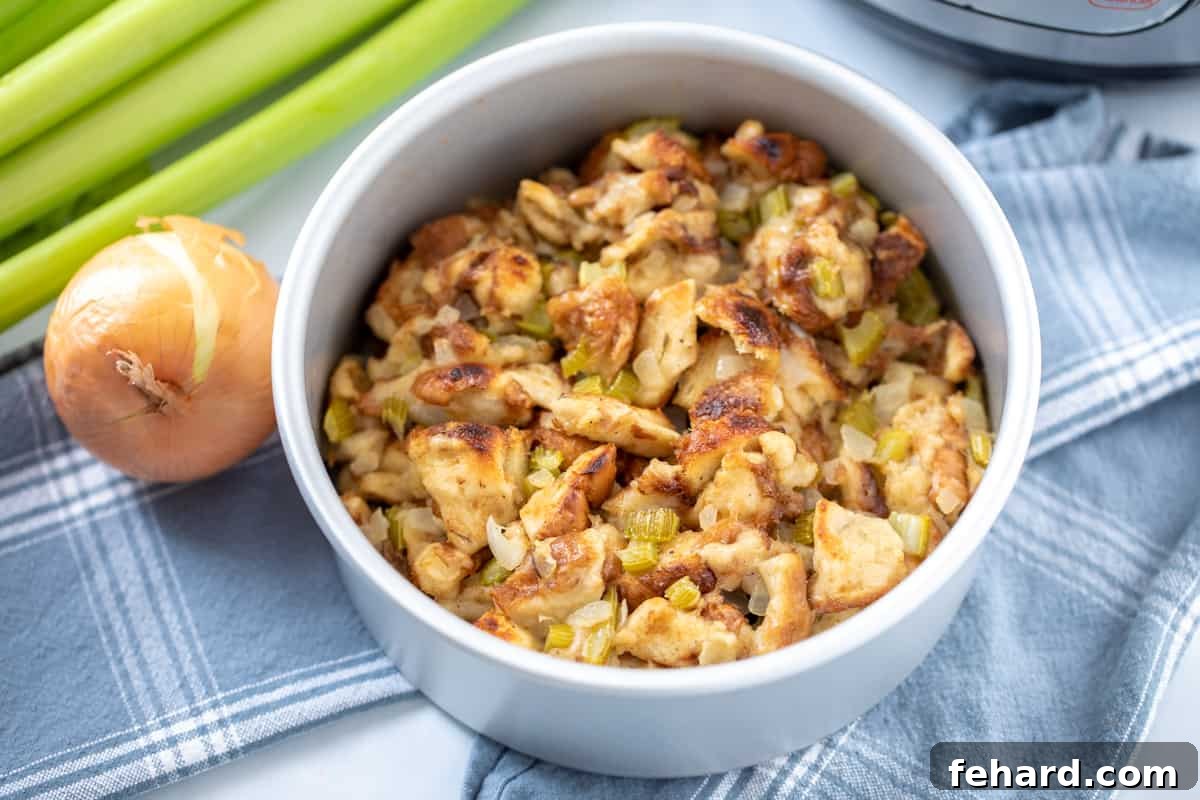
For those who adore a beautiful golden, slightly crispy top and edges on their stuffing, this optional finishing step is an absolute must. Carefully remove the pan of cooked stuffing from the Instant Pot and gently discard the aluminum foil. You have two excellent and efficient options for achieving that desirable browning:
- Broiler Method: Position your oven rack about 6-8 inches from the broiler element and preheat your broiler. Carefully place the uncovered stuffing pan under the preheated broiler for 3-5 minutes. It is crucial to watch it continuously, as broilers can brown very quickly, to achieve a beautiful golden crust without any burning.
- Air Fryer Lid Method: If you own an Instant Pot Air Fryer Lid, attach it to your Instant Pot and cook the stuffing according to the lid’s specific instructions until the top is lightly browned and perfectly crispy. This method provides excellent results with minimal additional effort and often more even browning.
Recipe Modifications & Notes for Your Stuffing
Customize your Instant Pot stuffing with these helpful tips and variations to suit your taste and dietary needs:
- Dairy-Free Option: This recipe can be easily adapted for dairy-free diets. Simply swap the traditional unsalted butter for your favorite high-quality plant-based stick butter or margarine. Always double-check that any chicken stock used is also dairy-free if following strict dietary guidelines.
- Enhance Flavor: For a flavor profile reminiscent of classic boxed stuffing, consider adding up to 1 teaspoon of homemade poultry seasoning to the mix along with, or in place of, the dried thyme. If you’re looking to keep the dish vegetarian, an easy substitution is to use a robust low-sodium vegetable broth instead of chicken broth. You can also elevate the overall flavor with additional fresh herbs like chopped sage or rosemary, or by adding sautéed mushrooms or finely chopped apples for a touch of subtle sweetness and earthy notes.
- Storage & Leftovers: Any leftover Instant Pot stuffing can be stored conveniently in an airtight container in the refrigerator for up to 4 days. To reheat, individual portions can be warmed effectively in the microwave in 30-second intervals until heated through, or covered and gently reheated in a conventional oven. Stuffing is wonderfully versatile and provides an excellent base for creative Thanksgiving leftover recipes—have you ever considered making Thanksgiving Egg Rolls? It’s a fantastic and delicious way to reinvent your holiday feast!
- Different Bread Choices: While plain white bread is recommended for its classic texture and absorption properties, you can certainly experiment with other sturdy breads. Options like challah or brioche can add a richer, slightly sweeter note, while a good quality gluten-free bread works perfectly if you need a gluten-free option. The most important factor remains to ensure any bread you choose is thoroughly dried before mixing.
- Additions for Texture and Flavor: Elevate your stuffing with a variety of additions. Cooked breakfast or sage sausage provides a hearty, savory boost. Chopped water chestnuts add a delightful crunch. For a touch of sweetness and chewiness, consider dried cranberries, while toasted pecans or walnuts can introduce a nutty depth and pleasing texture.
More Instant Pot Thanksgiving Recipes to Complete Your Meal
Streamline your entire holiday meal preparation and make your festive cooking truly stress-free by leveraging the power of your Instant Pot! Explore our comprehensive collection of Instant Pot Thanksgiving recipes to beautifully complement your perfectly cooked stuffing. Here are some of our personal favorites to help you create an effortlessly delicious and memorable feast:
- Instant Pot Turkey Breast: Achieve incredibly tender and juicy turkey breast cooked quickly and efficiently, perfect for smaller gatherings or as an addition to your main turkey.
- Instant Pot Cranberry Sauce: Prepare fresh, vibrant, and perfectly sweet-tart cranberry sauce in mere minutes, surpassing any canned version.
- Instant Pot Mashed Potatoes: Create unbelievably fluffy, creamy, and lump-free mashed potatoes with minimal effort and cleanup.
- Instant Pot Green Beans: Enjoy perfectly tender-crisp green beans, seasoned to perfection, in a fraction of the time compared to stovetop methods.
- Instant Pot Pumpkin Cheesecake: A decadent, smooth, and surprisingly easy dessert that will impress your guests and round off your holiday spread beautifully.
Instant Pot Stuffing Recipe
By: Kristen Chidsey
Servings: 8
Prep Time: 15 mins
Cook Time: 15-20 mins (plus pressure build-up and natural release time)
Total Time: Approximately 12 hrs 45 mins (including overnight bread drying)
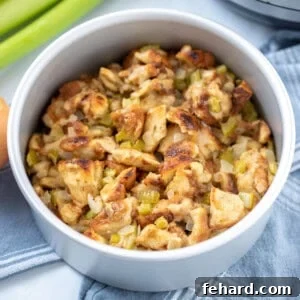
Made with perfectly sautéed celery and onions, and wonderfully cubed bread, this Instant Pot Stuffing is exceptionally rich, buttery, and incredibly moist. It’s the ultimate, oven-space-saving solution for preparing a truly delicious and hassle-free holiday meal.
Watch the Video Tutorial
Ingredients
- 1 pound bread (white bread, Italian, or sourdough recommended), cut into 1-inch cubes
- 4 tablespoons unsalted butter, plus more for greasing the pan
- 1 cup minced yellow onion (about 1 large onion)
- 1 cup diced celery (about 2-3 stalks)
- ½ teaspoon kosher salt
- ½ teaspoon black pepper
- ½ teaspoon dried thyme leaves (not ground thyme)
- 1½ – 2¼ cups low-sodium chicken stock (homemade chicken stock is excellent)
Instructions
- Prepare and Dry Bread: Cube 1 pound of bread into uniform 1-inch pieces. Spread these cubes evenly in a single layer onto a large baking sheet. To properly dry out the bread, you have two effective options: you can cover the sheet pan loosely with a clean kitchen towel and allow the bread to air-dry overnight at room temperature. Alternatively, for a quicker method, toast the bread in a preheated 300°F (150°C) oven for 10-15 minutes, stirring once or twice, until the cubes are dry, lightly golden, and firm to the touch. This crucial step is vital for preventing soggy stuffing and ensures optimal broth absorption.
- Sauté Aromatics: Turn on your Instant Pot and select the Sauté function (usually the Normal setting). Add 4 tablespoons of unsalted butter to the inner pot and allow it to melt completely. Once the butter has melted, add the minced yellow onion and diced celery. Sauté this mixture for 5-6 minutes, stirring occasionally, until the vegetables are softened and appear translucent. Next, stir in ½ teaspoon of kosher salt, ½ teaspoon of black pepper, and ½ teaspoon of dried thyme leaves (ensure it’s dried leaves, not ground thyme, for better flavor and texture). Continue to sauté for just another 1-2 minutes to lightly toast the spices and release their fragrant oils. Then, turn off the Sauté function.
- Deglaze and Mix Stuffing: Pour 1 cup of low-sodium chicken stock into the inner pot. Use a wooden spoon or a sturdy spatula to carefully scrape up any browned bits from the bottom of the pot. This deglazing action not only adds deep flavor but also prevents a “burn” notice during pressure cooking. Add the thoroughly dried bread cubes to the inner pot, along with the sautéed aromatics and spices. Gently fold all the ingredients together until well combined. Gradually add the remaining low-sodium chicken stock (from ½ cup up to 1¼ cups, depending on the dryness of your bread) a quarter-cup at a time, until the bread cubes are uniformly moistened but still clearly hold their distinct shape. Avoid over-saturating the bread to prevent it from becoming soggy.
- Transfer to Pan: Generously grease a 7-inch heat-safe baking dish (a round cake pan or Bundt pan works well) with additional butter. Carefully spoon the moistened stuffing mixture into the prepared pan, gently spreading it down evenly. Cover the pan tightly with aluminum foil. This covering is essential as it prevents any excess moisture from accumulating on the surface of the stuffing during pressure cooking, ensuring a perfect texture.
- Set Up Instant Pot: Pour 1.5 cups of cold water into the inner pot of your Instant Pot. Place the metal trivet (steamer rack) that came with your Instant Pot into the inner pot. Carefully place the foil-covered pan of stuffing onto the trivet, ensuring it is stable and centered. This setup is crucial for the “pot-in-pot” cooking method.
- Pressure Cook: Secure the lid on your Instant Pot, making sure the sealing ring is correctly in place and the steam release valve is turned to the “Sealing” position. Select the “Pressure Cook” or “Manual” setting on High Pressure. Set the cooking time to 20 minutes if you are using a cake pan, or 15 minutes if you are using a Bundt pan (the Bundt pan’s hollow center allows for slightly faster, more even cooking).
- Release Pressure: Once the pressure cooking cycle is complete, allow the pressure to release naturally for 10 minutes (NPR – Natural Pressure Release). After 10 minutes, carefully and slowly turn the steam release valve to the “Venting” position for a Quick Release (QR) of any remaining pressure until the float valve drops completely. This two-stage release method helps keep the stuffing wonderfully soft and fluffy.
- Remove and Serve: Carefully remove the pan of stuffing from the Instant Pot using oven mitts or a pot-in-pot sling. Gently remove and discard the aluminum foil. Your stuffing will be beautifully moist, flavorful, and ready to serve.
- Optional Browning: For those who love a golden, slightly crispy top on their stuffing, this step is highly recommended. You can either place the uncovered stuffing pan under a preheated broiler for 3-5 minutes (watching closely to prevent burning, as broilers work quickly) or use an Instant Pot Air Fryer Lid according to its instructions until the top is lightly browned and perfectly crispy. Serve immediately and enjoy!
Equipment
- Electric Pressure Cooker (6 or 8 quart)
- 7 inch cake pan (or 7-inch Bundt pan)
- Large baking sheet (for drying bread)
- Wooden spoon or spatula
- Aluminum foil
- Metal trivet (comes with Instant Pot)
Recipe Notes
- Bread Selection: While any sturdy bread will work, white bread, Italian, or sourdough are highly recommended for achieving the classic stuffing texture and flavor. Breads with multi-grains or seeds may alter the final taste and consistency. Gluten-free bread can also be used effectively, just ensure it is thoroughly dried before mixing.
- Dairy-Free Option: To make this recipe completely dairy-free, simply substitute the regular butter with an equal amount of your favorite plant-based stick butter or margarine.
- Seasoning Variations: For a more traditional, rich savory flavor, consider adding 1 teaspoon of homemade poultry seasoning either in addition to, or as a substitute for, the dried thyme. Other complementary herbs like dried sage, rosemary, or marjoram can also be incorporated to taste.
- Storage Instructions: Allow any leftover stuffing to cool slightly, then transfer it to an airtight container. Store it in the refrigerator for up to 3-4 days. To reheat, individual portions can be warmed in the microwave in 30-second intervals until heated through, or covered and reheated in a conventional oven.
- Serving Suggestions: This Instant Pot Stuffing is a perfect and versatile side dish for a wide array of main courses, including roasted turkey, chicken, pork loin, or even a holiday ham. It also makes for fantastic leftovers, ideal for post-holiday sandwiches, a quick re-fried stuffing side, or incorporated into creative casseroles.
Nutrition Information (Approximate per serving)
- Calories: 222 kcal
- Carbohydrates: 31g
- Protein: 7g
- Fat: 8g
- Saturated Fat: 4g
- Polyunsaturated Fat: 1g
- Monounsaturated Fat: 2g
- Trans Fat: 1g
- Cholesterol: 15mg
- Sodium: 516mg
- Potassium: 213mg
- Fiber: 3g
- Sugar: 5g
- Vitamin A: 234 IU
- Vitamin C: 2mg
- Calcium: 92mg
- Iron: 2mg
Nutrition information is automatically calculated and should be used as an approximation only. Factors like specific ingredients, brands, and cooking methods can alter the final values.
Tried this recipe?
We love hearing from you! If you’ve made this Instant Pot Stuffing, please consider leaving a comment and rating below. Your feedback helps other home cooks discover delicious new recipes!
Don’t forget to mention @amindfullmom or tag #amindfullmom on social media if you share your culinary creations!