
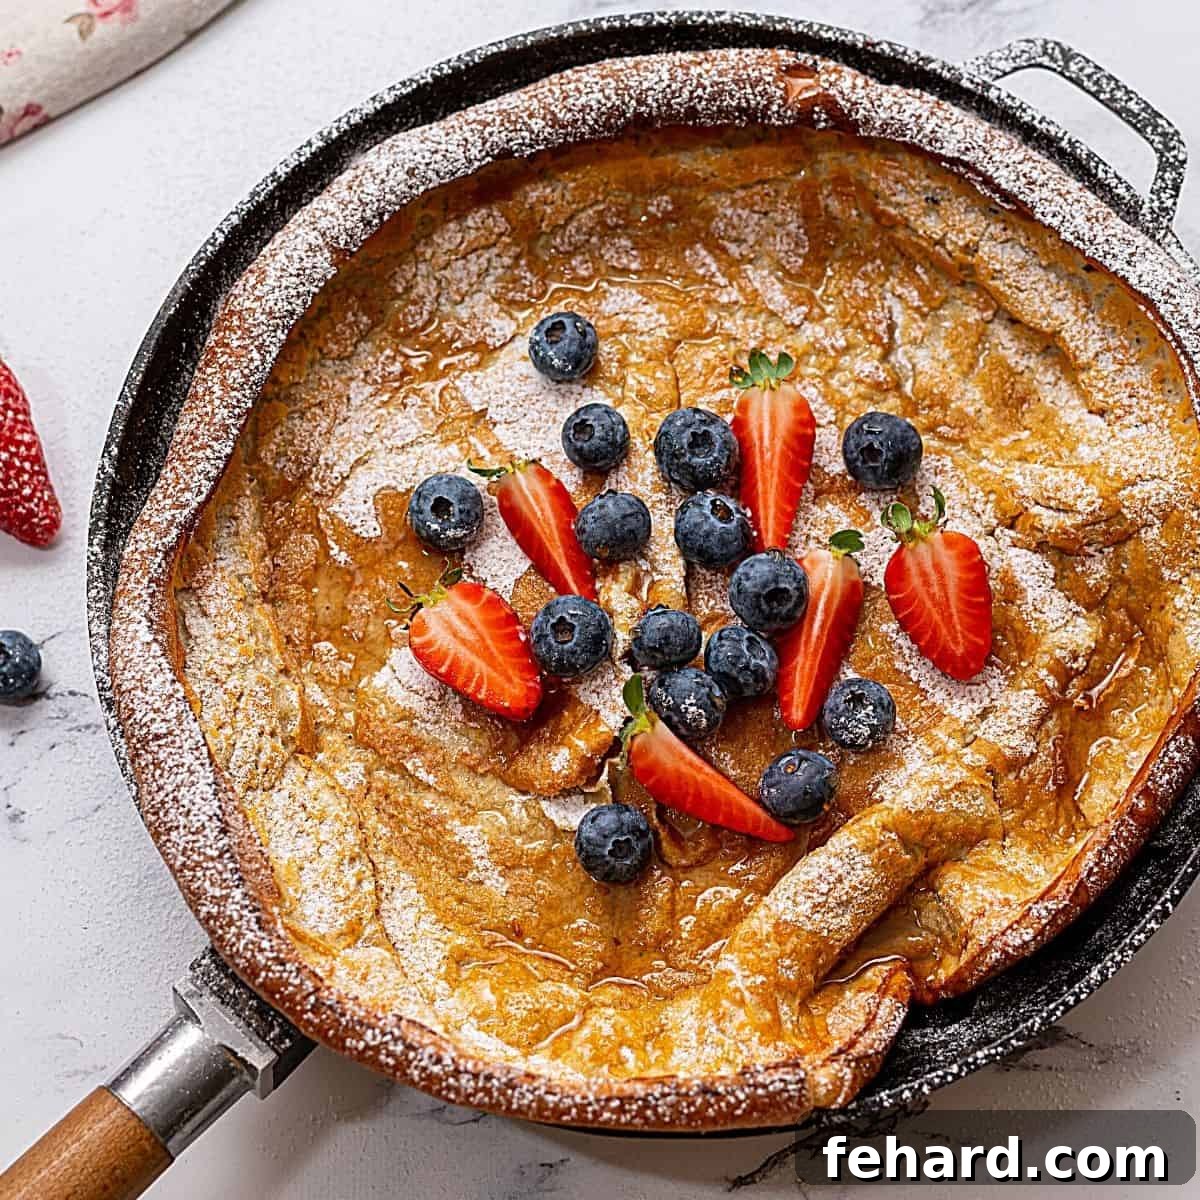
The Ultimate Dutch Baby Pancake: An Effortless & Show-Stopping Breakfast Delight
Prepare to be amazed by the sheer simplicity and incredible results of a Dutch Baby Pancake. This beloved oven-baked pancake transforms minimal effort into a magnificent, puffy creation, perfect for any breakfast or brunch. With just 5 minutes of active prep time, you’ll achieve a beautifully golden, irresistibly buttery, and wonderfully tender pancake with delightfully crispy edges. It’s a culinary spectacle that promises both ease and elegance.
Imagine serving this golden-edged marvel straight from the oven, its dramatic puff inviting eager forks. The rich aroma of butter and vanilla fills your kitchen, setting the stage for a truly unforgettable meal. Pair it with savory sides like crispy baked bacon or flavorful homemade breakfast sausage, and a vibrant honey-lime fruit salad for a perfectly balanced and utterly delicious experience.
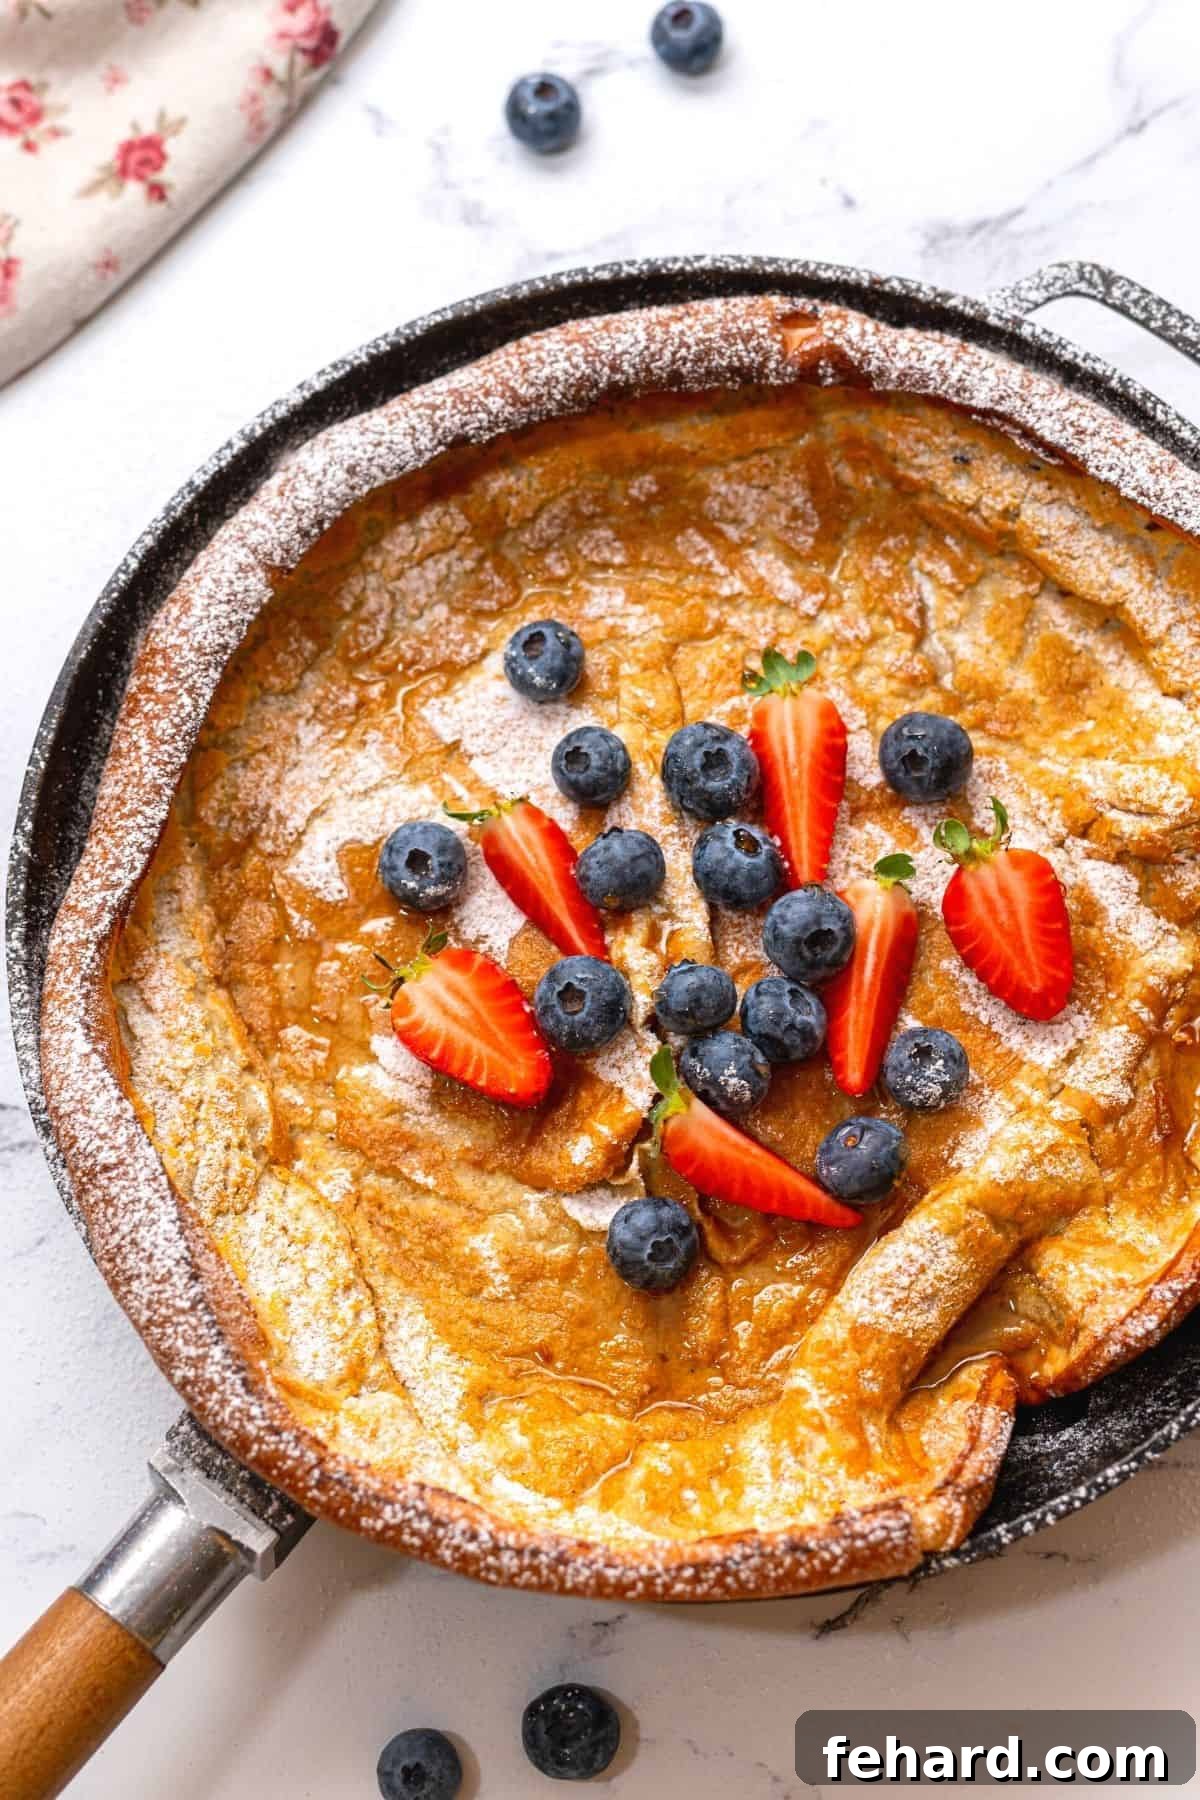
Why the Dutch Baby is My All-Time Favorite Pancake
In the world of pancakes, everyone has a favorite. My kids, without fail, will always vote for classic chocolate chip pancakes, while my husband consistently chooses the indulgent layers of strawberry cheesecake pancakes. But for me, if given the choice for a truly special breakfast, my personal vote consistently goes to the elegant and surprisingly simple Dutch Baby Pancake. Also known affectionately as a German Pancake or an Oven Pancake, this dish stands in a league of its own, offering a unique textural and flavor experience.
My preferred pancake is nothing like the fluffy, stacked varieties you might be accustomed to. Instead, the Dutch Baby is made with a rich, egg-forward batter that bakes into a spectacular, golden-brown creation. It’s characterized by wonderfully buttery, caramelized edges that provide a delightful crispness, while the center remains incredibly tender and custardy. It skillfully merges the delicate thinness and rich flavor of crepes with the comforting, bread-like softness of French toast and the satisfying, airy texture often found in waffles. The combination of these beloved breakfast elements results in something truly magical and utterly satisfying.
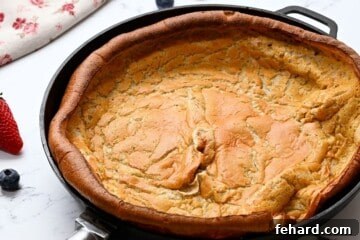
Despite how remarkably easy it is to prepare, the presentation of a Dutch Baby Pancake is nothing short of stunning. As it bakes in the high heat of the oven, the batter miraculously caramelizes and puffs up dramatically along the sides, forming impressive, golden walls around a slightly sunken, custardy center. This spectacular rise is reminiscent of a giant Yorkshire pudding, creating a breathtaking visual feast. Finished with a delicate dusting of powdered sugar, a scattering of colorful fresh berries, and a generous drizzle of warm maple syrup, it’s hard to find a breakfast that rivals the buttery richness and impressive appeal of a perfectly baked Dutch Baby Pancake. It’s a dish that feels gourmet but is achievable for any home cook.
Happy Cooking! xo Kristen
Table of Contents: Your Guide to Dutch Baby Perfection
- Dutch Baby Pancake Recipe
- The Fascinating Origin of the Dutch Baby Pancake
- Essential Ingredients & Equipment
- Step-By-Step Guide to the Perfect Dutch Baby
- Serving Suggestions & Creative Variations
- Troubleshooting Tips for Your Dutch Baby
- Doubling the Recipe for a Crowd
- More Favorite Pancake Recipes to Explore
The Fascinating Origin of the Dutch Baby Pancake
The name “Dutch Baby Pancake” often sparks curiosity, as it’s neither authentically Dutch nor exclusively German, despite its popular alias, “German Pancake.” The true origin of this delightful dish traces back to the United States, specifically to Seattle, Washington, in the early 20th century. The credit for popularizing this unique oven-baked pancake typically goes to Manca’s Cafe, a family-owned establishment.
Victor Manca, the proprietor of Manca’s Cafe, created what he called a “German Pancake” based on a traditional German Pfannkuchen, a large, thin pancake. However, the endearing “Dutch Baby” moniker is believed to have come from one of Manca’s daughters, who supposedly mispronounced “Deutsch” (the German word for German) as “Dutch.” The addition of “Baby” might have been a playful term of endearment for the smaller, personal-sized pancakes served, or simply to differentiate it from its larger German inspirations. Regardless of the exact linguistic evolution, the name “Dutch Baby” stuck, becoming synonymous with this unique, puffy breakfast sensation.
This charming backstory highlights the dish’s fusion of European culinary tradition with American innovation. It’s a testament to how food evolves and adapts, creating new favorites along the way. Knowing its heritage adds a layer of appreciation to each buttery, custardy bite, connecting you to a delightful piece of culinary history. The Dutch Baby Pancake isn’t just a meal; it’s a story on a plate, ready to be enjoyed and shared.
Essential Ingredients & Equipment for Your Perfect Dutch Baby
Crafting the perfect Dutch Baby Pancake requires just a handful of simple ingredients and the right tools. Below, you’ll find a detailed look at what you need, along with expert tips for selecting and preparing them to ensure the best possible results.
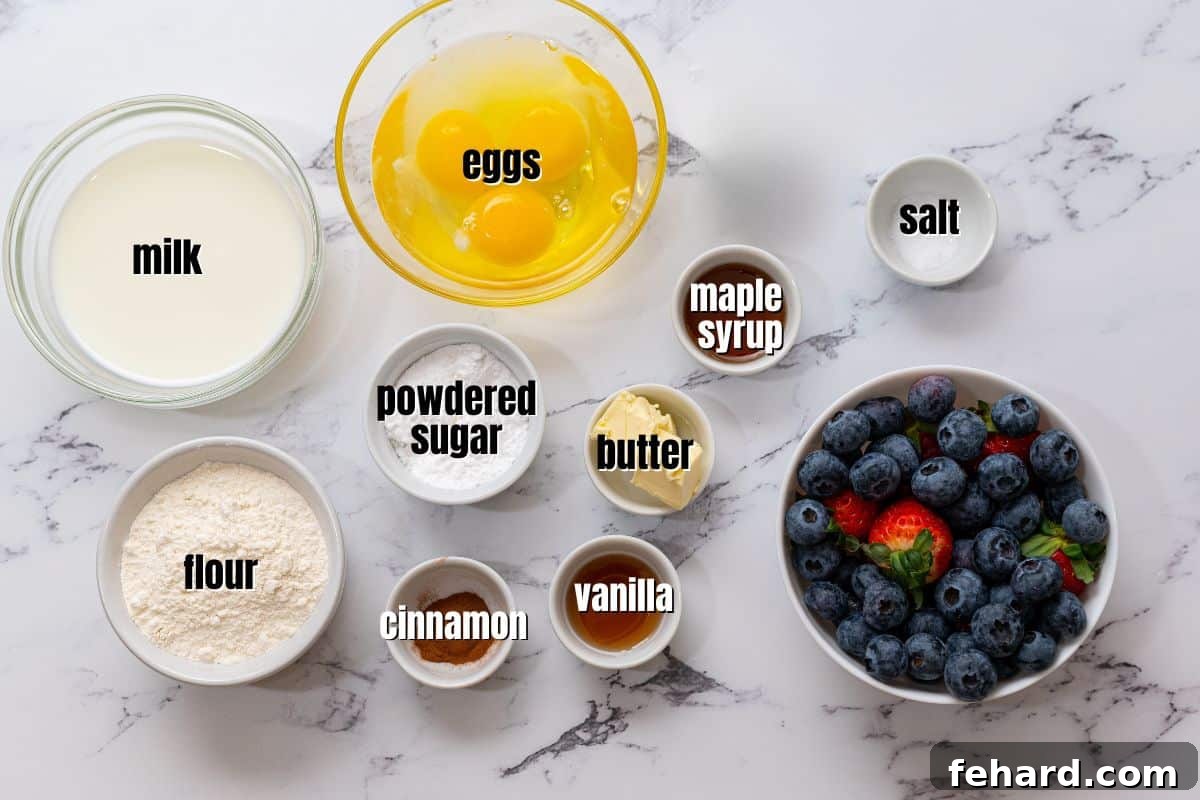
- Flour: The choice of flour is critical for the Dutch Baby’s signature texture. For a consistently light, tender, and slightly chewy result, all-purpose flour is your best bet. If you’re looking to incorporate more whole grains and a subtle nutty flavor, whole white wheat flour can be used without significantly compromising the pancake’s texture. Avoid using heavier flours like regular whole wheat flour, which can make the pancake dense and prevent it from puffing adequately.
- Milk: The fat content in milk contributes significantly to the pancake’s richness, tenderness, and golden-brown crust. While whole milk will undoubtedly yield the most luxurious and flavorful results, producing a truly decadent Dutch Baby, any variety of milk will work. Feel free to use 2%, 1%, or even non-dairy alternatives like almond, soy, or oat milk based on your dietary preferences or what you have available. Just remember that the richer the milk, the richer the flavor.
- Eggs: Eggs are the true star of the Dutch Baby, absolutely crucial for its impressive puff and custardy interior. They act as the primary leavening agent and provide the structure that allows the pancake to rise so dramatically. Always ensure your eggs are fresh and, ideally, at room temperature. Room temperature eggs blend more smoothly into the batter and can contribute to a better rise.
- Butter: Unsalted butter plays a dual role in this recipe. A small amount is incorporated into the batter for added richness and flavor. More importantly, a generous portion is melted and preheated in the skillet before the batter is added. This pre-melted, sizzling butter creates the iconic crispy, caramelized edges and prevents the pancake from sticking to the pan. Using unsalted butter allows you to control the overall saltiness of your dish.
- Sweeteners & Flavorings:
- Maple Syrup: A touch of pure maple syrup in the batter adds a subtle, natural sweetness and a depth of flavor that complements the richness of the eggs and butter. Of course, you’ll also want extra for drizzling generously over the finished pancake!
- Vanilla Extract: This is a non-negotiable ingredient for me. A good quality vanilla extract is essential for rounding out the flavors and infusing the pancake with its warm, aromatic, and comforting notes.
- Cinnamon (Optional): While not strictly a traditional addition to every Dutch Baby recipe, a hint of ground cinnamon offers a wonderful warmth and fragrance that pairs beautifully with the eggy batter and sweet toppings. If you prefer a more classic, unadulterated flavor, feel free to omit it.
- Salt: A small but important amount of table salt is included in the batter. It doesn’t make the pancake salty, but rather enhances and balances all the other flavors, making the sweetness brighter and the richness deeper.
Note on Equipment
The Right Skillet Makes All the Difference
The choice of skillet is paramount for a successful Dutch Baby. It is absolutely crucial to use a heavy, oven-safe 10-inch skillet that can withstand high temperatures, ideally up to 425°F (220°C). A sturdy 10-inch stainless steel skillet or, even better, a well-seasoned 10-inch cast-iron skillet will provide the consistent and even heat distribution necessary for optimal puffing and achieving those desirable crispy, golden-brown edges. Additionally, a blender is highly recommended for achieving a silky-smooth batter quickly and efficiently, though a whisk and bowl can work with more effort (see notes below).
Step-By-Step Guide to the Perfect Dutch Baby Pancake
Achieving that impressive puff, golden-crisp exterior, and custardy interior is simpler than you might imagine. Follow these detailed instructions to bake a Dutch Baby Pancake that will impress everyone at your breakfast or brunch table. The full list of ingredients and precise quantities can be found in the recipe card at the bottom of this post.
- Preheat Oven & Prepare Skillet: Begin by preheating your oven to a blazing 425°F (220°C). This high heat is crucial for the rapid expansion and puff of the pancake. While the oven heats, place 2 tablespoons of unsalted butter into your 10-inch oven-safe skillet. Once the oven reaches temperature, immediately place the skillet with butter inside for about 2-3 minutes, just long enough for the butter to melt completely and for the skillet itself to get piping hot. This critical step ensures immediate crisping of the batter and prevents sticking.
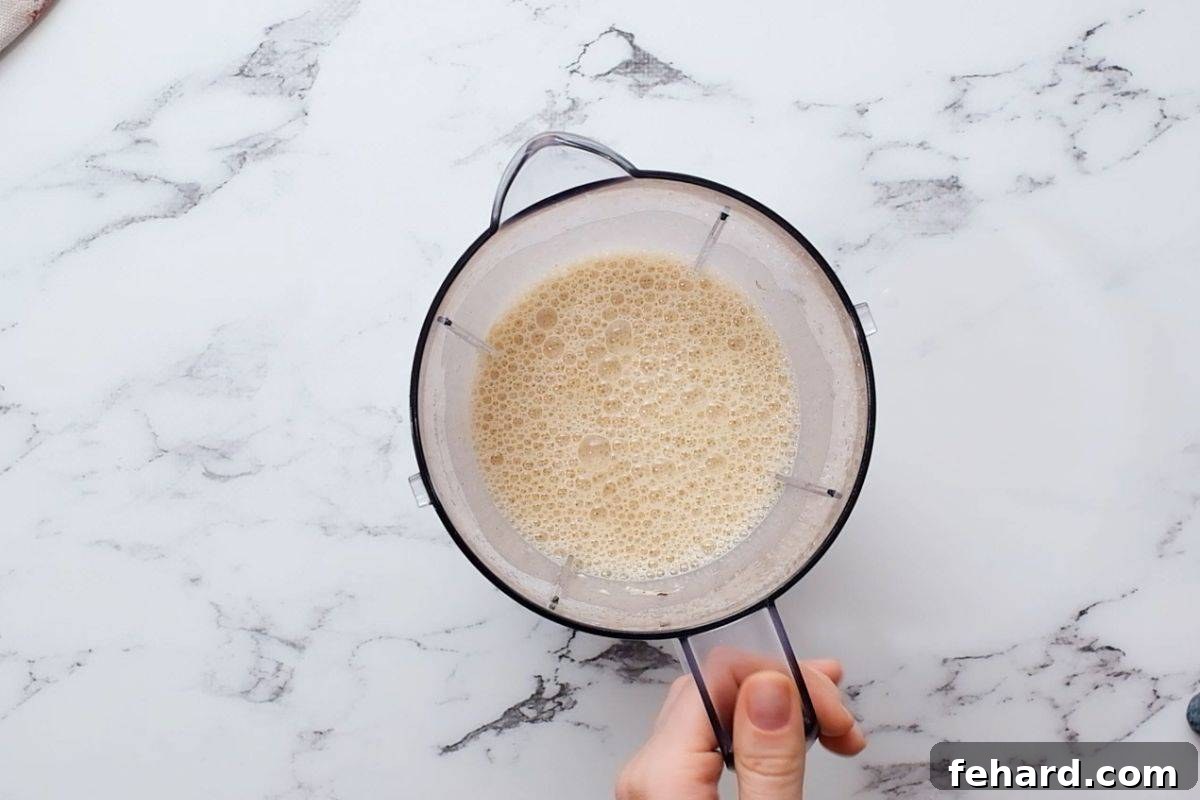
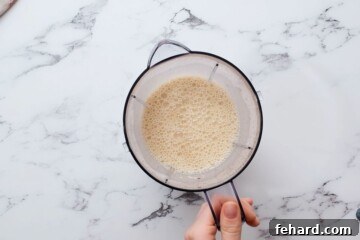
- Prepare the Batter (The Blender is Your Best Friend): In a blender, combine the slightly cooled 1 tablespoon of melted butter (ensure it’s not too hot, as it could scramble the eggs), 3 large eggs, ⅔ cup milk, 1 tablespoon maple syrup, 1 teaspoon vanilla extract, ½ teaspoon cinnamon (if you’re using it), ¼ teaspoon table salt, and ½ cup all-purpose flour. For best results and the smoothest batter, add liquids first, then dry ingredients. Blend on high speed until the batter is completely smooth, lump-free, and appears light and airy, about 30-60 seconds. A perfectly smooth batter is absolutely key to achieving a high, even rise.
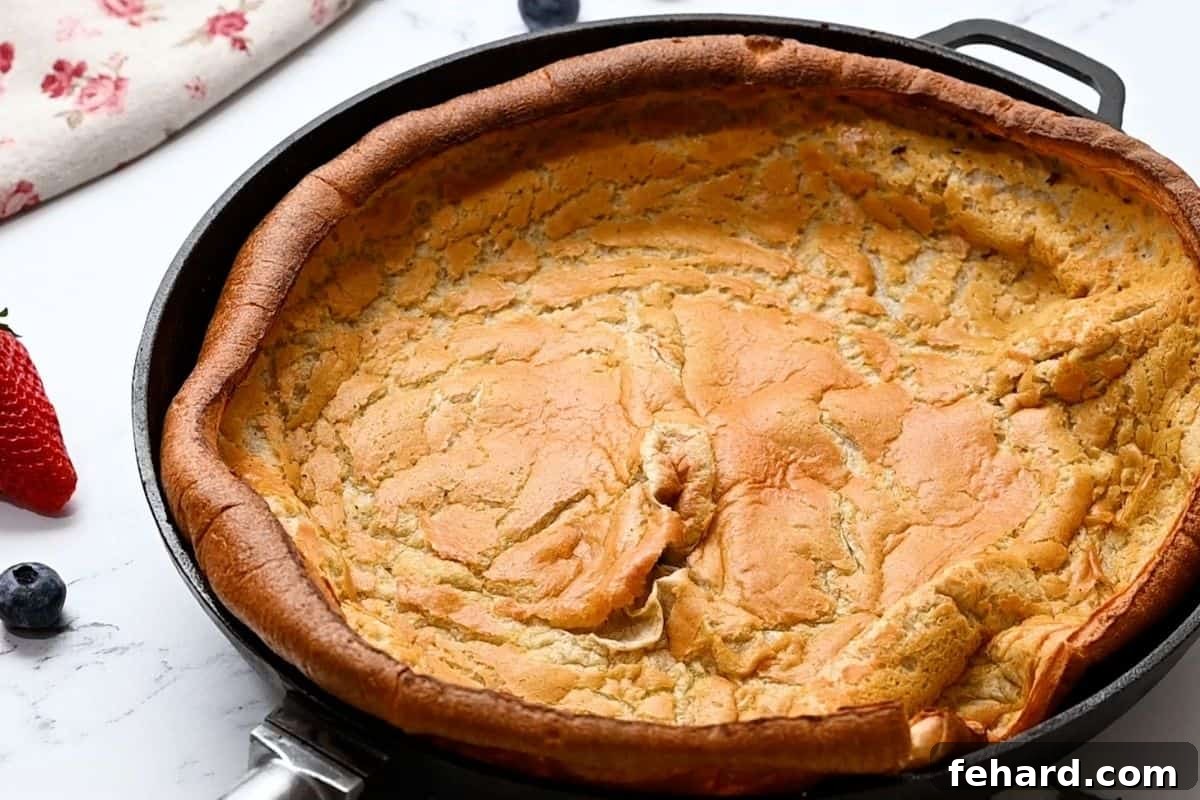
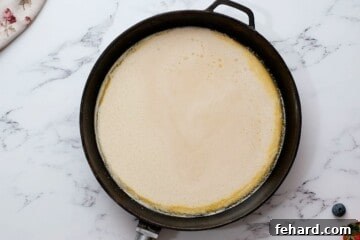
- Pour & Bake (Resist the Urge to Peek!): Carefully, and with oven mitts, remove the dangerously hot skillet from the oven. Swirl the melted butter to coat the bottom and sides evenly. Immediately pour the prepared batter directly into the center of the melted butter in the skillet. Return the skillet to the hot oven without delay. Bake for 20-25 minutes, or until the edges are deeply golden brown, beautifully crispy, and the entire center is dramatically puffed up and lightly golden. This is the magical part! Resist the temptation to open the oven door during baking, as any sudden drop in temperature can cause the delicate puff to deflate prematurely. If you wish to observe the transformation, simply use your oven light!
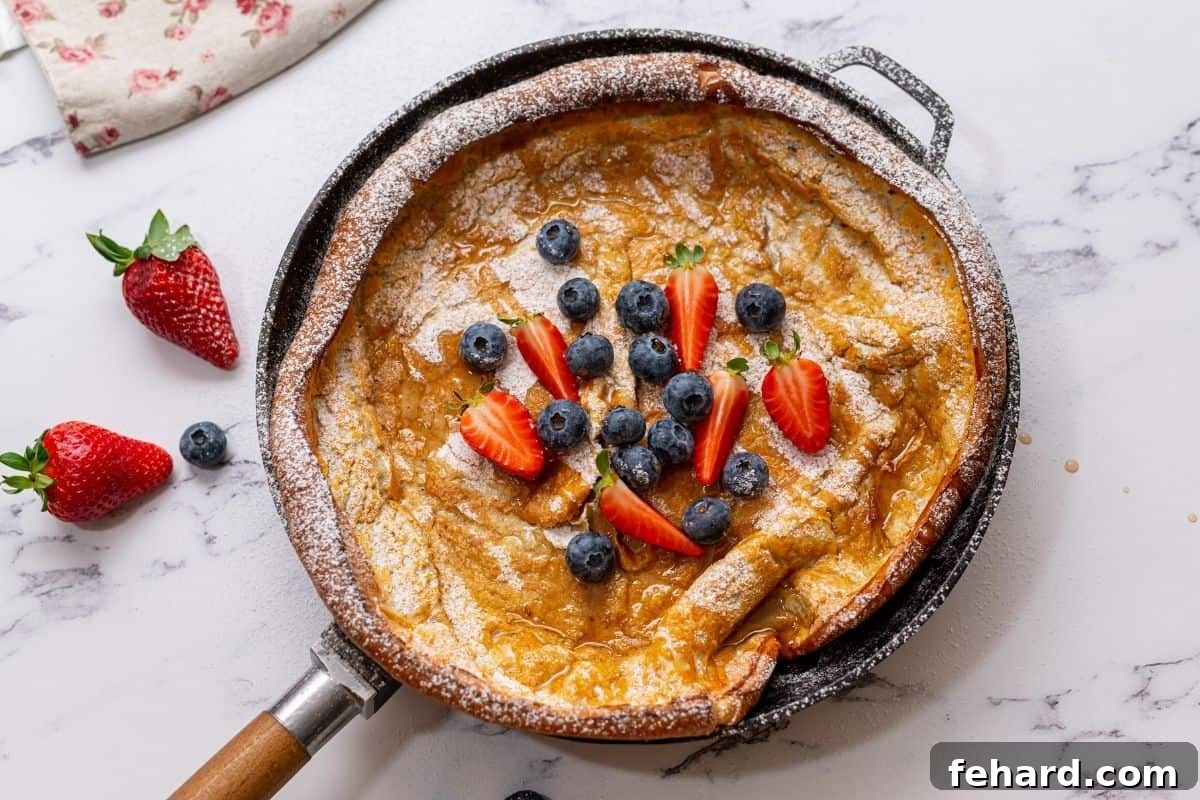
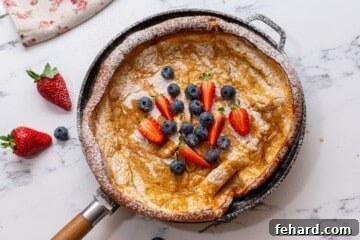
- Serve Immediately: The Dutch Baby Pancake is at its most spectacular and visually impressive moments after it comes out of the oven, when its dramatic puff is at its absolute peak. While it will still taste delicious as it cools and deflates slightly, the visual “wow” factor is best experienced fresh. Carefully transfer the pancake from the hot skillet to a large serving plate or cutting board. Cut it into wedges for easy serving. Garnish generously with a dusting of powdered sugar, a drizzle of extra maple syrup, and a vibrant medley of fresh berries. Serve warm and watch it disappear!
Serving Suggestions & Creative Variations
The inherent beauty of the Dutch Baby Pancake lies not only in its stunning appearance but also in its incredible versatility when it comes to toppings. While traditional sweet accompaniments are always a hit, don’t hesitate to get creative and explore both sweet and savory combinations to suit any craving or mealtime:
- Classic Sweet Delights: A simple dusting of powdered sugar, a generous drizzle of rich maple syrup, and a vibrant scattering of fresh berries (strawberries, blueberries, raspberries, or sliced peaches) create a timeless and refreshing combination. Add a dollop of whipped cream for extra indulgence.
- Bright Citrus Freshness: For a surprisingly tangy and delicious twist, serve your warm Dutch Baby with a squeeze of fresh lemon or orange juice and an extra sprinkle of powdered sugar. Lemon zest can also be added to the batter for an aromatic boost.
- Warm Apple Cinnamon Indulgence: Sautéed apple slices (or other seasonal fruits like pears) with a pinch of cinnamon and brown sugar, cooked until tender, make a wonderfully comforting and autumnal topping.
- Nutty Crunch & Richness: Add texture and flavor with a sprinkle of chopped toasted nuts such as pecans, walnuts, or almonds. A drizzle of your favorite nut butter (almond, peanut, or cashew) can also create a satisfying and hearty addition.
- Chocolate Lover’s Dream: Indulge your sweet tooth by scattering chocolate chips over the hot pancake immediately after it comes out of the oven so they melt into gooey pockets, or drizzle with warm chocolate sauce.
- Savory Adventures: Don’t limit your Dutch Baby to breakfast! Its eggy, tender base pairs wonderfully with savory elements, transforming it into a unique lunch or light dinner option. Consider toppings like roasted asparagus, caramelized onions, sautéed mushrooms, a fried or poached egg, a sprinkle of fresh herbs (chives or parsley), or a grating of Parmesan or Gruyère cheese.
- Seasonal Sensations: Embrace seasonal produce! In the summer, fresh peaches, plums, or cherries are fantastic. In the fall, roasted squash or pumpkin puree with a hint of sage could be a surprising savory pairing.
Troubleshooting Tips for Your Dutch Baby
While the Dutch Baby Pancake is relatively easy to master, sometimes things don’t go exactly as planned. Don’t worry, many common issues have simple solutions. Here’s a guide to help you troubleshoot and achieve Dutch Baby perfection every time:
- My Dutch Baby Didn’t Puff Up! This is the most common concern, as the dramatic puff is a signature feature.
- Oven Temperature is Key: The oven *must* be fully preheated to 425°F (220°C). A hot oven creates steam rapidly, which is what causes the pancake to rise. If your oven thermostat is inaccurate, consider investing in an oven thermometer.
- Hot Skillet is Crucial: Don’t skip preheating the skillet with butter! When the batter hits a super-hot, buttered surface, it creates an immediate sizzle that is essential for initiating the impressive lift.
- Resist the Urge to Peek: Opening the oven door, even for a moment, releases precious heat. This sudden drop in temperature can cause the delicate pancake to deflate before it has a chance to fully set its structure. Trust the process!
- Batter Consistency: Ensure your batter is smooth and lump-free from proper blending. While over-mixing can develop too much gluten (making it tougher), under-mixing might leave unblended flour pockets, both of which can hinder the puff.
- Freshness of Eggs: Fresher eggs tend to yield a better, more robust puff due to their stronger protein structure.
- My Dutch Baby is Sticking to the Pan! A sticky situation is easily avoidable.
- Sufficient Butter: Make sure you used enough butter (2 tablespoons for a 10-inch skillet) to generously coat the bottom and sides of the skillet.
- Properly Hot Skillet: The skillet must be piping hot with melted butter before the batter is added. This forms an immediate non-stick, caramelized layer.
- Well-Seasoned Cast Iron: If using a cast-iron skillet, ensure it is well-seasoned. A poorly seasoned cast iron pan is more prone to sticking.
- The Edges are Burnt, But the Center Isn’t Fully Cooked. This usually points to uneven heating.
- Oven Calibration: Your oven might run hotter than its display indicates. Try reducing the temperature by 25°F (about 15°C) or moving the skillet to a slightly lower rack in the oven for more even heat distribution.
- Skillet Quality: Ensure your skillet conducts heat evenly. Heavy cast iron or thick-bottomed stainless steel pans are ideal. Thinner pans can sometimes lead to hot spots.
- My Dutch Baby Deflated Too Quickly After Coming Out of the Oven. This is completely normal!
- The dramatic puff of a Dutch Baby is largely due to steam trapped within the batter. As it cools, the steam dissipates, and the pancake naturally deflates. While it will lose some height, it will retain its delicious flavor and tender-crisp texture. Serving immediately after baking captures the full visual spectacle.
Serving a Crowd?
How to Double a Dutch Baby Pancake for Larger Gatherings
This recipe, as written, comfortably serves 4 people. However, if you’re hosting a larger brunch or simply have a very hungry family, doubling the recipe is incredibly easy and highly recommended! To prepare a double batch, simply double all the ingredient quantities listed in the recipe card. Instead of a 10-inch skillet, you will need a larger 9×13-inch oven-safe baking dish. Ensure your baking dish can also safely withstand temperatures up to 425°F (220°C) for optimal results. The baking time might need to be extended slightly, typically by 5-10 minutes, so keep an eye on it until the edges are beautifully golden brown and puffed, and the center is set.
More Favorite Pancake Recipes to Explore
If you’ve fallen in love with the versatility and comforting nature of pancakes, here are a few more delightful recipes from our kitchen to add to your repertoire. Each offers a unique flavor or preparation method, ensuring there’s a perfect pancake for every mood and occasion:
- Chocolate Chip Pancakes: A timeless and universally loved classic that always brings smiles to the breakfast table.
- Whole Wheat Pancakes: A hearty and wholesome twist on traditional flapjacks, perfect for a nourishing start to your day.
- Banana Oat Pancakes: A fantastic gluten-free and naturally sweet option, these blender pancakes are incredibly easy and wholesome.
- Sheet Pan Pancakes: The ultimate solution for effortlessly feeding a crowd, this oven-baked method is largely hands-off and convenient.
- Lemon Ricotta Pancakes: Light, unbelievably fluffy, and bursting with bright, zesty citrus flavor, these are a gourmet treat.
Loved this Dutch Baby Pancake recipe?
If you enjoyed making and devouring this impressive oven pancake, please consider leaving a comment and a 5-star review at the bottom of this post. Your feedback is greatly appreciated and helps other home cooks discover this amazing recipe!
Dutch Baby Pancake Recipe
Rate
Ingredients
- 3 tablespoons unsalted butter, divided
- 3 large eggs
- ⅔ cup milk, any variety (whole milk recommended for richest results)
- 1 tablespoon maple syrup, plus more for serving
- 1 teaspoon vanilla extract
- ½ teaspoon cinnamon, optional, for added warmth
- ¼ teaspoon table salt
- ½ cup all-purpose flour
- powdered sugar, maple syrup, and fresh berries, for serving, as desired
Instructions
-
Preheat the oven to 425℉ (220°C).
-
Melt one tablespoon of butter in a heat-safe bowl in the microwave and allow to cool for 2-3 minutes. It is best to not add really hot butter to the batter, as it may scramble the eggs.
-
Layer the ingredients in the following order into the blender: 3 eggs, ⅔ cup milk, 1 tablespoon maple syrup, 1 teaspoon vanilla extract, ½ teaspoon cinnamon (if using), ¼ teaspoon salt, and ½ cup flour. Blend until completely smooth.

-
Place the remaining 2 tablespoons of butter into a 10-inch oven-safe skillet. Put the skillet into the preheated oven just long enough for the butter to melt and sizzle, about 2-3 minutes. Carefully, remove the piping hot skillet from the oven and then pour the pancake batter into the center of the skillet.
-
Return the skillet to the oven and bake the Dutch Baby for 20-25 minutes, or until the edges are beautifully crispy and browned, and the center is dramatically puffed up and lightly golden. Avoid opening the oven door during baking.
-
Remove the pancake from the skillet onto a serving plate or cutting board and cut into wedges for serving. Serve immediately for best results, garnished with a dusting of powdered sugar, fresh fruit, and maple syrup as desired.
Equipment
-
10 inch oven safe skillet
-
Blender
Notes
Pan: Be sure you use a heavy, 10-inch skillet that is oven-safe up to 425 degrees F (220°C). Cast iron or thick stainless steel works best.
Doubling the Recipe: To prepare a double batch, simply double all ingredients and bake in a 9×13-inch oven-safe baking dish. Ensure the dish is also safe up to 425°F. Baking time may extend by 5-10 minutes.
Preparing without a Blender: If you don’t have a blender, whisk the flour, salt, and cinnamon together in a large bowl until well combined. In a separate bowl, whisk the eggs, milk, vanilla, and cooled melted butter. Gradually add the wet ingredients to the dry, whisking vigorously with a handheld mixer on medium speed until the batter is smooth and well combined.
Leftovers: Any leftover Dutch Baby Pancake can be stored in an airtight container and refrigerated for up to 3 days. Reheat gently in the microwave for 45 seconds to 1 minute, or in a warm oven until heated through.
Nutrition
Carbohydrates: 34g
Protein: 5g
Fat: 11g
Saturated Fat: 6g
Cholesterol: 107mg
Sodium: 268mg
Potassium: 393mg
Fiber: 1g
Sugar: 21g
Vitamin A: 470IU
Vitamin C: 5.1mg
Calcium: 102mg
Iron: 0.8mg
Nutrition information is automatically calculated, so should only be used as an approximation.
Tried this recipe?Mention @amindfullmom or tag #amindfullmom!
This recipe was originally shared in 2016 but was thoughtfully updated and significantly expanded in 2025 to bring you the most comprehensive and delightful Dutch Baby Pancake experience, ensuring perfect results every time.