
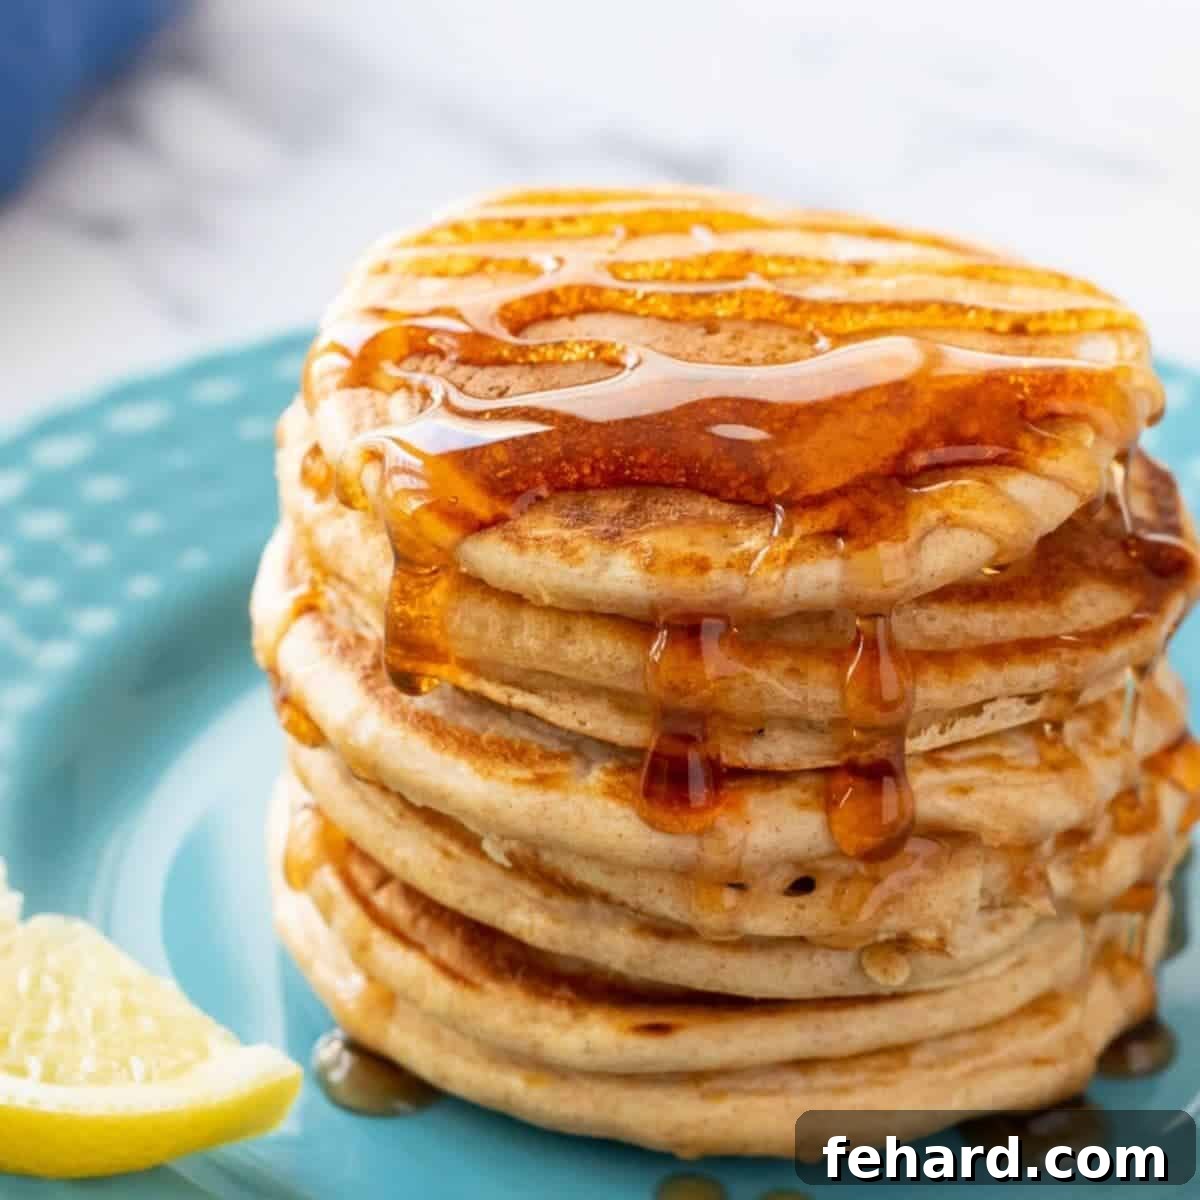
Are you tired of whole wheat pancakes that turn out dense, dry, or utterly flavorless? It’s a common challenge, but we’re here to tell you that it doesn’t have to be your reality. Prepare to revolutionize your breakfast routine! This ultimate whole wheat pancakes recipe unlocks the secrets to creating unbelievably tender, incredibly light, and perfectly fluffy pancakes, all while using 100% whole wheat flour.
Imagine waking up to the aroma of freshly cooked pancakes, knowing they’re not only delicious but also packed with the goodness of whole grains. This recipe makes achieving that dream easier than ever before. Forget everything you thought you knew about healthy pancakes – these are a game-changer! Pair these delightful whole wheat pancakes with a side of crispy baked bacon, savory homemade breakfast sausage, and a comforting homemade latte for a breakfast spread that will truly impress.
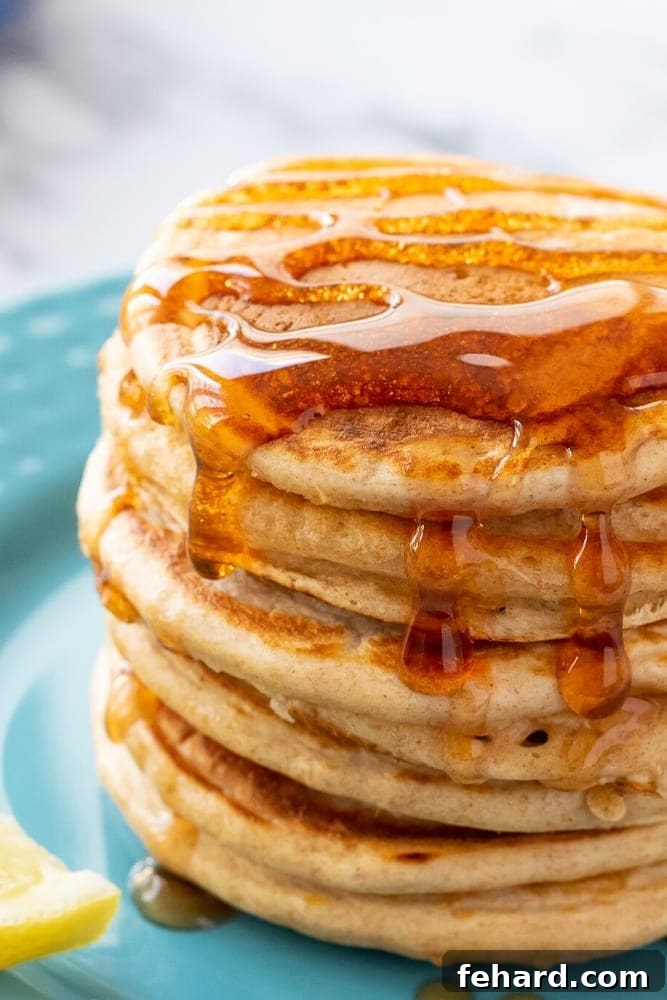
Achieving Perfectly Light & Fluffy Whole Wheat Pancakes Every Time
For far too long, whole wheat pancakes have suffered from a bad reputation. They’re often seen as tough, flat, and lacking in flavor – a necessary but often disappointing compromise for health-conscious eaters. This incredibly easy and smart recipe is designed to change that perception entirely. By incorporating a few key techniques and smart ingredient choices, we transform the humble whole wheat pancake into a breakfast delight that’s light, airy, and bursting with wholesome goodness.
You’ll be amazed at how simple it is to achieve such fantastic results, ensuring that these homemade whole wheat pancakes become a go-to recipe in your kitchen. Whether you’re planning a leisurely weekend brunch or need a quick, nutritious start to a busy weekday, this recipe delivers consistent fluffiness and delicious flavor every single time. Get ready to enjoy healthy eating without sacrificing an ounce of taste or texture!
Happy Cooking! xo Kristen
Essential Ingredients for Tender Whole Grain Pancakes
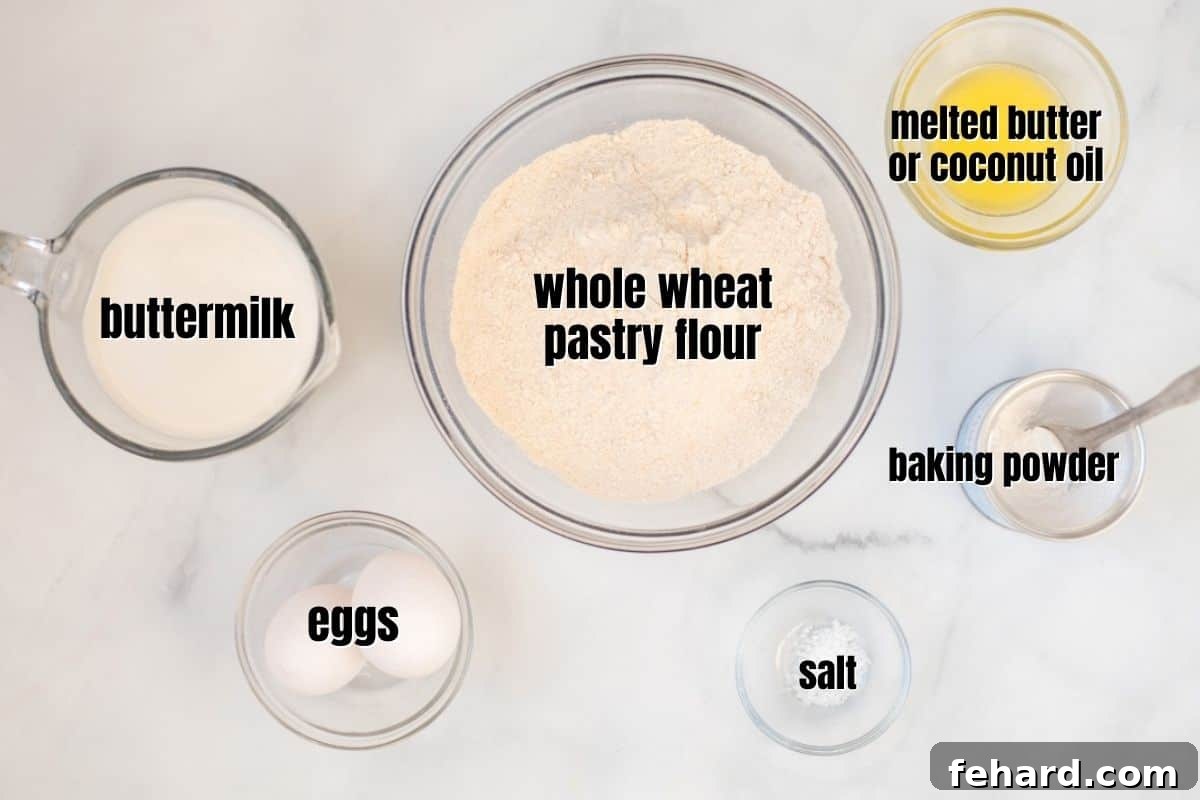
Crafting the perfect whole wheat pancake begins with understanding the role of each ingredient. Here’s a closer look at the key components that make this recipe shine:
- Whole Wheat Pastry Flour: This is our secret weapon for achieving truly light and tender whole wheat pancakes. Unlike regular whole wheat flour, pastry flour is more finely ground and contains a lower gluten content. This combination results in a delicate crumb, preventing the pancakes from becoming tough or chewy. If you don’t have whole wheat pastry flour, whole white wheat flour is an excellent substitute, offering a similar light texture while still being 100% whole grain. You can also use a 50/50 blend of regular whole wheat flour and all-purpose flour for a lighter result than pure regular whole wheat.
- Buttermilk: The acidity in buttermilk is crucial for two reasons. First, it reacts with the baking powder, creating more carbon dioxide bubbles which translates to a higher, fluffier rise in your pancakes. Second, buttermilk helps to break down gluten development in the flour, further contributing to a tender texture. If you don’t have buttermilk on hand, don’t worry – you can easily make your own! (See the tip below). Using room temperature buttermilk (and eggs!) is always recommended as it helps create a smoother batter and aids in leavening.
- Melted Butter or Oil: For a rich, classic flavor, opt for melted and cooled unsalted butter. For a dairy-free option or a slightly different flavor profile, melted and cooled coconut oil works wonderfully. Canola oil or another neutral-flavored vegetable oil can also be used. Ensure it’s cooled before adding to the wet ingredients to avoid scrambling the eggs.
- Baking Powder and Salt: These are essential leavening agents and flavor enhancers. Baking powder provides the lift, reacting with the buttermilk to create those desired bubbles. Salt balances the sweetness and brings out the overall flavor of the pancakes.
- Eggs: Large eggs bind the ingredients together, add richness, and contribute to the structure and fluffiness of the pancakes.
Homemade Buttermilk Made Simple
No buttermilk in the fridge? No problem at all! You can easily create a suitable substitute at home. Simply pour 1 tablespoon of white vinegar, apple cider vinegar, or fresh lemon juice into a glass measuring cup. Then, add enough milk (any variety, including dairy-free options like almond or soy milk) to reach the 1 ¼ cup line. Give it a gentle stir and let the mixture sit for about 5 minutes. You’ll notice it will curdle slightly – that’s exactly what you want! Once thickened, it’s ready to be added to your pancake batter as directed.
Step-by-Step Guide to Making Perfect Whole Wheat Pancakes
Follow these detailed instructions and helpful tips to achieve perfectly fluffy results every time. You’ll find the precise ingredient quantities and a comprehensive recipe card at the very bottom of this post.
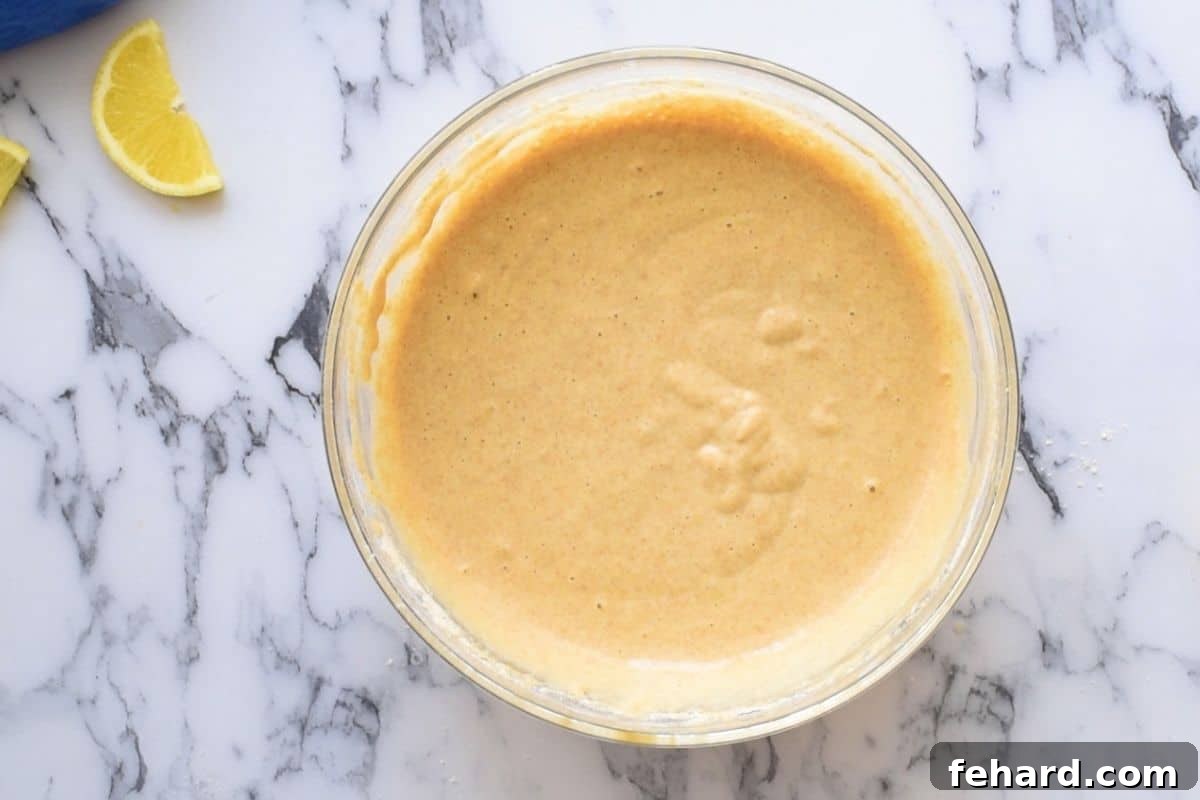
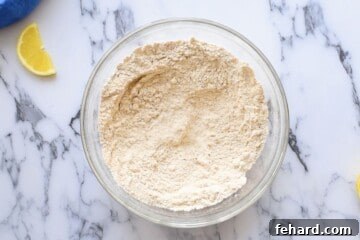
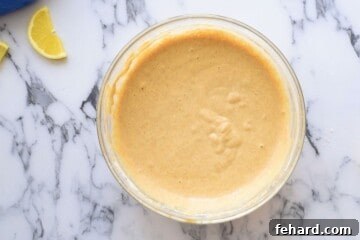
- Prepare the Batter with Care. The key to tender pancakes lies in careful mixing. Begin by combining all your dry ingredients (whole wheat pastry flour, baking powder, and salt) in a large bowl. Whisk them thoroughly to ensure even distribution. In a separate, smaller bowl, gently whisk together your wet ingredients (buttermilk, eggs, and melted butter or oil) until well combined. Now, pour the wet mixture into the dry ingredients. Stir them together just until the flour is moistened. A few small lumps are perfectly fine – and even desirable! Overmixing develops gluten, which can lead to tough, chewy pancakes. Stop stirring as soon as the last streaks of dry flour disappear. Allow the batter to rest for 5-10 minutes while your griddle heats; this allows the gluten to relax and the leavening agents to begin their work, contributing to an even fluffier pancake.
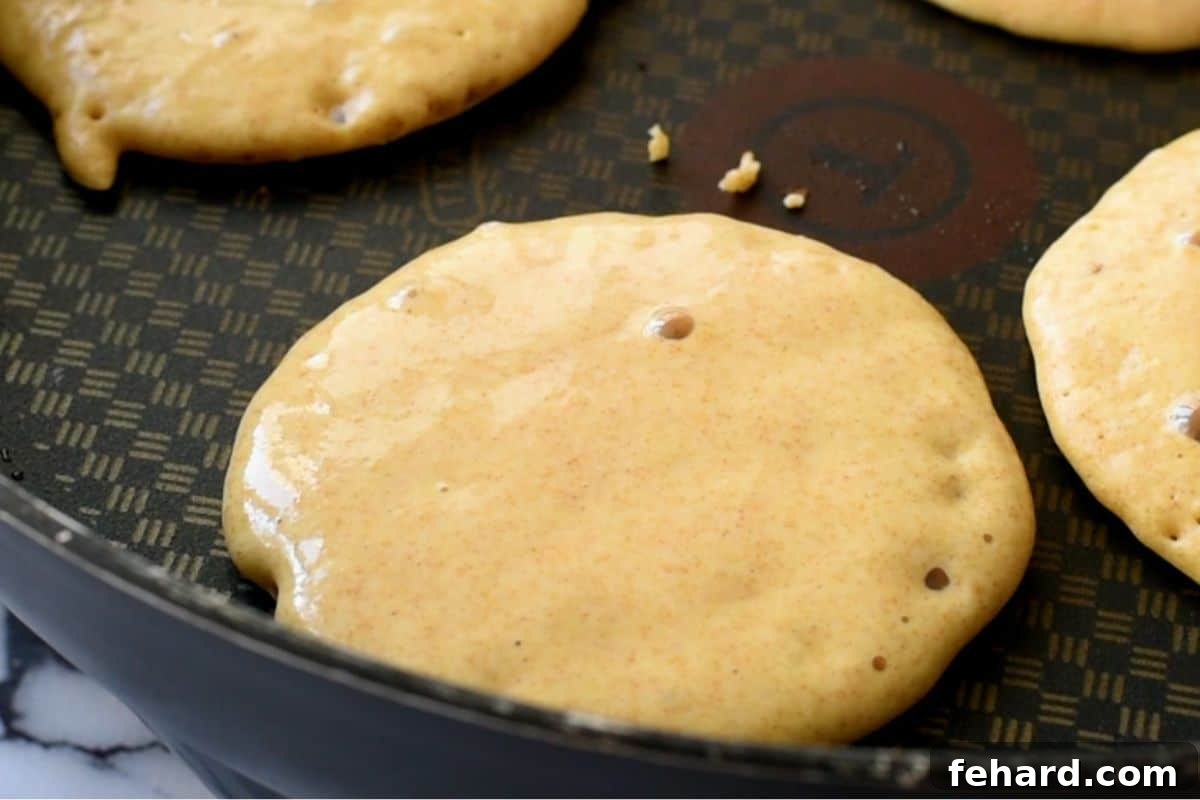
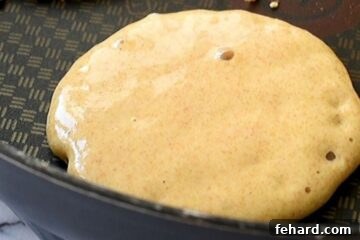
- Cook Pancakes Over Medium Heat. Preheat your skillet or griddle to medium heat. It’s crucial to get the temperature just right – too low, and your pancakes will be dry; too high, and they’ll burn on the outside before cooking through. Lightly grease the surface with a small amount of coconut oil, melted butter, or nonstick spray. Use an ice cream scoop or a 1/4 cup measuring cup to ladle the pancake batter onto the heated surface, leaving a bit of space between each pancake. Cook for 2-3 minutes per side. You’ll know they’re ready to flip when the edges begin to look set and dry, and small bubbles form and burst on the surface of the pancake batter. These bubbles are your visual cue that the inside is cooking and expanding.
The Perfect Moment to Flip
Pancakes are ready for their grand flip when several small bubbles appear across the entire surface of the batter, and the edges appear set and slightly dry. Resist the urge to flip them too early! Attempting to flip prematurely can result in a messy, uncooked pancake that tears apart. Wait for those clear signs, and your pancakes will be easy to flip and perfectly golden brown.
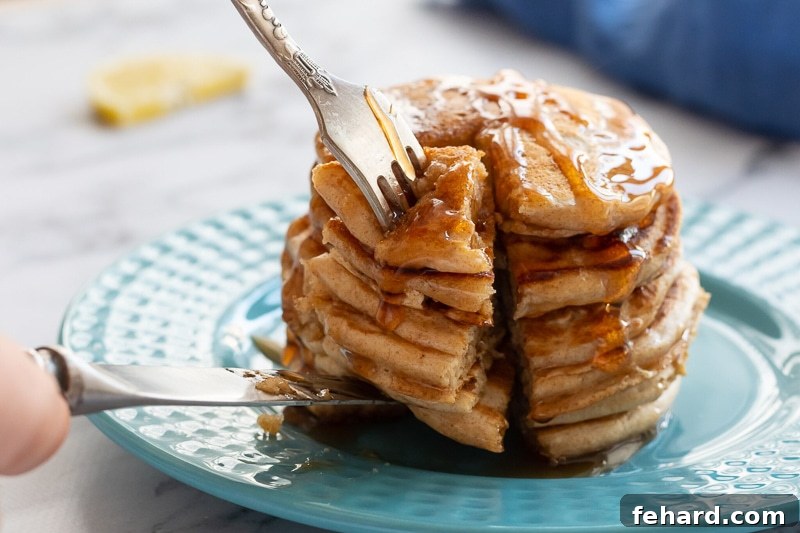
- Serve Immediately for Best Enjoyment. Once cooked, transfer the pancakes to a serving plate. While traditionally served with a pat of butter and a generous drizzle of real maple syrup, feel free to get creative with your toppings! Consider a dollop of homemade whipped cream, a spoonful of creamy yogurt, or a vibrant mix of fresh berries. Sliced bananas, a swirl of homemade chocolate syrup, or a smear of peanut butter also make fantastic additions. The possibilities are endless, allowing you to customize your pancake experience every time.
Mastering the Art: Key Tips for Fluffy Whole Wheat Pancakes
Achieving consistently fluffy and delicious whole wheat pancakes is an art, but one that’s easily mastered with these expert tips:
- Don’t Overmix the Batter: This is perhaps the most crucial rule for fluffy pancakes. Overmixing develops the gluten in the flour, resulting in tough, rubbery pancakes. Mix just until the wet and dry ingredients are combined and no dry streaks of flour remain. A few lumps are perfectly fine!
- Let the Batter Rest: Allowing your pancake batter to rest for 5-10 minutes before cooking gives the gluten a chance to relax and the baking powder time to activate. This leads to a more tender and higher-rising pancake.
- Use an Ice Cream Scoop for Consistency. For beautifully uniform pancakes that cook evenly and look professional, an ice cream scoop is your best friend. It not only reduces mess but ensures that every single pancake is the same size and shape, leading to a more consistent cooking time for the whole batch.
- Cook Pancakes over Medium Heat. Patience is a virtue when it comes to pancakes. If the heat is too high, the exterior of your pancakes will brown and potentially burn before the inside has a chance to cook through and become fluffy. Medium heat allows for a gentle, even cook, ensuring a golden-brown exterior and a fully cooked, tender interior.
- Resist the Urge to Press! After flipping the pancakes, it can be tempting to press them down with your spatula. Do NOT do this! Pressing down squeezes out all the precious air bubbles that contribute to their fluffiness, resulting in dense, flat pancakes. Let them cook undisturbed on the second side.
- Keep Cooked Pancakes Warm for Serving. To ensure all your pancakes are warm and delicious when served, as you remove them from the skillet, place them on a baking sheet fitted with a wire rack. Cover the sheet loosely with foil and keep them in a preheated 200°F (95°C) oven. The rack prevents the bottoms of the pancakes from getting soggy, while the foil helps trap moisture, preventing them from drying out.
Smart Storage Solutions: Refrigerate & Freeze for Later
These whole wheat pancakes are so good, you’ll want to make extra! Here’s how to store them to enjoy later:
- Refrigerate for Up to 4 Days: First, allow the cooked pancakes to cool completely on a wire rack. This is crucial to prevent them from becoming soggy from condensation. Once cooled, stack them with small pieces of parchment paper in between if desired to prevent sticking, and store them in an airtight container in the refrigerator for up to 4 days. To reheat, wrap one or two pancakes in a slightly damp paper towel and microwave for 30 seconds to 1 minute, or until warm and soft.
- Freeze for Longer Freshness: These pancakes freeze beautifully, making them perfect for meal prep and quick breakfasts! Once cooked, let the pancakes cool completely on a wire rack. Then, arrange them in a single layer on a parchment-lined baking sheet and place them in the freezer for about 30 minutes, or until they are solid. This “flash freezing” prevents them from sticking together. Once frozen, transfer the pancakes to a freezer-safe bag or container, removing as much air as possible, and freeze for up to 3 months. To reheat from frozen, wrap one or two pancakes in a slightly damp paper towel and microwave for 1-2 minutes, or toast them lightly in a toaster or toaster oven until heated through.
Explore More Delicious Pancake Recipes
If you’ve loved these whole wheat pancakes, you’ll surely enjoy exploring other exciting pancake creations from our kitchen:
- Whole Wheat Dutch Baby Pancake
- Effortless Sheet Pan Pancakes
- Gluten-Free Banana Oat Pancakes
- Hearty Sweet Potato Pancakes
- Classic Chocolate Chip Pancakes
- Indulgent Strawberry Cheesecake Pancakes
- Zesty Lemon Ricotta Pancakes
Loved this recipe?
If you enjoyed making and savoring these light and fluffy whole wheat pancakes, please take a moment to leave a comment with a 5-star review at the bottom of the post. Your feedback is greatly appreciated!
Fluffy Whole Wheat Pancakes
Kristen Chidsey
8
5 minutes
15 minutes
20 minutes
Rate
Ingredients
- 2 cups whole wheat pastry flour
- 4 teaspoons baking powder
- ⅛ teaspoon salt
- 1¼ cups buttermilk, or homemade buttermilk
- 2 large eggs
- 2 tablespoons melted butter, or canola oil
- coconut oil or butter , for cooking
Instructions
-
In a large mixing bowl, thoroughly whisk together 2 cups whole wheat pastry flour, 4 teaspoons baking powder, and ⅛ teaspoon salt. Ensure all dry ingredients are evenly incorporated for consistent leavening.

-
In a separate, smaller bowl, combine 1¼ cups buttermilk, 2 large eggs, and 2 tablespoons melted butter (ensure it’s cooled to avoid cooking the eggs). Whisk these wet ingredients until they are thoroughly blended.
-
Pour the wet ingredient mixture into the bowl with the dry ingredients. Stir gently with a spoon or whisk until just combined. It is crucial not to overmix; a few small lumps are perfectly acceptable and even desirable for tender pancakes. You only want the flour to be fully moistened. If your batter seems excessively thick, gradually add up to an additional ¼ cup of buttermilk, one tablespoon at a time, until the batter can be easily poured but is still thick enough not to be runny, similar to a slightly thicker cake batter consistency. Allow the batter to rest for 5-10 minutes while you preheat your griddle.
-
Preheat a large skillet or griddle to medium heat. Lightly grease the cooking surface with a small amount of coconut oil or butter, or a nonstick cooking spray.
-
Using a ¼ cup measuring cup or an ice cream scoop, ladle the pancake batter onto the heated skillet. Cook for approximately 2-3 minutes, or until bubbles begin to form and burst on the surface of the pancakes, and the edges appear dry and set. This indicates they are ready for flipping.
-
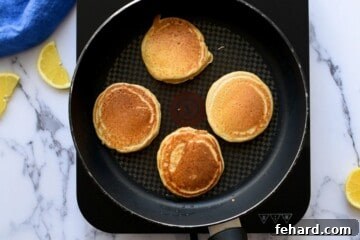
Carefully flip the pancakes and continue to cook for another 1-2 minutes, or until the second side is golden brown and cooked through. Remember, resist the temptation to press down on the pancakes with your spatula while they are cooking, as this will flatten them and remove their desired fluffiness.
-
Serve your delicious whole wheat pancakes immediately with your favorite toppings, such as butter, maple syrup, fresh fruit, or any other desired accompaniments.

Equipment
-
Nonstick Griddle or Large Skillet
-
Baking Sheet with Rack (Optional, for keeping pancakes warm)
-
Large Mixing Bowls
-
Whisk or Spoon
-
Measuring Cups and Spoons
Notes
Flour Alternatives: For the lightest whole wheat pancakes, whole wheat pastry flour is highly recommended due to its finer grind and lower gluten. If unavailable, whole white wheat flour is a great 100% whole grain alternative. For a less dense pancake, you can also use a blend of half all-purpose flour and half regular whole wheat flour.
Low Fat Modification: If you’re looking to reduce the fat content without sacrificing texture, you can easily replace the melted butter or oil with an equal amount of unsweetened applesauce, or simply add an extra 2 tablespoons of milk to the batter. These substitutions will yield perfectly delicious and moist pancakes.
Keeping Pancakes Warm: To ensure all pancakes are warm when ready to serve, transfer cooked pancakes to a baking sheet fitted with a wire rack. Cover them loosely with foil and hold them in a warm oven (around 200°F or 95°C) until your entire batch is complete. The rack prevents sogginess, and the foil maintains moisture.
Storing Leftovers: After cooking, allow pancakes to cool completely in a single layer on a wire rack to prevent them from becoming soggy. Once cool, store them in an airtight container in the refrigerator for up to 4 days. Reheat individual pancakes by wrapping them in a slightly damp paper towel and microwaving for 30 seconds to 1 minute.
Freezing for Future Meals: To freeze pancakes, first cool them completely on a wire rack. Then, arrange the cooled pancakes in a single layer on a parchment or wax paper-lined cookie sheet and place in the freezer for about 30 minutes, or until completely solid. This flash freezing prevents them from sticking together. Once frozen, transfer the pancakes to a freezer-safe bag or container, ensuring as much air is removed as possible, and store in the freezer for up to 3 months. To reheat from frozen, wrap a pancake in a slightly damp paper towel and microwave for 1-2 minutes, or toast in a toaster oven until warmed through.
Nutrition
Carbohydrates: 25g
Protein: 7g
Fat: 1g
Cholesterol: 42mg
Sodium: 80mg
Potassium: 426mg
Fiber: 3g
Sugar: 3g
Vitamin A: 185IU
Vitamin C: 2mg
Calcium: 178mg
Iron: 1.4mg
Nutrition information is automatically calculated, so should only be used as an approximation.
Tried this recipe?
Mention @amindfullmom or tag #amindfullmom!
Originally shared in 2017 and updated in 2025 for enhanced clarity and improved tips.