
Congratulations on becoming the proud owner of an Instant Pot! Before you embark on your culinary adventures, the most crucial first step is to complete a simple yet essential water test. This guide will walk you through easy, step-by-step instructions with clear explanations, ensuring you gain confidence and confirm your Instant Pot is working perfectly to create delicious Instant Pot recipes!
As you familiarize yourself with this versatile kitchen appliance, you might also find our comprehensive Guide to Using an Instant Pot and an in-depth explanation of Instant Pot Settings incredibly helpful. These resources are designed to make your journey into pressure cooking smooth and enjoyable.
Why the Instant Pot Water Test Is Absolutely Essential for New Users
Yes, performing an initial water test on your new Instant Pot is not just recommended; it’s absolutely vital. Whether you’re a seasoned chef or new to kitchen gadgets, this simple procedure offers numerous benefits:
- Familiarization and Confidence Building: The water test is your no-pressure (pun intended!) introduction to operating your Instant Pot. It helps you get comfortable with the buttons, display, sounds, and overall functionality without the fear of ruining food.
- Ensuring Proper Functionality: This test confirms that your Instant Pot seals correctly, builds pressure, maintains it, and releases it as expected. It’s a critical diagnostic step to catch any manufacturing defects or shipping damage before you commit ingredients to the pot.
- Understanding Safety Features: You’ll witness the float valve in action, learn how to secure the lid properly, and experience both natural and quick pressure release, all while being assured of the appliance’s safety mechanisms.
- Preventing Food Waste: Imagine preparing a delicious meal only to find your Instant Pot isn’t sealing! The water test prevents this frustration and ensures your precious ingredients aren’t wasted.
- Mastering Basic Operations: From setting the cooking time and pressure level to understanding the “ON” display and the countdown, the water test is a practical lesson in the fundamental operations of your Instant Pot.
By taking a few minutes to complete this test, you’ll be well-prepared and confident to tackle any Instant Pot recipe thrown your way.
How to Perform the Initial Instant Pot Water Test: A Step-by-Step Guide
Let’s get started with your first Instant Pot experience. Follow these detailed steps to complete the water test successfully.
- Prepare Your Instant Pot for Testing
Carefully place the stainless steel inner pot into the base of your Instant Pot. Ensure it’s seated properly and flat at the bottom. Next, securely attach the power cord to the Instant Pot unit itself (some models have a detachable cord) and then plug it into a working electrical outlet. Make sure the outlet is easily accessible. - Add Water to the Inner Pot
Pour exactly 3 cups of room-temperature tap water into the inner pot. This amount is sufficient to create enough steam and pressure for the test without overfilling. Avoid using hot water as it can affect the pressurization time. - Secure the Lid and Steam Release Valve
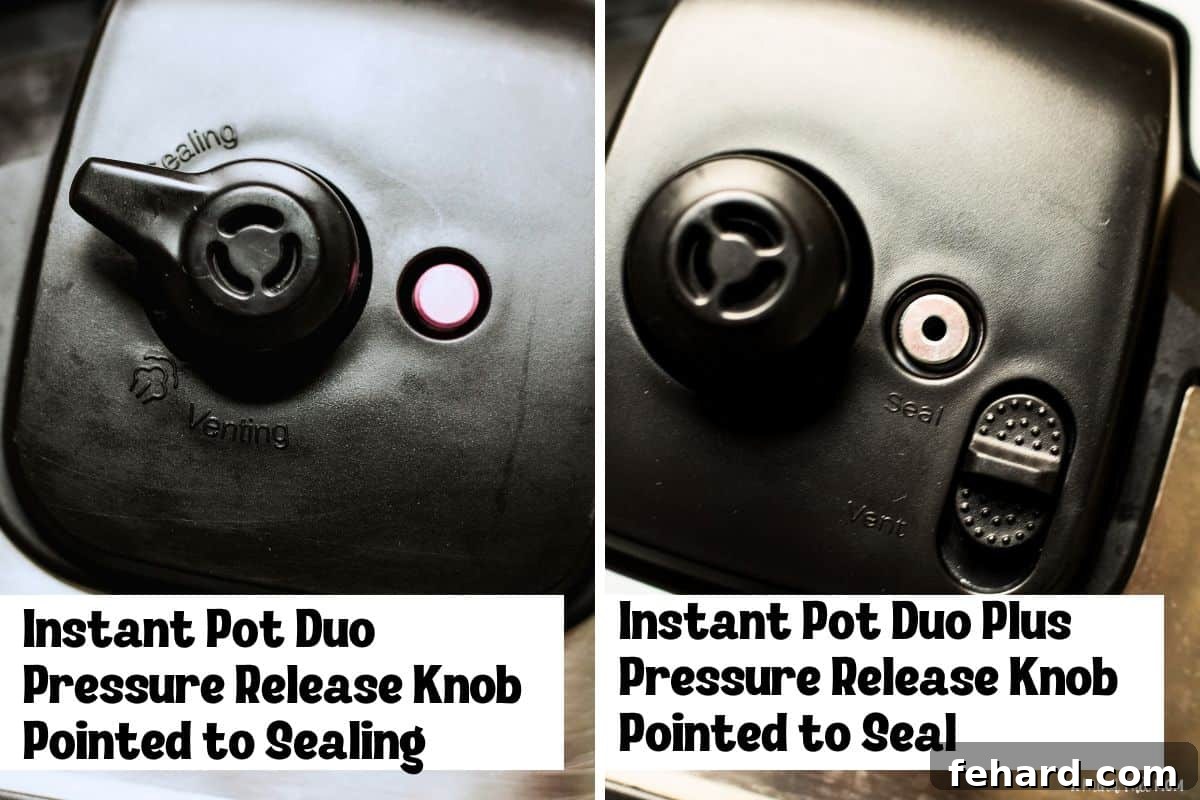
Before placing the lid, double-check that the sealing ring (a silicone gasket) is properly seated inside the lid’s rim and is clean and free from any debris. A misplaced or dirty sealing ring is a common cause of pressure issues. Now, align the arrow on the lid with the arrow on the Instant Pot base and twist the lid clockwise until it locks into place and you hear a chime (on most models). Finally, ensure the steam release valve (often a knob or lever) is pointed towards the “Sealing” position. This is crucial for the pot to build pressure. If it’s set to “Venting,” steam will escape, and pressure won’t build.
- Set the Cooking Program and Time
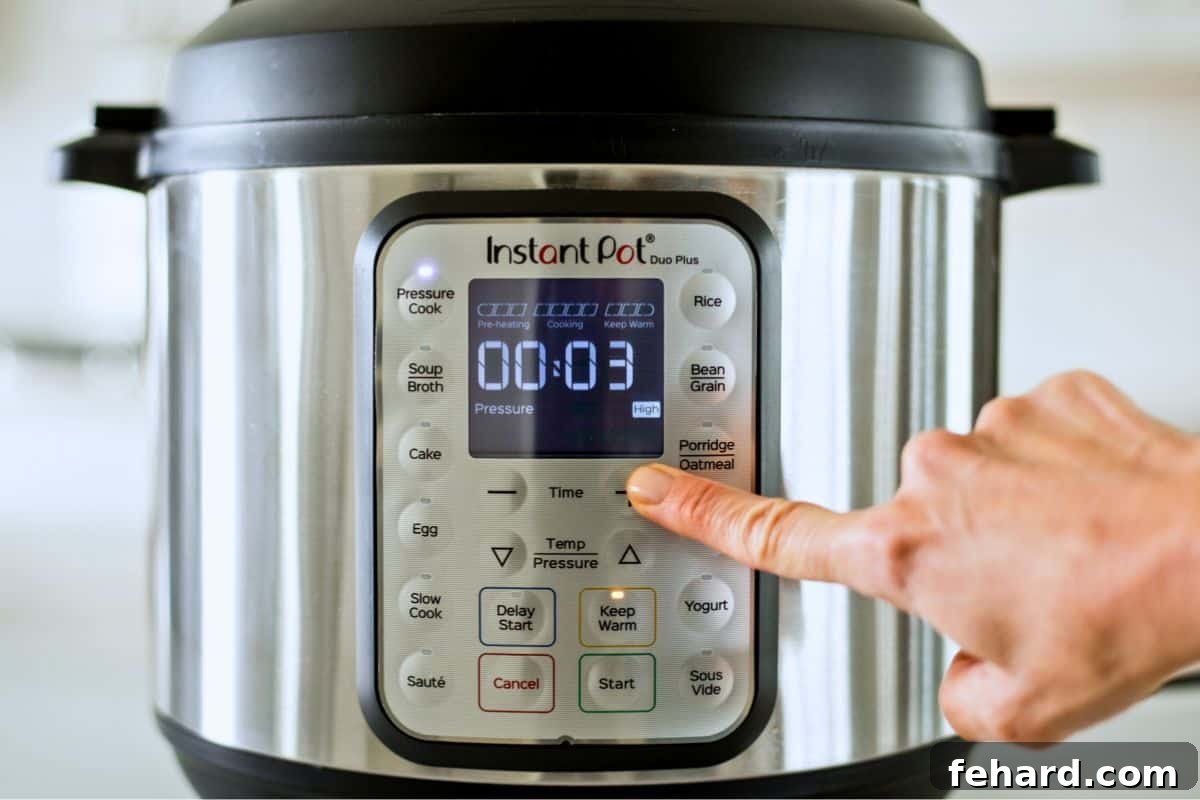
Locate the “Manual” or “Pressure Cook” button on your Instant Pot’s control panel. Press it once. Most Instant Pot models default to “HIGH” pressure, which is ideal for this test. If your screen doesn’t show “HIGH” pressure, press the “Pressure Level” button (if available) until “HIGH” is illuminated. Then, use the plus (+) and minus (-) buttons to adjust the cooking time to “3” minutes. On some older models, the time might flash, indicating you need to press “Start” to confirm the setting. For newer models, the Instant Pot typically beeps and automatically begins the preheating process after a few seconds of inactivity.
- Observe the Pressurization Process
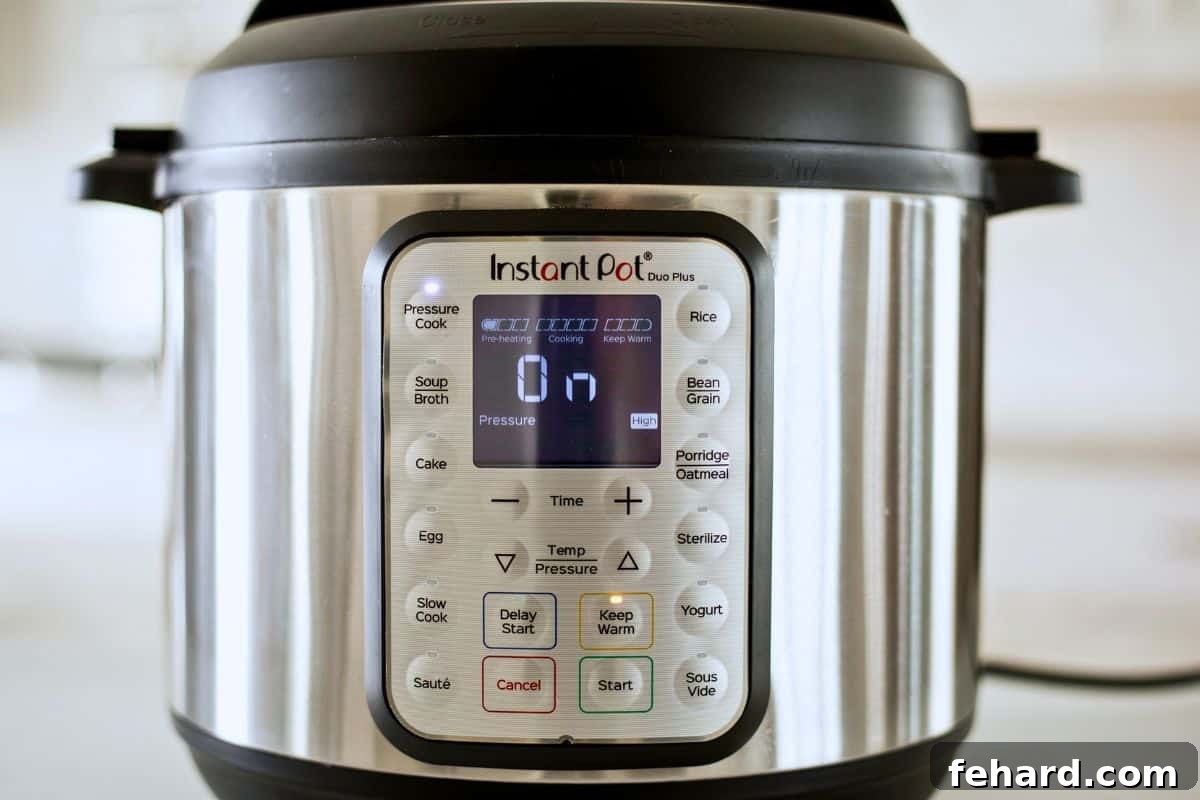
Once the program is set, the screen will likely display “ON” or “HEAT,” indicating that the Instant Pot is heating up and working to build pressure inside the pot. During this phase, it’s normal to see a small amount of steam escaping from the float valve (a small metal pin next to the steam release valve) or around the lid’s edges. This is the pot expelling excess air. However, if you see a significant, continuous stream of steam, immediately check that your steam release valve is correctly positioned to “Sealing.” The float valve should eventually rise and lock into place, signaling that full pressure has been reached. The time it takes to pressurize can vary based on the amount and temperature of water, but usually takes 5-10 minutes for this test.
- The Cooking Cycle Begins
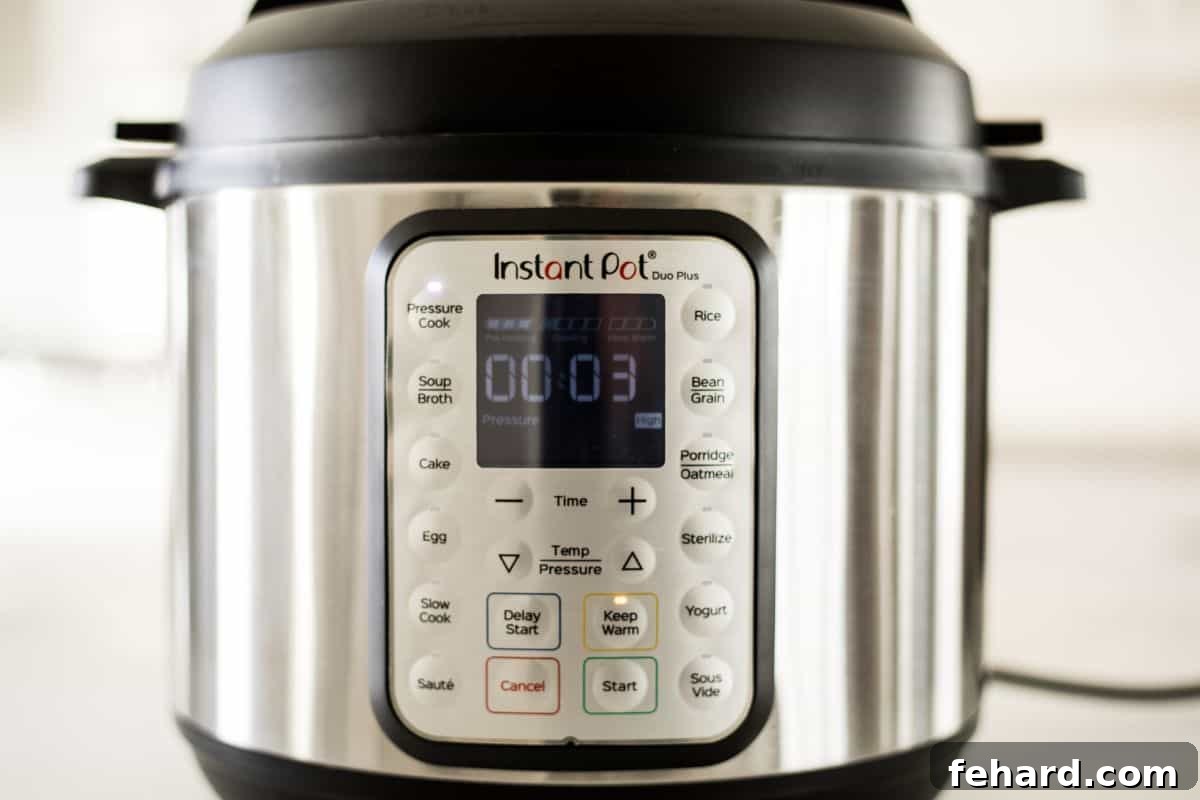
Once the Instant Pot has reached full pressure and the float valve has popped up, the display will switch from “ON” to your set cooking time (in this case, “3”). The timer will then begin to count down, signaling that the actual pressure cooking has started. You might hear occasional clicks or hisses, which are normal as the appliance regulates pressure.
- Completion and “Keep Warm” Mode
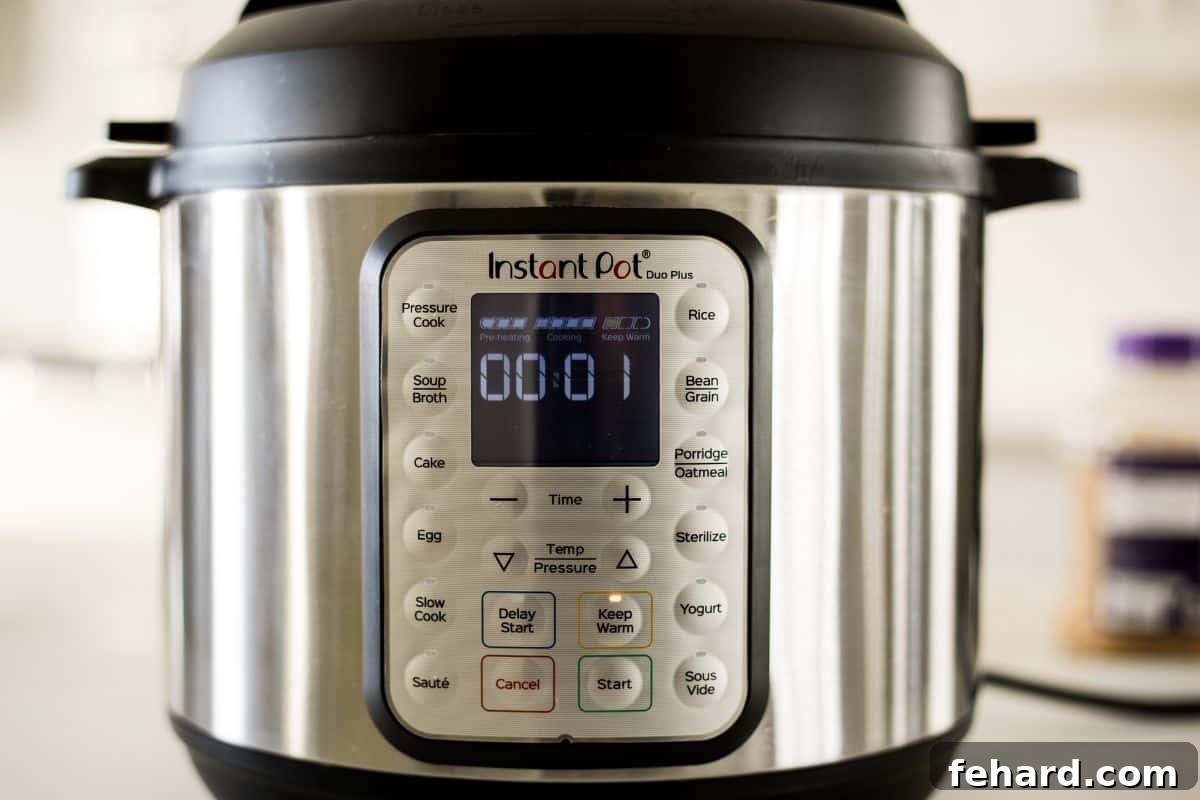
After the 3-minute cooking time has elapsed, most Instant Pot models will emit a series of beeps to signal completion. The appliance will then automatically switch to the “Keep Warm” function. The display will change, often showing “L0:00” and then counting upwards (L0:01, L0:02, etc.), indicating how much time has passed since the cooking cycle finished and it entered the “Keep Warm” phase. For the water test, you can proceed to the next step once the cooking time is done.
- Releasing the Pressure
There are two primary methods for releasing pressure from your Instant Pot:- Natural Pressure Release (NPR): For this method, you simply leave the Instant Pot untouched. The pressure will gradually dissipate on its own over time. The float valve will eventually drop back down when the internal pressure has normalized. This method is often used for foods that benefit from continued gentle cooking, such as soups or meats, and can take 10-40 minutes depending on the contents.
- Quick Pressure Release (QPR): To perform a Quick Release, carefully turn the steam release valve from “Sealing” to “Venting.” Be extremely cautious and always use a wooden spoon or tongs to avoid direct contact with the steam, which is very hot and can cause burns. Stand back and allow all the steam to escape until the float valve drops. This method is used when you want to stop the cooking process quickly, for example, with vegetables.
For the water test, you can choose either method. Experiencing both will further enhance your understanding.
- Turn Off and Unplug
Once the pressure is fully released and the float valve has dropped, hit the “Cancel” button on your Instant Pot to turn it off. Then, unplug the unit from the wall outlet. Carefully open the lid, tilting it away from your face to avoid any lingering steam. Empty the water from the inner pot and wipe it dry. Your Instant Pot water test is now complete!
Troubleshooting Common Instant Pot Water Test Issues
If your water test doesn’t go exactly as planned, don’t panic! It’s rare for a new Instant Pot to be defective. Most issues are easily resolved with a few simple checks:
- My Instant Pot Isn’t Sealing / Steam is Constantly Escaping:
- Check the Sealing Ring: Is the silicone sealing ring correctly positioned within the lid? Is it clean? Sometimes, it can be stretched or improperly seated. Ensure it’s snugly in place.
- Verify the Steam Release Valve: Is the steam release valve (the knob/lever on top of the lid) set firmly to the “Sealing” position? This is the most common culprit.
- Float Valve Obstruction: Ensure the float valve (the small silver or red pin) is clean and can move freely up and down. Any food residue (though unlikely in a water test) can prevent it from rising.
- Lid Placement: Double-check that the lid is fully locked and secure. It should not wiggle or feel loose.
- The “ON” Display Stays On Forever / Never Reaches Pressure:
- This usually points to a sealing issue, as described above. If steam continues to escape, pressure cannot build. Re-check the sealing ring and steam release valve.
- Ensure you’ve added enough liquid (3 cups for the water test is sufficient).
- Instant Pot Displays a “Burn” Message:
- While rare with just water, this message typically indicates that the bottom of the inner pot is too hot, usually due to insufficient liquid or scorched food. If you get this with water, ensure the inner pot is properly seated and there’s enough water. If it persists, contact customer service.
- Instant Pot Won’t Turn On:
- Ensure the power cord is securely plugged into both the Instant Pot and a working wall outlet. Try a different outlet to rule out an electrical issue.
If you’ve gone through these checks and are still encountering issues, please refer to my detailed Instant Pot Troubleshooting Guide. For persistent problems, it’s always best to contact Instant Pot Customer Service directly; they are equipped to provide specific assistance for your model.
Beyond the Water Test: Your Next Steps to Instant Pot Mastery
Now that you’ve successfully completed the water test, you’re officially ready to start cooking! The confidence you’ve gained from understanding the basic functions and safety features will serve you well.
Don’t forget to explore our comprehensive resources:
- Our Instant Pot 101 Guide is packed with essential tips, tricks, and information for beginners.
- Delve into the specifics of each function with our guide to Instant Pot Settings, explaining what each button does and when to use it.
Consider starting with simple recipes like perfectly cooked rice, hard-boiled eggs, or even homemade yogurt. These dishes are fantastic for building confidence and getting a feel for different cooking times and ingredients. Your Instant Pot is a powerful tool designed to simplify your cooking and unlock a world of delicious possibilities. Embrace the learning process, experiment with new recipes, and enjoy the convenience and speed it brings to your kitchen!
I truly hope you LOVE your Instant Pot and am always willing to help if you have questions! Happy cooking! -Kristen