

The Ultimate Guide to Perfect Instant Pot Hard-Boiled Eggs: Easy Peel, Every Time
Are you tired of the never-ending struggle with hard-boiled eggs – the ones that are either undercooked, overcooked, or notoriously difficult to peel? If so, your kitchen savior has arrived! The Instant Pot transforms the often-frustrating process of making hard-boiled eggs into a consistently perfect experience. This comprehensive guide introduces you to the renowned Instant Pot Hard-Boiled Eggs 5-5-5 method, a foolproof technique that guarantees perfectly cooked eggs with vibrant, creamy yolks and shells that practically slide right off, every single time. Prepare to revolutionize your breakfast, snacks, and meal prep!

Kristen’s Essential Tips for Foolproof Instant Pot Hard-Boiled Eggs
While mastering hard-boiled eggs in the Instant Pot is remarkably simple, keeping a few key tips in mind before you begin will ensure you achieve consistently perfect results. These insights are designed to help you avoid common pitfalls and achieve those coveted, easy-to-peel eggs.
- Perform a test with a single egg: Your Instant Pot model, local altitude, and even your personal preference for yolk consistency can subtly influence cooking times. By testing with just one egg initially, you can fine-tune the pressure cooking duration to perfectly match your specific conditions and desired doneness. This small step can save an entire batch!
- Always start with cold water: This step is more critical than you might think. The time it takes for the cold tap water (never use warm or hot water) to heat up and allow the Instant Pot to come to pressure is an integrated part of the overall cooking cycle. Using warmer water can shorten this pre-heating phase, leading to undercooked eggs and inconsistent results.
- Room temperature eggs work best: Eggs straight from the refrigerator are more susceptible to cracking when exposed to the rapid temperature changes inside the pressure cooker. Bringing your eggs to room temperature helps prevent these cracks and ensures more even cooking. If your eggs are cold, simply place them in a bowl of lukewarm water for 10-15 minutes before starting.
- Farm-fresh eggs are perfectly fine: While fresh eggs are often celebrated for their superior flavor, they traditionally have a reputation for being harder to peel. Fortunately, the Instant Pot method significantly minimizes this issue, allowing even the freshest eggs to cook beautifully and peel with surprising ease compared to conventional stovetop methods.
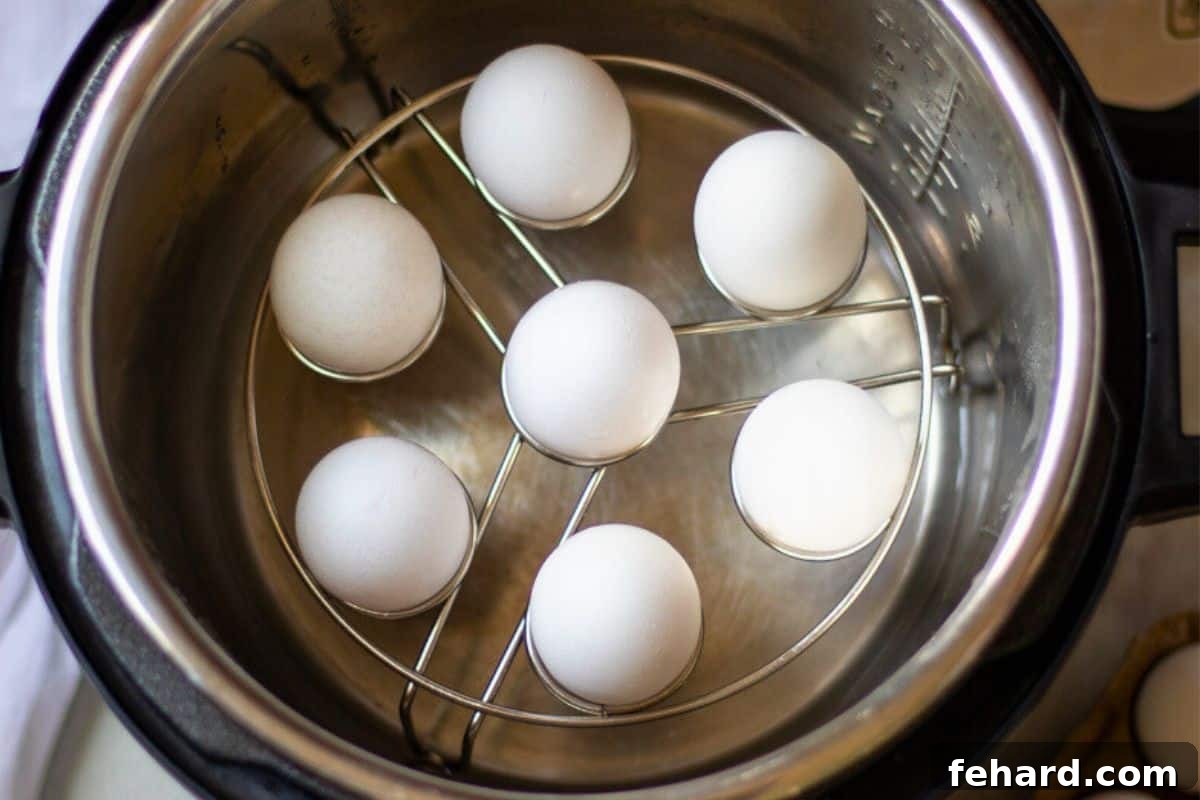
- An egg rack is helpful but optional: An egg rack (often sold separately or included with some models) can be useful for keeping eggs neatly separated and can help ensure yolks are perfectly centered. However, the metal trivet that typically comes with your Instant Pot works just as well. You can even stack eggs on a trivet for larger batches without negatively impacting the cooking time or consistency.
New to the world of pressure cooking?
If you’re just getting acquainted with your Instant Pot and need a foundational understanding, we highly recommend consulting our Beginner’s Guide to the Instant Pot. It provides a comprehensive walkthrough of its functions, essential safety tips, and answers to frequently asked questions, making it the perfect companion to this hard-boiled egg recipe.
Mastering the Instant Pot 5-5-5 Method for Hard-Boiled Eggs
Our acclaimed process for consistently crafting perfect hard-boiled eggs in the Instant Pot is widely known and celebrated as the “5-5-5 Method.” This incredibly simple yet profoundly effective formula has gained immense popularity, transforming the way countless home cooks prepare their eggs since its initial introduction in 2018. It’s a precise balance of pressure cooking, natural release, and rapid cooling that yields superior results.
- 5 minutes of pressure cooking: This is the active cooking phase where your Instant Pot builds and maintains high pressure, gently steaming the eggs. The controlled environment of the pressure cooker ensures even heat distribution, resulting in perfectly firm whites and creamy yolks.
- 5 minutes of natural pressure release: After the active cooking cycle concludes, it’s crucial to allow the pressure to naturally decrease for precisely 5 minutes. This natural release phase is vital; it prevents overcooking the eggs and allows the internal structure to stabilize, contributing significantly to their easy-to-peel quality.
- 5 minutes in an ice bath: The final, equally important step involves immediately transferring the hot eggs to a refreshing ice bath. This abrupt temperature change serves two critical functions: it instantly halts the cooking process, preventing any further cooking and the formation of that undesirable green ring around the yolk, and it facilitates the separation of the egg membrane from the shell, making peeling an absolute breeze.
While very minor adjustments might occasionally be necessary based on specific Instant Pot models, varying egg sizes, or particularly high altitudes (which is why a single-egg test is always recommended), the 5-5-5 method serves as the ultimate starting point. In the vast majority of cases—well over 90%—this method consistently delivers perfectly cooked eggs that peel effortlessly, leaving you with smooth, beautiful results every single time.
Step-by-Step Guide: How to Make Hard-Boiled Eggs in Your Instant Pot
Now, let’s break down the celebrated 5-5-5 process into simple, actionable steps. Follow these detailed instructions to confidently prepare perfectly cooked and effortlessly peeled hard-boiled eggs using your Instant Pot, ready to elevate any meal or serve as a convenient, healthy snack.
Step One: Prepare Your Instant Pot
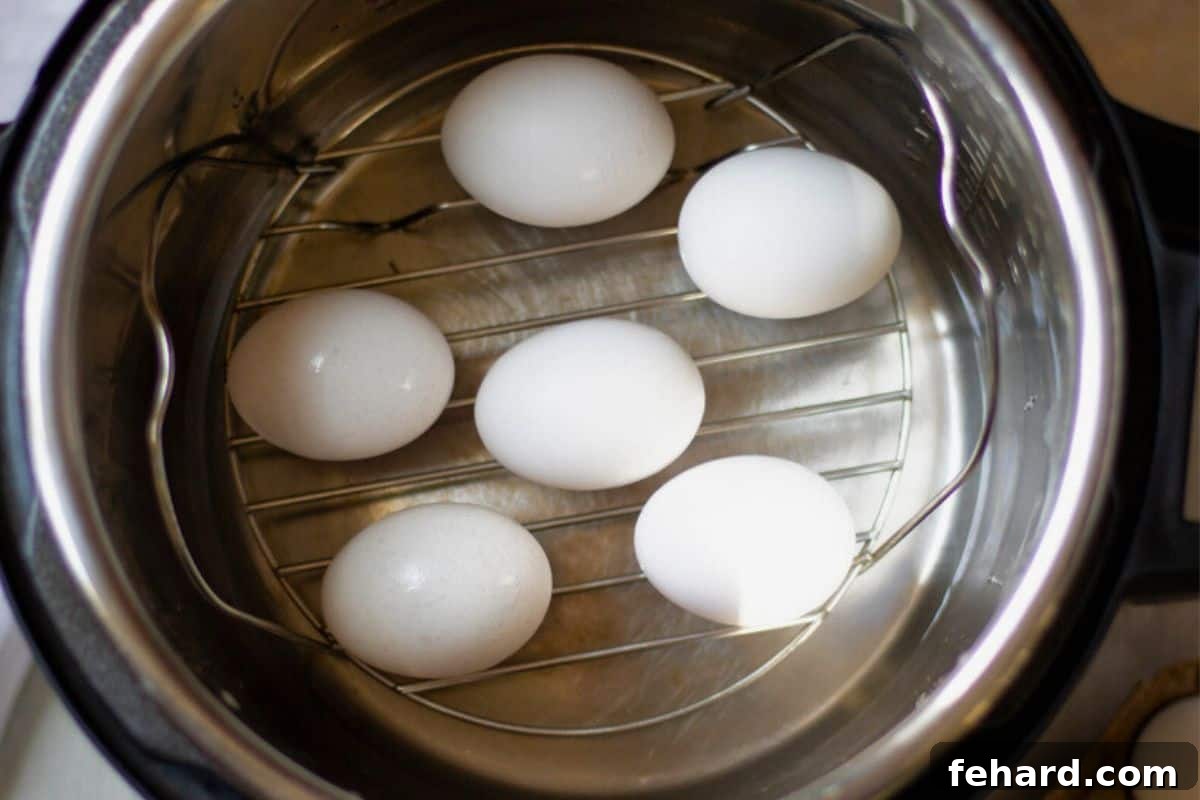
Start by adding the correct amount of cold tap water to the inner pot of your Instant Pot. For standard 3 or 6-quart models, use precisely 1 cup of cold water. If you own a larger 8-quart Instant Pot, increase the water quantity to 1½ cups. Once the water is in, carefully place a metal trivet or an egg rack inside the pot. This crucial piece of equipment keeps the eggs elevated above the water, ensuring they are gently steamed under pressure rather than boiling directly in the water.
👉 Crucial Reminder: Always use cold water! The initial temperature of the water significantly impacts the time it takes for the Instant Pot to build pressure. Using warm or hot water will shorten this crucial pre-heating phase, potentially leading to undercooked eggs and inconsistent results. Stick to cold water for reliable 5-5-5 method timing.
Step Two: Carefully Add the Eggs to the Pot
Gently arrange your room temperature eggs onto the trivet or into the egg rack within the Instant Pot. The number of eggs doesn’t change the cooking time, so feel free to make a single egg or a large batch. For larger quantities, it’s perfectly acceptable and effective to stack the eggs on top of each other. The pressure cooking environment ensures uniform cooking throughout the batch, regardless of their position.
👉 Pro Tip: Room temperature eggs are best! Eggs that are cold from the refrigerator are more prone to cracking when they experience the rapid temperature increase inside a pressure cooker. To mitigate this risk, place your cold eggs in a bowl of lukewarm (not hot) water for 10-15 minutes before introducing them to the Instant Pot. This simple pre-step often prevents those frustrating cracks.
Step Three: Pressure Cook for 5 Minutes
Once your eggs are in place and the water is added, securely fasten the lid onto your Instant Pot. Ensure that the steam release knob is correctly positioned to “sealed” or “locked” to allow the pressure to build properly. Select the “Manual” or “Pressure Cook” button (the exact name may vary slightly depending on your Instant Pot model) and set the cooking time to 5 minutes on high pressure. This short, precise cooking period is expertly calibrated for achieving those perfectly firm whites and creamy, golden yolks.
👉 Living at High Altitude? The reduced atmospheric pressure at higher elevations can significantly impact cooking times in pressure cookers. To account for this, you may need to slightly increase the active pressure cooking time to achieve your desired results. We’ve compiled a detailed Instant Pot Altitude Adjustment Chart that offers specific guidance to help you fine-tune your cooking and ensure perfection.
Step Four: Allow Natural Pressure Release for Exactly 5 Minutes (NPR)
After the 5-minute pressure cooking cycle concludes, your Instant Pot will typically beep and switch to its “Keep Warm” setting. At this critical juncture, it is absolutely vital that you allow the pressure to release naturally for precisely 5 minutes. Do not attempt to manually release the pressure immediately. This natural pressure release (NPR) period is fundamental for preventing overcooking, allowing the internal temperature of the eggs to gently stabilize, and it plays a significant role in making the eggs incredibly easy to peel later. For accuracy, we highly recommend setting a separate kitchen timer for these 5 minutes.
Step Five: Perform a Quick Release for Any Remaining Pressure
Once the exact 5 minutes of natural pressure release have passed, it’s time to release any residual pressure. Carefully use a long spoon or the handle of a wooden utensil to push or “knock” the steam release knob from the “sealed” or “locked” position to the “venting” position. You will observe a rapid stream of steam escaping from the valve. Continue to wait until the float valve drops completely. This indicates that all pressure has been safely released, and it is now safe to open the lid.
👉 Safety First: Protect Yourself! Always exercise extreme caution during this step. Stand back and keep your hands, face, and any exposed skin clear of the venting steam. It is intensely hot and can cause severe burns. Using a long utensil provides a safe distance and prevents direct contact with the steam.
Step Six: The Essential 5-Minute Ice Bath
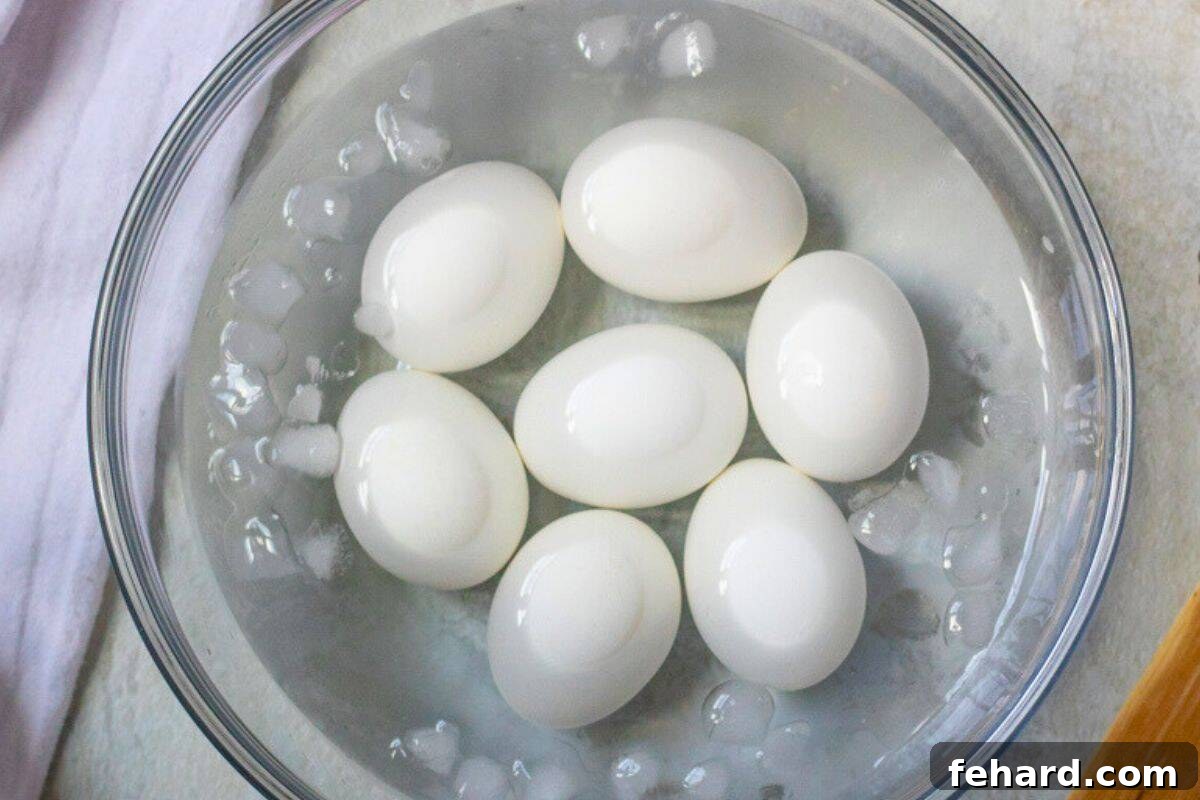
Immediately after successfully releasing all pressure and opening the Instant Pot lid, carefully transfer the hot eggs from the cooker into a large bowl filled generously with ice water. Allow them to chill completely in this ice bath for a full 5 minutes. This abrupt and rapid temperature change serves two immensely important purposes:
- It immediately halts the cooking process, preventing any further residual cooking that could lead to overcooked eggs or the undesirable greenish-gray ring around the yolk.
- It causes the egg membrane just beneath the shell to contract and separate from the egg white, which is the magic trick for making the eggs incredibly easy to peel later.
👉 Exercise Caution: Remember that the eggs will be piping hot when you remove them from the Instant Pot. For your safety, always use a slotted spoon, sturdy tongs, or even oven mitts to handle and transfer the eggs to the ice bath.
Step Seven: Effortless Peeling and Pure Enjoyment
After your eggs have had their full 5-minute chilling period in the ice bath, remove them one by one. Gently roll each egg on a flat, hard surface, such as your kitchen counter, applying light pressure to create fine cracks all over the shell. This simple action helps to further separate the membrane from the egg. Then, watch with satisfaction as the shells almost magically slide right off, revealing beautifully smooth, perfectly cooked hard-boiled eggs beneath. Your days of struggling with stubborn, crumbly eggshells are officially a thing of the past!

How to Store Your Instant Pot Hard-Boiled Eggs for Freshness
Once you’ve mastered the art of making flawless Instant Pot hard-boiled eggs, you’ll likely want to keep a batch ready in your refrigerator at all times. They are not just perfect for immediate consumption but also serve as an incredibly versatile ingredient for various dishes or a convenient, protein-packed snack throughout your week. Proper storage is key to maintaining their freshness, flavor, and texture.
- Peeled Eggs: For optimal freshness and to prevent them from drying out, store peeled hard-boiled eggs in an airtight container in the refrigerator for up to 3 days. To extend their shelf life significantly, you can store the peeled eggs submerged in water within an airtight container. Be sure to change the water every other day, and they will remain fresh for up to 7 days.
- Unpeeled Eggs: Hard-boiled eggs that are still in their shell offer a bit more protection and can be safely refrigerated for up to 7 days. It’s a very helpful practice to mark the carton or even the eggs themselves with a “HB” (for hard-boiled) and the date they were cooked. This simple step helps you easily distinguish them from raw eggs, preventing any accidental mix-ups in your fridge.
Instant Pot Hard-Boiled Eggs: Common Questions & Troubleshooting
Even with a tried-and-true method like the 5-5-5, questions or minor issues can sometimes arise. Here are answers to some of the most common queries and helpful troubleshooting tips to ensure your Instant Pot hard-boiled eggs are consistently perfect and meet your expectations.
A greenish-gray discoloration or ring around the yolk is a classic indicator of overcooking. This harmless but undesirable ring forms when hydrogen sulfide gas from the egg white reacts with iron in the yolk, creating ferrous sulfide. While safe to eat, it means the egg was subjected to heat for too long or at too high a temperature. To prevent this, consider slightly reducing your cooking time. We recommend experimenting by setting the pressure cook time to 4 minutes on high pressure, followed by 4 minutes of natural pressure release, before promptly transferring them to an ice bath.
If you consistently find your yolks to be too soft or runny, first double-check that you are strictly adhering to the “cold water” rule when starting the cooking process. Also, ensure you’ve considered any necessary altitude adjustments, as lower atmospheric pressure at high elevations can lead to undercooked results. If these factors are correctly addressed, you might need to slightly increase the active pressure cooking time. Try increasing the Instant Pot setting to 6 minutes on high pressure, while still maintaining the 5 minutes of natural release and the 5-minute ice bath, for a firmer, more set yolk.
Eggs cracking during the pressure cooking process is most commonly attributed to thermal shock, occurring when very cold eggs are introduced to a rapidly heating environment. This is precisely why we strongly recommend allowing your eggs to come to room temperature before placing them in the Instant Pot. If an egg does crack, rest assured, it is still perfectly safe and delicious to eat! While it might not be suitable for intricate presentations like deviled eggs, it will still taste fantastic. Simply peel it carefully and enjoy!
Delicious Uses for Your Perfect Instant Pot Hard-Boiled Eggs
Having a batch of perfectly cooked, easy-to-peel hard-boiled eggs on hand opens up a world of culinary possibilities! Beyond simply enjoying them as a quick and healthy snack, their versatile nature allows them to be incorporated into a wide array of dishes. Here are some popular and creative ways to utilize your Instant Pot hard-boiled eggs:
- Classic Deviled Eggs: The smooth, creamy yolks produced by the Instant Pot method are absolutely ideal for creating luscious, flavorful deviled eggs – a perennial favorite for potlucks, parties, or a delightful appetizer.
- Hearty Egg Salad: Transform your beautifully cooked eggs into a rich and satisfying egg salad sandwich filling. It’s excellent for quick lunches, picnics, or a light, protein-packed dinner.
- Enhance Salads: Sliced, quartered, or chopped hard-boiled eggs add a significant boost of protein, flavor, and richness to almost any salad. They are a fantastic addition to green salads, classic Cobb salads, or even a simple chef’s salad for a more filling meal.
- Potato Salad Perfection: A cherished staple at many summer barbecues and family gatherings, hard-boiled eggs are a traditional and much-loved addition to creamy potato salad, adding both texture and savory depth.
- Quick Breakfast or Snack: Grab a peeled hard-boiled egg for an incredibly quick, convenient, and healthy protein boost that’s perfect on the go. This makes busy morning routines much easier and ensures you start your day energized.
- Noodle Dishes & Soups: Halved or quartered hard-boiled eggs are a fantastic and flavorful garnish for a variety of Asian-inspired dishes such as ramen, pho, or other savory noodle and soup bowls, adding both visual appeal and satisfying substance.
Expand Your Instant Pot Culinary Skills with More Recipes
While mastering perfectly hard-boiled eggs alone might justify the investment in an Instant Pot, its incredible versatility extends far beyond. Your pressure cooker is an indispensable tool for efficiently preparing countless recipes and essential kitchen staples, ultimately saving you valuable time and money. Don’t stop at eggs; dive into more Instant Pot adventures with some of our other highly recommended and favorite recipes:
- Homemade Instant Pot Yogurt
- Perfectly Cooked Instant Pot Dried Beans
- Whole Instant Pot Chicken
- Fluffy Instant Pot Baked Potatoes
- Creamy Instant Pot Oatmeal
Instant Pot Hard Boiled Eggs Recipe
Kristen Chidsey
1 to 12 eggs
5 mins
10 mins
20 mins

Video Tutorial
Ingredients
- 1-12 large eggs, *preferably at room temperature for best results
- cold tap water, for Instant Pot (1 cup for 3/6-quart models, 1.5 cups for 8-quart models)
Instructions (The 5-5-5 Method)
-
Prepare Instant Pot: Add 1 cup of COLD water to the inner pot of a 3 or 6-quart Instant Pot, or 1½ cups of COLD water for an 8-quart model. Place a metal trivet or egg rack inside.
-
Add Eggs: Carefully place your room temperature eggs (1 to 12 eggs for 6-quart, up to 24 for 8-quart) on the trivet or rack. Stacking eggs is perfectly fine for larger batches.
-
Pressure Cook (5 Minutes): Secure the lid, ensure the vent knob is set to “sealed,” and cook on high pressure for 5 minutes. Use the “Manual” or “Pressure Cook” button on your Instant Pot.
-
Natural Release (5 Minutes): Once the cooking time has elapsed, allow the Instant Pot to naturally release pressure for EXACTLY 5 minutes. Set a separate timer to ensure precision.
-
Quick Release Remaining Pressure: After 5 minutes of natural release, carefully quick release any remaining pressure by turning the vent knob from “sealed” to “venting” using a long utensil. Stand clear of the hot steam.
-
Ice Bath (5 Minutes): Immediately transfer the hot eggs to a large bowl filled with ice water. Let them chill completely in the ice bath for 5 minutes.
-
Peel and Enjoy: Remove the eggs from the ice bath, gently roll them on the counter to crack the shells, then peel and savor your perfectly cooked, easy-to-peel hard-boiled eggs!
Equipment Needed
-
Electric Pressure Cooker (6 or 8 quart) (the Instant Pot Duo is a popular and reliable choice!)
-
Egg Rack or simply use the metal trivet that comes with your Instant Pot.
Recipe Notes & Tips
Batch Size Flexibility: This 5-5-5 method is incredibly versatile. You can cook as few as 1 egg or as many as 16 eggs in a 6-quart Instant Pot, or up to 24 eggs in an 8-quart model, all without any need to adjust the cooking time. The pressure cooking environment ensures consistent results for varying quantities.
Preventing Cracking: The best way to prevent your eggs from cracking during the pressure cooking process is to ensure they are at room temperature before placing them in the Instant Pot. This minimizes thermal shock.
For Softer, Jammy Yolks: If you prefer a slightly softer, more “jammy” yolk texture, you can adjust the pressure cooking time down to 4 minutes, followed by 5 minutes of natural pressure release, and then the immediate ice bath. Experiment to find your perfect consistency!
High Altitude Considerations: If you reside at a high altitude, it is crucial to consult our comprehensive Instant Pot Altitude Adjustments Guide. You may need to slightly increase your pressure cooking time to achieve perfectly set eggs due to the lower atmospheric pressure.
Nutrition Facts (Per Egg)
Protein: 5g
Fat: 4g
Saturated Fat: 1g
Cholesterol: 163mg
Sodium: 63mg
Potassium: 60mg
Vitamin A: 240IU
Calcium: 25mg
Iron: 0.8mg
Nutrition information is automatically calculated and should be used as an approximation. Individual results may vary based on exact ingredients and preparation.
Tried this perfect Instant Pot egg recipe?
Share your success with us! Mention @amindfullmom or tag #amindfullmom on your favorite social media platforms!
This comprehensive guide to perfect Instant Pot Hard-Boiled Eggs was originally published in 2018 and has been thoroughly updated and expanded in 2025 to provide the most current, detailed, and foolproof instructions for achieving outstanding results every time.