
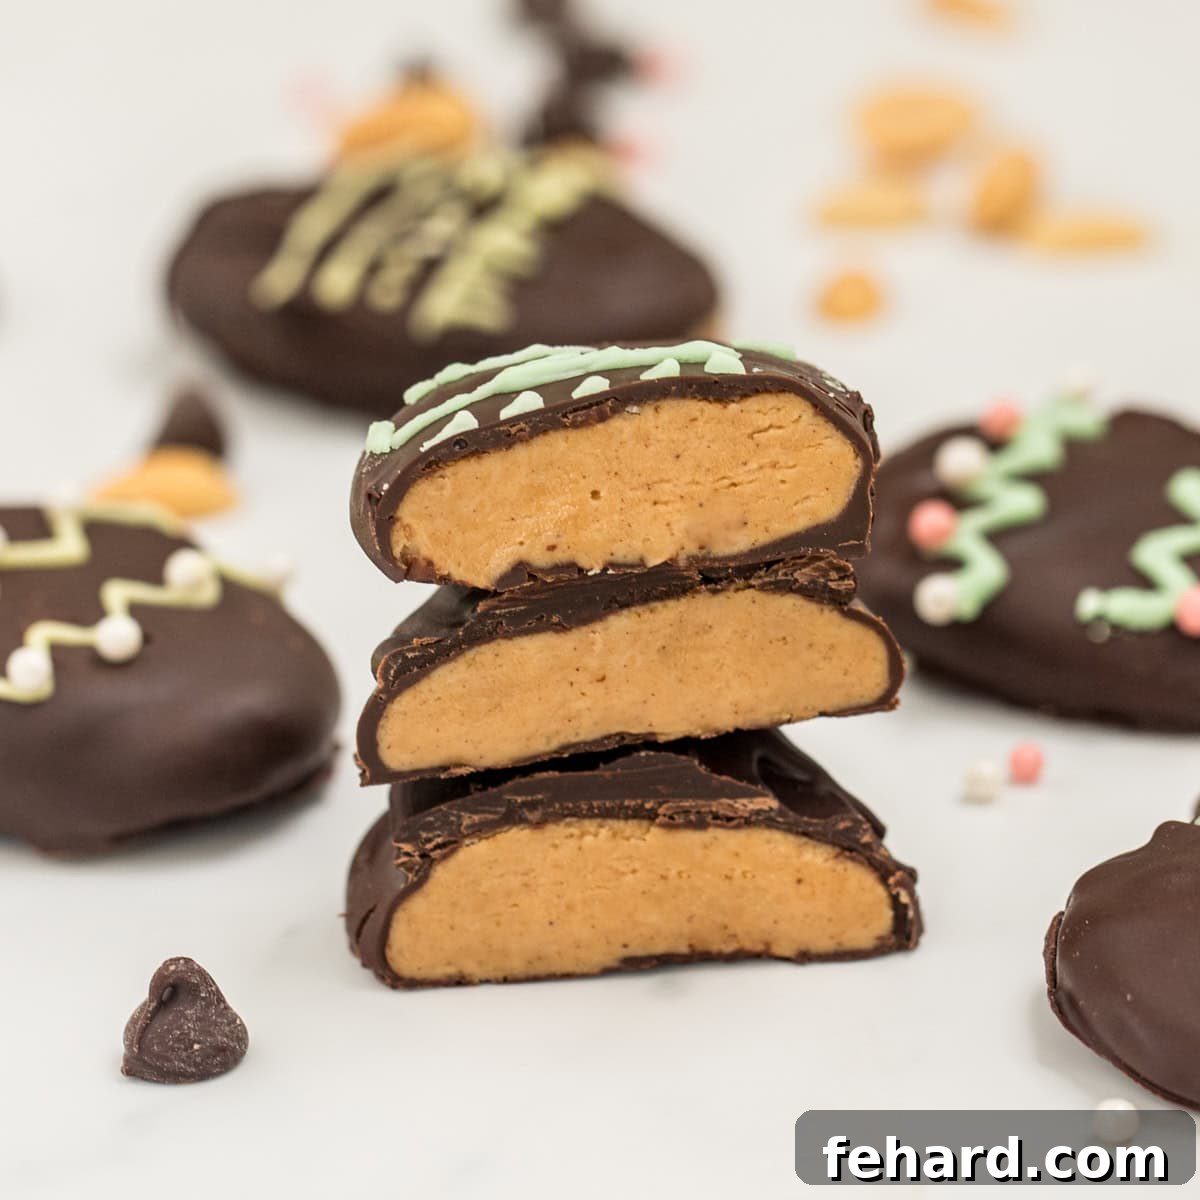
Experience the magic of Easter with these irresistible Homemade Peanut Butter Eggs! Far superior to any store-bought version, this easy, no-bake recipe combines just 6 simple ingredients to create the ultimate chocolate and peanut butter delight. Achieve the perfect balance of creamy peanut butter filling enrobed in rich, decadent chocolate, making these Copycat Reese’s Peanut Butter Eggs a must-have for your holiday celebrations. Get ready to discover a treat that will become a beloved tradition in your home, year after year!
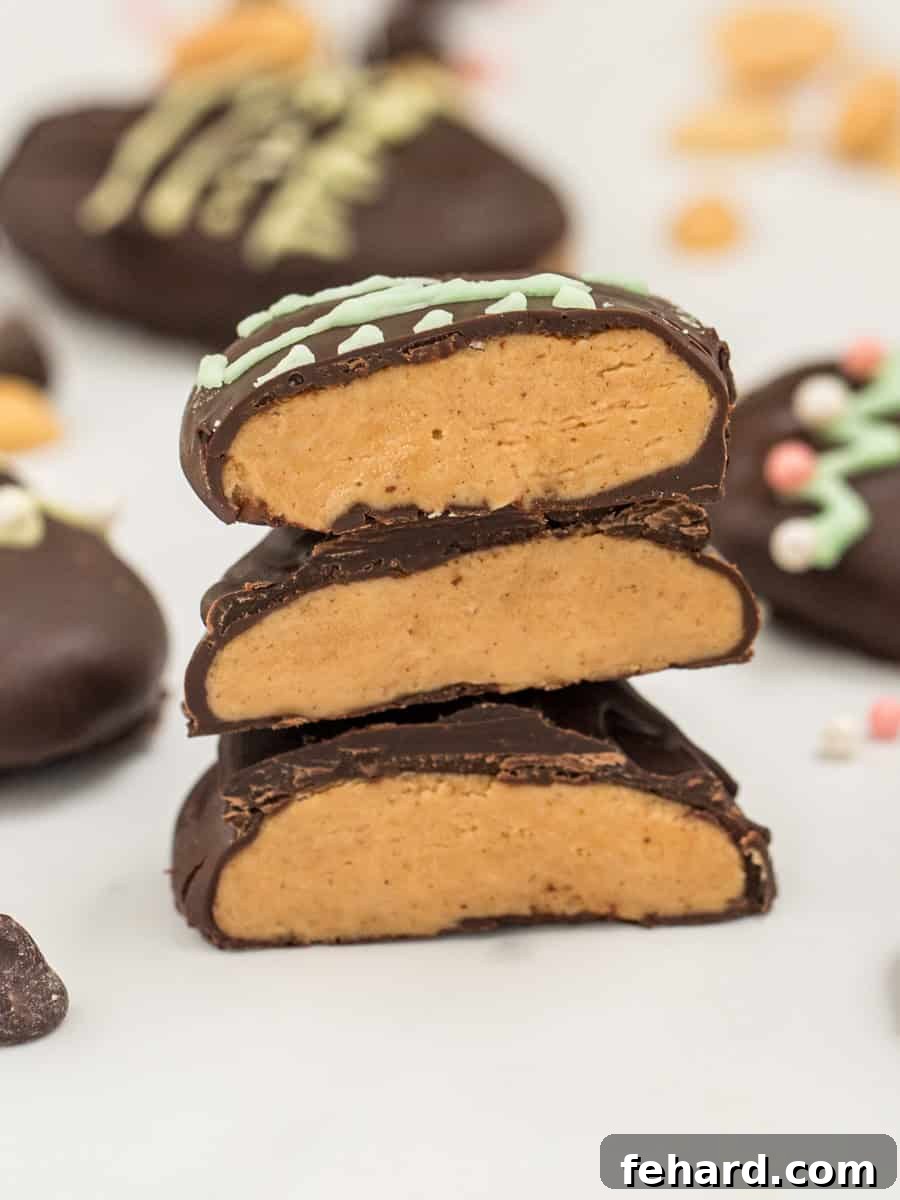
Crafting the Perfect Homemade Peanut Butter Eggs

For countless dessert enthusiasts, the arrival of Reese’s Peanut Butter Eggs marks a cherished seasonal tradition. There’s something undeniably captivating about their unique allure – a generous, creamy peanut butter center enveloped in a delicate layer of chocolate, offering a distinct and often preferred experience over the classic peanut butter cup. This beloved confectionery has garnered a cult following, with fans eagerly anticipating its limited-time appearance on store shelves each year.
But what if you could enjoy that same delectable chocolate peanut butter egg – not just better, but truly extraordinary? What if you could create a version that surpasses the original in flavor, texture, and overall satisfaction, right in your own kitchen? Prepare to elevate your Easter treat game to an entirely new level!
Building upon the foundation of my highly-praised homemade peanut butter cups recipe – celebrated for its use of readily available, wholesome ingredients – I’ve meticulously refined and adapted it to bring you a peanut butter egg that is simply unparalleled. This isn’t just a recipe; it’s a revelation, delivering a dangerously perfect harmony of sweet, salty, and utterly indulgent flavors.
While these easy homemade Easter eggs are an absolute must-have for every Easter basket and holiday gathering, their charm isn’t confined to a single season. The beauty of this no-bake recipe means you don’t have to wait for them to reappear in stores. You can whip up a batch of these glorious treats anytime a craving strikes, bringing joy and a touch of nostalgic indulgence to any day of the year. So, let’s get baking (or rather, no-baking!) and create some unforgettable memories.
Happy Cooking! xo Kristen
Recipe Highlights: Your Guide to Perfect Peanut Butter Eggs
- The Ultimate Peanut Butter Eggs Recipe
- Essential Ingredients & Smart Selection Tips
- Step-by-Step Recipe Walkthrough for Success
- Customize Your Eggs: Dietary Modifications
- Storage & Freshness Tips for Your Treats
- Common Questions & Troubleshooting
- More Easter Dessert Inspiration
Essential Ingredients & Smart Selection Tips for Your Peanut Butter Eggs
Crafting the perfect Homemade Peanut Butter Eggs begins with selecting the right ingredients. While the full list with precise quantities can be found in the comprehensive recipe card below, here’s an in-depth look at what you’ll need and crucial tips to ensure optimal results. Understanding each ingredient’s role is key to achieving that signature creamy filling and flawless chocolate coating.
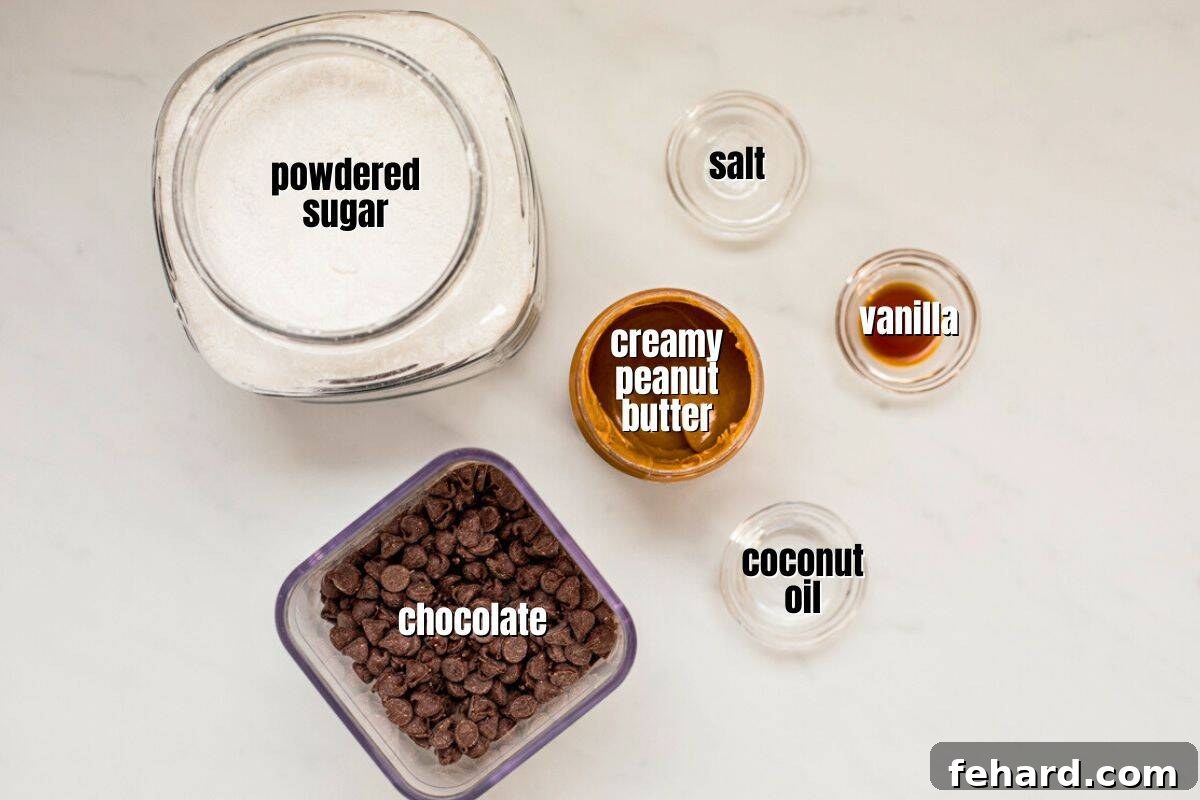
- Creamy Peanut Butter: This is the heart of your peanut butter eggs! For the best possible outcome – a filling that’s consistently creamy, smooth, and easy to shape – it’s absolutely essential to use shelf-stable, creamy peanut butter. Brands like Jif or Skippy work wonderfully. Avoid natural peanut butter that requires stirring, as its oil separation can lead to a greasy, less cohesive filling. Similarly, chunky peanut butter will alter the smooth texture we’re aiming for. This choice is vital, just as it is for my popular peanut butter blossoms and buckeye recipes.
- Powdered Sugar (Confectioners’ Sugar): A crucial component for both flavor and structure. You’ll notice this recipe calls for slightly more powdered sugar than my original homemade peanut butter cup recipe. This increase is deliberate, as it’s fundamental in firming up the peanut butter mixture, allowing it to hold its classic egg shape, and providing the necessary structure for easy dipping into melted chocolate. Furthermore, it helps to perfectly mimic the melt-in-your-mouth texture of a classic Reese’s egg. Remember to measure by scooping and leveling, rather than packing, to ensure accurate consistency.
- High-Quality Chocolate: The quality of your chocolate makes a significant difference in the final taste and appearance of your peanut butter eggs. You have several options: chocolate chips (often the most convenient and affordable), or pure chocolate bars (chopped into small pieces for the smoothest melt). I extensively tested these peanut butter eggs with various coatings: milk chocolate, dark chocolate, and semi-sweet chocolate. While all will provide a delicious result, dark chocolate emerged as the unanimous favorite. Its subtle bitterness brilliantly balances the sweetness from the increased powdered sugar in the peanut butter mixture, creating a sophisticated and perfectly harmonious flavor profile.
- Vanilla Extract & Salt: These two humble ingredients are flavor enhancers. The pure vanilla extract adds a warm, aromatic depth that complements both the peanut butter and chocolate. A pinch of table salt is not just for seasoning; it’s critical for bringing out the rich peanut butter flavor and preventing the eggs from tasting overly sweet. Don’t skip these!
- Coconut Oil (Optional, but Recommended): While technically optional, a small amount of coconut oil added to your melted chocolate offers several advantages. It helps to thin the chocolate slightly, making it smoother and easier to dip your eggs for a flawless coating. More importantly, it aids in quicker hardening of the chocolate and imparts a beautiful, glossy finish, giving your homemade treats a professional look.
Why No Butter in These Eggs?
You might notice that this Copycat Reese’s Eggs recipe intentionally omits butter, unlike some other peanut butter confectionery recipes. This was a conscious decision for a couple of compelling reasons: First, by leaving out butter, we allow the rich, distinctive flavor of the peanut butter to truly shine through, becoming the undisputed star of the show. Second, this exclusion makes the recipe incredibly straightforward to adapt for those with dietary restrictions. If you’re looking for a dairy-free peanut butter egg, simply substitute your favorite high-quality dairy-free chocolate, and you’re good to go!
Step-by-Step Recipe Walkthrough: Crafting Your Perfect Peanut Butter Eggs
Achieving perfect Homemade Peanut Butter Eggs is simpler than you think! Follow these detailed steps and expert tips to ensure flawless results every time. Remember, precise ingredient quantities and further specifics are always available in the complete recipe card found at the very end of this post.
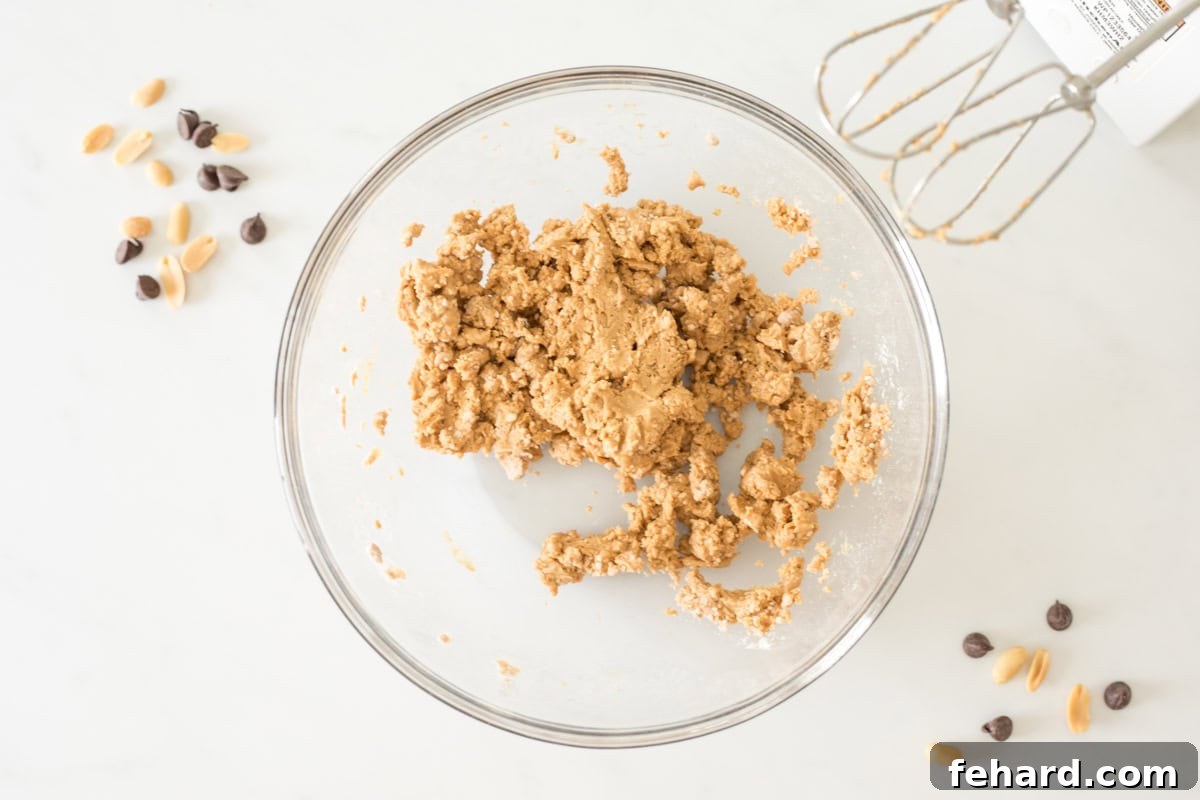
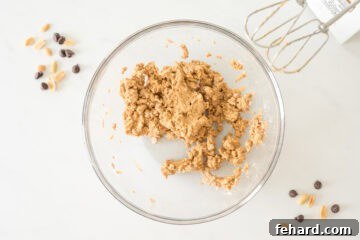
- Prepare Your Workspace and Peanut Butter Filling. Begin by lining a large baking sheet with parchment paper or a silicone baking mat. This crucial step prevents sticking and makes transferring your finished eggs a breeze. In a spacious mixing bowl, combine your chosen creamy peanut butter, vanilla extract, table salt, and powdered sugar. Using a handheld electric mixer on low speed, beat these ingredients together until they are thoroughly combined and take on a creamy consistency. The mixture, at this stage, should appear somewhat crumbly, but when pressed, it should easily come together and be pliable enough to roll into a uniform shape.
- Troubleshooting Consistency: If your mixture feels excessively dry and won’t cohere, gradually add ½ to 1 tablespoon of creamy peanut butter at a time, mixing well after each addition until the desired texture is achieved. Conversely, if the mixture is too sticky or soft to hold a shape, incorporate powdered sugar, 1 tablespoon at a time, until it firms up sufficiently. The goal is a moldable dough that isn’t greasy.
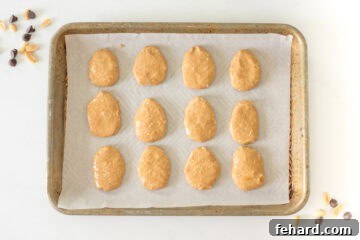
- Shape Your Classic Peanut Butter Eggs. Once your peanut butter mixture is perfectly pliable, scoop out approximately 1½ tablespoons for each egg. Roll this portion into a smooth ball between your palms. Next, gently flatten the ball to a thickness of about ½ to ¾ inch. With a little finesse, use your fingers to shape it into the distinctive egg silhouette – typically elongated with one end slightly narrower than the other, mirroring the iconic Reese’s egg design. Place each carefully shaped egg onto your prepared parchment-lined baking sheet, ensuring they are not touching. Maintain consistency in size for even chilling and coating.
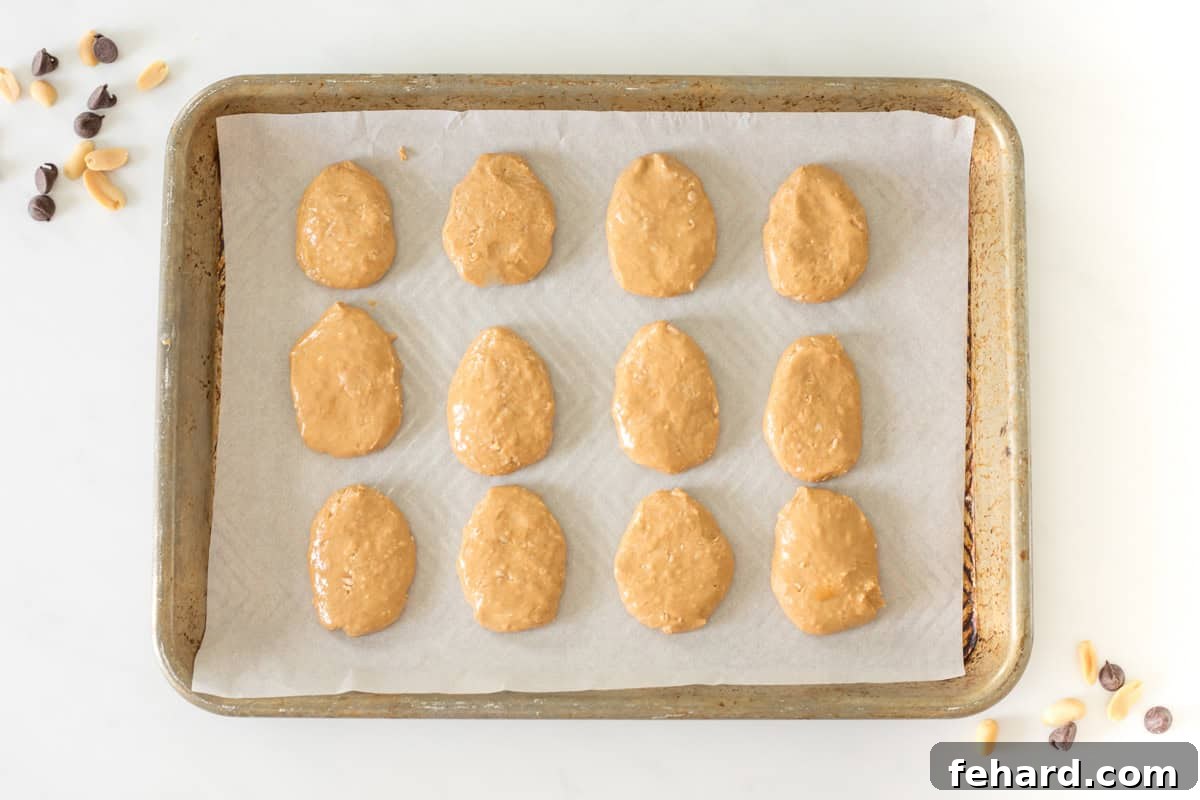
- Critical Chilling Period. This step is absolutely paramount and should not be skipped! For your peanut butter eggs to retain their shape and integrity when submerged in warm melted chocolate, they must be thoroughly chilled and hardened. Transfer the entire baking sheet with the shaped eggs into the freezer for a minimum of 20-30 minutes, or into the refrigerator for 60-90 minutes. Adequate chilling prevents the peanut butter mixture from softening or crumbling upon contact with the chocolate, ensuring a smooth, even coating.
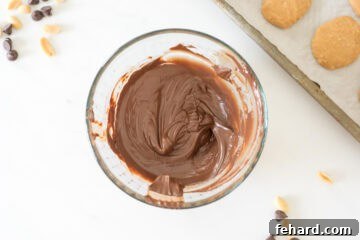
- Mastering the Chocolate Melt. While your peanut butter eggs are chilling, prepare your chocolate coating. If you’re using chocolate bars, chop them into small, uniform pieces to facilitate even melting. Place the chocolate chips, morsels, or chopped chocolate into a narrow, heat-safe bowl (a large glass measuring cup works exceptionally well for easy dipping). Microwave the chocolate in 30-second intervals, stirring thoroughly after each interval. Continue until the chocolate is smooth and fully melted, being careful not to scorch it. Once melted, stir in the optional coconut oil; this enhances fluidity, gloss, and aids in faster setting. Allow the melted chocolate to cool for about 5 minutes before dipping – this prevents the eggs from melting and makes the coating process easier.
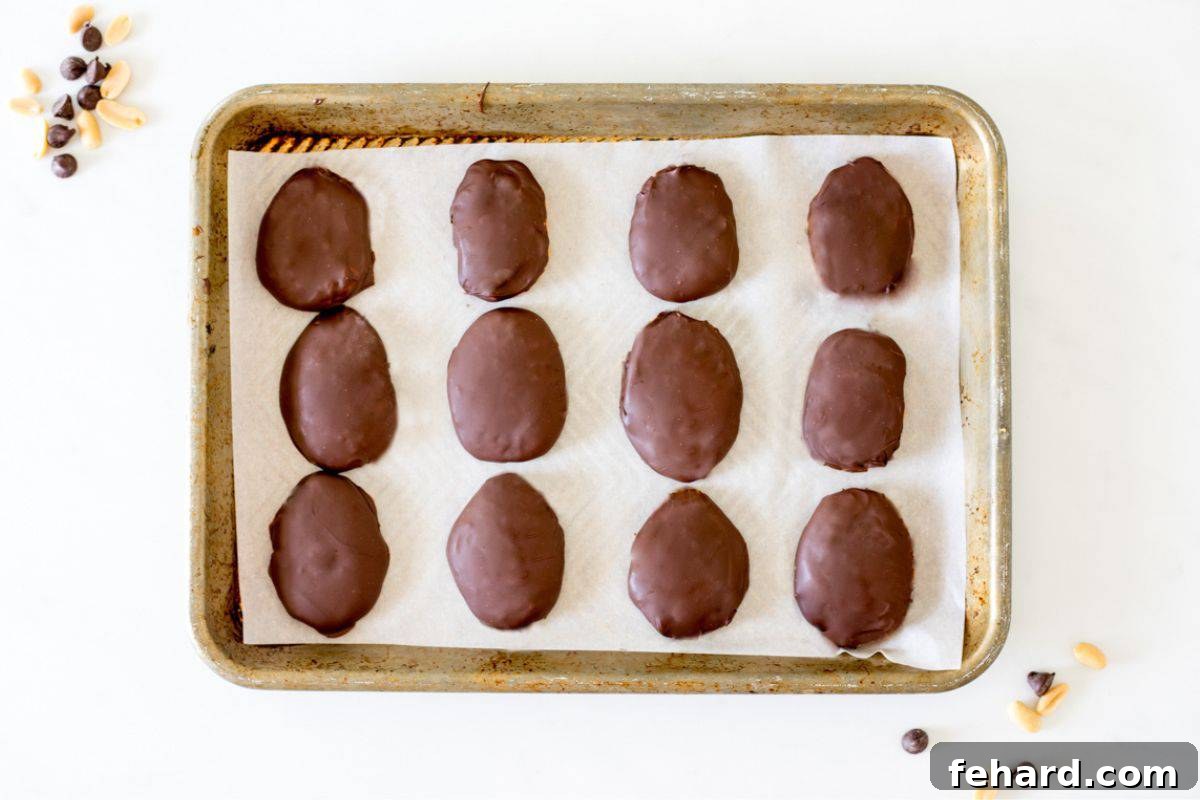
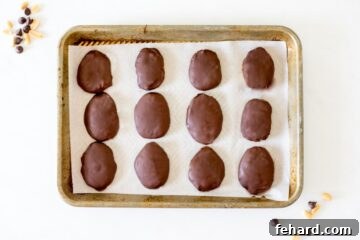
- The Art of Dipping. This step requires a gentle touch! Using a fork (a specialized dipping fork or a regular dinner fork will do), carefully place one thoroughly chilled peanut butter egg onto its tines. Submerge the entire egg into the melted chocolate, ensuring it’s fully coated. Lift the egg and gently tap the fork against the rim of the bowl to allow any excess chocolate to drip off, creating a thin, even layer. Using a second fork or a butter knife, carefully slide the chocolate-covered egg onto your parchment-lined baking sheet. If you plan to add sprinkles, do so immediately after dipping, before the chocolate begins to set. This process is similar to how I achieve perfect coatings on homemade Tagalong cookies. Repeat with the remaining eggs, working efficiently to keep the chocolate from cooling too much.
Don’t Waste Leftover Melted Chocolate!
If you find yourself with extra melted chocolate after dipping all your peanut butter eggs, don’t let it go to waste! It’s incredibly versatile. You can easily spread it thinly onto another piece of parchment paper and top with nuts, dried fruit, or sprinkles to make a quick and delicious chocolate bark. Alternatively, use it to coat raisins, various nuts, or even pretzels for another simple, delightful treat!
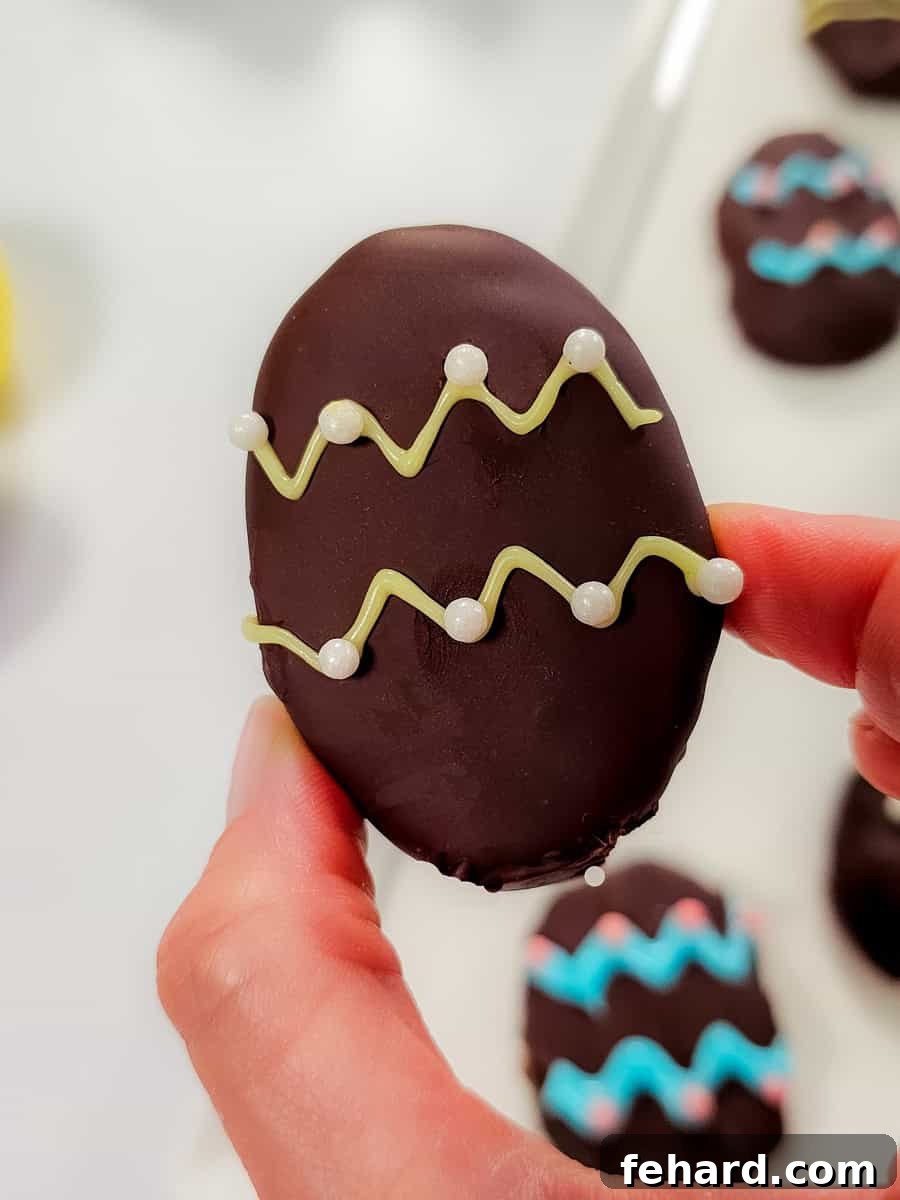
- Final Set and Decorate. Once all your peanut butter eggs are dipped, return the baking sheet to the refrigerator for approximately 30 minutes. This final chilling period allows the chocolate coating to fully set and harden, giving your treats that satisfying snap. After setting, your homemade peanut butter eggs are ready for their final flourish! If desired, use colored cookie icing, edible markers, or more sprinkles to add festive designs. This creative step is so much more enjoyable and delicious than simply coloring hard-boiled eggs – and far tastier too!
Customizing Your Treats: Dietary Modifications for Homemade Peanut Butter Eggs
Beyond their undeniably superior taste and delightful texture, one of the most significant advantages of preparing these homemade chocolate peanut butter eggs is the incredible flexibility they offer. You have the power to easily swap out ingredients, making these scrumptious treats accessible and safe for almost anyone to enjoy, regardless of specific dietary needs or preferences. It’s all about personalization without sacrificing flavor!
- Dairy-Free Peanut Butter Eggs: Crafting a dairy-free version of these beloved eggs is wonderfully simple. The primary adjustment involves selecting the right chocolate. Opt for your favorite high-quality dairy-free chocolate chips or melting wafers (popular brands include Enjoy Life or similar brands widely available in health food sections). Alternatively, use a dairy-free chocolate bar (such as Hu Kitchen, a personal favorite for its rich flavor) chopped into small, meltable pieces. All other ingredients in the peanut butter filling are naturally dairy-free, making this a quick and easy adaptation.
- Peanut-Free Alternatives (Nut-Free Options): For those with peanut allergies or who prefer other nut/seed butters, rest assured – you can absolutely make delicious “peanut butter” eggs without any peanuts! The key is substituting the creamy peanut butter with a suitable alternative. Excellent options include creamy almond butter, smooth cashew butter, or for a completely nut-free option, sunflower seed butter (like SunButter). Ensure your chosen alternative has a similar thick, creamy consistency to traditional peanut butter for the best shaping results. Always double-check ingredient labels to confirm they are processed in a peanut-free facility if allergies are a severe concern.
- Gluten-Free: Good news! This recipe is naturally gluten-free as all ingredients (peanut butter, powdered sugar, vanilla, salt, chocolate, coconut oil) typically do not contain gluten. Always check labels, especially for chocolate, to ensure no cross-contamination if severe gluten intolerance is a concern.
- Lower Sugar Options (Note with Caution): While the powdered sugar is crucial for texture, if you are mindful of sugar intake, you could experiment with reducing the powdered sugar slightly in the filling (e.g., by ¼ cup). However, be aware that this will affect the firmness and shaping ability of the eggs. They might become softer and harder to dip. For a truly lower-sugar alternative, you might need to explore specific sugar-free chocolate coatings, which can sometimes alter the flavor and melting properties.
Preserving Freshness: Storage Tips for Your Homemade Peanut Butter Eggs
Given that these delicious homemade peanut butter candies are crafted without the artificial preservatives and stabilizers often found in commercial products, proper storage is key to maintaining their freshness, texture, and exquisite flavor. Handle them with care to ensure every bite is as perfect as the first.
- Room Temperature Storage: Due to the fresh ingredients and the nature of the chocolate coating, these peanut butter eggs should not be left at room temperature for extended periods – ideally no longer than 2-3 hours. Prolonged exposure to warmth can cause the chocolate to soften and the peanut butter filling to become overly soft or even slightly oily.
- Refrigerator Storage (Recommended): Once your chocolate-covered eggs have fully set (as described in the recipe steps), carefully transfer them to an airtight container. For optimal freshness and to prevent sticking, arrange them in a single layer or separate layers with sheets of parchment paper. Stored this way in the refrigerator, your gourmet peanut butter eggs will remain perfectly fresh and delightful for up to 5 days. Chilling also enhances their firm, satisfying texture.
- Freezer Storage (For Longer Enjoyment): For those who want to enjoy these delectable treats beyond a few days, freezing is an excellent option! After the chocolate has fully set, place the eggs in a single layer on a parchment-lined baking sheet and freeze for about 1-2 hours until solid. Then, transfer the frozen eggs to a freezer-safe, airtight container or a heavy-duty freezer bag, again separating layers with parchment paper if needed. They can be stored in the freezer for up to 2-3 months. To enjoy, simply thaw them in the refrigerator for a few hours or at room temperature for about 15-20 minutes before serving.
With these storage methods, you can ensure that your homemade peanut butter eggs remain a delightful treat for days or even months to come, always ready to satisfy that craving!
Common Questions & Troubleshooting for Homemade Peanut Butter Eggs
Even the most straightforward recipes can sometimes present questions or minor challenges. Here are answers to common queries and solutions to help you troubleshoot your way to perfectly delicious peanut butter Easter eggs.
- Why is my peanut butter filling too crumbly or dry? This usually means you’ve added too much powdered sugar or your peanut butter was a bit thicker than ideal. Don’t worry! Gradually add ½ to 1 tablespoon of creamy peanut butter at a time, mixing thoroughly, until the mixture becomes pliable and easily forms a ball.
- My peanut butter filling is too sticky and won’t hold its shape. What now? This indicates too much peanut butter or not enough powdered sugar. Add powdered sugar, 1 tablespoon at a time, and mix until the mixture is firm enough to roll and shape without sticking excessively to your hands. Chilling the mixture briefly before shaping can also help.
- Why did my chocolate seize when melting? Chocolate seizing (turning thick, grainy, and unworkable) usually happens due to even a tiny amount of water coming into contact with it or overheating. Ensure your bowl and utensils are completely dry. When microwaving, use short intervals and stir frequently. If using a double boiler, make sure no steam or water splashes into the chocolate. Unfortunately, seized chocolate is often difficult to salvage for dipping, so it’s best to start over.
- My chocolate coating is too thick for dipping. How can I thin it? If your melted chocolate seems too thick, adding a little coconut oil (½ to 1 teaspoon at a time) can help thin it out and make it smoother for dipping. Ensure the oil is fully melted and incorporated. Alternatively, a tiny amount of vegetable shortening can also work.
- Why are my eggs falling apart when I dip them in chocolate? This is almost always due to insufficient chilling. The peanut butter eggs must be thoroughly chilled and firm before dipping. If they are too soft, the warm chocolate will cause them to soften further and potentially break. Place them back in the freezer for another 15-20 minutes or the fridge for an hour.
- Can I use natural peanut butter for this recipe? It is highly recommended to use shelf-stable, creamy peanut butter (like Jif or Skippy). Natural peanut butter tends to separate oils and can result in a greasier, less stable filling that is much harder to shape and dip successfully.
More Delectable Desserts Perfect for Your Easter Celebration
While these Homemade Peanut Butter Eggs are sure to be the star of your Easter dessert table, why stop there? Complement your holiday feast with these other crowd-pleasing and festive treats that are ideal for springtime gatherings:
- Bright & Zesty Lemon Cheesecake Bars
- Decadent Instant Pot Carrot Cake Cheesecake
- Sweet & Tangy Strawberry Crumb Bars
- Classic Homemade Banana Pudding from Scratch
- Moist & Flavorful Sour Cream Banana Cake
Did you make this recipe?
If you enjoyed this recipe, please leave a comment with a 5-star review at the bottom of the post. Thank you!
Best Homemade Peanut Butter Eggs (Copycat Reese’s)
Rate
Ingredients for Perfect Peanut Butter Eggs
- ½ cup creamy peanut butter (like Jif or Skippy, shelf-stable)
- 1 cup powdered sugar, scooped and NOT packed (confectioners’ sugar)
- ¼ teaspoon table salt
- ½ teaspoon pure vanilla extract
- 16 ounces dark chocolate, **see recipe notes for options (chips, wafers, or chopped bar)
- 1 tablespoon coconut oil (optional, for gloss and quick setting)
Instructions for Homemade Peanut Butter Eggs
-
Line a large baking sheet with parchment paper or a silicone baking mat; set aside. This ensures easy removal and prevents sticking.
-
In a large mixing bowl, combine ½ cup creamy peanut butter, 1 cup powdered sugar, ¼ teaspoon table salt, and ½ teaspoon pure vanilla extract. Using a handheld mixer on low speed, beat until the mixture is creamy and thoroughly combined. The mixture should be somewhat crumbly but easily pressed together to form a uniform shape. If too dry, add ½-1 tablespoon peanut butter at a time; if too sticky, add 1 tablespoon powdered sugar at a time until the right consistency for shaping is achieved.

-
Scoop about 1½ tablespoons of the peanut butter mixture. Roll it into a smooth ball, then gently flatten to ½-¾ inch thickness. Use your fingers to shape it into the classic egg form (elongated with one slightly narrower end). Place each shaped egg onto the prepared baking sheet.
-
Chill thoroughly: Transfer the peanut butter eggs to the freezer for 20-30 minutes, or the refrigerator for 60-90 minutes. This critical step ensures they are firm enough to hold their shape during chocolate dipping. Do not skip chilling!
-
While eggs chill, prepare the chocolate. If using a bar, chop 16 ounces dark chocolate into small pieces. Place chocolate in a narrow, heat-safe bowl (like a glass measuring cup). Microwave in 30-second intervals, stirring well after each, until smooth and melted. Stir in 1 tablespoon coconut oil (if using) for gloss and easy dipping. Let cool for 5 minutes.
-
Using a fork, submerge a chilled peanut butter egg into the melted chocolate. Lift and gently tap the fork against the bowl’s edge to remove excess chocolate. Carefully slide the coated egg onto the parchment-lined baking sheet using another fork or butter knife. If adding sprinkles, do so immediately before the chocolate sets. Repeat for all eggs.
-
Return the dipped eggs to the refrigerator for at least 30 minutes to allow the chocolate coating to fully set and harden. Once set, you can decorate them with colored icing or additional sprinkles for a festive touch.
Recommended Equipment
-
Parchment Paper or Silicone Baking Mat
-
Large Baking Sheet
-
Handheld Electric Mixer
-
Heat-Safe Narrow Bowl (or Glass Measuring Cup)
Chef’s Notes & Tips
Peanut Butter Type: For the best results, stick with shelf-stable, creamy peanut butter (e.g., Jif, Skippy). Natural peanut butter, which often separates oil, will result in a greasier, harder-to-manage filling.
Coconut Oil Benefits: This optional ingredient is a secret weapon for a professional finish! It helps thin the chocolate for easier dipping, encourages quicker hardening, and gives your eggs a beautiful, glossy sheen.
Storage for Freshness: These preservative-free treats are best stored in an airtight container in the refrigerator for up to 5 days, separated by layers of parchment paper. For longer storage, freeze them for up to 2-3 months.
Smart Use of Leftover Chocolate: Never waste melted chocolate! Transform it into homemade chocolate bark by spreading it on parchment and topping with nuts or dried fruit, or use it to coat raisins, pretzels, or other small snacks for an extra treat.
Nutrition Information
Nutrition information is automatically calculated, so should only be used as an approximation.