

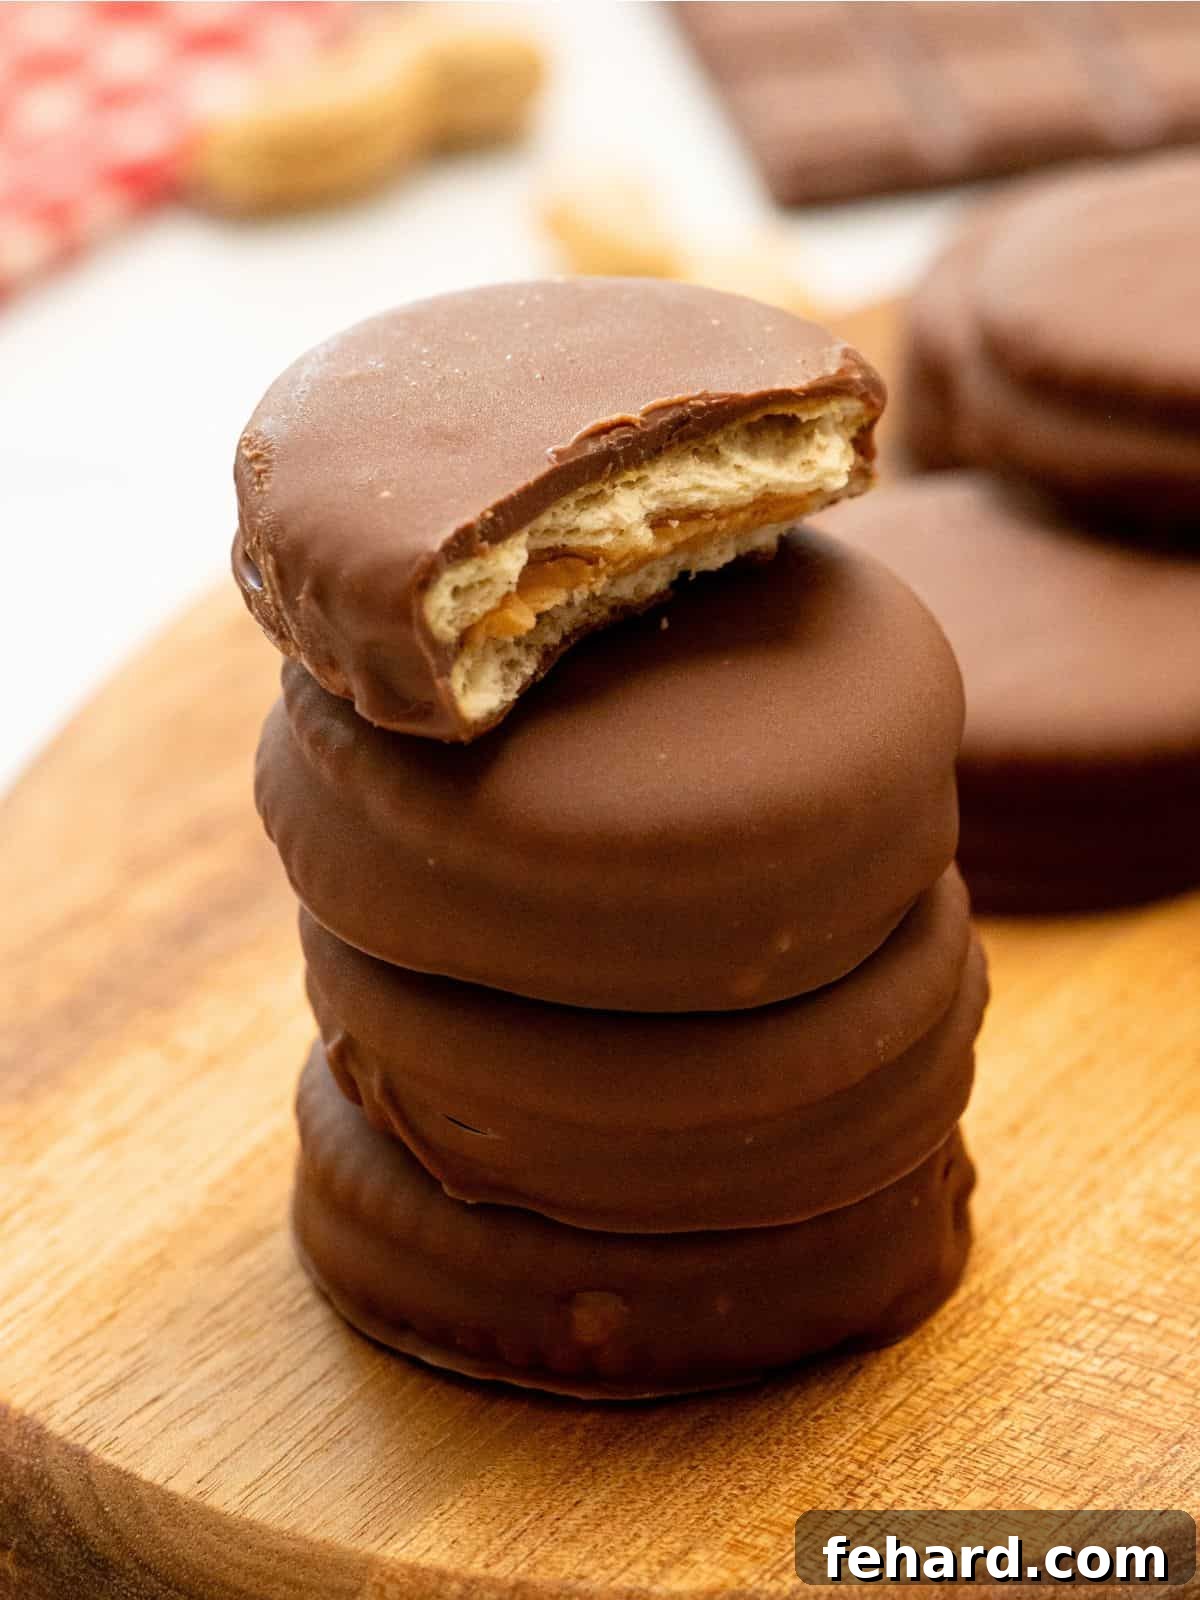
Experience the irresistible taste of Tagalong Cookies right in your own kitchen with this incredibly simple, 3-ingredient recipe! Our no-bake Chocolate Dipped Peanut Butter Crackers offer the easiest and most delicious way to recreate the iconic flavors of the beloved Girl Scout Tagalong Cookie at home, any time of year.
Crafted from a harmonious trio of creamy peanut butter, perfectly salty butter crackers, and luxurious melted chocolate, these copycat Tagalong cookies deliver an exquisite balance of sweet and savory in every bite. Whether you’re satisfying a year-round craving or looking to elevate your holiday cookie tray, alongside festive treats like cut-out sugar cookies, delightful candy cane cookies, or decadent saltine toffee, these homemade Tagalongs are sure to be a crowd-pleaser. They’re a testament to how simple ingredients can create extraordinary flavor, making them a must-try for any dessert enthusiast.
If you’re a devoted fan of Girl Scout Cookies, don’t stop here! Be sure to explore my recipe for Copycat Thin Mints for another fantastic homemade recreation of a classic favorite.
Kristen’s Key Tips for Perfect Copycat Tagalong Cookies
Achieving the perfect homemade Tagalong cookie is easier than you think. These expert tips will guide you to a flawless, delicious result every time:

- Enlist Helping Hands: This recipe is so simple and fun, it’s ideal for involving the whole family! Get your kids, grandkids, or friends to help spread the peanut butter on the crackers. It’s a wonderful way to create lasting memories in the kitchen while significantly speeding up the cookie-making process. Many hands make light work, especially when it comes to assembly!
- Choose Shelf-Stable Peanut Butter: For the best results, always opt for a smooth, shelf-stable peanut butter. All-natural peanut butters that require refrigeration tend to be runnier, which can make them challenging to spread evenly on butter crackers. A thicker, more stable peanut butter will ensure your sandwiches are neat and hold together perfectly.
- Prioritize REAL Chocolate: While chocolate almond bark might seem convenient for its easy melting and setting properties, I strongly recommend using high-quality dark, semi-sweet, or milk chocolate. The superior flavor of real chocolate will significantly elevate your homemade Tagalongs, giving them that authentic, rich taste that truly stands out. Invest in good chocolate for an unparalleled treat.
- Melt Ample Chocolate: When it comes to dipping, it’s always better to have more melted chocolate than you think you’ll need. A generous pool of chocolate makes the dipping process much smoother and ensures full, even coverage on each cookie. Don’t worry about waste; any leftover melted chocolate can be repurposed for other delightful treats like chocolate-covered raisins, nuts, or even drizzled over fruit.
- Master the Fork Dipping Technique: A simple fork is your best friend for dipping these delicate sandwich cookies into the melted chocolate. The prongs allow excess chocolate to drip off easily, preventing pools of chocolate at the base of your cookies and ensuring a thin, even coating. This smart trick also works wonders for other dipped confections, such as Peanut Butter Eggs.
Happy Cooking! xo Kristen
How to Make Homemade Tagalong Cookies: A Step-by-Step Guide
Crafting these delectable no-bake Tagalong cookies is surprisingly straightforward. Follow these detailed steps to ensure perfect results. You’ll find the precise ingredient quantities and comprehensive instructions conveniently located in the recipe card at the bottom of this post.
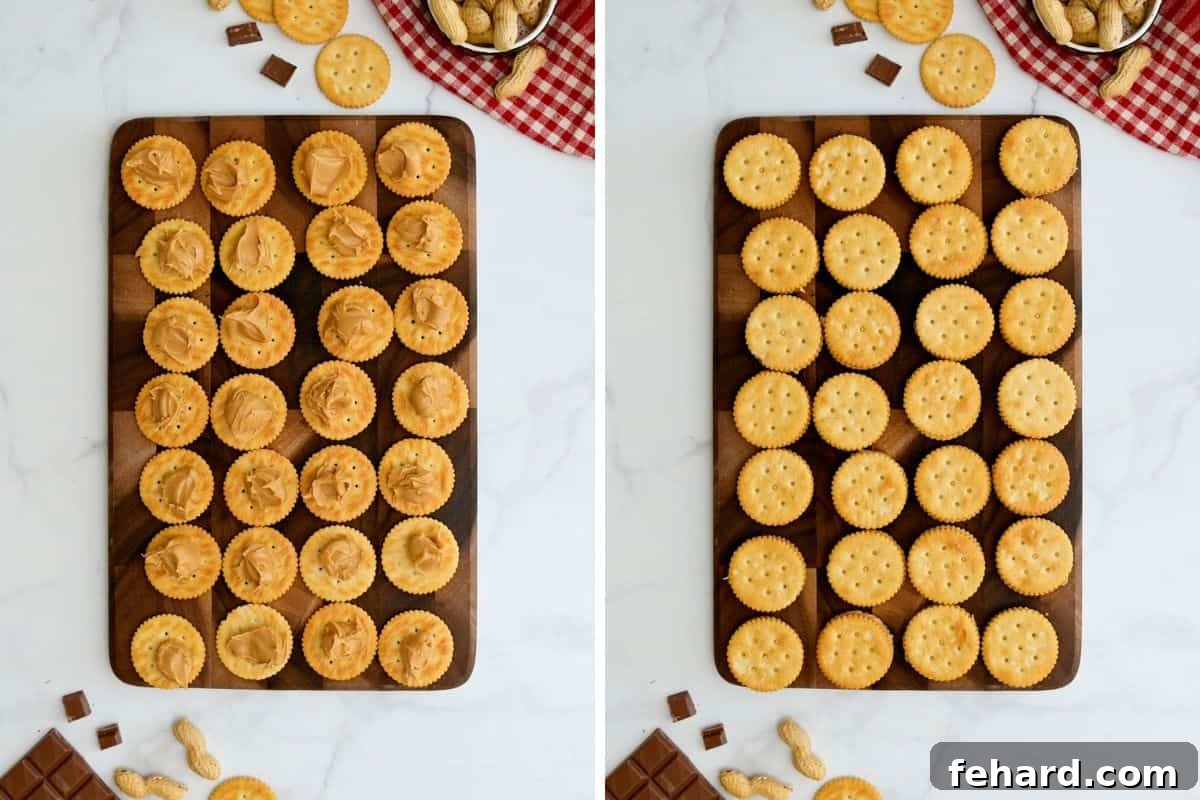
- Prepare Your Peanut Butter Crackers: Begin by lining a large baking sheet with parchment paper, which will prevent sticking and make cleanup a breeze. Carefully arrange half of your butter crackers on the prepared sheet. Take your smooth, shelf-stable peanut butter and spread a generous dollop (approximately 1-2 teaspoons, depending on cracker size and desired peanut butter thickness) onto each cracker. Ensure the peanut butter is spread evenly to the edges. Finally, gently top each peanut butter-covered cracker with another plain butter cracker, forming neat peanut butter cracker sandwiches. These are the delicious core of your homemade Tagalongs.
- Melt the Chocolate to Perfection: Place your chosen chocolate chips or finely chopped chocolate into a shallow, heat-safe bowl. To melt the chocolate using a microwave, heat it in 30-second intervals. Crucially, stir the chocolate thoroughly between each interval. Even if the chocolate doesn’t visibly appear melted, stirring helps to distribute the heat evenly and will gradually transform it into a smooth, luscious liquid. This prevents scorching and ensures a perfect consistency for dipping. Alternatively, you can use the double boiler method: rest your heat-safe glass bowl over a pot of simmering water (making sure the bottom of the bowl does not touch the water). Heat over medium-low, stirring frequently until the chocolate is completely smooth and free of lumps.
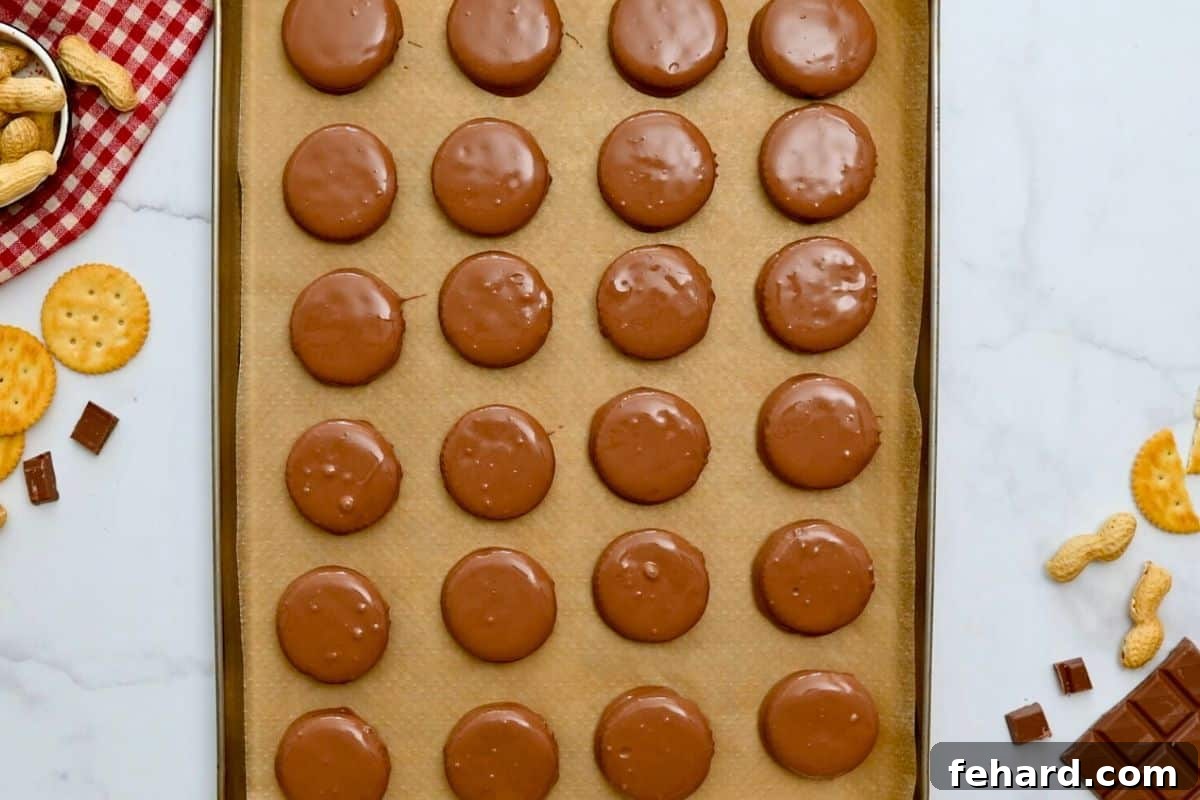
- Dip Your Peanut Butter Crackers: Once your chocolate is perfectly melted and smooth, it’s time for the dipping. Working one cookie at a time, gently place a peanut butter cracker sandwich onto a fork. Submerge the entire sandwich cookie into the melted chocolate, ensuring it’s fully coated. Lift the cookie with the fork and lightly tap the side of the bowl. This gentle tapping allows any excess chocolate to drip back into the bowl, ensuring a thin, even, and professional-looking chocolate shell around your cookie. Carefully transfer the dipped cookie from the fork to your prepared baking sheet lined with wax paper or parchment paper. Repeat this process until all your cracker sandwiches are beautifully coated.
- Allow to Harden and Set: For the best texture and appearance, allow the chocolate-dipped cookies to sit undisturbed at room temperature for approximately 2 hours. This gives the chocolate ample time to fully harden and set, resulting in a crisp, non-sticky coating. If you’re short on time and need to speed up the setting process, you can carefully place the baking sheet into the refrigerator for 20-30 minutes. Be aware that rapid cooling in the refrigerator or freezer can sometimes cause the chocolate to develop a slight “bloom” (a cloudy, whitish film), though this does not affect the taste or safety of the cookies. Once fully set, your homemade Tagalong cookies are ready to enjoy!
Creative Recipe Modifications for Everyone
One of the best aspects of this easy Tagalong recipe is its versatility. Feel free to customize these delicious treats to suit various dietary needs or personal preferences:
- Dairy-Free Tagalongs: Easily make these cookies dairy-free by opting for dairy-free chocolate chips. It’s also important to check the label of your butter crackers; you might be surprised to find that many popular “butter” crackers are naturally dairy-free. This simple swap allows those with dairy sensitivities to enjoy the classic flavor.
- Gluten-Free Tagalongs: For a gluten-free version, simply substitute traditional butter crackers with gluten-free butter crackers. The market now offers excellent gluten-free cracker options that maintain the same crispy, salty texture essential for these treats.
- Peanut-Free Tagalongs: If peanuts are a concern, you can effortlessly swap the peanut butter for an alternative nut butter like almond butter, cashew butter, or even a seed butter such as sunflower seed butter (often labeled as “soy butter” in some regions, but typically made from sunflower seeds). Ensure your chosen alternative butter has a smooth, shelf-stable consistency for best spreading results.
- Avoid Hydrogenated Oils: While any butter-style round cracker will work, for a healthier and often tastier option, I highly recommend choosing butter crackers made without hydrogenated oils. These crackers tend to have a cleaner flavor and are generally considered a better choice for your overall well-being.
- Double Boiler Method for Chocolate: Instead of microwave melting, you can use a double boiler for a more controlled melting process. Place your chocolate in a heat-safe glass bowl and set it over a pot of simmering water. Ensure the bowl does not touch the water. Heat over medium-low, stirring frequently until the chocolate is perfectly smooth and glossy. This method minimizes the risk of scorching and provides a consistent temperature for melting.
Storage Instructions for Freshness
To keep your homemade Tagalong cookies tasting fresh and delicious, proper storage is key:
- At Room Temperature: Once the chocolate has fully set and hardened, transfer your Tagalong cookies into an airtight container. Store them in a cool, dry place away from direct sunlight. They will maintain their quality and delicious flavor for up to 5 days at room temperature.
- In the Refrigerator: For extended freshness, place the fully hardened Tagalongs into an airtight container and refrigerate them for up to 10 days. Please note that when stored in the refrigerator (or freezer), the chocolate coating may develop a slight discoloration or “bloom,” appearing a bit cloudy. This is a natural process and does not affect the taste or safety of the cookies; they will still be absolutely delicious!
- In the Freezer: For long-term storage, arrange the set copycat Tagalongs in a single layer in a freezer-safe airtight container or freezer bag, separating layers with parchment paper if stacking. Freeze for up to 1 month. You can enjoy these frozen treats straight from the freezer for a delightful chilly snack, or let them thaw slightly at room temperature for about 10-15 minutes before indulging.
Why You’ll Love Making Homemade Tagalongs
Beyond the simple preparation, there are countless reasons why this 3-ingredient no-bake Tagalong recipe will become a household favorite:
- Year-Round Availability: Unlike Girl Scout cookies that are only available seasonally, you can whip up a batch of these crave-worthy treats whenever the mood strikes.
- Cost-Effective: Making your own Tagalongs is significantly more budget-friendly than buying boxes of Girl Scout cookies, allowing you to enjoy more for less.
- Control Over Ingredients: You have complete control over the quality of your ingredients. Choose organic peanut butter, your favorite brand of crackers, and high-quality chocolate to perfectly match your preferences and dietary needs.
- Perfect for Gifting: These charming homemade cookies make excellent gifts for friends, family, or neighbors during holidays or special occasions. Package them in decorative boxes or bags for a thoughtful, personalized present.
- Fun Family Activity: As mentioned in Kristen’s tips, this recipe is incredibly kid-friendly. It’s a fantastic way to introduce children to the joys of baking (or in this case, no-baking) and create cherished family memories.
- Satisfying Cravings Instantly: With minimal effort and ingredients you likely already have on hand, you can satisfy that specific sweet and salty, chocolate and peanut butter craving almost instantly.
More Peanut Butter Chocolate Delights to Explore
If you adore the classic combination of peanut butter and chocolate as much as we do, you’re in for a treat! Here are more fantastic recipes that celebrate this iconic duo:
- Easy Buckeye Candy: Another no-bake classic, these peanut butter balls dipped in chocolate are always a hit.
- Homemade Peanut Butter Cups: Craft your own gourmet chocolate peanut butter cups with simple ingredients.
- Peanut Butter Chocolate Chip Banana Muffins: A perfect breakfast or snack, combining fruit, peanut butter, and chocolate.
- Peanut Butter Blossoms: Soft peanut butter cookies adorned with a chocolate kiss – a timeless favorite.
- Peanut Butter Coffee: Start your day with a delightful and energizing peanut butter-infused coffee.
- Peanut Butter Rice Krispie Treats: An elevated version of a childhood classic, with added peanut butter goodness.
Did you make this recipe?
If you enjoyed crafting and tasting these easy homemade Tagalong cookies, we would love to hear from you! Please consider leaving a comment with a 5-star review at the bottom of the post. Your feedback is invaluable and helps others discover these delightful treats. Thank you for sharing your experience!
★
★
★
★
Homemade Tagalong Cookies
Kristen Chidsey
30
10 minutes
5 minutes
15 minutes
Rate

Video Overview (coming soon!)
A detailed video tutorial demonstrating each step of this easy recipe will be available here soon to guide you through the process, ensuring perfect results every time.
Ingredients
- 60 Butter Crackers
- 1 pound quality chocolate, *see note for chocolate type recommendations
- 1 cup smooth shelf-stable peanut butter
Instructions
-
Line a large baking sheet with parchment paper. Place 30 butter crackers on the baking sheet and dollop each cracker with about 2 teaspoons of smooth, shelf-stable peanut butter, spreading evenly. Top each cracker with an additional butter cracker to form neat peanut butter sandwiches.

-
Place 1 pound of quality chocolate (such as dark, semi-sweet, or milk chocolate chips or chopped chocolate) into a shallow heat-safe glass bowl. Microwave in 30-second intervals, stirring vigorously between each interval, until the chocolate is completely smooth and creamy. Remember to stir even if it doesn’t look melted, as this distributes heat and prevents scorching. Alternatively, melt the chocolate using a double boiler method for gentle, even melting.
-
Working one at a time, place a peanut butter sandwich cracker onto a fork. Dip it entirely into the melted chocolate, ensuring full coverage. Gently tap the fork on the side of the bowl, allowing any excess chocolate to drip off through the prongs back into the bowl. Carefully place the chocolate-dipped cookie onto your prepared baking sheet. Repeat until all sandwiches are dipped.
-
Allow the cookies to sit at room temperature for approximately 2 hours to fully harden and set the chocolate coating. If you need them to set faster, you can place the baking sheet into the refrigerator for 20-30 minutes. Once fully set, transfer the cookies to an airtight container and store at room temperature for up to 5 days, or as per the storage instructions above.



Notes
Dairy-Free Option: To make these treats dairy-free, simply use dairy-free chocolate chips and look for organic butter crackers, as many are surprisingly dairy-free. Always check ingredient labels carefully.
Gluten-Free Option: Easily adapt this recipe to be gluten-free by using gluten-free butter crackers. Ensure all other ingredients are certified gluten-free.
Storage Tips: Once the chocolate has fully set, store your peanut butter cracker cookies in a sealed, airtight container in a cool place for up to 5 days. Alternatively, they can be stored in an airtight container in the refrigerator for up to 10 days. For longer storage, freeze them in a freezer-safe airtight container for up to 1 month. If refrigerated or frozen, the chocolate may become slightly discolored (a phenomenon known as chocolate bloom), but rest assured, the cookies will still be perfectly safe and delicious to eat.
Nutrition Information (per serving)
Carbohydrates: 15g
Protein: 3g
Fat: 9g
Saturated Fat: 3g
Cholesterol: 2mg
Sodium: 102mg
Potassium: 62mg
Fiber: 1g
Sugar: 10g
Vitamin A: 35IU
Vitamin C: 0.1mg
Calcium: 30mg
Iron: 0.6mg
Nutrition information is automatically calculated, so should only be used as an approximation and for informational purposes.
Tried this recipe?
Mention @amindfullmom or tag #amindfullmom! We love to see your delicious creations!