
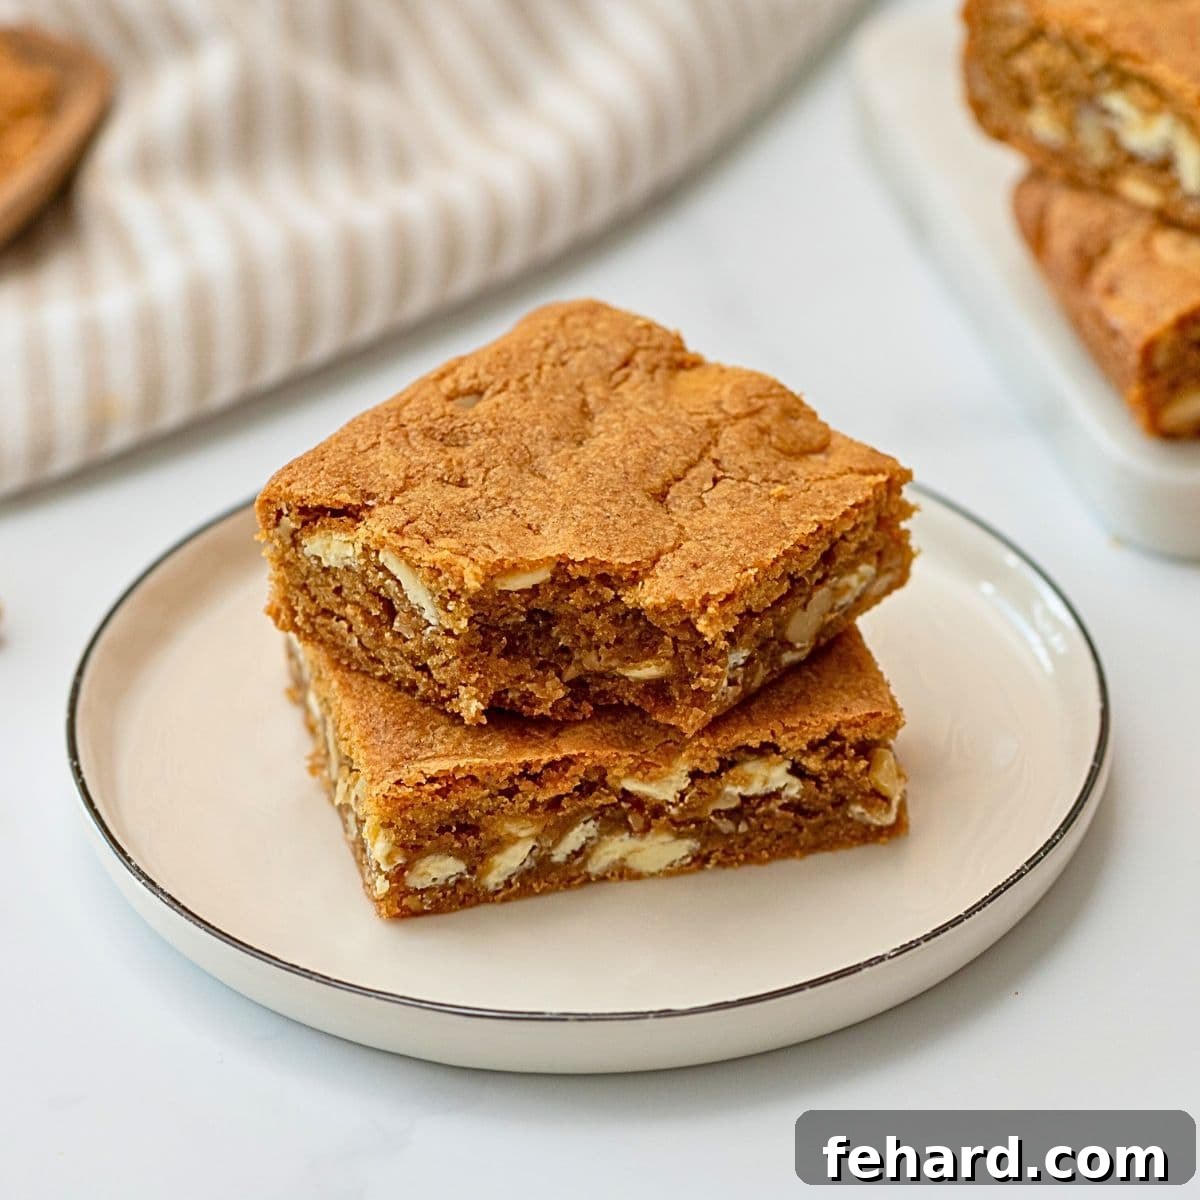
Prepare to fall in love with these irresistible Brown Butter Blondies! With their distinctive nutty brown butter base and your choice of delicious mix-ins, these bars are incredibly soft, wonderfully chewy, and boast an unparalleled toffee-like flavor that will have everyone asking for more. They are truly a game-changer in the world of home baking, offering a simple yet sophisticated dessert experience.
For years, I’ve enjoyed making classic blondies, appreciating their simple charm. However, the moment I introduced the technique of browning butter into the recipe, everything changed. It elevates these simple cookie bars from merely good to absolutely phenomenal. Just five extra minutes of effort transform ordinary butter, infusing it with rich, deep caramel and nutty notes that make these blondies taste like they came straight from a gourmet bakery. This isn’t just another blondie recipe; it’s the *ultimate* version you’ll ever make, guaranteed to become a cherished staple in your dessert repertoire. Get ready to experience a depth of flavor that sets these apart!
Why Brown Butter Blondies Are a Game-Changer
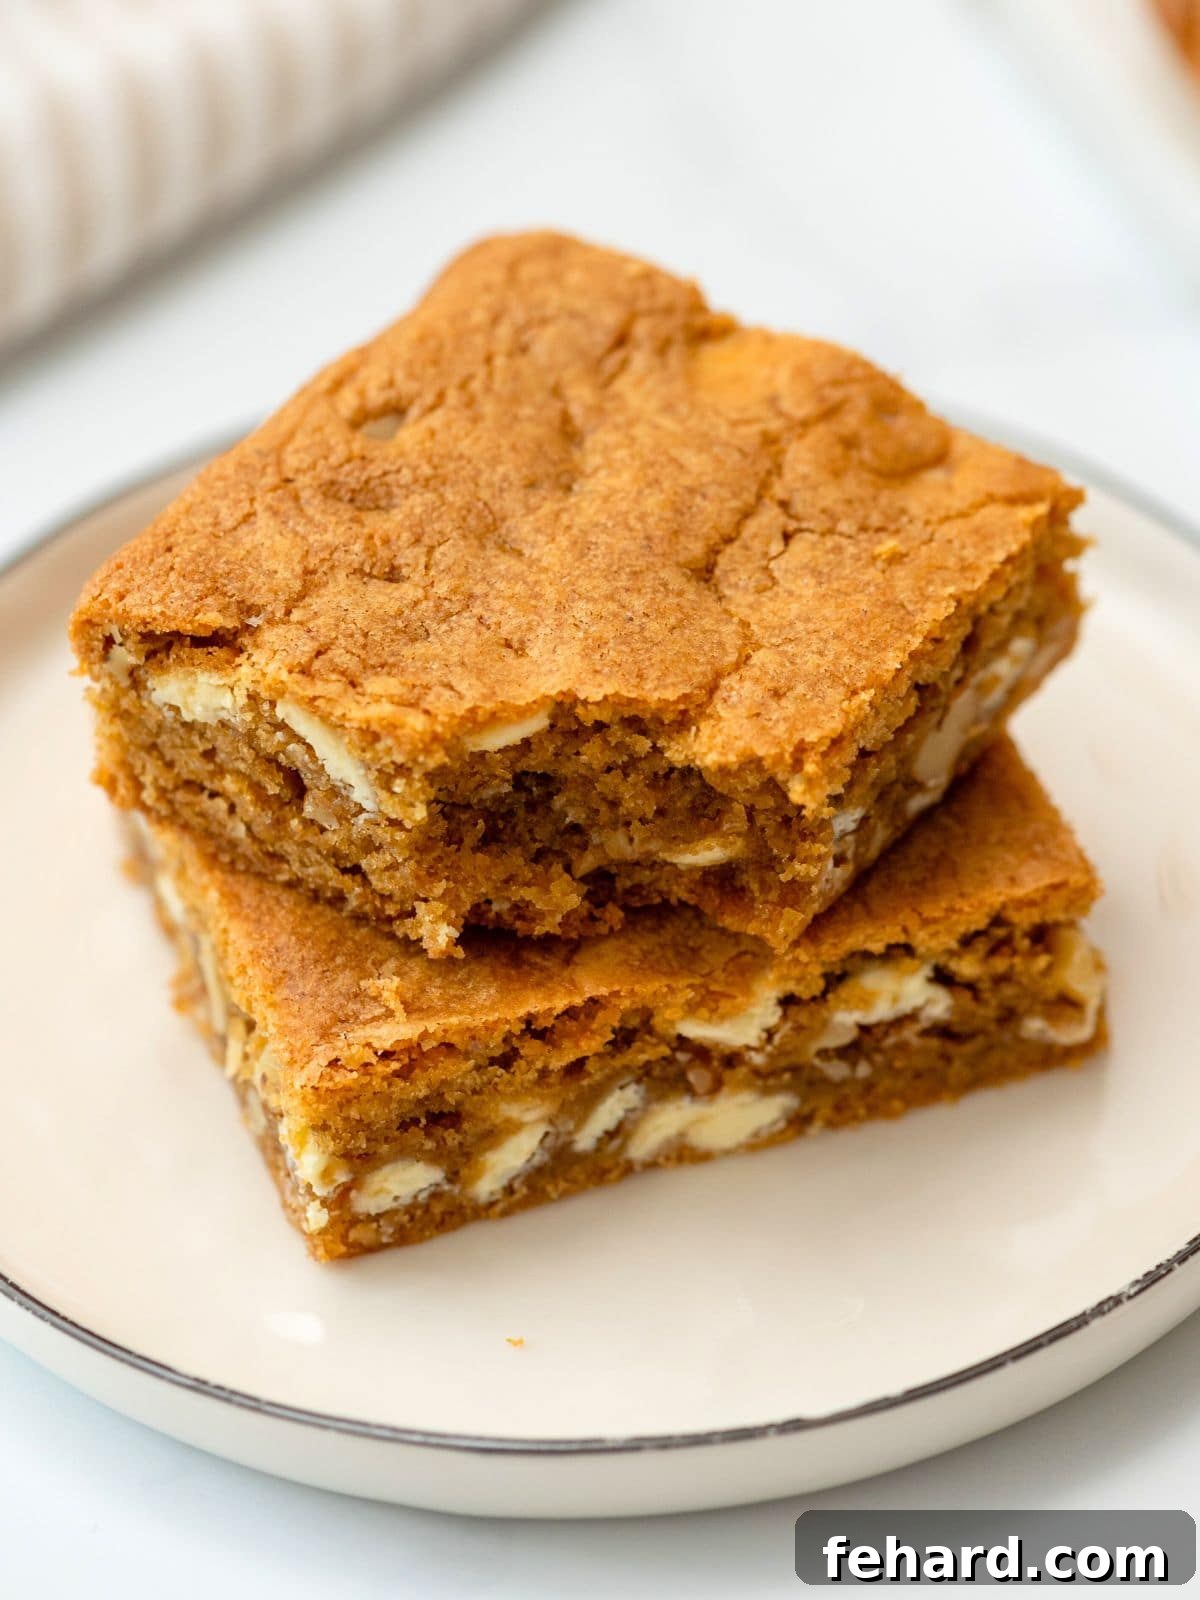
If you’ve never experimented with browning butter, you’re in for a delightful and transformative surprise. This seemingly simple technique, often overlooked by home bakers, converts ordinary unsalted butter into a golden, fragrant elixir that imparts an incredible depth of flavor. The process involves gently cooking the butter until its milk solids toast, developing complex nutty aromas and rich caramel undertones. When this browned butter is incorporated into blondies, it creates a profound, toffee-like taste that is utterly addictive and distinguishes these bars from any other blondie recipe you might have tried before. It’s truly the secret ingredient that elevates these humble cookie bars into a gourmet dessert experience, adding layers of sophisticated flavor that are hard to resist.
The Anatomy of a Perfect Blondie: Expert Tips from Kristen
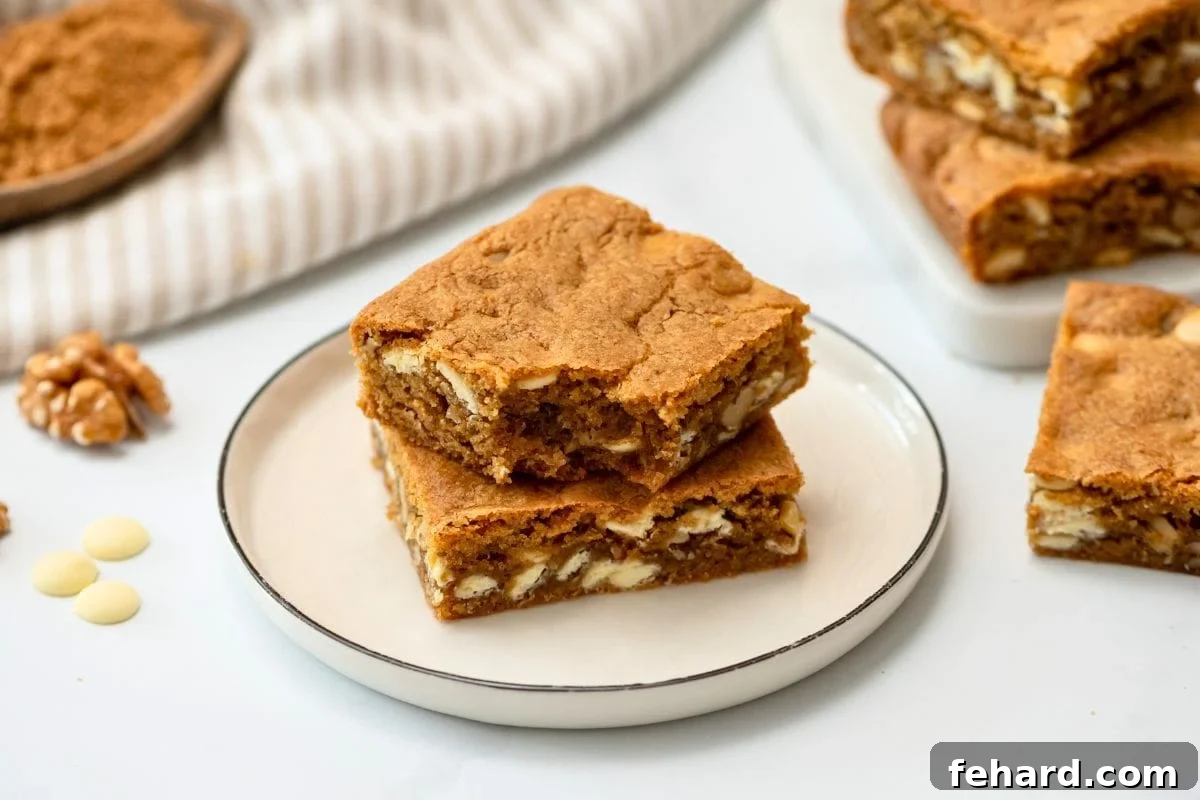
These Brown Butter Blondies are designed to deliver that coveted crinkly top, perfectly crispy edges, and a wonderfully soft and chewy interior – a texture reminiscent of a classic brownie, but with its own unique, butterscotch-forward flavor profile (no cocoa powder here!). They are not only incredibly flavorful and forgiving for bakers of all skill levels, but also endlessly customizable. While the recipe itself is straightforward, incorporating a few key tips from Kristen will ensure you achieve the best possible results every single time, making your blondies truly bakery-worthy and consistently delicious.
- Unleash Your Creativity with Mix-Ins: Blondies offer the perfect canvas for your favorite additions, allowing you to tailor each batch to your preference. Feel free to fold in classic semi-sweet, milk, or dark chocolate chips, vibrant white chocolate chunks, crunchy walnuts or pecans, colorful M&M’s, sweet shredded coconut, or irresistible buttery toffee bits. Each addition brings its own unique texture and flavor dimension, enhancing the overall experience. If you prefer a simpler, pure butterscotch and brown butter experience, you can absolutely omit all mix-ins altogether and let the profound base flavors shine through on their own. Don’t be afraid to experiment and discover your ultimate flavor combination!
- Choose Your Brown Sugar Wisely: The type of brown sugar you select plays a significant role in defining both the flavor and visual appeal of your finished blondies. Dark brown sugar, characterized by its higher molasses content, will further deepen the nutty, caramel notes already introduced by the browned butter, resulting in a richer, more intense flavor profile and a slightly darker colored blondie. Light brown sugar, on the other hand, will still provide excellent moisture and a tender crumb but with a milder caramel flavor, producing a lighter golden bar. Both options yield delicious results, so choose based on your desired intensity and color.
- Salt’s Secret Role: Embracing Fine Sea Salt: Never underestimate the crucial role of salt in sweet baking – it’s a flavor enhancer! Fine sea salt is highly recommended for this recipe as it dissolves beautifully and evenly into the batter, ensuring that every single bite has a perfectly balanced taste. It expertly compliments and elevates the nutty undertones of the browned butter and helps to counteract the sweetness, preventing the blondies from being overly cloying. It is an absolutely essential ingredient for a well-rounded and nuanced flavor profile that truly shines.
- Baking Powder: Your Texture Architect: This ingredient offers a subtle yet significant control over the final texture of your blondies. For a super dense, exquisitely fudgy, and wonderfully gooey blondie that almost melts in your mouth, you can confidently omit the baking powder entirely. However, if you prefer a blondie with a slight lift, a bit more chew, and a slightly cake-like crumb, adding just a tiny touch of baking powder is key. I personally favor adding a small amount (¼ teaspoon) to strike that ideal balance: dense enough to be incredibly chewy, but with just enough lightness to avoid being overly heavy or greasy.
- The Right Pan Makes All the Difference: For blondies boasting those truly irresistible crispy, chewy edges and a perfectly soft, gooey center, a metal 8×8-inch baking pan is your absolute best friend. Metal baking pans conduct heat more efficiently and evenly than glass, leading to those desirable caramelized edges and a consistent bake. If you opt for a glass baking dish, which tends to retain heat longer, you may need to add an extra 3-5 minutes to the baking time to achieve similar results. Regardless of your chosen pan material, *always* line it with parchment paper, allowing a generous overhang on the sides. This simple yet critical step ensures effortless lifting and removal of the entire slab of blondies after baking, making slicing a breeze and clean-up minimal.
Happy Cooking! xo Kristen
Mastering the Art of Brown Butter Blondies: A Step-by-Step Guide
Creating these sensational brown butter blondies is an incredibly rewarding and surprisingly easy process, even for novice bakers. The extra step of browning butter is minimal but yields maximum flavor impact. I’m here to guide you through each stage, providing clear instructions and helpful tips to ensure you achieve perfect, mouth-watering results every single time you bake them. Let’s dive in and make some magic!
Step One: Unlock the Nutty Flavor – Browning the Butter
Browning butter might sound like a technique reserved for gourmet chefs, but it’s remarkably simple to do and takes just a few focused minutes. While you could certainly opt to just melt butter in the microwave and proceed with the recipe, you would undeniably miss out on the profound rich, nutty, and caramel notes that perfectly browned butter imparts to these blondies. This step is where the magic truly begins, elevating the flavor profile significantly and giving your blondies their signature depth.
- **Melt Butter Over Medium Heat:** Begin by placing your ½ cup of unsalted butter in a small, light-colored saucepan. The light color of the pan is crucial as it allows you to easily observe the subtle color changes in the butter, which helps prevent it from burning. Melt the butter over medium heat, stirring constantly with a whisk or a heat-proof spatula. Consistent stirring ensures even heating and helps prevent the milk solids from sticking to the bottom of the pan and burning prematurely.
- **Observe the Foaming Stage:** As the butter melts completely and heats up further, it will begin to foam vigorously. This is a normal and expected part of the process, indicating that the water content within the butter is actively evaporating. Continue stirring steadily through this stage, as the foam will eventually begin to subside.
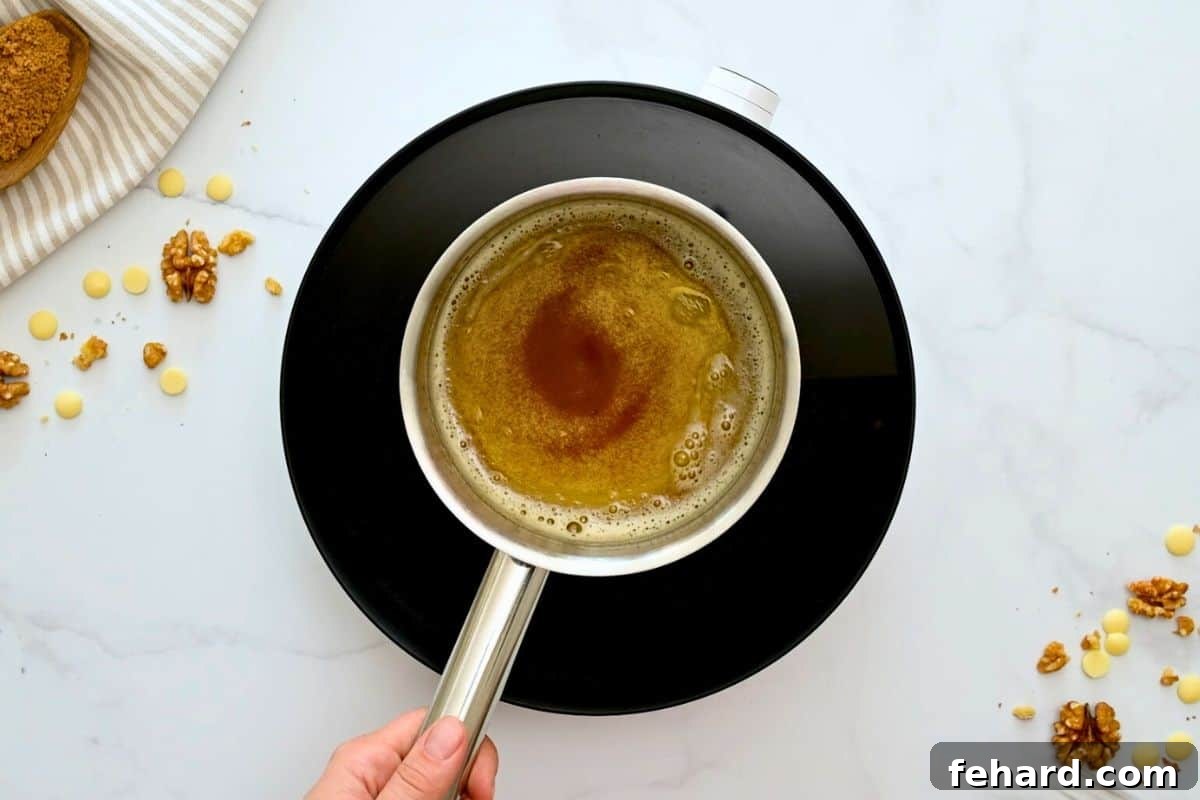
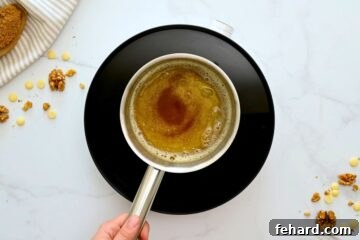
- **Watch for Golden Flecks and Nutty Aroma:** Keep cooking and stirring constantly. The foam will eventually recede, revealing the golden liquid butter underneath. At this critical point, the butter will start to turn a beautiful golden-amber color. Crucially, you will notice tiny brown flecks forming and settling at the bottom of the pan. These are the toasted milk solids, and they are exactly what you’re looking for – they carry all the delicious nutty flavor! When the butter takes on a deep golden hue and emits a distinct, heavenly nutty aroma (similar to toasted hazelnuts), it’s done. Remove the pan from the heat immediately to stop the cooking process and prevent these precious milk solids from burning. This entire process usually takes between 3 to 8 minutes, depending on your stovetop’s heat and the type of pan used.
Step Two: Patience is Key – Cooling the Brown Butter
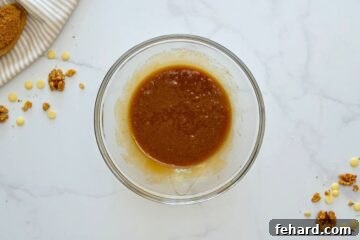
Once your butter has achieved that beautiful golden-brown color and irresistible nutty aroma, it’s absolutely vital to immediately transfer it from the hot saucepan to a large, heat-safe mixing bowl. Leaving it in the hot pan can cause it to continue cooking and potentially burn. Allowing it to cool for at least 10 minutes is a crucial step that cannot be skipped. This cooling period is essential to prevent your egg from scrambling when it’s added to the warm butter, which would lead to a lumpy, unappealing batter instead of a smooth, cohesive one. Don’t rush this step – a properly cooled brown butter is key to a perfectly smooth and delicious blondie batter.
Step Three: The Simple Mix – Combining Ingredients
One of the beauties of this brown butter blondie recipe is its elegant simplicity – there’s no need to dirty extra bowls by mixing wet and dry ingredients separately! All components conveniently come together in one bowl, significantly cutting down on your cleanup time. However, it’s incredibly important to pay close attention to the order in which the ingredients are added to ensure everything is evenly combined without overmixing, which is a common culprit for tough, dense blondies.
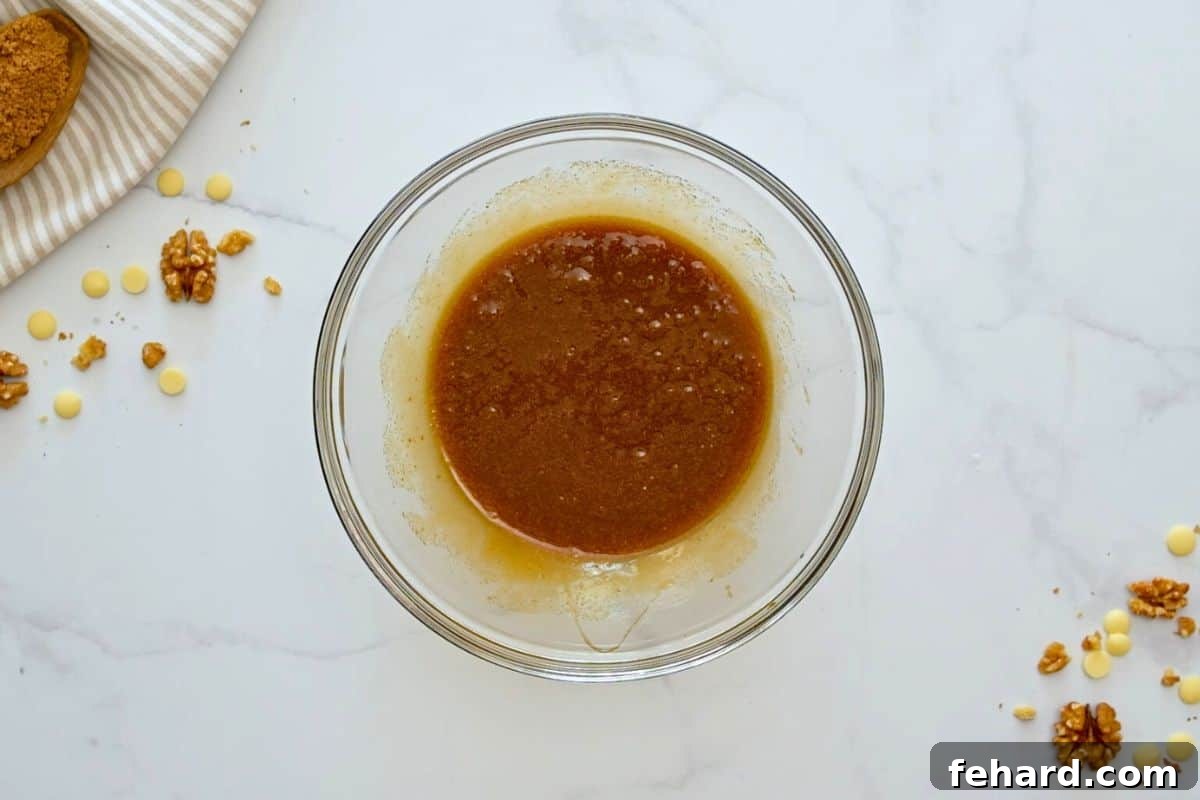
- **Whisk in Wet and Leavening Agents:** To the slightly cooled brown butter in your large mixing bowl, add the ¾ cup brown sugar, 1 teaspoon vanilla extract, the room temperature large egg, ¼ teaspoon baking powder (if you are using it for a chewier texture), and ½ teaspoon fine sea salt. Whisk these ingredients vigorously until they are thoroughly combined and the mixture appears smooth, shiny, and glossy. Ensure the brown sugar is mostly dissolved and the egg is fully incorporated into the butter mixture.
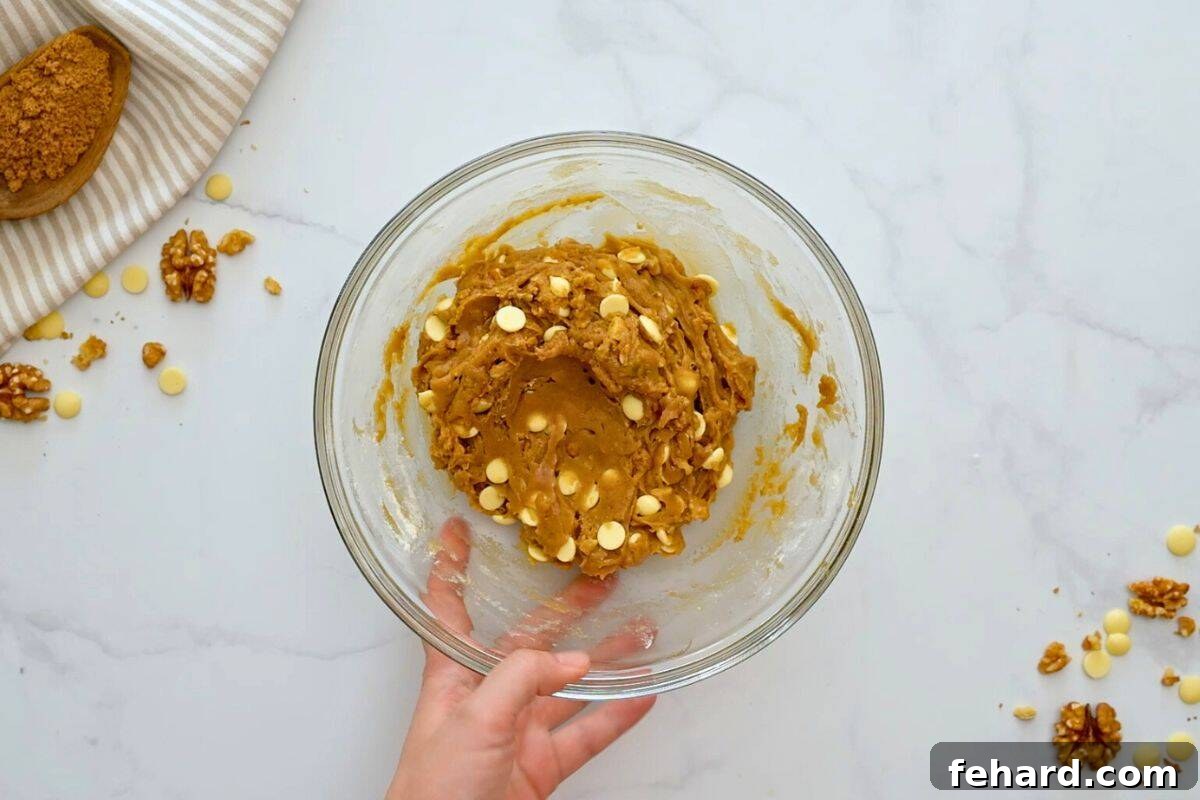
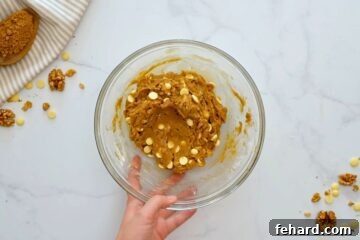
- **Gently Fold in Flour and Mix-Ins:** Next, add the 1 cup of all-purpose flour. Using a wooden spoon or a rubber spatula, gently fold the flour into the wet ingredients. Mix only until the flour is *just* combined – a few small streaks of flour are perfectly fine at this stage and will disappear during baking. Immediately after incorporating the flour, add your chosen mix-ins (up to 1 cup of chocolate chips, nuts, etc.), folding them in just until they are evenly distributed throughout the thick, rich blondie batter. The key here is to avoid overmixing the flour, as this develops gluten, which can result in tough, dry, and less tender blondies. A light, gentle touch is best here to maintain that desirable chewy texture.
Step Four: Prepare for Perfection – Spreading in Pan
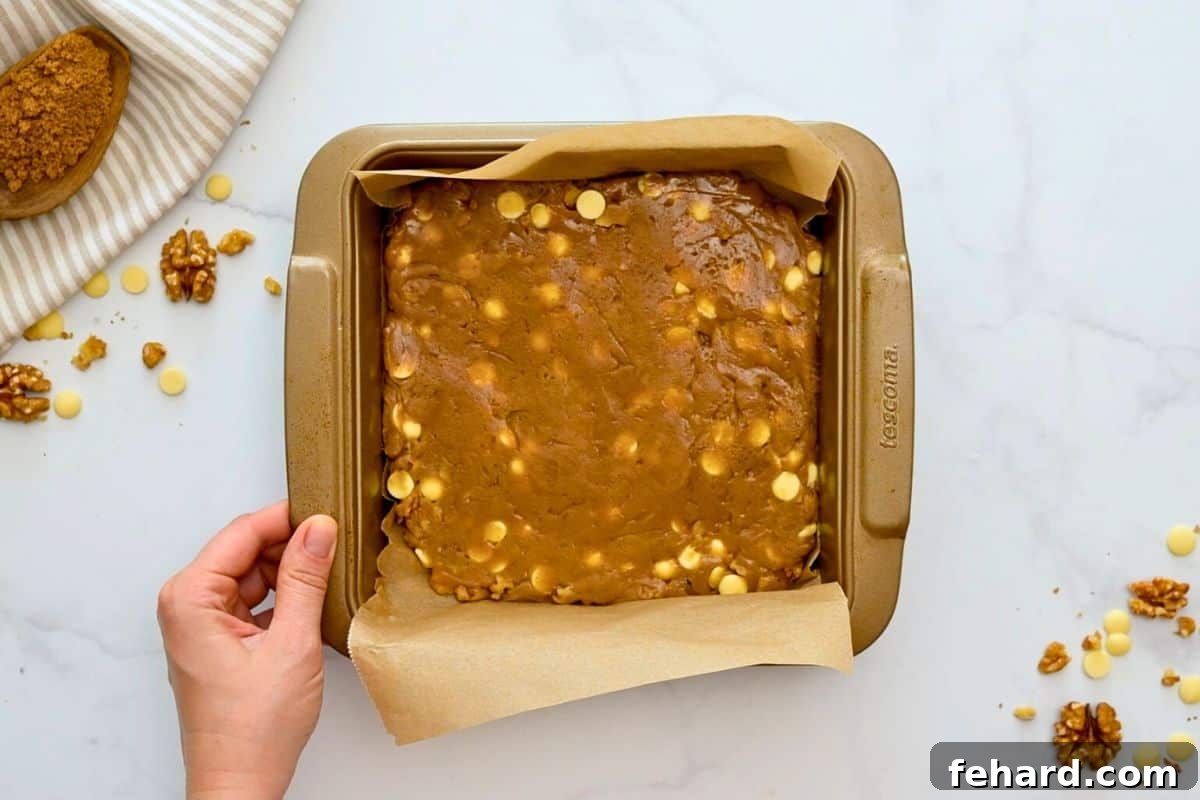
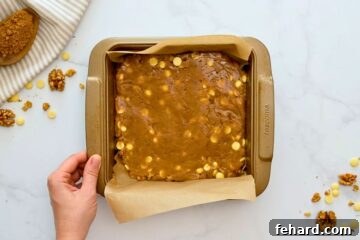
The blondie dough is intentionally thick and wonderfully dense, very similar in consistency to a classic chocolate chip cookie dough. Because of its robust texture, it’s best to use a sturdy rubber spatula or the back of a spoon to gently press and spread the dough into an even, uniform layer in your prepared baking dish. Ensure your 8×8-inch metal pan is meticulously lined with parchment paper, allowing some overhang on two opposing sides. This thoughtful preparation makes for incredibly easy lifting and removal of the entire baked blondie slab after baking, ensuring clean edges and a perfect, effortless presentation.
Step Five: Bake to Golden Perfection
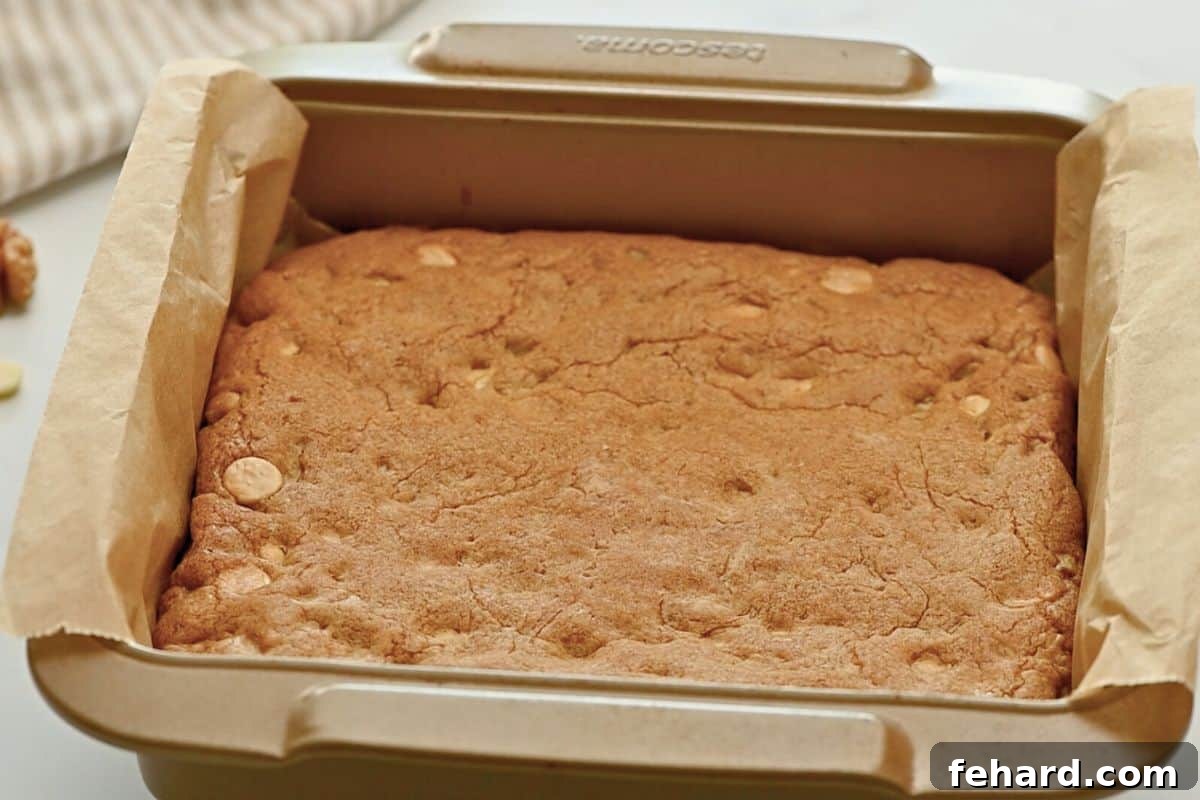
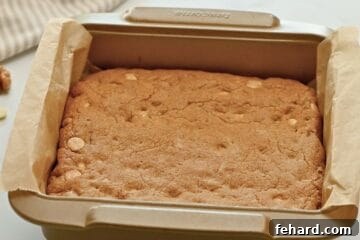
Baking blondies to perfection is all about precise timing and knowing what visual and textural cues to look for. You’ll know they are finished baking when the edges appear fully set and have turned a beautiful golden brown. The center, however, should still have a slight, almost imperceptible jiggly movement when the pan is gently shaken. This delicate jiggly center is key to achieving that signature soft and chewy texture! Blondies will continue to set and firm up considerably as they cool down on the counter, so resist the temptation to bake them until the very center is completely firm. Overbaking is the primary culprit for dry, crumbly blondies, and we want to preserve that delightful chewiness.
Step Six: The Final Touch – Cool, Slice & Serve
Once baked to golden perfection, allow the blondies to cool in their baking dish on a wire cooling rack for at least 10 minutes. This initial cooling period is crucial as it allows them to set further and makes them much easier to handle without crumbling. After 10 minutes, use the parchment paper overhang to carefully lift the entire slab of blondies out of the pan and transfer it directly to the cooling rack. Let them cool completely before attempting to cut them into neat squares. While it’s incredibly tempting to dive in when they’re still warm and gooey, cooling them fully allows for cleaner, more precise slices and the full development of their ultimate chewy texture. Once cooled, slice, serve, and savor your homemade masterpiece!
Serving Suggestions for Your Delicious Blondies
These Brown Butter Blondies are phenomenal on their own, showcasing their rich, nutty, and caramel notes beautifully. However, here are a few ideas to elevate your dessert experience and make them even more special for any occasion:
- Warm with Ice Cream: For an ultimate indulgent treat, serve a slightly warm blondie square with a generous scoop of vanilla bean ice cream, salted caramel ice cream, or even a coffee-flavored ice cream. The delightful contrast of warm and cold, chewy and creamy, is simply divine.
- Drizzled with Sauce: Enhance the decadence with a drizzle of homemade caramel sauce, a rich chocolate ganache, or a simple dusting of powdered sugar. A sprinkle of flaky sea salt on top can also add an extra layer of gourmet appeal by balancing the sweetness.
- Coffee or Tea Companion: These blondies make a perfect, sophisticated accompaniment to your morning coffee, an afternoon cup of tea, or as a delightful treat with an after-dinner espresso.
- Dessert Platter: Cut the blondies into smaller, bite-sized squares and arrange them elegantly on a dessert platter alongside other sweet treats for parties, potlucks, or family gatherings. Their rich flavor ensures a little goes a long way, making them a satisfying addition to any spread.
Yield & Storage: Keeping Your Blondies Fresh
This recipe typically yields 16 small, perfectly satisfying squares, which are often ideal given how incredibly rich and decadent these Brown Butter Blondies are. The intense flavor means a smaller portion is often all you need to feel completely satisfied. However, if you’re feeling particularly indulgent or serving a smaller crowd, you might opt for 9 larger, more generous servings.
For any delightful leftovers, ensure they are stored in an airtight container at room temperature. They will maintain their exceptional freshness, soft texture, and incredible flavor for up to 4 days, making them perfect for meal prepping your sweet tooth throughout the week. If you’re planning ahead or wish to savor them for an extended period, blondies freeze exceptionally well. Simply place them in a single layer in a freezer-safe bag or container, separating layers with parchment paper if stacking them. They can be frozen for up to 2 months without losing quality. To enjoy, simply thaw at room temperature for a quick and easy dessert anytime!
Frequently Asked Questions (FAQ) About Blondies
New to blondie baking or just have some burning questions about achieving perfection? Here are answers to common queries to help you master these delicious bars and bake with confidence:
- Q: What exactly is a blondie?
A: A blondie is a rich, sweet dessert bar that is essentially the vanilla counterpart to a chocolate brownie. Its primary flavor base comes from brown sugar and butter, often complemented by vanilla extract and various mix-ins like chocolate chips, nuts, or toffee. Blondies are cherished for their characteristic chewy texture and a sweet, butterscotch-like flavor profile. - Q: Why should I use brown butter instead of just regular melted butter?
A: Browning butter involves cooking it gently until the milk solids toast and turn golden brown, releasing a profound, nutty, and caramel-like aroma and flavor. This simple but magical process significantly enhances the complexity and richness of the blondies, imparting an unparalleled depth and a distinct toffee-like taste that plain melted butter simply cannot achieve. It truly elevates the entire dessert. - Q: How do I achieve that beautiful, crinkly top on my blondies?
A: The coveted crinkly top on blondies often results from a combination of factors: thoroughly whisking the eggs and sugar to create a thin, glossy, meringue-like layer on the surface of the batter, and ensuring the correct baking temperature. Using a mix of melted butter (especially browned butter) and brown sugar also significantly contributes to the formation of this desirable, slightly crispy top layer. - Q: Can I substitute white sugar for brown sugar in this recipe?
A: While you can technically use white sugar, it is strongly not recommended for blondies. Brown sugar is absolutely crucial for their signature chewy texture, vital moisture content, and rich, deep butterscotch flavor. Substituting white sugar would result in a drier, more cake-like texture and a far less complex or satisfying flavor profile. - Q: How can I tell if my blondies are perfectly done baking?
A: Look for blondies with golden brown edges that appear fully set. The center of the pan, however, should still have a slight, almost imperceptible jiggly movement when the pan is gently shaken. This delicate jiggly center is your key indicator! Remember that blondies continue to set and firm up considerably as they cool outside the oven, so removing them when the center is still a bit soft ensures they remain perfectly soft, tender, and chewy, never dry or overbaked. - Q: My blondies turned out dry and crumbly. What might have gone wrong?
A: Dry blondies are almost always a tell-tale sign of either overmixing the flour in the batter or overbaking them in the oven. To avoid this, ensure you only mix the flour until it is *just* combined with the wet ingredients, and always remove the blondies from the oven when the center is still slightly soft and jiggly. Precision in these two steps is vital for a moist, chewy result. - Q: Can I make these brown butter blondies ahead of time for a party or event?
A: Absolutely! These blondies are a fantastic make-ahead dessert. They keep exceptionally well when stored in an airtight container at room temperature for up to 4 days, and their flavor often deepens slightly over time. For longer planning, they can be frozen for up to 2 months. Simply thaw them at room temperature before serving for a delicious and convenient treat!
More Easy & Irresistible Dessert Recipes
Whether you’re baking for a bustling school bake sale, contributing to a casual potluck, or simply craving a decadent after-school snack to satisfy your sweet tooth, a classic blondie is always a winning choice that pleases nearly everyone. But if you’re looking to expand your dessert repertoire with even more easy-to-make and crowd-pleasing recipes that are guaranteed hits, be sure to explore some of our other favorite concoctions below. Happy baking and enjoy the sweet journey!
- Copycat Ghirardelli Brownies
- No Chill Chocolate Chip Cookies
- Microwave Fudge
- Banana Cake
- Mini Cheesecakes
Did you make this recipe?
If you enjoyed this recipe, please share your experience and consider leaving a 5-star review at the bottom of the post. Your feedback helps other bakers discover and enjoy these delicious blondies!
4.67 from 3 votes
Brown Butter Blondies
By: Kristen Chidsey
Yields: 16 squares
Prep: 10 mins
Cook: 25 mins
Cooling: 20 mins
Total: 55 mins
Rate
With nutty browned butter and mix-ins of your choice, these Brown Butter Blondies are soft, chewy, and have the most incredible toffee-like flavor. Perfect for any occasion and a guaranteed crowd-pleaser!
Ingredients
- ½ cup (113g) unsalted butter
- ¾ cup (150g) brown sugar, dark or light (dark for deeper caramel notes)
- 1 teaspoon vanilla extract (pure vanilla extract for best flavor)
- 1 large egg, at room temperature (important for smooth batter)
- ¼ teaspoon baking powder, OPTIONAL (omit for a denser, gooier blondie; add for a slightly chewier, more tender crumb)
- ½ teaspoon fine sea salt (enhances flavor beautifully)
- 1 cup (120g) all-purpose flour
- 1 cup (approx. 170g) add-ins of choice (e.g., chocolate chips (white, milk, dark), chopped nuts (walnuts, pecans), toffee bits, shredded coconut, dried fruit; see notes for optimal quantities)
Instructions
-
Prepare Pan: Preheat your oven to 350°F (175°C). Line an 8×8-inch metal baking dish with parchment paper, allowing an overhang on two opposing sides. This overhang will serve as “handles” for easy removal of the baked blondies.
-
Brown the Butter: Place ½ cup unsalted butter in a small, light-colored saucepan. Melt it over medium heat, stirring constantly with a whisk. The butter will foam, then the foam will subside, and tiny brown flecks (toasted milk solids) will begin to appear at the bottom of the pan as the butter bubbles. Remove from the heat IMMEDIATELY once the butter smells distinctly nutty and turns a deep, golden brown color. This process typically takes 3-8 minutes; watch it closely to prevent burning.

-
Cool the Butter: Pour the hot browned butter immediately into a large, heat-safe mixing bowl. Allow it to cool for about 10 minutes. This crucial cooling period prevents the egg from scrambling when added to the mixture.
-
Mix Wet Ingredients: To the slightly cooled brown butter, add the ¾ cup brown sugar, 1 teaspoon vanilla extract, 1 large egg, ¼ teaspoon baking powder (if using), and ½ teaspoon fine sea salt. Whisk these ingredients vigorously until they are thoroughly combined, smooth, and glossy. Ensure the sugar is mostly dissolved and the egg is fully incorporated.
-
Fold in Dry Ingredients & Mix-ins: Add the 1 cup all-purpose flour and up to 1 cup of your chosen add-ins. Using a wooden spoon or rubber spatula, gently fold the mixture until *just* combined. Be careful not to overmix, as this can lead to tough blondies. Stop mixing as soon as no dry streaks of flour remain and mix-ins are evenly distributed.
-
Spread in Pan: Transfer the thick blondie batter to the prepared 8×8-inch pan. Use a spatula or the back of a spoon to gently press and spread the batter evenly into a uniform layer, ensuring it reaches all corners of the pan.
-
Bake: Bake for 20-22 minutes. You’ll know the blondies are done when the edges are golden brown and fully set, but the very center still has a slight, barely perceptible jiggly movement when the pan is gently shaken. Blondies continue to set as they cool, so avoiding overbaking is key to their chewy texture.
-
Cool & Slice: Let the blondies cool in the pan on a wire cooling rack for 10 minutes. Then, use the parchment paper overhang to lift the entire slab of blondies out of the pan and transfer it to the cooling rack. Allow them to cool completely before slicing into squares. This ensures clean cuts and the best chewy texture. Serve and enjoy!
Equipment
- Parchment Paper
- Metal 8×8 Baking Dish
- Small, light-colored saucepan (for browning butter)
- Whisk or heat-proof spatula
- Large heat-safe mixing bowl
- Wire cooling rack
Notes
- Glass Baking Dish: If you choose to use a glass baking dish instead of metal, you will need to increase the bake time slightly, typically to 25-28 minutes. Glass heats slower but retains heat longer, which can affect baking time.
- Baking Powder Adjustment: The ¼ teaspoon of baking powder adds a slightly chewier, more tender crumb to the blondies. For those who prefer an intensely dense, fudgier, and gooier blondie, you can omit the baking powder entirely.
- Optimal Add-ins: For the best balance of flavor and texture, I recommend using no more than 1 cup of total add-ins. For chocolate (chips or chunks), using up to ½ cup is usually ideal; exceeding this can make the blondies overly rich and gooey, potentially compromising their structure. For nuts, up to ½ cup works wonderfully; more than that can sometimes make the batter a bit too dry. A fantastic combination I personally adore is ½ cup chocolate chips paired with ½ cup chopped nuts. The blondies pictured in this recipe were made using ½ cup white chocolate chips and ½ cup walnuts.
- Storage Instructions: Store cooled blondies in an airtight container at room temperature for up to 4 days. For extended freshness, freeze them in a single layer in a freezer-safe bag or container (separated by parchment if stacking) for up to 2 months. Thaw at room temperature before serving.
Nutrition Information
Carbohydrates: 16g
Protein: 1g
Fat: 6g
Saturated Fat: 4g
Polyunsaturated Fat: 0.3g
Monounsaturated Fat: 2g
Trans Fat: 0.2g
Cholesterol: 27mg
Sodium: 82mg
Potassium: 42mg
Fiber: 0.2g
Sugar: 10g
Vitamin A: 197IU
Calcium: 19mg
Iron: 1mg
Nutrition information is automatically calculated based on the ingredients provided and should only be used as an approximation. Values may vary significantly based on specific brands, exact measurements, and chosen add-ins.
Tried this delicious recipe?
Share your creations on Instagram! Mention @amindfullmom or tag your photo with #amindfullmom! We love seeing your baking success!