

Kickstart your morning with a stack of these incredibly light, yet delightfully crispy whole wheat waffles! Crafted with care using 100% whole grains and absolutely no added sugar, these waffles are a powerhouse of fiber and wholesome goodness, promising a truly nourishing and energizing beginning to any day. Forget bland, heavy whole wheat options; this recipe delivers on taste, texture, and health benefits, proving that wholesome can also be utterly delicious.

My Go-To Waffle Recipe: The Ultimate Healthy Breakfast

While I certainly appreciate a hearty stack of whole wheat pancakes or a luxurious slice of French toast, waffles will forever hold a special place in my heart. There’s an undeniable magic in those perfectly crisp, golden edges, beautifully contrasted with a tender, airy interior. Plus, the deep pockets and intricate nooks of a waffle are simply unparalleled for catching every last drop of maple syrup, melted butter, or your favorite fruit compote.
When I can indulge in a waffle that’s not only incredibly delicious but also genuinely good for me, I am absolutely thrilled! And that’s precisely the promise of this exceptional whole wheat waffle recipe. You’ll enjoy tender, flavorful waffles that are brimming with nutrient-rich whole grains AND are completely sugar-free (meaning no refined sugars or even natural sweeteners are added to the batter). This recipe stands out by letting the natural flavors shine, making it an excellent choice for those seeking to reduce their sugar intake without compromising on taste.
Whether you prefer to savor them hot off the waffle iron, prepare a larger batch to stash in the freezer for bustling weekday mornings, or unleash your culinary creativity by using them as a wholesome base for sweet or savory sandwiches (who can resist a peanut butter and banana waffle sandwich?), this straightforward whole wheat waffle recipe is destined to become a staple in your kitchen. Its versatility and ease of preparation mean you’ll find yourself turning to it time and again, making healthy eating both convenient and enjoyable.
Happy Cooking! xo Kristen
Why Choose Whole Wheat & Sugar-Free Waffles? Health Benefits Explored
Opting for whole wheat and sugar-free waffles isn’t just a dietary choice; it’s a step towards a more wholesome and balanced lifestyle. Unlike conventional waffles often made with refined white flour and loaded with added sugars, these homemade beauties offer a myriad of health advantages:
- Rich in Fiber: Whole wheat flour retains the bran and germ of the wheat kernel, which are excellent sources of dietary fiber. Fiber is crucial for digestive health, helps regulate blood sugar levels, and keeps you feeling fuller for longer, preventing mid-morning cravings.
- Sustained Energy Release: The complex carbohydrates in whole grains break down slowly, providing a steady release of energy throughout your morning. This means no sugar crashes, just consistent fuel to power your activities.
- Better Blood Sugar Management: With no added sugars, this recipe is ideal for individuals managing blood sugar, or anyone looking to reduce their sugar intake. The natural sweetness can be enhanced by healthy toppings, giving you control over your sugar consumption.
- Nutrient Density: Whole wheat flour is richer in essential vitamins and minerals, including B vitamins, iron, magnesium, and zinc, compared to its refined counterpart.
- Heart Health Benefits: A diet rich in whole grains is associated with a reduced risk of heart disease and improved cholesterol levels.
Embracing these wholesome waffles means you’re not just enjoying a delicious breakfast; you’re actively contributing to your overall well-being. This recipe makes it incredibly easy to incorporate healthy habits without sacrificing flavor or satisfaction.
Essential Notes on Ingredients for Perfect Waffles
Crafting these delectable whole wheat waffles relies on a few fundamental ingredients, but smart choices make all the difference. Below, I’ve shared key tips to help you select the best components. You’ll also discover convenient dietary modifications for preparing egg-free and dairy-free whole wheat waffles within the full recipe card further down this page.
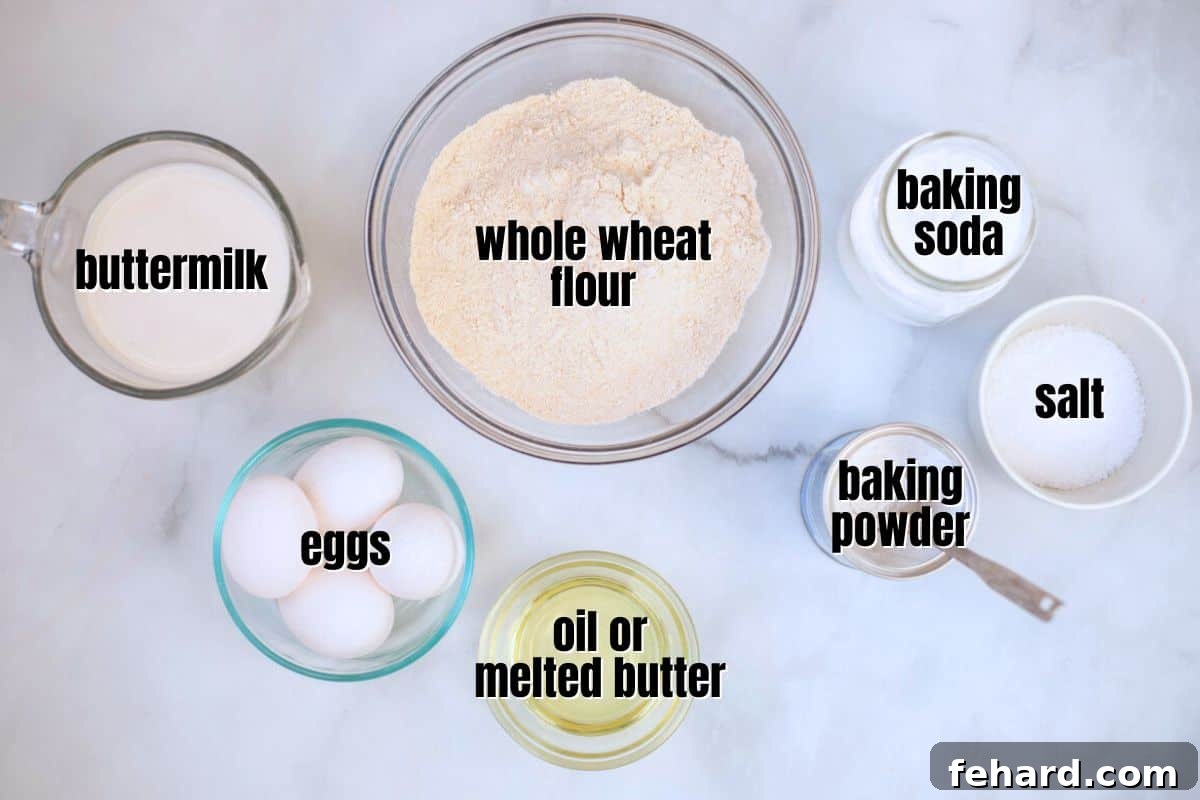
- Flour: This recipe is meticulously developed to utilize 100% whole wheat flour, ensuring a maximum boost of whole grains and dietary fiber. However, its versatility allows for successful results with various flour types. You can confidently substitute with whole white wheat flour (for a slightly lighter texture and milder flavor), standard all-purpose flour, or even a reputable 1:1 gluten-free flour blend if you’re catering to specific dietary needs. Each option yields a delicious waffle, though the texture may vary slightly.
- Oil/Butter: For the fat component, you have several excellent choices that all contribute to tender waffles. Canola oil, melted and then cooled coconut oil, or melted and cooled unsalted butter are all equally effective. If you’re aiming for a lower-fat alternative, consider replacing up to half of the oil with unsweetened applesauce or plain Greek yogurt. This substitution maintains moisture while significantly reducing the fat content.
- Buttermilk: Buttermilk is a cornerstone ingredient for achieving truly fluffy and tender waffles. Its acidity is vital as it reacts with the baking soda, creating tiny bubbles of carbon dioxide that leaven the batter, resulting in an incredibly light and airy texture. Don’t worry if you don’t have store-bought buttermilk on hand; I’ve provided simple instructions below for creating a perfect homemade substitute using common pantry staples.
Effortless Homemade Buttermilk
No buttermilk in your fridge? No problem at all! For this specific waffle recipe, simply pour 1 tablespoon of distilled white vinegar, apple cider vinegar, or fresh lemon juice into a large glass measuring cup. Then, add enough milk (any dairy or non-dairy milk of your choice works) to reach the 3 ½ cups mark. Give it a gentle stir and let the mixture sit undisturbed for about 5 minutes. You’ll notice it start to curdle slightly, indicating it’s ready to be used exactly as the recipe directs, providing that essential tang and activation for your baking soda.
How to Make Perfectly Crispy & Fluffy Whole Wheat Waffles
Achieving perfect results with your homemade whole wheat waffles is simpler than you might think. Follow these detailed tips to ensure every batch turns out golden, crispy, and tender. You’ll find all the precise ingredient quantities and comprehensive instructions conveniently laid out in the recipe card at the very bottom of this post.
- Prepare the Batter with Precision. To guarantee a consistently combined batter and the coveted light crumb in your finished waffles, it’s best practice to mix your dry and wet ingredients in separate bowls initially. Once each is thoroughly mixed, gently combine the wet mixture into the dry ingredients. Stir just until the flour is fully moistened and no dry streaks remain. Overmixing can develop the gluten too much, leading to tough waffles, so a light hand is key here.
Kristen’s Pro Tip for Batter Perfection
If your recipe calls for melted butter or coconut oil, ensure it has cooled sufficiently before whisking it together with the buttermilk and eggs. Adding hot fat to cold eggs can cause them to scramble prematurely, which is definitely something we want to avoid for a smooth, homogenous batter! 😉
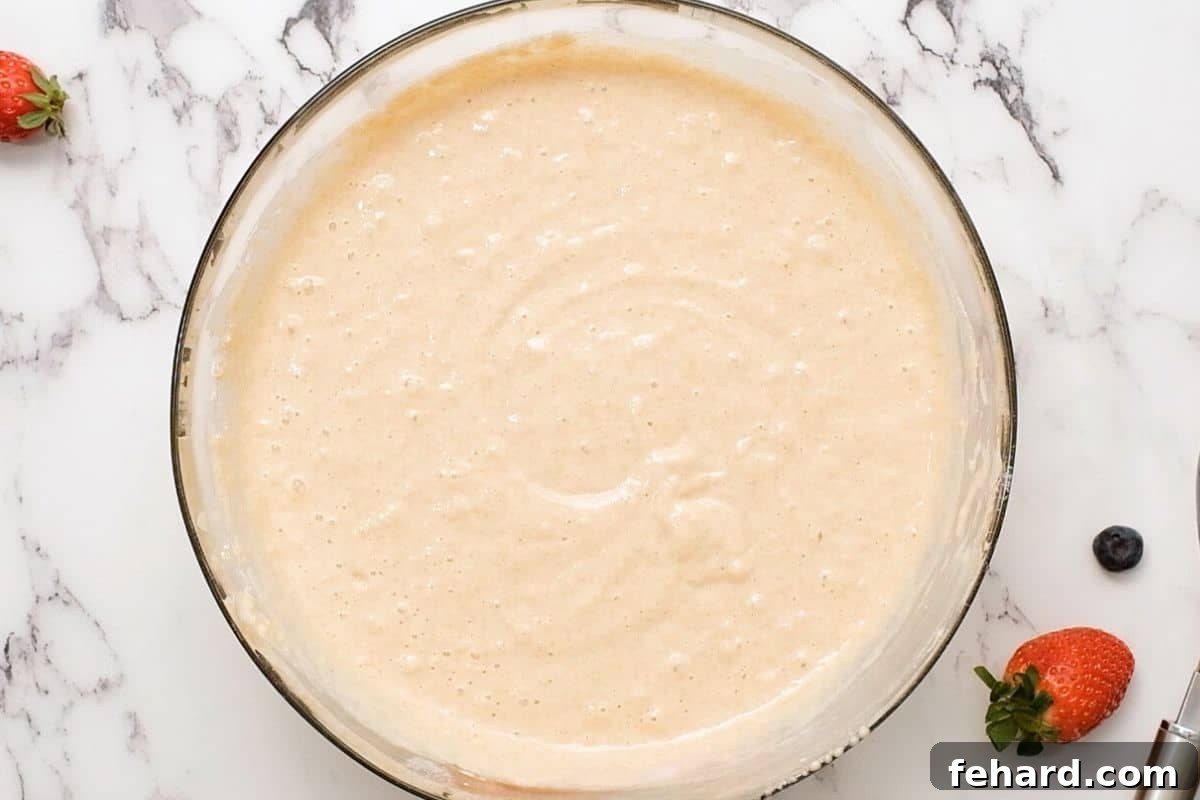
- Allow the Waffle Batter to Rest. Just like with delicate crepes, giving your waffle batter adequate resting time is a crucial step that ensures truly tender and wonderfully fluffy waffles – a particularly important technique when working with whole wheat flour. This resting period allows the gluten to relax and the flour to fully hydrate, which prevents a dense or chewy texture. Aim to let your batter rest for at least 10 minutes at room temperature, or for even better results, you can prepare it the night before and refrigerate it overnight.
- Carefully Add Batter to the Waffle Iron. For a clean cooking experience and uniformly sized waffles, I highly recommend using an ice cream scoop, a dedicated measuring cup, or a ladle to transfer the batter. Pour the batter directly into the center of each waffle plate. This technique minimizes drips and spills, making cleanup much easier, and ensures that each waffle is perfectly portioned and cooks evenly.
Optimal Batter Quantity Per Waffle
The precise amount of batter needed for each waffle can vary significantly based on the specific model and size of your waffle iron. While most standard-sized waffle irons typically require anywhere from ⅓ to ½ cup of batter per waffle, it’s always best practice to consult your machine’s instruction manual. This will help you determine the exact quantity of batter to use per waffle plate for optimal cooking and perfect waffle formation.
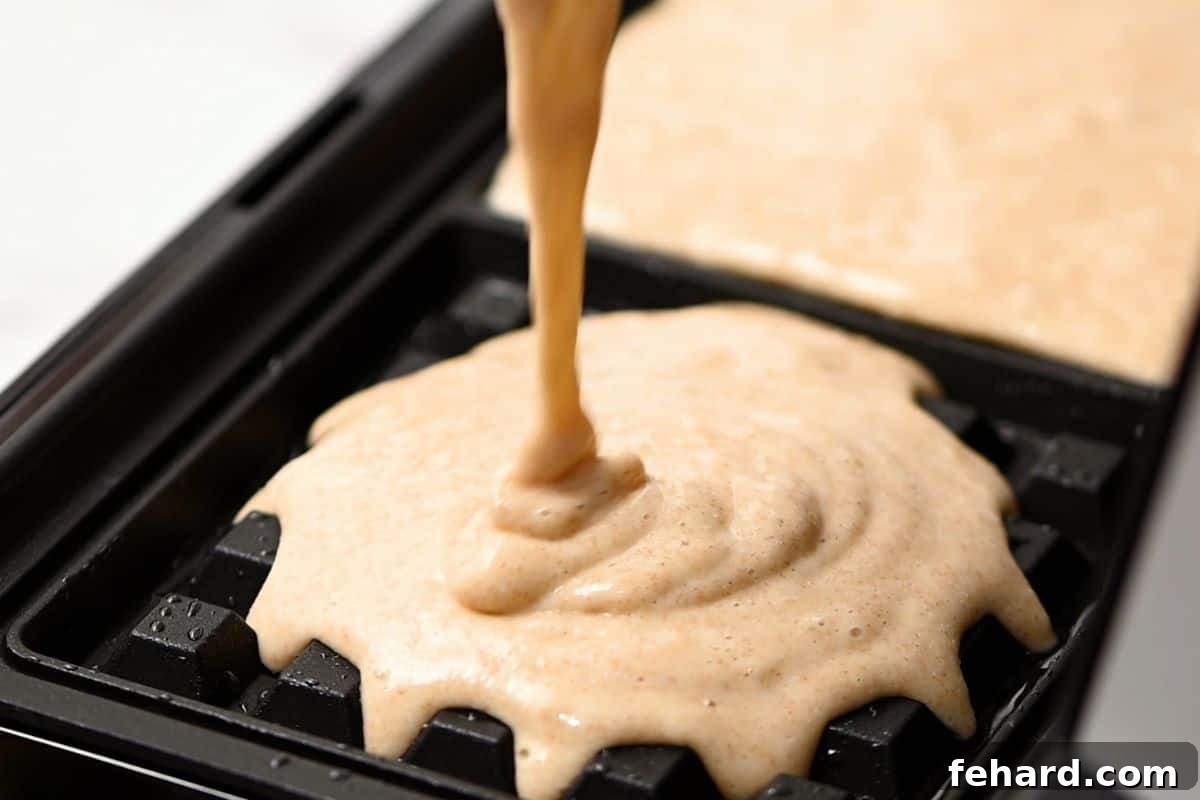
- Cook Until Beautifully Golden. For the ideal texture and color, always refer to the specific cooking guidelines provided with your waffle maker. Many models feature indicator lights that signal when the waffles are ready (e.g., a red light turning green). Generally, you’re aiming for a set, firm texture and a lovely golden-brown hue, which typically takes about 3-4 minutes per waffle, depending on your iron’s power and batter thickness. Avoid the temptation to peek too early, as this can interrupt the cooking process and lead to uneven results.

Keeping Waffles Warm: A Simple Method for Crispness
Since most home waffle irons can only produce a few waffles at a time, you’ll likely want a reliable method to keep your freshly cooked waffles warm and crisp until the entire batch is ready for serving. This simple technique ensures everyone enjoys hot, perfectly textured waffles.
- First, preheat your oven to a low setting, around 200℉ (95℃). This gentle heat is perfect for maintaining warmth without overcooking.
- Line a standard baking sheet with a wire cooling rack. The wire rack is essential as it allows hot air to circulate evenly around the waffles, preventing them from becoming soggy on the bottom and preserving their delightful crispness.
- As each waffle finishes cooking and is removed from the waffle maker, immediately transfer it to the prepared baking sheet in the warm oven. Continue adding subsequent waffles to the rack until all of your batter has been cooked. Your entire family or guests can then enjoy a communal serving of perfectly warm and crispy waffles.
Creative Serving Suggestions to Elevate Your Waffles
While a classic drizzle of pure maple syrup is always a fantastic choice for these wholesome whole wheat waffles, don’t hesitate to get creative! Waffles are incredibly versatile, serving as a delicious canvas for both sweet and savory culinary adventures. Explore these unique ideas to put an exciting spin on your waffle breakfast, brunch, lunch, or even dinner!
- Classic Fruit & Cream: Crown your waffles with an abundance of fresh, seasonal fruit like berries, sliced bananas, or peaches. Add a dollop of light whipped cream or a scoop of Greek yogurt for a truly delightful treat.
- Nut Butter & Fruit Jam: For a hearty and satisfying option, generously slather your waffles with your favorite nut butter (peanut, almond, or cashew work wonderfully). Top with sliced bananas, fresh berries, or a spoonful of homemade chia jam – this combination is a personal favorite for its rich flavor and added nutrients.
- Savory Sandwich Base: Think outside the breakfast box! Use these sturdy wheat waffles as an innovative and delicious alternative to bread for a turkey or ham sandwich. The slight sweetness and crispy texture add an unexpected gourmet touch.
- Avocado & Egg Powerhouse: Create a savory breakfast masterpiece by topping your waffles with creamy smashed avocado, a sprinkle of everything bagel seasoning, and a perfectly poached egg. It’s a fantastic way to enjoy healthy fats and protein.
- Chicken & Waffles Reinvented: For a comforting and decadent meal, pair your whole wheat waffles with crispy fried chicken, or for a lighter option, use baked and breaded chicken tenders. A drizzle of hot honey or spicy syrup adds an incredible sweet and savory kick.
- Dessert Extravaganza: Transform these wholesome waffles into an indulgent dessert! Top with a scoop of creamy vanilla ice cream, warm hot fudge, or rich chocolate syrup for a treat that satisfies any sweet tooth.

Meal Prep Made Easy: How to Freeze Whole Wheat Waffles
One of the many fantastic qualities of these whole wheat waffles is how incredibly well they freeze and reheat. This makes them an absolutely ideal candidate for bulk preparation, saving you valuable time on those busy mornings. Having a stash of wholesome whole wheat waffles ready in your freezer makes enjoying a nutritious breakfast effortlessly attainable, even on your most hectic days!
- Cool Completely: Begin by preparing the waffles exactly as directed in the recipe. Once cooked, transfer them to a wire cooling rack and allow them to cool completely to room temperature. This step is crucial to prevent ice crystal formation when freezing.
- Flash Freeze: After cooling, arrange the waffles in a single layer on a baking sheet. Place the baking sheet into the freezer for approximately 30-60 minutes, until the waffles are firm and frozen to the touch. This “flash freezing” technique prevents the waffles from sticking together when stored in a bag, allowing you to easily grab just one or two at a time.
- Store Long-Term: Once individually frozen, transfer the waffles to a freezer-safe container or a heavy-duty freezer storage bag. Remove as much air as possible from the bag to prevent freezer burn. They can be stored in the freezer for up to 3 months, maintaining their excellent quality.
- Reheat with Ease: To reheat your frozen waffles, the best method is to toast them individually in a toaster or toaster oven. This crisps them up perfectly, making them taste as fresh as if they were just made. Avoid the microwave, as it can make them soggy.
Did you make this recipe?
If you enjoyed preparing and tasting this recipe, we would be delighted if you could leave a comment with a 5-star review at the bottom of the post. Your feedback is greatly appreciated!
Whole Wheat Waffles (No Added Sugar)
Kristen Chidsey
12
5 minutes
5 minutes
10 minutes

Ingredients
- 3 cups whole wheat flour
- 1 teaspoon kosher salt
- 1 teaspoon baking soda
- 2 ½ teaspoons baking powder
- ½ cup melted coconut oil or melted unsalted butter
- 4 large eggs
- 3 ½ cups buttermilk, see note for homemade buttermilk
Instructions
-
In a large bowl, whisk together the 3 cups whole wheat flour, 1 teaspoon kosher salt, 1 teaspoon baking soda, and 2 ½ teaspoons baking powder until thoroughly combined.
-
In a separate medium bowl, whisk together the cooled ½ cup melted coconut oil or melted unsalted butter with 4 large eggs and 3 ½ cups buttermilk until well combined. Gently pour the wet mixture into the dry ingredients and stir just until everything is moistened and no dry spots of flour remain. Be very careful not to overmix, as this can lead to tough waffles. Set the waffle batter aside to rest while your waffle iron heats up.
-
Preheat your waffle iron according to the manufacturer’s instructions. If you plan to keep your waffles warm as you cook them in batches, preheat your oven to 200℉ (95℃) and line a rimmed baking sheet with a wire baking rack.
-
Once the waffle iron is fully heated, lightly brush or spray each waffle plate with a small amount of canola oil, coconut oil, melted butter, or your preferred cooking spray. Ladle approximately ⅓ to ½ cup of the batter (or the specific amount recommended by your waffle iron manufacturer) onto the very center of each grid. Close the waffle maker and cook according to its instructions, typically until golden brown and crisp.
-
When the waffles are perfectly cooked, carefully remove them from the waffle maker using a silicone spatula or wooden chopsticks (to avoid scratching non-stick surfaces). Transfer them to the prepared baking sheet in the warm oven to keep them crisp and hot while you finish cooking the remaining waffles.
-
Serve your delicious whole wheat waffles immediately with any toppings you desire, from classic maple syrup and berries to creative savory combinations.
Equipment
-
Waffle Maker
-
Baking Sheet with Rack
Notes for Dietary Modifications & Storage
Dairy-Free Waffles: To make these waffles dairy-free, use a non-dairy milk (like almond, soy, or oat milk) to prepare your homemade buttermilk substitute. Ensure you also use melted coconut oil or canola oil in place of butter for the fat component.
Egg-Free Waffles: For an excellent egg-free alternative, combine ¼ cup of finely ground flaxseed with ¾ cup of water. Stir well and let this mixture sit for 15 minutes to thicken. Use this “flax egg” mixture in place of the 4 large eggs.
Gluten-Free Waffles: I have successfully adapted this recipe to create delicious gluten-free waffles by using a high-quality 1:1 gluten-free flour blend. Ensure your blend contains xanthan gum for best texture.
Storage & Reheating: Cooked waffles can be stored safely in an airtight container in the refrigerator for up to 4 days. For longer storage, freeze them for up to 3 months following the flash-freezing method described above. They are best reheated for a crispy texture in a toaster or toaster oven directly from frozen.
Note on Sweetness: This recipe is designed to be sugar-free, relying on toppings for sweetness. However, if you prefer sweeter waffles, you can easily add 2-3 tablespoons of maple syrup, honey, or your preferred granular sweetener (like erythritol or stevia blend) directly to the wet ingredients in the batter.
Nutrition Information
Calories:
225
kcal
Carbohydrates:
25
g
Protein:
8
g
Fat:
7
g
Saturated Fat:
1
g
Cholesterol:
49
mg
Sodium:
389
mg
Potassium:
328
mg
Fiber:
4
g
Sugar:
1
g
Vitamin A:
195
IU
Calcium:
144
mg
Iron:
1.4
mg
Nutrition information is automatically calculated and should be used as an approximation only. Individual results may vary based on specific ingredients and preparation methods.
Tried this recipe?
Mention @amindfullmom or tag #amindfullmom!
This comprehensive guide and recipe for wholesome whole wheat waffles was originally published in 2017 and has been thoughtfully updated and expanded in 2025 to provide the most current tips, dietary modifications, and serving ideas.