
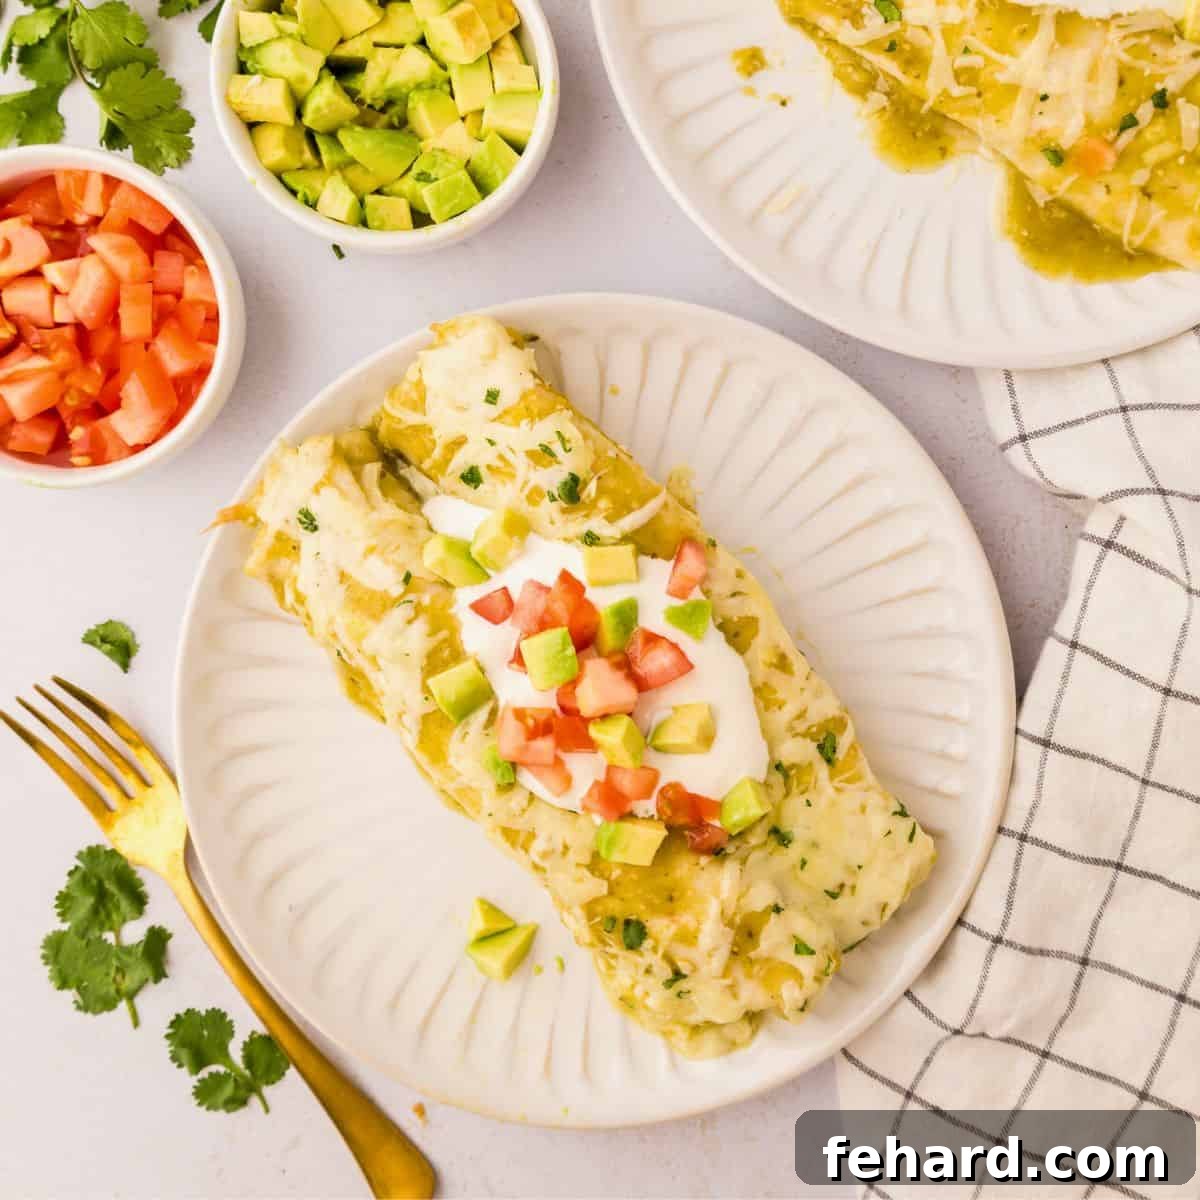
Salsa Verde Chicken Enchiladas are a celebrated Tex-Mex classic, renowned for their irresistibly creamy, cheesy texture and incredibly rich, vibrant flavor! This easy recipe features tender shredded chicken, a luscious sour cream filling, and an abundance of melted Monterey Jack cheese, all generously smothered in bright, tangy Salsa Verde. If you’re searching for an easy yet impressive dinner that’s guaranteed to please, look no further than this delightful **Salsa Verde Chicken Enchilada recipe**.
Craving more delicious enchilada ideas to add to your repertoire? Explore our other family favorites, each offering a unique twist: Easy Chicken Enchilada Casserole, Classic Chicken Enchiladas, and our satisfying Vegetarian Enchiladas.
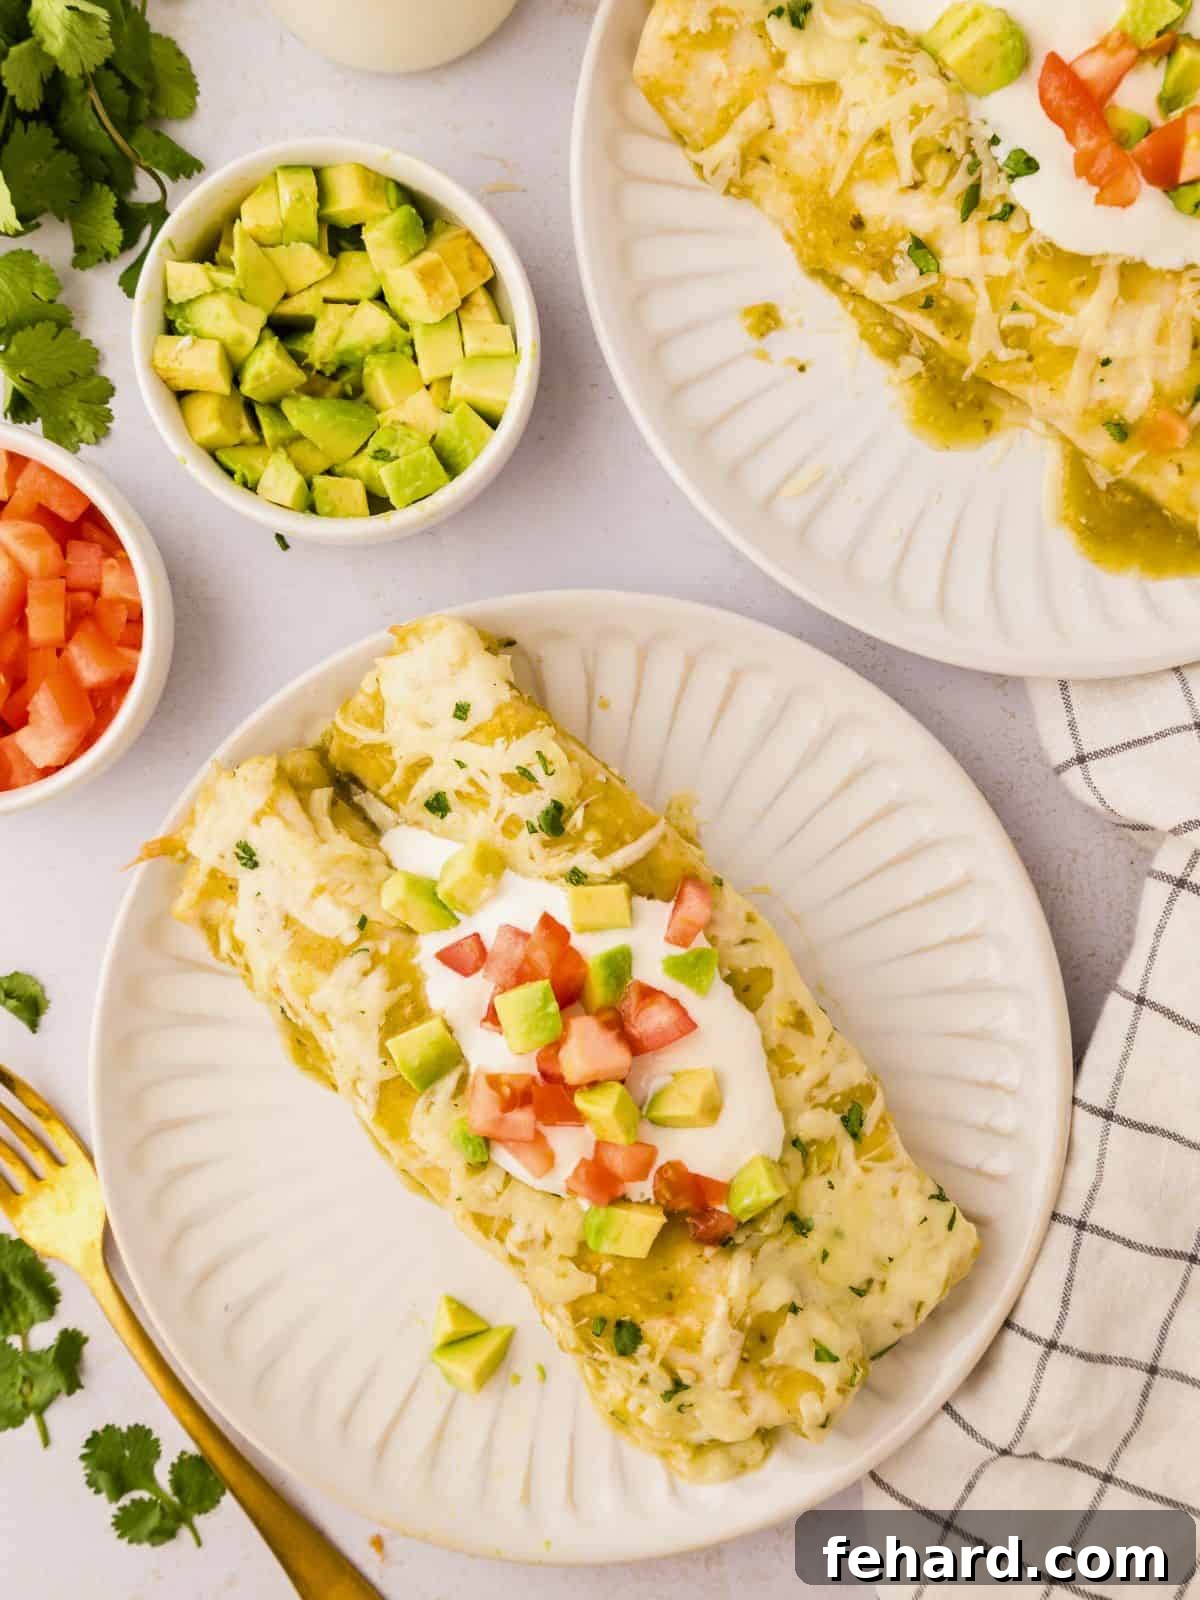
Bright & Tangy Salsa Verde Chicken Enchiladas: A Family Favorite Dinner Solution
Salsa Verde Chicken Enchiladas hold a cherished spot in our family’s recipe collection. They are truly one of the most requested weeknight dinners, and it’s easy to see why! The magic of this dish lies in the perfect harmony of its components: a creamy, hearty chicken filling that is seasoned to perfection, lovingly encased in soft tortillas, and then bathed in a vibrant, zesty tomatillo salsa. Each bite offers a delightful balance of savory chicken, the refreshing tang of salsa verde, and comforting, gooey melted cheese, making these green enchiladas incredibly satisfying and utterly delicious for all ages.
What makes this dish even more appealing is its remarkable simplicity and speed, especially when you leverage a convenient shortcut. By starting with pre-cooked or leftover cooked chicken, these flavorful salsa verde chicken enchiladas transform into a quick and easy dinner solution that’s perfect for even the busiest nights of the week. They’re hearty enough to satisfy everyone at the table and versatile enough to be customized to your family’s specific tastes and dietary needs.
Whether you’re planning a casual family gathering, preparing a special weekend meal, or simply seeking a comforting and fuss-free dinner, these enchiladas are guaranteed to be a resounding success. Prepare to enjoy a dish that brings smiles, warmth, and full, happy bellies to your home!
Why You’ll Love This Salsa Verde Chicken Enchilada Recipe
- Incredibly Flavorful: The combination of tangy salsa verde, creamy filling, and savory chicken creates a taste explosion.
- Easy to Make: With pre-cooked chicken, this recipe comes together quickly, making it ideal for busy weeknights.
- Family-Friendly: A dish that appeals to both adults and children, often becoming a household favorite.
- Customizable: Easily adaptable with different proteins, tortillas, and spice levels to suit any preference.
- Make-Ahead & Freezer-Friendly: Perfect for meal prepping or stocking your freezer for future quick dinners.
- Comfort Food: A warm, cheesy, and hearty meal that brings comfort and satisfaction.
Essential Ingredients for Irresistible Green Chicken Enchiladas
Crafting exceptional Salsa Verde Chicken Enchiladas requires just a handful of straightforward, readily available ingredients. Each component plays a crucial role in building the layered flavors and rich, comforting texture of this classic Tex-Mex dish. Here’s a detailed breakdown of what you’ll need, along with expert tips for selecting and using each element for the best possible results:
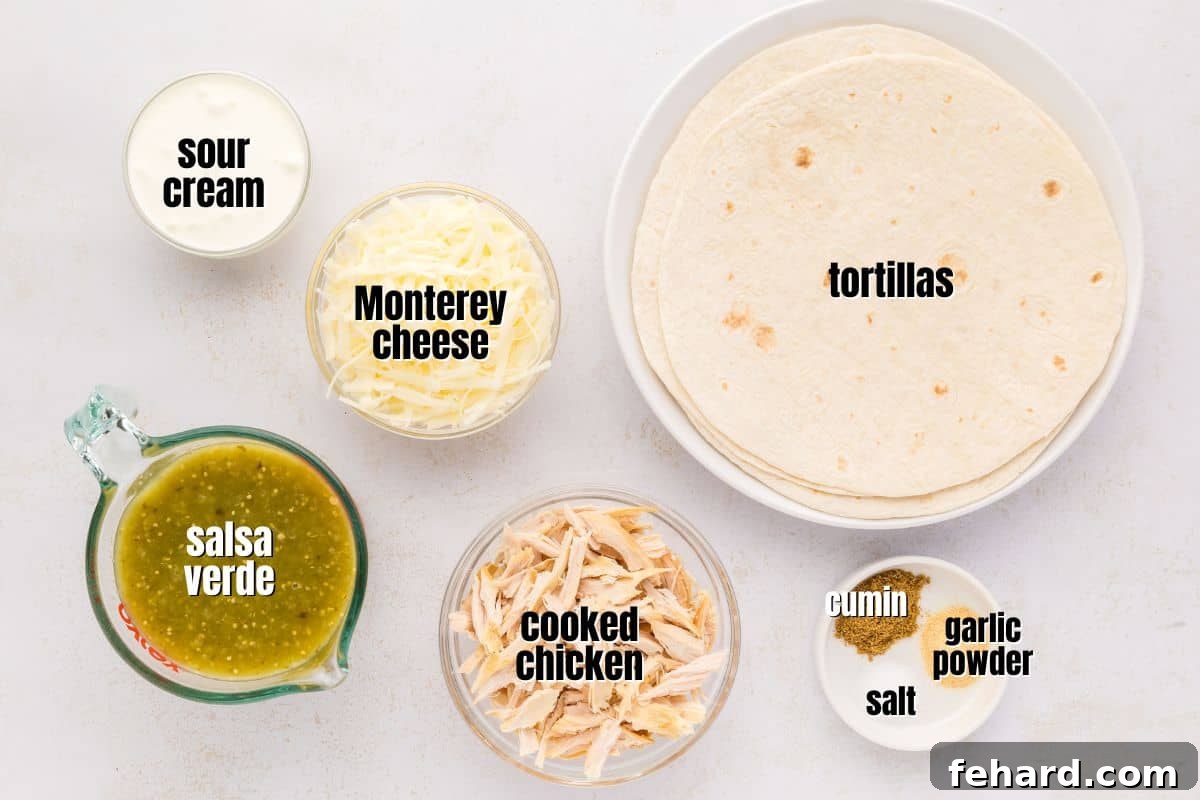
- Shredded Cooked Chicken: This is the hearty foundation of our enchilada filling. Using pre-cooked chicken is an absolute game-changer for speed and convenience. You can easily opt for a store-bought rotisserie chicken, whip up your own homemade rotisserie chicken, or even quickly prepare shredded Instant Pot chicken breast. Whichever method you choose, ensure the chicken is thoroughly shredded or diced into small, manageable pieces for even distribution throughout the filling and to make rolling easier.
- Tortillas: The perfect wrapper for all that delicious goodness! While many traditional recipes often feature corn tortillas, we find that flour tortillas tend to create a softer, more pliable enchilada that is significantly easier to roll and less prone to tearing during assembly. However, feel free to use your preferred choice – corn, gluten-free tortillas, or even freshly made homemade flour tortillas all work beautifully. The key is to always warm your tortillas slightly before rolling; this crucial step dramatically increases their flexibility and prevents them from cracking.
- Sour Cream: This ingredient is absolutely vital for achieving that wonderfully creamy, rich, and slightly tangy filling. It adds a luxurious mouthfeel and ensures the chicken filling remains moist and incredibly flavorful throughout the baking process. For the best texture and taste, we highly recommend using full-fat or at least reduced-fat sour cream. Fat-free varieties can sometimes be overly watery or gelatinous, which may not deliver the desired creaminess and richness.
- Salsa Verde: The undeniable star of this dish! You can either choose your favorite high-quality brand of store-bought salsa verde, or for an authentic, fresh-from-scratch experience, whip up a batch of homemade Salsa Verde. It’s important to specifically use actual salsa verde, rather than a generic green enchilada sauce, as authentic salsa verde offers a distinctively bright, tangy, and fresh flavor profile from tomatillos and chilies that traditional enchilada sauces often lack. Don’t be overly concerned about the specific heat level initially; salsa verde varieties span a wide range from mild to medium to hot, so simply pick what best suits your personal heat preference.
- Simple Seasonings: To perfectly complement and subtly enhance the natural, vibrant flavors of the chicken and salsa verde, we keep the additional seasonings minimal yet impactful. A thoughtfully balanced blend of salt, garlic powder, and ground cumin will provide a warm, savory depth and a touch of classic Tex-Mex aroma without ever overwhelming the star of the show – the bright salsa.
- Shredded Cheese: Nothing truly completes an enchilada like a generous, bubbling blanket of melted cheese! Monterey Jack cheese is our top recommendation for this recipe because it melts beautifully into a smooth, gooey consistency and possesses a mild, creamy flavor that perfectly complements the tang of the green salsa. However, don’t hesitate to experiment with your favorite shredded cheese varieties, such as sharp cheddar, Colby, a pre-packaged Mexican blend, or even a blend of several cheeses for added complexity and visual appeal.
Step-by-Step Guide: Crafting Your Delicious Salsa Verde Chicken Enchiladas
Making these incredibly delicious enchiladas is simpler and quicker than you might imagine! Follow these detailed, easy-to-understand instructions to achieve perfect, flavorful results in your kitchen every single time. For specific ingredient quantities, please refer to the comprehensive recipe card located at the very end of this page.
- Prepare Your Baking Dish & Preheat Oven: Begin by preheating your oven to 350°F (175°C). Next, lightly grease a standard 9×13-inch baking dish (or a 2-quart casserole dish if preferred) with a liberal coating of non-stick cooking spray. Pour approximately ¼ cup of the Salsa Verde into the bottom of the dish and spread it evenly across the surface. This crucial initial step not only helps prevent the tortillas from sticking to the pan but also infuses an extra layer of delicious flavor right from the start. Set the prepared dish aside.
-
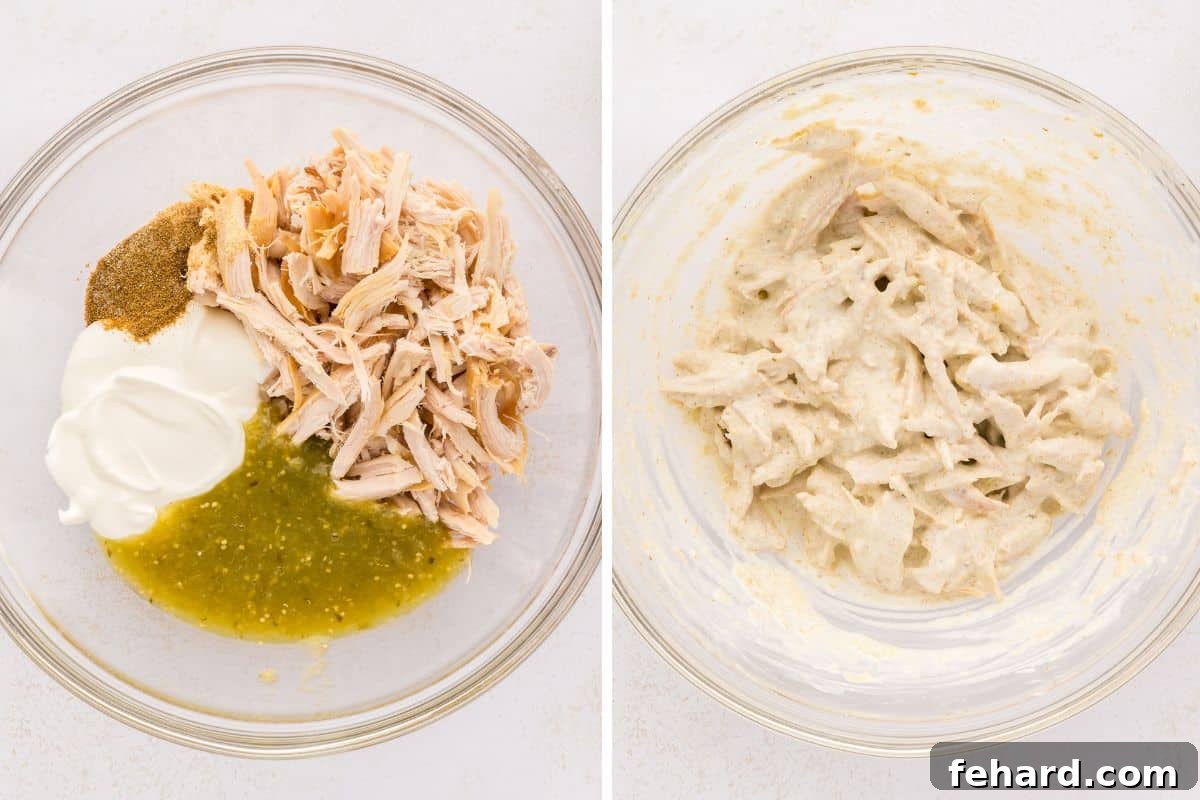
Create the Creamy Chicken Filling: In a large, spacious mixing bowl, combine your 2 cups of perfectly shredded or diced cooked chicken with ½ cup of creamy sour cream, ½ cup of mild or medium Salsa Verde (this specific portion is designated for the filling itself), 1 teaspoon of aromatic ground cumin, ½ teaspoon of savory garlic powder, and ½ teaspoon of kosher salt. Using a sturdy spoon or a flexible spatula, mix all these ingredients thoroughly until the chicken is completely and evenly coated and the entire mixture achieves a uniformly creamy and appealing consistency.

Mixing the rich and flavorful chicken filling, the heart of your sensational enchiladas. -
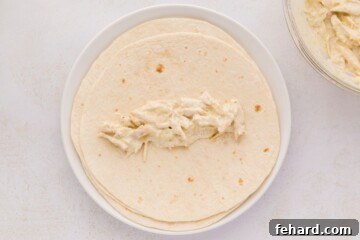
Warm and Fill the Tortillas: To ensure easier rolling and to significantly prevent any tearing of the tortillas, it’s essential to lightly warm them. Stack your 6 (10-inch) flour or corn tortillas on a microwave-safe plate, cover them securely with a damp paper towel, and microwave for approximately 30 seconds. This brief warming period will make them wonderfully pliable. Once warm, carefully take one tortilla and add about ⅓ cup of the creamy chicken mixture down the center, forming a neat line.
Evenly spread the savory chicken filling across each perfectly warmed tortilla. -
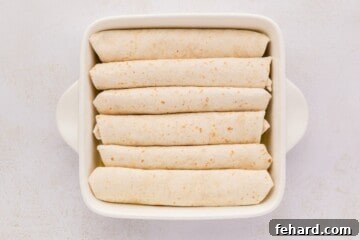
Roll the Enchiladas: To successfully roll each enchilada, first fold in both of the shorter sides of the tortilla over the delicious filling. Then, starting from one of the longer ends, roll it up tightly lengthwise, making sure to tuck the ends in as you go, to form a secure, neatly shaped “cigar-like” roll. With care, place each rolled enchilada, seam-side down, into your prepared baking dish. Repeat this entire process with the remaining tortillas and filling, arranging them snugly in a single, organized layer in the dish.
Neatly arranged enchiladas, poised and ready for their delicious topping and a trip to the oven. -
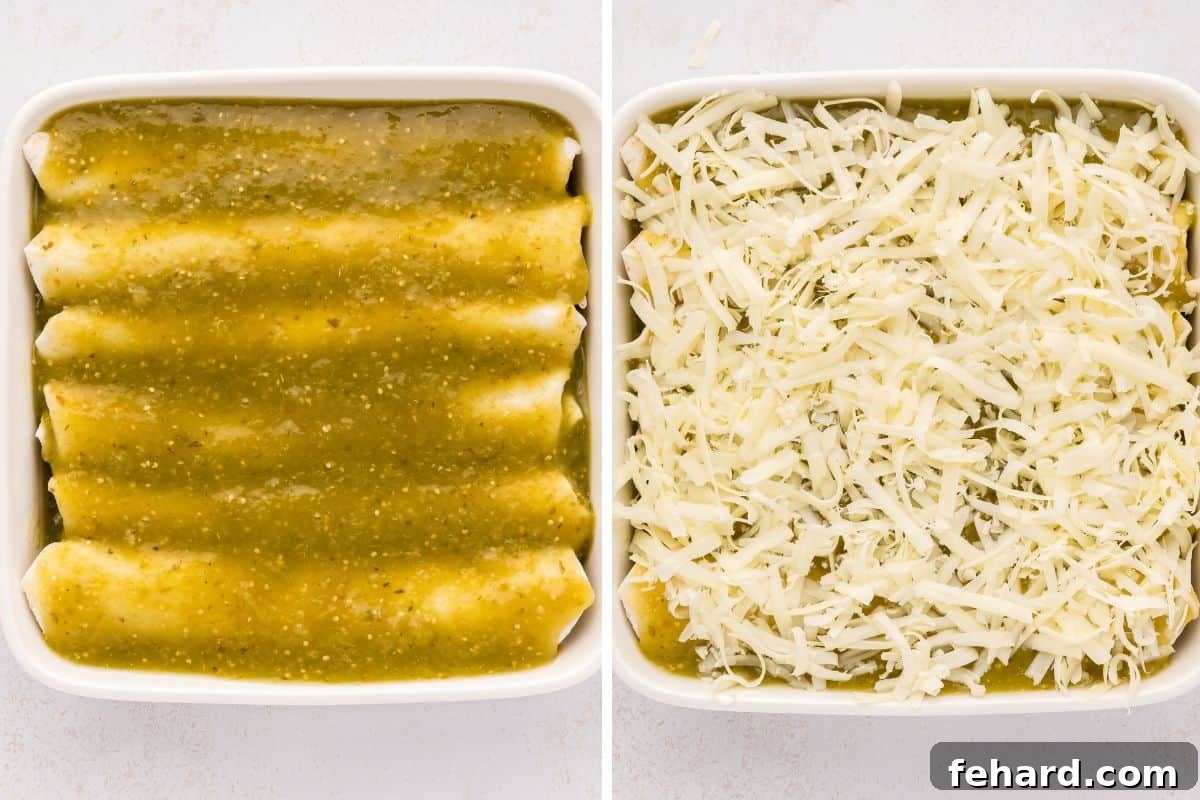
Top with Salsa Verde & Cheese: Once all your enchiladas are perfectly rolled and comfortably nestled in the baking dish, it’s time for the final touches. Generously pour the remaining 2 cups of mild or medium Salsa Verde evenly over all the enchiladas, ensuring that each one is thoroughly coated and glistening. Following this, sprinkle the full 1½ cups of shredded Monterey Jack cheese uniformly over the entire dish. This creates an irresistible, bubbling, and golden-brown cheesy crust during baking.
Layering on the vibrant salsa verde and a generous amount of cheese for that quintessential enchilada finish. -
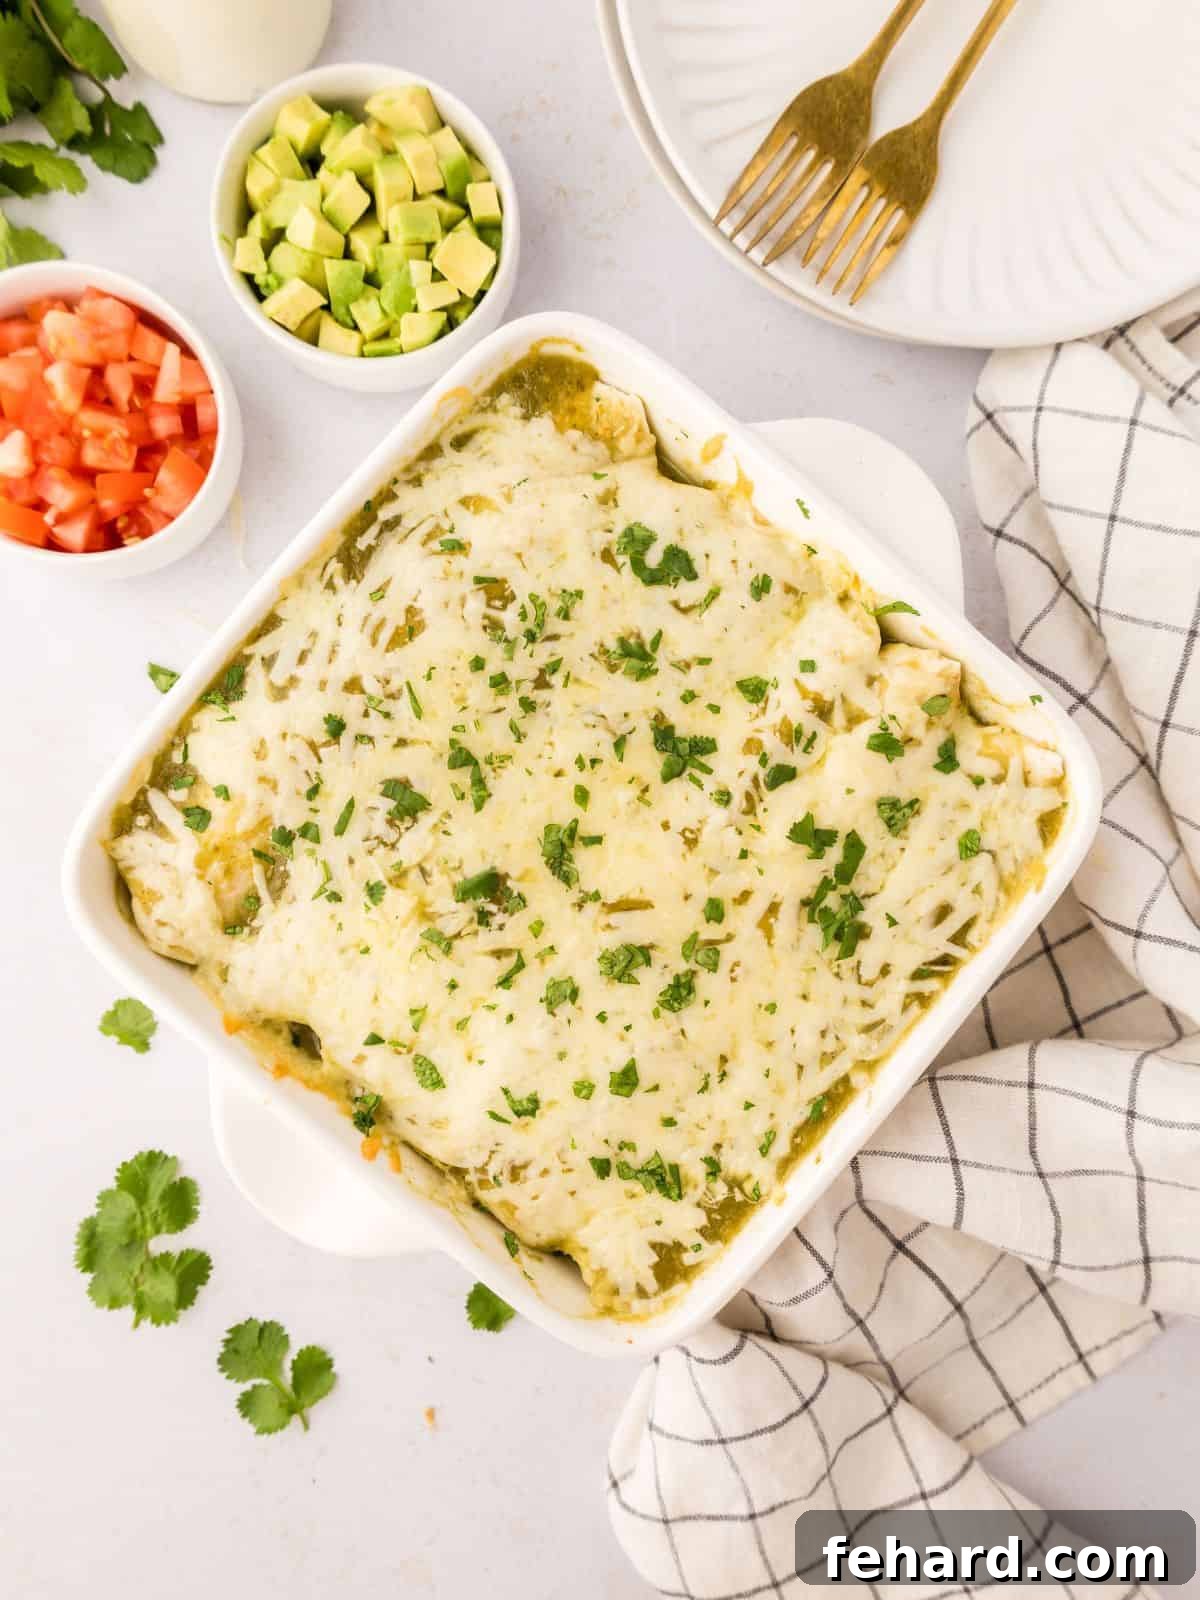
Bake to Golden Perfection: Cover the baking dish tightly and securely with aluminum foil. Place it in your preheated oven and bake for 20 minutes. After this initial baking period, carefully remove the foil (be mindful of steam!) and continue to bake for an additional 10-15 minutes, or until the enchiladas are thoroughly heated through, the cheese is beautifully melted, gloriously bubbly, and has achieved a light, appealing golden-brown hue. A slight crispiness on the edges of the cheese is highly desirable and adds wonderful texture!
Hot and bubbly enchiladas, fresh from the oven, promising a delightful culinary experience. - Rest and Serve: Once removed from the oven, allow the enchiladas to rest undisturbed for approximately 5-10 minutes before attempting to serve. This brief but important resting period allows the molten cheese to set slightly and helps the enchiladas firm up, making them significantly easier to cut and serve without falling apart. Garnish generously with fresh cilantro, creamy diced avocado, a dollop of extra sour cream, or thinly sliced green onions if desired, and enjoy every flavorful bite!
Expert Tips for Achieving Perfect Salsa Verde Enchiladas
Even though this recipe is straightforward, a few expert tips can elevate your Salsa Verde Chicken Enchiladas from good to absolutely phenomenal:
- Preventing Soggy Tortillas: The secret to avoiding soggy enchiladas lies in two key areas. First, resist the urge to overfill them; a thinner, more even layer of filling works best. Second, ensure your tortillas are adequately warmed to make them pliable, but not soaked in water. A thin layer of salsa verde at the very bottom of the baking dish also acts as a protective barrier, preventing the tortillas from absorbing too much liquid.
- Evenly Shredded Chicken is Key: Whether you opt for a convenient store-bought rotisserie chicken, homemade Instant Pot chicken, or simply use leftover cooked chicken, make sure it’s finely and uniformly shredded or diced. This ensures that every single bite of your enchilada receives a consistent and delicious distribution of chicken, and it also prevents the tortillas from becoming lumpy or difficult to roll neatly.
- Choosing Your Salsa Verde Wisely: While store-bought salsa verde offers fantastic convenience, the quality can vary significantly. Look for brands that prioritize fresh, vibrant ingredients and avoid those with excessive additives. If you’re feeling adventurous and have the time, making homemade salsa verde allows you to control the freshness and adjust the spiciness to your exact preference by selecting different types of chilies.
- The Right Cheese Makes a Difference: Monterey Jack is an excellent choice for its superior melting properties and its mild, creamy flavor, which beautifully complements the tangy green salsa. For those who prefer a sharper taste, consider blending Monterey Jack with some sharp cheddar. If you’re aiming for that authentic, wonderfully stringy melt, authentic Oaxaca cheese is a fantastic, traditional option.
- Don’t Skimp on the Creaminess Factor: The sour cream (or Greek yogurt substitute) isn’t just for flavor; it’s crucial for keeping the chicken filling wonderfully moist, rich, and creamy, which prevents the enchilada from becoming dry. If you decide to substitute with Greek yogurt, ensure it’s plain and preferably full-fat to achieve a similar level of richness and texture.
- The Importance of Resting: Allowing the enchiladas to rest for 5-10 minutes after baking is a small step that yields big results. This brief period allows the hot, melted cheese to set slightly and the internal juices to redistribute, making the enchiladas much easier to cut and serve cleanly without falling apart.
Creative Recipe Modifications & Flavorful Substitutions
One of the most appealing aspects of Salsa Verde Chicken Enchiladas is their incredible adaptability. This recipe serves as a fantastic foundation, allowing you to easily customize it to suit your dietary preferences, what ingredients you have on hand, or simply to experiment with new flavor combinations!
- Use Greek Yogurt for a Lighter Yet Creamy Twist: For a slightly healthier alternative without sacrificing creaminess, you can effortlessly swap out the traditional sour cream for an equal amount of plain Greek yogurt. Greek yogurt will still provide that desirable velvety texture and tangy flavor, while also contributing an additional boost of protein to your delicious filling.
- Explore Alternate Protein Options: While tender chicken is a classic choice, this recipe is remarkably versatile when it comes to the main protein. Don’t limit yourself! Instead of shredded cooked chicken, consider these incredibly delicious alternatives:
- Flavorful cooked Taco Meat (whether it’s ground beef, turkey, or a plant-based crumble seasoned for tacos).
- Hearty Sofritas Tofu Taco Meat for a wonderfully flavorful and completely vegetarian or vegan-friendly option.
- Rich, succulent leftover Beef Barbacoa or tender Pork Carnitas for an even more robust and deeply satisfying flavor profile.
- For a completely meatless yet substantial version, a hearty mix of mashed or whole pinto beans or black beans works absolutely wonderfully as a filling.
- Experiment with Tortilla Sizes and Types: This recipe typically recommends using burrito-size (10-inch) tortillas because they create wonderfully substantial enchiladas and fit perfectly into a standard baking dish. However, if you prefer smaller, more appetizer-sized portions, feel free to use smaller tortillas (such as 6-inch or 8-inch). Just keep in mind that you will naturally need more tortillas overall, and be extra cautious not to overfill them to ensure they roll up securely and don’t burst during baking.
- Enhance with Fresh and Vibrant Toppings: While these green chicken enchiladas are undeniably delicious straight from the oven, they become truly spectacular with the addition of fresh toppings! Consider serving them with generous dollops of extra sour cream or Greek yogurt, freshly diced ripe tomatoes, creamy diced avocado or guacamole, thinly sliced green onions or red onions for a mild bite, or a generous sprinkle of minced fresh cilantro for an extra burst of freshness, color, and aroma.
- Adjust the Spice Level: If you’re a fan of heat, don’t shy away from customizing! Feel free to add a pinch of cayenne pepper, a dash of your favorite hot sauce, or a finely minced jalapeño or serrano pepper to the chicken filling. You could also opt for a hotter variety of salsa verde when assembling the dish for an extra kick that awakens the palate.
- Double the Recipe for a Crowd or Meal Prep: Planning for a larger gathering, a party, or simply want to ensure you have delicious leftovers for the week? This recipe is incredibly easy to double! Simply double all of the ingredients as listed, and then bake them in a larger 9×13-inch baking dish as directed, or divide them between two separate casserole dishes for easier handling and baking.
Make-Ahead & Storage Instructions: Effortless Meal Planning for Any Occasion
These green chicken enchiladas are not just delicious and easy to prepare; they’re also incredibly freezer-friendly and perfect for efficient meal prepping. Whether you want to get a significant head start on an upcoming dinner, prepare a convenient meal for guests, or simply stock your freezer with a homemade, comforting meal to pull out on a busy weeknight, these enchiladas store beautifully and reheat wonderfully.
- Prepare Up to 3 Days in Advance (Refrigerated):
- Assembly: Assemble the chicken enchiladas exactly as directed in the main recipe instructions.
- Preparation: Carefully place the assembled enchiladas into a baking dish that has been lightly greased and pre-coated with a thin, even layer of Salsa Verde.
- Covering: Cover the dish tightly and securely with at least one layer of aluminum foil.
- Refrigeration: Refrigerate the covered dish for up to a maximum of 3 days before baking.
- To Bake (from Refrigerated): When you’re ready to cook, remove the baking dish from the refrigerator and allow it to sit on the kitchen counter for about 15-20 minutes while your oven preheats to 350°F (175°C). Bake, still covered with foil, for 30 minutes. Then, carefully remove the foil and continue baking for an additional 10-15 minutes, or until the enchiladas are bubbling hot throughout and the cheese is beautifully golden and melted.
- Freeze for Up to 3 Months in Advance (Frozen):
- Assembly: Assemble the chicken enchiladas precisely as directed in the recipe.
- Freezer-Safe Pan: Transfer them into a greased freezer-safe baking pan (a disposable foil cake pan works exceptionally well for this, as it can go directly from the freezer to the oven, eliminating cleanup!). Ensure the bottom of the pan is coated with a thin layer of Salsa Verde to prevent sticking.
- Secure Covering: Cover the pan tightly with a layer of plastic wrap, making sure it’s pressed against the food to minimize air exposure. Follow this with a layer of heavy-duty aluminum foil to prevent any potential freezer burn.
- Freezing: Freeze for up to 3 months for optimal freshness and quality.
- To Reheat (from Frozen): When you’re ready for a delicious meal, remove the enchiladas from the freezer. Discard both the plastic wrap and the foil from the dish. Recover the dish tightly with a fresh piece of aluminum foil. Bake from frozen in a preheated oven at 350°F (175°C) for approximately 1 hour. After this, remove the foil and continue to bake for another 20-25 minutes, or until the cheese is wonderfully melted, bubbling, and lightly browned, and the enchiladas are thoroughly heated through to the center.
- Storing Leftovers (Cooked):
- Cooling & Storage: Once your enchiladas are baked and have cooled completely to room temperature, store any leftover portions in an airtight container in the refrigerator for up to three days.
- To Reheat: For the best and most tender results, place one or two individual enchiladas on a heat-safe plate. Cover the plate loosely with a damp paper towel (this helps to retain moisture and prevent drying) and reheat in the microwave in convenient 30-second intervals until they are thoroughly warmed through. Alternatively, you can reheat them gently in a preheated oven at 300°F (150°C) until hot.
More Delicious Tex-Mex Recipes to Explore
If you’ve enjoyed the vibrant flavors and comforting warmth of these Salsa Verde Chicken Enchiladas, you’ll surely love exploring these other fantastic Tex-Mex inspired dishes that are perfect for any meal or occasion:
- Instant Pot Chicken Tacos: Incredibly quick, effortlessly easy, and bursting with zesty flavor – a weeknight savior!
- Tamale Pie: A delightful and comforting casserole featuring a savory meat filling crowned with a fluffy, golden cornbread topping.
- Instant Pot Refried Beans: Experience the rich, authentic taste of homemade refried beans, far superior in flavor and texture to any canned variety.
- Crockpot Salsa Chicken: A marvel of minimal effort yielding maximum flavor – simply set it and forget it for a tender, delicious result.
- Shredded Chicken Tacos: A versatile, endlessly adaptable, and supremely family-friendly staple that everyone will love.
- Chicken Al Pastor: Indulge in the perfect balance of sweet, savory, and perfectly spiced chicken, reminiscent of traditional al pastor.
- Cowboy Chicken: A hearty, robust, and incredibly satisfying one-pan meal that brings big flavors to your table with ease.
If you gave this fantastic recipe for Salsa Verde Chicken Enchiladas a try, we would absolutely love to hear about your experience! Please take a moment to leave a comment and a review below to share your thoughts, tips, and any delicious customizations you made. Your feedback is invaluable!
Salsa Verde Chicken Enchiladas Recipe
By: Kristen Chidsey
Yields: 6 servings
Prep Time: 10 minutes
Cook Time: 25 minutes
Total Time: 35 minutes
From the creamy, rich chicken filling to the tender tortillas and the fresh, vibrant tomatillo salsa, these Salsa Verde Enchiladas are perfectly balanced, incredibly delicious, and a true family favorite. This recipe offers a delightful blend of textures and flavors that will make it a regular on your dinner rotation.
Ingredients
- 2 cups shredded or diced cooked chicken
- ½ cup sour cream
- ½ cup mild or medium Salsa Verde (for the filling)
- 1 teaspoon ground cumin
- ½ teaspoon garlic powder
- ½ teaspoon kosher salt
- 2 cups mild or medium Salsa Verde (for topping)
- 6 (10-inch) flour or corn tortillas
- 1½ cups shredded Monterey Jack cheese
Instructions
- Preheat oven to 350℉ (175℃). Grease a 9×13-inch casserole dish (or 2-quart dish) with non-stick cooking spray and then add ¼ cup of the Salsa Verde to the bottom to prevent sticking. Set aside.
- In a large mixing bowl, combine the 2 cups shredded or diced cooked chicken, ½ cup sour cream, ½ cup mild or medium Salsa Verde (for filling), 1 teaspoon ground cumin, ½ teaspoon garlic powder, and ½ teaspoon kosher salt. Mix until well combined and the chicken is fully coated.
- Place the 6 (10-inch) flour or corn tortillas on a plate, cover them with a damp paper towel, and microwave for 30 seconds to make them pliable. Add about ⅓ cup of the chicken filling down the middle of each tortilla.
- Fold in both sides of the tortillas and then roll up lengthwise, tucking as you roll to secure the enchiladas in a cigar-like shape. Repeat, lining up tortillas, seam-side down, tightly in the prepared baking dish.
- Pour the remaining 2 cups mild or medium Salsa Verde over the enchiladas, spreading to cover. Sprinkle the 1½ cups shredded Monterey Jack cheese evenly over the dish.
- Cover tightly with foil and bake for 20 minutes. Remove the foil and continue to bake for another 10-15 minutes, or until the cheese has melted, is bubbly, lightly browned, and the enchiladas are warmed through.
- Let sit for 5-10 minutes then serve hot with desired toppings.
Equipment
- 9×13-inch Casserole Dish (or 2-Quart Dish)
- Large Mixing Bowl
Notes
- Greek Yogurt Option: For a slightly lighter option, substitute sour cream with plain Greek yogurt for the filling.
- Salsa Verde Heat: Salsa Verde comes in various heat levels (mild, medium, hot). Choose one that suits your preference.
- Protein Alternatives: Instead of chicken, you can use cooked taco meat (beef or turkey), Sofritas tofu, leftover beef barbacoa, or pork carnitas. Beans are also a great vegetarian filling option.
- Smaller Tortillas: If using smaller tortillas, you will need more to accommodate the filling. Be mindful not to overfill them.
- Doubling the Recipe: This recipe is easily doubled. Simply double all ingredients and bake in a larger 9×13-inch baking dish or two separate dishes.
- Storage: Baked and cooled leftovers can be stored in an airtight container in the refrigerator for up to three days. Reheat gently in the microwave or oven until warmed through.
Nutrition (Approximate per Serving)
- Calories: 379 kcal
- Carbohydrates: 36g
- Protein: 22g
- Fat: 16g
- Saturated Fat: 12g
- Cholesterol: 85mg
- Sodium: 675mg
- Potassium: 435mg
- Fiber: 1g
- Sugar: 8g
- Vitamin A: 1010 IU
- Vitamin C: 3.2mg
- Calcium: 315mg
- Iron: 2.4mg
Nutrition information is automatically calculated and should only be used as an approximation. Individual results may vary based on specific ingredients and preparation methods.