
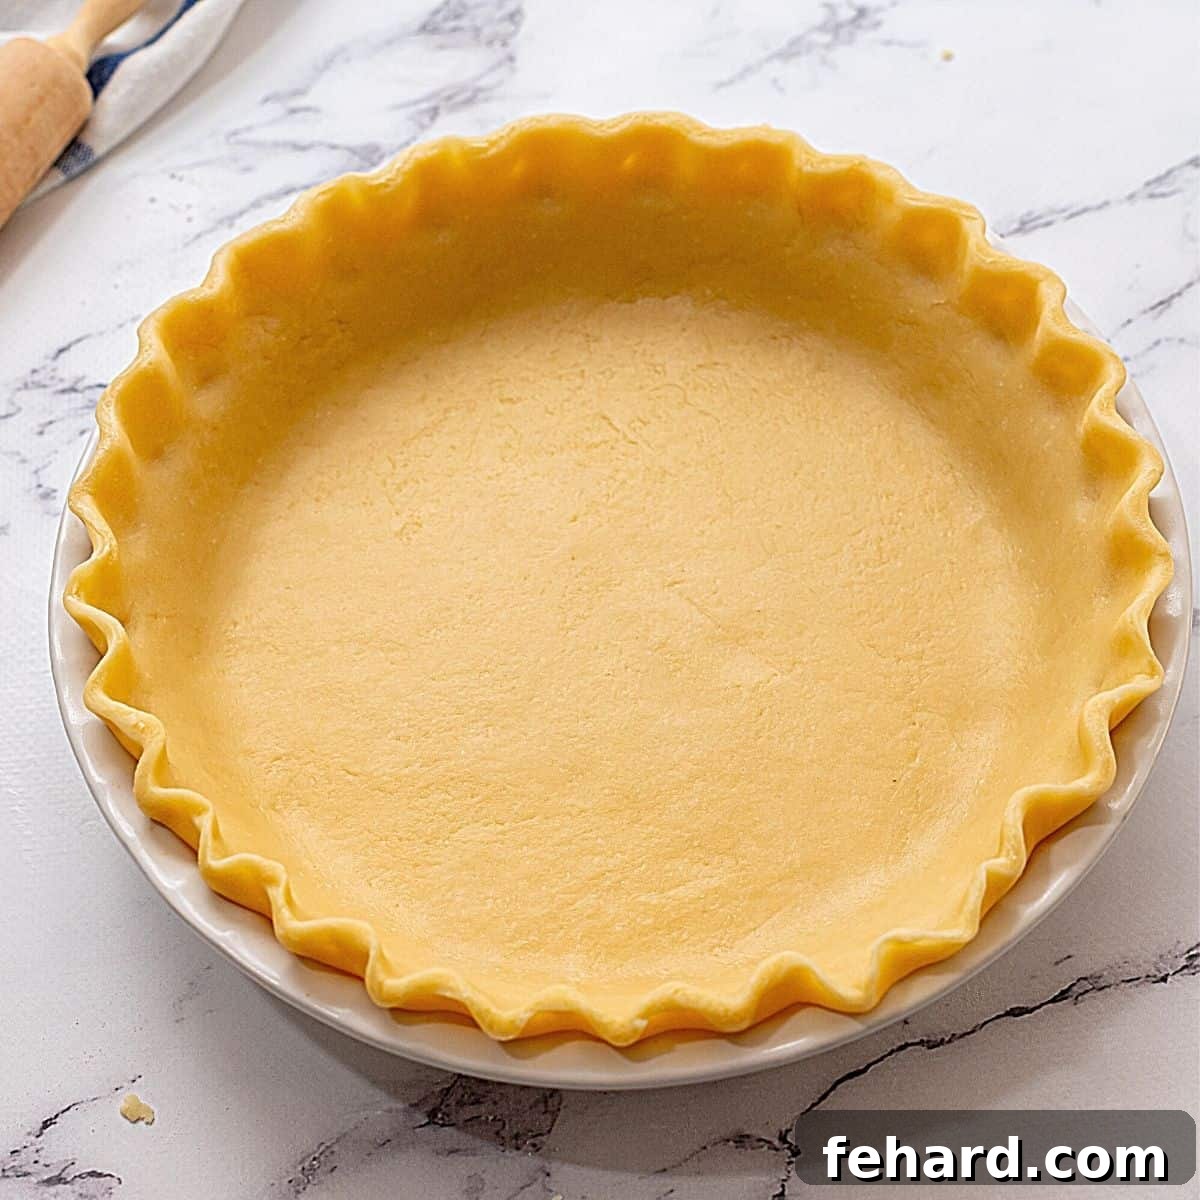
Flaky, tender, and irresistibly light, this homemade all-butter pie crust is surprisingly easy to master and uses just 4 simple ingredients. Elevate your baking from everyday to extraordinary with a crust that truly shines in both flavor and texture.
Are you intimidated by the thought of making pie crust from scratch? Many home bakers shy away from it, opting for store-bought versions that often lack the rich flavor and delicate flakiness of a homemade crust. But what if we told you that achieving a perfect, foolproof pie crust is not only possible but surprisingly straightforward? Say goodbye to tough, bland crusts and hello to the easiest, flakiest, most flavorful pie crust you’ll ever make, crafted entirely with butter.
This comprehensive guide will walk you through creating an exceptional pie crust that comes together effortlessly, especially when utilizing a food processor. With just four basic ingredients—flour, butter, salt, and ice water—you’ll unlock the secret to bakery-quality pies. This versatile crust is perfect for a wide array of delectable desserts and savory main courses, from a classic pumpkin pie, a vibrant cherry crumb pie, to a hearty quiche. Master this essential baking skill, and your pies will never be the same!
Expert Tips for the Flakiest All-Butter Pie Crust You’ll Ever Make
The journey to a perfect homemade pie crust doesn’t have to be complicated. While it might seem daunting at first, following a few key principles will guarantee consistently tender, flaky, and flavorful results. These expert tips are designed to address common concerns and simplify the process, ensuring your success every time.
- The Golden Rule: Chill Everything Thoroughly! This is arguably the most crucial step for achieving that coveted flaky texture and preventing a tough crust. Cold ingredients, especially butter, inhibit excessive gluten development. When the cold butter hits the hot oven, the water within it turns to steam, creating air pockets that separate the layers of dough. This results in an incredibly light and flaky crust. Don’t just chill the butter; extend this principle to your flour, the food processor bowl, the dough blade, and even your pie dish before you start. The colder everything is, the better your results will be.
- Leverage Your Food Processor. While traditional methods using a pastry cutter or your hands are valid, a food processor is a game-changer for pie crusts. It significantly speeds up the process and, more importantly, minimizes the risk of overworking the dough or melting the butter with warm hands. Its quick, controlled pulses efficiently cut the butter into the flour, ensuring the butter remains in distinct, small pieces – a secret weapon for flakiness. This efficiency makes homemade pie crust accessible to even the busiest bakers.
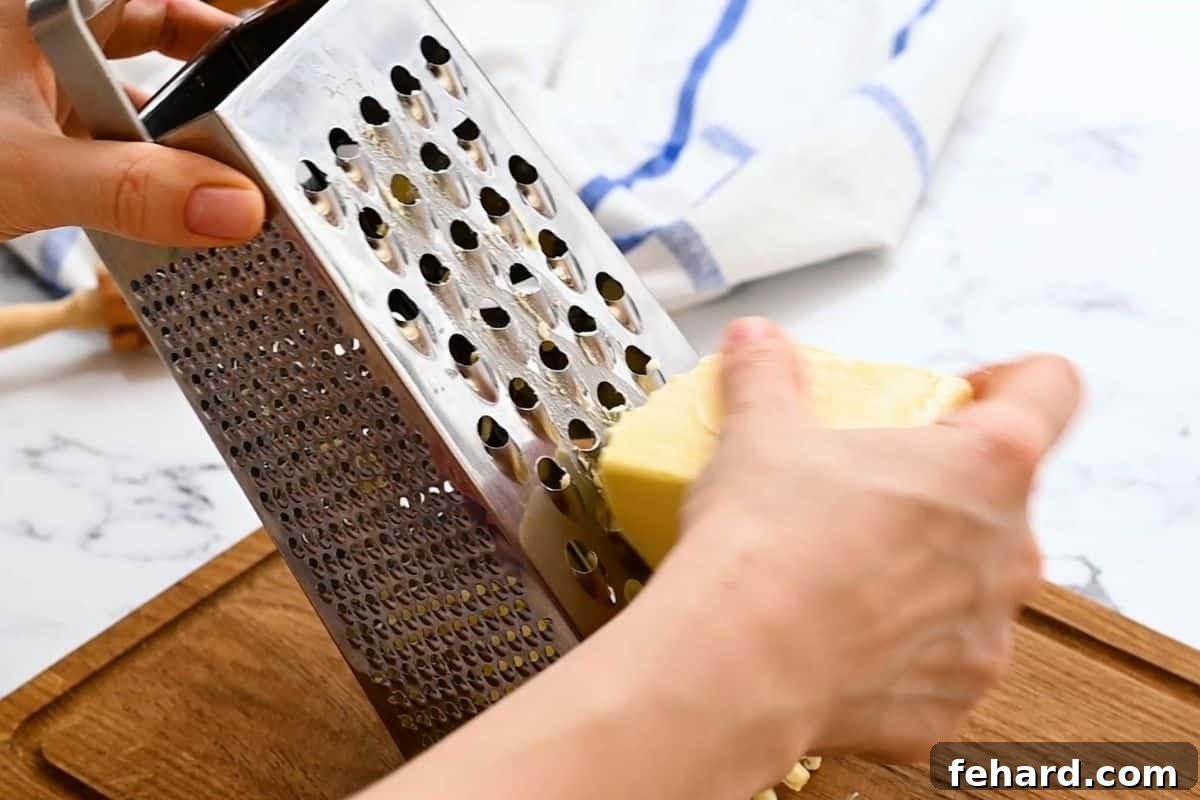
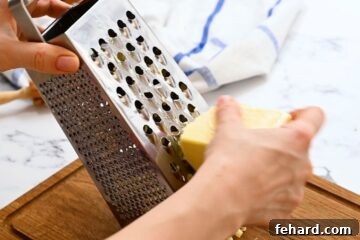
- Grate or Finely Dice Your Butter. For optimal flakiness, you want many tiny, cold pieces of butter dispersed throughout the flour. These small butter bits melt quickly, creating steam that lifts and separates the dough layers. Grating frozen unsalted butter with a box grater is an excellent technique that effortlessly produces perfectly sized, cold butter fragments. If grating isn’t an option, ensure your cubed butter is very small, ideally around ½-inch, and keep it in the freezer until ready to use.
- Insist on Ice Water (and just enough of it). The temperature of the water is as critical as the butter’s temperature. Using ice-cold water ensures the butter stays firm and doesn’t prematurely melt or get absorbed into the flour, which would hinder flakiness. The trick is to add the ice water gradually, typically 1 tablespoon at a time, pulsing briefly after each addition. You’re looking for the dough to just come together, forming large clumps that feel moist and slightly sticky, but never overtly wet or soupy. The exact amount of water can vary based on your flour and ambient humidity, so trust the feel of the dough.
- Chill the Formed Dough Again – It’s Essential! After you’ve mixed your dough and formed it into disks, and especially after you’ve rolled it out and placed it into your pie dish, a final chilling period is paramount. This allows the gluten strands to relax, which is key to preventing the crust from shrinking excessively during baking. More importantly, it ensures the butter is rock-solid cold before it enters the hot oven, guaranteeing maximum steam production and superior flakiness. Aim for at least an hour of chilling time for the formed crust in the pie dish before baking.
- Bake on a Baking Stone or Metal Baking Sheet. To prevent your pie plate from cracking due to thermal shock (the sudden temperature change from a cold refrigerator to a hot oven) and to ensure an evenly cooked, crisp bottom crust, always place your pie plate on a preheated baking stone or a sturdy metal baking sheet. This provides a buffer, distributes heat slowly and consistently, and ensures your crust bakes through beautifully without any unpleasant surprises.
Crafting Your Flaky All-Butter Pie Crust: A Detailed Step-by-Step Guide
Creating a perfect homemade pie crust is a truly rewarding experience, and with these detailed, easy-to-follow steps, you’ll achieve fantastic results every time. While the following instructions provide comprehensive guidance, remember that precise ingredient quantities and a concise overview can be found in the dedicated recipe card at the very bottom of this post.
- Prepare and Thoroughly Chill Your Butter and Equipment. For the lightest, most tender, and flakiest crust, preparation is key. Begin by placing the bowl for your food processor, its plastic dough blade, your measured all-purpose flour, and your empty pie dish in the refrigerator to chill thoroughly for at least 30 minutes. Meanwhile, take your unsalted butter directly from the freezer (or ensure it’s extremely cold). Using a box grater, grate the butter directly into small pieces. This method is superior to cubing as it creates many tiny, uniform pieces that are crucial for extreme flakiness. If you don’t have a grater, cube the butter into very small ½-inch pieces. Immediately after grating or cubing, transfer the butter to the freezer for another 15-20 minutes. Remember this mantra: we want everything absolutely cold, cold, cold!
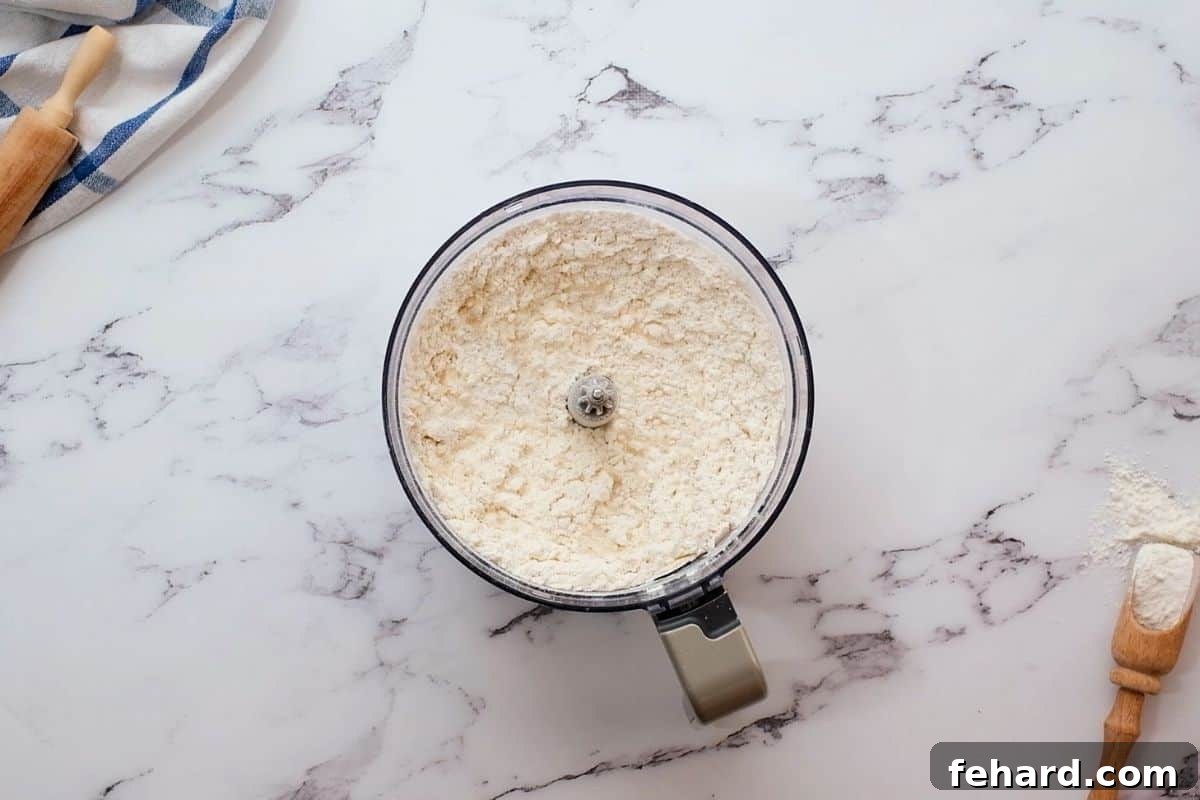
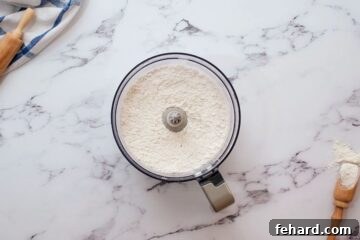
- Combine Your Dry Ingredients. Remove your chilled food processor bowl and dough blade from the refrigerator and assemble the food processor. Add the measured all-purpose flour and kosher salt into the bowl. Pulse the mixture a few times, just enough to ensure the salt is evenly and completely dispersed throughout the flour. This prevents any pockets of excessive saltiness and ensures consistent seasoning in your final crust.
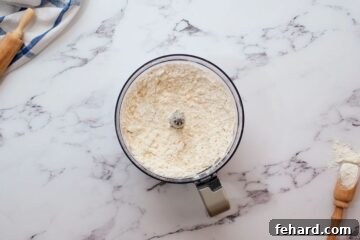
- Incorporate the Chilled Butter into the Flour. Retrieve the now-frozen grated or cubed butter from the freezer. Add it directly to the flour mixture in the food processor. Pulse the mixture in short bursts, typically 2-3 pulses at a time, until the butter is evenly distributed and the mixture resembles coarse crumbs. You should see small, pea-sized pieces of butter visible throughout the flour. Be very careful not to over-process at this stage; we want distinct pieces of butter, not a smooth paste, to achieve that desirable flakiness.
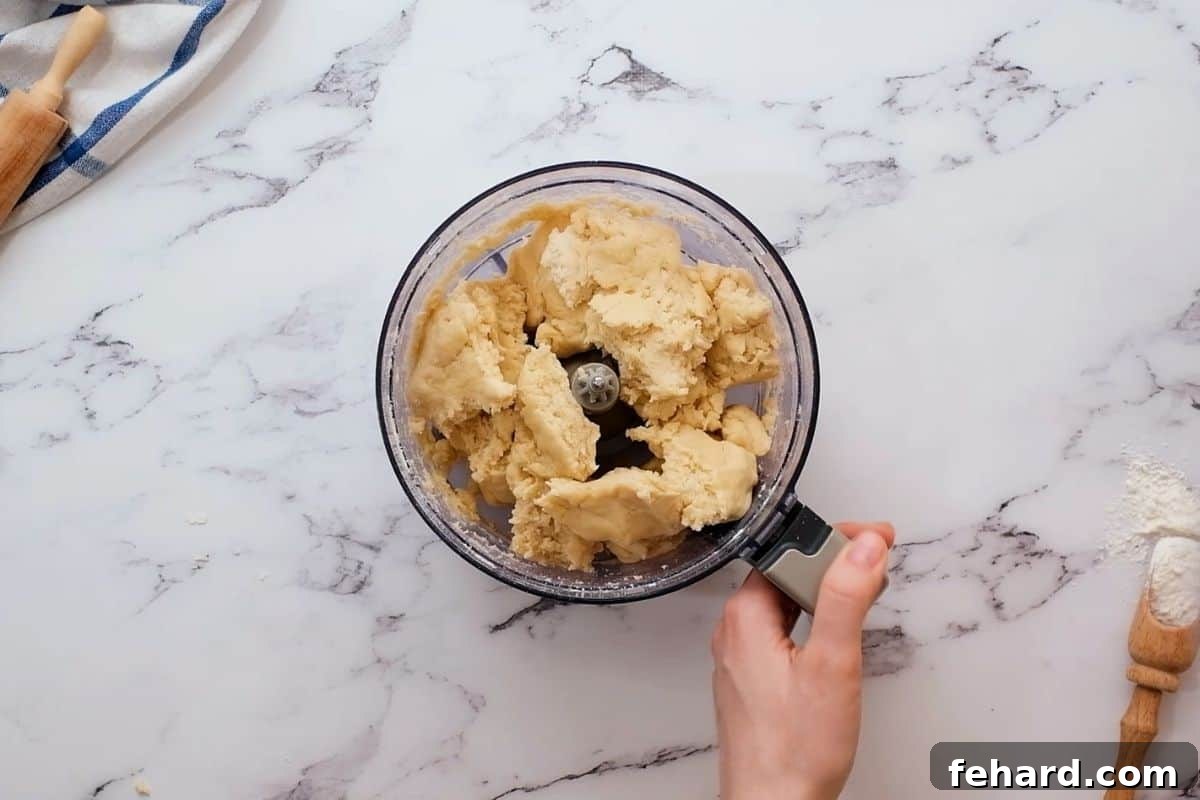
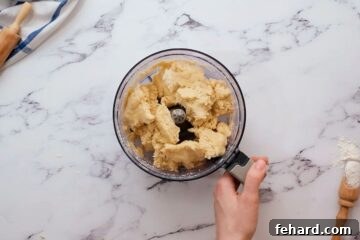
- Gradually Add Ice Water to Form the Dough. With the food processor running (or by pulsing between additions), gradually drizzle in 2 tablespoons of ice water at a time. Process briefly after each addition. Continue adding additional ice water, 1 tablespoon at a time, until the dough just begins to come together. The dough should start to form large clumps and, when pinched between your fingers, should feel moist and slightly sticky, but crucially, not overtly wet or slushy. The exact amount of water needed can vary depending on your flour’s hydration and the humidity levels in your kitchen – typically, 6-10 tablespoons are sufficient. Stop immediately once the dough reaches the right consistency to avoid overmixing, which can lead to a tough crust.
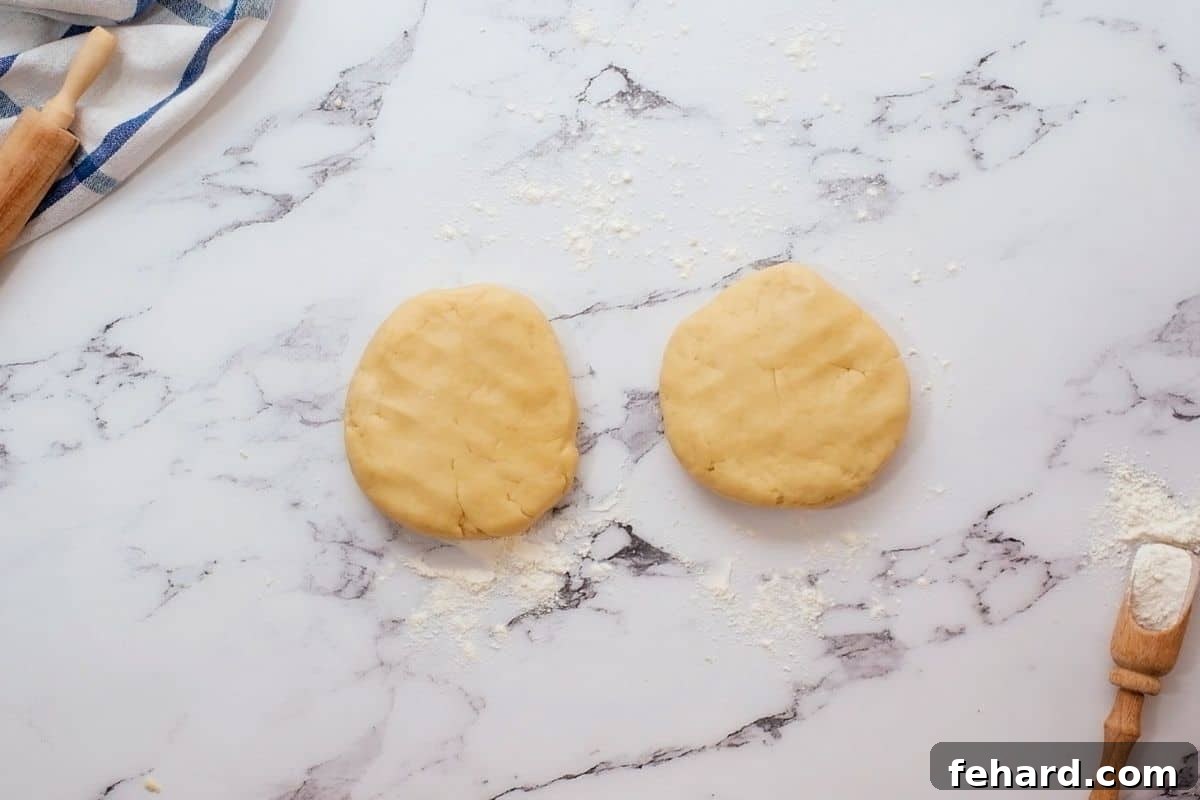
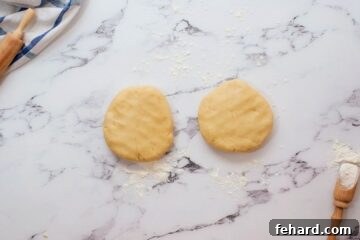
- Divide, Form Disks, and Chill the Dough. Gently turn the dough out onto a lightly floured work surface. Using floured hands, quickly gather and press the dough together until it forms a cohesive mass. Avoid kneading or working the dough too much, as this develops gluten and will result in a tough crust. Divide the dough evenly in half. Form each half into a flat, 1-inch thick disk. Wrap each disk tightly in plastic wrap to prevent it from drying out, and refrigerate for a minimum of 2 hours. This critical chilling period serves several purposes: it allows the gluten to relax (preventing shrinkage during baking), and it ensures the butter firms up completely, making the dough much easier to roll and promoting maximum flakiness. The dough disks can be refrigerated for up to 5 days.
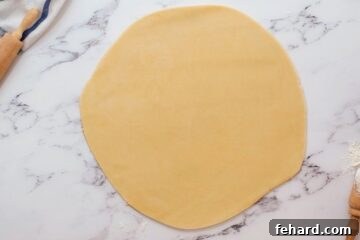
- Roll Out Your Pie Crust. When you’re ready to bake, remove one dough disk from the refrigerator a few minutes before rolling to allow it to soften just enough to become pliable, but still very cold. Lightly flour your clean work surface and your rolling pin. Roll the dough from the center outwards in all directions, rotating the dough frequently (about a quarter turn after each roll) to maintain a circular shape and prevent it from sticking to the surface. Aim for a circle roughly 12 inches in diameter, which should be approximately 2 inches larger than your standard 9-inch pie dish. Ensure the thickness is even across the entire circle.
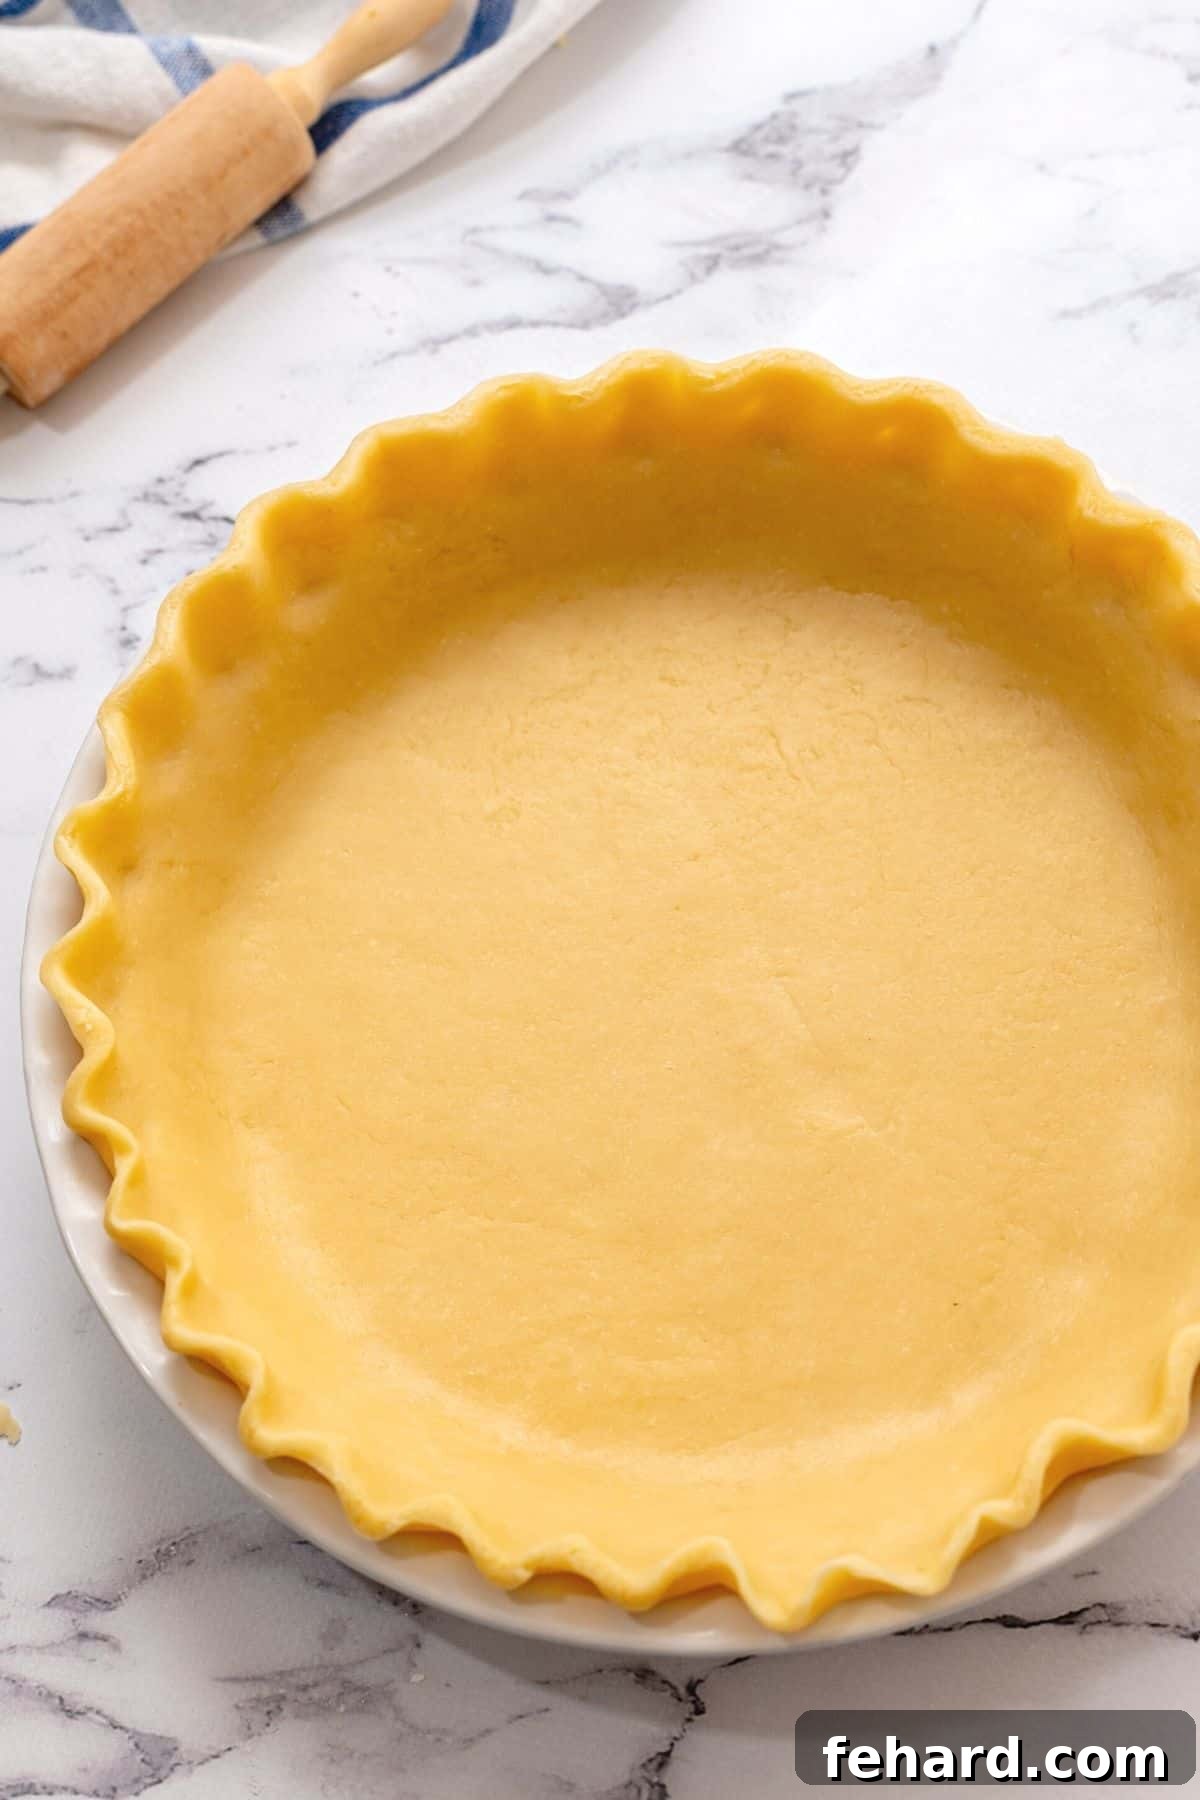
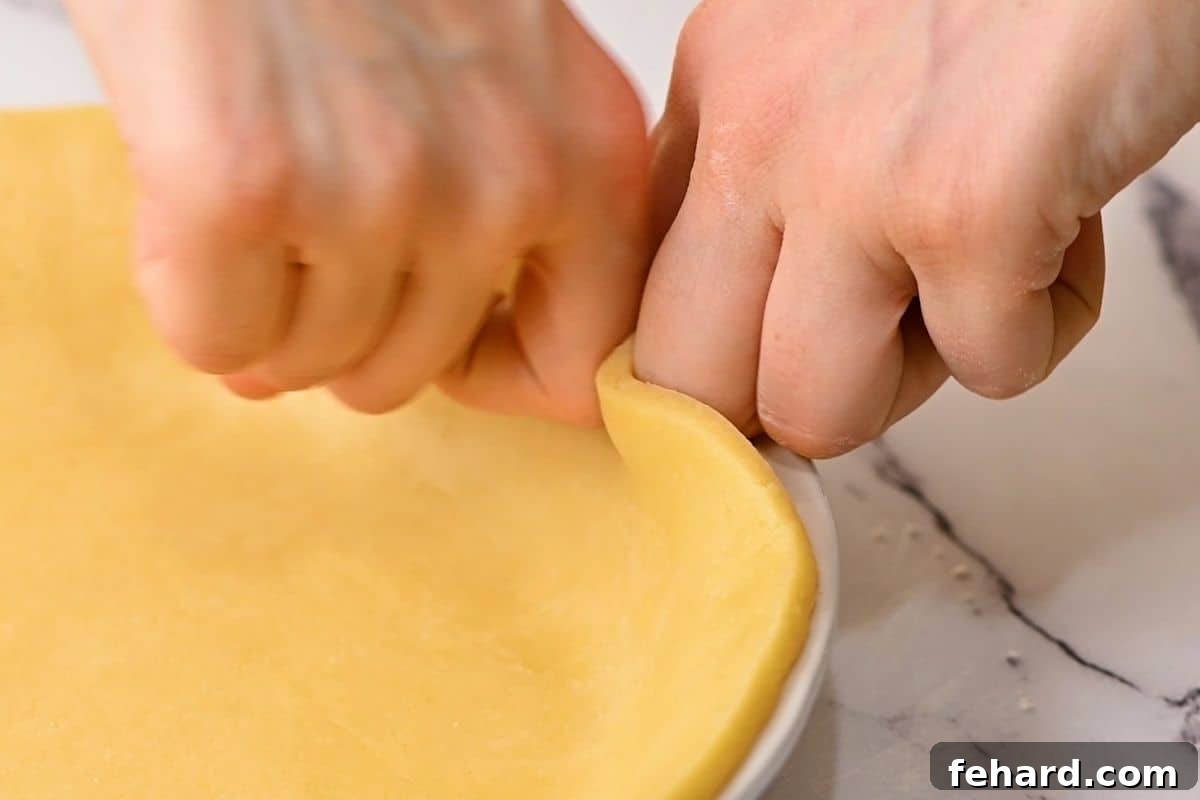
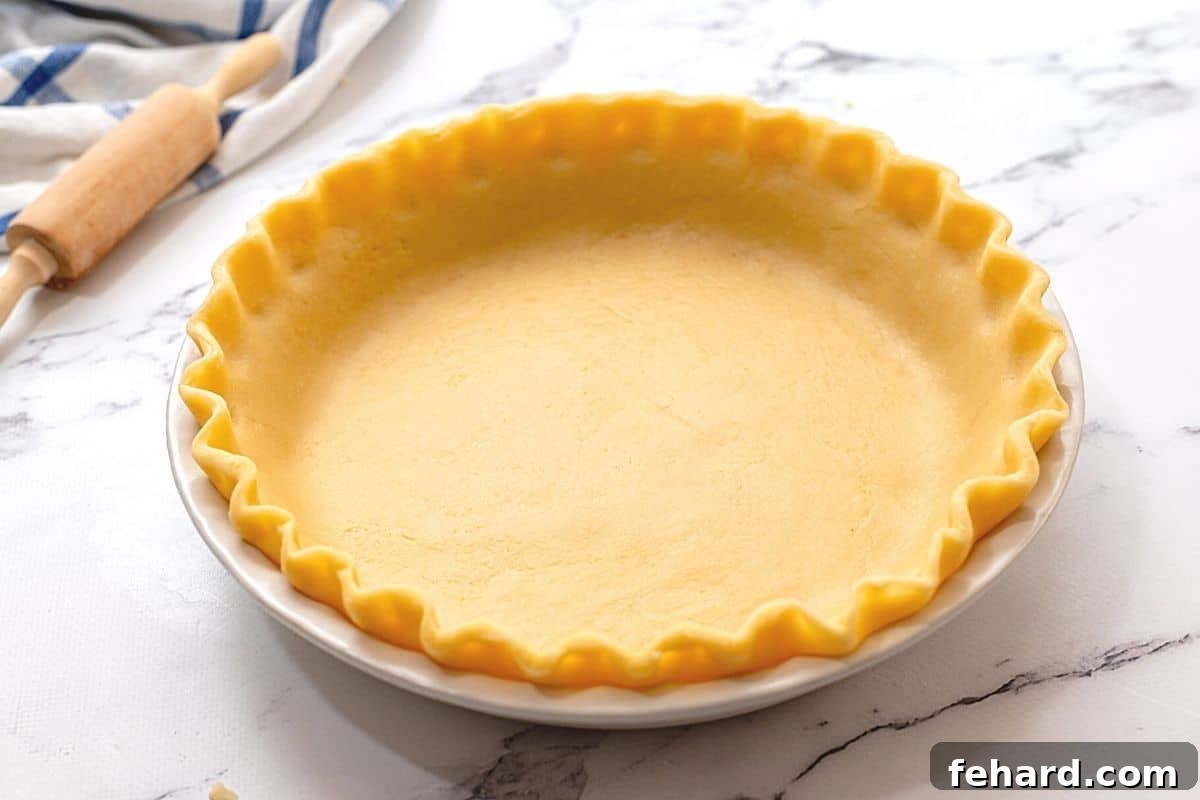
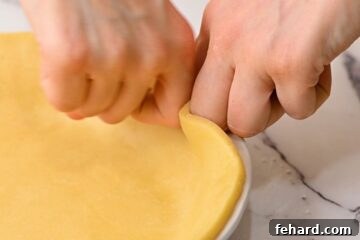
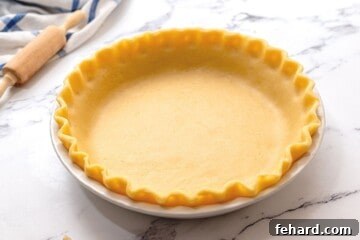
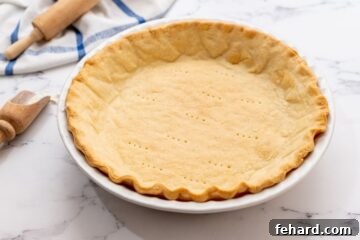
- Transfer to Pie Pan and Create Fluted Edges. Allow the rolled-out dough to rest for a couple of minutes on the counter; this helps prevent shrinkage. Then, very carefully transfer the pie crust to your chilled pie pan. The easiest way to do this is to gently roll the dough around your rolling pin and then unroll it directly over the pie dish. Gently press the dough into the contours of the pan, ensuring there are no trapped air bubbles beneath. Trim any excess dough, leaving about a ½-inch overhang around the rim. Fold this overhang under itself to create a thick, sturdy, and even edge. To flute the edges, use the knuckle of one finger to indent the crust from the inside, while simultaneously using two fingers from your other hand to pinch the crust from the outside, forming a beautiful, decorative wavy pattern. There are various fluting styles, so feel free to experiment to find one you love!
- Perform a Final Chill Before Baking. Regardless of whether your recipe calls for blind baking the crust or filling it immediately and baking, a final chilling step is absolutely mandatory for optimal results. Place the prepared pie crust, now in its pie pan with fluted edges, back into the refrigerator for at least 1 hour. This crucial chill ensures the butter is rock-hard and the gluten is completely relaxed before the crust enters the hot oven, thereby promoting maximum flakiness and preventing any undesirable shrinkage or loss of its beautiful shape during baking.
The Art of Blind Baking: Achieving a Perfectly Cooked Pie Crust
Blind baking, also known as pre-baking, is a vital technique where you bake a pie crust without its filling. This step is crucial for preventing a soggy bottom, especially when working with wet fillings (like custards, quiches, or fruit pies) or when preparing a no-bake pie that requires a fully cooked crust. Some recipes, such as a rich Quiche Lorraine, might call for a partially baked crust, while others demand a fully baked, golden-brown crust. The method for both is quite similar, differing primarily in the total baking time.
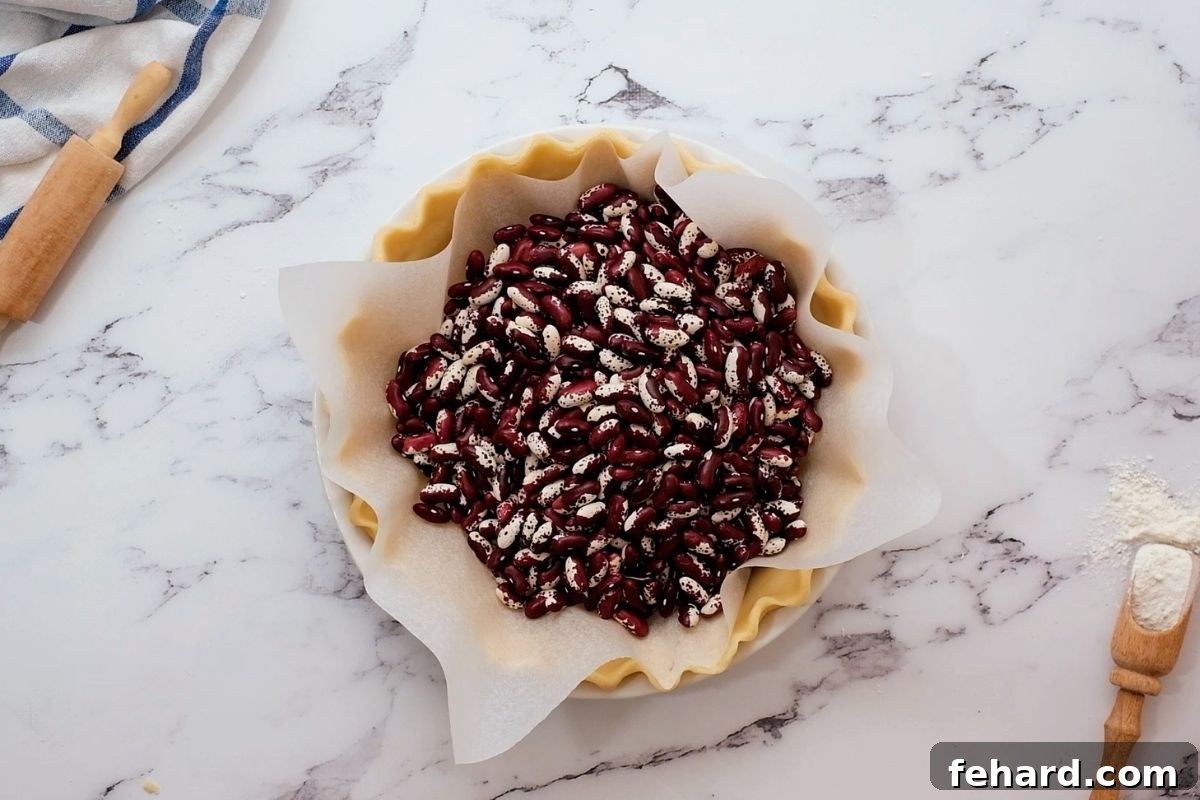
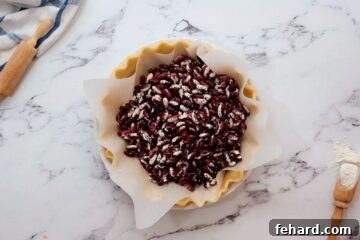
- Prepare the Crust for Blind Baking. After your shaped pie crust has undergone its final essential chill (as detailed in step 8 above), remove it from the refrigerator. Carefully line the crust with a sheet of parchment paper or aluminum foil, gently pressing it into the bottom and up the sides of the crust. Ensure the edges are covered to protect them from burning prematurely. Fill the lined crust generously with pie weights, dried beans, or uncooked rice. These weights are essential to prevent the crust from puffing up or shrinking significantly during baking.
- Initial Bake with Weights. Place the pie plate, still sitting on a sturdy metal baking sheet or your preheated baking stone (as recommended in our expert tips), into your preheated oven (typically 375°F/190°C). Bake for 15 minutes. This initial baking period helps to set the crust’s structure and begin the cooking process.
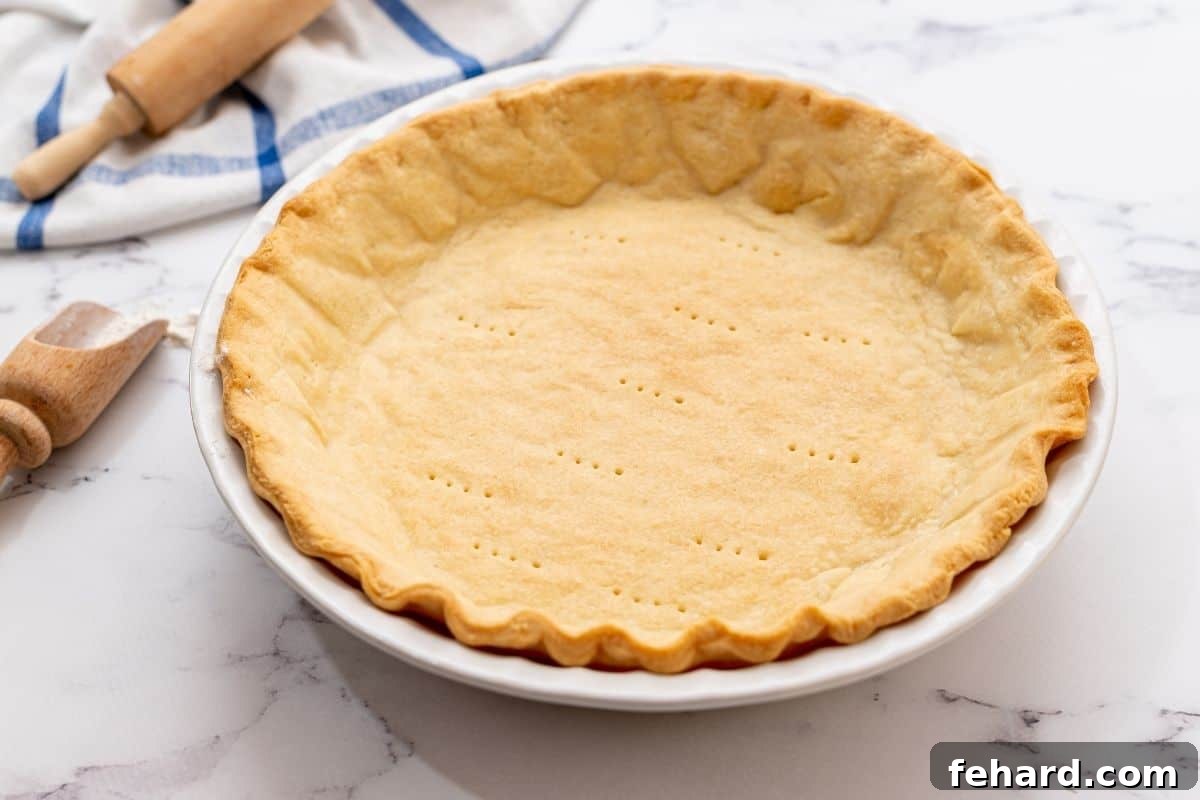
- Remove Weights and Dock the Crust. After 15 minutes, carefully remove the pie plate from the oven. Gently lift the corners of the parchment paper or foil to remove the pie weights. Discard the parchment/foil (if using dried beans, remember they absorb moisture and won’t soften enough to cook for consumption; label them “pie weights” and store them for future blind baking use). Using a fork, lightly prick the bottom of the empty pie crust several times. This process, known as “docking,” allows trapped steam to escape, preventing large bubbles from forming and ensuring an even, flat bake.
- Second Bake for Desired Doneness. Return the docked pie crust to the oven. Continue baking for an additional 8-10 minutes for a partially baked crust (this is ideal for pies that will be baked again with a wet filling, like quiches or certain fruit pies). Alternatively, bake for 15-18 more minutes for a fully baked, golden-brown crust (perfect for no-bake fillings, cold pies, or dishes that only require a quick reheat). Throughout this second bake, keep a close eye on the crust’s edges; if they begin to brown too quickly, loosely cover them with strips of aluminum foil or a dedicated pie crust shield to prevent burning while the rest of the crust finishes baking. Once baked, remove from oven and allow to cool completely.
∗ Essential Pro Tips and Troubleshooting for Pie Crust Success ∗
Beyond the core recipe, these additional pointers will help you troubleshoot common issues, manage your baking workflow, and ensure your homemade all-butter pie crust turns out beautifully, every single time.
- The Absolute Golden Rule: Chill, Chill, Chill. We cannot stress this enough. Skipping or significantly shortening the specified chilling times is the most common reason for pie crust problems such as excessive shrinking, a tough texture, or lack of flakiness. The cold keeps the butter solid, creating those essential steam pockets, and allows the gluten to relax, which is vital for the dough to hold its shape and achieve that perfectly light, tender texture.
- Only Need One Pie Crust? Batch Bake and Freeze the Rest! This versatile recipe is designed to yield enough dough for two standard 9-inch pie crusts. If your current baking project only calls for one, simply wrap the second disk of dough tightly in several layers of plastic wrap, then place it into a large, freezer-safe bag. It can be stored efficiently in the freezer for up to 3 months, making future pie-baking sessions much faster and more convenient. Remember to thaw it completely in the refrigerator before its next use.
- Preventing Burnt Edges. It’s a common occurrence for pie crust edges to brown more quickly than the center of the pie, especially during longer baking times. If you notice your edges are getting too dark or risk burning, simply remove the pie from the oven and carefully cover the edges with a dedicated pie crust shield. Alternatively, you can loosely crimp strips of aluminum foil around the perimeter of the pie crust. This protects the vulnerable edges while the rest of the crust (or pie filling) continues to bake to perfection.
- Smart Use of Pie Weights. If you choose to use dried beans or rice as pie weights for blind baking, remember a crucial detail: once baked, they will have absorbed moisture and become extremely hard, unsuitable for cooking or consumption. Therefore, it’s wise to label them clearly as “pie weights” and store them separately in an airtight container specifically for future blind baking needs. They are reusable many times over!
- No Food Processor? No Problem! Hand-Mix for a Classic Approach. Don’t own a food processor? You can still achieve a fantastic, flaky pie crust using traditional hand methods. In a large mixing bowl, thoroughly whisk together the flour and salt. Add the very cold, grated or ½-inch cubed butter, tossing to coat each piece with flour. Then, use a sturdy fork or a dedicated pastry cutter to cut the butter into the flour mixture until it resembles coarse crumbs, with pea-sized bits of butter distributed evenly throughout. Gradually pour in 2 tablespoons of ice water at a time, stirring gently with a rubber spatula after each addition, until the dough just begins to come together. Be careful not to add too much water or overmix the dough. Turn the dough out onto a lightly floured workspace, gently form it into a cohesive ball, divide it in half, and flatten each half into two 1-inch thick disks. Wrap tightly and refrigerate as directed.
- Make Pie Dough in Advance for Effortless Baking. Homemade pie dough is an ideal candidate for advance preparation, making your baking day much smoother. Once you’ve formed the dough disks, wrap them tightly in several layers of plastic wrap to prevent air exposure. These wrapped disks can be stored in the refrigerator for up to 5 days. For longer storage, place the plastic-wrapped disks into a freezer-safe bag and store them in the freezer for up to 3 months. To use frozen dough, simply thaw it completely in the refrigerator overnight. Always perform a final chill after rolling out and shaping the thawed dough into your pie pan, ensuring it’s firm and cold before baking.
Delightful Recipes Using This Flaky All-Butter Pie Crust
This incredibly versatile and robust all-butter pie crust provides the perfect foundation for an expansive array of sweet and savory dishes. Its tender flakiness and rich buttery flavor will elevate any pie, making it a standout. Here are some of our favorite recipes where this homemade crust truly shines:
- Homemade Pumpkin Pie – A quintessential holiday dessert, greatly enhanced by a buttery, tender, and perfectly crisp crust.
- Dutch Apple Pie – This crust offers the ideal sturdy yet flaky complement to a sweet, crumbly topping and warm, spiced apple filling.
- Cherry Crumb Pie – Provides a robust yet delicate base that beautifully holds the juicy, tart cherry filling and crumbly topping.
- Quiche Lorraine – Absolutely essential for creating this savory, custard-filled classic, guaranteeing a firm, non-soggy bottom that holds up to the rich filling.
- Classic Quiche – A foundational and versatile crust, perfect for any quiche variation you can imagine, ensuring a professional-quality result.
We sincerely hope you enjoyed mastering this comprehensive recipe for Homemade All-Butter Flaky Pie Crust! If you tried it and loved the results, we would be incredibly grateful if you would leave a review below and share your experience. Your valuable feedback helps us refine our recipes, inspires other home bakers, and helps our community grow!
Homemade All-Butter Flaky Pie Crust
Print Recipe
Recipe Video
For a visual step-by-step guide, please refer to the detailed recipe video often available on the original blog post.
Ingredients
- 1 cup unsalted butter, (2 sticks, very cold, grated or ½-inch cubed)
- 2½ cups all-purpose flour, spooned and leveled (313 grams)
- 1 teaspoon kosher salt
- 6-10 tablespoons ice water, divided (ensure it’s truly ice-cold)
Instructions
- Place the bowl for your food processor, the plastic dough blade, your measured flour, and your pie dish in the refrigerator to chill thoroughly for at least 30 minutes.
- Using a box grater, grate 1 cup of unsalted butter directly from the freezer. Alternatively, cube the very cold butter into ½-inch pieces. Place the grated/cubed butter back into the freezer for 15-20 minutes.
- Remove the chilled food processor bowl, dough blade, and flour from the refrigerator. Assemble the food processor with the dough blade. Place the 2½ cups all-purpose flour and 1 teaspoon kosher salt in the food processor and pulse a couple of times to combine.
- Add the frozen grated butter to the food processor. Pulse 2-3 times until it resembles coarse crumbs, or the butter is evenly distributed through the flour in pea-sized pieces. Do not over-process.
- Through the opening, drizzle in 2 tablespoons of ice water and pulse once. If needed, add additional ice water 1 tablespoon at a time, pulsing after each addition, until the dough comes together easily and begins to form large clumps. The dough should feel moist and a little sticky, but not overly wet. For most, 6-10 tablespoons of ice water are typically needed. Stop immediately once the dough forms.
- Using floured hands, turn the dough out onto a lightly floured workspace. Press the dough together until evenly combined (avoid kneading) and form it into a disk. Cut in half and then flatten each disk to about 1-inch thickness. Wrap each disc tightly in plastic wrap and refrigerate for at least 2 hours (and up to 5 days) before shaping the crust.
- Remove the dough from the refrigerator a few minutes before rolling to make it easier to work with. Lightly flour your work surface and rolling pin. Roll out the disk of dough from the center moving outward in all directions until the dough is even and the diameter of the circle is about 12 inches (a couple of inches larger than your 9-inch pie pan).
- Let the dough rest for a couple of minutes, then very carefully transfer the pie crust to the chilled pie pan. Gently press the dough onto the sides of the pie plate and then fold under the overhanging crust so that the edge is thick and even.
- To flute the edges of the pie crust, use your knuckle from one finger to indent the pie crust, and then two fingers from your other hand to pinch the crust, forming the fluted edge.
- Place the prepared pie crust into the refrigerator for at least 1 hour before using it for your pie recipe. Be sure to bake the crust on a baking stone or a metal baking sheet to help distribute heat evenly and prevent your pie plate from cracking.
To Pre-Bake/Blind Bake Pie Crust:
- Position an oven rack in the lower-middle portion of your oven and preheat to 375℉ (190℃).
- Remove the chilled pie plate from the refrigerator. Line the pie shell with parchment paper or foil, pressing it into the crust and folding over the edges so that the entire crust is covered as best as possible. Fill to the top of the foil/parchment with pie weights or dried beans. Place the pie plate on a metal baking sheet or preheated baking stone.
- Place the pie crust into the preheated oven and bake for 15 minutes.
- After 15 minutes, remove the pie crust from the oven and carefully remove the parchment paper and pie weights by lifting up the corners of the parchment paper. Use a fork to dock the bottom of the empty pie crust several times.
- Return to the oven, and bake for 8-10 more minutes for a partially baked crust OR for 15-18 more minutes for a fully baked crust. If you notice your edges are browning too quickly, use a pie crust shield or cover them with foil.
- If using for a no-bake pie, chill the crust completely before adding the filling.
Recommended Equipment
- Food Processor (highly recommended for ease and speed)
- Rolling Pin
- 9-inch Pie Pan
- Box Grater (for grating butter)
- Pie Weights (or dried beans/rice)
- Pie Shield (optional, for protecting crust edges)
Notes for Perfect Pie Crust
Storage: Homemade Pie Crust Dough is excellent for advance preparation. Once formed into disks and tightly wrapped in plastic wrap, it can be stored in the refrigerator for up to 5 days without any loss of quality. For longer storage, see our detailed freezing instructions below.
Freezing Instructions: To freeze the pie crust dough, wrap each disk securely in several layers of plastic wrap, ensuring no air can reach the dough. Then, place the wrapped disks into a large, freezer-safe storage bag or an airtight container. The pie dough will maintain its excellent quality in the freezer for up to 3 months. When you’re ready to use frozen dough, transfer it to the refrigerator to thaw completely; this typically takes anywhere from 24-36 hours. Once the dough is thawed and you’ve rolled it out and shaped it into your pie pan, remember to perform a final chill for at least 1 hour before baking to ensure optimal flakiness and prevent shrinkage.
For Truly Ice-Cold Water: To guarantee your water is as cold as possible, fill a glass with approximately ½ cup of water and add several ice cubes. Allow it to sit for a few minutes so the water can thoroughly chill. When measuring, scoop out the water directly from the glass, being careful to leave the ice cubes behind. This ensures the lowest possible temperature for your dough, which is crucial for a flaky crust.
The Non-Negotiable Chill: We emphasize this throughout the recipe because it is paramount to success. Chilling the pie dough for at least 2 hours after forming the disks, and then again for a minimum of 1 hour after rolling out and shaping it into the pie pan, is an absolutely critical step. Do not skip or shorten these chilling periods! This time allows the gluten to relax, making the dough easier to roll and significantly reducing the risk of it shrinking drastically in the oven. It also ensures the butter remains perfectly solid, which is the undeniable secret to achieving those glorious, tender, and flaky layers.
Fluted Edges: A Matter of Preference: While beautifully fluted edges add a classic and elegant touch to your homemade pie, they are entirely optional. If you are pressed for time, or if the fluting technique feels overwhelming, simply ensure your crust is evenly thick around the edges and proceed with the recipe. The taste and exceptional flakiness of your pie will still be outstanding, regardless of the decorative edge.
To Make Without a Food Processor: The Hand-Mix Method: If you don’t own a food processor, you can still achieve a beautiful, flaky crust by hand. In a large mixing bowl, thoroughly whisk together the all-purpose flour and kosher salt until well combined. Add the very cold, grated or ½-inch cubed butter and toss lightly to coat each piece of butter with flour. Using a sturdy fork or a dedicated pastry cutter, work the butter into the flour mixture until all the flour is coated and the mixture resembles coarse crumbs, with pea-sized bits of butter distributed evenly throughout. Gradually pour in 2 tablespoons of the ice water at a time, stirring gently with a rubber spatula after each addition, until the dough just begins to come together. Be careful not to add too much water and absolutely avoid overmixing the dough. Turn the dough out onto a lightly floured workspace, gently form it into a cohesive ball (again, no kneading!), then divide the dough in half and flatten each portion into two 1-inch thick disks. Wrap tightly in plastic wrap and refrigerate as directed in the main instructions.
Recipe Yield: This recipe is specifically formulated to produce the equivalent of two standard 9-inch pie crusts, perfect for a double-crust pie or two single-crust pies.
Nutrition values are estimates and are based on ⅛ of one 9-inch pie crust. These figures are automatically calculated and should be used as an approximation, as they can vary based on specific ingredient brands and preparation methods.
Nutrition Information
Calories: 173kcal
Carbohydrates: 15g
Protein: 2g
Fat: 12g
Saturated Fat: 7g
Trans Fat: 1g
Cholesterol: 31mg
Sodium: 148mg
Potassium: 24mg
Fiber: 1g
Sugar: 1g
Vitamin A: 355IU
Calcium: 7mg
Iron: 1mg
Nutrition information is automatically calculated and should only be used as an approximation. It is based on 1/8th of one 9-inch pie crust.