
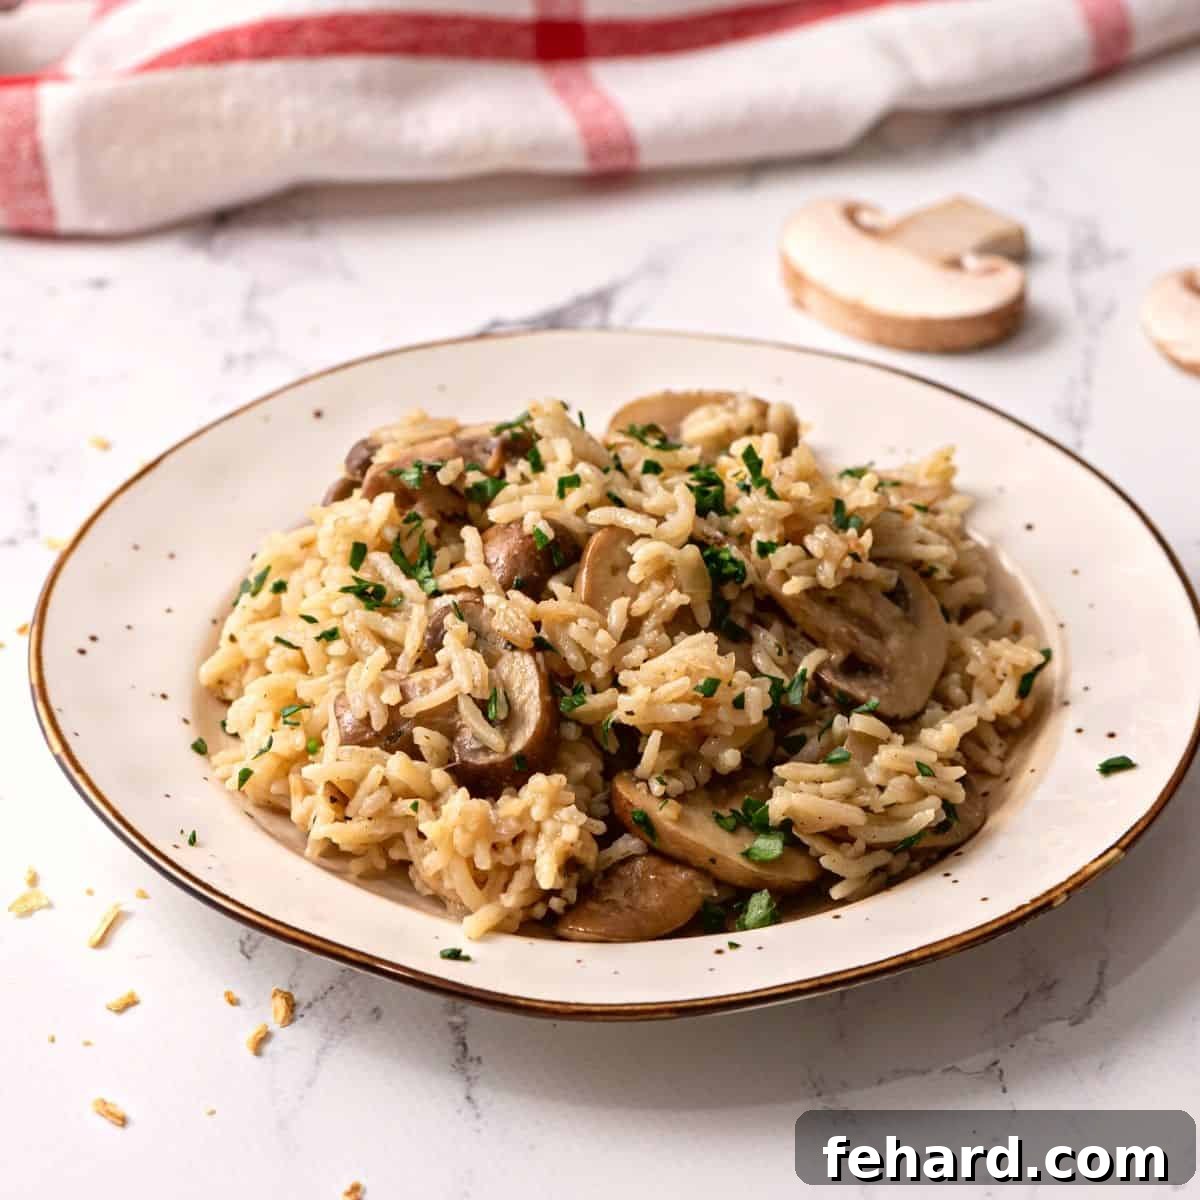
When searching for a side dish that’s both deeply flavorful and remarkably easy to prepare, this recipe for Homemade Rice Pilaf is your perfect solution. Far from being just plain rice, this dish elevates everyday ingredients into a culinary delight. Crafted with carefully toasted rice, deeply earthy mushrooms, and a proprietary blend of homemade spices, this Mushroom Rice Pilaf recipe delivers a consistently buttery, delightfully nutty, and intensely delicious experience that will impress everyone at your table.
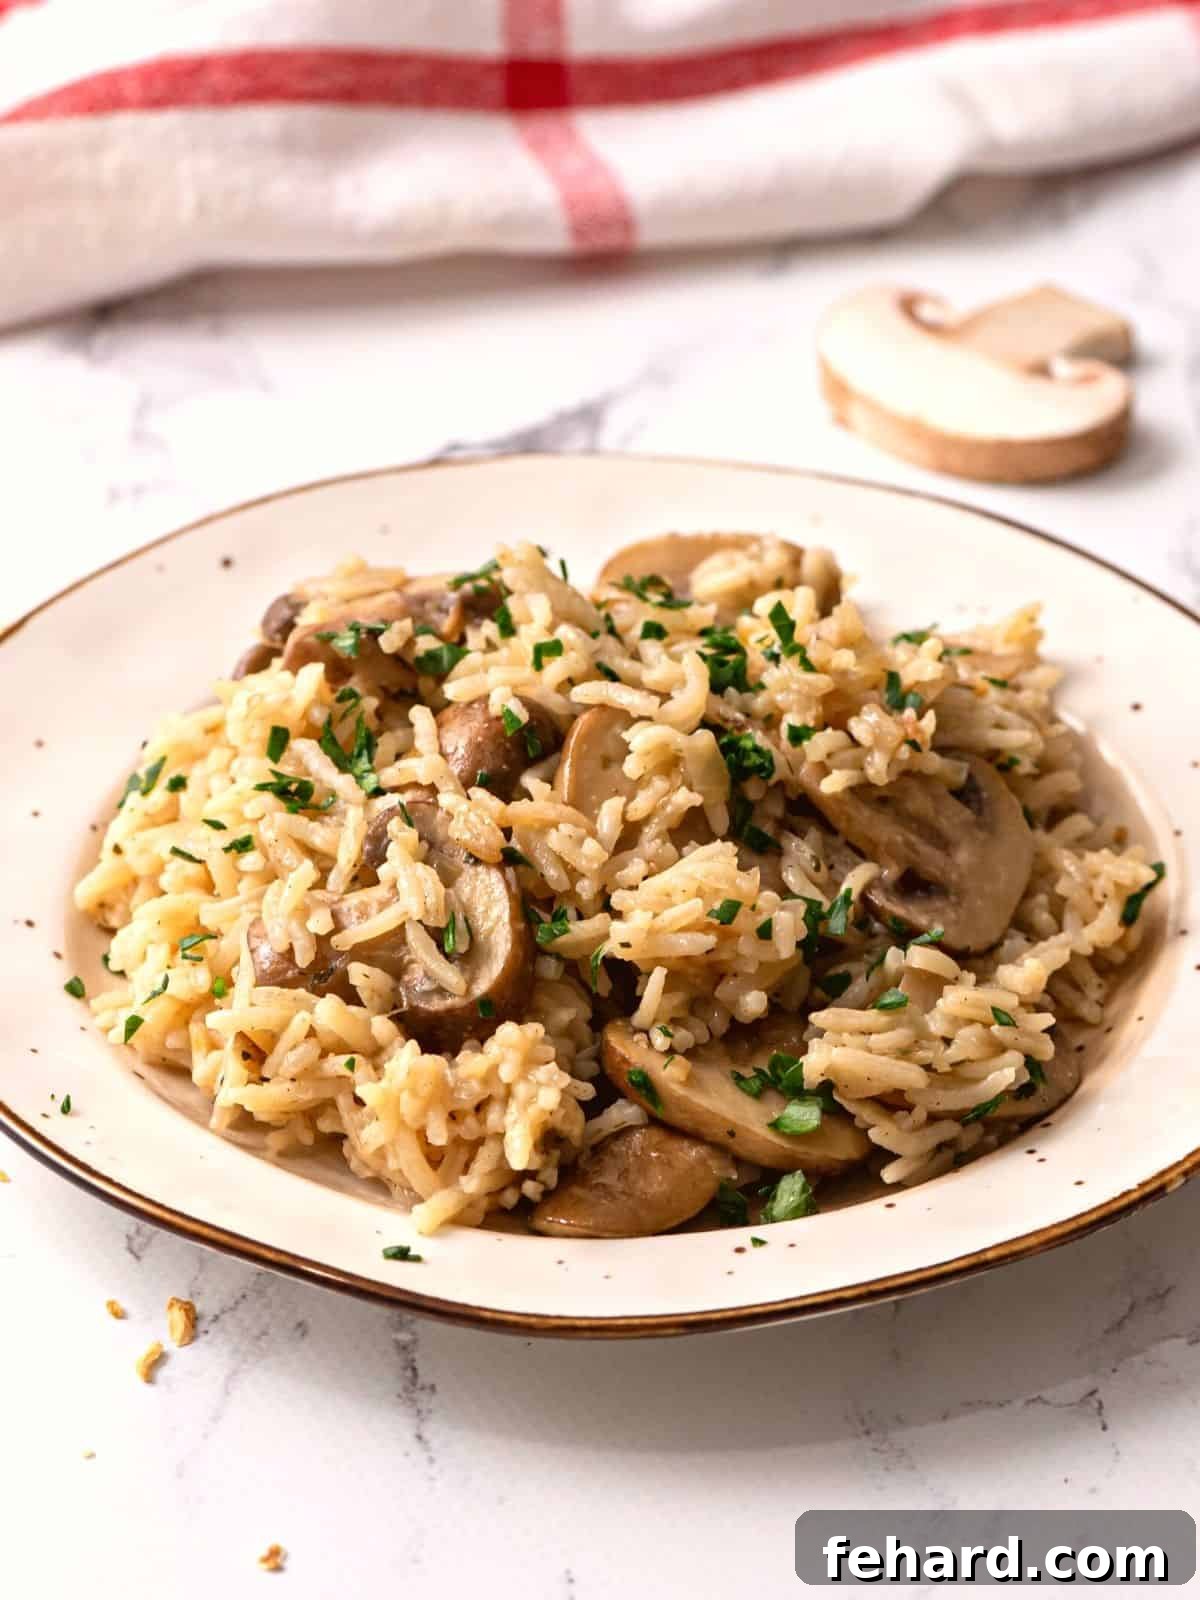
Mushroom Rice Pilaf: Effortless Elegance on Your Plate

In my childhood home, my mother’s rice pilaf was affectionately dubbed “fancy rice.” And while its rich taste and elegant presentation might suggest complexity, let me assure you, this recipe is anything but complicated! It’s a testament to how a few simple, intentional steps can transform humble rice into a truly memorable side dish, much like how orzo pasta can be dressed up for a special occasion. This recipe proves that gourmet flavor doesn’t require hours in the kitchen.
- An Impressively Easy Side Dish: This buttery, savory, and nutty rice pilaf tastes undeniably fancy and is perfectly suited for special meals, holiday gatherings, or whenever you want to elevate your dinner. Despite its gourmet appeal, the preparation is surprisingly straightforward, making it an ideal choice for busy weeknights too.
- Crafted with Wholesome Ingredients: Forget the mystery ingredients and artificial flavors found in store-bought boxed mixes or pre-packaged seasonings. Our recipe champions fresh, simple ingredients and a custom blend of everyday spices. This ensures a dish brimming with authentic flavor, made with components you know and trust, proving that superior taste doesn’t need expensive or obscure items.
- Unbelievably Versatile Pairing: The deep, earthy notes from the mushrooms, combined with the savory spices, make this rice pilaf an extraordinarily versatile companion for almost any entrée. It harmonizes beautifully with robust beef dishes, succulent pork, tender chicken, and delicate seafood. We find it to be an exceptional match for perfectly seared Ribeye Steaks, a classic, juicy London Broil, or an elegant Balsamic Pork Tenderloin, transforming any meal into a more sophisticated dining experience.
Happy cooking, and enjoy the delightful flavors this recipe brings to your table! xo Kristen
Recipe Navigation & Quick Links
- The Ultimate Homemade Rice Pilaf Recipe Card
- Understanding Your Ingredients: Tips & Choices
- Step-by-Step Guide: How to Make Perfect Rice Pilaf
- Expert Tips for Fluffy Pilaf Perfection
- Creative Modifications & Flavorful Variations
- Storage & Reheating for Best Results
- Inspiring Serving Suggestions & Pairings
- Frequently Asked Questions (FAQ)
Essential Ingredients for an Exceptional Rice Pilaf
Crafting a truly flavorful and perfectly textured rice pilaf begins with selecting the right ingredients and understanding their roles. Below, we’ve outlined the key components and offered tips to help you make the best choices for your homemade pilaf. You’ll find the complete list of ingredients, including specific quantities, within the detailed recipe card at the very end of this article.
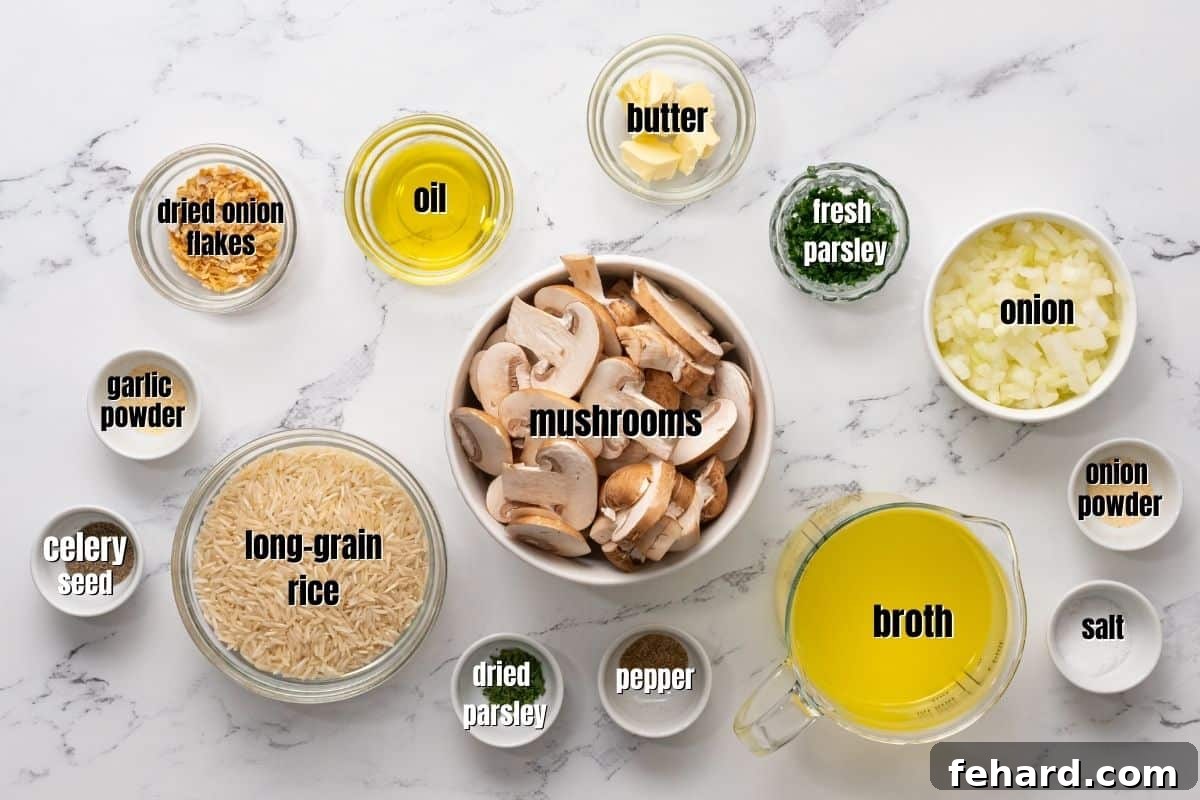
- Rice Selection: The foundation of any pilaf, your choice of rice significantly impacts the final texture. Long-grain white rice or basmati rice are the gold standards for rice pilaf. Their slender grains cook up fluffy and separate, perfectly absorbing the rich flavors of the broth and spices without becoming sticky. If you opt for long-grain brown rice for its nutritional benefits, please note that the cooking time will need to be increased, and you may require a slight adjustment in liquid.
- Butter + Olive Oil Duo: This combination is crucial for both flavor and function. The butter imparts an incredibly rich, luxurious, and nutty depth to the pilaf as the rice toasts, contributing to its signature “buttery” profile. The olive oil, with its higher smoke point, acts as a guardian, preventing the butter from burning during the initial sautéing stages. For optimal flavor, always use unsalted butter and a good quality extra virgin olive oil.
- Mushrooms: These earthy gems are central to the “mushroom” aspect of this pilaf, adding a fantastic umami punch and a tender texture. Baby Bella (cremini), shiitake, or common button mushrooms all perform beautifully in this recipe. Slice them thinly to ensure even cooking and thorough distribution throughout the rice. For those with dietary restrictions or simply a preference, the mushrooms can be easily omitted without compromising the core deliciousness of the pilaf, creating a classic plain rice pilaf instead.
- Onion: A fundamental aromatic that builds a robust flavor base. Sweet onions, white onions, and yellow onions are all excellent choices, offering a balanced sweetness and pungent aroma when caramelized. We generally advise against using red onion, as its more assertive flavor and vibrant purple hue can slightly alter the desired taste and appearance of the final dish.
- Homemade Seasoning Blend: This carefully crafted blend of spices is the secret behind the rice pilaf’s exceptional flavor profile. It’s designed to replicate the savory goodness of traditional dried onion soup mix, but without the common additives, excessive sodium, and artificial ingredients found in many packaged versions. Our blend typically includes dried onion flakes, onion powder, garlic powder, celery seed, black pepper, dried parsley, and kosher salt. This harmonious mix infuses every grain of rice with profound flavor, making each bite incredibly satisfying. For details on crafting your own, consider exploring our guide on DIY Dry Onion Soup Mix.
- Broth: The liquid medium in which the rice cooks is paramount for flavor infusion. Your choice of broth will subtly influence the pilaf’s character:
- Vegetable Broth: The ideal choice for a vegetarian-friendly option, providing a lighter, cleaner flavor that allows the nuances of the mushrooms and spices to shine through.
- Chicken Stock/Broth: A widely popular choice that adds a gentle, savory depth without overshadowing the other ingredients.
- Beef Broth: For a truly rich, deeply savory, and robust rice pilaf, beef broth is an excellent selection, particularly when pairing the dish with red meats.
Always opt for low-sodium versions of your chosen broth to maintain precise control over the overall saltiness of your finished dish, allowing you to adjust to taste.
Step-by-Step Guide to Crafting the Perfect Rice Pilaf
Creating this aromatic and flavorful rice pilaf is a simple process, especially when you follow these helpful tips designed to ensure perfect results every time. For exact ingredient quantities and more detailed instructions, please refer to the comprehensive recipe card located at the bottom of this post.
- Sauté the Aromatics: Begin by heating the olive oil and butter in a medium saucepan over medium heat. Allow the butter to melt completely and become shimmering. Once melted, add the minced yellow onion to the pan. Sauté the onions for approximately 3-4 minutes, stirring occasionally, until they have softened and become translucent, releasing their sweet aroma. Next, introduce the thinly sliced mushrooms to the pan, joining the onions. Continue to sauté this mixture for an additional 2-3 minutes, stirring as needed, until the mushrooms are fragrant, tender, and beautifully browned. This initial step is vital for building a rich flavor base for your pilaf.
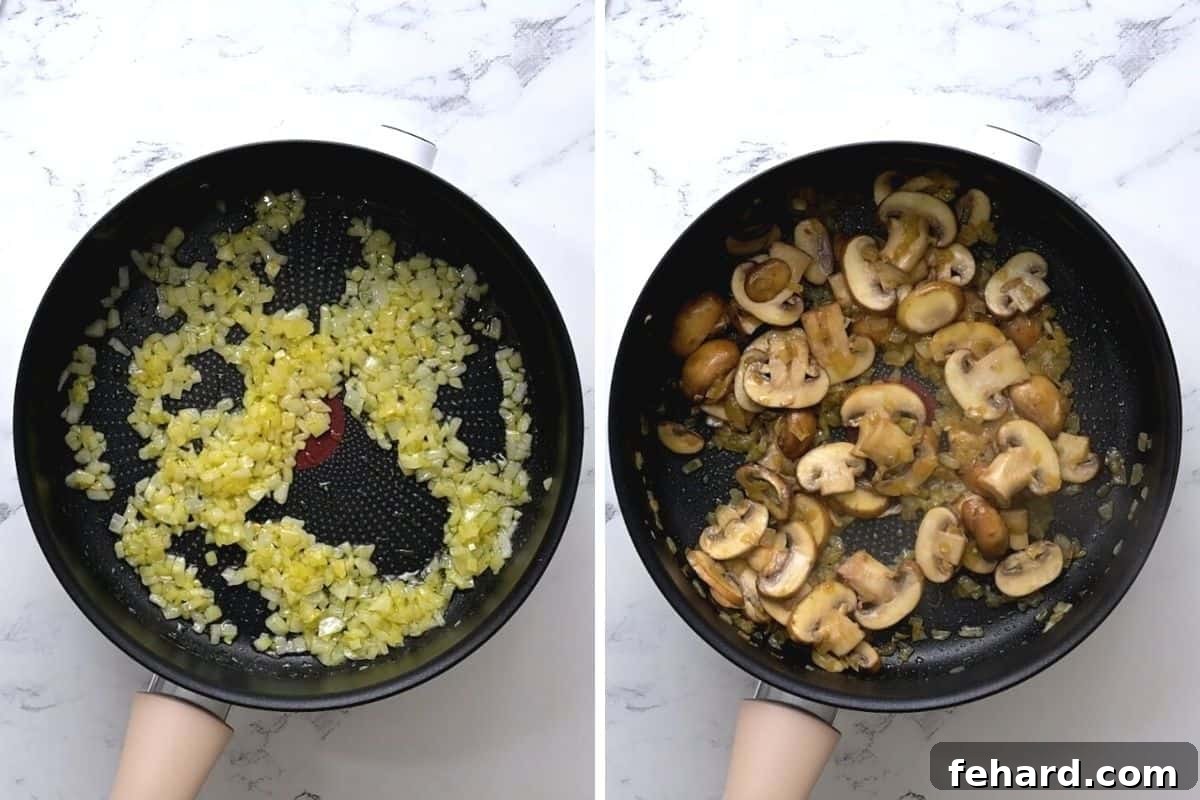
- Rinse and Toast the Rice with Spices: While your onions and mushrooms are developing their flavors, prepare your rice. Place 1 cup of long-grain white rice in a fine-mesh strainer and rinse it thoroughly under cold running water. This crucial step removes excess surface starch, which helps prevent the rice grains from clumping together and ensures a beautifully fluffy pilaf. After rinsing, shake the strainer vigorously to remove as much excess water as possible. Once the vegetables are perfectly sautéed, add the rinsed and drained rice along with the entire homemade seasoning blend (dried onion flakes, onion powder, garlic powder, celery seed, pepper, dried parsley, and kosher salt) into the saucepan. Toss all the ingredients together thoroughly, ensuring that each grain of rice is coated with the aromatic buttery seasoning mixture. Continue to toast this mixture for just 1-2 minutes, stirring constantly to prevent any burning. This short toasting period is a game-changer, as it significantly deepens the nutty flavor of the rice and allows the dried herbs to “bloom,” releasing their full aromatic essences into the dish.
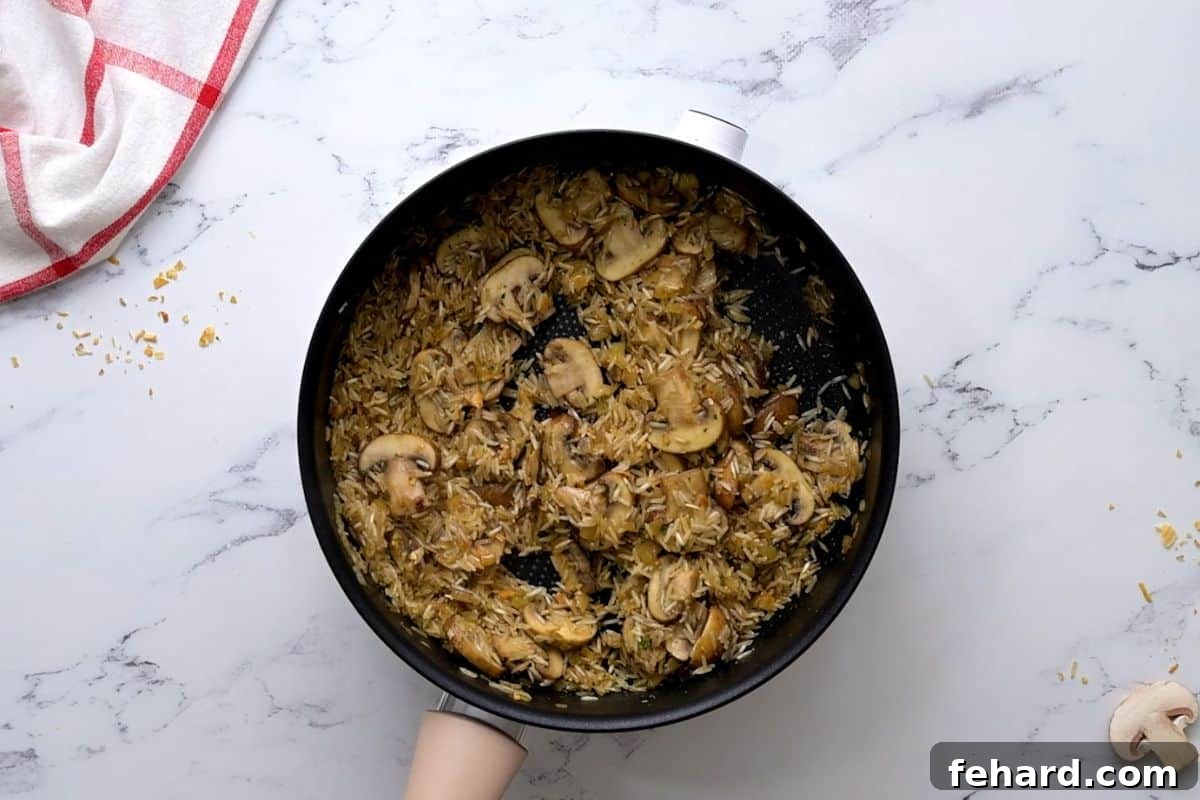
- Simmer to Perfection with Broth: Once the onions, mushrooms, and seasoned rice have been perfectly toasted, the remaining cooking process is as straightforward as preparing basic rice. Carefully pour in 2 cups of your chosen low-sodium broth (beef, chicken, or vegetable) into the saucepan. Increase the heat to bring the mixture to a gentle boil. As soon as you observe small, delicate bubbles forming along the sides of the pan, immediately reduce the heat to medium-low. Cover the saucepan tightly with a well-fitting lid, trapping the steam inside, and allow it to simmer undisturbed for 12-15 minutes. This gentle, consistent heat ensures even cooking, allowing the rice to absorb all the flavorful liquid thoroughly without scorching. The rice should be tender, and all the liquid fully absorbed at this point.
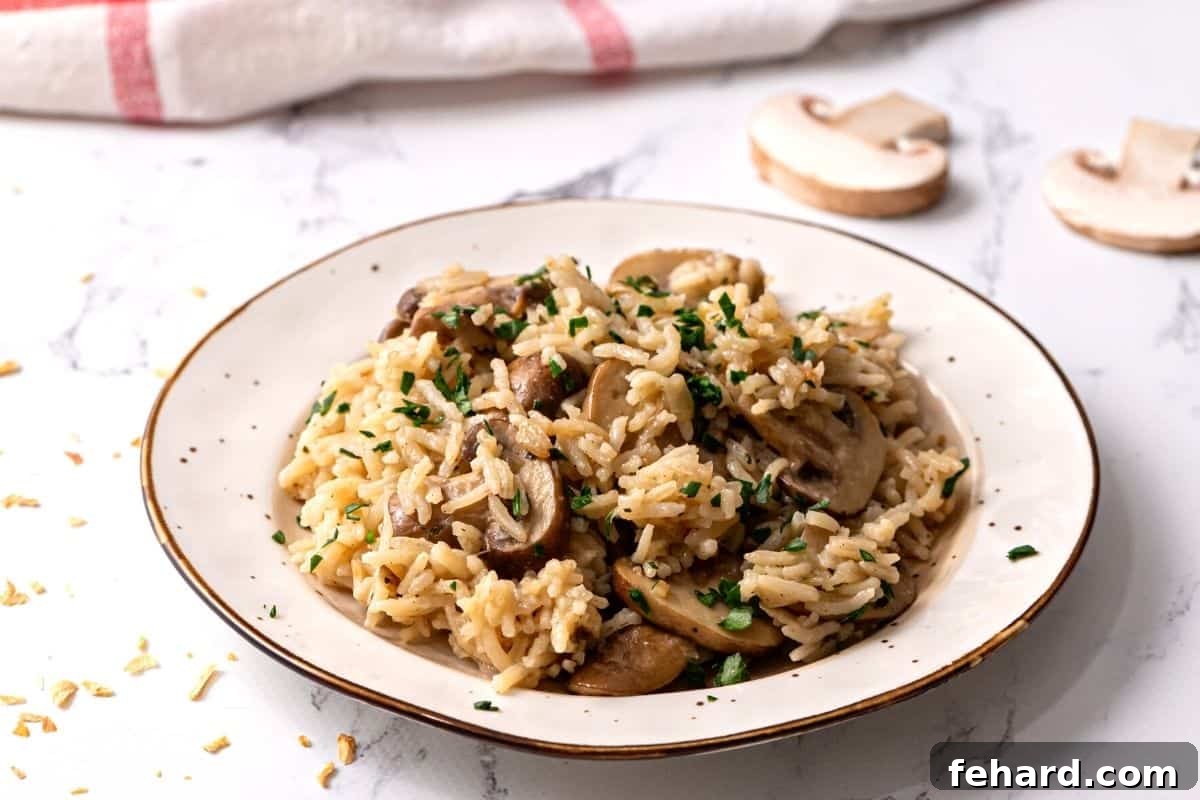
- Fluff and Serve with Care: Once the cooking time is complete and the rice is tender, remove the pan from the heat. This is a critical step for achieving a perfect texture: resist the urge to stir the rice with a spoon! Instead, gently fluff the rice with a fork. Aggressive stirring can break down the delicate rice grains, leading to an undesirable mushy texture. Fluffing gently separates the individual grains, ensuring your pilaf is light, airy, and perfectly cooked. Give the rice a taste and adjust the seasoning to your preference, adding a little more salt or pepper if needed. Serve your exquisite rice pilaf immediately, garnished with a sprinkle of fresh minced parsley or chives for a vibrant burst of color and freshness.
Expert Tips for Unbeatable Rice Pilaf Perfection
Achieving consistently fluffy, flavorful, and perfectly cooked rice pilaf is easy with a few key techniques. Follow these expert tips to ensure your homemade pilaf turns out spectacular every single time:
- Rinse Your Rice Thoroughly: This step is non-negotiable for fluffy pilaf! Rinsing long-grain rice under cold running water removes excess surface starch. This starch is what causes rice grains to stick together and become mushy. Keep rinsing until the water runs clear, then drain extremely well.
- The Art of Toasting: Don’t underestimate the power of toasting. Sautéing the raw rice grains in butter and olive oil (with the aromatics and spices) for 1-2 minutes before adding liquid is fundamental. This process, known as “toasting,” slightly cooks the exterior of each grain, seals in the flavor, and develops a richer, nuttier aroma and taste. It also helps the grains remain separate and fluffy after cooking.
- Maintain a Gentle Simmer: Once you add the broth and bring it to a boil, immediately reduce the heat to medium-low. A rolling boil will cause the liquid to evaporate too quickly, leading to unevenly cooked rice (burned on the bottom, raw on top). A gentle simmer ensures steady, even absorption of liquid, resulting in perfectly tender grains.
- Resist the Urge to Peek: Once you’ve covered the pot and reduced the heat, leave the lid on! Lifting the lid allows precious steam to escape, which is vital for the rice to cook properly. Every peek extends the cooking time and compromises the final texture. Trust the process for the recommended 12-15 minutes.
- Fluff, Don’t Stir: After the rice has finished cooking, remove the pot from the heat and let it rest for a few minutes before lifting the lid. Then, gently fluff the rice with a fork. Avoid using a spoon or aggressively stirring, as this can break the delicate rice grains, releasing starch and leading to a mushy texture. Fluffing separates the grains, creating that desirable light and airy consistency.
- Season to Taste at the End: Different brands of broth vary in sodium content, and personal preferences for saltiness differ. Always taste your pilaf after it’s cooked and fluffed. This is the perfect moment to adjust the seasoning, adding a touch more salt or pepper if needed. Freshly minced herbs added at this stage also enhance the flavor and appearance.
Creative Modifications & Flavorful Variations for Your Pilaf
This Homemade Rice Pilaf recipe is beautifully adaptable, making it easy to customize according to your preferences, seasonal ingredients, or dietary needs. Don’t hesitate to get creative with these suggestions to make it uniquely yours:
- Incorporate More Vegetables: To add extra color, texture, and a nutritional boost, finely diced carrots are a fantastic addition. Sauté them along with the onion in the initial step; their natural sweetness complements the earthy mushrooms beautifully. Alternatively, for a vibrant touch, stir in a handful of frozen peas or corn kernels immediately after the rice has finished cooking. Simply place the lid back on the pan and let the residual heat warm them through for about 5 minutes until defrosted and tender.
- Boost the Umami & Depth: For an even deeper, more complex savory profile, consider stirring in 1-2 teaspoons of Worcestershire sauce along with the broth. This adds a subtle tang and a rich umami layer that elevates the overall flavor without being overpowering. A dash of soy sauce (low-sodium) can also achieve a similar depth.
- Dairy-Free Adaptation: If you’re catering to dietary restrictions or simply prefer a dairy-free option, this recipe is incredibly easy to adjust. Replace the unsalted butter with an equal amount of your preferred non-dairy butter substitute, or simply use an additional tablespoon of high-quality olive oil. The pilaf will remain wonderfully flavorful and satisfying.
- Spice It Up: For those who appreciate a touch of heat, a pinch of red pepper flakes toasted with the rice and spices can add a pleasant warmth. A small amount of smoked paprika (½ teaspoon) can also introduce a delightful smoky undertone, especially when served with grilled meats.
- Introduce Fresh Herbs: While dried parsley is included in the seasoning blend, a generous sprinkle of fresh, finely minced herbs at the end can brighten and elevate the dish significantly. Beyond fresh parsley, consider fresh thyme, chives, or even a hint of dill, stirred in just before fluffing the rice for maximum aromatic impact.
- Embrace Your Instant Pot: If you’re a fan of quick and precise cooking, or simply short on time, this recipe can be perfectly adapted for a pressure cooker. For detailed instructions and foolproof results, be sure to check out our dedicated recipe for Instant Pot Rice Pilaf.
- Make it Gluten-Free: This recipe is naturally gluten-free, provided you use gluten-free broth and ensure any added ingredients (like Worcestershire sauce) are certified gluten-free. Always double-check labels if strict adherence is necessary.
Storage & Reheating for Fresh and Flavorful Pilaf
Proper storage is key to preserving the delicious taste and texture of your homemade rice pilaf, ensuring you can enjoy leftovers that are just as good as the freshly made batch. Here’s how to store and reheat your pilaf effectively:
- Refrigeration: Allow the rice pilaf to cool slightly to room temperature within one hour of cooking. Promptly transfer the cooled pilaf into an airtight container. Stored correctly, it will remain fresh and flavorful in the refrigerator for up to 3 days. This makes it an excellent option for meal prepping throughout the week.
- Freezing for Longer Storage: If you have a larger batch or wish to enjoy your pilaf far in the future, it freezes beautifully. Ensure the rice has cooled completely before packaging. Divide the leftover pilaf into freezer-safe containers or heavy-duty freezer bags, pressing out as much air as possible to prevent freezer burn. It can be stored in the freezer for up to 3 months. For best results, thaw frozen pilaf overnight in the refrigerator before reheating.
- Optimal Reheating Method: To restore your pilaf to its moist and fluffy glory, transfer the desired portion into a microwave-safe container. To prevent it from drying out, add a small splash of additional broth or water (approximately 1-2 tablespoons per cup of rice). Crucially, cover the container with a moistened paper towel; this creates steam during reheating, which rehydrates the rice grains and keeps them tender. Heat in the microwave in 60-second intervals, stirring gently between each interval, until the pilaf is thoroughly warmed through. Alternatively, you can reheat it in a covered saucepan over low heat with a splash of liquid, stirring occasionally until heated.
Inspiring Serving Suggestions & Perfect Pairings
This versatile, earthy, and buttery rice pilaf, whether made with or without mushrooms, is an exceptional side dish that effortlessly complements an endless array of main courses. Its rich and savory flavor profile makes it a superb partner to everything from hearty meats to delicate seafood, elevating any meal. Explore these fantastic recipes and meal ideas to pair with your homemade pilaf:
- Delightful with Pork: The savory and slightly sweet notes of the pilaf are a natural match for pork dishes. Try serving it alongside tender, perfectly cooked Air Fryer Pork Chops or juicy, flavorful Instant Pot Pork Chops for a comforting and satisfying meal.
- Exquisite with Chicken: For a lighter yet profoundly satisfying meal, this pilaf is an ideal partner for various chicken preparations. It makes a superb accompaniment to zesty Lemon Pepper Chicken or perfectly tender and healthy Air Fryer Chicken Breast.
- Harmonious with Seafood: Don’t overlook the wonderful synergy between this pilaf and fresh seafood. The delicate flavors of fish are beautifully enhanced by the richness and seasoning of the pilaf. Consider pairing it with flaky, easy-to-make Easy Baked Cod or elegantly roasted Baked Salmon for a gourmet touch.
- Versatile with Vegetarian Mains: For a delicious vegetarian meal, this robust pilaf can stand alone or serve as an excellent complement. Pair it with roasted seasonal vegetables, a hearty lentil or bean stew, grilled halloumi cheese, or a flavorful vegetable tagine for a complete and satisfying plant-based dinner.
- As a Hearty Base for Bowls: Transform your pilaf into a complete meal by using it as a flavorful base for grain bowls. Top it with grilled chicken, chickpeas, roasted root vegetables, a dollop of Greek yogurt, and a drizzle of a vibrant herb sauce for a healthy, customizable, and incredibly delicious weeknight dinner.
Frequently Asked Questions (FAQ) About Homemade Rice Pilaf
- What is the main difference between regular rice and rice pilaf?
- The fundamental difference lies in the cooking technique and flavor development. Regular rice is typically simply boiled or steamed in water until tender. Rice pilaf, on the other hand, involves sautéing the dry rice grains (often with aromatics like onions or garlic) in butter or oil until lightly toasted before simmering them in a seasoned broth. This toasting step gives pilaf its characteristic nutty flavor and ensures a fluffier texture with distinct, separated grains, unlike the potentially stickier texture of plain boiled rice.
- Can I prepare this rice pilaf without mushrooms?
- Absolutely! While the earthy mushrooms add a wonderful depth and texture to this specific recipe, they can be easily omitted without compromising the core flavors of the pilaf. The dish will still be incredibly delicious, thanks to the toasted rice, rich butter, and homemade spice blend. If you prefer, you can also substitute the mushrooms with other finely diced vegetables such as carrots, bell peppers, or zucchini, added during the initial sautéing step.
- Which type of rice is best suited for making pilaf?
- For the best results in rice pilaf, long-grain white rice or basmati rice are highly recommended. Their slender grains remain separate and cook up fluffy, absorbing the rich flavors of the broth and spices beautifully. Short-grain or medium-grain rice varieties tend to have a higher starch content, which can result in a stickier, less desirable texture for a classic pilaf.
- Why did my rice pilaf turn out mushy?
- Mushy rice pilaf is a common issue often attributed to one of two factors: either an excessive amount of liquid was used during cooking, or the rice was stirred too frequently (or too vigorously) during or immediately after the simmering process. Thoroughly rinsing the rice before cooking helps eliminate excess surface starch. Additionally, resisting the urge to stir once the rice is simmering and then gently fluffing it with a fork after it’s cooked will help maintain the integrity of the individual grains, ensuring a light and fluffy texture.
- Is it possible to make this rice pilaf in advance?
- Yes, rice pilaf is an excellent dish for meal prepping and can be made ahead of time. Once prepared, allow it to cool completely to room temperature (within an hour), then transfer it to an airtight container. It can be stored safely in the refrigerator for up to 3 days. When ready to reheat, simply add a splash of broth or water to help restore its moisture, as detailed in our comprehensive storage and reheating instructions.
Did you enjoy making this recipe?
If you loved this homemade rice pilaf, we would be thrilled if you could leave a comment with a 5-star review at the bottom of this post. Your feedback is invaluable and helps other home cooks discover this delicious dish!
Easy Homemade Mushroom Rice Pilaf
Kristen Chidsey
6
10 mins
20 mins
30 mins
Rate This Recipe
Print Recipe
Made with perfectly toasted rice, savory sautéed mushrooms, and a custom blend of homemade spices, this Easy Homemade Mushroom Rice Pilaf recipe is deliciously buttery, wonderfully nutty, and incredibly satisfying. It’s the ultimate side dish that brings gourmet flair to any meal with minimal effort.
Ingredients
- 1 tablespoon extra virgin olive oil
- 1 tablespoon unsalted butter
- ½ cup yellow onion, minced
- 8 oz baby Bella or button mushrooms, thinly sliced
- 1 cup long-grain white rice, rinsed and well-drained
- 2 tablespoons dried onion flakes
- ½ teaspoon onion powder
- ½ teaspoon garlic powder
- ¼ teaspoon celery seed
- ¼ teaspoon black pepper
- ½ teaspoon dried parsley
- ½ teaspoon kosher salt (adjust to taste)
- 2 cups low-sodium broth (beef, chicken, or vegetable)
- Minced fresh parsley or chives, for serving (optional garnish)
Instructions
- In a medium saucepan, heat 1 tablespoon extra virgin olive oil and 1 tablespoon unsalted butter over medium heat until the butter is just melted. Add ½ cup minced yellow onion and sauté until the onion begins to soften and become translucent, about 3-4 minutes.
- Add 8 oz thinly sliced baby Bella or button mushrooms and continue to sauté until they are fragrant and lightly browned, about 2-3 minutes.
- Add 1 cup rinsed and well-drained long-grain white rice along with 2 tablespoons dried onion flakes, ½ teaspoon onion powder, ½ teaspoon garlic powder, ¼ teaspoon celery seed, ¼ teaspoon pepper, ½ teaspoon dried parsley, and ½ teaspoon kosher salt. Toss all ingredients together thoroughly to coat the rice with the butter and seasonings. Toast this mixture for 1-2 minutes, stirring constantly, to develop a rich, nutty flavor.
- Pour in 2 cups low-sodium broth (beef, chicken, or vegetable). Bring the mixture to a gentle boil over medium heat.
- Once small bubbles begin to form along the sides of the pan, cover the pan tightly with a lid. Reduce the heat to medium-low and simmer undisturbed for 12-15 minutes, or until the rice is cooked through and all the liquid has been absorbed.
- Remove the pan from the heat. Carefully remove the lid and gently fluff the rice with a fork. Do NOT stir the rice vigorously, as this can break the grains and make the pilaf mushy. Taste and adjust seasoning (salt and pepper) if needed.
- Serve immediately, garnished with fresh minced parsley or chopped green onions, if desired, for a final touch of freshness and color.
Notes
Important Tip for Perfect Pilaf: Do not be tempted to increase the heat when cooking rice pilaf. High heat can lead to burnt butter, overcooked mushrooms, and unevenly cooked rice (burned on the bottom, undercooked on top). A gentle, consistent simmer is the key to perfectly cooked, fluffy pilaf.
Rice Choice: For the best texture and flavor, always opt for long-grain white rice or basmati rice in this recipe. If you decide to use long-grain brown rice, be aware that its cooking time will be longer (typically an additional 10-15 minutes), and you may need a slight adjustment in the amount of liquid used.
Broth Options: You have flexibility in your choice of broth to tailor the flavor profile of your pilaf. Use vegetable broth to keep the recipe vegetarian-friendly and light, chicken broth for a balanced savory taste, or beef broth for a richer, more robust pilaf that pairs exceptionally well with red meats.
Storage: To store leftover rice pilaf, allow it to cool slightly, then transfer it to an airtight container. It can be safely refrigerated for up to 3 days, making it a convenient make-ahead side dish.
Freezing: For longer storage, once the rice pilaf has cooled completely, transfer it to a freezer-safe container or bag. It can be frozen for up to 3 months. For best results, thaw it in the refrigerator overnight before reheating.
Reheating: To reheat, place the desired portion of pilaf into a heat-safe container. Add a splash of additional broth or water (about 1-2 tablespoons per cup of rice) to help rehydrate it. Cover the container with a moistened paper towel to create steam, which prevents the rice from drying out. Heat in the microwave in 60-second intervals, stirring gently until warmed through. The added liquid and moist towel are essential for maintaining a tender, flavorful texture.
Nutrition Information (Approximate Per Serving)
The following nutrition information is an estimate calculated for 6 servings. Values may vary based on specific ingredients, brand choices, and preparation methods.
- Calories: 184 kcal
- Carbohydrates: 30g
- Protein: 5g
- Fat: 5g
- Saturated Fat: 2g
- Polyunsaturated Fat: 1g
- Monounsaturated Fat: 2g
- Trans Fat: 1g
- Cholesterol: 5mg
- Sodium: 223mg
- Potassium: 326mg
- Fiber: 1g
- Sugar: 2g
- Vitamin A: 59IU
- Vitamin C: 2mg
- Calcium: 28mg
- Iron: 1mg
Please note: Nutrition information is automatically calculated and should be used as an approximation. It is not intended to be a substitute for professional nutritional advice or medical consultation.
Loved making this delicious recipe?
We invite you to share your culinary creations on social media! Mention @amindfullmom or use the hashtag #amindfullmom. We can’t wait to see your amazing pilaf!