
Experiencing Instant Pot frustrations? Is your pressure cooker failing to reach pressure, displaying a dreaded “burn notice,” or simply not cooking as expected? Don’t let common Instant Pot issues derail your culinary plans. This comprehensive guide will help you understand, solve, and prevent these problems, ensuring you get back to confident, successful pressure cooking in no time.
There’s nothing more disheartening than eagerly preparing to cook a beloved Instant Pot recipe, only for your appliance to falter. Whether you’re aiming for perfectly tender Instant Pot Baked Potatoes, a succulent Instant Pot Pot Roast, or any other delicious dish, encountering repeated burn notices or a pot that refuses to pressurize can be incredibly frustrating. The good news is that most of these common Instant Pot problems have straightforward solutions.
If you’ve found yourself frustrated because your Instant Pot isn’t coming to pressure, rest assured, you are far from alone. This is one of the most frequently reported issues among Instant Pot users, from beginners to seasoned cooks.
Similarly, if you’ve recently received a burn warning while following an Instant Pot recipe, know that this is also a very common occurrence. Many users encounter this message and feel discouraged, but it’s often an indicator of a simple fix rather than a faulty appliance.
Once users have mastered the basic operation of their Instant Pot, they frequently encounter specific hurdles when trying to execute complex recipes. Issues like the Instant Pot failing to reach pressure or triggering a burn notice are typically the next set of challenges that arise. Understanding the root causes of these problems is the first step toward resolving them and becoming a true Instant Pot pro.
Diagnosing Common Instant Pot Malfunctions
When your Instant Pot seems to be “not working,” the primary symptoms usually involve either a failure to come to pressure or the appearance of a burn notice. Let’s delve into how to identify these issues and what they signify about your pressure cooker’s operation.
Instant Pot Not Coming to Pressure
Nine times out of ten, the fundamental reason your Instant Pot won’t come to pressure is an improper seal. The pressure cooker relies on a completely airtight environment to build the necessary steam and heat for pressure cooking. Without this seal, steam escapes, and pressure cannot build. Fortunately, this issue is often easily identified and remedied.
There are two key indicators to help you determine if your Instant Pot is struggling to seal properly:
- **Extended Preheating Time:** Depending on the recipe’s volume and temperature of ingredients, it can take anywhere from 5 to 30 minutes for your Instant Pot to build enough pressure and for the cook time to begin. If this expected time frame has passed, and you notice that the silver float valve on the lid has not popped up, and the digital display has not switched from “On” to the countdown timer, it’s a strong sign that your pressure cooker is not sealing. *Please note: For large quantities of frozen food or a very high volume of liquid, the preheating time can extend up to 45 minutes to fully reach pressure.*
- **Cook Time Starts, Float Valve Stays Down:** In some cases, the Instant Pot’s timer might mistakenly begin counting down, indicating that it believes it has reached pressure, but the float valve remains in the down position. This is a clear sign of a sealing failure. The float valve is a physical indicator of successful pressurization; if it’s not up, true pressure has not been achieved.
If either of these scenarios occurs, it’s essential to cancel the cooking cycle and investigate the possible causes before proceeding.
Understanding the Instant Pot Burn Notice
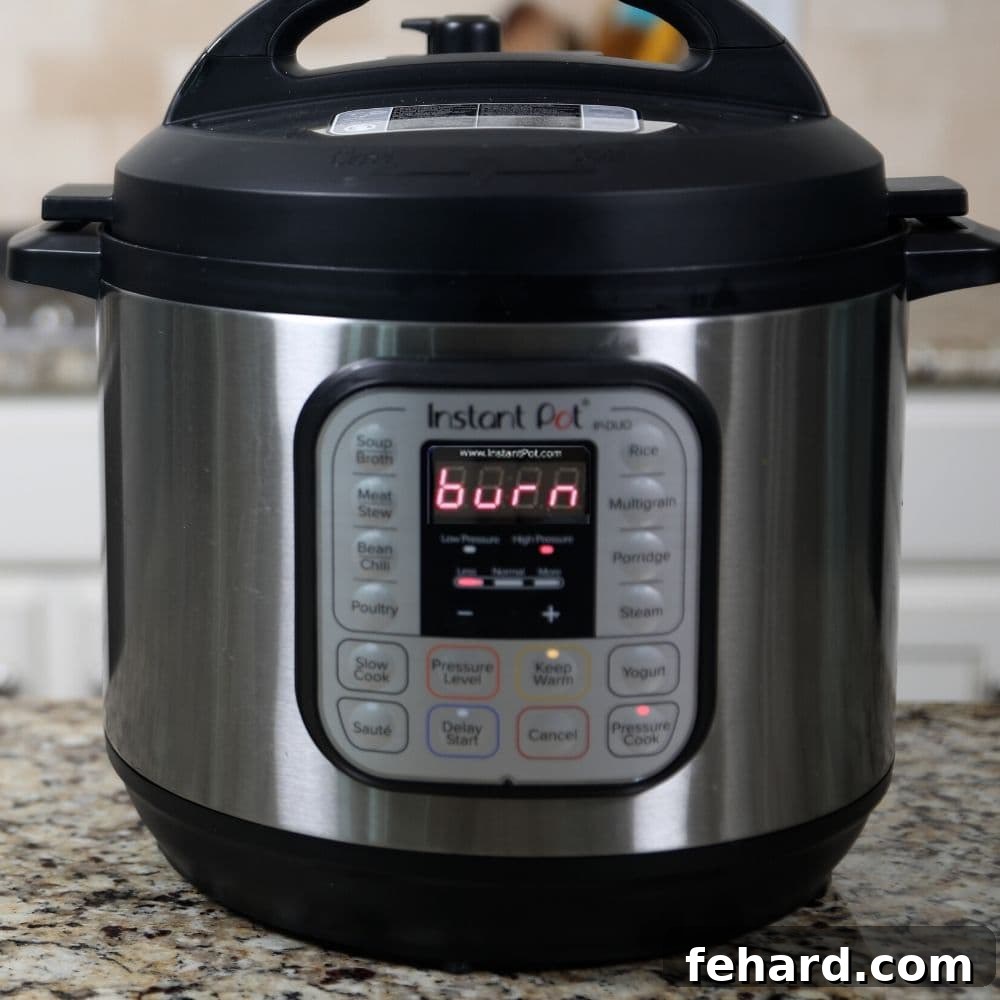
Another common and often alarming issue is the Instant Pot displaying a burn notice. This usually appears as “Burn” or “OvrHt” on the control panel, indicating that the inner pot has overheated, and there’s a detection of food potentially scorching at the bottom. This safety feature is designed to prevent food from burning and damage to the appliance.
Burn notices frequently occur while the Instant Pot is attempting to come to pressure. They are often triggered by a recipe not being followed precisely, particularly regarding liquid content or the layering of ingredients. When a burn notice appears, the Instant Pot automatically stops heating, requiring your attention to resolve the underlying issue.
Common Instant Pot Problems: Reasons and Solutions
Once you’ve identified that your Instant Pot isn’t performing as it should, the next critical step is to pinpoint the exact cause and implement the correct fix. Let’s explore the most frequent culprits behind Instant Pot sealing failures and burn notices, along with their effective solutions.
Insufficient Thin Liquid
The Instant Pot operates by creating steam from liquid to build pressure. Therefore, having an adequate amount of thin liquid is absolutely crucial, not only for the pot to reach pressure successfully but also to prevent a burn notice. Without enough liquid, the pot can’t generate the necessary steam, leading to either a failure to seal or an overheated inner pot.
The minimum liquid requirements vary by Instant Pot size:
- For a 3-quart Instant Pot, you need at least ¾ cup of thin liquid.
- For a 6-quart Instant Pot, ensure you have at least 1 cup of thin liquid.
- For an 8-quart Instant Pot, a minimum of 1-½ cups of thin liquid is required.
What constitutes “thin liquid”? This refers to liquids that easily vaporize and create steam without thickening or scorching. Examples include water, stock (chicken, beef, vegetable), or juice. It specifically does NOT include thicker substances like tomato sauce, barbecue sauce, condensed soups, or salsa, which behave differently under pressure and can impede proper function. Always ensure that the specified minimum amount of thin liquid is present in your recipe.
Vent Knob Position (Sealing vs. Venting)
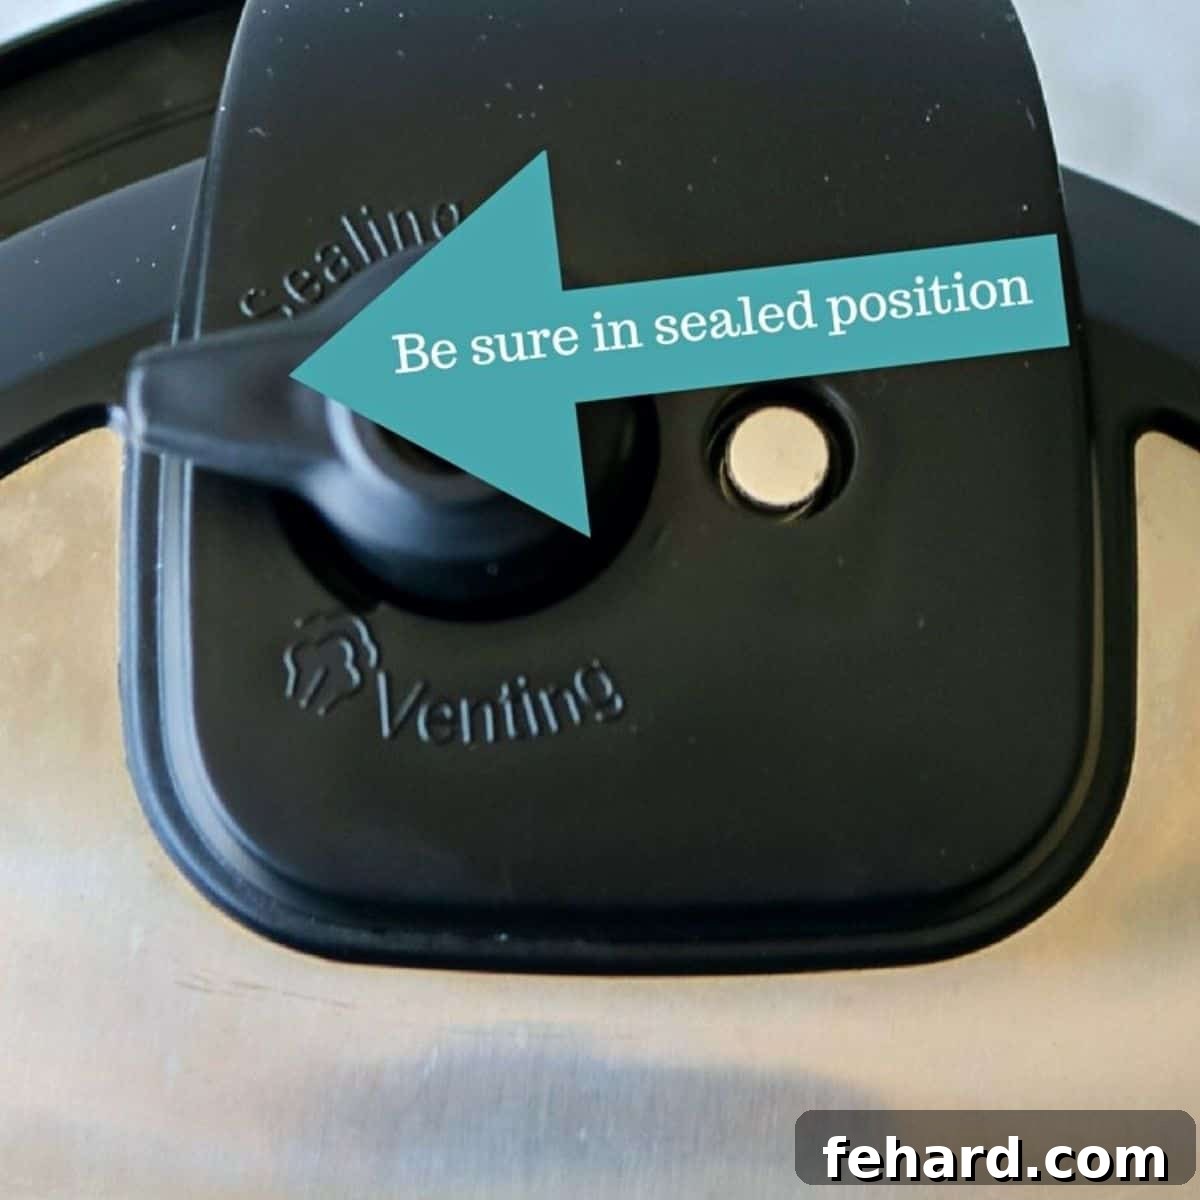
This is perhaps the simplest, yet most common, reason for an Instant Pot failing to pressurize. If your pressure release vent knob is inadvertently turned to the “Venting” position instead of the “Sealing” position, the Instant Pot will never seal. The steam generated from the thin liquid will simply escape through the vent, preventing pressure from building inside the cooker.
It’s an easy mistake that many users, including experienced ones, make. A misplaced vent knob can quickly ruin dinner plans or at least significantly delay them.
If you discover the vent knob is in the “Venting” position *immediately* after starting the cook time (within a minute or two), you may be able to carefully switch it to “Sealing” and allow the pot to continue. However, if more time has passed and steam has been escaping, it’s best to hit “Cancel” on your Instant Pot. Then, carefully open the Instant Pot – be cautious of any steam that might still release – check your liquid levels (as some may have evaporated), adjust the vent knob to “Sealing,” and restart the cooking cycle. Attempting to switch the knob after significant steam loss can lead to insufficient liquid or even a burn notice.
Problems with the Sealing Ring
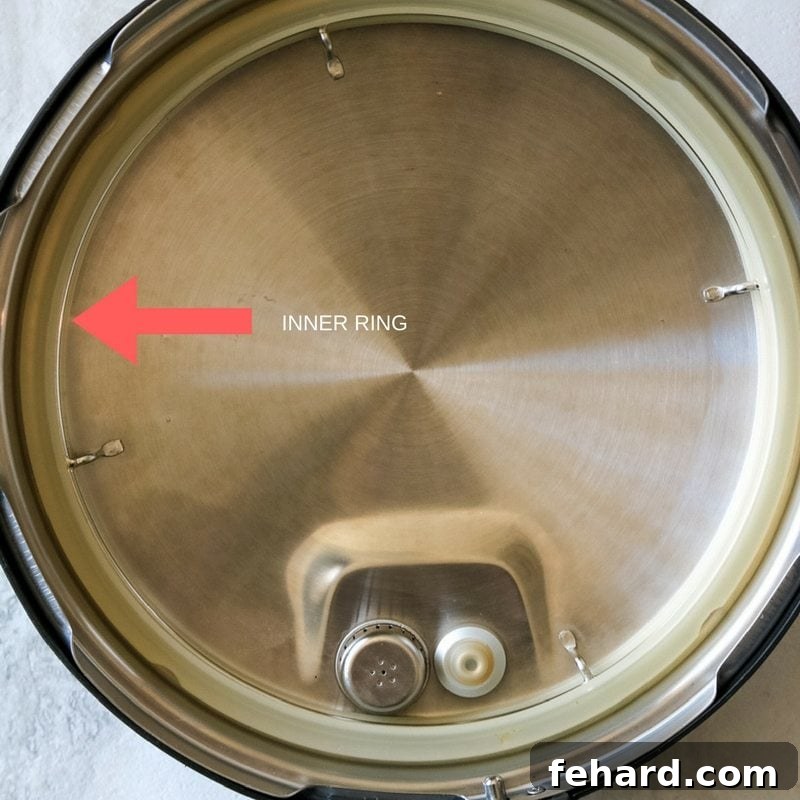
The silicone sealing ring is a critical component of your Instant Pot, forming an airtight seal between the lid and the inner pot. If this ring is not correctly seated, is damaged, or is unclean, the lid will not seal properly, preventing the Instant Pot from coming to pressure.
Whenever you observe your pressure cooker struggling to reach pressure, and you’ve confirmed the vent knob is in the correct “Sealing” position, your next step should always be to inspect the sealing ring thoroughly.
**Common Sealing Ring Issues and Solutions:**
- **Incorrect Placement:** Ensure the sealing ring is snugly fitted into the groove on the underside of the lid. If it’s twisted, stretched, or partially out of its track, it won’t form a proper seal. Remove it, clean it, and carefully reinsert it, ensuring it lies flat and evenly.
- **Expansion from Recent Use:** The silicone ring expands slightly with heat. If you’ve just used your Instant Pot for another recipe or performed a quick release to add ingredients, the ring may still be expanded. An expanded ring can prevent a new, tight seal. To fix this, you can try placing the sealing ring in the freezer for about 5 minutes to help it cool and return to its normal size. Alternatively, if you have a spare sealing ring (which is highly recommended for all Instant Pot owners), insert the cool, unused one.
- **Dirt or Food Debris:** A dirty sealing ring, even with minute food particles, can compromise the seal. Remove the ring, wash it thoroughly with warm, soapy water, and dry it completely before reinserting. Inspect for any lingering debris.
- **Tears or Damage:** Over time, sealing rings can wear out, crack, or tear. Inspect your ring for any visible damage. A damaged ring cannot create an airtight seal and must be replaced. It’s a good practice to replace your sealing ring every 6-12 months, or sooner if you notice a persistent issue or damage.
Always remember to double-check that there’s still enough thin liquid in the Instant Pot after any sealing ring adjustments, especially if steam has been escaping!
Food Burned or Stuck to the Bottom of the Inner Pot
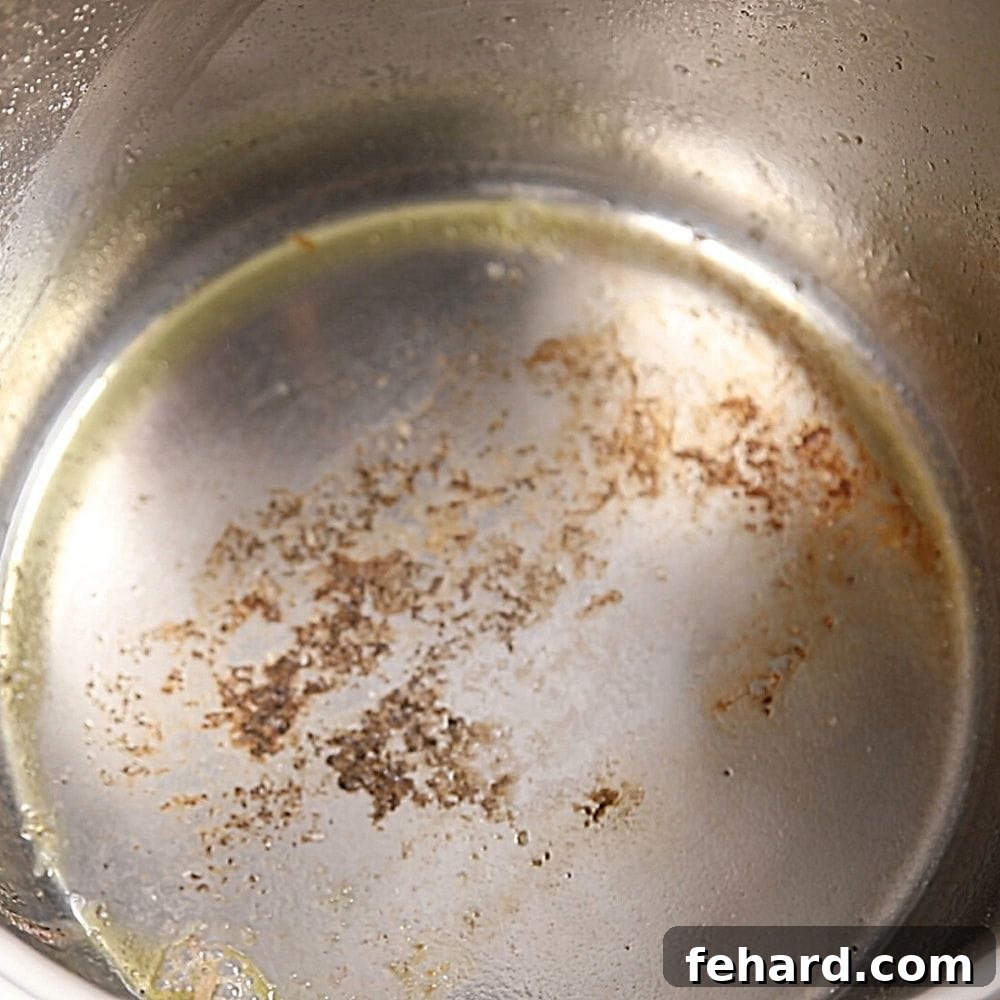
Beyond insufficient thin liquid, the most common reason for a burn notice is that food has scorched or is stuck to the bottom of the Instant Pot’s inner pot. The Instant Pot’s intelligent sensor detects localized high heat at the base, triggering the burn warning as a safety measure.
This issue is incredibly common, especially if you neglect to deglaze your inner pot after sautéing ingredients. For instance, when preparing hearty dishes like Instant Pot Chili or Instant Pot Beef Stew, meat and aromatics are often sautéed directly in the inner pot, leaving behind browned bits.
**Preventing and Resolving Burned Food Issues:**
- **Always Deglaze After Sautéing:** After using the sauté function, immediately hit “Cancel” to turn off the heat. If you’ve browned a large cut of meat (like for a pot roast), remove it to a separate plate. Pour in your specified thin liquid (broth, water, etc.) and use a wooden spoon or silicone spatula to vigorously scrape up all the browned bits stuck to the bottom of the inner pot. These bits, if left unstirred, can easily scorch and trigger the burn notice. Ensure the bottom is completely smooth before adding remaining ingredients.
- **Addressing an Active Burn Notice:** If you receive a burn notice during cooking, immediately hit “Cancel” and perform a quick release of any pressure (if the float valve has risen). Once the pressure is fully released and the float valve drops, carefully open the lid. Remove all contents from the inner pot, placing them into another bowl or pot. Thoroughly clean and dry the inner pot, ensuring no burned residue remains. If the burn was minor and you deglazed, you might be able to return the ingredients and add a bit more thin liquid before restarting. If the burn was severe, you may need to salvage what you can and adjust the recipe or start fresh.
Using Thick Sauces and Thickeners Prematurely
It is absolutely vital that you avoid adding thickeners like flour, cornstarch, or similar agents directly into your Instant Pot’s inner pot until *after* the pressure cooking cycle is complete. The reason is simple: these ingredients will thicken the thin liquid prematurely, hindering the Instant Pot’s ability to generate sufficient steam to come to pressure. Moreover, thick sauces can settle at the bottom and easily scorch, triggering an undesirable burn notice.
Recall how we emphasized that tomato-based products (like tomato paste, crushed tomatoes, or pasta sauce) do not count towards your required “thin liquid” quantity? This doesn’t mean they can’t be used in the Instant Pot at all. Instead, it means you must adjust your cooking technique. Never place these thick or tomato-based sauces directly on the bottom of the inner pot where they can easily burn. The best approach is to layer them: add your thin liquid first, then other ingredients, and finally, gently layer any thick sauces or tomato products on top. Do not stir them into the thin liquid until after the pressure cooking cycle is finished. If your recipe requires a thicker consistency, you can always add a cornstarch slurry or flour paste *after* the pressure cook cycle is done and then use the sauté function to thicken the sauce.
Incorporating Dairy Products
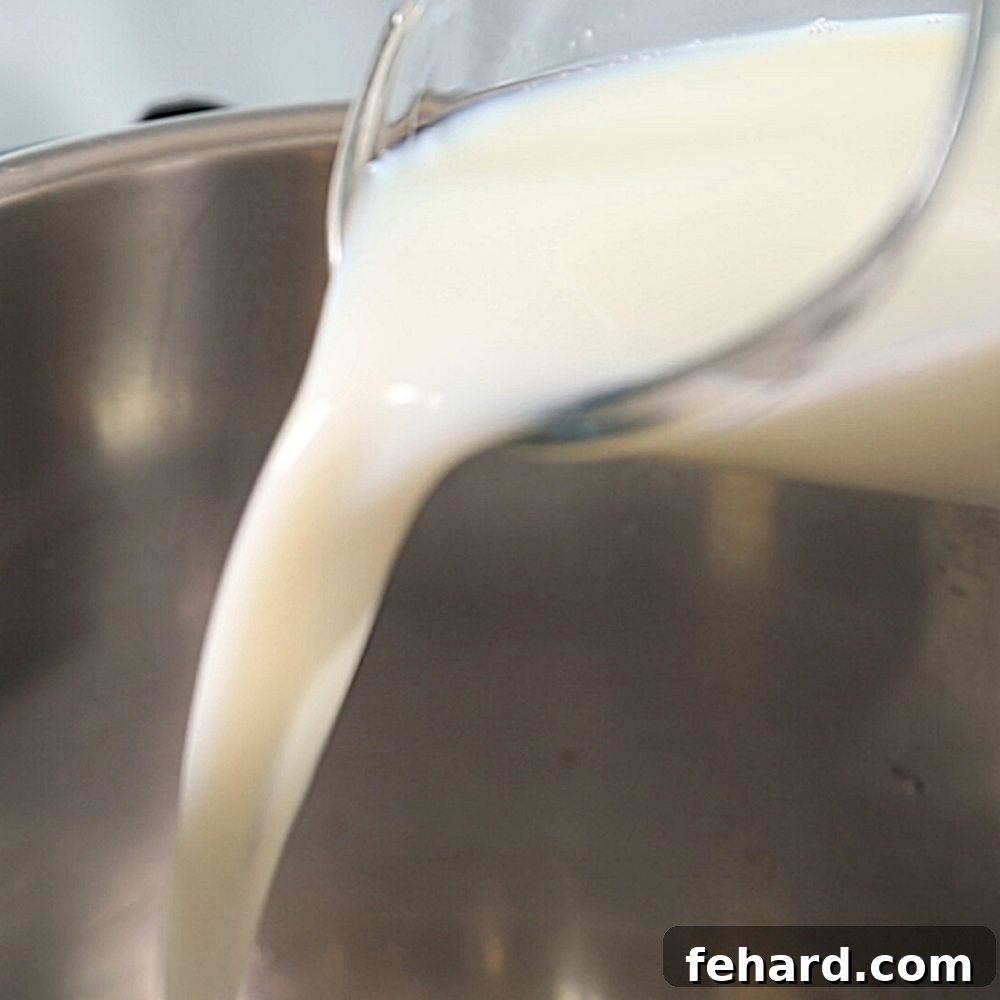
Think about cooking with milk or cream on a stovetop. Even a moment of inattention can result in scorched milk sticking stubbornly to the bottom of your pan. The same principle applies, even more intensely, within the high-heat environment of an Instant Pot. Adding dairy products like milk, cream, butter, or yogurt directly to the inner pot before or during pressure cooking will very likely result in a burn notice due to scorching. Dairy solids quickly separate and adhere to the heated base, triggering the sensor.
Unlike some other issues, this problem cannot be easily overcome by simply stirring or adding more liquid. Dairy requires a different approach for Instant Pot recipes. You have two primary options:
- **Pot-in-Pot (PIP) Method:** This is the safest and most recommended method for cooking with dairy in the Instant Pot. Place your dairy-containing ingredients in a separate, oven-safe bowl that fits inside your Instant Pot. Add water to the main Instant Pot liner (underneath the trivet holding your bowl) to create the steam for pressure. This indirect heating prevents direct contact with the heating element, minimizing scorching. Learn more about the pot-in-pot cooking method for diverse applications.
- **Post-Pressure Cooking Addition:** If your recipe allows, add dairy ingredients *after* the main pressure cooking cycle is complete. Use the sauté function on low, or simply the “Keep Warm” setting, to gently incorporate and heat the dairy without reaching scorching temperatures.
If neither of these methods is suitable for your recipe, it might be best to prepare the dish using a conventional oven or stovetop to avoid disappointment and a potential mess.
Specific Considerations for 8-Quart Instant Pots
While larger capacity is appealing, 8-quart Instant Pot models are notably more prone to overheating and displaying burn notices compared to their 3-quart and 6-quart counterparts. This is primarily because they operate with higher wattage and their sauté function can reach higher temperatures more rapidly, increasing the risk of scorching ingredients at the bottom of the larger inner pot.
To mitigate these tendencies when using an 8-quart model:
- **Adjust Sauté Heat:** When using the sauté function, always adjust the setting to “Medium” heat instead of the default “High” to provide better control and reduce the chance of rapid scorching.
- **Allow Cooling Time:** After completing any sautéing, it’s highly recommended to wait approximately 5 minutes after you turn the sauté function off. This allows the heating element and the inner pot to cool down slightly before you proceed with adding liquids and pressure cooking. This brief cooling period helps prevent the residual heat from immediately burning ingredients once the lid is sealed.
- **Increase Thin Liquid Slightly:** For particularly problematic recipes, you might consider adding an extra ¼ to ½ cup of thin liquid to an 8-quart pot, just to be safe, especially if the recipe was developed for a smaller unit.
Still Having Instant Pot Problems?
If you have diligently followed all the troubleshooting tips outlined above and your Instant Pot continues to experience issues – whether it’s persistently failing to come to pressure, repeatedly giving a burn notice, or exhibiting other unusual behavior – it may be time to consider professional assistance. At this point, the problem could be related to an internal component or a manufacturing defect rather than user error.
We recommend contacting Instant Pot Customer Service directly. They are equipped to provide specialized diagnostic support, offer further troubleshooting steps, or guide you through warranty claims and potential repairs or replacements. Be prepared to describe the problem in detail and mention all the steps you’ve already taken to resolve it, as this will help them assist you more efficiently.
Final Insight for Instant Pot Success
Cultivate a Relationship with Your Instant Pot
Ultimately, Instant Pots, much like people, possess their own unique characteristics and quirks. Some models or individual units may be a bit more temperamental or sensitive to certain conditions than others. If your specific pressure cooker seems particularly prone to overheating or triggering a burn notice, it’s wise to be extra cautious and diligently follow the preventative tips mentioned above, perhaps even adding a little extra thin liquid or cooling time. Conversely, if your Instant Pot proves to be consistently reliable and easy-going, you might find yourself with more leeway in your cooking approach. Learning the personality of your appliance through regular use and mindful observation is key to a harmonious and successful pressure cooking experience.
This post was originally published in 2017 to help users with initial Instant Pot adoption challenges. It was comprehensively updated in 2020 and further expanded in [Current Year – e.g., 2024] to include additional common issues and advanced troubleshooting insights that readers and our community have shared over the years, ensuring it remains the most current and helpful resource for Instant Pot users.