

Are you yearning for a truly satisfying, comforting, and nutrient-packed meal that perfectly balances heartiness with a light, wholesome feel? Look no further! This Instant Pot Sweet Potato Chili recipe is an absolute game-changer for anyone seeking a delicious, easy, and healthy vegetarian or vegan option. Featuring the natural sweetness of sweet potatoes, the robust goodness of black beans, and the protein power of quinoa, this chili is a symphony of flavors and textures, all brought together effortlessly in your Instant Pot.
Infused with bold and aromatic seasonings and overflowing with nutrient-dense sweet potatoes, this all-in-one Instant Pot dinner is not only remarkably low in fat but also bursts with incredible flavor, essential fiber, and plant-based protein. It’s designed to be so simple and quick that it can easily become a go-to recipe for any busy night of the week, proving that healthy eating doesn’t have to be complicated or time-consuming.

Why You’ll Adore This Instant Pot Sweet Potato Chili
This recipe isn’t just another chili; it’s a culinary experience tailored for modern, health-conscious cooks. You’ll find yourself falling in love with its simplicity and profound flavor for many reasons:
- Unbelievably Easy & Quick: Thanks to the magic of the Instant Pot, this chili delivers “cooked all day” flavor in a fraction of the time. Perfect for those busy weeknights when you crave homemade comfort without the lengthy cooking process.
- Packed with Nutrients: Sweet potatoes are a powerhouse of vitamins (especially A and C) and fiber. Combined with protein-rich black beans and quinoa, this meal is incredibly nourishing and satisfying, keeping you full and energized.
- Hearty & Flavorful: Despite being vegetarian and vegan-friendly, this chili is anything but bland. The carefully selected spices, chipotle in adobo, and fresh lime juice create a deep, smoky, and bright flavor profile that will tantalize your taste buds.
- Diet-Friendly: Naturally vegetarian, easily made vegan (just skip dairy toppings), and gluten-free, this chili caters to a variety of dietary needs and preferences without compromising on taste or texture.
- Versatile & Customizable: Easily adjust the spice level to your preference, swap out beans, or add different vegetables. It’s a flexible recipe that can adapt to your pantry and palate.
- Perfect for Meal Prep: This chili tastes even better the next day! It’s an excellent candidate for meal prepping, offering delicious and healthy lunches or dinners throughout the week. It also freezes beautifully.
Expert Tips for Crafting the Perfect Instant Pot Sweet Potato Chili
Inspired by my popular Black Bean Sweet Potato Chili recipe, this Instant Pot version is designed for maximum flavor with minimal effort. To ensure your vegetarian chili is so irresistible you’ll want to make it on repeat, pay close attention to these key pointers from Kristen’s kitchen:
- Build a Strong Flavor Foundation. The secret to a chili that tastes like it simmered all day is starting with a robust flavor base. Sautéing the onion, red bell pepper, and jalapeño before pressure cooking caramelizes their sugars and deepens their savory notes. This crucial step extracts maximum aroma and sweetness from your aromatics, creating a complexity that would otherwise be missing. Don’t rush this stage; those few minutes of sautéing make an immense difference.
- Always Rinse Your Quinoa. While it might seem like an extra, unnecessary step, rinsing quinoa is vital for the best taste. Quinoa has a natural coating called saponin, which can impart a bitter, soapy taste to your dish. A quick rinse under cold running water for 1-2 minutes effectively removes this coating, ensuring your chili has a clean, pleasant flavor. This small action truly makes all the difference in the final outcome.
- Master the Art of Smart Layering. In Instant Pot cooking, the order of ingredients matters significantly, especially to prevent the dreaded “burn notice.” Always layer your ingredients carefully: liquids and vegetables first, followed by beans and grains, and crucially, tomatoes last. And whatever you do, resist the urge to stir everything together before pressure cooking! Keeping the thicker, acidic ingredients like tomatoes on top helps distribute heat evenly and prevents them from scorching on the bottom of the pot.
- Don’t Skip the Fresh Lime Juice. This tiny addition at the very end is a game-changer. A generous squeeze of fresh lime juice brightens the entire chili, cutting through the richness and balancing the smoky sweetness of the sweet potatoes and chipotle. It awakens all the flavors, transforming the chili from merely good to absolutely “wow!” It’s a simple step that provides a burst of freshness and acidity, perfectly completing the dish.
How to Prepare This Irresistible Instant Pot Sweet Potato Chili
Whether you’re just learning the ropes of Instant Pot cooking or you’re a seasoned pressure cooker pro, this detailed section will guide you through each stage of the process. Follow these steps meticulously to ensure you achieve perfectly cooked, flavorful chili every single time, without encountering a single “burn notice” scare!
Step One: Sauté the Onions, Peppers, and Garlic
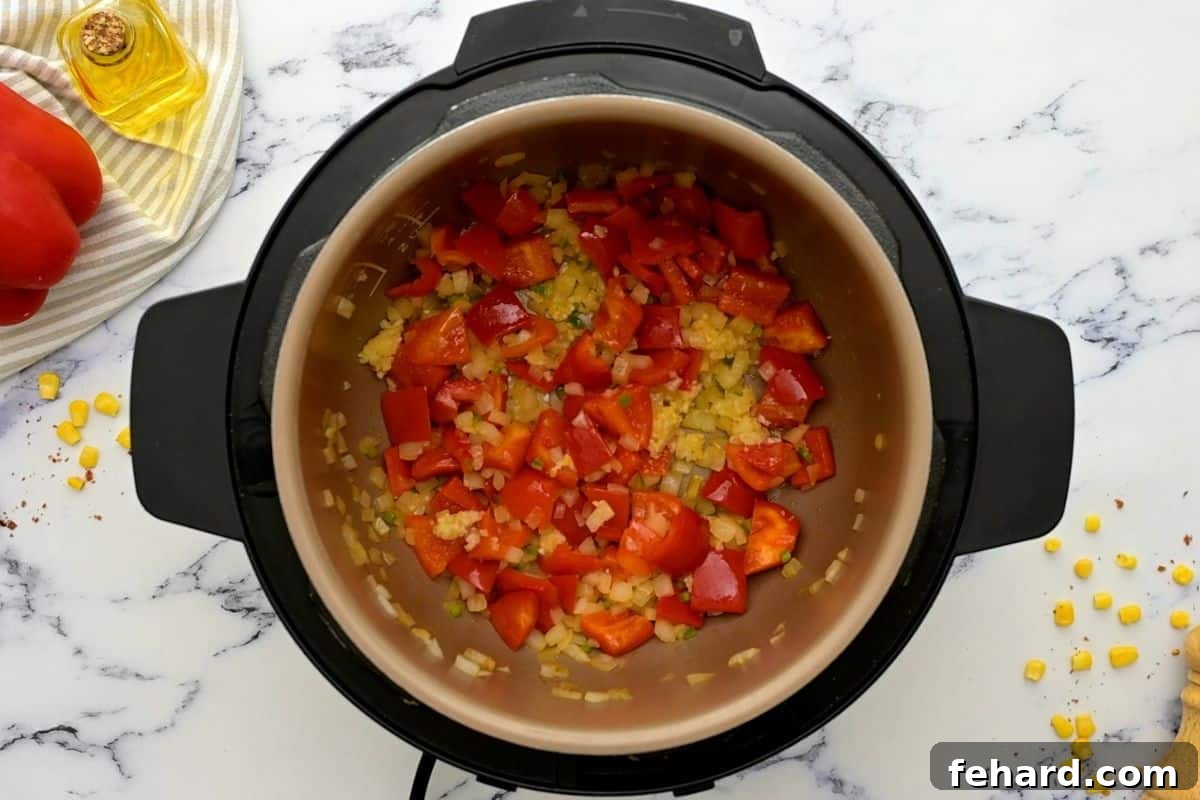
Begin by setting your Instant Pot to the “Sauté” function on normal heat. Add a tablespoon of extra virgin olive oil to the inner pot and allow it to heat up. Once shimmering, add the diced yellow onion, finely minced jalapeño, and diced red bell pepper. Cook these aromatic vegetables for approximately 3-4 minutes, stirring occasionally, until they begin to soften and become slightly translucent. This initial sautéing step is crucial for developing a rich, caramelized flavor base that pressure cooking alone cannot replicate, infusing your chili with an incredible depth right from the start. Next, stir in the minced garlic and sauté for just another 30-60 seconds until fragrant, being careful not to burn it. Once the garlic is toasted, hit the “Cancel” button to turn off the Sauté function and prepare for the next step.
Step Two: Deglaze the Inner Pot
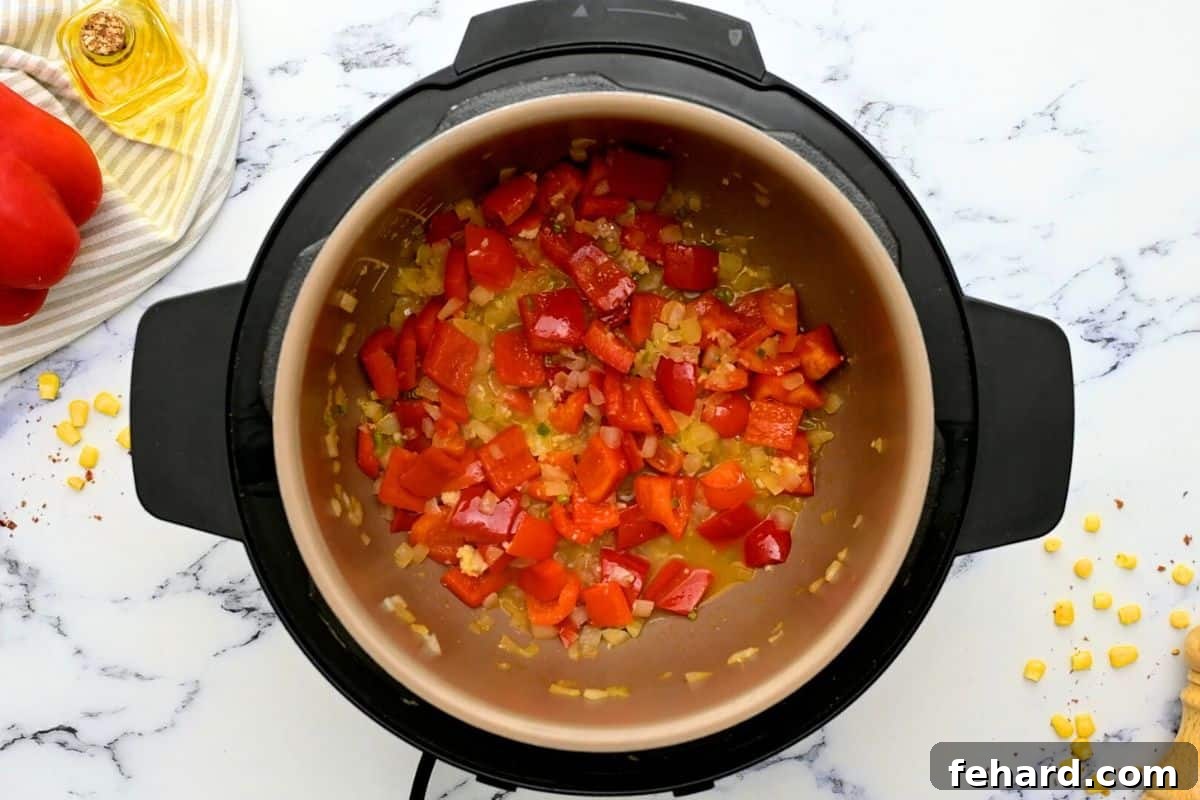
Carefully pour about ½ cup of the low-sodium vegetable broth into the inner pot. Immediately use a sturdy wooden spoon or a heat-resistant silicone spatula to scrape up any browned bits that may have accumulated at the bottom of the pot during sautéing. This process, known as deglazing, is essential for two reasons: it not only incorporates those delicious caramelized flavors back into your chili, adding layers of taste, but more importantly, it prevents the dreaded “burn notice” error on your Instant Pot. Ensure the bottom is completely free of stuck-on food particles before proceeding.
Step Three: Layer the Chili Ingredients Strategically
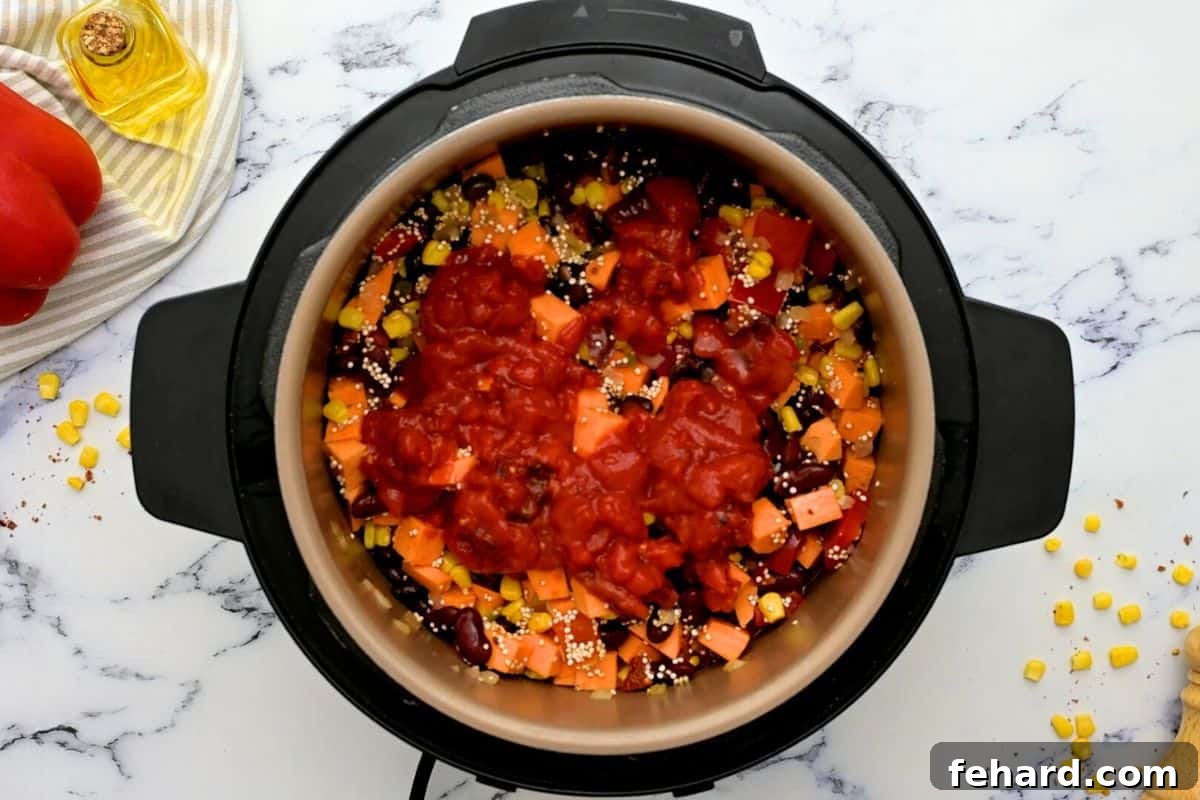
Now, it’s time to add the remaining ingredients to the pot, but remember the crucial “no stirring” rule for the final layers. Pour in the remaining vegetable broth. Then, add the cubed sweet potatoes, rinsed quinoa, black beans, kidney beans, corn, chili seasoning mix, kosher salt, and chipotle in adobo sauce. Gently stir these ingredients together to ensure they are well combined and evenly distributed. Finally, and this is critical, pour the can of fire-roasted diced tomatoes directly over the top of the mixture. Absolutely do not stir the tomatoes into the chili base. Layering the tomatoes on top helps prevent them from settling at the bottom and potentially causing a burn notice. This careful layering ensures all ingredients cook perfectly under pressure.
Step Four: Pressure Cook and Natural Release
Secure the lid onto your Instant Pot, making sure it is properly sealed. Double-check that the steam release valve is set to the “Sealing” position. Select the “Manual” or “Pressure Cook” function (depending on your Instant Pot model) and set the cooking time for 5 minutes on high pressure. Once the cooking cycle is complete, the Instant Pot will beep. It is vital at this stage to allow the pressure to release naturally for at least 10-15 minutes. A natural pressure release (NPR) is crucial for this recipe as it allows the sweet potatoes to finish cooking gently, preventing them from becoming mushy. It also helps prevent hot liquid from spewing out when you eventually open the vent. After 10-15 minutes of NPR, you can carefully turn the steam release valve to the “Venting” position (using a long-handled utensil like a wooden spoon to protect your hands from steam) to release any remaining pressure. Once the float valve drops, it’s safe to open the lid.
Step Five: Final Touches and Serving
With the pressure released and the lid safely removed, stir the chili thoroughly. Now, squeeze in the fresh juice from one medium lime. This burst of citrus is essential as it brightens all the deep, smoky flavors that have developed during pressure cooking, creating a wonderfully balanced taste profile. Give the chili a taste and adjust the seasoning as needed. Sometimes, a final pinch of kosher salt is all it takes to make all the flavors truly sing and come alive, enhancing the overall deliciousness of your sweet potato chili.
👉🏻Serving Tip: While this Instant Pot Sweet Potato Chili is absolutely delicious on its own, a variety of toppings can elevate it to another level! Fresh cilantro, a dollop of cool sour cream (or a dairy-free alternative for vegan), crunchy corn chips, creamy diced avocado, and a sprinkle of shredded cheese are all fantastic options. I typically like to serve these toppings on the side, allowing each person to customize their bowl to their heart’s content, making dinner an interactive and enjoyable experience for the whole family.

Recipe Modifications and Creative Variations
This Instant Pot Sweet Potato Chili recipe is incredibly flexible, allowing for easy adjustments to suit your personal preferences or what you have on hand. Don’t hesitate to experiment!
- Craving More Heat? For those who love a fiery kick, consider adding an extra chipotle pepper in adobo sauce. You can also leave some of the seeds in the jalapeño for a more intense spice level, or even add a pinch of cayenne pepper with the chili seasoning.
- Prefer a Milder Flavor? If you’re sensitive to spice, it’s easy to tone it down. Simply omit the jalapeño entirely, or reduce the amount of chipotle in adobo sauce by half. You’ll still get a wonderful depth of flavor without the heat.
- No Quinoa on Hand? No problem! You can easily adapt this recipe. Just double the amount of beans (e.g., use two cans of black beans and two cans of kidney beans) to maintain the hearty texture and protein content. When making this adjustment, also reduce the vegetable broth to 3 cups to ensure the chili doesn’t become too soupy.
- Keep it Super Simple / Pantry-Friendly. For a minimalist approach or when your pantry is looking a bit sparse, you can still make a delicious chili! Omit the red bell pepper, chipotle in adobo, jalapeño, and corn. This will result in a pantry-staple Instant Pot vegetarian chili that still packs a lot of comforting flavor from the sweet potatoes, beans, and core seasonings.
- Add More Veggies: Feel free to toss in other quick-cooking vegetables like zucchini, diced carrots, or bell peppers of different colors during the layering step for added nutrition and visual appeal.
- Smoky Flavor Boost: A dash of liquid smoke (just a few drops!) can enhance the smoky depth, especially if you’re skipping the chipotle.
Storage and Reheating Instructions for Your Chili
This Instant Pot Sweet Potato Chili is not only delicious freshly made but also fantastic as leftovers, making it perfect for meal prep. Proper storage ensures its flavors and textures remain at their best:
- Refrigerate: Allow the chili to cool completely to room temperature before storing. Transfer it to an airtight container and store it in the refrigerator for up to 5 days. The flavors often meld and deepen overnight, making it even tastier the next day.
- Freeze: For longer storage, this chili freezes beautifully. Once fully cooled, transfer the chili into freezer-safe containers or heavy-duty freezer bags. Ensure you leave about 1 inch of headspace in containers to allow for expansion during freezing. It can be stored in the freezer for up to 3 months. This is an excellent way to prepare healthy meals in advance for quick future dinners.
- Reheat: If reheating from frozen, it’s best to defrost the chili in the refrigerator overnight. For individual servings, transfer the desired amount to a heat-safe bowl and reheat in the microwave in 1-minute intervals, stirring between each, until heated through. Alternatively, reheat larger quantities on the stovetop over medium-low heat, stirring frequently. If the chili appears too thick after reheating, add a splash of vegetable broth or water to reach your desired consistency.
Explore More Delicious Vegetarian Instant Pot Recipes
If you’ve loved the ease and flavor of this Instant Pot Sweet Potato Chili, you’re in for a treat! The Instant Pot is a phenomenal tool for preparing a wide array of vegetarian and vegan dishes quickly and efficiently. Expand your culinary repertoire with these other fantastic recipes:
- Instant Pot Lentil Soup: A hearty and healthy soup packed with protein and vegetables, perfect for a warming meal.
- Instant Pot Minestrone Soup: A classic Italian vegetable and pasta soup, made effortlessly in your pressure cooker.
- Instant Pot Vegetarian Tikka Masala: Rich, creamy, and wonderfully spiced, this vegetarian twist on a favorite Indian dish is a must-try.
- Instant Pot Vegetable Soup: A simple yet satisfying soup bursting with garden-fresh flavors and nutrients.
- Instant Pot Tomato Soup: Creamy and comforting, this homemade tomato soup is far superior to canned versions.
- Instant Pot Black Bean Soup: A smoky, spicy, and satisfying black bean soup that’s incredibly easy and flavorful.
Instant Pot Sweet Potato Chili
Rate

Video
A video tutorial for this recipe would typically appear here, demonstrating each step visually.
Ingredients
- ½ tablespoon extra virgin olive oil
- 1 medium yellow onion, minced
- ½ small jalapeño, seeded, and finely minced
- 1 medium red bell pepper, diced into ¾-inch pieces
- 4 cloves garlic, minced
- 4 cups low-sodium vegetable broth
- 1½ tablespoons Chili Seasoning Mix
- ½ teaspoon kosher salt
- 1 tablespoon chipotle in adobo sauce
- 2 medium sweet potatoes, peeled and cubed into ½-inch pieces (about 4 cups of diced sweet potatoes)
- ½ cup uncooked quinoa, rinsed well
- 1 (15oz) can black beans, rinsed and drained
- 1 (15oz) can kidney beans, rinsed and drained
- 1 cup frozen corn kernels
- 1 (15oz) can fire roasted tomatoes
- 1 medium lime
Instructions
-
Turn your Instant Pot to the “Sauté” function (normal heat setting). Add the ½ tablespoon of extra virgin olive oil to the inner pot and allow it to heat up for about 1 minute.
-
Once the oil is hot, add the minced yellow onion, finely minced jalapeño, and diced red bell pepper. Sauté these vegetables for 2-3 minutes, or until the onion begins to soften and become translucent. Stir in the minced garlic and continue to sauté for an additional 30-60 seconds, just until the garlic becomes fragrant and lightly toasted. Press the “Cancel” button to turn off the Instant Pot’s Sauté function.

-
Pour 1 cup of the 4 cups low-sodium vegetable broth into the inner pot. Use a wooden spoon or silicone spatula to vigorously scrape up any browned bits that are stuck to the bottom of the pot. This deglazing step is crucial to prevent a “burn notice” during pressure cooking and to incorporate all the delicious caramelized flavors into your chili.
-
Add the remaining 3 cups of low-sodium vegetable broth, 1½ tablespoons of Chili Seasoning Mix, ½ teaspoon of kosher salt, and 1 tablespoon of chipotle in adobo sauce to the pot. Next, add the diced sweet potatoes, rinsed quinoa, rinsed and drained black beans, rinsed and drained kidney beans, and frozen corn kernels. Stir all these ingredients gently to combine them well. Finally, pour the 1 (15oz) can of fire-roasted tomatoes over the top of the mixture. IMPORTANT: DO NOT STIR THE TOMATOES INTO THE CHILI! They should remain as the top layer.
-
Place the lid securely on the Instant Pot. Ensure the vent knob is pointed to the “Sealing” position. Select the “Manual” or “Pressure Cook” function (depending on your model) and set the cooking time to 5 minutes on high pressure.
-
Once the cooking time has finished, allow the pressure to release naturally for at least 10-15 minutes (a full natural pressure release is also perfectly fine). This natural release helps the sweet potatoes cook perfectly and prevents the chili from erupting when you open the vent. After the natural release, use the handle of a wooden spoon or a long kitchen utensil to carefully knock the vent knob from the “Sealed” to the “Venting” position to quick-release any remaining pressure. Be sure to stand back to protect yourself from escaping steam. Once the float valve drops, the lid can be safely opened.
-
Once the pressure has fully released and the lid is open, add the fresh juice of the 1 medium lime to the chili and stir everything well to combine. Taste the chili and adjust seasoning as needed; sometimes a final pinch of salt will truly enhance all the flavors.
-
Serve your flavorful Instant Pot Sweet Potato Chili hot with your favorite desired toppings. Great options include diced avocado, shredded cheese (or dairy-free alternative), sour cream (or dairy-free alternative), and crunchy corn chips. Enjoy!





Equipment
-
Electric Pressure Cooker (6 or 8 quart)
Notes
Spice Level Adjustment: This recipe offers a medium spice level, but it’s simple to customize. For added spice, you can include an extra chipotle pepper in adobo sauce. Another option is to leave some or all of the seeds in the jalapeño pepper, as the seeds contain most of the heat. For a milder chili, simply skip the jalapeño entirely or reduce the chipotle in adobo sauce to half a tablespoon.
Quinoa Substitute: If quinoa isn’t available or preferred, you can easily omit it. To maintain the hearty consistency and nutritional value, simply double the amount of beans called for in the recipe (using 2 cans of black beans and 2 cans of kidney beans). When making this adjustment, also reduce the vegetable broth amount to 3 cups to ensure the chili doesn’t become too thin.
Storage Best Practices: Store any leftover chili in a clean, airtight container in the refrigerator for up to 5 days. For longer preservation, the chili can be stored in a freezer-safe container for up to 3 months. When ready to enjoy from frozen, defrost it overnight in the refrigerator. Reheat individual servings in a microwave-safe bowl or larger portions on the stovetop over low heat, adding a splash of liquid (broth or water) as needed to achieve your desired consistency.
Nutrition
Nutrition information is automatically calculated, so should only be used as an approximation.