
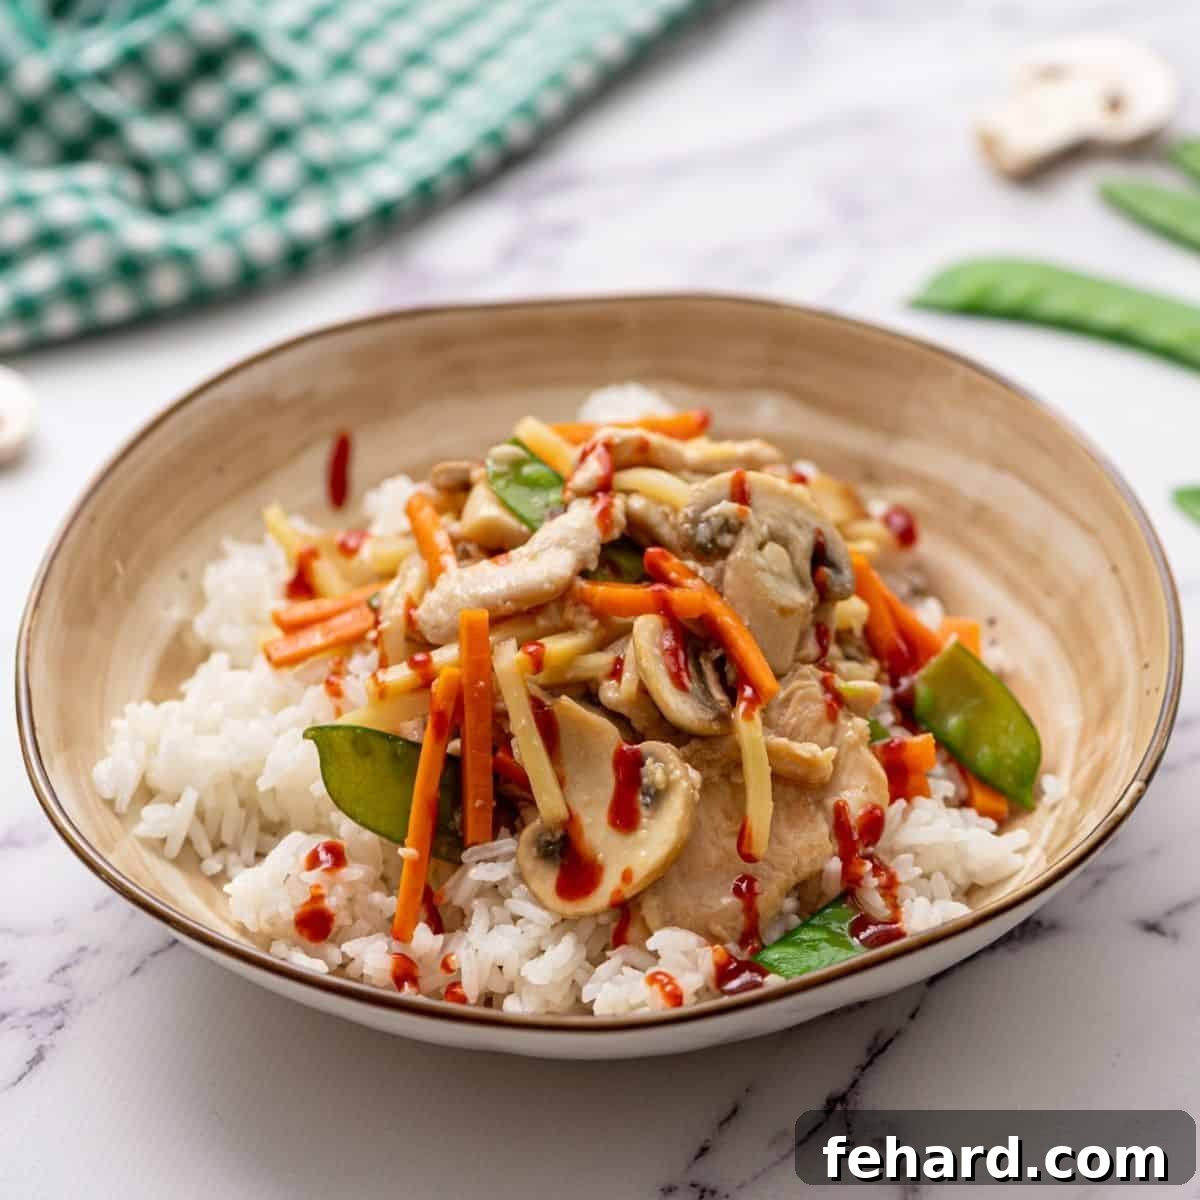
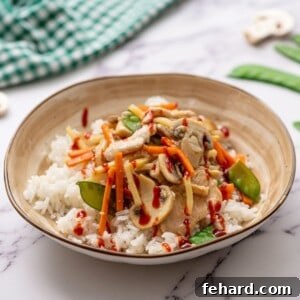
Welcome to the ultimate guide for creating an authentic and incredibly delicious Moo Goo Gai Pan right in your own kitchen! This beloved Cantonese-inspired stir-fry is a harmonious blend of tender chicken and earthy mushrooms, all enveloped in a richly seasoned, yet remarkably light, sauce. It’s a recipe that promises intense flavor, impressive ease of preparation, and the satisfaction of a wholesome, homemade meal. Forget the usual takeout; our version utilizes everyday ingredients to deliver a dish that’s not just tastier, but also better for you, and it comes together with minimal effort, making it a perfect family-favorite dinner that you’ll want to make on repeat.
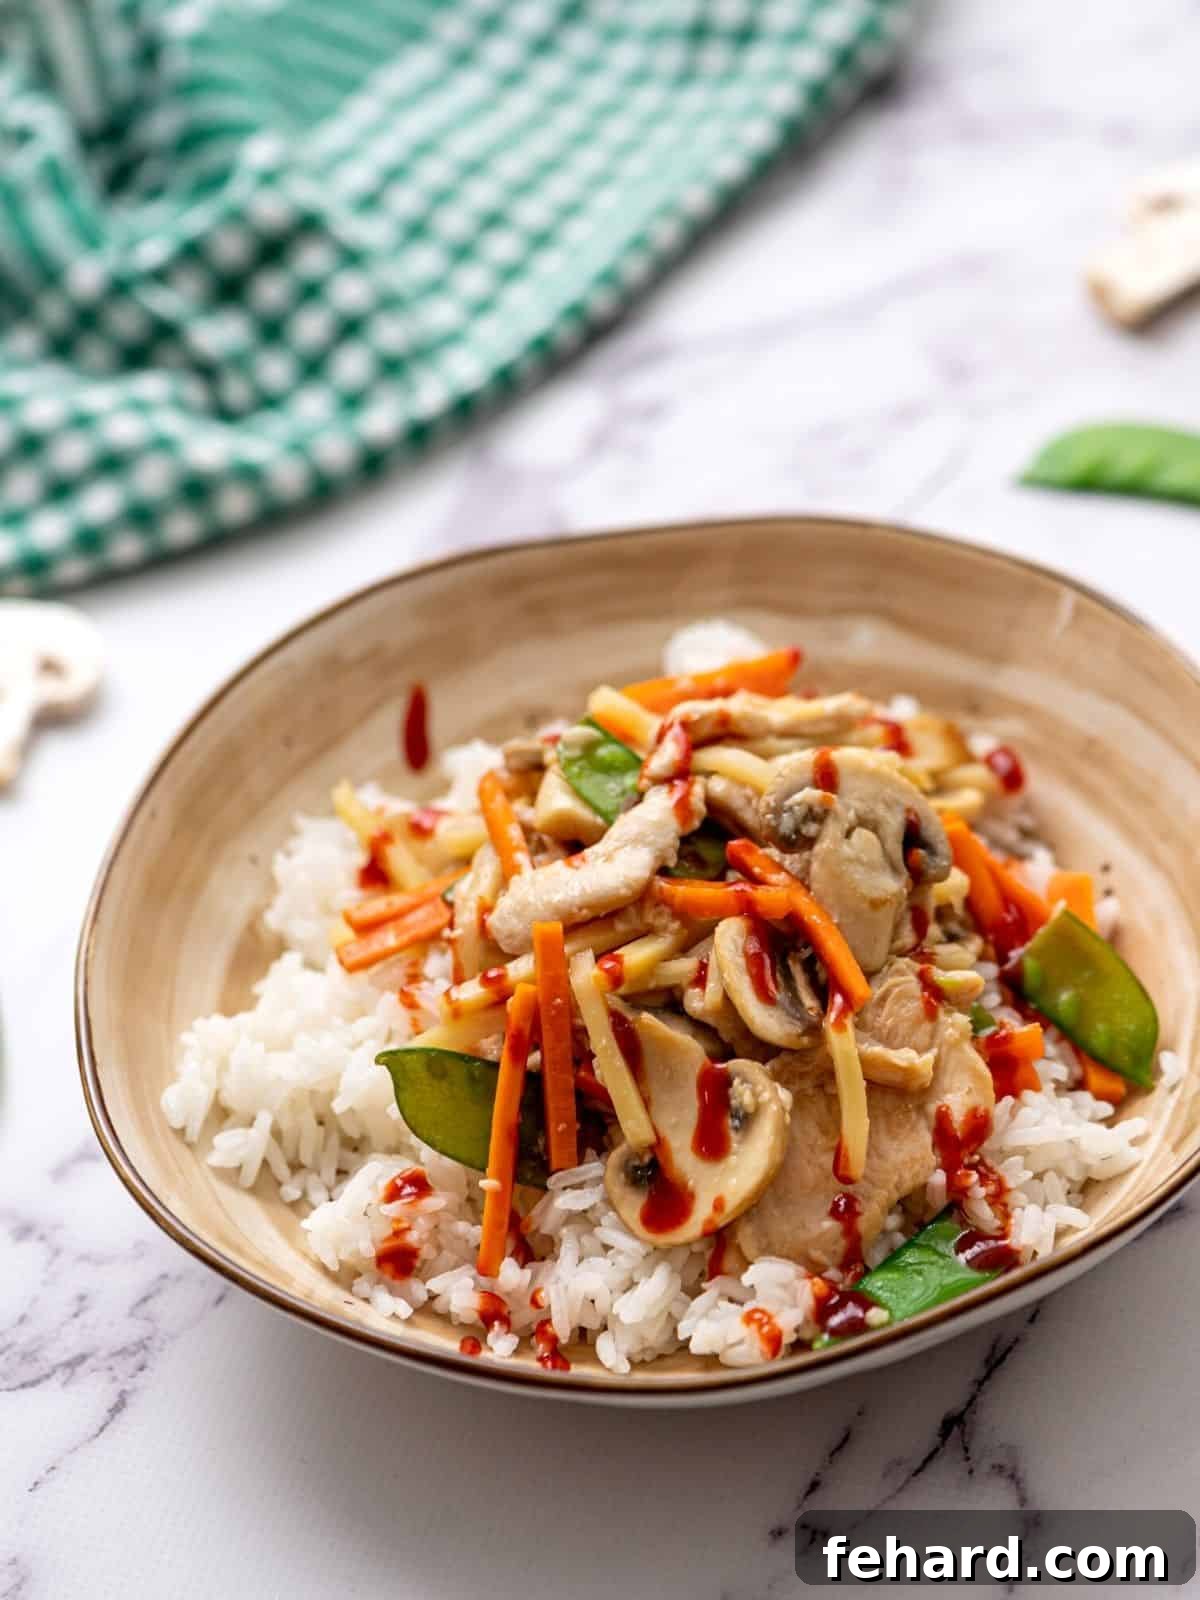
Unlock Restaurant-Quality Moo Goo Gai Pan: Expert Tips
While this Moo Goo Gai Pan recipe is delightfully straightforward, I’ve gathered a few invaluable tips to ensure you achieve restaurant-quality results every single time. These insights will elevate your homemade stir-fry from good to absolutely phenomenal, guaranteeing a dinner recipe you’ll be eager to recreate regularly!
- Achieve Perfectly Tender Chicken with Thin, Even Slices: The secret to juicy, never-dry chicken in your stir-fry starts with how you slice it. Aim for thin, uniform pieces. This not only ensures quick and even cooking, but also allows the chicken to absorb the marinade more effectively, contributing to its incredible tenderness. A simple trick is to pop the chicken into the freezer for 10-15 minutes before slicing; it firms up just enough to make precise, thin cuts much easier.
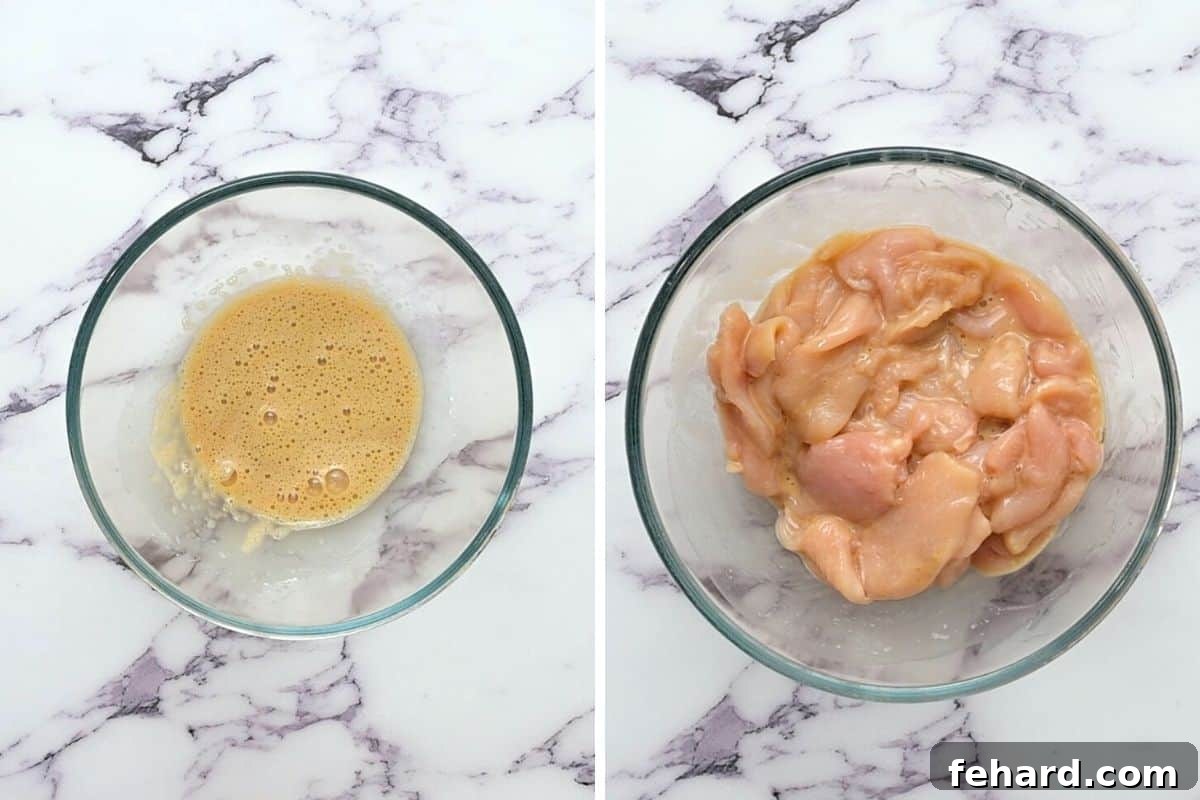
- Embrace the “Velveting” Technique through Marination: Do not underestimate the power of marination! The cornerstone of achieving that signature melt-in-your-mouth texture found in professional Chinese stir-fries is a technique called “velveting.” By marinating thinly sliced chicken in a mixture of egg white and cornstarch for at least 10 minutes (and up to an hour), you create a protective coating that locks in moisture, resulting in chicken that is incredibly tender, silky, and flavorful. This step is non-negotiable for authentic results.
- Maximize Efficiency with Smart Prep During Marination: Time management is key in stir-frying, as the actual cooking process is incredibly fast. Use the time your chicken is marinating to your advantage! This is the perfect window to slice and dice all your vegetables, mince your garlic and ginger, and thoroughly whisk together your stir-fry sauce ingredients. Having everything prepped and ready to go before you even turn on the stove ensures a smooth, stress-free cooking experience and prevents any ingredients from overcooking or burning.
- Oyster Sauce: The Heart of the Flavor Profile: Oyster sauce is more than just an ingredient; it’s a foundational element that lends a deep, rich umami and a subtle sweetness to the Moo Goo Gai Pan sauce. Its complex flavor profile is hard to replicate, providing an authentic depth that defines this dish. If you find yourself without oyster sauce, Hoisin sauce can be used as a worthy substitute, offering a similar sweet and savory balance, though with a slightly different character. Choose the best quality oyster sauce you can find for the most impactful flavor.
5-Star Reader Review
“This Moo Goo Gai Pan recipe is incredibly flavorful and utterly delicious! I honestly couldn’t believe even my notoriously picky youngest son absolutely loved it. Thank you so much for sharing this amazing recipe!” -Caryn
Crafting Your Homemade Moo Goo Gai Pan: Step-by-Step Guide
Consider this section your personal cooking session with me, where I’ll walk you through each step of creating this fantastic Moo Goo Gai Pan. I’ll provide expert tips along the way to ensure your success, making the process enjoyable and the outcome incredibly rewarding.
Step One: Prepare and Marinate the Chicken for Tenderness
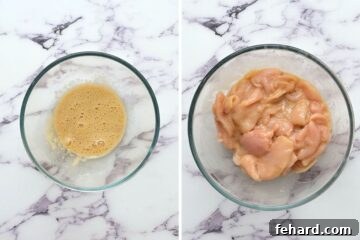
Begin by preparing your chicken. For optimal texture and ease of slicing, place your boneless, skinless chicken breasts or thighs in the freezer for 10-15 minutes. This slight freezing firms up the meat, making it much easier to slice against the grain into thin, uniform strips. Once sliced, transfer the chicken to a medium mixing bowl. In a separate small bowl, whisk together one large egg white, one tablespoon of low-sodium soy sauce, and one tablespoon of cornstarch until the cornstarch is completely dissolved and no lumps remain. Pour this mixture over the chicken, tossing gently to ensure every piece is thoroughly coated. Cover the bowl and refrigerate for at least 10 minutes, allowing the “velveting” process to work its magic and tenderize the chicken. You can marinate for up to 60 minutes for even deeper flavor and tenderness.
Step Two: Whisk Together Your Flavorful Stir-Fry Sauce
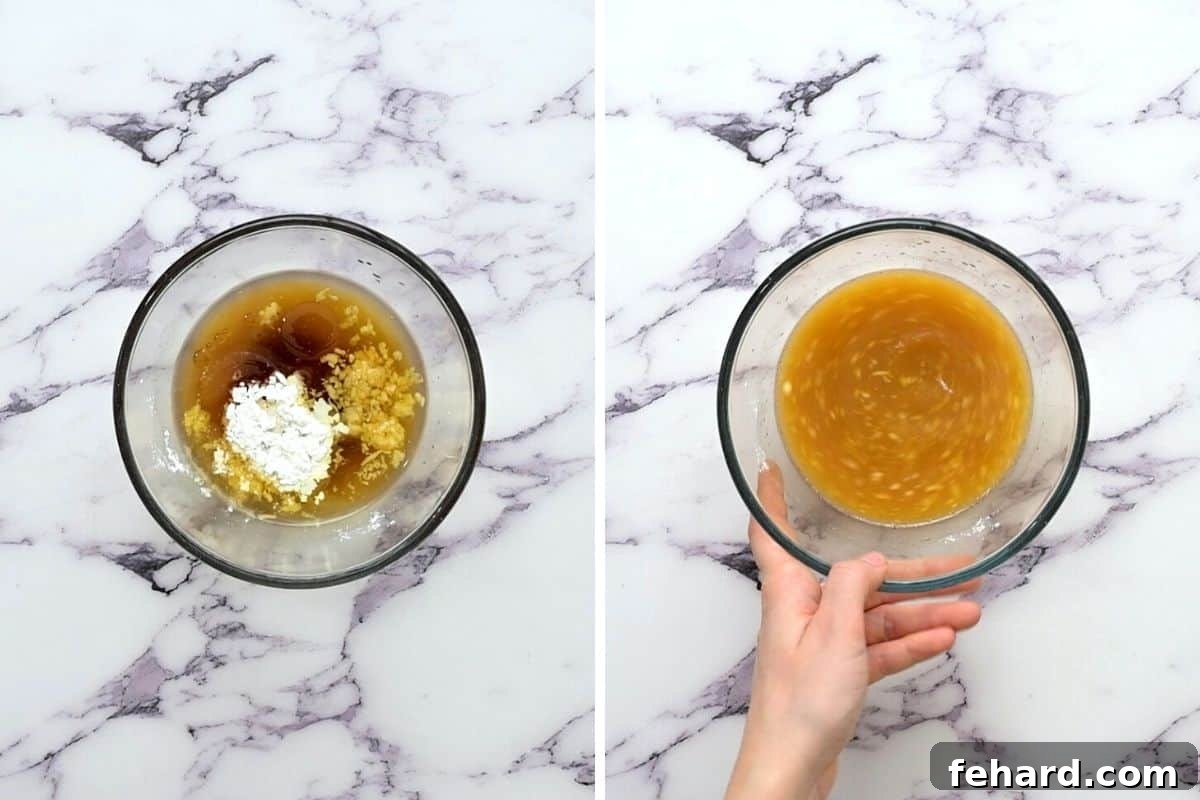
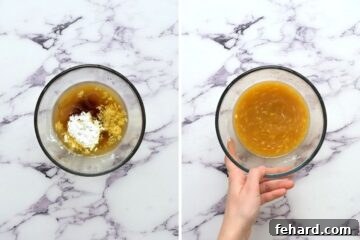
While your chicken is marinating, prepare the essential stir-fry sauce. In a small bowl or a glass measuring cup, combine the low-sodium chicken stock, mirin (or its substitute), oyster sauce (or hoisin), toasted sesame oil, minced garlic, freshly grated ginger, brown sugar (or honey), an additional tablespoon of low-sodium soy sauce, and one tablespoon of cornstarch. Whisk all these ingredients vigorously until the cornstarch is completely dissolved and the sauce is smooth and lump-free. The cornstarch acts as a thickening agent, ensuring a glossy, rich sauce at the end. Set this flavorful concoction aside, as it will be added to the stir-fry towards the final stages of cooking.
👉🏻Time-Saving Tip: This is also an excellent moment to complete all your remaining prep work. Slice your mushrooms, carrots, snow peas, and any other desired vegetables. Having all your ingredients chopped and ready before you start cooking is crucial for a smooth and quick stir-fry process.
Step Three: Perfectly Stir-Fry the Velveting Chicken
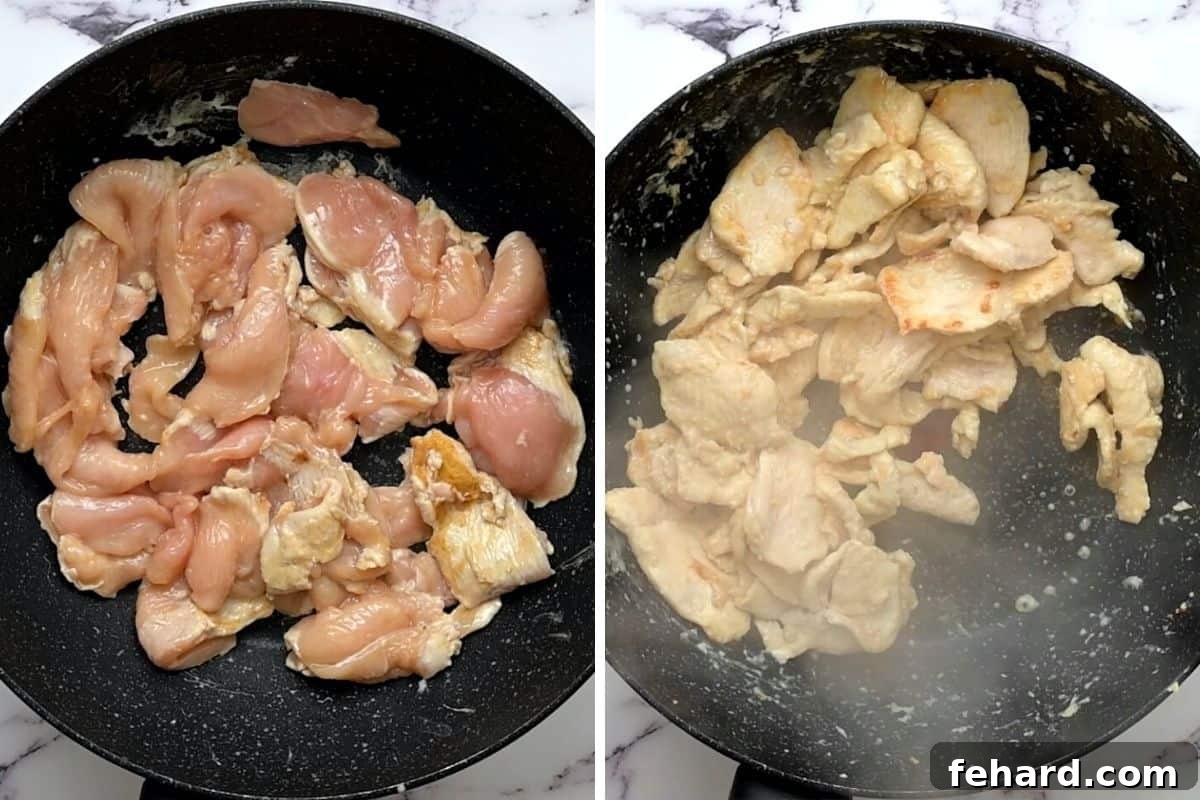
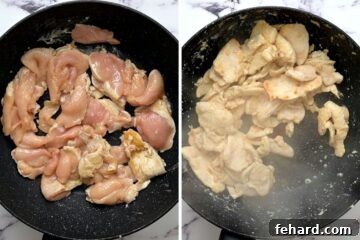
Once your chicken has marinated, it’s time to cook it. Heat half a tablespoon of neutral oil (such as peanut, vegetable, or canola oil) in a large skillet or wok over medium-high heat. Allow the oil to heat for a minute or two, or until it shimmers, indicating it’s hot enough for stir-frying. Carefully remove the marinated chicken strips from the bowl, letting any excess marinade drip back. Add the chicken to the hot pan in a single layer if possible, avoiding overcrowding. Stir-fry for approximately 2 minutes, until the chicken is just cooked through and has developed a light golden hue. It’s important not to overcook it, as it will continue to cook slightly when combined with the sauce. Remove the cooked chicken from the pan and set it aside on a clean plate. Briefly wipe out the pan with a paper towel if there’s any residue, preparing it for the vegetables.
Step Four: Sauté the Vegetables to Crisp-Tender Perfection
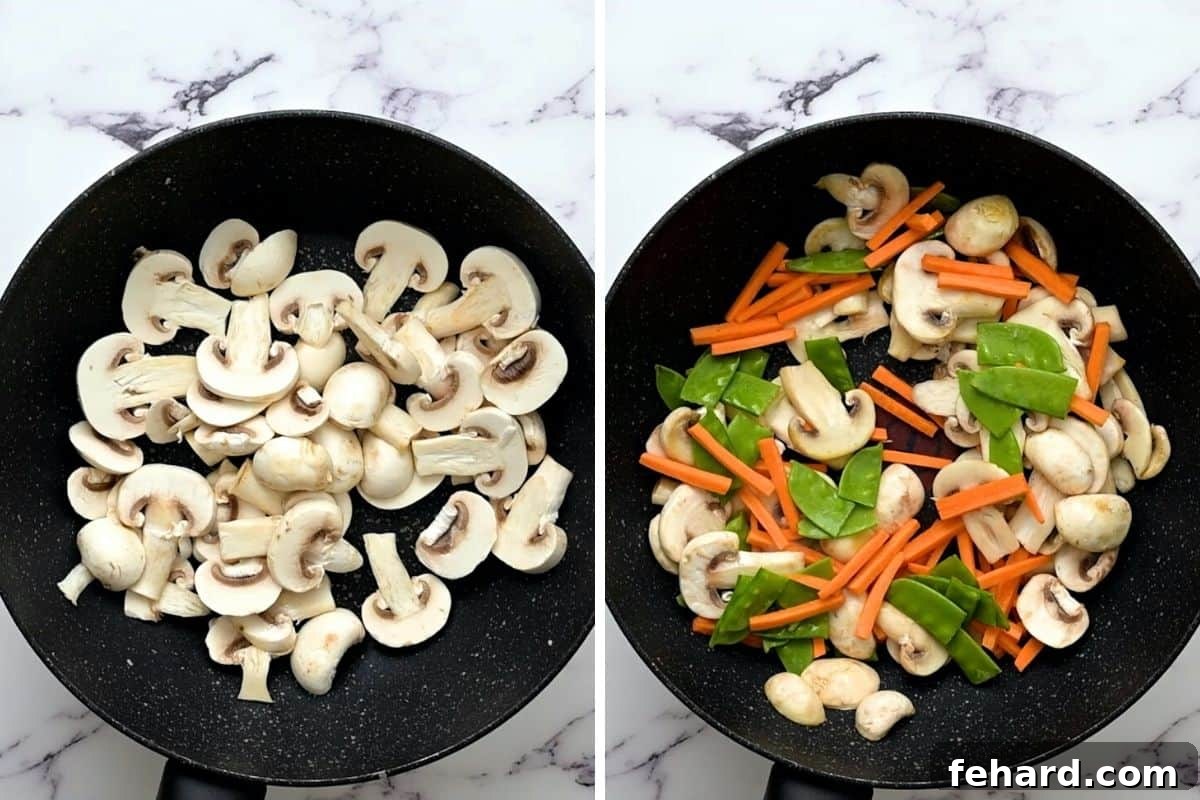
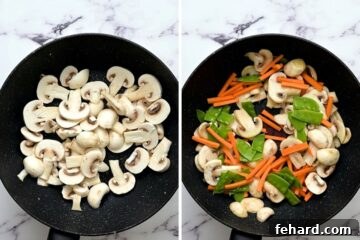
Using the same skillet or wok, add the remaining half tablespoon of neutral oil and heat it for another minute over medium-high heat. Add your sliced mushrooms first and stir-fry for about a minute. This allows them to release some of their natural moisture and begin to soften, concentrating their flavor. Once the mushrooms have started to soften, incorporate your sliced carrots and halved snow peas (or any other vegetables you’ve chosen). Continue to stir-fry for an additional 2-3 minutes, or until the vegetables are crisp-tender, still retaining their vibrant color and a slight bite. The goal is to cook them just enough so they are tender but not mushy, maintaining their freshness and texture.
Step Five: Bring It All Together: Combine and Thicken the Sauce
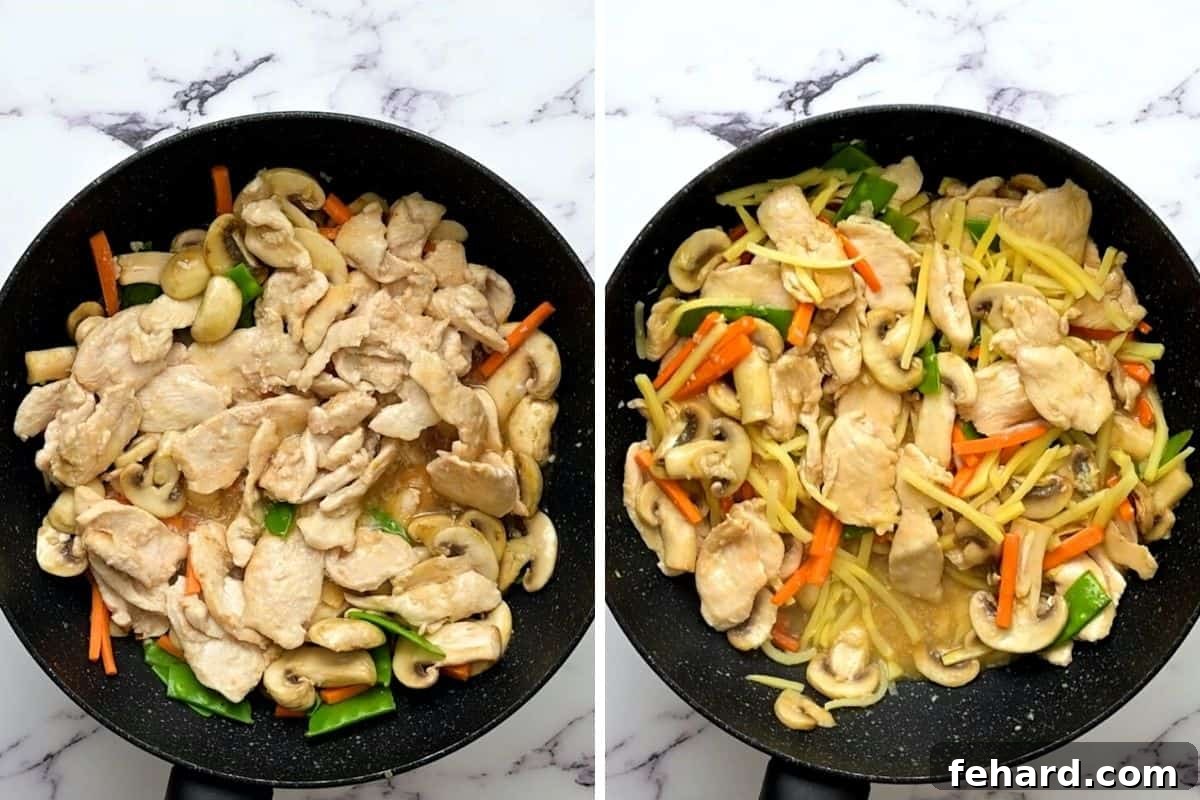
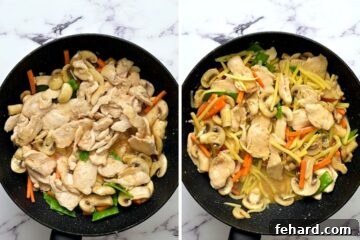
Now for the grand finale! Give your prepared sauce one last quick whisk to ensure the cornstarch hasn’t settled at the bottom. Pour the sauce directly into the pan with your crisp-tender vegetables. Immediately add the previously cooked chicken and the drained and rinsed bamboo shoot strips to the pan. Increase the heat slightly if needed and bring the mixture to a gentle simmer. Continuously stir the ingredients as the sauce heats through and thickens. Thanks to the cornstarch, this thickening process happens quite rapidly, usually within a couple of minutes. Keep stirring until the sauce achieves a glossy consistency and evenly coats all the chicken and vegetables, creating a beautiful, cohesive dish.
Step Six: Plate and Enjoy Your Authentic Stir-Fry
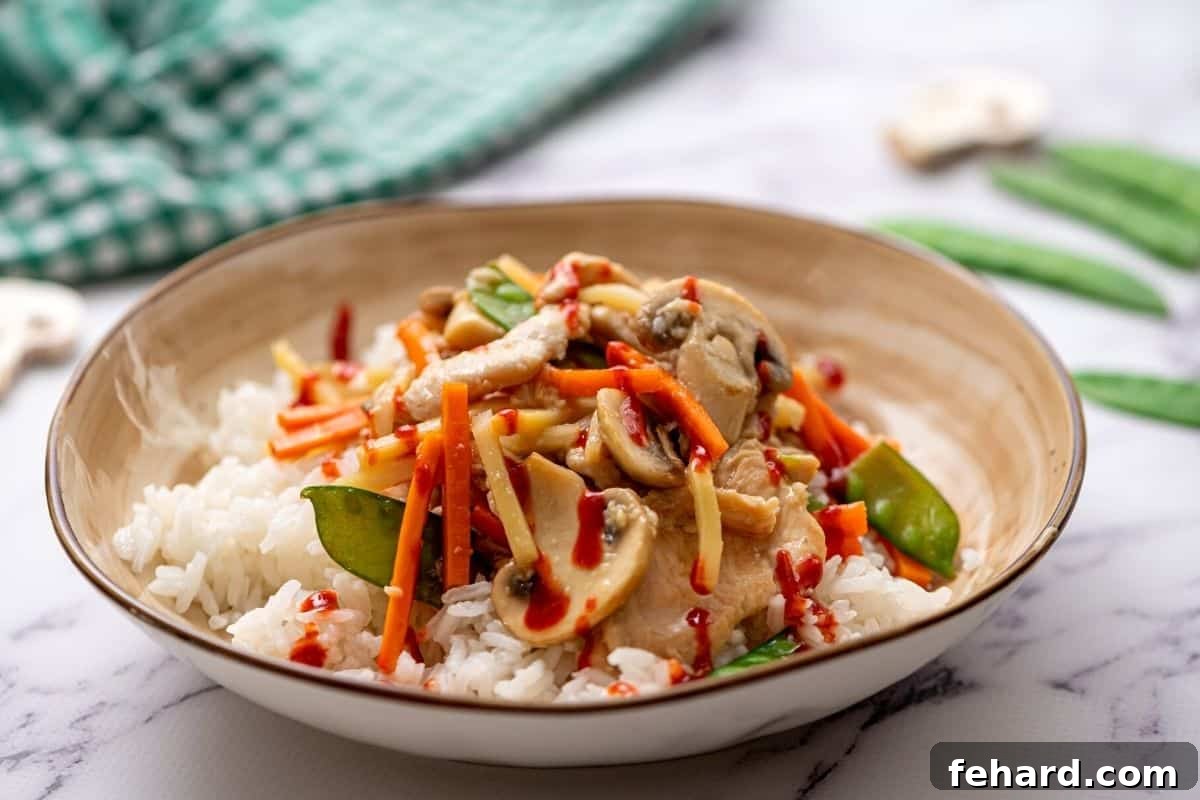
Your homemade Moo Goo Gai Pan is now ready! Serve it immediately, while it’s hot and fresh, over a bed of steamed white rice or cauliflower rice. The rice is essential for soaking up every last drop of that incredibly delicious, glossy pan sauce. For those who appreciate a little extra kick, I highly recommend placing a bottle of Sriracha on the table, allowing everyone to customize their dinner with a touch of spice. Garnish with some freshly chopped green onions or a sprinkle of toasted sesame seeds for an added layer of flavor and visual appeal. Enjoy the fruits of your labor – a truly authentic and satisfying Chinese stir-fry experience!
Why Choose Homemade Moo Goo Gai Pan Over Takeout?
While ordering takeout is convenient, making Moo Goo Gai Pan at home offers a multitude of benefits that elevate the dining experience significantly. Firstly, you have complete control over the quality and freshness of your ingredients. You can opt for organic chicken, fresh local vegetables, and high-quality sauces without any hidden additives or excessive sodium. This not only results in a healthier meal but also allows for customization to suit dietary needs or preferences. Secondly, the flavor of a freshly made stir-fry is incomparable. The vibrant textures of crisp-tender vegetables and the succulent tenderness of perfectly velveted chicken simply cannot be replicated after sitting in a takeout container. Finally, it’s often more cost-effective and provides a satisfying sense of accomplishment to create a beloved dish from scratch.
Recipe Modifications for Every Palate and Diet
This Moo Goo Gai Pan recipe is incredibly versatile and can be easily adapted to suit various tastes and dietary requirements. Don’t be afraid to experiment and make it your own!
- Change Up the Veggies: While button mushrooms are a classic choice and form the “Moo Goo” (mushrooms) part of the name, there’s plenty of room for creativity. Feel free to omit or swap out the carrots and snow peas for other quick-cooking vegetables. Excellent additions include bok choy, napa cabbage, colorful bell peppers (red, yellow, orange), thinly sliced onions, edamame for a protein boost, or fresh green beans. Adjust cooking times slightly based on the hardness of the vegetables.
- Gluten-Free Version: To make this delicious stir-fry gluten-free, simply substitute regular soy sauce with tamari, which offers a similar savory flavor without the wheat. Always double-check your chicken broth and oyster sauce labels to ensure they are certified gluten-free, as some brands may contain hidden gluten ingredients.
- MSG-Free Option: If you’re sensitive to MSG or prefer to avoid it, look for an oyster sauce specifically labeled “without added MSG.” Brands like Kikkoman often offer MSG-free versions, ensuring you can enjoy the authentic flavor profile without concern.
- Egg-Free Alternative: For those with egg allergies, you can easily omit the egg white from the chicken marinade. To maintain the chicken’s moisture and tenderness, simply add about 2 tablespoons of water or chicken broth to the cornstarch and soy sauce mixture for the marinade.
- Soy-Free Adaptations: To make this recipe completely soy-free, replace both the soy sauce in the marinade and the main sauce with coconut aminos, a fantastic soy-free alternative that provides a similar umami depth with a touch of sweetness. Additionally, use a vegetarian mushroom “oyster” sauce, which is typically soy-free and mimics the richness of traditional oyster sauce.
Frequently Asked Questions About Moo Goo Gai Pan
What does “Moo Goo Gai Pan” mean?
“Moo Goo Gai Pan” is a transliteration of the Cantonese name for this dish. “Moo Goo” (蘑菇) refers to mushrooms, and “Gai Pan” (雞片) translates to sliced chicken. So, the name literally means “sliced chicken with mushrooms,” which perfectly describes the main ingredients of this classic stir-fry.
Can I prepare Moo Goo Gai Pan ahead of time?
While stir-fries are generally best enjoyed fresh, you can certainly do a lot of the prep work in advance. You can slice the chicken and marinate it up to an hour before cooking. The sauce can be mixed and stored in the refrigerator for up to 3 days. All your vegetables can be prepped and stored in airtight containers. This makes assembly quick and easy when it’s time to cook.
How do I store and reheat leftovers?
Store any leftover, cooled Moo Goo Gai Pan in an airtight container in the refrigerator for up to 3 days. To reheat, you can microwave individual servings until warmed through. For best results and to retain some of the stir-fry texture, reheat in a dry skillet over medium heat, stirring occasionally, until heated thoroughly. You might need a splash of water or broth to loosen the sauce.
What’s the best type of oil for stir-frying?
For stir-frying, it’s crucial to use an oil with a high smoke point. Peanut oil is an excellent traditional choice for Chinese stir-fries due to its high smoke point and subtle flavor. If you don’t have peanut oil, vegetable oil, canola oil, or grapeseed oil are all fantastic neutral alternatives that can withstand the high heat required for stir-frying.
Explore More Quick & Easy Take-Out Copycat Recipes
- Easy Orange Chicken
- Shrimp Stir-Fry
- Stir-Fried Chicken and Bok Choy
- Chicken Asparagus Stir Fry
- Shrimp Lo Mein
- General Tso Shrimp
Moo Goo Gai Pan
Kristen Chidsey
4
10 mins
20 mins
30 mins
1 hr
Video
For a visual guide, search for “Moo Goo Gai Pan recipe video” on your preferred video platform.
Ingredients
For the Chicken Marinade:
- 1 pound boneless skinless chicken breasts , or boneless skinless chicken thighs, thinly sliced
- 1 large egg white
- 1 tablespoon low sodium soy sauce
- 1 tablespoon cornstarch
For the Stir-Fry Sauce:
- ½ cup low-sodium chicken broth
- ¼ cup Mirin
- 1 tablespoon oyster sauce
- 1 teaspoon toasted sesame oil
- 2 cloves garlic, minced
- 1 teaspoon freshly grated ginger
- 1 teaspoon brown sugar, or honey
- 1 tablespoon low sodium soy sauce
- 1 tablespoon cornstarch
For the Stir-Fry:
- 1 tablespoon neutral oil, divided
- 8 ounces button mushrooms, sliced
- ½ cup sliced carrots
- ½ cup halved snow peas
- 8 ounce can of bamboo shoot strips, drained and rinsed
Instructions
-
To make slicing easier and ensure tender chicken, place the chicken breasts or thighs into the freezer for 10-15 minutes to firm them up slightly.
-
While the chicken is in the freezer, prepare the marinade: In a medium mixing bowl, whisk together 1 large egg white, 1 tablespoon low sodium soy sauce, and 1 tablespoon cornstarch until the cornstarch is completely dissolved and the mixture is smooth.
-
Remove the chicken from the freezer and thinly slice it against the grain into very thin, uniform strips. Add the chicken slices to the prepared cornstarch mixture and toss thoroughly to ensure every piece is coated. Cover the bowl and refrigerate for a minimum of 10 minutes, or up to 1 hour, to allow the velveting process to tenderize the chicken.

-
While the chicken is marinating, prepare your stir-fry sauce: In a small mixing bowl or glass measuring cup, whisk together ½ cup low-sodium chicken broth, ¼ cup Mirin, 1 tablespoon oyster sauce, 1 teaspoon toasted sesame oil, 2 cloves minced garlic, 1 teaspoon freshly grated ginger, 1 teaspoon brown sugar, 1 tablespoon low sodium soy sauce, and 1 tablespoon cornstarch until the cornstarch is fully dissolved. Set aside until you’re ready to add it to the stir-fry.
-
After the chicken has marinated, heat ½ tablespoon of the neutral oil in a large wok or a large skillet over medium-high heat. Allow the oil to heat for about 1 minute, or until it shimmers.
-
Once the oil is hot, carefully remove the chicken from the marinade, letting any excess drip back into the bowl. Add the chicken to the heated pan. Stir-fry for approximately 2 minutes, or until the chicken is nearly cooked through and lightly golden. Be careful not to overcrowd the pan; cook in batches if necessary. Remove the cooked chicken to a clean plate and set aside. Wipe out the pan with a paper towel if any residue remains.
-
Add the remaining ½ tablespoon of oil to the same pan and heat for another minute. Add the sliced mushrooms and stir-fry for 1 minute until they begin to soften. Next, add the sliced carrots and halved snow peas. Continue to stir-fry until the vegetables are crisp-tender and still bright in color, typically about 2-3 minutes.
-
Give the prepared sauce another quick whisk to ensure it’s well combined. Pour the sauce into the skillet, then add the cooked chicken and the drained and rinsed bamboo shoot strips. Simmer, stirring constantly, for about 2 minutes, or until the sauce has thickened to a glossy consistency and evenly coats all the ingredients.
-
Serve your delicious homemade Moo Goo Gai Pan immediately over steamed rice or cauliflower rice, as desired. Enjoy!
Notes
Vegetables: Feel free to customize your stir-fry with any vegetables you enjoy that have similar cooking times to mushrooms and carrots. Excellent options include bell peppers, onions, snap peas, broccoli florets, baby corn, edamame, or green beans. Adjust the order of addition based on their density.
Mirin Substitute: Mirin is a sweet rice wine crucial for authentic flavor. The best substitutes are dry sherry or Marsala wine. If you don’t have these, rice wine vinegar or rice vinegar can be used, but you might want to add a pinch more sugar (or honey) to balance the increased acidity.
Oil Choice: A neutral oil with a high smoke point is essential for stir-frying. Peanut oil is ideal, providing a subtle nutty flavor. Other great options include vegetable oil, canola oil, grapeseed oil, or even avocado oil.
Nutrition
Carbohydrates: 17g
Protein: 29g
Fat: 7g
Saturated Fat: 1g
Polyunsaturated Fat: 2g
Monounsaturated Fat: 3g
Trans Fat: 1g
Cholesterol: 73mg
Sodium: 807mg
Potassium: 744mg
Fiber: 1g
Sugar: 7g
Vitamin A: 2840IU
Vitamin C: 11mg
Calcium: 27mg
Iron: 1mg
Nutrition information is automatically calculated and should only be used as an approximation.
Tried this recipe?
Mention @amindfullmom or tag #amindfullmom!