
Mastering the art of cooking hard-boiled eggs on the stovetop is simpler and more rewarding than you might imagine. Forget rubbery whites and yolks marred by an unappetizing greenish-gray ring! This comprehensive guide reveals my personal, fail-proof method for achieving perfectly cooked hard-boiled eggs with a delightfully creamy, vibrant yellow yolk, every single time. You’ll be whipping up batches of these protein-packed powerhouses in 15 minutes or less, ready to enjoy on their own or as a star ingredient in countless dishes, making them a kitchen staple you’ll wonder how you ever lived without.
Hard-boiled eggs are truly one of the most versatile and indispensable ingredients in any kitchen. Their ease of preparation, long shelf life, and rich nutritional profile make them an indispensable staple for busy individuals and culinary enthusiasts alike. From light lunches to hearty dinners, and even quick, satisfying snacks, these humble eggs possess an incredible ability to elevate a wide array of meals. Seamlessly incorporate them into vibrant salads for added protein and textural interest, or make them the star of your weekly meal prep, pairing them effortlessly with popular dishes like an Egg Roll in a Bowl or hearty Easy Roasted Veggies Meal-Prep Bowls. Beyond savory main courses, they transform beautifully into delightful egg muffins, classic deviled eggs perfect for entertaining, or a comforting easy egg salad and its creamy, modern cousin, avocado egg salad. Their adaptability even extends to more elaborate creations, shining brightly in recipes such as my Kale Salad with Sweet Potato and Hard Boiled Eggs, truly demonstrating their incredible culinary flexibility.
Beyond their remarkable culinary versatility, hard-boiled eggs offer a fantastically convenient and profoundly nourishing snack all on their own. They are incredibly budget-friendly, often being one of the most economical sources of high-quality protein available, making them an excellent choice for anyone looking to eat well and healthily without straining their finances. Whether you’re seeking a quick, energizing breakfast to kickstart your day, a satisfying and substantial addition to your lunchbox, or a light yet fulfilling dinner component, hard-boiled eggs fit seamlessly and effortlessly into any meal plan or dietary regimen. While modern kitchen gadgets like the Instant Pot offer alternative methods for cooking eggs, this comprehensive guide exclusively focuses on the tried-and-true, classic stovetop technique. This ensures that absolutely everyone, regardless of their appliance arsenal, can achieve consistently perfect results with just basic kitchen equipment and a little bit of know-how.
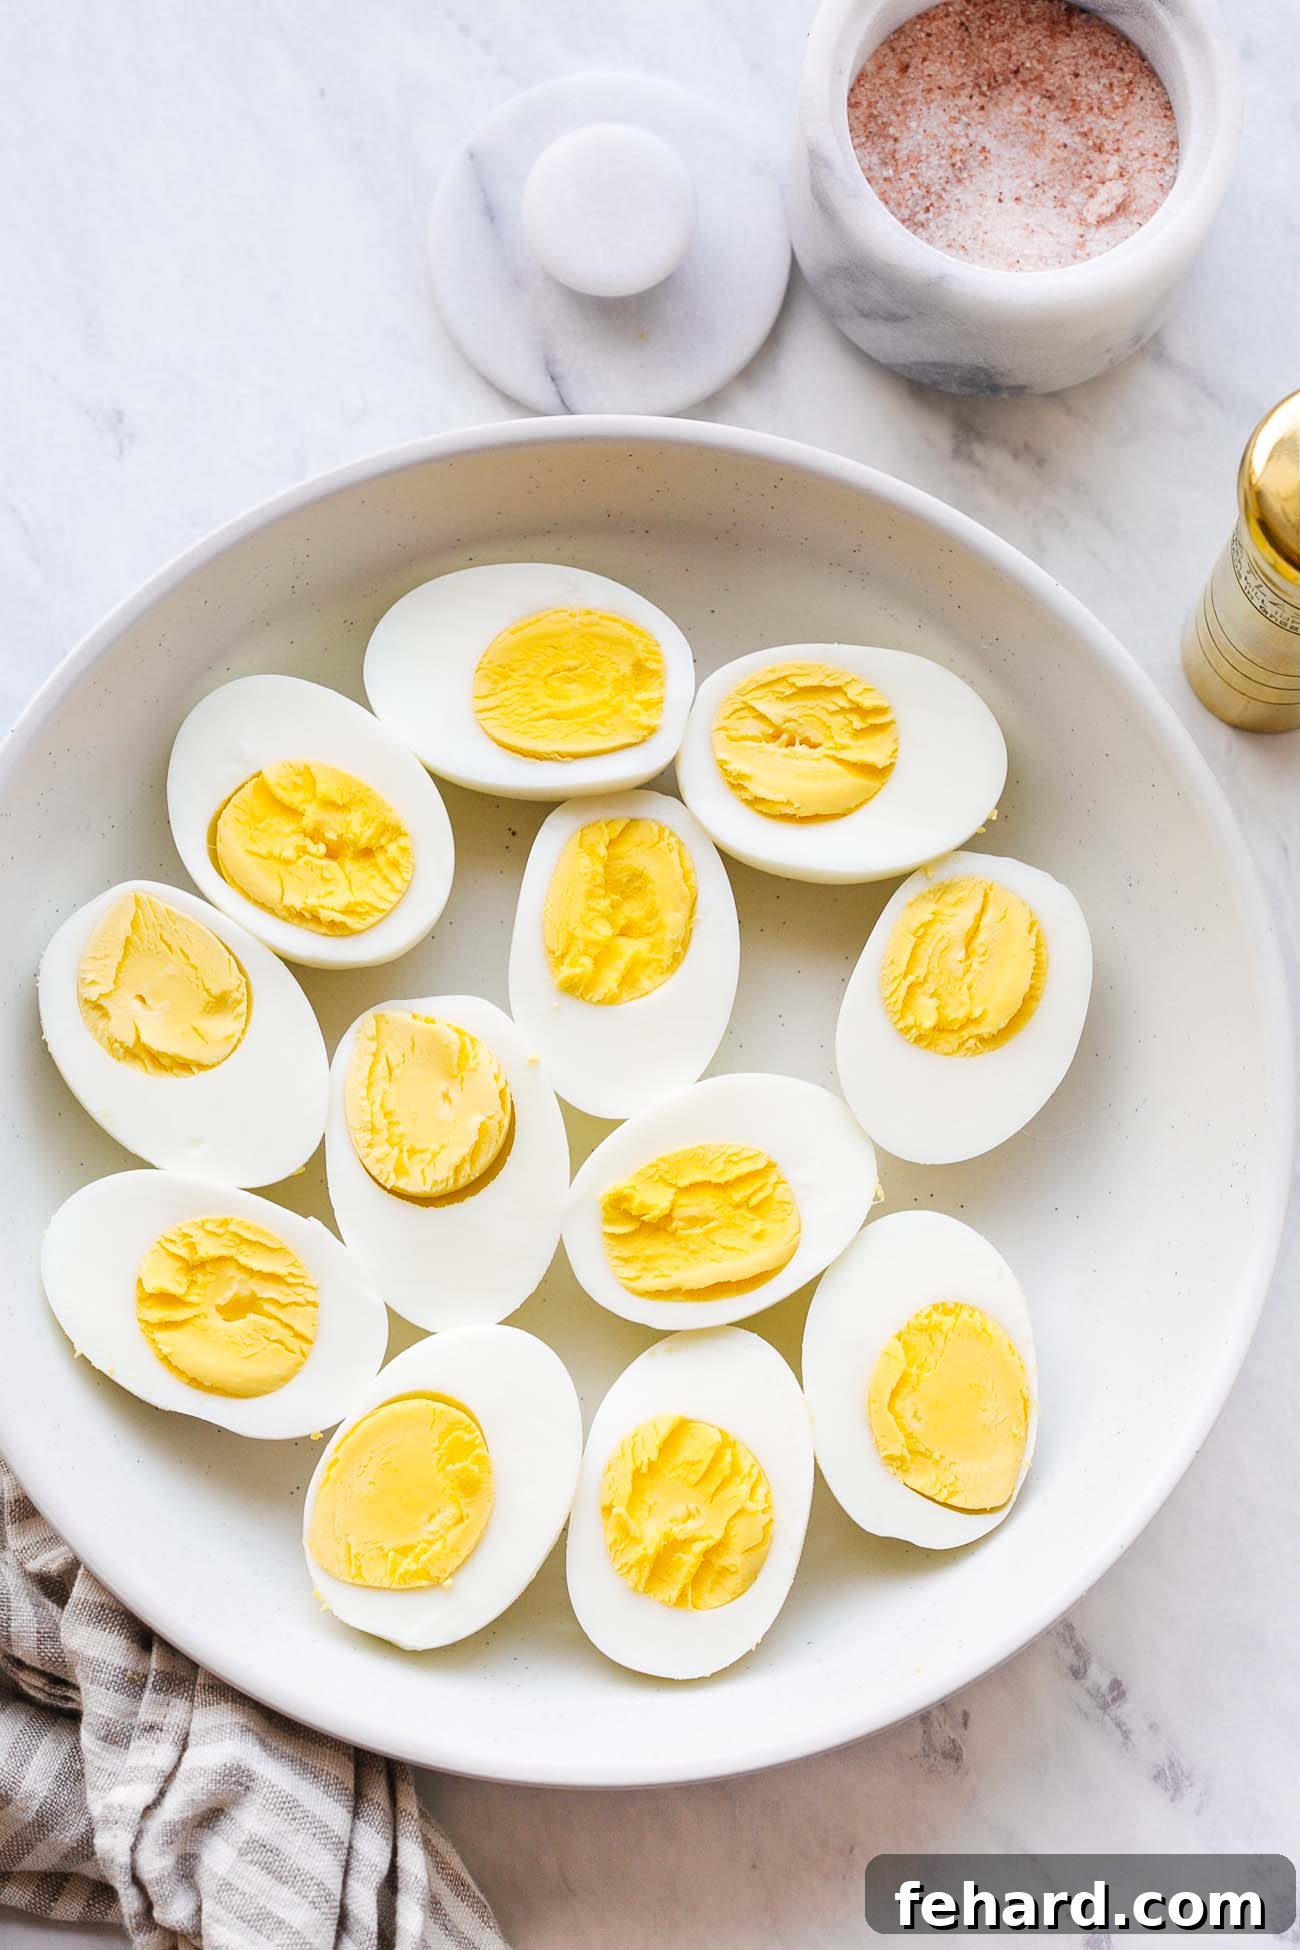
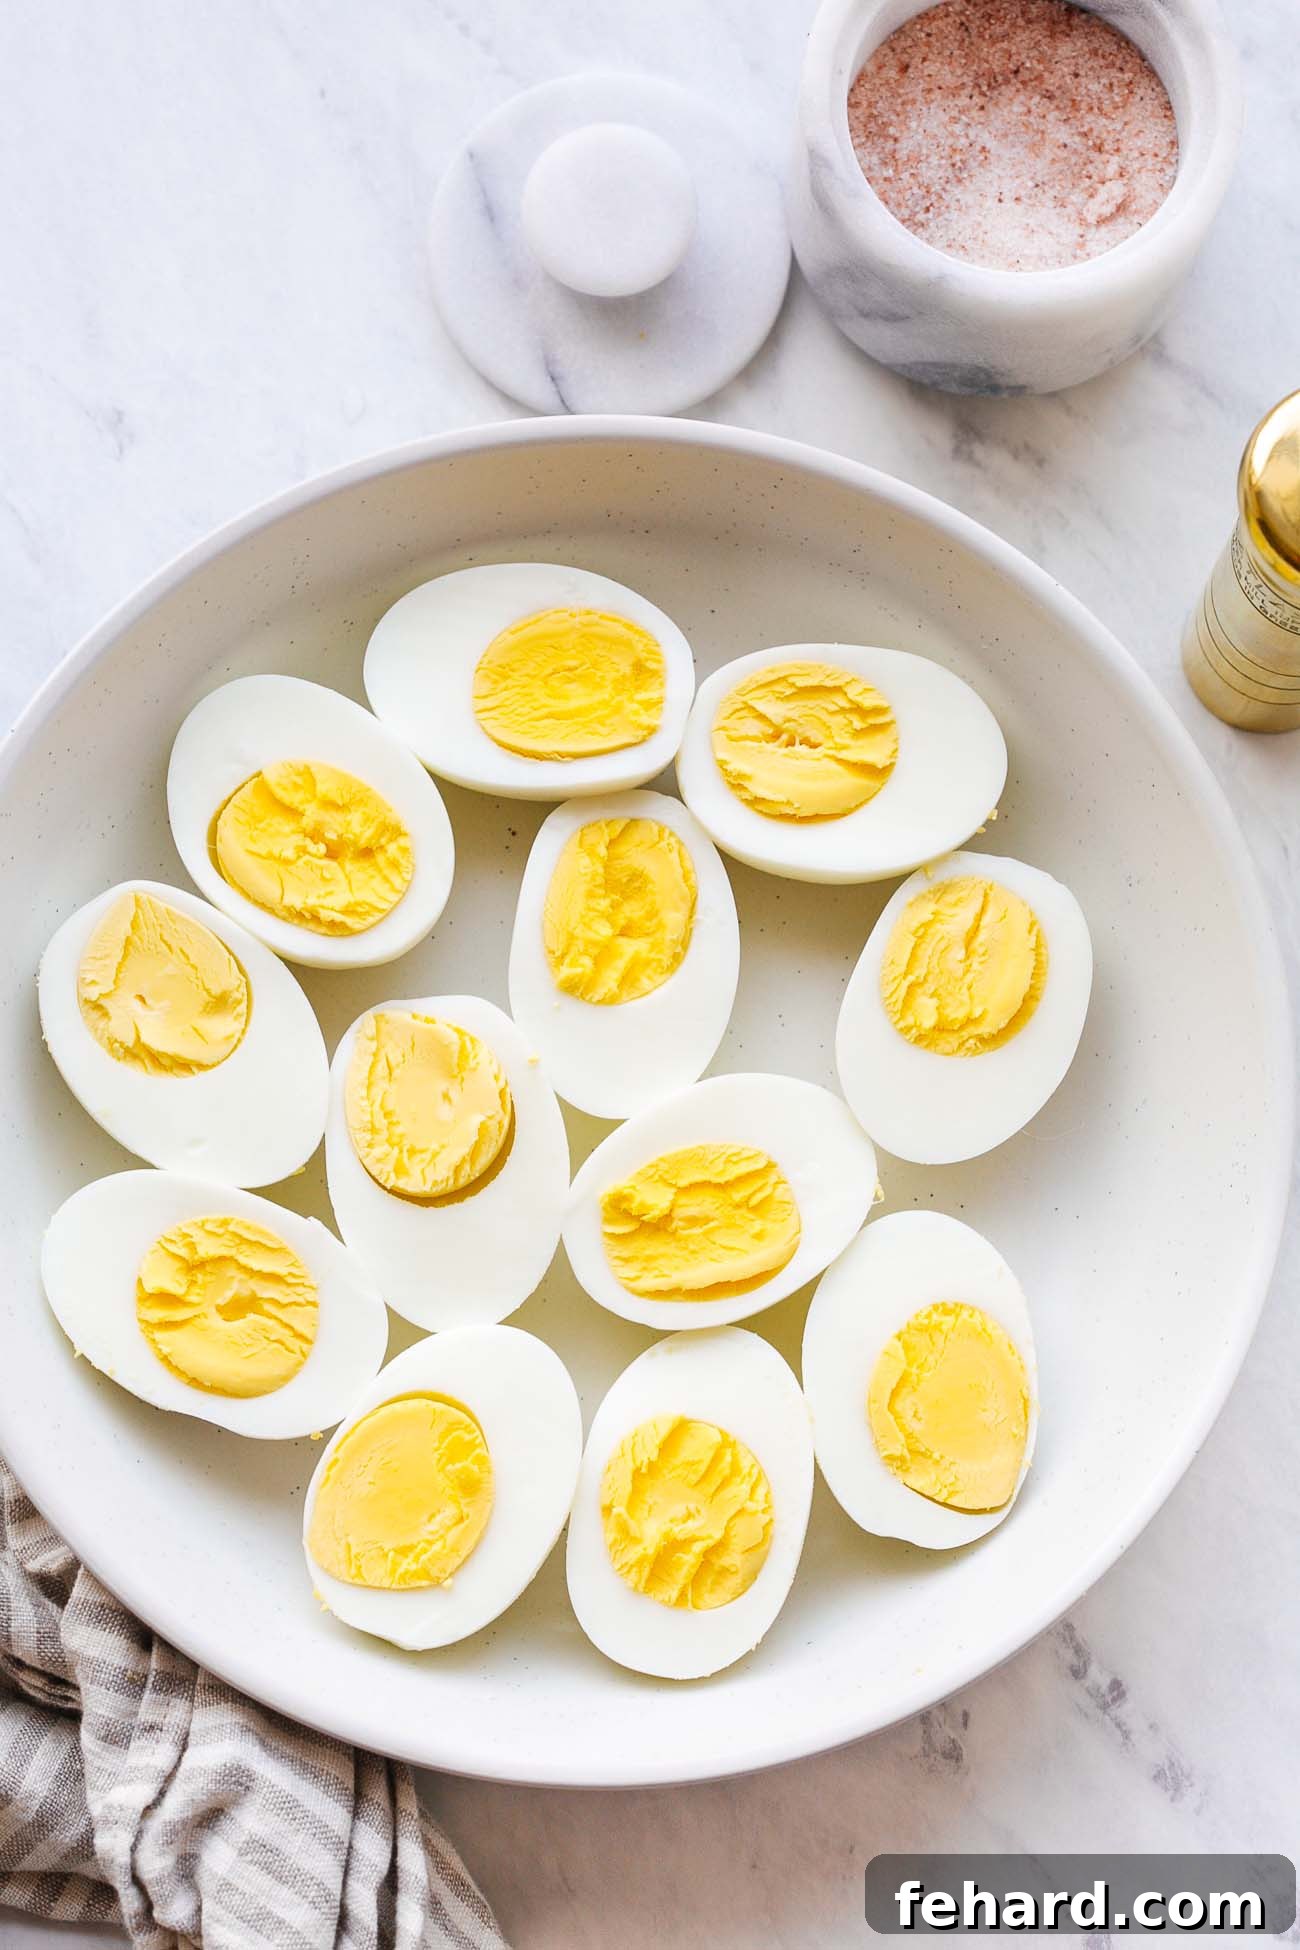
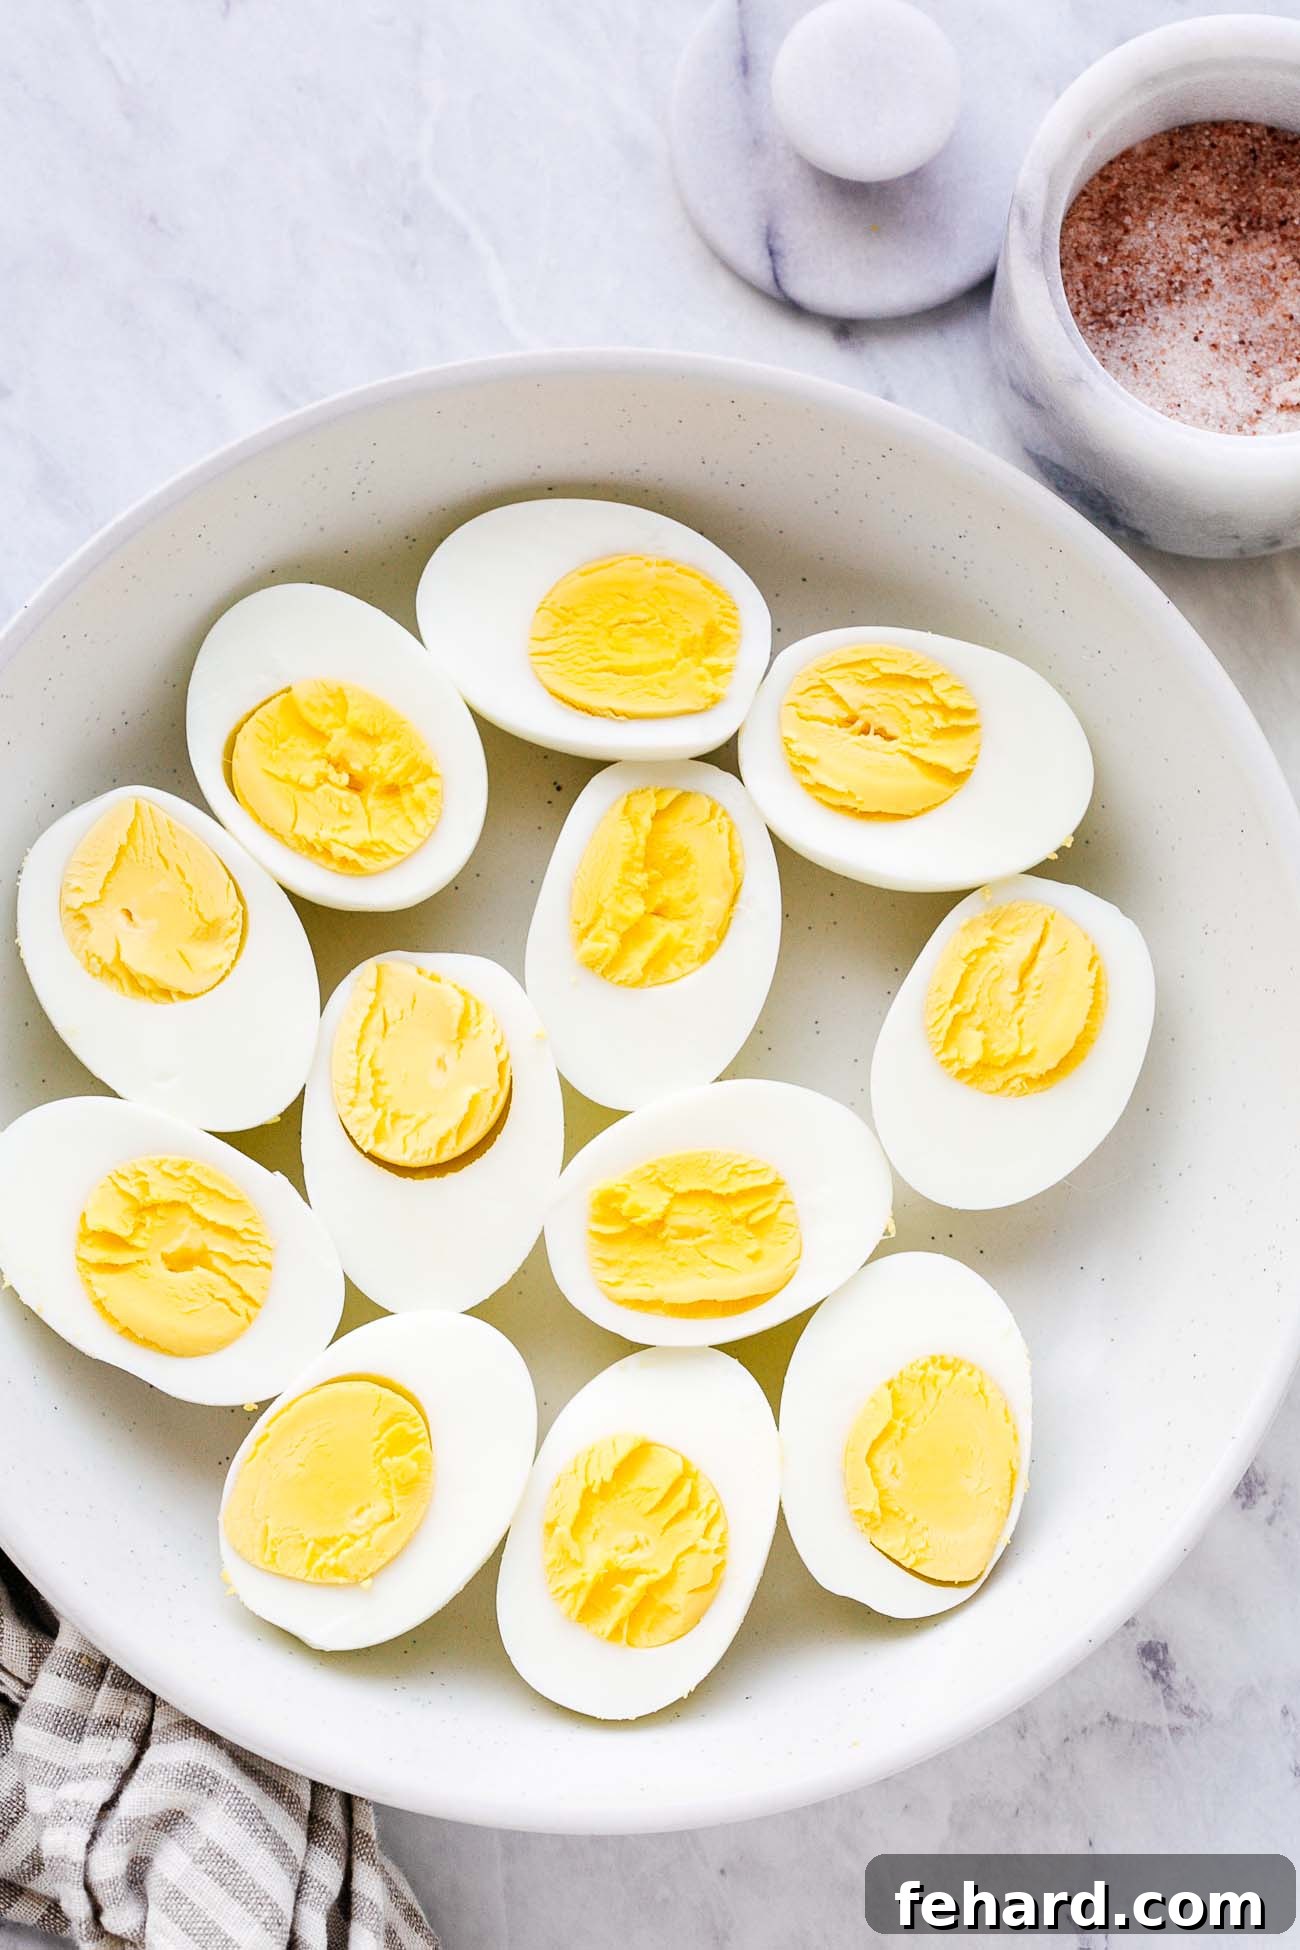
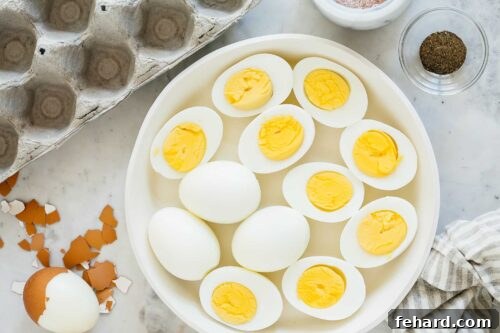
While making hard-boiled eggs appears deceptively simple, it’s surprisingly easy to fall into common pitfalls that lead to less-than-ideal results. The most frequent issue is overcooking, which sadly results in that dreaded greenish-gray ring forming around the yolk – a clear sign of sulfur compounds reacting and an indication of a dry, chalky texture. But fear not! You can effectively learn from these common mistakes and consistently achieve perfection in every batch you make. For me, the epitome of a truly perfect hard-boiled egg is beautifully captured in the enticing image above: a yolk that’s uniformly cooked through from edge to center, boasting an irresistibly creamy and smooth texture, and crucially, entirely devoid of any greenish-gray discoloration. There’s truly nothing more disappointing than cracking open an egg with eager anticipation, only to find a dry, crumbly yolk paired with tough, rubbery whites. Down below, I’ll meticulously share all my essential tips, expert tricks, and precise timings, ensuring that with this guide in hand, you’ll never encounter a ‘bad egg’ again.
Essential Ingredient for Perfect Hard-Boiled Eggs
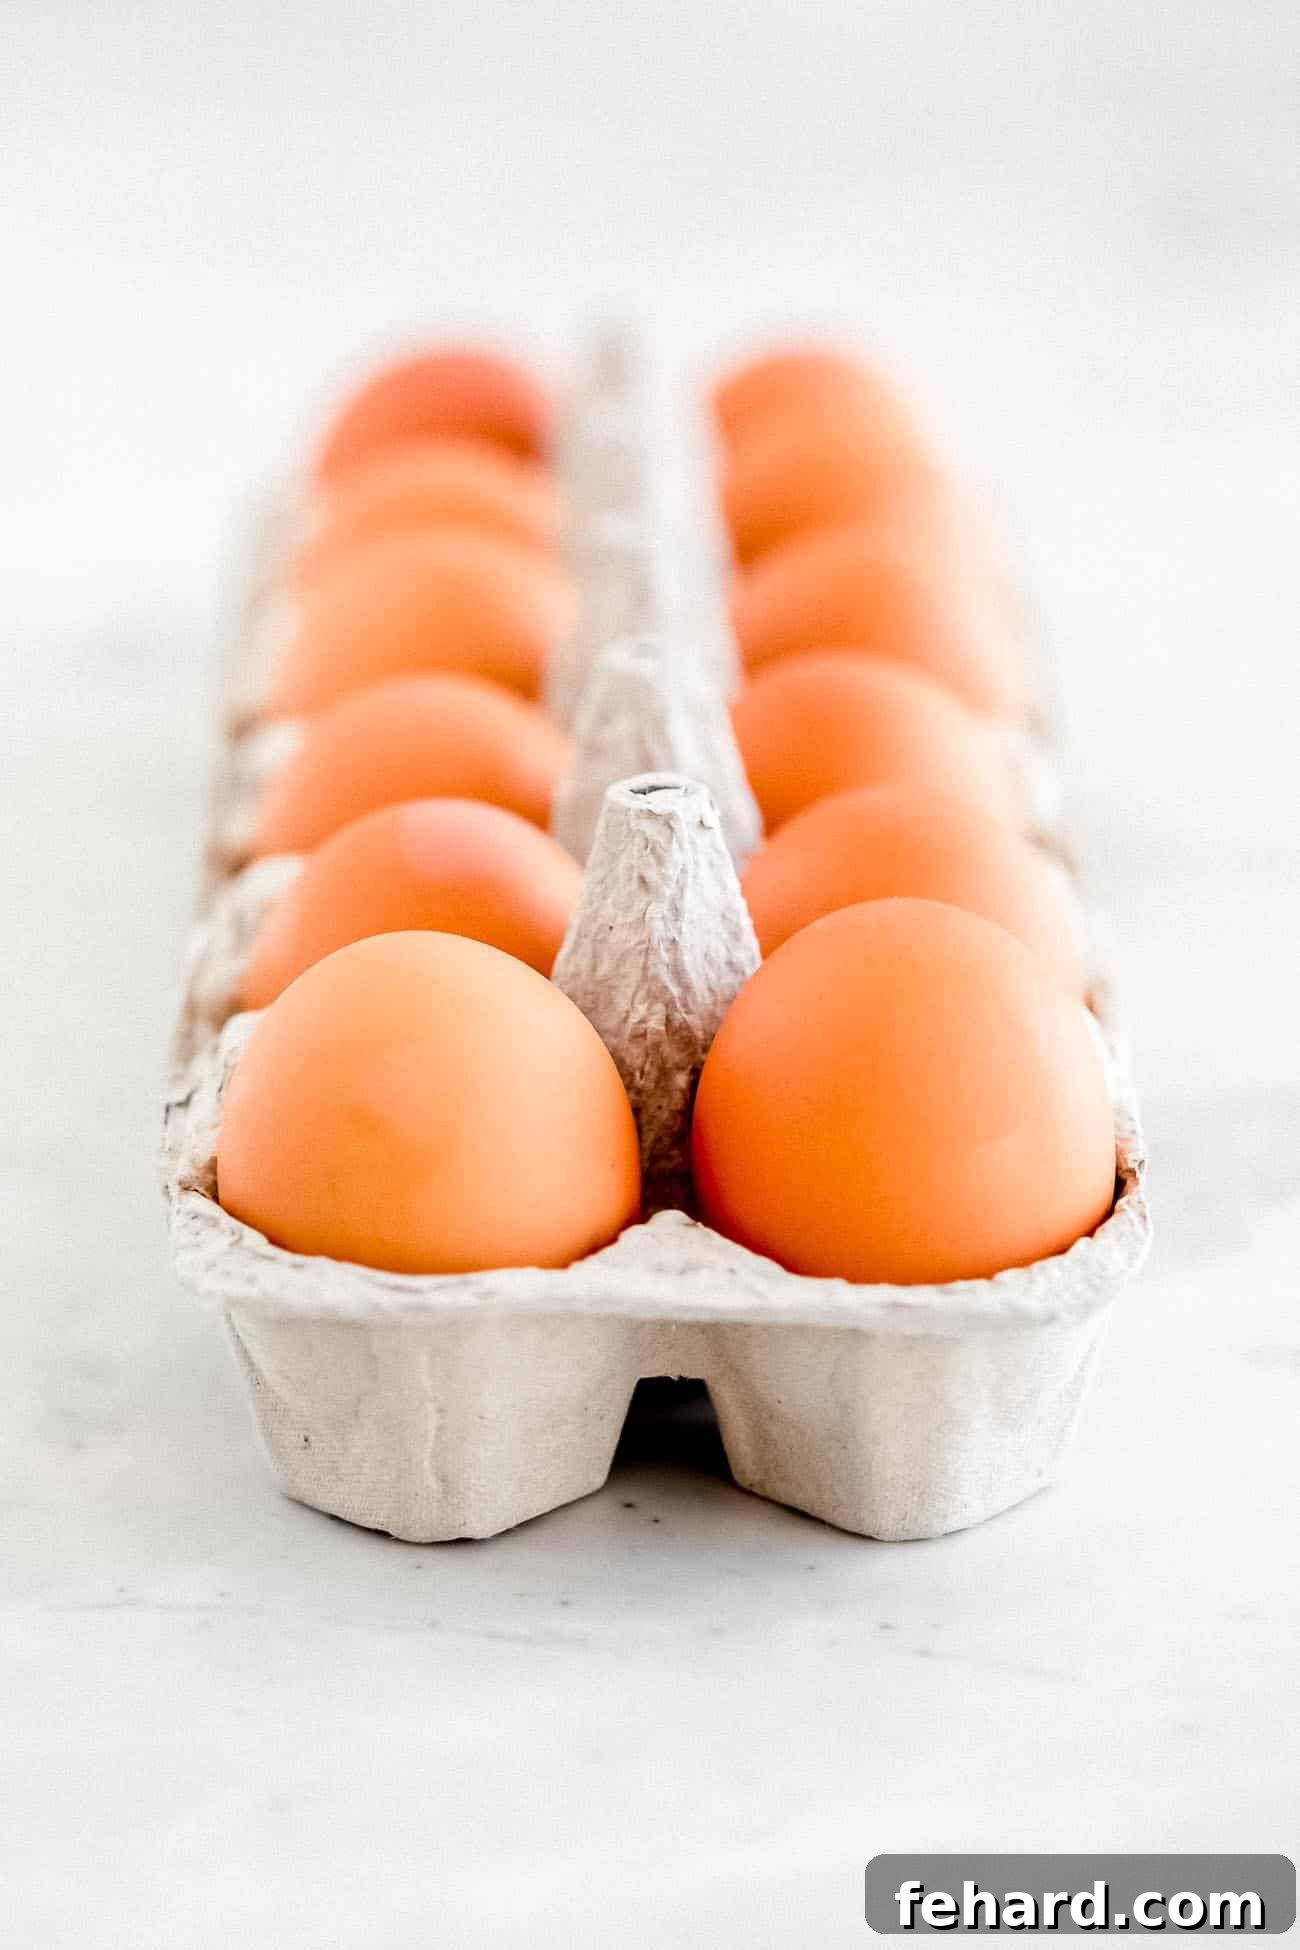
- Eggs: The foundational ingredient and undisputed star of our culinary endeavor. I consistently opt for large free-range eggs due to their superior flavor and the vibrant, rich hue of their yolks, but the true beauty and adaptability of this method lie in its universality. You are more than welcome to use whatever type of eggs you have conveniently available, whether they are standard grocery store varieties, organic selections, or even exquisitely fresh farm-raised eggs from your local market. The paramount consideration for achieving consistently excellent results is to ensure that the eggs within a single batch are of a similar size, which promotes uniform cooking. For optimal and stress-free peeling, a well-known culinary secret is to use eggs that are a few days to approximately one week old. Very fresh eggs, while delicious, tend to have membranes that adhere more stubbornly to the shell, making peeling a slightly more challenging task.
Step-by-Step Instructions To Make Perfect Hard-Boiled Eggs
Prepare the Eggs and Water
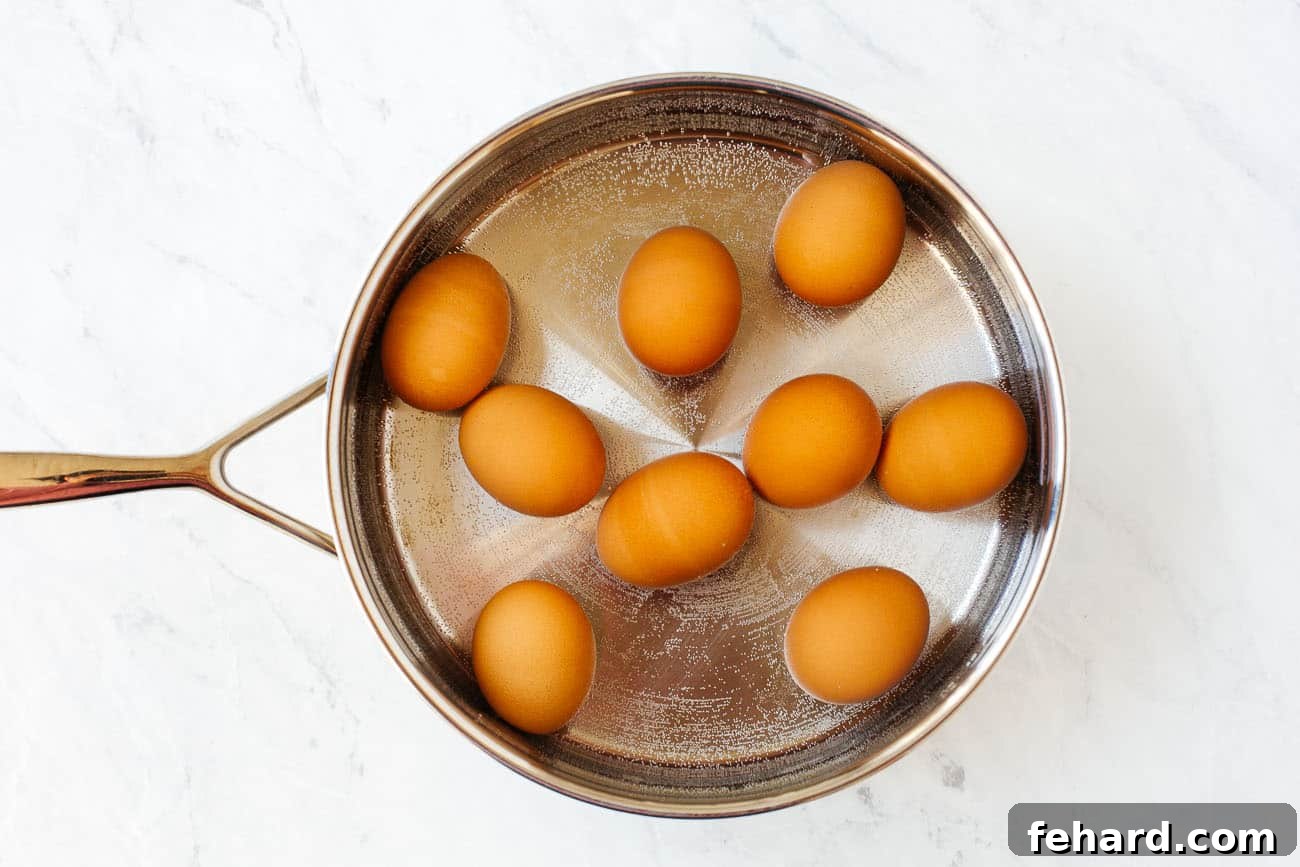
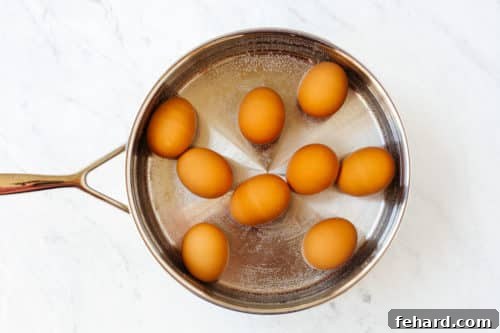
- Begin by carefully placing your eggs in a single, uncrowded layer at the bottom of a spacious saucepan. It’s absolutely crucial to avoid stacking the eggs, as this practice can lead to uneven cooking, where some eggs are overdone and others undercooked, and also significantly increases the risk of them cracking during the boiling process. Once the eggs are neatly arranged, fill the saucepan with cold water, ensuring that the water level generously covers the eggs by at least one inch. This ample water coverage is essential for promoting consistent and even heat distribution around each individual egg, which is key to uniform cooking. If you find yourself in a situation where you need to boil a larger quantity of eggs, such as a full dozen, and they simply don’t fit in a single layer without overcrowding, it’s always best practice to cook them in two separate, smaller batches. This guarantees optimal results for every single egg. For an extra layer of security against potential cracking, consider using eggs that have been allowed to come to room temperature, or adding a small pinch of salt to the water at this stage.
The Gentle Boil Method
- Place the saucepan, with the eggs and water, over high heat on your stovetop. Bring the water to a rapid, rolling boil – you should see large, active bubbles breaking the surface. It’s important to stay attentive during this phase, as precise timing is paramount for success. Once the water has reached a vigorous boil, immediately set a timer and allow the eggs to boil for exactly 1 minute. This initial minute of direct, intense boiling serves to rapidly set the egg whites.
- After precisely 1 minute, promptly and completely turn off the heat source. Do NOT remove the pot from the burner; instead, leave it in place to retain warmth. Crucially, cover the pan tightly with a lid and let it sit undisturbed. This “resting” period is where the magic truly happens, as the residual heat from the water and the covered pot gently cooks the eggs through without the harshness of continuous boiling. This gentle cooking method is the secret to preventing overcooked yolks, rubbery whites, and that undesirable green ring. The exact resting time will subtly vary based on the size of your eggs and your personal preference for yolk consistency:
- For perfect, creamy, and tender yolks (the ideal consistency, much like those showcased in the images), allow large eggs to sit for 9-10 minutes.
- If your preference leans towards a slightly firmer, yet still moist, yolk, extend the sitting time to 11-12 minutes for large eggs.
- For larger eggs, such as extra-large (XL) or jumbo varieties, you will need to add a few more minutes to the sitting time. Typically, 12-14 minutes will ensure they cook through properly without being overdone.
Remember, setting a reliable kitchen timer is absolutely essential here for achieving consistent and predictable results every single time.
Optional Steaming Method for Easy Peeling: As an alternative approach to boiling, you can also hard cook eggs using a steaming method. Place your eggs carefully into a steamer basket, ensuring they are in a single layer. Add about an inch of water to the bottom of the pot, bring it to a boil, then place the steamer basket over the boiling water, cover tightly, and steam for approximately 12-15 minutes (the duration will depend on your desired firmness and the size of your eggs). Many find this method can consistently result in eggs that are notably easier to peel.
The Essential Ice Bath
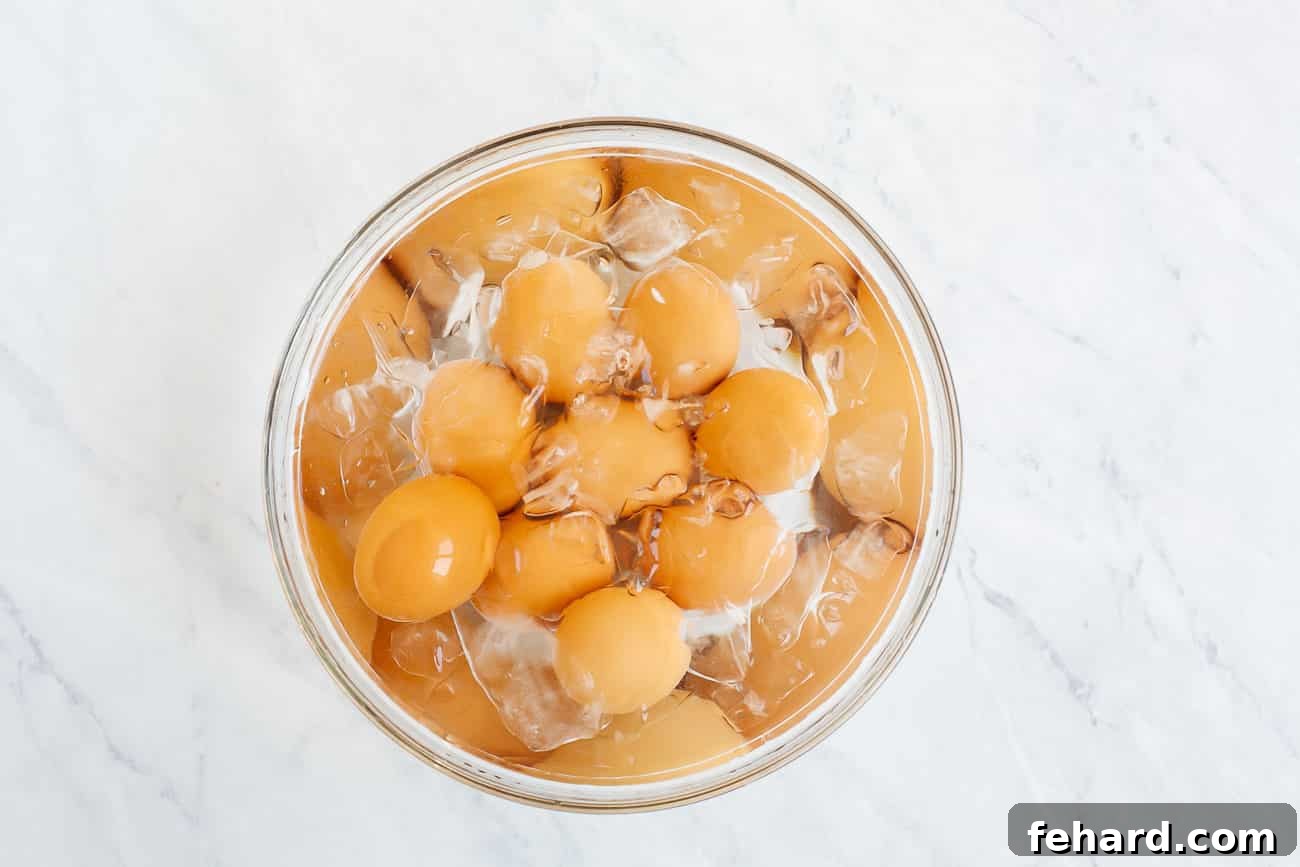
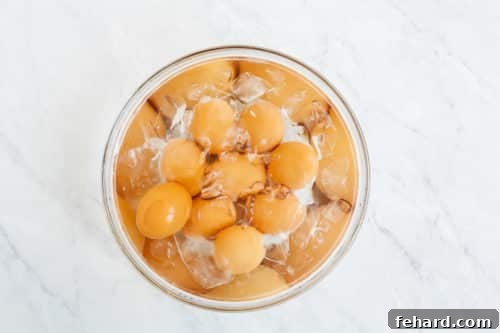
- Once the prescribed sitting time is complete (9-12 minutes for large eggs, as per your preference), it is absolutely critical to halt the cooking process immediately and effectively. Before your timer even goes off, ensure you have prepared a large bowl filled generously with ice water – a true ice bath, not just cool tap water. Using a sturdy slotted spoon, carefully and quickly transfer the hot eggs directly from the saucepan into this prepared ice bath. Allow the eggs to sit fully submerged in this cold environment for a minimum of 5 minutes. This rapid cooling step achieves two profoundly vital objectives: firstly, it instantly stops the cooking process dead in its tracks, which is the key to preventing the dreaded greenish-gray ring from forming around the yolk and ensures a creamy texture. Secondly, the sudden temperature shock causes the egg white to contract rapidly, pulling away from the inner shell membrane. This crucial separation makes the eggs significantly easier and less frustrating to peel. Do not, under any circumstances, skip this essential step! Besides the scientific benefits for your perfect eggs, it also cools them down sufficiently so you can comfortably handle and peel them without the risk of burning your fingers.
Peel, Serve, and Store
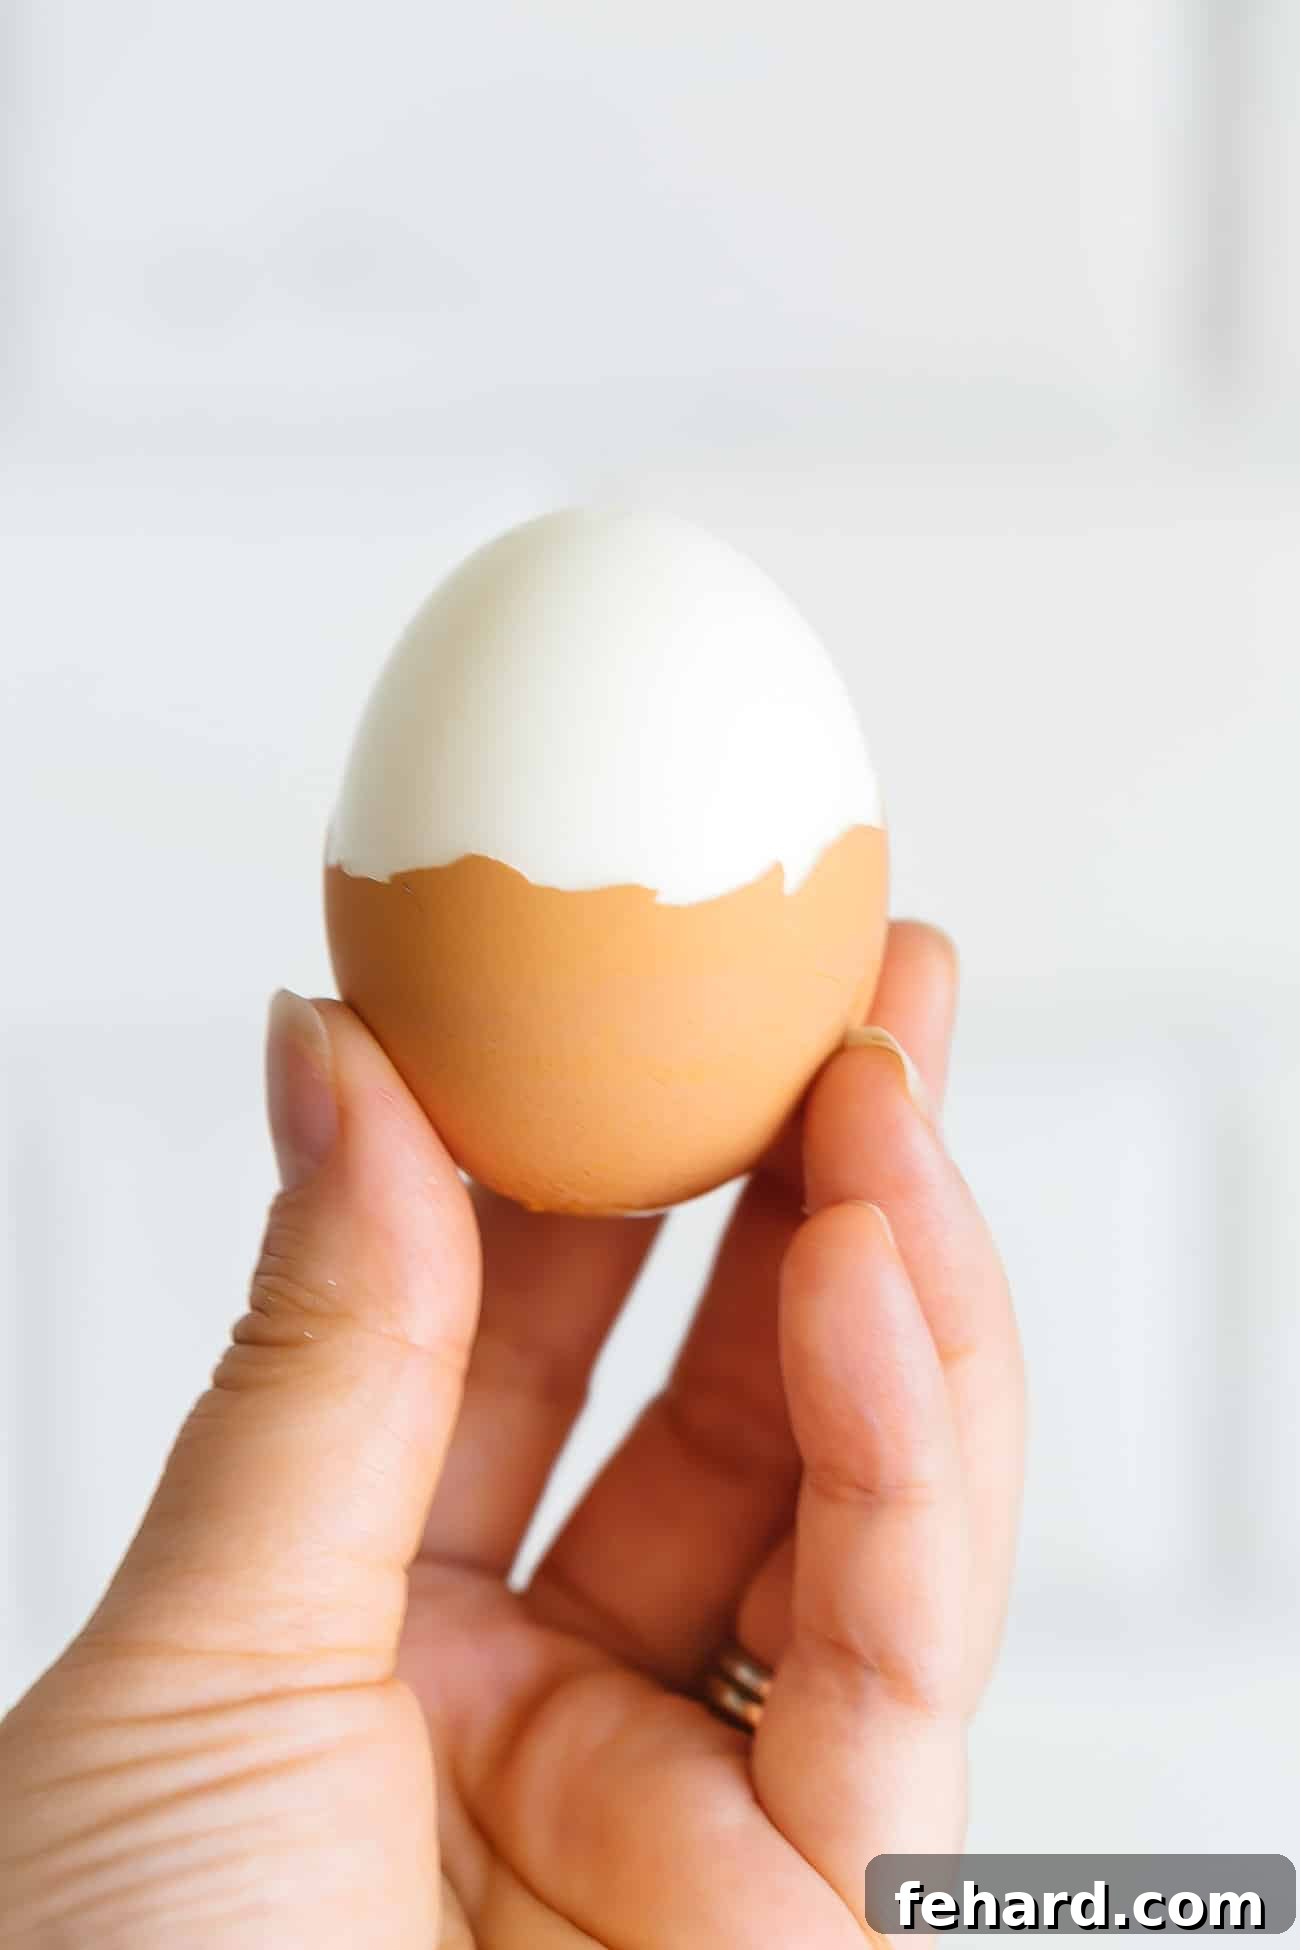
- After their refreshing and effective ice bath, your perfectly cooked hard-boiled eggs are now ready for peeling and enjoyment. Gently tap each egg on a hard, flat surface, such as your kitchen countertop, until you observe small, spiderweb-like cracks appearing all around the shell. For a comprehensive crack pattern, you can also gently roll the egg between your palms with slight pressure. Once adequately cracked, the shell should peel away with remarkable ease, especially if you diligently followed the critical ice bath step. Discard all the eggshells and either serve your freshly peeled hard-boiled eggs immediately, perhaps with a sprinkle of salt, or prepare them for later enjoyment. For optimal storage, carefully transfer them to an airtight glass container and place them in the refrigerator. Properly stored in this manner, hard-boiled eggs will remain wonderfully fresh and delicious for up to a full week, making them an unparalleled choice for efficient and healthy meal prepping throughout your busy week.
Tips for Effortlessly Peeling Hard-Boiled Eggs
Achieving a smooth, frustration-free peel is often considered the final, most satisfying hurdle to enjoying your perfectly cooked hard-boiled eggs. While the ice bath method significantly aids in this process, here are some additional expert tips and clever tricks to make peeling an absolute breeze, ensuring your eggs emerge pristine and intact:
One highly effective technique that many seasoned cooks swear by is to peel your eggs under a gentle, continuous stream of running cold water in your kitchen sink, or even directly while submerged in the ice water bath itself. The flowing water works its way into the tiny crevices of the cracked shell, lubricating the delicate membrane that lies between the shell and the egg white. This lubrication helps the shell segments slip off much more easily, often coming off in larger pieces. If you encounter any particularly stubborn spots where the shell clings, simply crack the egg a little more firmly on the countertop or another hard surface, then return it to the water to continue peeling. For the most efficient and cleanest peel, always try to start peeling from the wider end of the egg, as this is typically where a small air pocket is located, providing an excellent starting point to get under the membrane.
Another clever trick, particularly useful for very fresh eggs which are notoriously harder to peel, is to add a small amount of an alkaline ingredient to the cooking water. A pinch of baking soda (approximately ½ teaspoon per quart of water) increases the alkalinity of the water. This subtle change in pH can, in turn, facilitate the separation of the egg white from the inner membrane, making the eggs noticeably easier to peel. Alternatively, a splash of white vinegar (about 1 tablespoon) can also be added to the water. While vinegar doesn’t necessarily aid in peeling, it serves a different, equally useful purpose: its acidity helps the egg white coagulate more quickly if an egg should happen to crack during the boiling process, effectively sealing the rupture and preventing too much of the precious egg white from leaking out into the water.
Tip: How to Meal Prep Hard Boiled Eggs
- Hard-boiled eggs are truly the ultimate champions of meal prep, offering unparalleled convenience and lasting power. When stored correctly in the refrigerator, they remain perfectly fresh for up to a full week. Their inherent convenience and dense nutrient profile make them an incredibly versatile component for a diverse range of meals throughout your busy schedule. Effortlessly pack them as a wholesome, protein-rich snack to stave off mid-day hunger, or integrate them as a vital part of a satisfying lunch. Crack one open and enjoy it for a quick, energizing breakfast – they’re absolutely fantastic when sliced and placed atop creamy avocado toast! You can also easily chop them into vibrant, crunchy salads, layer them into hearty sandwiches for a protein boost, add them to nourishing grain bowls for a complete meal, or simply grab one for an instant snack whenever hunger unexpectedly strikes.
- To maximize the freshness and extend the shelf life of your hard-boiled eggs, you have the option to store them either peeled or unpeeled. After they have thoroughly cooled down in the ice bath, transfer them into an airtight container before refrigerating. For the absolute longest possible shelf life and best quality, I highly recommend storing them whole and unpeeled. Once an egg is sliced or halved, its internal surfaces are exposed to the air, which can cause it to dry out more quickly and potentially spoil faster.
- A crucial note for preservation: I do not recommend freezing hard-boiled eggs. The freezing and subsequent thawing process irrevocably alters the delicate texture of the egg whites. They tend to become tough, unpleasantly rubbery, and often release excess water, significantly diminishing the enjoyable experience of a perfectly cooked egg.
Delicious Ways to Season Hard-Boiled Eggs
While a plain hard-boiled egg is undeniably a delicious, satisfying, and nutritious treat on its own, venturing into the world of seasonings can truly transform it into an exciting and versatile culinary experience. Don’t limit yourself to just salt and pepper! Here are some fantastic ways to enhance and customize the flavor of your perfectly cooked hard-boiled eggs, turning a simple snack into a gourmet delight:
- Salt and Pepper: The quintessential and timeless classic pairing. A simple sprinkle of flaky sea salt and freshly ground black pepper is often all that’s needed to truly bring out the natural, rich flavors of the egg, providing a satisfyingly basic yet perfect taste.
- Garlic Salt: For those who crave a more savory and aromatic kick, garlic salt adds a wonderful, pungent depth. Consider pairing it with a touch more black pepper for an even more complex and robust flavor profile.
- Paprika: A generous sprinkle of paprika not only imparts a beautiful, inviting reddish hue but also a mild, earthy, and subtly sweet flavor. For a bolder, more intense taste, smoked paprika can offer a distinct, alluring smoky twist that complements the egg beautifully.
- Everything But The Bagel Seasoning: This incredibly popular and versatile blend, typically featuring a delightful mix of sesame seeds, poppy seeds, dried garlic, dried onion, and flaky sea salt, is an absolute game-changer for hard-boiled eggs. It offers an irresistible burst of savory, nutty, and slightly crunchy goodness that elevates the egg to new heights.
- Lemon Pepper: Bright, zesty, and refreshingly tangy, lemon pepper seasoning provides a vibrant zing that perfectly complements the creamy, rich texture of the egg. It’s an excellent choice for a lighter, more refreshing flavor profile.
- Sriracha Sauce: For enthusiasts who adore a delightful kick of heat, a controlled drizzle of sriracha sauce adds a fiery, garlicky, and slightly sweet spice that is incredibly addictive and invigorating.
- Hot Sauce: Any of your favorite hot sauces can be a fantastic addition, allowing for customized levels of heat and introducing distinct flavor notes, ranging from bright and vinegary to rich and smoky, depending on your selection.
- Flavored Salt: Elevate your hard-boiled egg experience with specialty salts. Try truffle salt for an earthy, luxurious aroma that feels incredibly gourmet, or experiment with chili-lime salt for a tantalizing combination of spicy heat and tangy zest.
For an optimal tasting experience, try slicing your eggs in half lengthwise and generously sprinkling them with a chosen seasoning or a creative combination. Alternatively, for a quick and easy spread, mash your eggs with a fork and thoroughly mix in your preferred flavors, creating a simple yet delicious egg salad base.
Expert Tips To Prevent Eggs from Cracking During Boiling
One of the most common and often frustrating occurrences when boiling eggs is encountering cracked shells, which can unfortunately lead to unsightly egg whites leaking out into the water. While a cracked egg is still perfectly safe and edible, preventing them from happening ensures a more aesthetically pleasing and easier-to-peel result. Here are a few expert tips to help keep your eggs beautifully intact:
- Start with Room Temperature Eggs: This is a frequently overlooked but highly effective tip. Eggs taken directly from the cold refrigerator are significantly more prone to cracking when abruptly introduced to hot water. This is due to the rapid and uneven expansion of the egg’s contents and shell caused by thermal shock. To mitigate this, allow your eggs to sit on the kitchen counter for at least 15-30 minutes before boiling, bringing them closer to room temperature. This gradual temperature equalization significantly reduces the stress on the shell.
- Add Salt to the Water: As briefly mentioned earlier, adding a teaspoon of common table salt to the cooking water can be surprisingly effective. While it doesn’t directly prevent cracks from forming, if an egg does happen to develop a hairline fracture during cooking, the salt in the water helps the egg white coagulate more quickly upon contact, effectively sealing the crack and preventing excessive leakage into the boiling water. This minimizes waste and keeps your eggs looking neater.
- Don’t Overcrowd the Pot: This rule is fundamental for even cooking and crack prevention. Always ensure that your eggs are placed in a single, uncrowded layer at the bottom of the saucepan. Overcrowding the pot forces eggs to jostle and knock against each other, particularly during a vigorous boil, which dramatically increases their chances of cracking. If you are preparing a large quantity of eggs, it is always advisable to work in smaller, manageable batches rather than cramming them all into one pot.
- Avoid Intense, Continuous Rolling Boils: While our method strategically begins with a brief, rapid boil, it’s crucial to understand that continuous, intense boiling is detrimental. A fierce, constant boil causes the eggs to tumble excessively, exacerbating the risk of them colliding and cracking. The initial minute of rolling boil is perfectly sufficient to set the outer layer of the egg whites; the subsequent cooking should be gentle, relying on residual heat off the burner, as outlined in our primary instructions.
- Gently Place Eggs in the Pot: Resist the temptation to simply drop your eggs into the saucepan! This sudden impact against the hard bottom of the pot is a common cause of cracks, even before cooking commences. Instead, carefully lower each egg one by one into the bottom of the empty saucepan using a slotted spoon or your hand, ensuring a soft landing.
- Avoid Adding Eggs to Already Boiling Water: Introducing cold eggs directly into fiercely boiling water creates an immediate and severe temperature shock that almost guarantees cracking. The sudden change in temperature causes the air bubble inside the egg to expand too quickly, exerting pressure on the shell. Always start with cold tap water and the eggs together in the pot, then gradually bring them to a boil as outlined in our recommended method. This gradual heating allows the egg and shell to expand more uniformly.
More Delicious Egg Recipes to Explore
If you’ve thoroughly enjoyed mastering the craft of making the perfect hard-boiled egg, you’ll be thrilled to further explore and expand your culinary repertoire with other incredible and versatile egg-based dishes:
- Healthy Breakfast Meal Prep Bowls: An excellent and efficient way to commence your day with balanced nutrition and sustained energy. These bowls frequently feature eggs as a pivotal, high-quality protein component, easily adaptable to your taste.
- Easy Vegetable Frittata: A wonderfully versatile and remarkably quick dish that proves perfect for a leisurely brunch, a satisfying lunch, or even a light yet fulfilling dinner. It’s effortlessly packed with your favorite seasonal vegetables, making it a delicious and customizable option.
- Avocado Egg Salad Recipe: A creamy, uniquely satisfying, and nutritious twist on the beloved classic egg salad. This version is luxuriously enriched with healthy fats and a vibrant flavor profile derived from ripe avocados, offering a delightful alternative.
- Breakfast Egg Muffins Recipe: These portable, infinitely customizable, and incredibly convenient muffins are an absolute dream for anyone seeking grab-and-go breakfasts. They are a meal prep marvel, allowing you to prepare healthy, delicious options in advance.
How to Make Hard Boiled Eggs
Video
Ingredients
- Eggs
Instructions
-
Fill a saucepan with water and carefully place the eggs inside in a single layer. Bring the water to a rolling boil over high heat, then boil for just 1 minute. Turn off the heat immediately, cover the saucepan with a lid, and let it sit undisturbed for 9-12 minutes. Adjust resting time based on egg size and desired yolk firmness (9-10 min for creamy large yolks, 11-12 min for firmer large yolks; add 2-3 min for XL/Jumbo eggs).

-
Carefully drain the hot water from the saucepan. Immediately transfer the cooked eggs into a large bowl filled with ice water (an ice bath). Allow the eggs to sit in the ice bath for 5 minutes. This stops the cooking process and makes peeling significantly easier.
-
Gently tap and peel the eggs, discarding the shells. Serve your perfectly hard-boiled eggs immediately or transfer them to an airtight glass container and store in the refrigerator for up to 1 week.
Notes
- Older eggs are generally easier to peel than very fresh eggs due to changes in their pH balance and membrane adherence.
- Adding a pinch of baking soda (about ½ teaspoon per quart of water) to the cooking water can help increase its alkalinity, which in turn aids in making eggs easier to peel, especially with very fresh batches.
- Always adjust your cooking and resting times to accommodate different egg sizes. Smaller eggs (medium) may require slightly less time (e.g., 8-9 minutes resting), while extra-large (XL) or jumbo eggs will require a few extra minutes (e.g., 12-14 minutes resting) to cook through properly.
- To store: For maximum freshness and ease, store peeled hard-boiled eggs in an airtight container filled with a little cold water in the fridge for up to a week. Alternatively, you can store them unpeeled in an airtight container for the same duration.
- To freeze: Freezing hard-boiled eggs is not recommended whatsoever. The process results in a significantly undesirable change in texture, making the egg whites rubbery, tough, and often watery upon thawing, severely compromising their quality.
Nutrition
Nutrition information is automatically calculated, so should only be used as an approximation.
Did You Make This?
Follow @primaverakitchen on Instagram, snap a photo, and tag it #primaverakitchen. We’d love to see your recreation.