
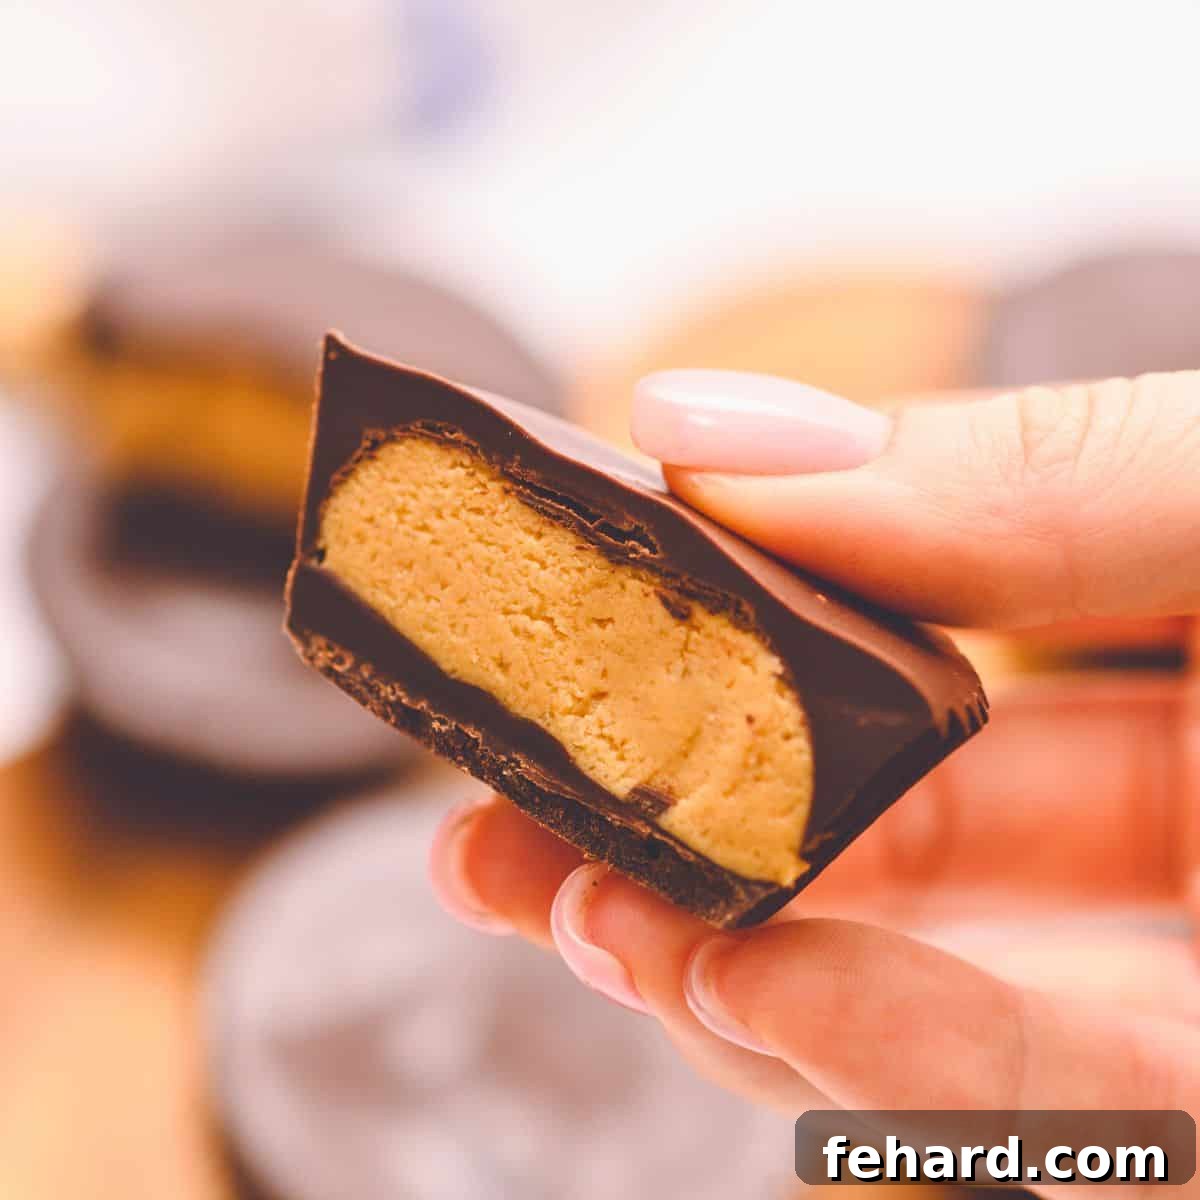
The Ultimate Guide to Homemade Peanut Butter Cups: Easy No-Bake Recipe
There’s something undeniably magical about the combination of rich chocolate and creamy peanut butter. It’s a classic pairing that has captured hearts and taste buds for generations. While store-bought versions are a beloved convenience, imagine creating that iconic, melt-in-your-mouth experience right in your own kitchen! This ultimate guide reveals a simple, no-bake homemade peanut butter cup recipe that delivers all the nostalgic flavor you adore, often surpassing the original. With minimal ingredients and straightforward steps, you’ll be indulging in these decadent treats in no time. Get ready to impress your friends, delight your family, or simply treat yourself to the satisfying joy of a truly amazing homemade dessert.
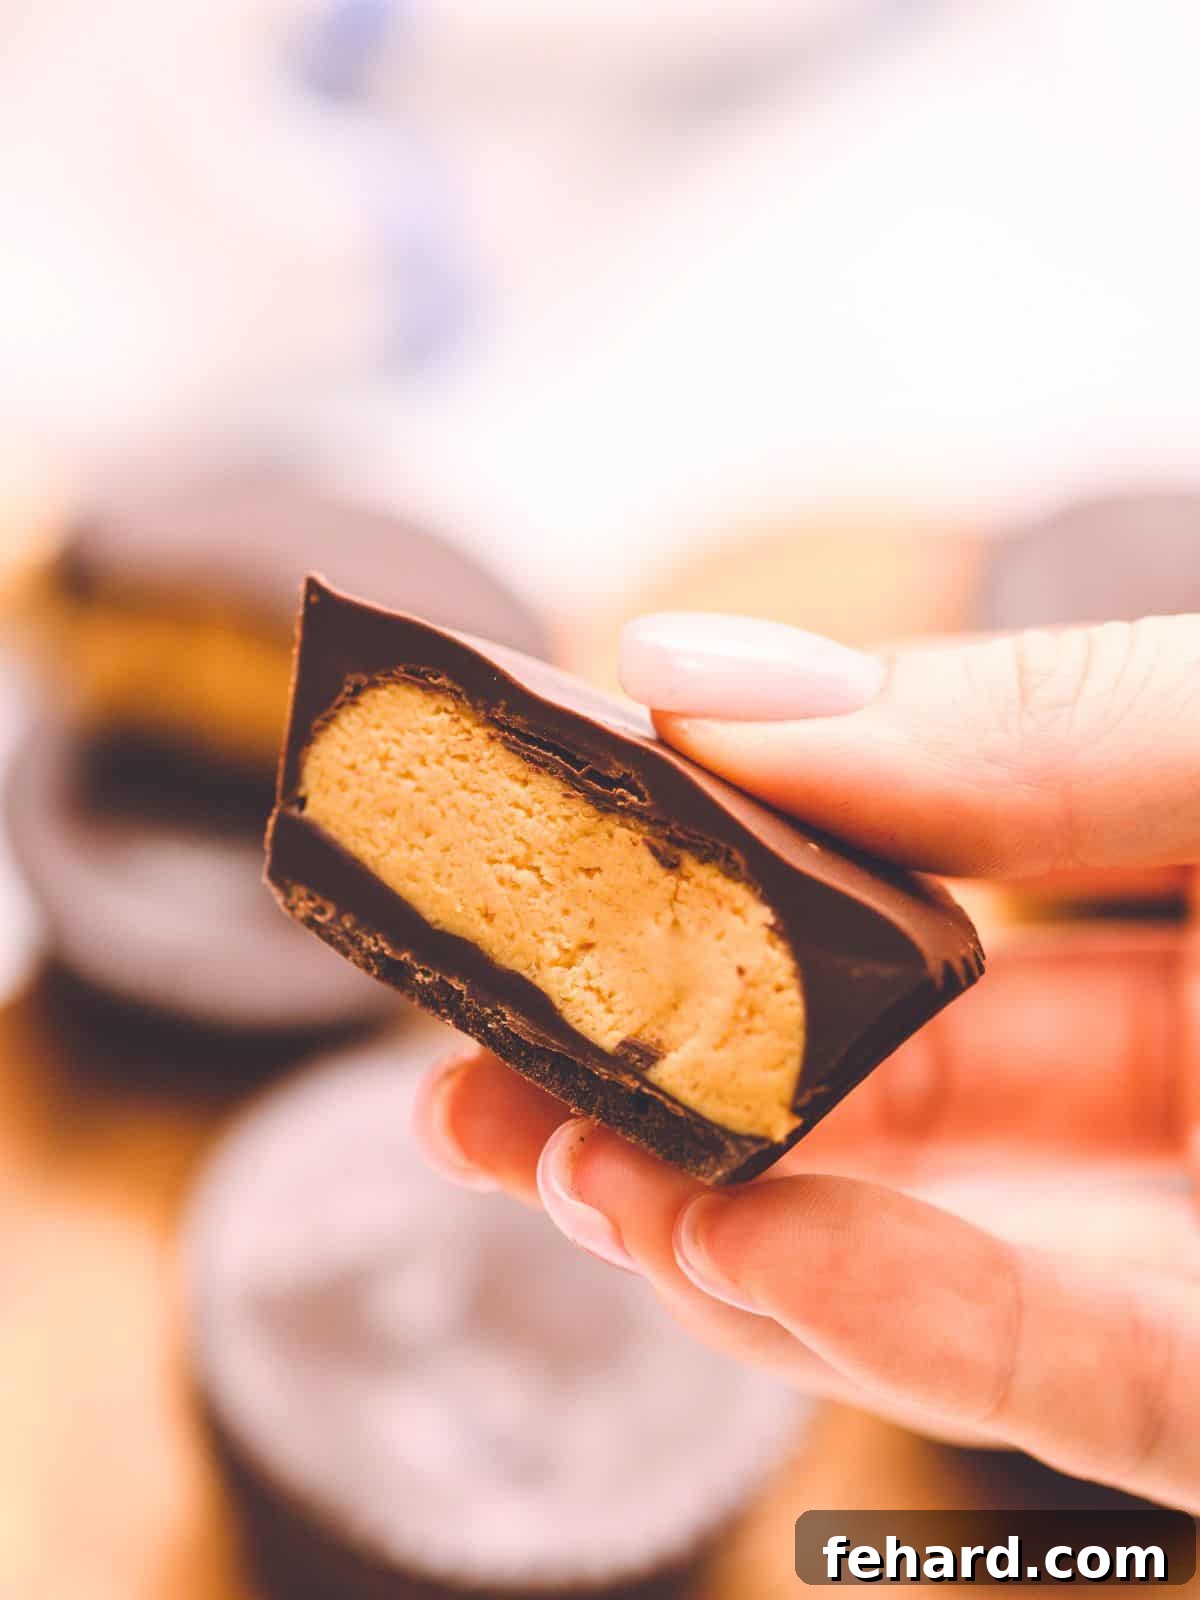
Why Make Your Own Homemade Peanut Butter Cups?
Beyond the sheer enjoyment of a fresh, homemade treat, there are numerous compelling reasons to whip up your own batch of chocolate peanut butter cups. Firstly, ingredient control is paramount. You get to choose high-quality chocolate, your favorite brand of peanut butter, and can even opt for organic or all-natural components. This means no artificial preservatives, sweeteners, or unwanted additives often found in commercially produced candies.
Secondly, the freshness and flavor are unparalleled. Homemade treats always boast a superior taste, and these peanut butter cups are no exception. The chocolate is vibrant, the peanut butter filling is wonderfully creamy, and the textures are simply divine. You can savor the full, authentic flavor profile without any compromise.
Furthermore, this recipe offers incredible customization opportunities. Want to use dark chocolate? Prefer a mix of milk and semi-sweet? Crave a touch of sea salt or a sprinkle of chopped nuts? When you make them yourself, the possibilities are endless. This allows you to tailor the treat precisely to your preferences or to accommodate dietary needs, such as making them dairy-free or peanut-free (more on that later!).
Finally, the process itself is wonderfully simple and rewarding. As a no-bake recipe, it eliminates the need for an oven, making it accessible to even novice bakers. The step-by-step instructions are easy to follow, and the quick setting time means you won’t have to wait long to enjoy your delicious creations. It’s a fantastic activity for families, a thoughtful gift for loved ones, or a personal indulgence that’s sure to bring a smile.
Essential Tips for Perfect Homemade Peanut Butter Cups
While this recipe is remarkably easy, a few key insights can elevate your homemade peanut butter cups from good to absolutely extraordinary. Paying attention to these simple details will ensure a smooth process and a delicious outcome every time.
- Peanut Butter Choice: Consistency is Key. For the best results, opt for shelf-stable creamy peanut butter like Jif or Skippy. These brands tend to have a firmer, more consistent texture that holds its shape beautifully in the filling. If you prefer to use natural, refrigerated peanut butter (which often has a thinner, oilier consistency), you’ll need to adjust the recipe slightly. Plan to add an extra 1-2 tablespoons of powdered sugar to the filling mixture. This additional sugar will absorb excess oil and provide the necessary structure to create a firm, dough-like consistency for your peanut butter discs.
- Your Chocolate, Your Rules. The beauty of homemade treats lies in personalization. Feel free to use any type of chocolate you love! Milk chocolate will give you a sweeter, classic Reese’s flavor. Dark chocolate, my personal favorite, offers a richer, more sophisticated contrast to the sweet peanut butter. Semi-sweet chocolate provides a balanced flavor, and even white chocolate can create a unique and delightful variation. Chocolate chips, baking bars chopped into pieces, or even couverture chocolate will all work perfectly, just ensure it’s good quality for the best taste.
- Coconut Oil: The Secret to Smooth, Glossy Chocolate. Adding a small amount of coconut oil to your melted chocolate is optional, but highly recommended. It serves two main purposes: first, it helps the chocolate melt more smoothly and become easier to spread, ensuring a thin, even coating. Second, it contributes to a beautiful, glossy finish and helps the chocolate set up quickly and cleanly, making the cups easier to unmold. If you don’t have coconut oil on hand, don’t worry – you can still make excellent peanut butter cups, though the chocolate might be slightly less shiny and take a little longer to harden.
- Muffin Liners: Silicone for the Win. To ensure your peanut butter cups release effortlessly from the pan without any chocolate sticking, I highly recommend using a silicone muffin tin or individual silicone liners. These are non-stick by nature, making unmolding a breeze and ensuring every precious bit of chocolate stays intact. While paper liners can also be used, sometimes small pieces of chocolate might adhere to them when peeling them off, which can be a little frustrating. If using paper, you might find lightly greasing them beforehand helps.
5-star Reader Review
My 10-year-old wanted to surprise us with dessert. She found this recipe and made these 100% on her own! They turned out fabulous. –Carla⭐⭐⭐⭐⭐
Step-by-Step: Crafting Your Own Delicious Peanut Butter Cups
Recreating the magic of a Reese’s peanut butter cup at home might seem like a daunting task, but rest assured, the process is incredibly straightforward and fun. Follow these detailed step-by-step instructions, and you’ll be a peanut butter cup artisan in no time!
Preparation is Key: Setting Up for Success
Before you begin melting chocolate or mixing ingredients, it’s wise to prepare your workspace. This ensures a seamless process and prevents any last-minute scrambling.
- Line Your Muffin Tin: Begin by lining a 6-cup standard muffin tin with silicone liners or paper liners. If you’re aiming for mini peanut butter cups, a 12-cup mini cupcake tin with corresponding liners will work perfectly. The liners are crucial for easy removal of your finished treats.
Step One: Building the Rich Chocolate Base
The foundation of any great peanut butter cup is a sturdy, delicious chocolate base. This initial layer creates the signature shape and ensures a delightful chocolatey bite from the very beginning.
- Melt the Chocolate: Place approximately one-third of your total chocolate chips (about 1 cup) into a small, heat-safe bowl. Microwave the chocolate in 30-second intervals, stirring thoroughly between each burst. The key is to stop heating when only a few small chunks of chocolate remain. The residual heat from the bowl and the already melted chocolate will continue to melt these remaining pieces as you stir, resulting in a perfectly smooth and creamy consistency without burning. If using, stir in 1 teaspoon of coconut oil until it’s fully incorporated and the chocolate looks glossy.
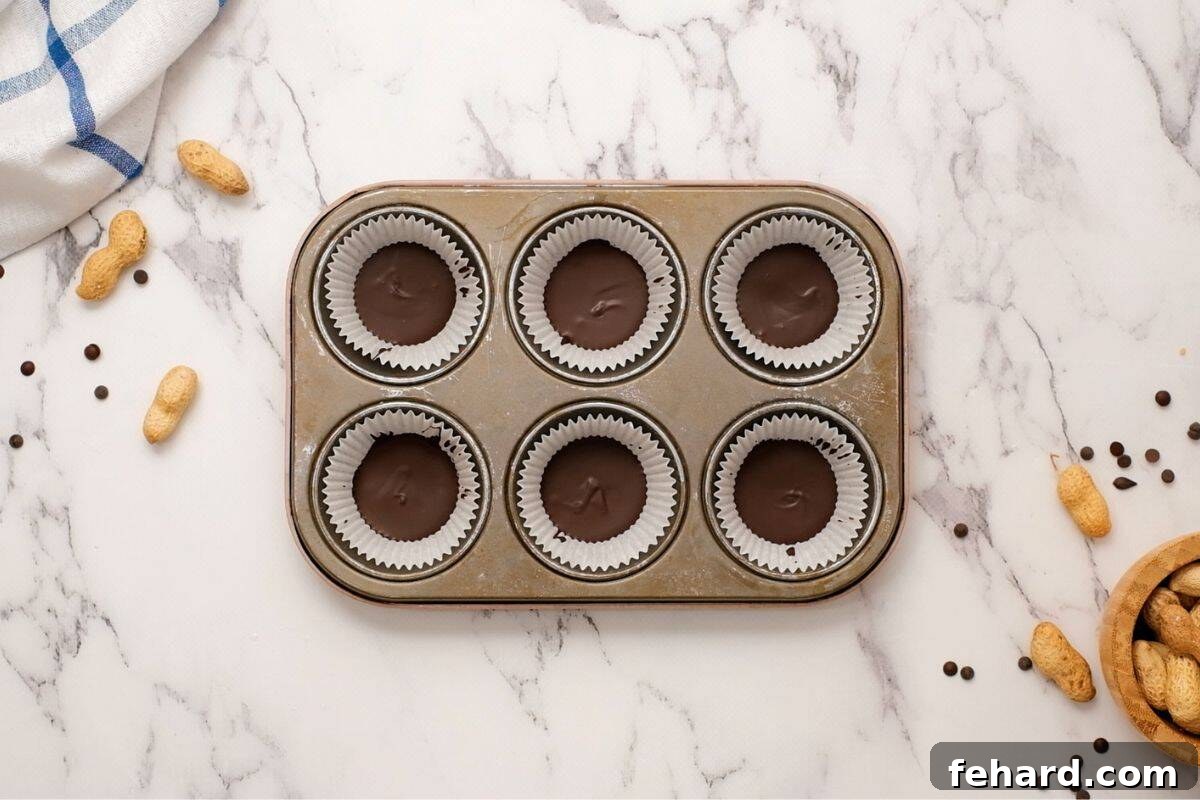
- Spoon into Molds: Carefully spoon about ½ tablespoon of the melted chocolate into the bottom of each prepared muffin liner. Use the back of your spoon to gently spread the chocolate into a thin, even layer, ensuring the entire bottom is covered.
- Let Harden: To set the chocolate quickly, transfer the muffin tin to the refrigerator or freezer for approximately 5 minutes. This step is essential to create a firm base that won’t mix with your peanut butter filling.
Step Two: Crafting the Creamy Peanut Butter Filling
While your chocolate base is chilling, seize the opportunity to prepare the star of the show: the rich, thick, and utterly irresistible peanut butter filling. This recipe is designed to yield a filling that closely resembles the dense, creamy texture found in your favorite store-bought peanut butter cups.
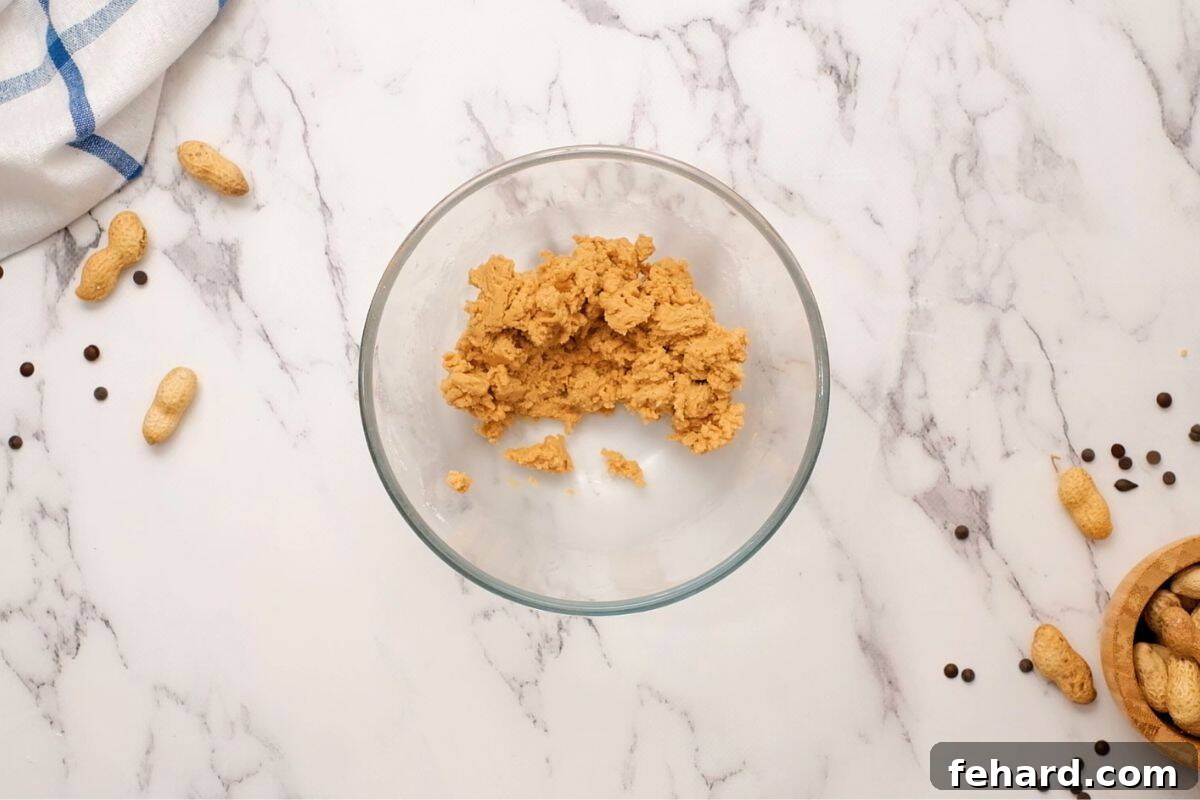
- Cream the Peanut Butter Mixture: In a medium mixing bowl, combine ½ cup of creamy peanut butter, ¼ cup of powdered sugar, ½ teaspoon of vanilla extract, and ¼ teaspoon of table salt. Using a handheld mixer on medium speed, beat the ingredients together until they are well combined and form a thick, dough-like mixture. The consistency should be firm enough to roll and shape with your hands, similar to a soft cookie dough. Remember, if you opted for natural peanut butter, you might need to gradually add an extra tablespoon or two of powdered sugar until you achieve this perfect, pliable consistency.
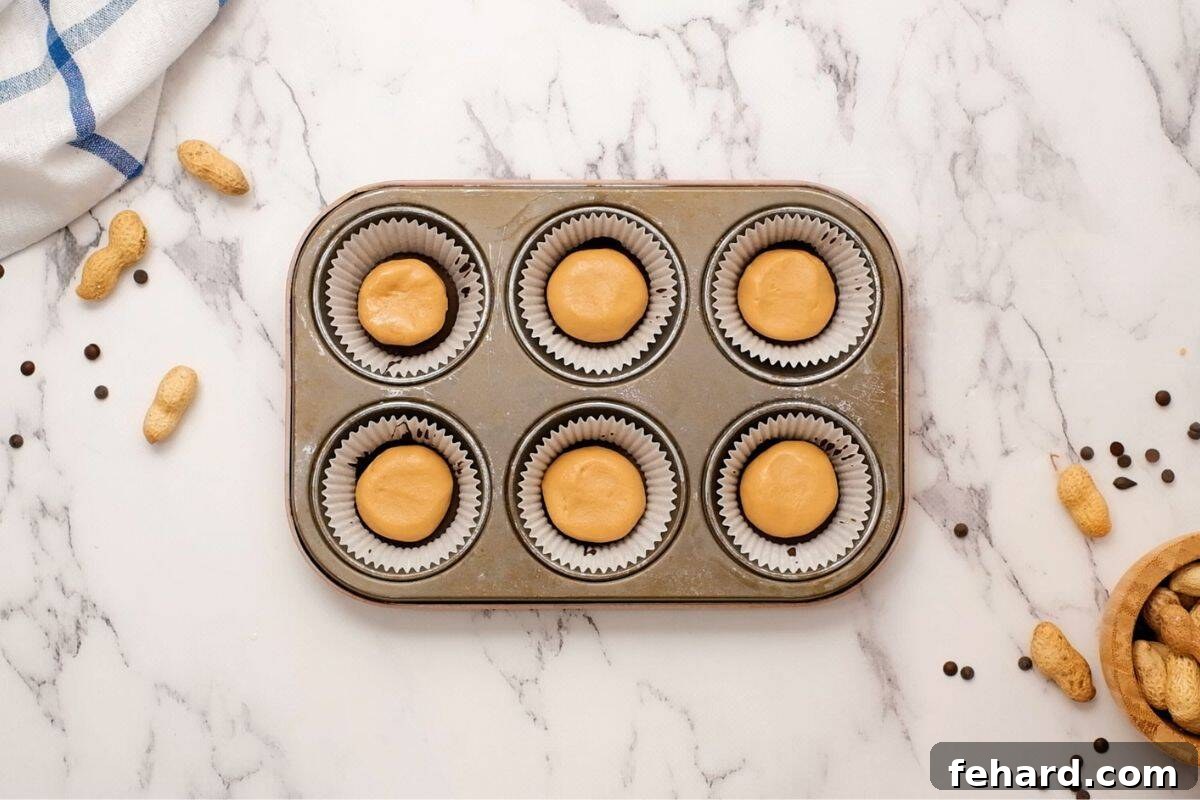
- Prepare Peanut Butter Discs: Remove the muffin tin from the refrigerator or freezer. Take about 1 tablespoon of the peanut butter mixture for each cup. Using the palms of your hands, roll and flatten each portion into a small disc. These discs should be slightly smaller in diameter than your chocolate base. Carefully place one peanut butter disc on top of the hardened chocolate base in each muffin cup. Repeat this process until all the cups have their delightful peanut butter centers.
Step Three: Sealing with a Glossy Chocolate Top
Now it’s time to complete your homemade masterpieces by adding the final layer of luscious melted chocolate. This step creates that classic peanut butter cup dome shape and ensures the perfect chocolate-to-peanut butter ratio, just like your favorite Reese’s.
- Melt the Remaining Chocolate: Place the remaining 1½ cups of chocolate chips into a clean, heat-safe bowl. Repeat the melting process as you did for the base: microwave in 30-second intervals, stirring thoroughly after each, until mostly melted with only a few small chunks remaining. Stir until smooth and creamy from residual heat. Add the remaining 2 teaspoons of coconut oil (if using) and stir until the chocolate is smooth, fluid, and beautifully glossy.
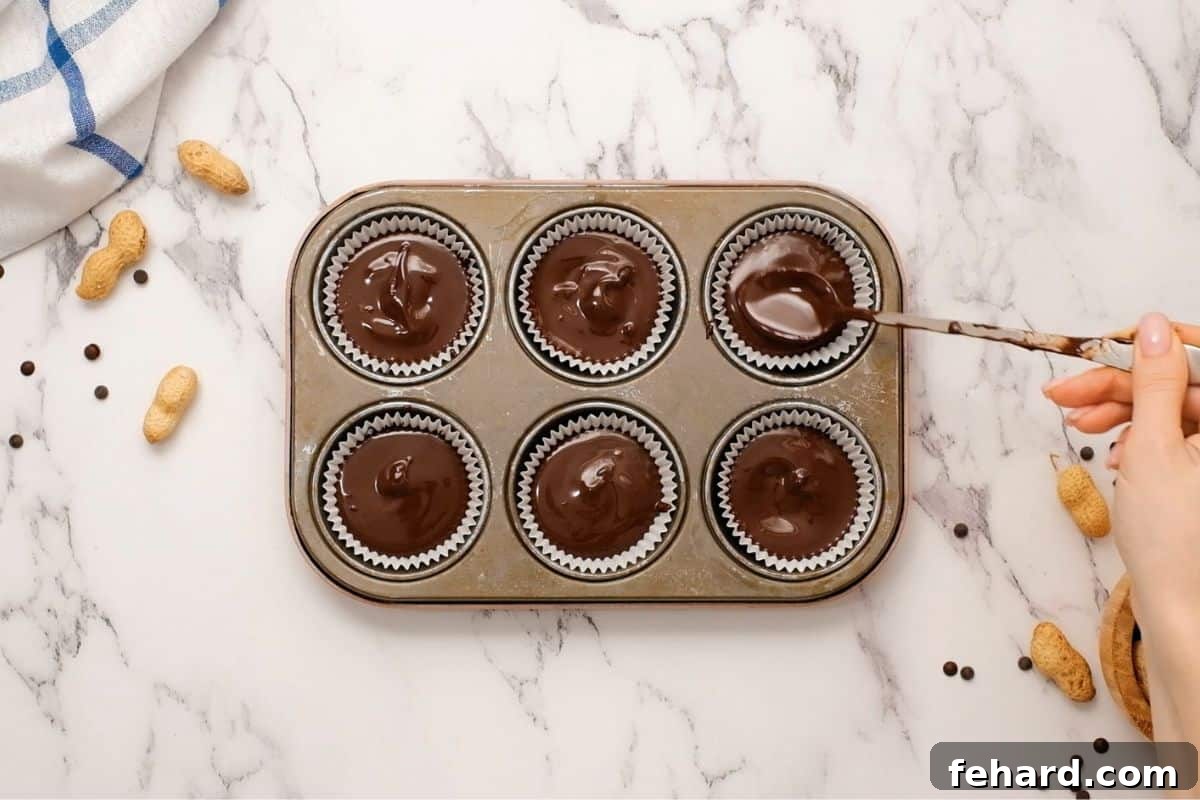
- Spoon Chocolate Over Peanut Butter: Pour about 2 teaspoons of the freshly melted chocolate over each peanut butter disc. Use the back of your spoon to gently spread the chocolate evenly over the entire top of the peanut butter, allowing any excess to drip down the sides and fully encapsulate the peanut butter center. This ensures a complete and even chocolate shell around the peanut butter filling.
Step Four: The Chilling Game – Letting Them Harden
Patience is a virtue, especially when it comes to no-bake treats. This crucial step allows the chocolate to fully solidify, giving your peanut butter cups their definitive structure and snap.
Place the muffin tin, now filled with your almost-complete peanut butter cups, into the refrigerator for at least one hour. This allows the chocolate to firm up completely, ensuring they can be easily unmolded without breaking. For those eager to enjoy their treats sooner, you can speed up the process by popping the muffin tin into the freezer for a quick 10-15 minutes.
Step Five: Unmold, Serve, and Store for Future Enjoyment
The moment of truth! Once your peanut butter cups are perfectly hardened, it’s time to unleash them from their molds and savor the fruits of your labor.
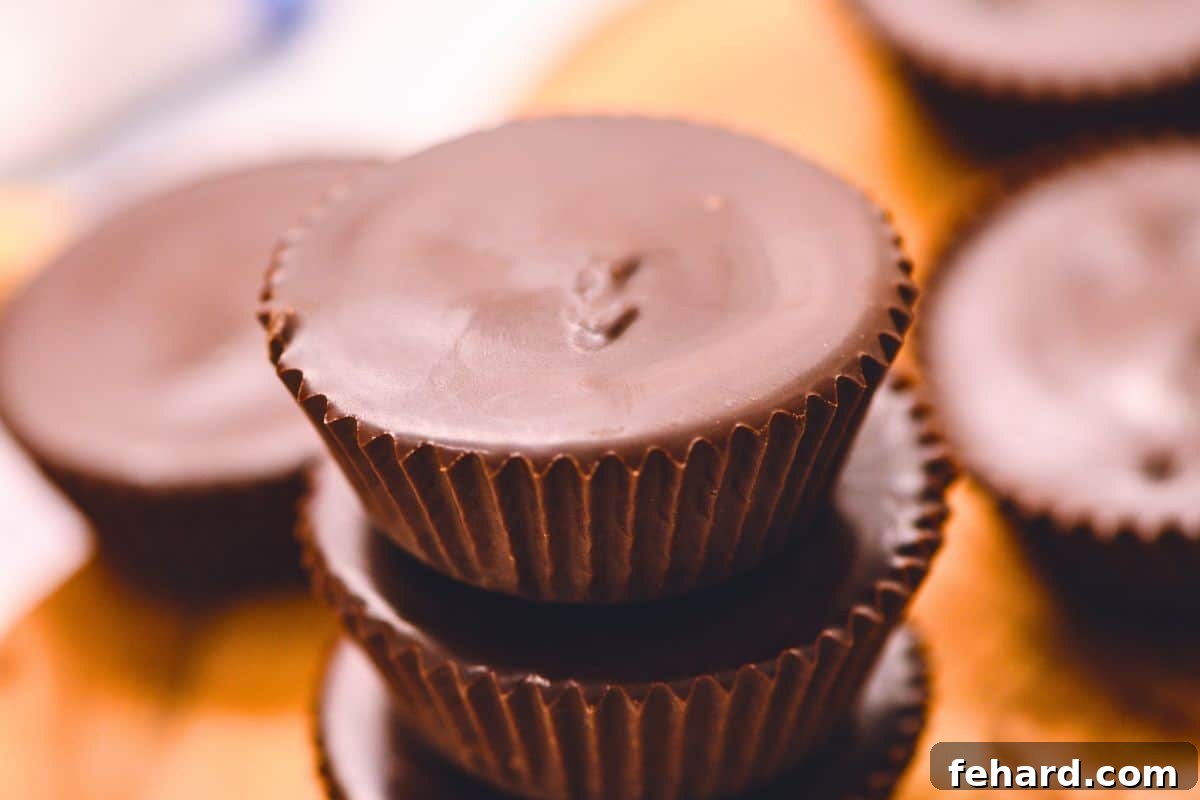
- Unmold with Care: Gently remove the peanut butter cups from the muffin tin. If you used silicone liners, they should pop right out. If using paper liners, carefully peel them away. Some find it easier to peel the liners when the cups are slightly chilled.
- Storage Solutions: These homemade treats are best enjoyed after allowing them to sit at room temperature for 5-10 minutes to achieve the ultimate texture and flavor. Store any leftovers in an airtight container in the refrigerator for up to 5 days. For longer storage, they can be frozen for up to 1 month. When freezing, layer them between parchment paper to prevent sticking. Keep in mind that when stored, especially in the fridge, the chocolate may develop a slight “bloom” or cloudiness, but rest assured, this does not affect the delicious taste or quality.
Creative Variations & Customizations
One of the greatest joys of making homemade treats is the freedom to customize them to your heart’s content. While this homemade peanut butter cup recipe is fantastic on its own, it also serves as a perfect canvas for your culinary creativity. Let these suggestions inspire you to make this sweet treat uniquely yours.
- Dairy-Free Delight: For those with dairy sensitivities or following a vegan diet, it’s incredibly simple to make these cups dairy-free. Simply swap out traditional chocolate for your favorite high-quality dairy-free chocolate chips or baking bars. Many excellent options are available in most grocery stores today that melt beautifully.
- Nut-Free Alternatives: If peanuts are an allergen or you simply prefer another flavor, this recipe is highly adaptable. Replace the peanut butter with almond butter, cashew butter, or for a completely nut-free option, sunflower seed butter (SunButter works wonderfully). Adjust powdered sugar as needed for consistency, as different nut/seed butters have varying thicknesses.
- Add Exciting Toppings: Before the final chocolate layer fully hardens, transform your peanut butter cups with a sprinkle of delicious toppings. A pinch of flaky sea salt enhances the chocolate and peanut butter flavors beautifully. Colorful sprinkles add a festive touch, perfect for parties or holidays. Crushed pretzels introduce a delightful salty-sweet crunch, while a dusting of cocoa powder or a drizzle of contrasting chocolate (like white chocolate on dark chocolate cups) can add visual appeal and extra flavor dimension.
- Explore Shapes and Sizes: Don’t limit yourself to standard muffin tins! Use a mini muffin tin to create bite-sized peanut butter cups, perfect for sharing or portion control. For a larger, more indulgent treat, a jumbo muffin tin will yield generously sized cups. You can even get creative with silicone molds in various fun shapes – think hearts for Valentine’s Day, eggs for Easter (like the famous copycat Reese’s peanut butter eggs), or seasonal shapes for holidays. The shaping possibilities are endless, making them a fun project for any occasion.
Frequently Asked Questions About Homemade Peanut Butter Cups
Even with the simplest recipes, questions can arise. Here are some common queries about making homemade peanut butter cups, along with detailed answers to help you troubleshoot and succeed.
If your peanut butter filling isn’t forming a firm, dough-like consistency, it’s likely due to the type of peanut butter used (natural peanut butter tends to be thinner) or the ratio of ingredients. The easy fix is to add additional powdered sugar, one tablespoon at a time. Mix thoroughly after each addition until the mixture thickens and reaches the desired consistency – it should be pliable enough to roll into discs without being sticky or runny.
Absolutely! The double-boiler method is an excellent way to melt chocolate gently and evenly, preventing it from burning. To do this, fill a medium saucepan about one-third to halfway with water and bring it to a simmer over medium-low heat. Place a heatproof bowl (glass or metal) that fits snugly over the saucepan without touching the water. Add your chocolate to the bowl. Reduce the heat to low and stir the chocolate continuously with a spatula until it is completely melted and smooth. Once melted, carefully remove the bowl from the heat, making sure to wipe any condensation from the bottom of the bowl to prevent water from getting into your chocolate. Proceed with the recipe as directed. Pro tip: You can melt all your chocolate at once using this method and keep it warm by leaving the bowl over the warm (but not boiling) water with the heat turned off.
Yes, using a slow cooker for melting chocolate is a fantastic method, especially if you’re making a large batch or want to keep the chocolate warm and pliable throughout the entire process. While it takes a bit longer to initially melt, it offers great control. Fill the base of your slow cooker halfway with water. Place the chocolate chips (and coconut oil, if using) into a heat-safe jar, like a mason jar. Carefully place the jar into the water bath in the slow cooker; the water should reach about halfway up the jar. Set the slow cooker to high heat, leaving the lid off, for 20-30 minutes, or until the chocolate is fully melted and smooth. Once melted, switch the slow cooker setting to “warm” to maintain the chocolate’s consistency. My personal trick: I find it easiest to remove the jar from the slow cooker, quickly wipe it dry, use the chocolate to form the base layer of the peanut butter cups, then place the jar back into the slow cooker to keep the remaining chocolate warm for the top layer.
Ingredients for Your Homemade Peanut Butter Cups
Gathering your ingredients is the first step towards creating these irresistible treats. This recipe uses simple, accessible items you likely already have in your pantry.
Chocolate Layer Ingredients:
- 16 ounces chocolate chips, divided (approximately 2½ cups of your preferred chocolate chips or chopped chocolate)
- 3 teaspoons coconut oil, divided (optional, for gloss and faster setting)
Peanut Butter Filling Ingredients:
- ½ cup creamy peanut butter (shelf-stable recommended for best consistency)
- ¼ cup powdered sugar (plus 1-2 tablespoons extra if using natural peanut butter)
- ½ teaspoon vanilla extract
- ¼ teaspoon table salt
Step-by-Step Instructions to Make Homemade Peanut Butter Cups
Follow these precise steps to create perfect homemade peanut butter cups that rival any store-bought version.
- Prepare Your Molds: Line a 6-cup standard muffin tin with silicone liners or paper liners. Alternatively, if making mini cups, line a 12-cup mini cupcake tin. This is crucial for easy removal.
- Melt First Batch of Chocolate: Place 1 cup of the chocolate chips into a small, heat-safe bowl. Microwave in 30-second intervals, stirring well between each interval, until only a few small chunks of chocolate remain. Continue stirring until the residual heat fully melts these chunks, creating a smooth and creamy consistency. Stir in 1 teaspoon of coconut oil (if using) until fully incorporated and glossy.
- Create Chocolate Bases: Spoon about ½ tablespoon of the melted chocolate into the bottom of each muffin liner. Use the back of the spoon to spread the chocolate into a thin, even layer that covers the entire base. Place the muffin tin into the refrigerator or freezer for 5 minutes to allow the chocolate to harden completely.
- Prepare Peanut Butter Filling: While the chocolate bases are setting, combine ½ cup creamy peanut butter, ¼ cup powdered sugar, ½ teaspoon vanilla extract, and ¼ teaspoon table salt in a medium mixing bowl. Using a handheld mixer on medium speed, mix until well combined and a thick, dough-like mixture forms. (Note: If using natural peanut butter, you may need to add an additional 1-2 tablespoons of powdered sugar, mixing until the desired thick, rollable consistency is achieved.) The mixture should resemble soft cookie dough.
- Form Peanut Butter Centers: Remove the muffin tin from the fridge or freezer. Take approximately 1 tablespoon of the peanut butter mixture for each cup. Use the palms of your hands to shape each portion into a small disc, ensuring it’s slightly smaller in diameter than the hardened chocolate base. Gently place one peanut butter disc on top of the chocolate base in each muffin cup.
- Melt Second Batch of Chocolate: Place the remaining 1½ cups of chocolate chips into a clean, small heat-safe bowl. Repeat the melting process from Step 2: microwave in 30-second intervals, stirring thoroughly between each, until mostly melted. Continue stirring until smooth and creamy. Stir in the remaining 2 teaspoons of coconut oil (if using) until the chocolate is glossy and fully incorporated.
- Apply Top Chocolate Layer: Pour about 2 teaspoons of the freshly melted chocolate over each peanut butter disc. Use the back of the spoon to gently smooth the chocolate over the top, ensuring the entire peanut butter center is completely covered. Allow excess chocolate to drip down the sides for a fully encased cup.
- Harden the Cups: Return the muffin tin to the refrigerator. Allow the peanut butter cups to chill and harden for at least one hour. For a quicker set, place them in the freezer for 10-15 minutes.
- Unmold and Enjoy: Once the chocolate has fully hardened, remove the peanut butter cups from the muffin tin. If using liners, carefully peel them off. For optimal taste and texture, let the cups sit at room temperature for 5-10 minutes before indulging. Store any remaining homemade peanut butter cups in an airtight container in the refrigerator for up to 5 days, or freeze for up to 1 month.
Equipment You’ll Need
These are the basic tools that will make your peanut butter cup-making process smooth and enjoyable.
- Muffin tin (standard 6-cup or mini 12-cup)
- Silicone muffin cup liners or paper muffin liners
- Heat-safe microwaveable bowls
- Spoons for melting and spreading chocolate
- Handheld mixer (optional, but makes mixing peanut butter filling easier)
Chef’s Notes for Your Homemade Peanut Butter Cups
Keep these additional tips in mind for an even better experience:
- The Role of Coconut Oil: The coconut oil in this recipe is an optional but beneficial addition. It helps the chocolate melt into a smoother, more fluid consistency, making it easier to spread evenly. Furthermore, it contributes to a beautiful, glossy finish on your chocolate and assists in faster setting. If you prefer not to use it or don’t have it, your peanut butter cups will still be delicious, just potentially slightly less shiny.
- Chocolate Type: Feel free to experiment with your favorite type of chocolate. This recipe is highly versatile and works beautifully with milk chocolate, dark chocolate, semi-sweet chocolate, or even white chocolate. Using good quality chocolate will significantly enhance the flavor of your final product.
- Dairy-Free Option: To easily adapt this recipe for a dairy-free diet, simply choose your preferred brand of dairy-free chocolate chips or chopped chocolate. Most major grocery stores now offer a wide variety of excellent dairy-free chocolate options that melt and set just like traditional chocolate.
Nutritional Information (per serving)
Here’s an approximation of the nutritional content for one serving of homemade peanut butter cups. Please note that these values are automatically calculated and should be used as a general guide, as they can vary based on specific ingredients and brands used.
- Calories: 272 kcal
- Carbohydrates: 30g
- Protein: 5g
- Fat: 15g
- Saturated Fat: 7g
- Cholesterol: 8mg
- Sodium: 132mg
- Potassium: 70mg
- Fiber: 2g
- Sugar: 27g
- Vitamin A: 114IU
- Vitamin C: 1mg
- Calcium: 48mg
- Iron: 1mg
Nutrition information is automatically calculated, so should only be used as an approximation.
More Indulgent Peanut Butter & Chocolate Recipes
If you’re a fan of the irresistible combination of peanut butter and chocolate, you’re in for a treat! Here are more delicious recipes that showcase this classic pairing:
- Peanut Butter Banana Chocolate Chip Muffins
- Peanut Butter Coffee (a unique beverage treat!)
- Easy Homemade Tagalong Cookies
- Peanut Butter Buckeye Balls
- Classic Peanut Butter Blossoms Cookies
- Chocolate Peanut Butter Rice Krispie Treats
- Banana Peanut Butter Chocolate Chip Bars
Making homemade peanut butter cups is a truly satisfying experience that offers a fresh, customizable, and often more delicious alternative to store-bought versions. With this detailed guide, you have all the knowledge and tips to create perfect, no-bake chocolate and peanut butter treats right in your own kitchen. Whether you’re making them for a special occasion, a thoughtful gift, or simply to satisfy a craving, these homemade delights are sure to become a cherished favorite. Enjoy the process, and most importantly, savor every single bite!
This post was originally published in 2014 and comprehensively updated in 2025 to include more detailed instructions, tips, and variations for an enhanced reader experience.