
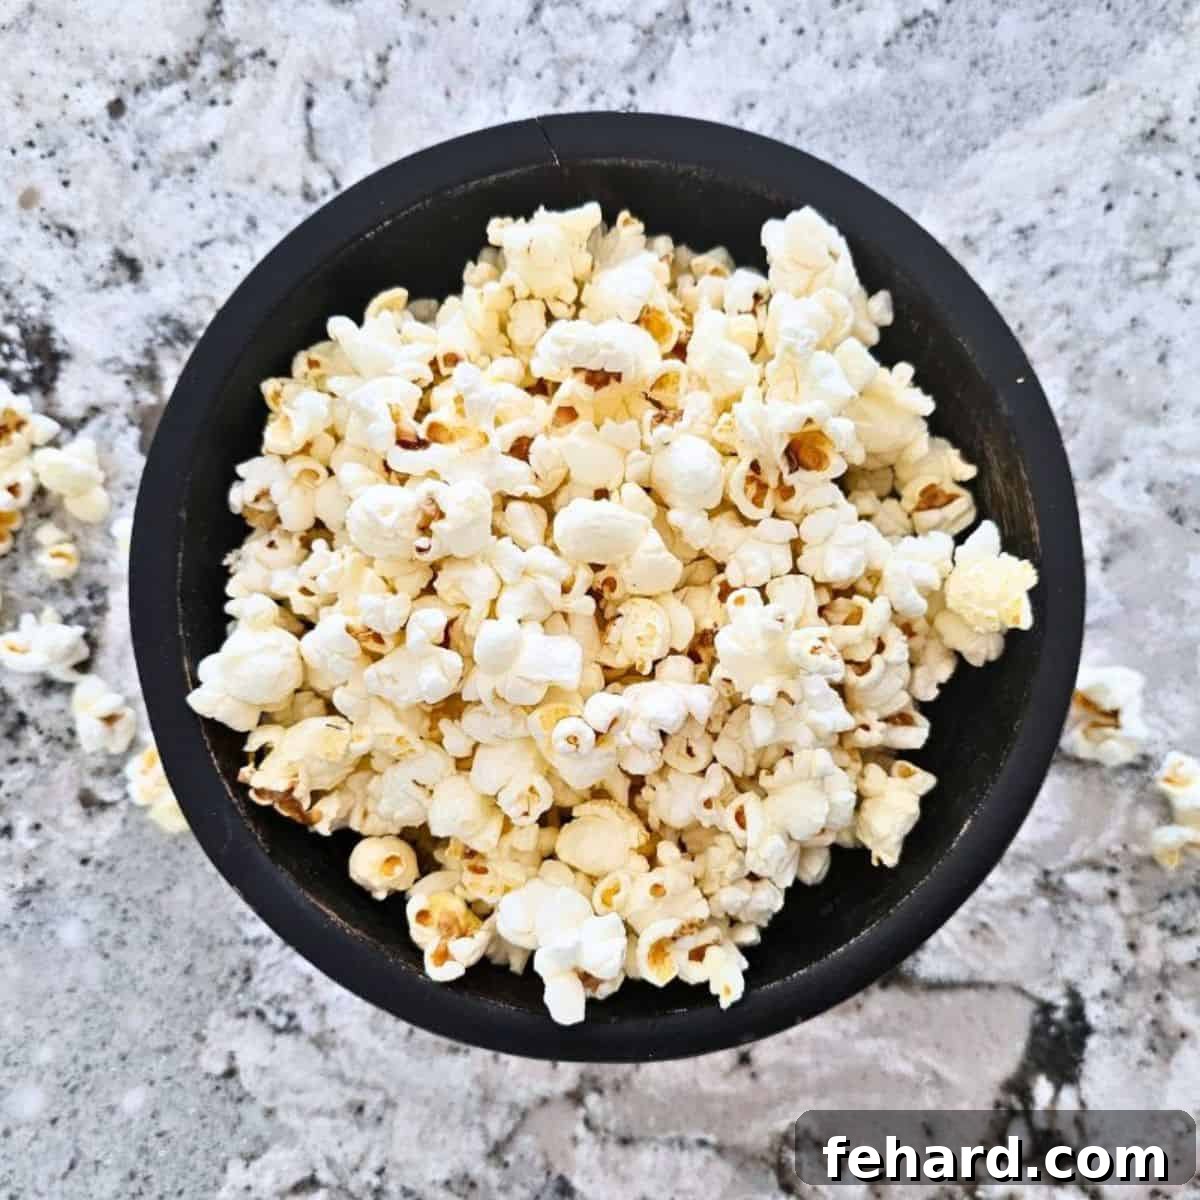
Mastering Homemade Microwave Popcorn: A Quick, Healthy, and Delicious Snack
Transform your snack time with perfectly popped, fluffy, and incredibly easy homemade microwave popcorn! Forget expensive, additive-filled store-bought bags. With just a few simple steps and natural ingredients, you can enjoy a wholesome, customizable treat whenever your cravings strike. Our comprehensive guide will show you two foolproof methods to achieve popcorn perfection at home.
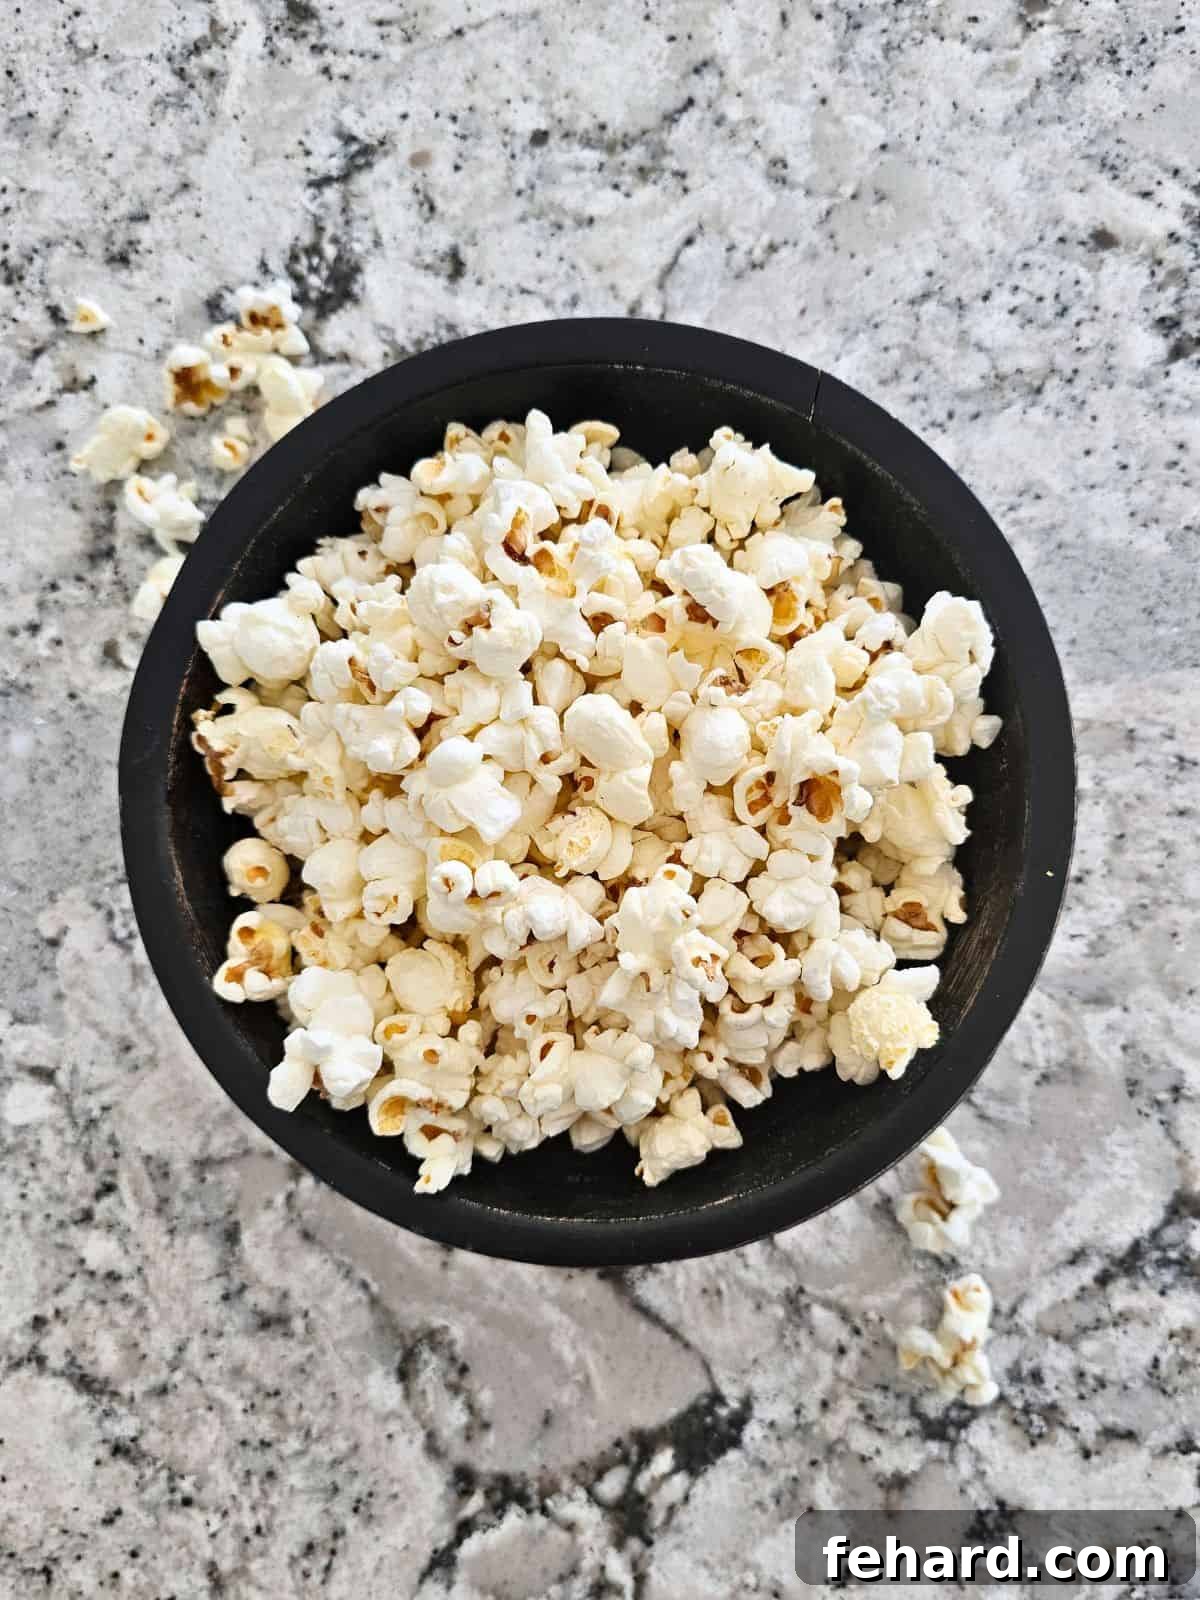
Whether you’re gearing up for an epic movie night, need a satisfying savory bite, or simply looking for a guilt-free munchie, homemade popcorn is undeniably one of the best choices for a healthy snack. It’s not just a childhood favorite; it’s a versatile, whole-grain option that can be enjoyed by everyone. Making popcorn from scratch puts you in control of the ingredients, ensuring a healthier and more delicious result compared to pre-packaged alternatives.
Why Choose Homemade Microwave Popcorn? The Benefits Are Popping!
Making popcorn at home, especially using the convenient microwave method, offers numerous advantages over its store-bought counterparts. Here’s why you’ll quickly fall in love with this simple culinary hack and make it a staple in your kitchen:
- Unparalleled Quality Control & A Healthier Choice: Store-bought microwave popcorn often comes laden with excessive sodium, unhealthy trans fats, and artificial flavors or preservatives that can be detrimental to your health. When you prepare it yourself, you dictate every ingredient. You have the freedom to select high-quality, non-GMO kernels, healthy oils like avocado or olive oil, and just the right amount of natural sea salt. This approach allows you to create a genuinely wholesome and clean snack, free from any questionable or unwanted additives.
- Ridiculously Easy and Lightning-Fast: While traditional stovetop popcorn is simple enough, the microwave method elevates convenience to an entirely new level. It’s incredibly quick, often ready in under 5 minutes from start to finish, making it the perfect solution for those spontaneous snack attacks or when you need a speedy, satisfying treat. It’s also significantly less hands-on than other methods, freeing you up for other tasks while your kernels efficiently transform into fluffy popcorn.
- Budget-Friendly Snacking: Per serving, homemade microwave popcorn is a mere fraction of the cost of pre-packaged bags. Investing in a large, economical bag of bulk popcorn kernels and a bottle of your preferred cooking oil will yield countless batches of delicious popcorn, saving you a substantial amount of money in the long run. This proves that healthy, delicious eating doesn’t have to break the bank.
- Naturally Nutritious & Satisfying: Popcorn, in its purest, unadulterated form, is a nutritional powerhouse. It is a whole grain, naturally rich in dietary fiber, which is crucial for digestive health and helps promote satiety, keeping you feeling full longer. It’s also remarkably low in calories, making it an excellent choice for weight management or mindful snacking. Plus, it’s naturally gluten-free! This fiber-packed snack effectively satisfies cravings for salty treats without derailing your healthy eating goals.
- Endless Customization & Flavor Adventures: From the timeless simplicity of butter and salt to gourmet sweet or spicy blends, homemade popcorn is a versatile blank canvas for your culinary creativity. This incredible adaptability ensures you’ll never grow tired of this snack and can effortlessly tailor its flavor profile to match your current mood, seasonal preferences, or any specific occasion.
Essential Ingredients & Equipment for Microwave Popcorn Success
Crafting the perfect batch of microwave popcorn requires only a handful of basic items that you likely already have in your pantry. Here’s a detailed look at what you’ll need to embark on your delicious popcorn journey:
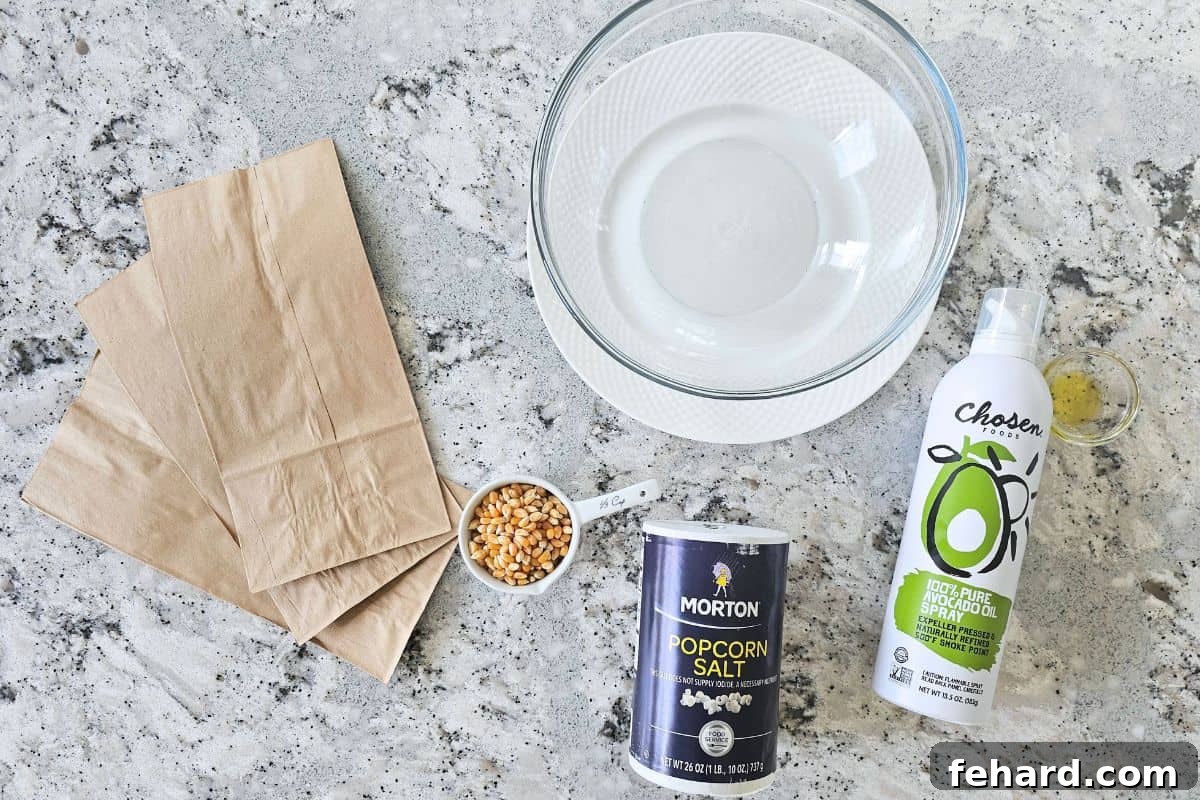
- Popcorn Kernels: The undeniable star of this snack! You typically have a choice between yellow or white popcorn kernels. Yellow kernels generally produce larger, more irregularly shaped popcorn with a slightly chewier texture, while white kernels tend to yield smaller, more tender, and often fluffier puffs. Through countless home-cooking experiments, many enthusiasts find that premium brands, such as Orville Redenbacher’s, consistently boast a higher pop rate and produce significantly fluffier, more satisfying results compared to generic or budget brands. This often makes the slight extra cost well worth it for a superior popcorn experience.
- Oil or Cooking Spray: A small amount of fat plays a vital role in both flavoring your popcorn and ensuring that the salt and other seasonings adhere properly. A light, even spray with an avocado oil cooking spray is a convenient and healthy option. Alternatively, a small drizzle of high-quality olive oil, avocado oil, melted coconut oil (which imparts a subtle sweetness), or canola oil works wonderfully. It’s crucial to note that if your goal is classic buttered popcorn, it is always best to add melted butter *after* the kernels have fully popped. Butter has a low smoke point and tends to burn very quickly in the microwave, long before the popcorn has a chance to pop, resulting in an unpleasant smoky flavor and possibly burnt kernels.
- Salt: For optimal and even flavor distribution, specialized popcorn salt is highly recommended. Its extra-fine grains are specifically designed to cling much more effectively to the myriad nooks and crannies of popped corn than standard coarse table salt. However, if popcorn salt isn’t readily available in your pantry, regular iodized table salt will work perfectly fine. Adjust the quantity to your personal taste preference – some prefer just a subtle hint of salt, while others enjoy a more robust and pronounced salty kick.
- Seasonings (Optional, but Highly Recommended for Flavor Exploration!): While perfectly salted popcorn is a delicious delight in its own right, the possibilities for creative seasoning are truly endless and incredibly exciting. Think beyond just salt and explore a vibrant world of spices, herbs, and unique flavor blends. We’ll share some popular and highly-rated seasoning suggestions below, but don’t hesitate to experiment with your own favorite spice combinations to create a signature snack.
- Essential Equipment for Popping: To successfully and safely make popcorn in the microwave, you’ll need one of two primary vessel types, each offering distinct advantages:
- Microwave-Safe Bowl: If you plan on making homemade popcorn frequently, investing in a dedicated microwave popcorn bowl, often crafted from durable silicone or heat-resistant glass, is an excellent choice. These bowls are specifically designed for optimal popping and usually come with a specialized lid. If you don’t own a specialized popcorn bowl, a large, sturdy, and explicitly heat-safe glass or ceramic bowl (approximately 7-cup capacity or larger) covered securely with a heat-safe plate that fits snugly as a lid will also perform admirably. It is absolutely crucial to verify that your chosen bowl and accompanying plate are explicitly labeled “microwave-safe” and “heat-safe” by the manufacturer to prevent any risk of cracking, shattering, or other damage due due to the intense and rapid heat generated during the popping process.
- Brown Paper Bag: For an incredibly simple, cost-effective, and remarkably mess-free disposable option, standard brown paper lunch bags are ideal. They create a perfect enclosed environment for the kernels to pop efficiently without the need for any specialized kitchen equipment. For safety, avoid the temptation to reuse paper bags, especially if you’ve added oil, as residual oil can potentially pose a fire risk during subsequent microwave uses.
Unleash Your Inner Chef: Creative Seasoning Options for Homemade Popcorn
Once your popcorn has burst into fluffy perfection, it’s time to elevate its flavor and transform it into a gourmet snack. While a simple sprinkle of salt is always a classic, why not explore a spectrum of exciting and imaginative seasoning blends? Remember this golden rule: always add these additional seasonings *after* the popcorn has fully popped. This prevents them from burning and ensures maximum flavor adhesion and distribution.
- Classic Movie Theater Style: For that irresistible, nostalgic cinema experience, generously drizzle your freshly popped popcorn with 2-4 tablespoons of melted unsalted butter. A fine sprinkle of extra-fine popcorn salt further enhances this beloved classic, bringing the movie magic right into your living room.
- Zesty Italian-Seasoned Popcorn: Give your popcorn an aromatic and savory twist. Sprinkle it with approximately ½ teaspoon of a high-quality homemade or store-bought Italian seasoning blend and a generous ¼ cup of freshly grated Parmesan cheese. The fragrant herbs combined with the sharp, salty cheese create an Italian-inspired flavor that is simply irresistible.
- Sweet & Savory Delight: Combine contrasting flavors for an incredibly addictive and satisfying snack mix. Immediately after popping, add a handful of dark chocolate chips and a handful of roasted peanuts to your salted popcorn. The melting chocolate, crunchy nuts, and salty popcorn create a delightful textural and flavor combination that hits all the right notes.
- Irresistibly Cheesy Popcorn: For devoted cheese lovers, this option is a must-try. Omit the initial added salt before popping. Instead, toss your warm popcorn with 1 tablespoon of macaroni and cheese seasoning powder (the kind typically found in boxed mac and cheese kits) or a full ¼ cup of freshly grated sharp cheddar cheese. The residual warmth of the popcorn will slightly melt the cheese, creating a gooey, flavorful coating.
- Warm Cinnamon Sugar Popcorn: Indulge your sweet tooth with this comforting and aromatic flavor profile. In a small, separate bowl, combine 1 tablespoon of granulated sugar with ½ teaspoon of ground cinnamon. Sprinkle this delightful mixture evenly over the popcorn while it’s still warm, gently tossing to ensure every piece is beautifully coated.
- Tangy Ranch-Flavored Popcorn: If you adore the herbaceous, tangy, and zesty notes of ranch dressing, then this popcorn variation is definitely for you. Generously sprinkle 1 tablespoon of a good quality Ranch Seasoning mix over your popped popcorn. This bold and familiar flavor is a universal crowd-pleaser and adds a vibrant, savory kick to your snack.
How to Make Homemade Popcorn in a Microwave: Two Simple Methods
Making popcorn directly in the microwave is surprisingly straightforward and offers incredible convenience. You have two excellent, tried-and-true methods to choose from, depending on the equipment you have readily available or your preference for cleanup. Both techniques consistently deliver fantastic results: perfectly popped, fluffy kernels every time!
Method 1: Popping Perfection with a Brown Paper Bag
The humble brown paper lunch bag method is arguably the easiest and most mess-free way to make homemade microwave popcorn. It requires minimal cleanup and consistently yields reliable, delicious results, making it ideal for quick snacks.
- Prepare the Bag: Take one standard-sized brown paper lunch bag. Carefully pour up to ⅓ cup of unpopped popcorn kernels into the bottom of the bag. Adhering to this precise amount is crucial for successful popping and to minimize the number of unpopped kernels.
- Season the Kernels: Lightly spray the kernels inside the bag with a healthy cooking spray (such as avocado oil) or drizzle them with about ½ teaspoon of your preferred oil (olive, avocado, melted coconut, or canola oil). Then, add ½ to 1 teaspoon of popcorn salt or regular table salt.
- Seal and Shake: Fold the top edge of the paper bag over twice, pressing firmly to create a tight “seal.” This enclosure is essential for keeping the kernels contained and allowing steam to build during the popping process. Gently shake the bag vigorously to ensure all the kernels are evenly coated with the oil and salt – this step is key for well-seasoned popcorn.
- Microwave: Place the sealed bag on its side in the very center of your microwave turntable. Set the cooking time for an initial 6 minutes. However, the true secret to perfectly popped popcorn lies in your ears! Once the popcorn begins to pop frequently, listen closely. Stop the microwave immediately when you hear 2 to 3 seconds pass without any new kernels popping. This optimal popping window usually occurs between 2 to 5 minutes, depending on the specific wattage and power of your microwave oven.
- Serve Safely: Using thick oven mitts or a sturdy kitchen towel, carefully remove the hot bag from the microwave. Exercise extreme caution when opening the bag, as a potent burst of hot steam will quickly escape. Carefully transfer the freshly popped popcorn to a serving bowl, add any desired extra seasonings or melted butter, and enjoy immediately while it’s warm and crisp!
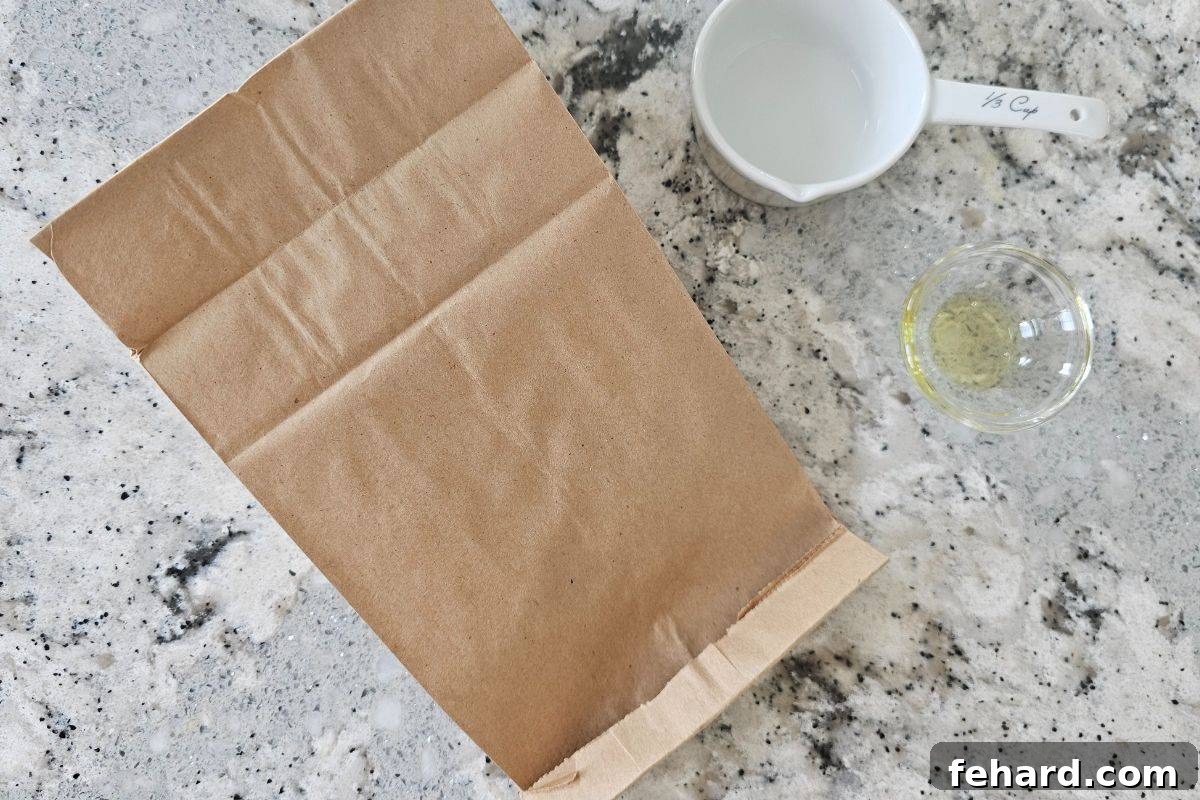
Method 2: Using a Heat-Safe Bowl for Microwave Popcorn
If you prefer a reusable option, wish to minimize waste, or simply don’t have brown paper bags readily available, making popcorn in a heat-safe bowl is an excellent and equally effective alternative. This method offers durability and can be a more aesthetically pleasing option for serving. Remember, safety is paramount with this technique!
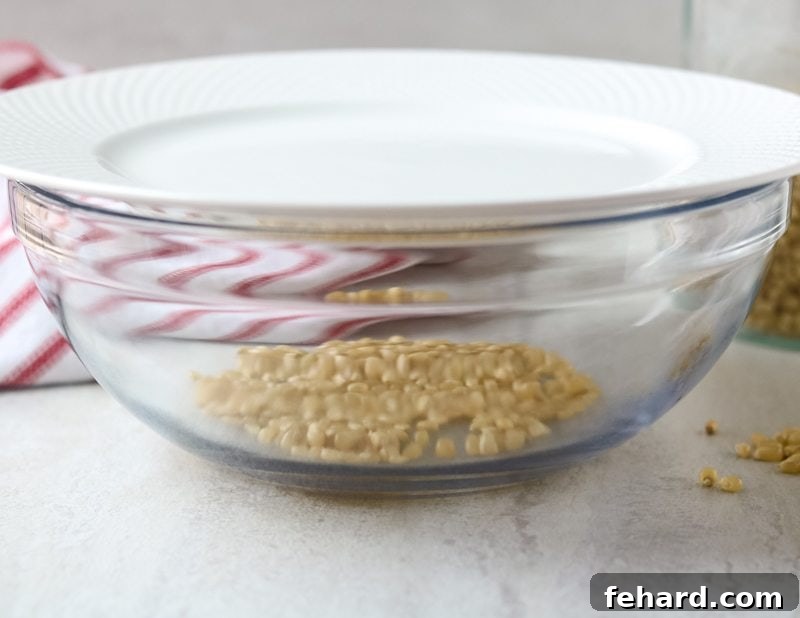
- Prepare the Bowl: Pour up to ⅓ cup of unpopped popcorn kernels into a large, explicitly heat-safe bowl. This can be a dedicated microwave popcorn bowl (often silicone or glass) or a sturdy glass or ceramic bowl. Ensure the bowl has at least a 7-cup capacity to allow ample room for the popcorn to expand.
- Season the Kernels: Spray the kernels with a light coating of cooking spray or drizzle them with about ½ teaspoon of your chosen oil. Then, sprinkle with ½ to 1 teaspoon of salt. Use a spoon to stir thoroughly, ensuring every kernel is lightly and evenly coated with the oil and salt.
- Cover Securely: If you are using a specialized microwave popcorn bowl, affix its lid securely according to the manufacturer’s instructions. For a standard heat-safe bowl, cover it tightly with a large, heat-safe plate that completely seals the top of the bowl. The plate acts as an effective lid, trapping the steam inside and creating the necessary pressure for the kernels to pop efficiently.
- Microwave: Place the covered bowl in the center of your microwave turntable. Set the timer for an initial 6 minutes. Just like with the paper bag method, the most critical step is to listen intently. As the popping begins to subside, stop the microwave as soon as you hear a pause of 2 to 3 seconds between individual pops. This precise timing prevents burning the popped corn. You will typically find that popping is complete within 2 to 4 minutes, but this can vary based on your microwave’s wattage.
- Handle with Care: Using thick oven mitts, carefully remove the very hot bowl from the microwave. Be exceedingly cautious when removing the lid or plate, as a significant cloud of intensely hot steam will be released. Transfer the freshly popped popcorn to a serving bowl, add any additional seasonings or melted butter if desired, and savor it immediately while it’s warm, light, and crisp.
Essential Tips for Perfect Homemade Microwave Popcorn Every Time
Achieving consistently perfect, fluffy, and delicious microwave popcorn is simple when you follow these crucial tips and tricks. These insights will help you sidestep common pitfalls and ensure a delightful, hassle-free snacking experience every single time:
- Safety First! Always Exercise Caution: Both the popping bowl and the paper bag will become extremely hot during the microwaving process. Always use thick oven mitts or sturdy pot holders when removing them from the microwave. Additionally, be exceedingly careful when opening the bag or removing the lid, as a concentrated burst of hot steam will inevitably escape, which can cause burns.
- Do Not Overfill the Container: For optimal popping efficiency and to minimize the number of unpopped kernels (affectionately known as “old maids”), never attempt to pop more than ⅓ cup of kernels at a time in a single container. Overfilling restricts proper air circulation and reduces the effectiveness of the popping process, leading to fewer popped kernels and potential burning. If you require a larger quantity of popcorn, simply make multiple smaller batches.
- Avoid Pyrex Bowls for Popcorn: While many Pyrex products are indeed microwave-safe for reheating food, they are generally *not* designed to withstand the rapid, intense, and highly localized heat generated specifically during the popcorn popping process. This specific type of thermal stress can cause Pyrex bowls to crack, shatter, or even explode. Always opt for bowls explicitly labeled “heat-safe” for stovetop or oven use, or invest in dedicated microwave popcorn makers.
- Embrace the Oil (or Cooking Spray): While it is technically possible to pop kernels without any oil, adding a small amount makes a significant difference in both flavor and texture. The oil helps to tenderize the kernels, contributes a richer, more satisfying taste to the popcorn, and acts as an effective binder, ensuring that salt and other dry seasonings adhere beautifully to each fluffy piece.
- Strategic Timing for Seasonings: For the best flavor infusion, add your initial salt (along with the oil) *before* microwaving the popcorn. This allows the salt to adhere well and permeate the kernels from the start. However, always reserve any alternative or additional powdered seasonings (such as cheese powders, cinnamon sugar blends, or ranch seasoning) for *after* the popcorn has completely popped. Many powdered seasonings contain dairy, sugars, or delicate herbs that can easily burn and create a bitter, unpleasant taste when exposed to the high, direct heat of the microwave.
- Listen Intently for the Lull: This is arguably the most critical factor in achieving perfectly popped corn and preventing burnt batches. Once the popping sounds begin, keep a keen ear focused on the microwave. Stop the cooking cycle as soon as you hear a distinct pause of 2 to 3 seconds between individual pops. Going even a few seconds beyond this point can rapidly lead to burning the already popped corn, resulting in a smoky smell and ruined snack.
- Microwave Wattage Varies Greatly: The precise time it takes for your popcorn to pop will be directly dependent on the wattage and power level of your specific microwave oven. A more powerful microwave will typically pop kernels much faster. While we recommend setting an initial timer for 6 minutes, most microwaves will finish popping ⅓ cup of kernels within an efficient 2 to 4 minutes. Take a moment to learn your microwave’s optimal performance for popcorn.
- Not All Kernels Will Pop: It is a perfectly natural and expected part of the popcorn-making process – not every single kernel is destined to burst. Do not attempt to continue cooking a batch solely to pop the few remaining unpopped kernels, as this will invariably result in burning the vast majority of the already popped corn. Simply discard the small handful of unpopped kernels at the bottom of your bowl or bag.
Serving & Storage Suggestions for Your Homemade Popcorn
Homemade microwave popcorn truly delivers its most exceptional taste and texture when enjoyed immediately after preparation. It’s at its peak of warmth, lightness, fluffiness, and crispness, offering the most satisfying and delightful snacking experience possible.
Should you find yourself with any delicious leftovers (which is a rare and pleasant surprise!), it’s important to handle them properly for best preservation. Allow the popcorn to cool completely to room temperature before storing it. Then, transfer it to an airtight container and keep it at room temperature for up to 24 hours. While the popcorn will remain safe to consume beyond this 24-hour window, you will likely notice a significant decline in its desirable texture and flavor, often becoming stale and less appealing. For optimal freshness and maximum enjoyment, always prioritize consuming your homemade popcorn fresh off the microwave.
More Easy Homemade Snacks to Satisfy Your Cravings
If you’ve thoroughly enjoyed the simplicity, health benefits, and deliciousness of making homemade microwave popcorn, you might love exploring these other equally easy and healthy snack recipes from our kitchen:
- Fresh and Flavorful Grilled Corn Salsa
- Creamy Homemade Chip Dip
- Crispy Homemade Cheese Crackers
- Delightful Homemade Fruit Roll-Ups
- Wholesome No-Bake Granola Bars (Gluten-Free)
We hope you loved making homemade microwave popcorn! If this recipe brought joy to your kitchen, please consider leaving a comment and review below to share your experience with our community. Your feedback is greatly appreciated!
Homemade Microwave Popcorn Recipe
Servings: 2
Cook: 5 mins
Total: 7 mins
Rate This Recipe
Print Recipe
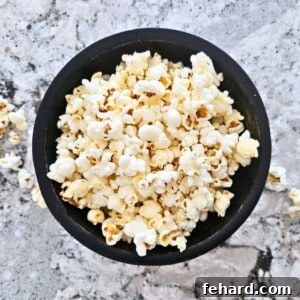
Using one of two simple methods, you can enjoy perfectly popped, fluffy, popcorn at home whenever the craving strikes.
Ingredients
- ⅓ cup popcorn kernels, white or yellow
- ½ teaspoon oil (olive oil, avocado oil, melted coconut oil, or canola oil, or avocado cooking spray)
- ½-1 teaspoon popcorn salt (or regular table salt)
Instructions
Using a Bowl
- Add popcorn kernels to the bowl. Spray or drizzle with oil. Sprinkle with salt, and stir to evenly coat the kernels with the salt and oil. Cover the bowl with a heat-safe plate or the lid provided with the microwave popcorn bowl.
- Place the bowl into the microwave and set the cooking time for 6 minutes. Once the popcorn begins to pop, listen closely and stop the cooking time when 2 to 3 seconds go by without hearing kernels popping. You will likely not need more than 4 minutes of cooking time.
- Use pot holders to carefully remove the bowl from the microwave and then use caution to remove the lid or plate from the bowl.
- Season with additional seasonings and/or melted butter if desired and enjoy immediately.
Using a Brown Bag
- Place ⅓ cup of popcorn kernels into the brown paper bag. Spray with cooking spray or drizzle the kernels with oil and add in the salt.
- Fold the top of the bag over twice to “seal” and shake to coat the kernels evenly in the salt and oil.
- Place the bag on its side and microwave for 2-5 minutes. I suggest setting the cooking time to 6 minutes. Once the popcorn begins to pop, listen closely and stop the cooking time when 2 to 3 seconds go by without hearing kernels popping.
- Remove the popcorn bag carefully from the microwave and carefully open it, keeping in mind that steam will escape the bag when opened.
- Season with additional seasonings and/or melted butter if desired and enjoy immediately.
Equipment
- Silicone Popcorn Bowl
- Glass Popcorn Bowl
- Brown Lunch Bags
Notes
Amount of Kernels: Don’t try popping more than ⅓ cup of kernels at a time, as this can result in an excess of unpopped kernels. Therefore, do not attempt to double this recipe in a single batch.
Listen carefully when popping: Once the popcorn kernels begin to pop, keep a close ear on the microwave. Stop the cooking time when 2 to 3 seconds go by without hearing kernels popping to prevent burning.
Timing is based on the wattage of your microwave: The exact time it takes for your popcorn to pop will vary depending on the power level of your microwave oven. Most microwaves typically require between 2-4 minutes to pop ⅓ cup of popcorn kernels.
Not all kernels will pop: It is normal for a few kernels to remain unpopped. Simply discard these kernels. Do not continue cooking in an attempt to pop them, as this will inevitably cause the already popped popcorn to burn.
Storage: Allow any leftover popcorn to cool to room temperature before storing it in an airtight container for up to 24 hours. While safe to eat beyond this period, the popcorn will likely begin to taste stale. For the freshest taste, it is best enjoyed immediately.
DO NOT USE PYREX BOWLS! They are generally not designed for the specific heat demands of microwave popcorn and can crack.
Nutrition Information (per serving)
Calories: 60 kcal
Carbohydrates: 10g
Protein: 1g
Fiber: 1g
Nutrition information is automatically calculated and should be used as an approximation.
Tried this recipe?
Mention @amindfullmom or tag #amindfullmom!