
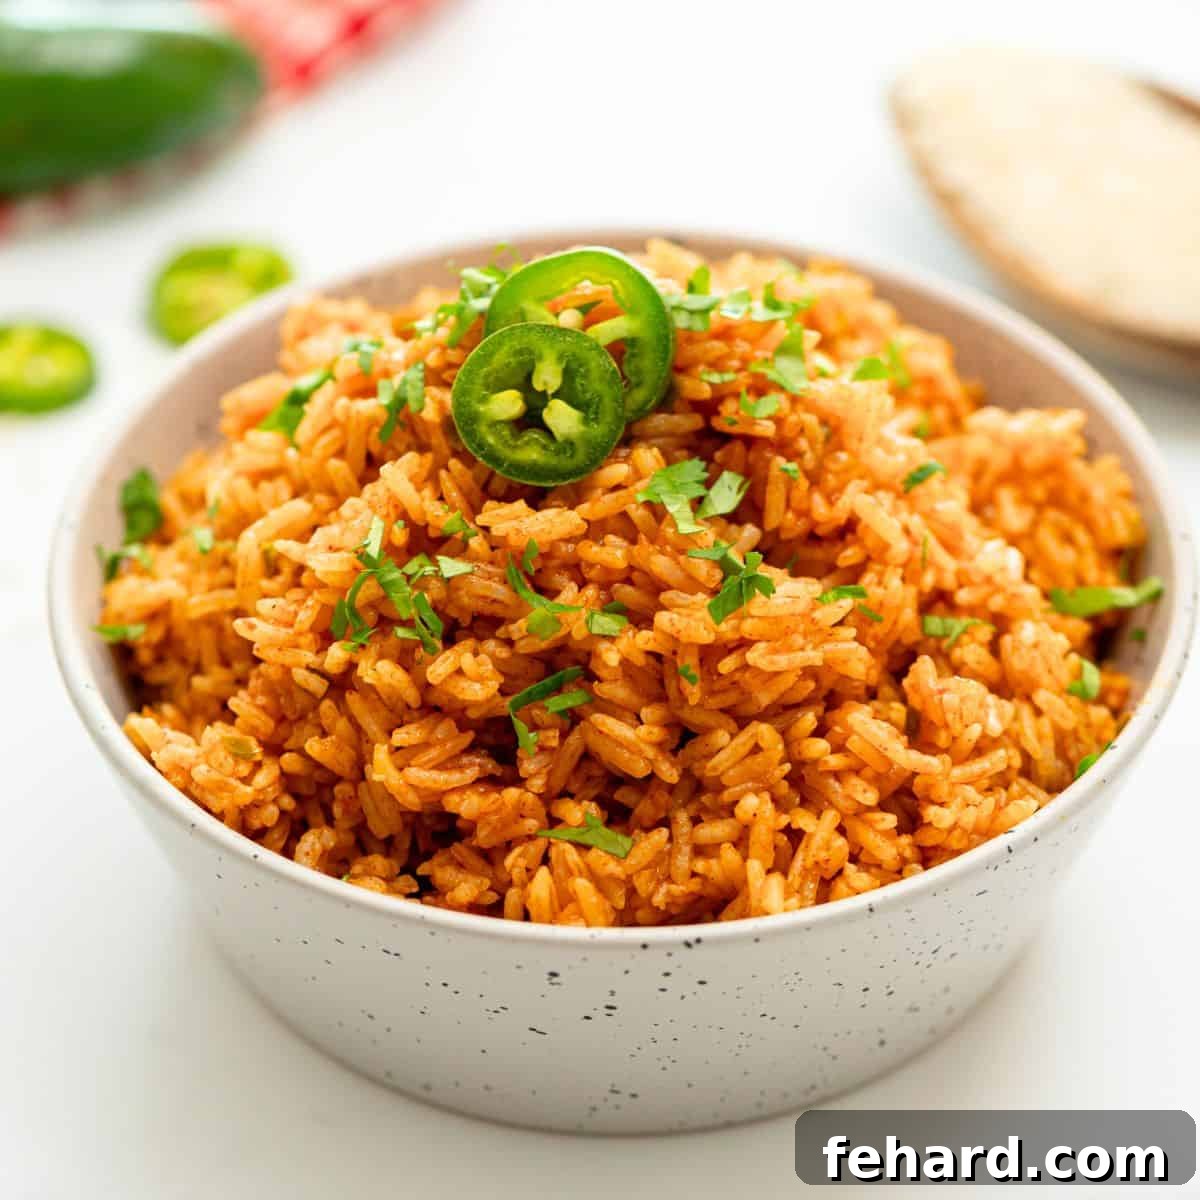
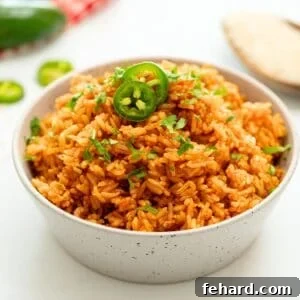
This recipe for Instant Pot Spanish Rice, often cherished as Mexican Rice or Arroz Rojo, brings the authentic, rich flavors of your beloved Mexican restaurant right into your kitchen. Crafted with everyday pantry staples, it demands minimal hands-on effort and consistently yields perfectly fluffy, tender grains brimming with savory taste. The magic of the Instant Pot simplifies what might seem like a complex dish, making restaurant-quality Spanish rice achievable for home cooks of all skill levels. Prepare to impress your family and friends with this vibrant, delicious side.
Whether it’s lovingly tucked inside hearty bean burritos, forming the flavorful base of vibrant bowls, served alongside sizzling tacos, or piled high next to cheesy enchiladas, this versatile and flavorful side dish is an undeniable crowd-pleaser. What makes this recipe truly exceptional is the foolproof method of preparing Spanish rice in the Instant Pot, ensuring perfect results every single time without the worry of mushy, clumpy, or burnt rice. It’s the ultimate time-saver for busy weeknights and festive gatherings alike.
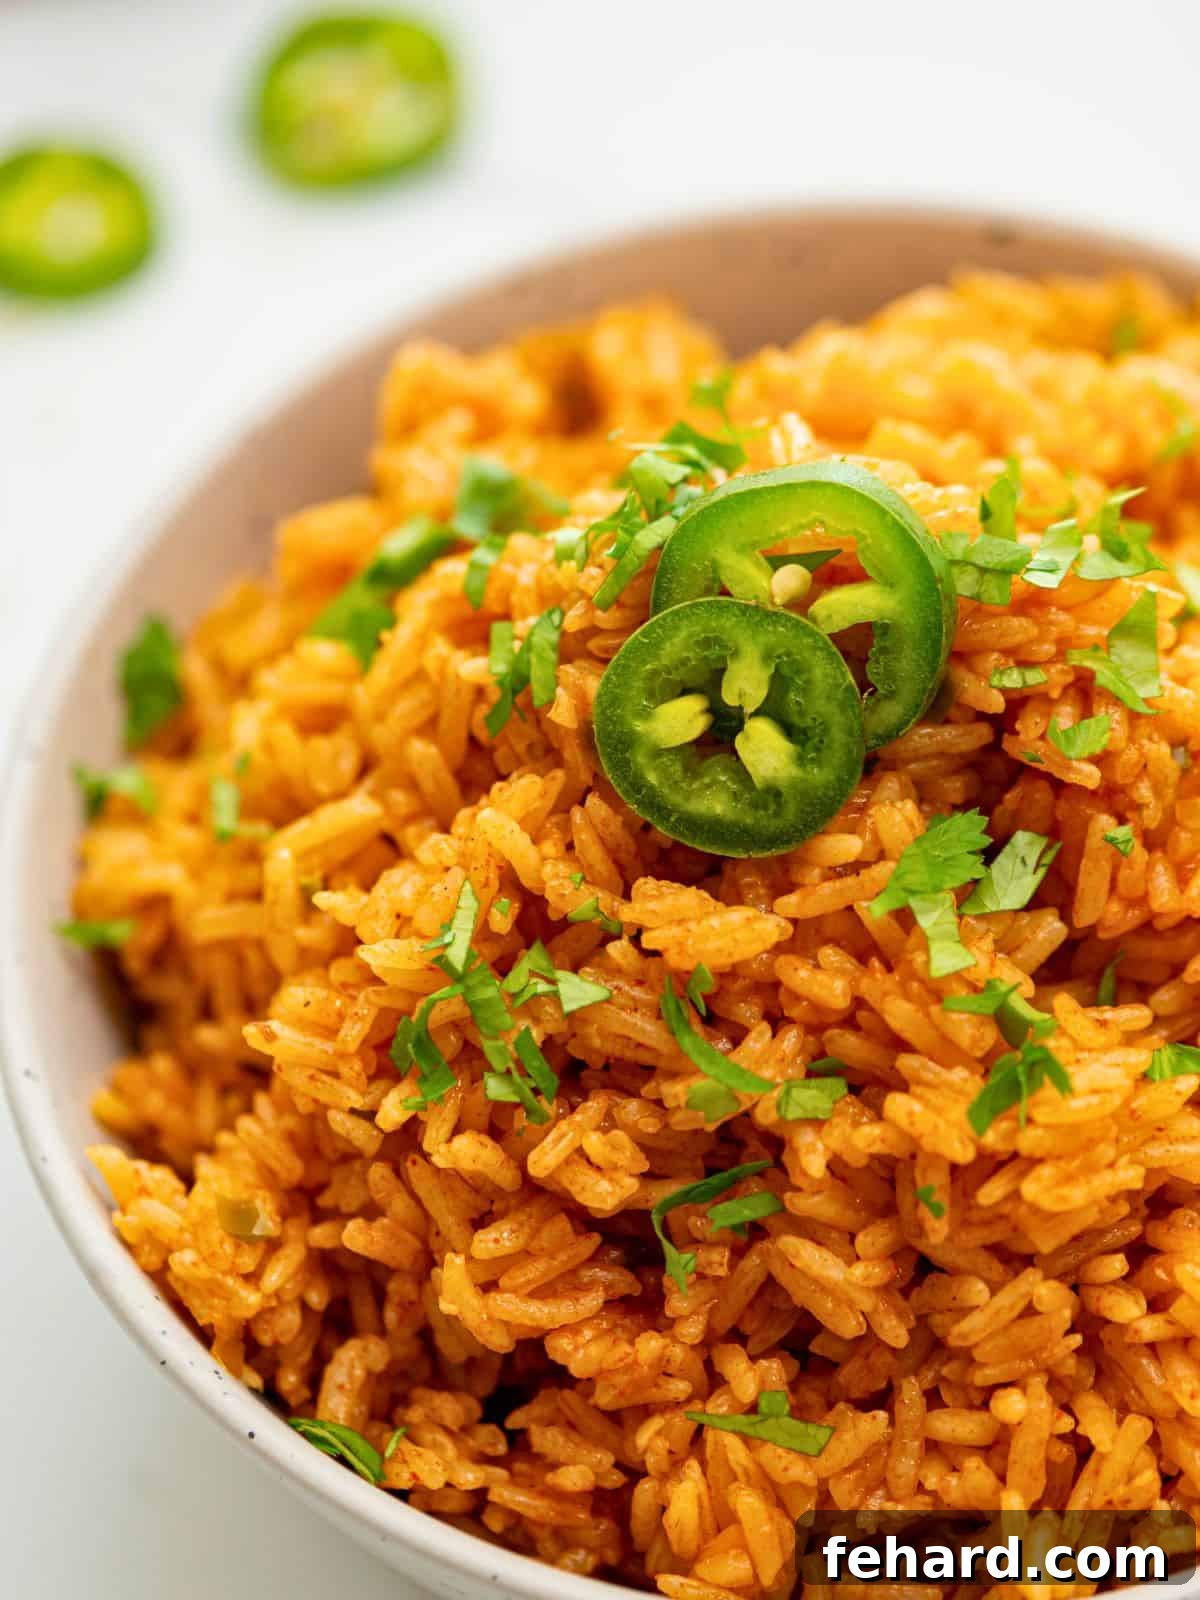
Why the Instant Pot is Your Secret Weapon for Spanish Rice
The Instant Pot isn’t just a trendy kitchen gadget; it’s a revolutionary tool for dishes like Spanish rice, transforming what can sometimes be a finicky stovetop process into an effortlessly perfect experience. Its sealed, high-pressure environment allows for unparalleled even cooking and consistent moisture retention, both of which are absolutely crucial for achieving that ideal fluffy, distinct grain texture without any mushiness. Traditional stovetop methods often demand constant vigilance, requiring frequent stirring and careful heat adjustments to prevent sticking, scorching, or unevenly cooked grains.
With the Instant Pot, you simply set it and let it work its magic. The pressurized cooking process forces liquids and aromatic spices deep into each grain of rice, infusing it with flavor from the inside out. This hands-off approach guarantees that your Spanish rice will emerge perfectly cooked, tender, and bursting with authentic taste, every single time. Say goodbye to guesswork and hello to consistently delicious Arroz Rojo!
Kristen’s Essential Tips for Unforgettable Instant Pot Spanish Rice
Achieving truly fluffy, incredibly flavorful Instant Pot Spanish rice that rivals any restaurant comes down to mastering a few essential techniques. These aren’t just steps; they’re the underlying secrets that ensure perfection every time, elevating your simple side dish into a culinary masterpiece:
- Choose the Right Rice: Long-Grain White or Brown for Best Texture. The foundation of great Spanish rice is the right type of grain. Both long-grain white and long-grain brown rice are excellent choices for this recipe. Long-grain varieties are preferred because they contain less starch and maintain their shape better during cooking, resulting in distinct, fluffy grains rather than a sticky, clumpy texture. While the type can vary, the goal is always a non-gummy outcome.
- Rinse Your Rice Thoroughly: A Non-Negotiable Step for Fluffiness. This critical pre-cooking ritual is often overlooked but makes a monumental difference in the final texture. Rinsing the rice under cold water removes excess surface starch, which is the primary culprit behind gummy or clumpy rice. Continue rinsing in a fine-mesh strainer, agitating the grains gently, until the water running through the strainer is completely clear. This ensures each grain is clean and primed for optimal texture.
- Strategic Layering: The Golden Rule of “Don’t Stir the Tomato Sauce!” This seemingly counterintuitive tip is vital for two significant reasons. First, layering the tomato sauce on top of the rice and liquid prevents it from settling directly on the bottom of the pot, where its sugars can scorch and potentially trigger the dreaded “burn notice” on your Instant Pot. Second, this gentle layering allows the vibrant flavors of the tomato to gradually infuse and meld with the rice during the pressure cooking process, resulting in a more harmonious and evenly seasoned dish upon completion.
- Embrace the Natural Pressure Release (NPR): Patience Pays Off in Texture. Once the cooking time concludes, allowing a natural pressure release (NPR) for a full 15 minutes is absolutely non-negotiable for perfectly cooked rice. This slow, gentle release of pressure provides crucial time for the rice to absorb all the flavorful cooking liquid, steam evenly, and finish cooking to tender perfection without bursting or becoming mushy. Rushing this step with a quick release will almost certainly result in undercooked, starchy, and often crunchy rice.
- Fluff with a Fork, Not a Spoon: Preserve Grain Integrity. After the pressure has naturally released, gently fluffing the rice with a fork is the preferred method. This delicate technique preserves the integrity of each individual rice grain, preventing breakage and clumping. Simultaneously, it effectively distributes the vibrant tomato sauce and aromatic spices evenly throughout the pot, ensuring every single bite is bursting with flavor and boasts that desirable fluffy texture.
A 5-Star Reader Review!
“I’ve tried countless Spanish Rice recipes for the Instant Pot, but this one truly stands out as the BEST! It’s simply perfect every time—fluffy, flavorful, and so easy.” – Gina ⭐⭐⭐⭐⭐
How to Make Instant Pot Spanish Rice: A Detailed Step-by-Step Guide
Creating this delicious, authentic Spanish rice in your Instant Pot is surprisingly straightforward and incredibly rewarding. These detailed, step-by-step instructions are meticulously designed to guide you confidently through each phase of the process, ensuring a perfect outcome whether you’re a seasoned Instant Pot enthusiast or just beginning your culinary journey with electric pressure cooking. Follow along for perfect, flavorful results that will transport your taste buds straight to your favorite Mexican eatery!
- Prepare the Rice: Rinse Until Water Runs Clear. The first and most critical step for achieving fluffy, non-sticky rice is thorough rinsing. Place your chosen long-grain rice into a fine-mesh strainer. Position the strainer under cold running water and allow the water to flow over the grains. Gently agitate the rice with your hand or a spoon, encouraging the release of excess surface starch. Continue this process for several minutes until the water draining from the bottom of the strainer runs completely clear, indicating that most of the starch has been washed away. Once rinsed, set the strainer aside to allow the rice to drain completely.
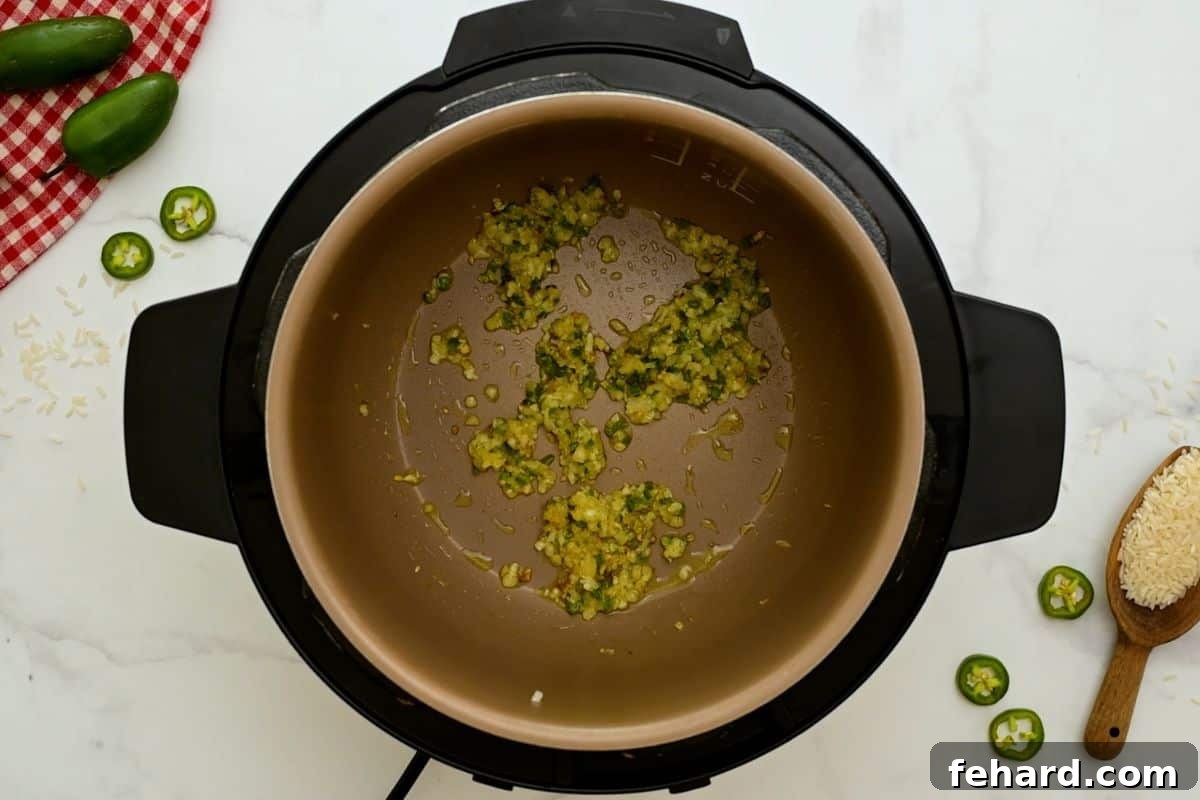
- Sauté the Aromatics: Building a Deep Flavor Base. Turn on your Instant Pot and select the “Sauté” function (usually “Normal” heat setting). Allow the pot to heat for about a minute, or until it indicates “Hot.” Add 1 tablespoon of extra virgin olive oil to the inner pot. Once the oil is shimmering, add the finely diced yellow onion and the seeded, finely minced jalapeño (remember to adjust the jalapeño quantity based on your desired heat level – see modifications section for details). Sauté these aromatics for 2-3 minutes, stirring frequently with a wooden spoon, until the onions become translucent and softened, releasing their sweet fragrance. Next, stir in the minced garlic and continue to sauté for just another 30 seconds. This brief toasting period is enough to release the garlic’s pungent aroma without burning it, which can turn bitter. Immediately hit the “Cancel” button to turn off the sauté function and prevent any further cooking or scorching.
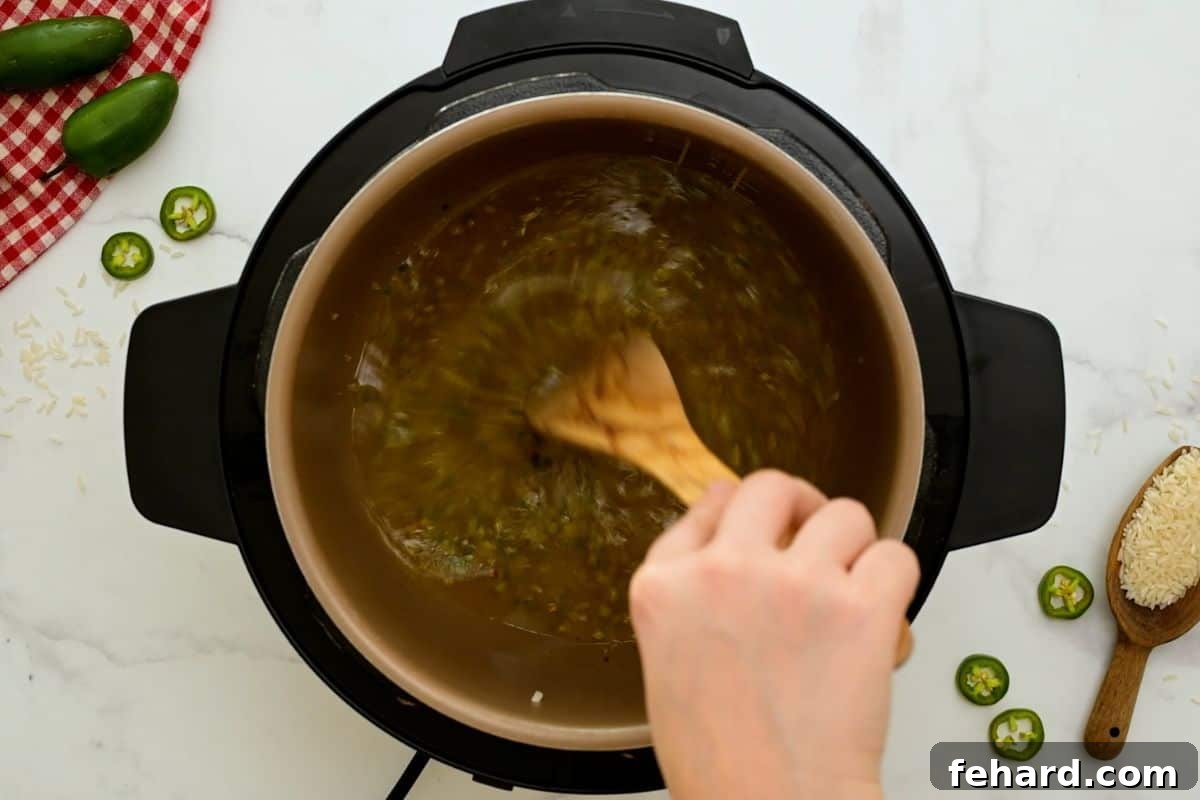
- Deglaze the Pot: Crucial for Preventing the “Burn” Notice. Pour 2 cups of chicken or vegetable broth into the inner pot. This is a crucial moment: immediately use a sturdy wooden spoon or a heat-resistant spatula to vigorously scrape up any small browned bits (fond) that may have stuck to the bottom of the inner pot during the sautéing process. Ensure the entire bottom surface is perfectly clean and smooth. This essential deglazing step not only incorporates those delicious caramelized flavors into your broth but, more importantly, it prevents your Instant Pot from triggering a dreaded “burn warning” during the pressure cooking cycle. A clean bottom ensures smooth operation.
- Season the Base and Layer the Rice and Tomato Sauce. With the pot deglazed, it’s time to build the flavor profile. Add the aromatic spices to the broth: 1 teaspoon kosher salt, 1 teaspoon paprika, 1 teaspoon chili powder, ½ teaspoon cumin, and ¼ teaspoon oregano. Stir these spices well into the liquid until they are fully combined and fragrant. Next, carefully add the thoroughly rinsed and drained rice into the inner pot. Gently press the rice down with the back of a spoon to ensure it is completely submerged in the seasoned liquid. Finally, and this is a key step, pour ⅔ cup of tomato sauce directly on top of the rice. DO NOT STIR the tomato sauce into the rice. This strategic layering is vital; it helps prevent the burn notice by keeping the thicker tomato sauce from settling at the bottom, and it allows the flavors to meld beautifully during the pressure cooking.
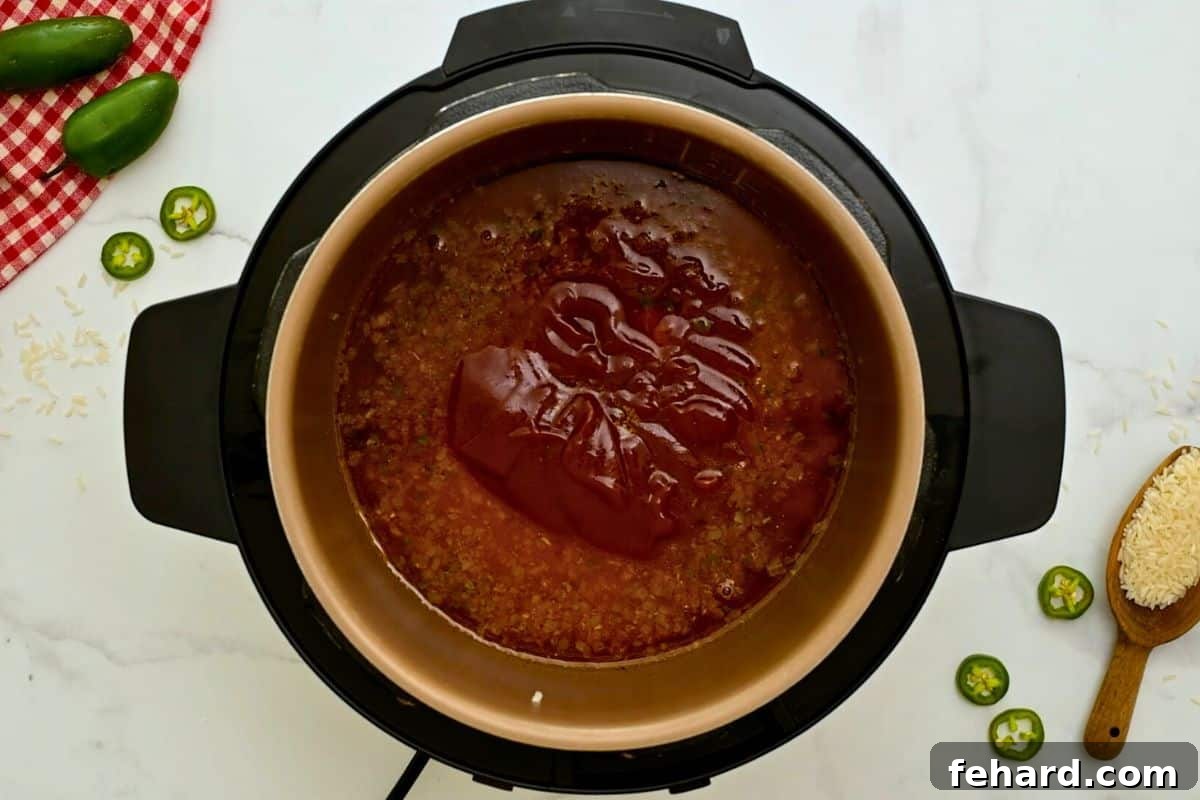
- Pressure Cook to Perfection. Now it’s time to seal the flavor in! Secure the lid onto your Instant Pot, ensuring that the vent knob is turned firmly to the “Sealing” position. Select the “Pressure Cook” or “Manual” setting and set the Instant Pot to cook on “High Pressure.” The cooking time will vary depending on the type of rice you are using:
- For Long-Grain White Rice: Set the cook time for precisely 3 minutes on High Pressure.
- For Long-Grain Brown Rice: Set the cook time for 22 minutes on High Pressure.
Remember that the Instant Pot will take several minutes to build up to full pressure before the cooking countdown actually begins. Do not be alarmed by this pre-heating time; it’s part of the process.
- Crucial Natural Pressure Release (NPR): The Secret to Fluffy Rice. Once the cooking cycle is complete and your Instant Pot beeps, do not manually release the pressure immediately. This is perhaps the most critical step for achieving truly fluffy and tender Spanish rice. Instead, allow the pressure to release naturally for at least 15 minutes. This extended natural pressure release (NPR) provides a gentle steaming period that is paramount for perfectly cooked rice. It allows the rice grains to fully expand, absorb all the flavorful cooking liquid, and achieve that coveted fluffy, tender texture without becoming gummy or starchy. After the minimum 15 minutes of natural release, you can then carefully turn the vent knob to “Venting” to quick-release any remaining pressure. Ensure the float valve has dropped before proceeding to open the lid.
What Exactly Is Natural Pressure Release (NPR)?
Natural Pressure Release (NPR) simply means leaving your Instant Pot undisturbed after the cooking cycle finishes, allowing the pressure to dissipate on its own, gradually. The “Keep Warm” function may remain on during this time. The lid will unlock automatically once the pressure has fully dropped. For this recipe, allowing a minimum of 15 minutes for NPR is essential for perfect rice texture. If you need more in-depth guidance on Instant Pot functions and safety, refer to a comprehensive guide to using an Instant Pot.
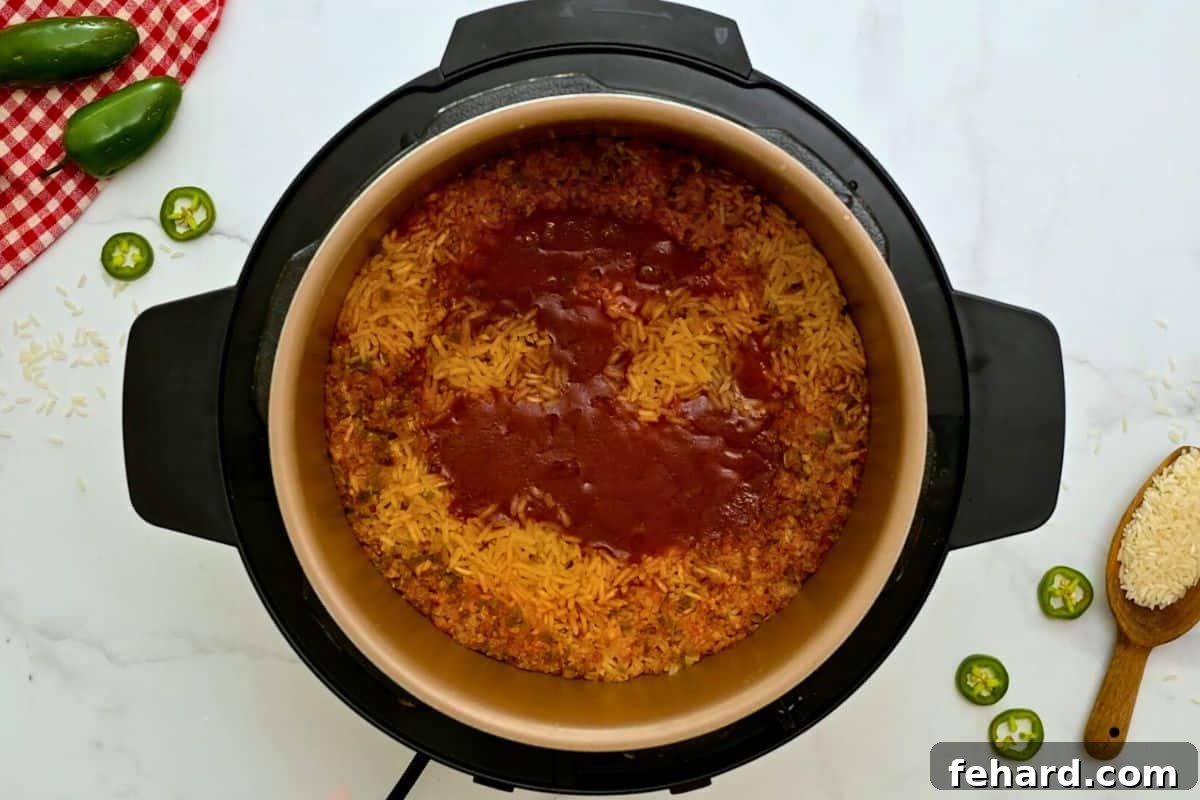
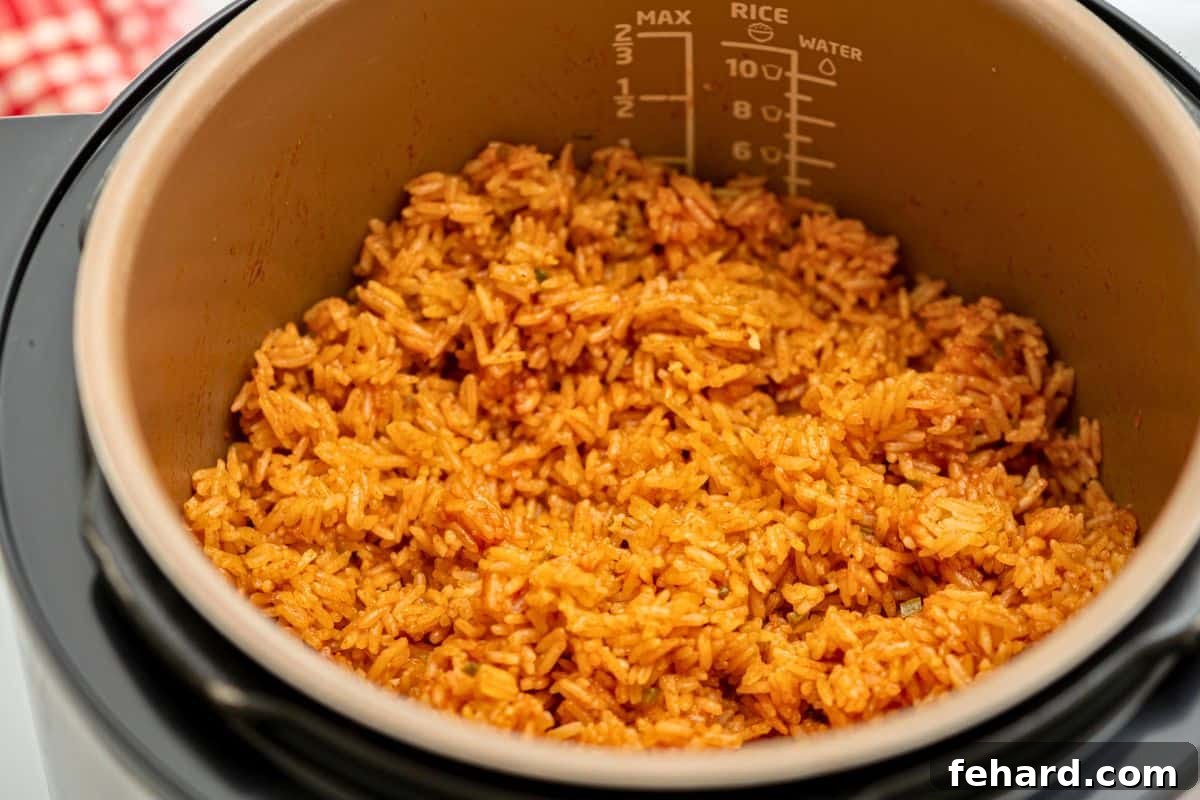
- Fluff and Serve: The Grand Finale. Once the pressure has fully released and the lid is safe to open, carefully remove it. If you’re using it, now is the time to add 1 tablespoon of unsalted butter (or a vegan alternative) for extra richness, gloss, and a delightful aroma. Use a fork to gently fluff the rice, working from the bottom up. As you fluff, the beautifully vibrant tomato sauce from the top will gracefully incorporate into the rice, creating that signature reddish hue and distributing all the delicious flavors and any added butter evenly throughout. Serve immediately and savor the perfectly cooked, flavorful Instant Pot Spanish Rice you’ve just created!
Recipe Modifications & Dietary Adjustments for Your Spanish Rice
This Instant Pot Spanish Rice recipe is incredibly versatile and can be easily adapted to suit your specific taste preferences or dietary needs. Don’t hesitate to experiment with these popular modifications to make it your own perfect dish:
- Customize the Heat Level: The jalapeño adds a lovely underlying warmth and a nuanced complexity to the rice.
- For a truly mild flavor, ensure you remove all the seeds and the inner white ribs (pith) from the jalapeño before finely mincing it. Most of the capsaicin, the heat-inducing compound, resides in these parts.
- If you enjoy a pleasant touch of heat and a gentle kick, simply leave a few seeds in the jalapeño. Taste a tiny piece of the rib to gauge its potency first.
- For those who prefer absolutely no spice at all, you can omit the jalapeño entirely. However, be aware that the rice might lack a certain depth of fresh, verdant flavor that the pepper contributes. As an alternative, consider adding a pinch of finely diced green bell pepper for a subtle, sweet, and mild enhancement.
- Make it Vegetarian: Easily transform this flavorful dish to be vegetarian-friendly by simply swapping out the chicken stock. Be sure to use an equal amount of a high-quality vegetable broth instead of chicken stock. The rich flavors of the spices and tomato will still shine through beautifully, creating a satisfying meat-free option.
- Achieve a Vegan Version: To make this Spanish rice completely vegan, follow the vegetarian modification by exclusively using vegetable broth. Additionally, you will need to omit the butter entirely or substitute it with your favorite plant-based, non-dairy butter alternative. A swirl of olive oil can also be used for fluffing if preferred, adding a rich mouthfeel.
- Add Extra Vegetables for Nutrition and Color: Feel free to stir in some frozen peas, corn, or finely diced bell peppers (red, green, or yellow work well) after the rice has cooked and been fluffed. If adding fresh bell peppers, sauté them along with the onion and jalapeño to soften them. This boosts the nutritional content, adds vibrant color, and can introduce additional textures.
- Boost Smoky Flavor: For a deeper, more robust, and authentic smoky flavor profile reminiscent of traditional cooking, consider adding a tiny pinch of liquid smoke (just a drop or two!) or a quarter teaspoon of smoked paprika along with the other spices. This adds another layer of complexity.
- Brown Rice Variation: As noted in the instructions, this recipe adapts perfectly to long-grain brown rice. Just remember to adjust the pressure cooking time to 22 minutes to account for the longer cooking requirements of brown rice. The rinsing and layering steps remain the same.
Storage & Reheating Instructions for Delicious Leftovers
Proper storage is essential to safely enjoy your delicious Instant Pot Spanish Rice leftovers and maintain its best possible texture. Rice should be cooled promptly after cooking before being transferred to a storage container, but it’s equally important not to leave it at room temperature for extended periods (no more than 1 hour is recommended for cooked rice). We recommend spreading the freshly cooked rice out evenly on a shallow dish or baking sheet, then popping it into the refrigerator uncovered to cool for 15-20 minutes. Once it has cooled down sufficiently, follow these guidelines:
- Refrigerate: Transfer the cooled Spanish rice to an airtight container. It will keep beautifully in the refrigerator for 3-4 days. For optimal taste and safety, consume it within this timeframe.
- Freeze: For longer-term storage, cooled rice can be placed into a freezer-safe container or a heavy-duty freezer bag. If using a bag, press out as much air as possible before sealing. Freeze for up to 3 months. When you’re ready to enjoy it again, defrost the rice in the refrigerator overnight. Once thawed, use it within 3 days. Freezing rice is a fantastic meal prep hack!
- Reheat: To restore its perfect texture and warmth, transfer the desired amount of rice to a microwave-safe bowl. Add a small splash of stock or water (about 1-2 tablespoons per cup of rice) to help reintroduce moisture and prevent it from drying out. Cover the bowl loosely with a damp paper towel to trap steam during reheating. Reheat in the microwave in 1-minute intervals, stirring gently between each interval, until the rice is heated through and fluffy. Alternatively, you can reheat it on the stovetop over low heat with a bit of added liquid, stirring occasionally until warm.
Instant Pot Spanish Rice FAQs: Your Frequently Asked Questions Answered
Can I double this recipe for a larger batch?
Yes, absolutely! If you are using a 6-quart or 8-quart Instant Pot model, you can confidently double this recipe without any issues. The key is to keep the pressure cook time exactly the same as indicated for a single batch (3 minutes for white rice, 22 minutes for brown rice). However, be aware that the amount of time it takes for your Instant Pot to come to pressure initially, and for the pressure to release naturally after cooking, will increase significantly with a larger volume of ingredients. Always ensure you do not exceed the maximum fill line of your Instant Pot. Do not attempt to double this recipe if you are using a smaller 3-quart Instant Pot, as it will likely exceed its capacity and could lead to unsafe operation or overflow.
Is it possible to halve the recipe?
While cooking smaller quantities in a large pot can sometimes be tricky, this recipe is adaptable. For an 8-quart Instant Pot model, it’s generally recommended to cook the full amount for optimal results and to ensure proper pressure buildup. However, if you’re using either a 3-quart or a 6-quart Instant Pot, you can successfully halve this recipe. As with doubling, the pressure cook time remains unchanged. Just be mindful that the pot will come to pressure and release pressure more quickly with a smaller volume of ingredients, so be ready for the natural release slightly sooner.
Can I speed up the process by using a quick pressure release?
No, a quick pressure release (QPR) is strongly discouraged for this Instant Pot Spanish Rice recipe. Attempting a quick release will likely cause starchy liquid to vigorously spew from the vent, making a considerable mess in your kitchen, and more importantly, it will result in severely undercooked and potentially gummy or crunchy rice. The crucial natural pressure release (NPR) allows the rice grains to gently finish cooking, steam evenly, and fully absorb the flavorful liquid, leading to that desirable fluffy and tender texture. Patience during the natural release phase is truly key to achieving perfect, restaurant-quality results.
What kind of tomato sauce should I use for this recipe?
For this Instant Pot Spanish Rice recipe, it is essential to use plain canned tomato sauce. Do not substitute with crushed tomatoes, diced tomatoes, tomato paste, or pasta sauce. Plain tomato sauce provides the ideal smooth consistency and a pure tomato flavor profile without altering the liquid balance or introducing unwanted herbs, spices, or sugars that could affect the final taste and texture of your rice. Look for low-sodium options if you are managing your salt intake.
Can I toast the rice before adding liquid?
While some traditional rice recipes call for toasting the dry rice grains in oil before adding liquid, it’s not strictly necessary for this Instant Pot method. The pressure cooking environment provides such even heat distribution that toasting is less critical. However, if you prefer a slightly nuttier flavor and a firmer, more distinct grain, you can optionally toast the *rinsed and thoroughly drained* rice in a tablespoon of oil on the “Sauté” function for 2-3 minutes until it’s lightly golden before adding the broth and spices. If you choose to toast, remember to deglaze the pot thoroughly afterward to prevent any browned bits from causing a burn notice.
Why did my rice turn out mushy or too wet?
Mushy or too wet rice often points to one of two things: either the rice was not thoroughly rinsed, leaving excess starch that caused stickiness, or the natural pressure release was not fully completed. It’s crucial to allow the full 15 minutes (or more) for natural pressure release, as this extended steaming period allows the grains to absorb the remaining moisture and firm up to the perfect texture. Ensure your liquid-to-rice ratio is correct (1:1 for this recipe) and avoid adding extra liquid.
Serving Suggestions for Your Instant Pot Spanish Rice
This Instant Pot Spanish Rice is so incredibly versatile and flavorful that it can effortlessly be the star of your meal or the perfect supporting actor to a wide array of dishes. For an authentic, restaurant-style Mexican spread right in the comfort of your home, I absolutely love pairing it with a generous side of creamy Instant Pot refried beans, crisp tortilla chips, and a vibrant, zesty blender salsa. This classic combination is simple, deeply satisfying, and guaranteed to be a hit at any dinner table. Beyond this traditional pairing, it harmonizes beautifully with an endless array of main courses. Here are a few of our personal favorites that truly elevate the dining experience:
- Flavorful Tacos: Serve a hearty scoop of Spanish rice alongside savory Instant Pot Chicken Tacos or wholesome Black Bean Tacos for a complete and satisfying meal. The rice adds a wonderful texture, body, and perfectly absorbs all the delicious taco seasonings.
- Customizable Mexican Bowls: Create wholesome and easily customizable Mexican bowls. Start with a generous base of this fluffy Spanish rice, then add your favorite protein (such as grilled chicken, succulent carnitas, or plant-based Copycat Chipotle Sofritas), along with black beans, sweet corn, creamy avocado slices, fresh pico de gallo, and a dollop of cooling sour cream or Greek yogurt.
- Sizzling Fajitas: Pair this rice with sizzling platters of vibrant Vegetarian Fajitas or zesty Honey Lime Chicken Fajitas. The rice provides a perfect, fluffy balance to the rich, smoky, and slightly spicy flavors of the fajitas.
- Enchilada Sidekick: No authentic enchilada dinner is truly complete without a generous side of fluffy Spanish rice. It perfectly complements cheesy chicken enchiladas, beef enchiladas, or vegetarian versions, soaking up any extra flavorful sauce and adding a comforting element.
- Hearty Burrito Filler: Enhance your homemade burritos or dynamic burrito bowls with a substantial scoop of this flavorful rice. It adds fantastic body, an authentic taste, and helps to make your burritos even more satisfying and filling.
- Perfect with Grilled Meats: This rice makes an excellent and easy side dish for various grilled proteins, including perfectly seared steak, succulent chicken breasts, or flaky fish, especially when seasoned with complementary Mexican or Tex-Mex spices.
- Breakfast Burritos: Repurpose leftovers into delicious breakfast burritos with scrambled eggs, cheese, and a dollop of salsa!
No matter how you choose to serve it, this Instant Pot Spanish Rice is sure to become a cherished staple in your meal rotation, bringing authentic Mexican flavors to your table with incredible ease.
Instant Pot Spanish Rice Recipe
Cook time: 3 minutes (white rice) / 22 minutes (brown rice)
Natural Pressure Release time: 15 minutes
Total time: Approximately 38-50 minutes (includes pressure build-up and release)
Print Recipe
Ingredients
- 2 cups long-grain rice (white or brown, see notes for cook times)
- 1 tablespoon extra virgin olive oil
- ¼ cup diced yellow onion
- 1 small jalapeño, seeded and finely minced (adjust to taste for heat)
- 2 cloves garlic, minced
- 2 cups low sodium chicken stock, or vegetable broth (for vegetarian/vegan)
- 1 teaspoon kosher salt
- 1 teaspoon paprika
- 1 teaspoon chili powder
- ½ teaspoon cumin
- ¼ teaspoon oregano
- ⅔ cup tomato sauce (plain canned)
- 1 tablespoon unsalted butter, optional (for fluffing; use non-dairy for vegan)
Instructions
- Place 2 cups of long-grain rice in a colander and rinse thoroughly under cold running water until the water runs completely clear. Drain well and set aside.
- Turn the Instant Pot to “Sauté” function, add 1 tablespoon extra virgin olive oil and let it heat. Once shimmering, add ¼ cup diced yellow onion and 1 small jalapeño (seeded and finely minced). Sauté for 2-3 minutes until the onion is translucent and softened. Stir in 2 minced garlic cloves and continue to sauté for an additional 30 seconds to toast the garlic. Hit “Cancel” to turn off the Sauté function.
- Pour 2 cups of low sodium chicken stock (or vegetable broth) into the inner pot. Immediately use a sturdy wooden spoon or spatula to vigorously scrape up any browned bits from the bottom of the pot. This crucial step prevents a “burn” notice during cooking.
- Add 1 teaspoon kosher salt, 1 teaspoon paprika, 1 teaspoon chili powder, ½ teaspoon cumin, and ¼ teaspoon oregano to the inner pot and stir well with the broth. Add the rinsed rice and gently push it down with a spoon to submerge it in the liquid. Pour ⅔ cup tomato sauce directly on top of the rice, but DO NOT STIR.
- Place the lid on the Instant Pot, ensuring the vent knob is set to the “Sealing” position. Select “Pressure Cook” or “Manual” and set to “High Pressure”:
- For Long-Grain White Rice: Cook for 3 minutes.
- For Long-Grain Brown Rice: Cook for 22 minutes.
- Once the cooking time has elapsed, allow the pressure to release naturally for at least 15 minutes. This natural pressure release is vital for perfectly fluffy rice. After 15 minutes, carefully turn the vent knob to “Venting” to release any remaining pressure, then remove the lid.
- If desired, add 1 tablespoon unsalted butter (or vegan alternative). Use a fork to gently fluff the rice, incorporating the tomato sauce and butter evenly throughout. Serve warm and enjoy!
Equipment
- Electric Pressure Cooker (6 or 8 quart)
- Fine-mesh strainer
- Wooden spoon or heat-resistant spatula
Notes
Type of Rice: This recipe works perfectly with both long-grain brown and white rice. The measurements for all ingredients remain the same, but the cooking time under high pressure will differ:
- White rice: Cook for 3 minutes on High Pressure.
- Brown rice: Cook for 22 minutes on High Pressure.
Control the Spice/Heat: The jalapeño adds a subtle warmth and depth. For a milder flavor, remove all seeds and white ribs. For a bit more heat, leave some seeds in. If you’re not a fan of jalapeños, you can omit it entirely, but note the rice will have a slightly less complex flavor profile.
Storage: To store leftovers, cool the rice quickly by spreading it on a shallow dish and chilling in the fridge for 15-20 minutes. Once cooled, transfer to an airtight container and refrigerate for up to 4 days. For longer storage, freeze in a freezer-safe container for up to 3 months. Thaw overnight in the refrigerator before reheating.
Reheat: Add the desired amount of rice to a microwave-safe bowl with a splash of liquid (water or broth). Cover with a damp paper towel and microwave in 1-minute intervals, stirring gently until heated through. This method helps maintain moisture and fluffiness.
Nutrition Information (Approximate Per Serving)
Serving Size: 1/8 of recipe
- Calories: 196 kcal
- Carbohydrates: 40g
- Protein: 4g
- Fat: 2g
- Saturated Fat: 1g
- Sodium: 520mg
- Potassium: 134mg
- Fiber: 1g
- Sugar: 2g
- Vitamin A: 330 IU
- Vitamin C: 4mg
- Calcium: 17mg
- Iron: 1mg
Nutrition information is automatically calculated and provided as an approximation only. Actual values may vary based on specific ingredients used and preparation methods.