

Step into a world of cozy nostalgia with this incredibly easy recipe for Old-Fashioned Apple Crisp, lovingly passed down through generations from my grandma’s kitchen to yours. Imagine the delightful aroma filling your home as sweet, tender apples, infused with warming spices, bake beneath a perfectly golden, buttery oat topping. This timeless dessert isn’t just a treat; it’s a comforting hug in a bowl, making it the ultimate fall indulgence and a cherished family tradition.
My Great-Grandma, a true baking queen, was renowned for her heartwarming and delicious recipes. This homemade apple crisp stands as a testament to her culinary legacy. Once you’ve savored every bite of this classic, be sure to explore more of her beloved creations, including her famous Hot Milk Cake, the crowd-pleasing Texas Sheet Cake, a zesty Lemon Bread, and her moist Banana Cake. Each recipe tells a story of simple ingredients transforming into extraordinary flavors.
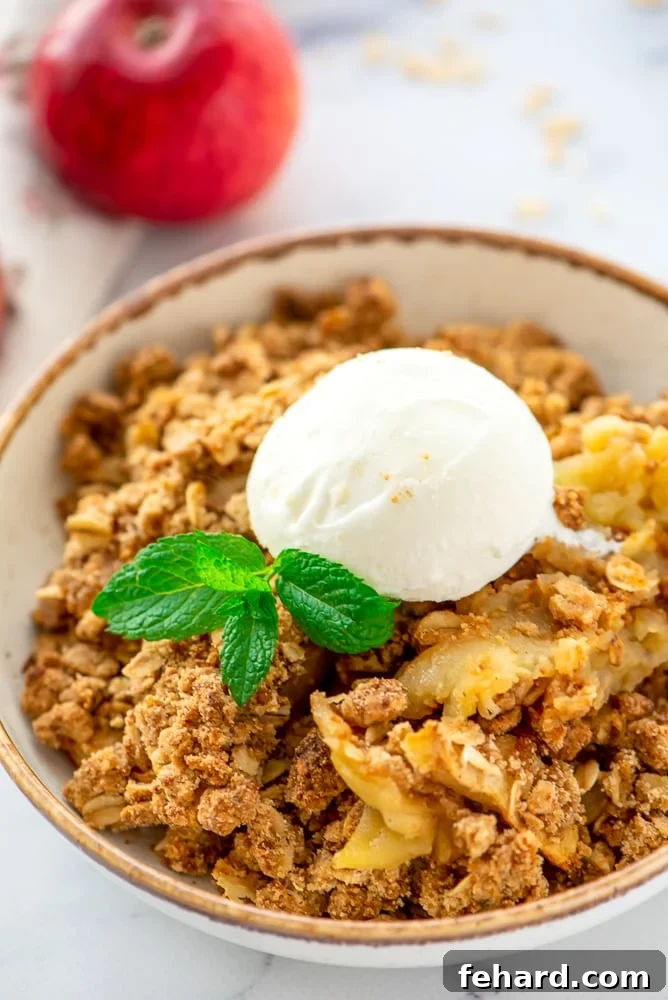
Why This Old-Fashioned Apple Crisp Will Become Your Favorite
Throughout the years, I’ve had the pleasure of tasting countless variations of apple crisp, but none compare to my Great-Grandma’s recipe. It’s a simple, yet profoundly perfect creation that consistently outshines the rest. Let’s delve into what makes this particular recipe a true standout:
- Effortlessly Simple to Make: One of the most appealing aspects of this dessert is its straightforward preparation. The most “labor-intensive” part is peeling the apples, but here’s a little secret from our family kitchen: you don’t even have to! Leaving the peels on adds extra fiber, a lovely rustic texture, and shaves precious minutes off your prep time. The choice is entirely yours, making this recipe wonderfully adaptable for busy days or relaxed baking afternoons.
- The Irresistible Crispy Oat Topping: If a truly delectable, crumbly oat topping is what you seek in an apple crisp, then your search ends here. This topping achieves the perfect balance: it’s exquisitely buttery, wonderfully crumbly with just the right amount of chew from the oats, and sweetened to perfection. Each spoonful promises a delightful textural contrast against the soft, warm apples below, creating a symphony of flavors and sensations.
- Pure, Cozy Fall Flavors: At its heart, this dessert celebrates the natural sweetness and tartness of fresh apples. These star ingredients are not overshadowed but beautifully enhanced by a harmonious blend of warming spices like cinnamon and nutmeg, all embraced by that signature buttery oat crumble. It evokes the very essence of autumn – crisp air, colorful leaves, and the comforting feeling of home.
A 5-Star Reader Review
“I absolutely adored your recipe! I opted for whole wheat rolled oats and grass-fed salted butter, then added some chopped pecans for an extra layer of texture. I even doubled the recipe because it vanished so quickly! “–Dawn B ⭐⭐⭐⭐⭐
Essential Ingredients for the Perfect Apple Crisp
My grandma’s approach to baking was always rooted in quality, simple ingredients, and this apple crisp is no exception. With a thoughtful selection of apples and a straightforward yet magical combination for the topping, perfect results are guaranteed every time. Let’s take a closer look at each component:
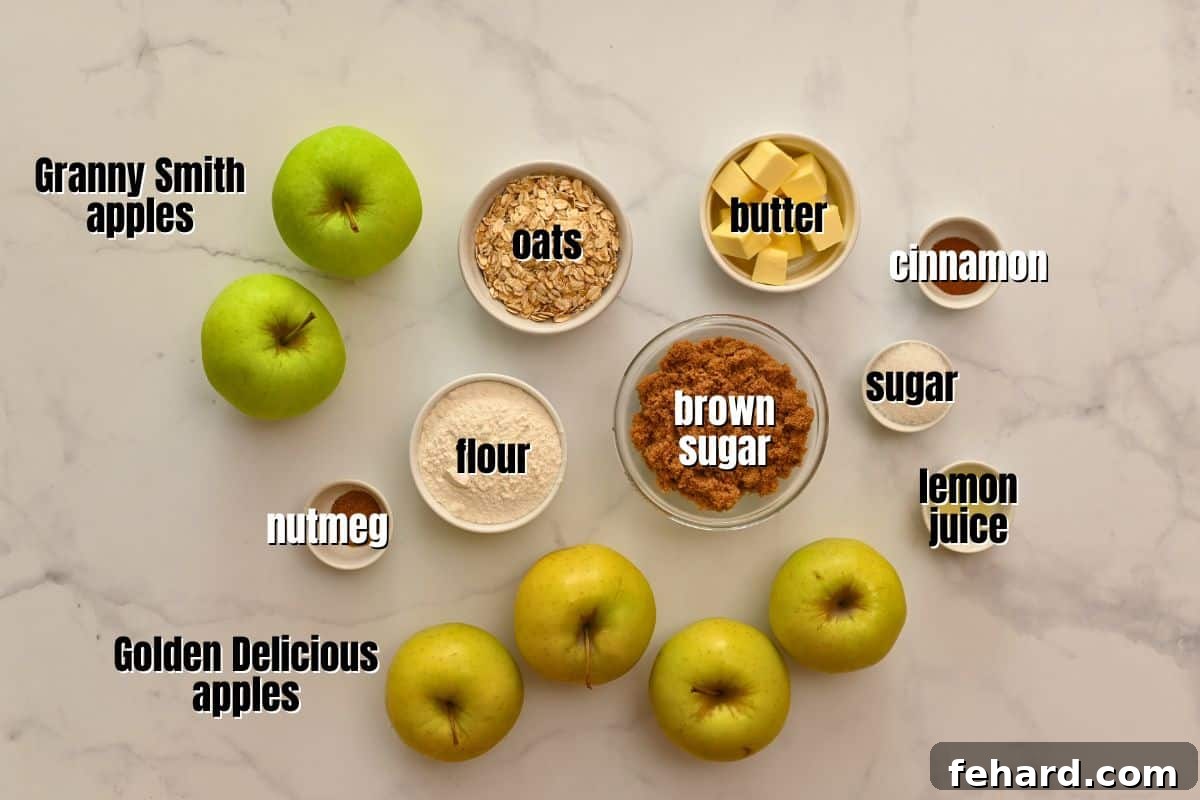
- Apples: The undisputed star of any apple crisp! While most firm, baking-friendly apples will perform admirably, for the best flavor and texture, I highly recommend using a blend of sweet and tart varieties, favoring the sweeter ones slightly more. My personal go-to combination includes crisp Golden Delicious for sweetness and classic Granny Smith for that perfect tangy counterpoint. Other excellent choices are Jonagold, Honeycrisp, Braeburn, Mutsu, Winesap, and Pink Lady. Be sure to steer clear of softer apples like McIntosh and Red Delicious, as they tend to become excessively mushy and lose their structure when baked. You’ll need about 6 cups of diced apples (roughly 6 large apples), but don’t fret over exact measurements; a close approximation is perfectly fine.
- Sugar: This recipe utilizes a duo of sugars to achieve a balanced sweetness and depth of flavor. A small amount of granulated sugar lightly sweetens the apple base, enhancing their natural flavors. Brown sugar, on the other hand, is crucial for the crisp topping, imparting a rich, molasses-like warmth and contributing to its wonderfully chewy and crumbly texture.
- Oats: Rolled oats are essential for that characteristic “crisp” texture. Whether you opt for quick-cook or old-fashioned rolled oats, they both integrate beautifully into the topping, delivering a satisfying chew and a rustic charm. Ensure your oats are certified gluten-free if you are catering to dietary restrictions.
- Flour: All-purpose flour forms the structural base of our crispy topping. For those seeking a gluten-free alternative, a 1:1 gluten-free flour blend works perfectly here. Remember to double-check that your oats are also certified gluten-free to ensure the entire dessert meets dietary requirements.
- Lemon Juice: Just a splash of lemon juice plays a dual role: it brightens the overall flavor profile of the apples, preventing them from tasting flat, and it helps to inhibit browning. Freshly squeezed lemon juice is always preferred for its vibrant flavor, but 100% bottled lemon juice will also work effectively in this recipe.
- Butter: Unsalted butter, cold and cubed, is key to achieving that perfectly crumbly topping. When cold butter slowly melts during baking, it creates pockets of steam that result in a light, tender, and incredibly crisp texture. For a dairy-free version, a good quality unsalted non-dairy stick butter can be used with excellent results.
- Spices: Cinnamon and nutmeg are the quintessential warming spices for apple crisp, bringing that comforting, aromatic essence. While ground cinnamon is readily available, I highly recommend grating whole nutmeg fresh. The difference in richness and fragrance is truly remarkable and elevates the entire dessert.
Crafting Your Homemade Apple Crisp: A Step-by-Step Guide
Ready to bring this comforting dessert to life? Let’s walk through the simple steps together. Think of this as me (or my Great-Grandma!) right there beside you in the kitchen, guiding you to apple crisp perfection.
Old-Fashioned Apple Crisp with Oats
Kristen Chidsey
8
15 mins
45 mins
1 hr
Ingredients
For the Apple Mixture
- 4 large sweet firm apples (like Golden Delicious), peeled (optional), cored, and chopped into 1-inch cubes
- 2 large Granny Smith apples, peeled (optional), cored, and chopped into 1-inch cubes
- 1 teaspoon lemon juice
- 1 tablespoon granulated sugar (optional, see notes below)
For the Buttery Oat Crisp Topping
- ⅔ cup brown sugar, light or dark, packed
- ½ cup all-purpose flour
- ½ cup uncooked rolled oats, quick-cook or old-fashioned (ensure certified gluten-free if needed)
- ¾ teaspoon ground cinnamon
- ¾ teaspoon nutmeg (preferably freshly grated)
- ⅓ cup unsalted butter (cold and cubed), plus extra for greasing the baking dish
Instructions
-
Prepare Your Baking Dish and Oven: Begin by preheating your oven to a comforting 375℉ (190℃). Generously grease an 8×8-inch baking dish with butter. This ensures your crisp won’t stick and aids in cleanup. Set it aside for now.
-
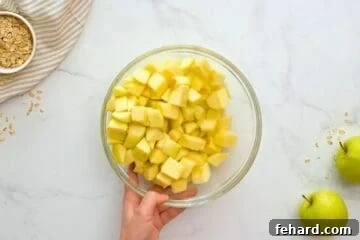
Prepare the Apple Filling: In a spacious mixing bowl, combine your prepared apples. If you chose to peel them, now is the time. Add 1 teaspoon of fresh lemon juice and 1 tablespoon of granulated sugar (refer to the Kristen’s Note below for more insight on sugar in the apple mixture). Toss everything gently until the apples are evenly coated.

A Note From Kristen
Having grown up surrounded by apple orchards, we rarely found it necessary to add sugar directly to the diced apples. The buttery, spiced oat crumble naturally sweetens the apples as they bake. For freshly picked, in-season apples, this is often all the sugar needed. However, when using store-bought or out-of-season apples, a touch of granulated sugar helps to ensure that perfect sweetness balance.
-
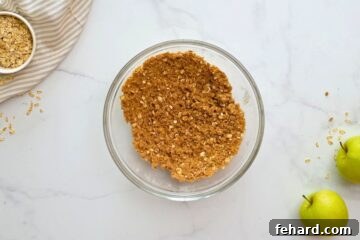
Craft the Crumbly Oat Topping: In a separate medium-sized mixing bowl, whisk together the ⅔ cup brown sugar, ½ cup all-purpose flour, ½ cup uncooked rolled oats, ¾ teaspoon ground cinnamon, and ¾ teaspoon freshly grated nutmeg. Now, add the ⅓ cup of cold, cubed unsalted butter. Using a pastry cutter, or your hands (as my grandma always swore by, as they incorporate the butter beautifully without overworking the dough), mix the ingredients until the butter is evenly distributed and the mixture resembles coarse crumbs. Avoid overmixing; a few larger clumps are desirable for that perfect crisp texture.
-
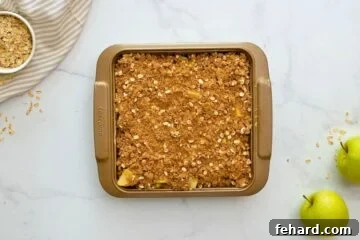
Assemble Your Crisp: Carefully pour the apple mixture into your prepared baking dish, spreading them into an even layer. Then, evenly crumble the oat topping over the apples, ensuring good coverage.
-
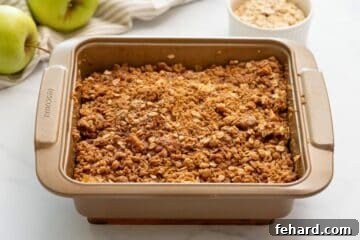
Bake to Golden Perfection: Cover the baking dish loosely with aluminum foil and bake for the initial 20 minutes. This crucial step allows the apples to become beautifully tender without the topping drying out or browning too quickly. After 20 minutes, remove the foil and continue baking for an additional 15-20 minutes, or until the apples are fork-tender and the crisp topping has transformed into a rich, golden brown. You’ll know it’s done when your kitchen smells absolutely heavenly!
-
Serve and Savor: While it’s tempting to dive in immediately, allowing the apple crisp to cool slightly before serving is best. You want it to be wonderfully warm, but no longer bubbling. This brief resting period helps the flavors meld and the topping to set. The absolute ultimate way to enjoy this treat is with a generous scoop of creamy homemade vanilla ice cream or no-churn vanilla ice cream. The cold, melting ice cream against the warm, spiced apples and crunchy topping is truly a little slice of heaven! A dollop of whipped cream or a drizzle of milk also makes for a delightful pairing.
Equipment Needed
-
8×8 inch baking pan
-
Large mixing bowl
-
Medium mixing bowl
-
Pastry cutter (or your hands!)
Helpful Notes & Expert Tips
Choosing Your Apple Varieties: For the optimal flavor and texture balance, I love combining two tart Granny Smith apples with four sweet, firm apples. However, if you prefer a sweeter profile, feel free to use all sweet apples. If you opt for an all-tart apple blend, simply increase the granulated sugar in the apple mixture to 3 tablespoons to offset the tartness and achieve a harmonious taste. Refer to the “Essential Ingredients” section for recommended sweet apple types.
Best Sweet Apple Varieties: Excellent choices for sweet, firm baking apples include Golden Delicious, Jonagold, Honeycrisp, Braeburn, Mutsu, Winesap, and Pink Lady. These varieties hold their shape beautifully and offer fantastic flavor. Avoid McIntosh or Red Delicious, as they tend to break down excessively and become mushy during baking. Feel free to mix and match to create your perfect blend!
Doubling the Recipe: This recipe is incredibly adaptable and can be easily doubled for larger gatherings. Simply double all the ingredients and bake in a larger 9×13-inch pan or a 4-quart shallow baking dish. Remarkably, the baking time will remain approximately the same.
Making it Gluten-Free: To ensure this delicious dessert is entirely gluten-free, make sure to use certified gluten-free rolled oats in your topping. Additionally, substitute the all-purpose flour with a high-quality 1:1 gluten-free flour blend.
Dairy-Free Option: For a dairy-free version of this crisp, simply swap out the unsalted butter for an unsalted, non-dairy stick butter alternative. Most reputable brands will perform beautifully in the topping.
Adding a Nutty Crunch: If you enjoy a textural contrast and an earthy flavor, consider adding up to ¼ cup of finely chopped walnuts or pecans to your crisp topping mixture. This adds a delightful nutty crunch that complements the apples and oats wonderfully.
Nutrition Information (per serving)
Carbohydrates: 27g
Protein: 4g
Fat: 10g
Saturated Fat: 5g
Cholesterol: 29mg
Sodium: 239mg
Potassium: 91mg
Sugar: 17g
Vitamin A: 235IU
Calcium: 23mg
Iron: 0.8mg
Please note: Nutrition information is automatically calculated and should be used as an approximation.
Yield, Storage, and Reheating Tips
While this recipe is officially designed to serve 8, I must confess, in our family, we typically only manage to get 6 servings out of a single batch. It’s simply too delicious not to go back for a second (or third!) scoop! If you’re planning to serve more than 6 people, I highly recommend doubling the batch to ensure everyone gets their fill of this irresistible treat.
- To Double This Recipe: Doubling is incredibly simple! Just double all the ingredient quantities and transfer the crisp to a larger 9×13-inch baking dish. You’ll be pleased to know that the baking time will remain largely the same, so no complex adjustments are needed.
- Storing Leftovers: Should you be fortunate enough to have any leftovers, allow the apple crisp to cool completely before storing. Once cooled, you can either cover the entire baking dish tightly with plastic wrap or transfer the crisp to an airtight container. Store it in the refrigerator for up to 3 days. Beyond this period, the apples tend to break down further and the topping can lose some of its crispness.
- Reheating Individual Servings: For a quick and easy reheat, place an individual portion in a microwave-safe bowl. Microwave in 30-second intervals, stirring gently in between, until it is warmed through to your liking.
- Reheating Multiple Portions: If you’re reheating several servings at once, transfer the leftover crisp to an oven-safe baking dish. Cover it with aluminum foil to prevent the topping from over-browning, and bake at 350℉ (175℃) for approximately 20 minutes, or until thoroughly heated. This method helps restore some of the original texture.
And there you have it—our family’s cherished old-fashioned apple crisp recipe! I genuinely hope that you and your loved ones enjoy this delightful dessert as much as we do. It’s more than just a recipe; it’s a taste of home and tradition. With warmth, Kristen.
Explore More Delicious Apple Recipes
If you’ve fallen in love with the comforting flavors of this apple crisp, you’ll be thrilled to discover these other fantastic apple-centric recipes from our kitchen. Perfect for any time of year!
- Homemade Instant Pot Applesauce
- Warm and Comforting Baked Apples
- Spiced Apple Cinnamon Bread
- Classic Dutch Apple Pie
- Fluffy Applesauce Muffins
- Hearty Baked Apple Oatmeal
- Rich Instant Pot Apple Butter
Loved this recipe?
If you enjoyed making and savoring this old-fashioned apple crisp, we’d be delighted if you shared your experience! Please consider leaving a comment or review to let us know how it turned out for you.
This post was originally published in 2015 and has been thoughtfully updated in 2025 to provide even more detail and helpful tips.