
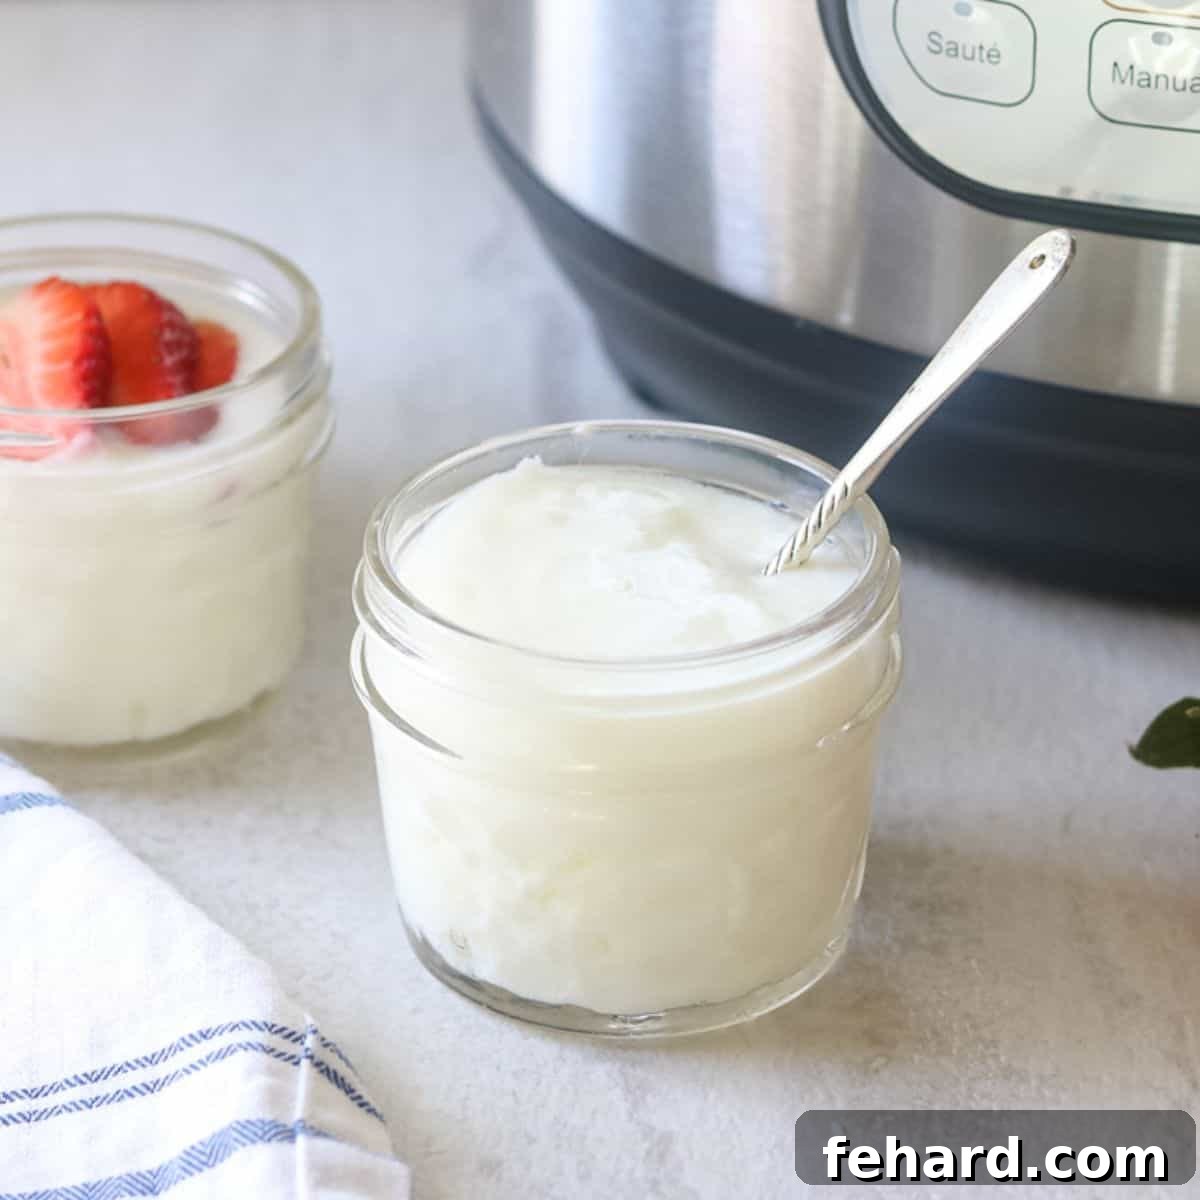
Welcome to the ULTIMATE Instant Pot Yogurt tutorial! Prepare to transform your kitchen into a homemade yogurt factory. This comprehensive guide provides step-by-step, detailed instructions for making luscious, creamy yogurt right in your Instant Pot. Whether your model has a dedicated yogurt setting or not, we’ve got you covered. You’ll learn how to craft everything from rich full-fat yogurt to light nonfat options, and even how to strain it into luxurious Greek yogurt. Plus, we’ll share expert tips on sweetening and flavoring your homemade batches. This tutorial truly includes EVERYTHING you need to know about making delicious, wholesome yogurt using an Instant Pot.
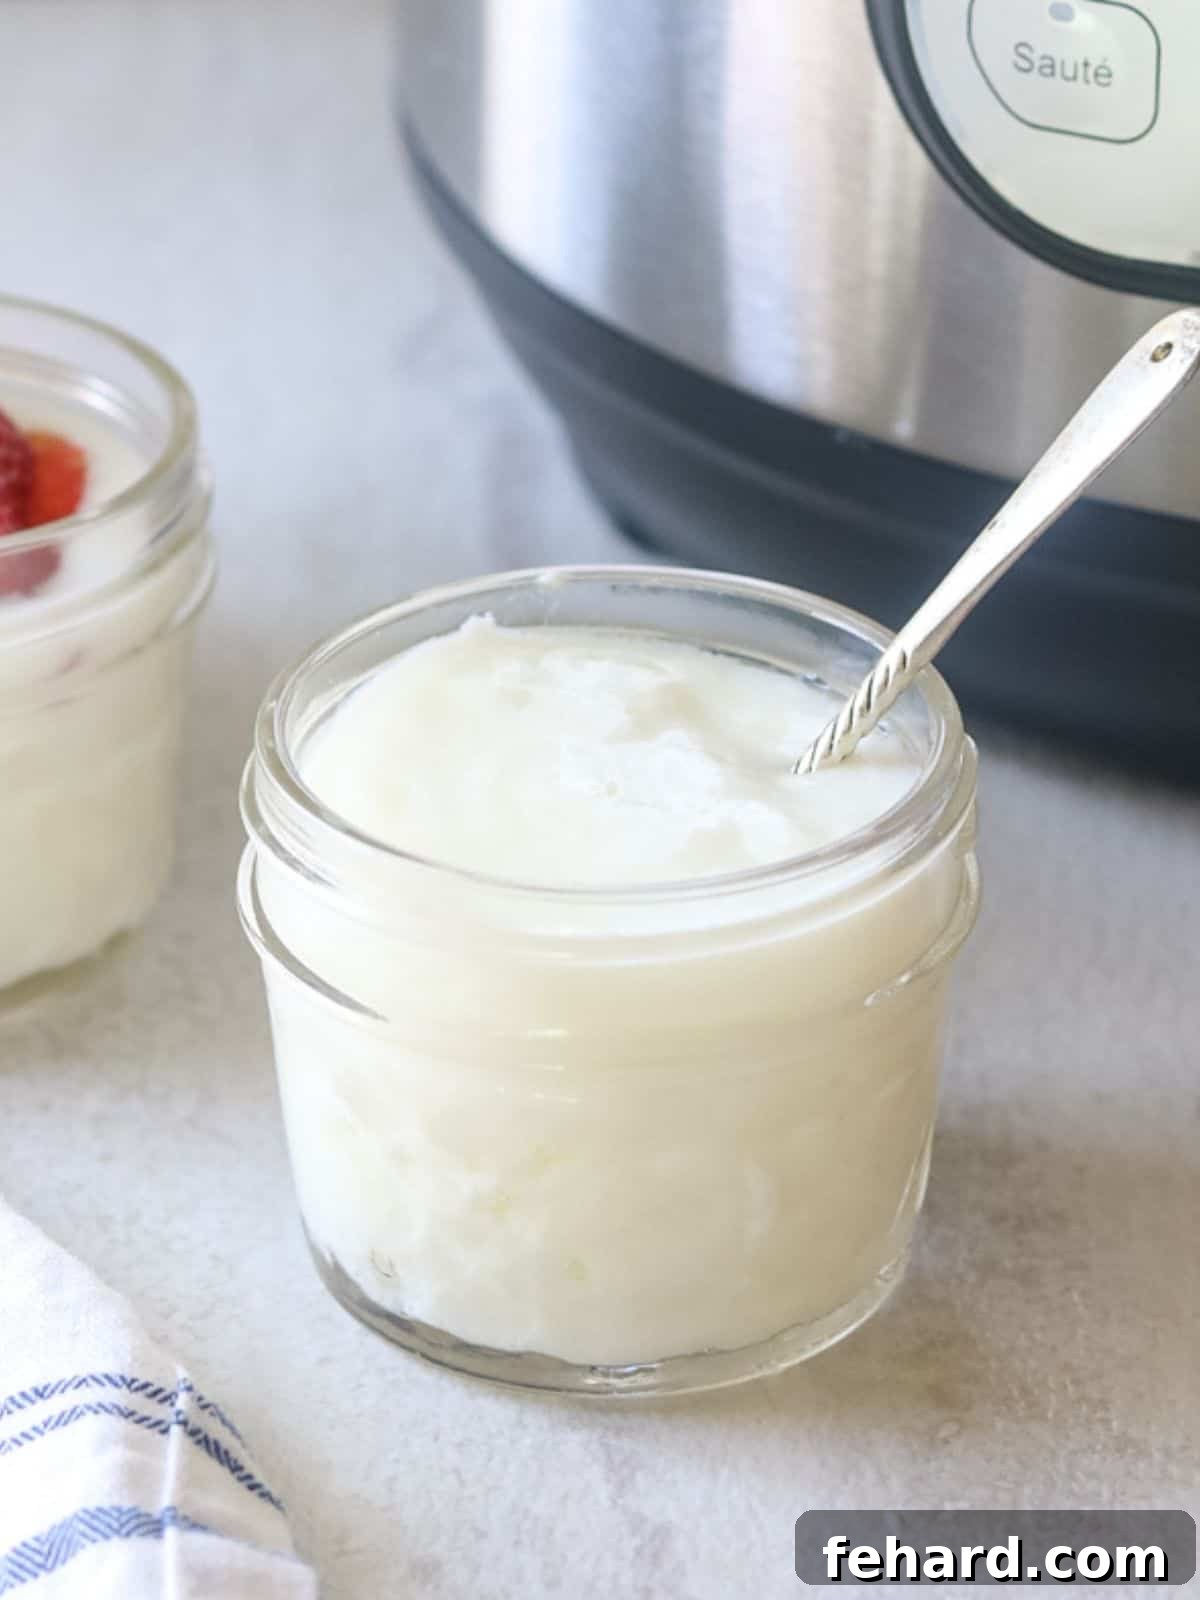
Instant Pot Yogurt: Easier and More Delicious Than You Think

There’s immense satisfaction in crafting everyday essentials from scratch. I’ve ventured into making fruit roll-ups, rich chicken stock, wholesome granola bars, and even succulent rotisserie chicken. But yogurt? For many, including myself initially, the idea of making yogurt at home seemed daunting and overly complicated.
Then came the Instant Pot. This game-changing appliance truly revolutionized my perspective. Giving homemade yogurt a try with my Instant Pot yielded results that genuinely astonished me. The process was almost foolproof, and the outcome was nothing short of phenomenal! The yogurt was incredibly creamy, with a subtle tang that was far more appealing than most store-bought varieties.
Beyond the superior taste and texture, homemade Instant Pot yogurt offers significant cost savings, often costing about half the price of commercial brands. It’s a true win-win: better quality and more budget-friendly. This method has quickly become a staple in my kitchen, empowering countless others to enjoy the benefits of creamy, delicious, and economical homemade yogurt using their Instant Pot. I’m excited to guide you through the process, so you can experience the same success and satisfaction!
Happy Cooking! xo Kristen
Table of Contents: Your Journey to Perfect Instant Pot Yogurt
- Instant Pot Yogurt Recipe Card
- Essential Ingredients & Equipment for Homemade Yogurt
- Crucial Timing: Planning Your Yogurt Making Process
- Step-by-Step Guide: How to Make Yogurt in Your Instant Pot
- Making Yogurt Without a Dedicated Yogurt Setting
- Tips for Crafting Delicious Instant Pot Fat-Free Yogurt
- Transforming Regular Yogurt into Instant Pot Greek Yogurt
- Creative Ways to Sweeten & Flavor Your Homemade Yogurt
- Storage and Freezing Tips for Instant Pot Yogurt
- Instant Pot Yogurt FAQs: Troubleshooting & Expert Answers
Essential Ingredients & Equipment for Homemade Instant Pot Yogurt
Crafting homemade yogurt is simpler than you might imagine, especially with the right tools and ingredients. Here’s what you’ll need to get started on your journey to creamy perfection:
- Instant Pot (or Any Electric Pressure Cooker): The Instant Pot is the star of this recipe. While having a model with a built-in yogurt setting/function significantly simplifies temperature control, it’s not strictly necessary. Don’t worry if your model lacks this specific button; we provide clear instructions to achieve fantastic results regardless. The Instant Pot’s ability to maintain precise temperatures is key to successful yogurt incubation.
- Milk: This recipe is optimized for traditional dairy milk. For best results, use fresh milk. Whole milk will yield the thickest, creamiest yogurt, but any fat percentage (2%, 1%, or skim milk) will work, albeit with slightly varying textures. It’s crucial to note that non-dairy milks generally cannot be substituted directly in this recipe due to different protein structures; for a dairy-free alternative, please refer to my specific Instant Pot Coconut Milk Yogurt recipe. If you’re using ultra-filtered milk (like Fairlife), my Instant Pot Cold Start Yogurt recipe is the ideal guide.
- Prepared Yogurt with Active Cultures (Yogurt Starter): To initiate the fermentation process, you need a starter. The simplest and most economical option is to purchase a small tub of plain, store-bought dairy yogurt that explicitly states it contains “active live cultures” on its label. Look for specific bacterial strains such as Lactobacillus acidophilus, Bifidobacterium bifidum, or Streptococcus thermophilus, which are common in most good quality brands. Once you’ve successfully made your first batch of homemade yogurt, you can reserve a small amount to use as a starter for your subsequent batches, creating a continuous cycle of fresh yogurt!
- Thermometer: Precision is paramount in yogurt making. A reliable digital instant-read thermometer is essential to ensure your milk reaches and cools to the exact temperatures required for optimal bacterial activity. Guessing temperatures can lead to inconsistent or failed results.
- Cheesecloth: This is a vital tool if you plan to make Greek-style yogurt. Cheesecloth is used to strain the yogurt, removing excess whey and concentrating the proteins, resulting in a thicker, tangier product. If you prefer regular, thinner yogurt, cheesecloth is not necessary.
Kristen’s Essential Timing Insight
Strategic Planning for Yogurt Incubation
The incubation phase is the longest part of making Instant Pot yogurt, typically requiring 8 to 10 hours for the cultures to develop properly. It’s crucial to plan when you start this process. Choose a time when you’ll be conveniently available to manage the yogurt once the incubation period is complete. Avoid starting it late at night if you plan to sleep, or right before you leave home for an extended period. Timely removal from the Instant Pot ensures the best texture and flavor, preventing over-incubation which can lead to excessively tangy or even curdled yogurt.
Mastering Homemade Yogurt: A Step-by-Step Instant Pot Guide
While the overall process of making Instant Pot yogurt requires a significant amount of time, it is far from difficult. With an electric pressure cooker, especially one equipped with a yogurt setting, the hands-on effort is minimal. Follow these detailed, step-by-step instructions, and you’ll achieve perfect, creamy results every time.
- Sanitize the Inner Pot. Before you begin, proper sanitation of your Instant Pot’s inner pot is critical. This step is not just about washing; it actively prevents the growth of undesirable bacteria that could compromise the flavor and safety of your yogurt. You have two effective methods for sanitizing:
- Boiling Water Method: Fill a thoroughly cleaned inner pot with hot, boiling water and let it sit for at least 10 minutes. This high temperature effectively sterilizes the surface. After 10 minutes, carefully discard the water and dry the inner pot completely before proceeding.
- Pressure Cook Method: Pour 2 cups of clean tap water into the inner pot. Secure the Instant Pot lid, ensuring the sealing ring is properly seated. Set the Instant Pot to “Pressure Cook” (or “Manual”) on HIGH pressure for 3 minutes. Once the cooking cycle is complete, perform a quick release of the pressure. Drain the water, dry the inner pot completely, and return it to the Instant Pot unit.
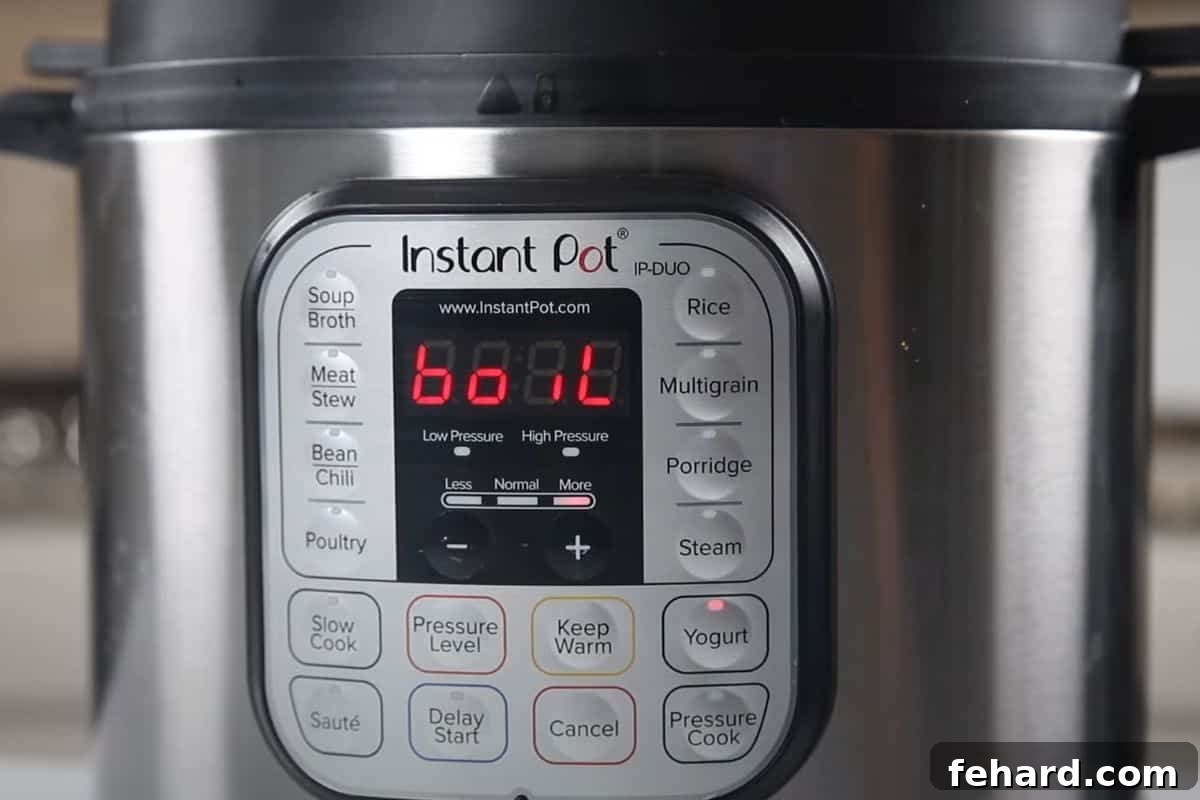
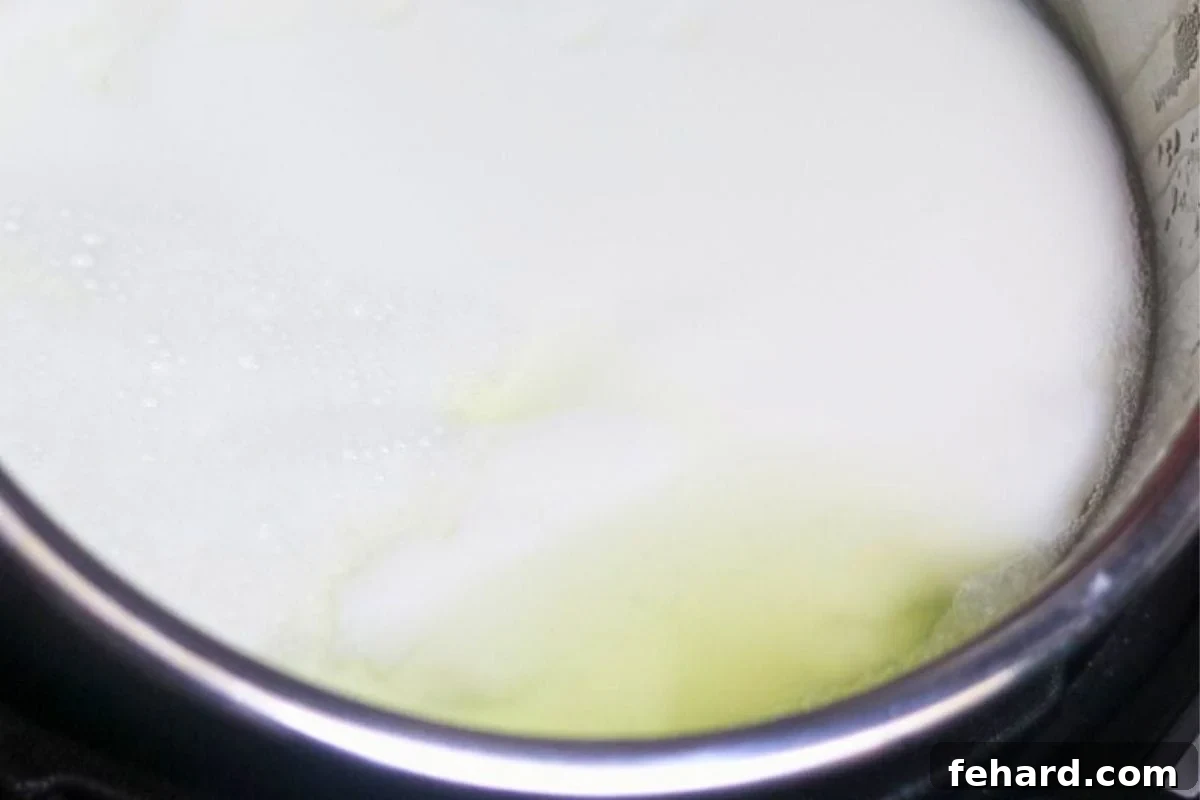
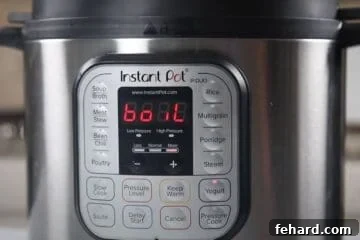
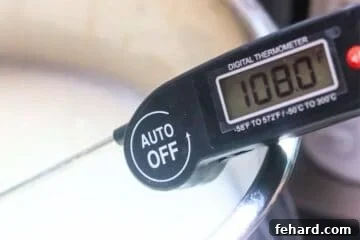
- Heat the Milk to the Ideal Temperature. Pour your chosen milk into the sanitized inner pot. Place the lid securely on the Instant Pot – the vent position (sealed or open) does not matter for this function. Press the “Yogurt” button. For most models, you’ll then need to press “Adjust” (or press the “Yogurt” button again) until the display shows “Boil.” The Instant Pot will now automatically heat the milk to the necessary temperature. This process usually takes between 30 to 60 minutes, depending on your specific model and the initial temperature of the milk. Once the Instant Pot beeps to signal completion, carefully remove the lid. Immediately use your digital instant-read thermometer to verify the milk’s temperature. It should ideally be between 180-190℉ (82-88℃). This heating process denatures the milk proteins, which contributes to a thicker, creamier yogurt.
Kristen’s Expert Tip for Heating Milk
If you observe that your milk isn’t consistently reaching the target temperature of 180-190℉ using the “Yogurt” function’s “Boil” setting, you can switch to the “Saute” function. This will heat the milk more aggressively, so it’s essential to monitor it very closely and stir frequently to prevent scorching or boiling over. Always use your thermometer to confirm the correct temperature.
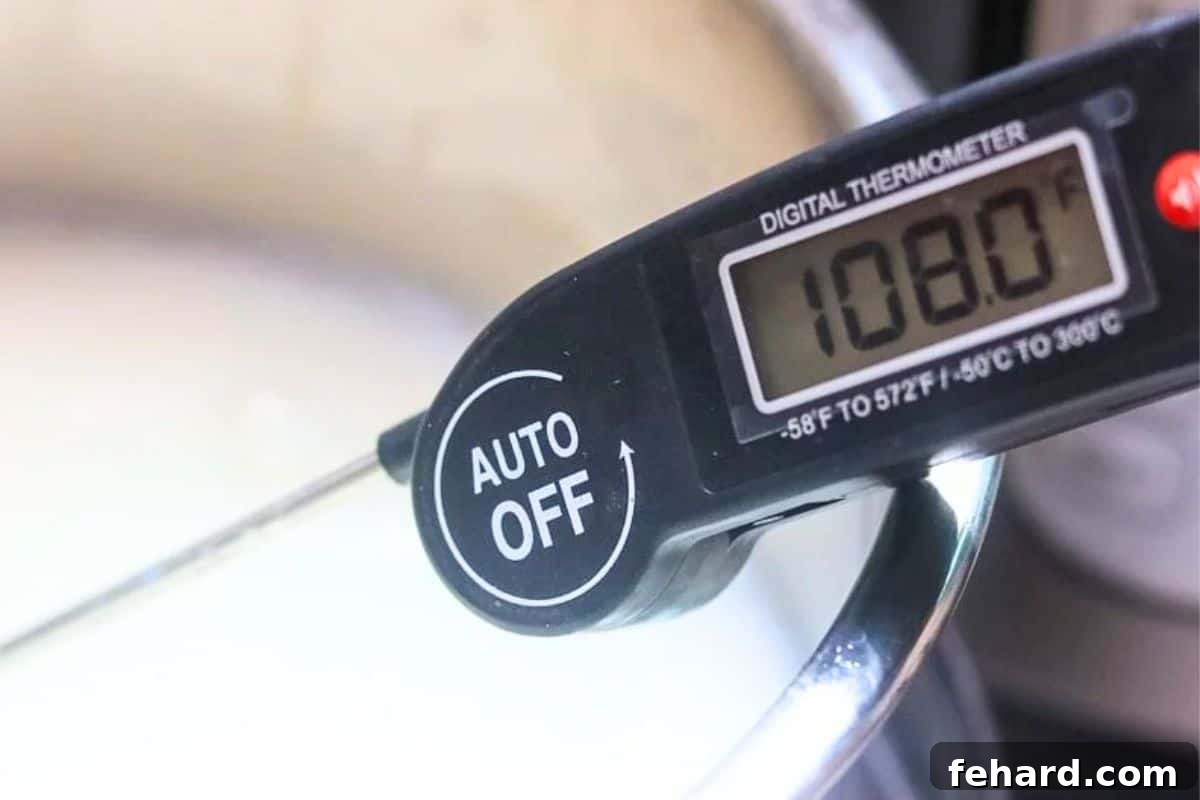
- Cool the Milk to Incubation Temperature. After the boiling cycle, allow the milk to rest in the inner pot inside the Instant Pot for about 5 minutes. This brief resting period is a small but effective trick that helps the yogurt achieve a slightly thicker consistency. After 5 minutes, remove the inner pot from the Instant Pot unit. Now, the crucial step is to cool the milk down to the optimal culturing temperature of approximately 105-115℉ (41-46℃). Cooling can be done in two ways:
- Counter Cooling: Simply leave the inner pot on your kitchen counter. This method is passive and typically takes about 1 hour.
- Ice Bath Method: To significantly speed up the cooling process to just 5-10 minutes, carefully place the inner pot into a larger bowl filled with ice water. Stir the milk gently but continuously until it reaches the desired temperature range. This quick cooling prevents unwanted bacterial growth and ensures your starter cultures thrive.
Always use your digital thermometer to accurately gauge the temperature before proceeding.
- Remove the “Skin” from the Milk. Once your milk has cooled to the proper temperature, you’ll likely notice a thin layer of “skin” that has formed on the surface. Use a clean spoon to gently skim off this layer and discard it. This small step is important for achieving the creamiest, most homogenous yogurt texture without any undesirable lumps.
- Incorporate the Yogurt Starter. Now it’s time to introduce the magic! Add the prepared yogurt (or specific yogurt starter) into the cooled milk. Whisk the mixture thoroughly yet gently until the starter is completely dissolved and evenly incorporated throughout the milk. This ensures the live active cultures are distributed, allowing them to ferment the milk efficiently.
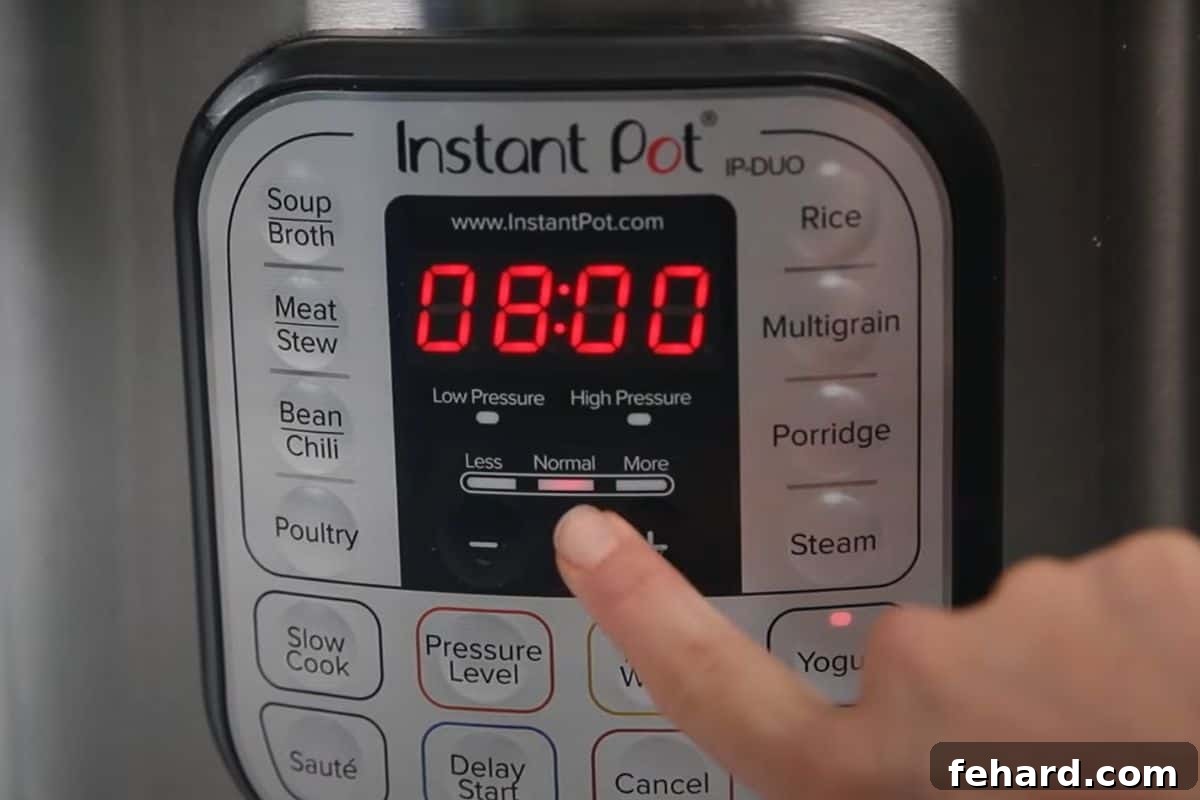
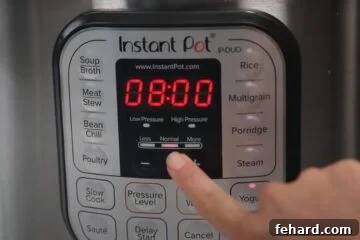
- Begin the Incubation Process. Carefully place the inner pot back into your Instant Pot unit. If you used an ice bath, ensure the exterior of the inner pot is completely dry. Secure the lid on the Instant Pot (again, the steam release valve’s position doesn’t impact this function). Press the “Yogurt” button once more. Then, depending on your model, press “Adjust” (or the “Yogurt” button repeatedly) until the screen displays “NORMAL” (ensure it’s not set to “Low”). Use the +/- buttons to set the incubation time to 8:00 (for 8 hours). If your Instant Pot model requires it, press “Start.” Now, let your Instant Pot work its wonders! The “Normal” setting maintains the optimal warm temperature for the live cultures to transform the milk into delicious yogurt.
Craving Tangier Yogurt?
The duration of the incubation period directly influences the tanginess of your yogurt. For a noticeably tangier flavor profile, extend the incubation time from 8 hours to 10 hours. The longer the cultures ferment, the more lactic acid they produce, resulting in a more pronounced tartness.
- Chill for Optimal Thickness. Once the Instant Pot signals that the incubation cycle is complete, carefully remove the inner pot from the unit. To ensure your yogurt achieves maximum thickness and a truly creamy consistency, cover the inner pot tightly with plastic wrap or a lid. Transfer it directly to the refrigerator and let the yogurt chill undisturbed for a minimum of 8 hours. This chilling period is crucial as it allows the yogurt to continue setting and firming up, resulting in a much better texture. Skipping this step can lead to runnier yogurt.
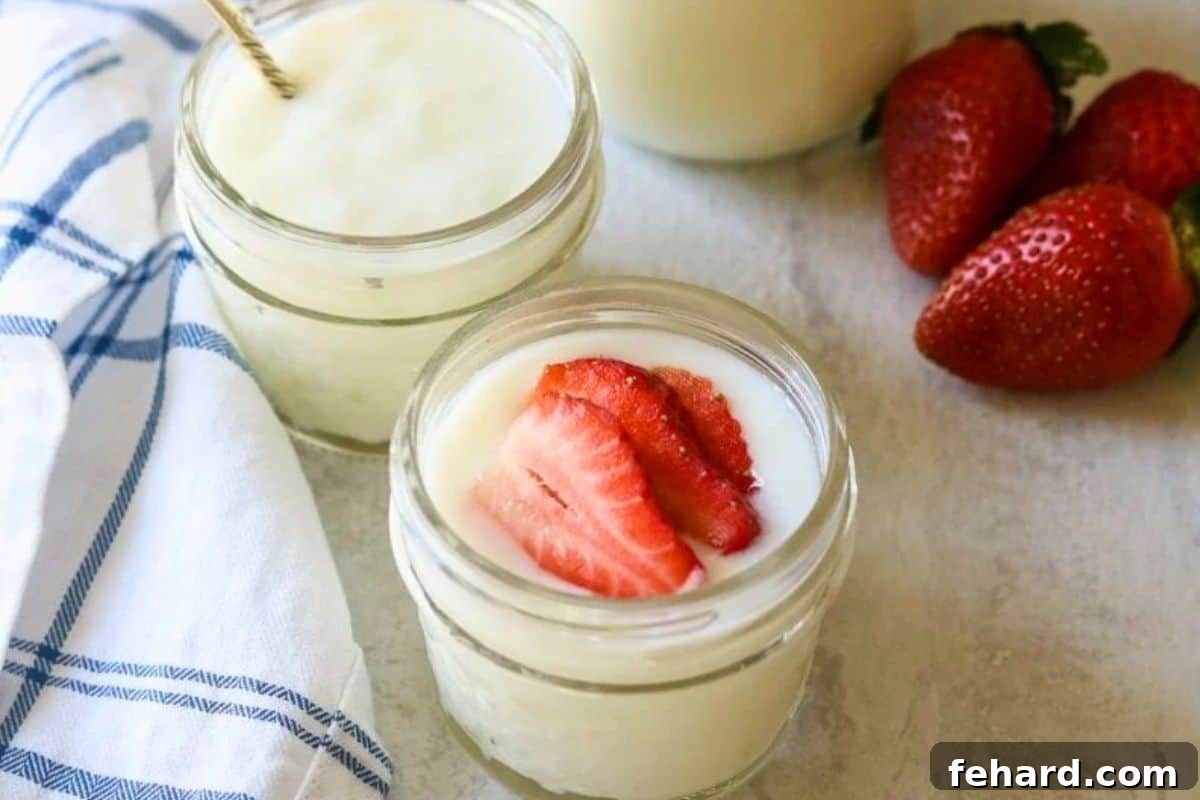
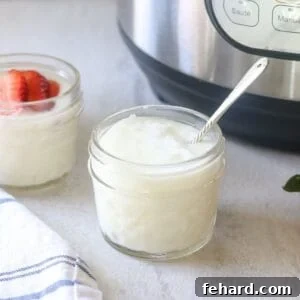
- Serve or Store for Later Enjoyment. After the extensive chilling period, your homemade Instant Pot yogurt is ready! At this point, you have a couple of options: you can either proceed to strain the yogurt to create a thicker, Greek-style yogurt (see instructions below), or you can immediately transfer it into smaller, airtight storage containers for daily use. Alternatively, dish out a portion and enjoy your freshly made, creamy yogurt straight away!
Crafting Instant Pot Yogurt Without a Dedicated Yogurt Setting
While the “Yogurt” function on many Instant Pot models streamlines the heating and incubation processes, it’s absolutely possible to make delicious homemade yogurt even if your pressure cooker lacks this specific button. The key steps – heating the milk and maintaining a consistent incubation temperature – remain crucial. Here’s how to achieve excellent results manually:
- Sanitize the Inner Pot: Begin by sanitizing your inner pot using either the boiling water method or the pressure cook method detailed in Step 1 of the main instructions. Proper sanitation is vital for successful fermentation.
- Heat the Milk Manually: Add the milk to the sanitized inner pot. Instead of the “Yogurt” setting, turn on the “Saute” function. This will heat the milk.
- Monitor Temperature Carefully: As the milk heats on the “Saute” setting, it’s essential to stir frequently to prevent it from scorching on the bottom. Use your digital instant-read thermometer to continuously monitor the temperature. Heat the milk until it reaches the target range of 180-190℉ (82-88℃).
- Cool the Milk: Once the milk reaches the desired temperature, immediately hit “Cancel” to turn off the pressure cooker. Carefully remove the inner pot from the Instant Pot unit. Place the inner pot on your counter to cool naturally, or for a faster approach, set it into a larger bowl filled with ice water (an ice bath). Stir the milk occasionally to expedite cooling.
- Reach Optimal Incubation Temperature: Continue cooling the milk until its temperature drops to 105-115℉ (41-46℃). This precise temperature is crucial for the starter cultures to thrive without being killed by excessive heat.
- Add the Starter: Once the milk is at the correct temperature, skim off any “skin” that may have formed. Add the yogurt starter (prepared yogurt with active cultures) to the milk and whisk thoroughly until it is fully incorporated.
- Incubate Without the “Yogurt” Function: Return the inner pot to the Instant Pot base. Place the lid securely on the Instant Pot. Crucially, leave the Instant Pot **unplugged**. To create a warm, stable environment for incubation, wrap the entire unplugged Instant Pot unit in a large, thick towel, or even two regular towels. This insulation will help maintain the milk’s temperature.
- Allow for Extended Incubation: Let the yogurt sit undisturbed in the wrapped Instant Pot for 8 to 10 hours. The longer incubation time (closer to 10 hours) will generally result in a tangier yogurt. After incubation, proceed with the chilling and storage steps as outlined in the main recipe.
Important Considerations for Fat-Free Yogurt
Mastering Instant Pot Fat-Free Yogurt
If you prefer to make fat-free yogurt using your Instant Pot, a few specific adjustments will help ensure perfect, consistent results:
- Adjust Starter Quantity: When using skim milk, it’s advisable to increase the amount of prepared yogurt starter. Instead of 2 tablespoons, use 3 tablespoons. This helps compensate for the lower fat content and encourages robust fermentation.
- Expect More Whey: Nonfat yogurt naturally produces significantly more whey (the clear liquid that separates) on top compared to yogurt made with full or reduced-fat milk. After the chilling period, but before transferring your yogurt to storage containers, gently tilt your inner pot to one side. This allows the excess liquid to collect, making it easier to drain off. You can discard the whey or save it for other culinary uses.
- Re-separation is Normal: As nonfat yogurt continues to sit in the refrigerator, it’s common for some liquid to separate again. This is perfectly normal and does not indicate spoilage. Simply mix the separated liquid back into the yogurt with a spoon before serving to restore its creamy texture.
Transforming Instant Pot Yogurt into Creamy Greek Yogurt
Greek-style yogurt is simply a concentrated version of regular yogurt, achieved by straining out a portion of the whey. This process results in a thicker, richer consistency, a tangier flavor, a lower sugar content, and an increased protein content. To prepare luscious Greek yogurt from your homemade Instant Pot yogurt, follow these straightforward straining instructions after your yogurt has been incubated and thoroughly chilled:
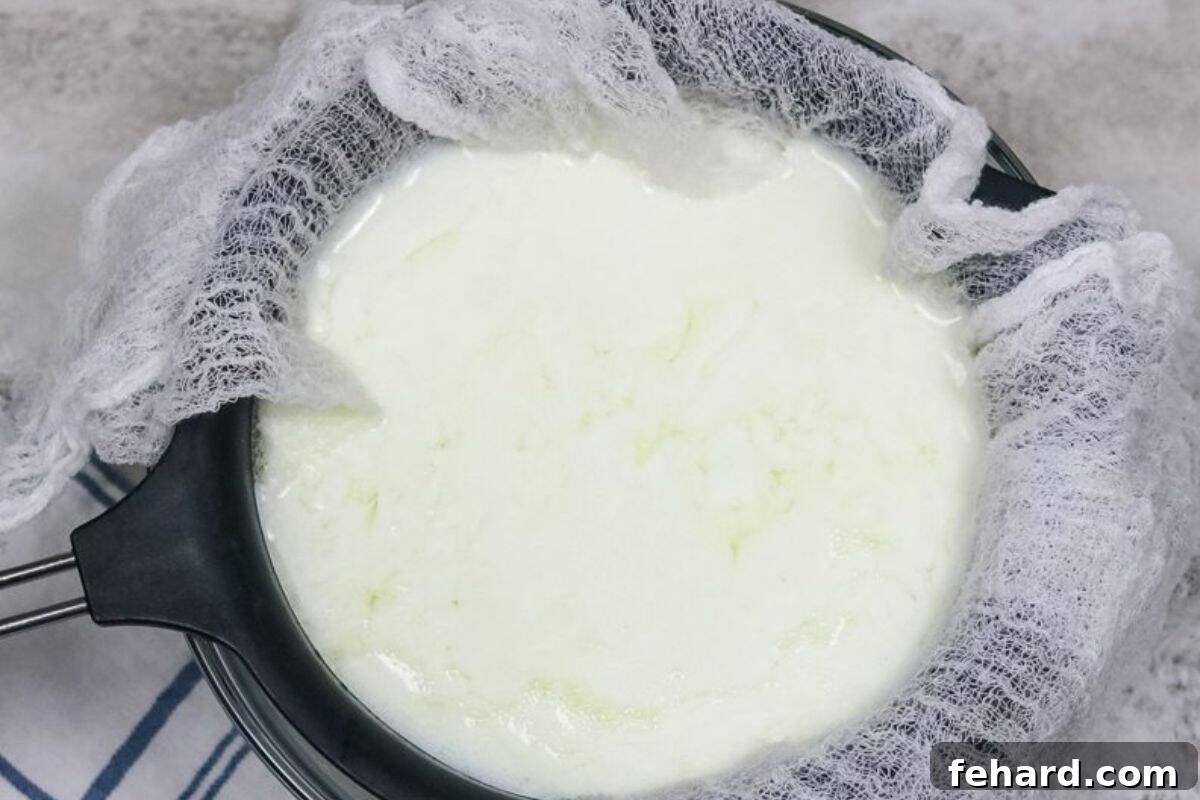
- Set Up Your Straining Station: Place a large, fine-mesh strainer over a sizable mixing bowl. Line the strainer generously with several layers of high-quality cheesecloth. Ensure the cheesecloth extends well over the edges of the strainer. The bowl underneath will collect the whey as it drains.
- Strain in the Refrigerator: Carefully spoon your chilled, incubated Instant Pot yogurt into the cheesecloth-lined strainer. Place the entire setup (strainer with yogurt over the bowl) into the refrigerator. Allow it to strain for a period of 8 to 12 hours. The longer the yogurt strains, the thicker and more concentrated your Greek yogurt will become. Monitor the consistency to match your preference.
- Store Your Greek Yogurt: Once the desired thickness is achieved, carefully transfer the thick, creamy Greek yogurt from the cheesecloth into clean, airtight containers. Your homemade Greek yogurt is now ready to enjoy. As for the drained liquid (whey), you have options: you can either discard it, or, being rich in nutrients, it can be repurposed. Consider adding it to smoothies for an extra protein boost, using it in baking, or incorporating it into oatmeal.
Creative Ways to Sweeten & Flavor Your Homemade Instant Pot Yogurt
For the best texture and consistency, it is crucial to wait until your Instant Pot yogurt has completed its incubation and chilling phases before adding any sweeteners or flavorings. Introducing these elements too early in the process can interfere with the setting of the yogurt and negatively impact its final consistency.
- Classic Vanilla Yogurt: For a delightful and aromatic vanilla yogurt, simply stir in 1 tablespoon of pure vanilla extract into your entire batch of chilled homemade yogurt before transferring it to storage containers. Adjust to taste.
- Perfectly Sweetened Yogurt: The beauty of homemade yogurt is controlling the sweetness. I find it most effective to sweeten individual servings directly. Add 1-3 teaspoons of natural sweeteners like honey or maple syrup to your yogurt just before eating. If you prefer to sweeten the entire batch, incorporate ¼ cup of your chosen sweetener into the chilled yogurt, mixing well.
- Fruity Freshness: Blend in fresh or frozen berries, sliced peaches, or a homemade fruit compote for a burst of natural flavor and sweetness. Consider pureeing fruits for a smoother consistency.
- Citrus Zest: A little lemon, orange, or lime zest can add a bright, refreshing note without additional sugar.
- Warm Spices: Stir in a pinch of cinnamon, nutmeg, or cardamom for a cozy, comforting flavor. These pair wonderfully with a touch of honey.
- Make a Delicious Parfait: One of my absolute favorite ways to enjoy wholesome Instant Pot yogurt is by layering it into a delightful parfait. Combine your creamy yogurt with a medley of fresh berries and crunchy homemade granola for a satisfying and nutritious meal or snack.
Maximizing Freshness: Storage and Freezing Tips for Instant Pot Yogurt
Proper storage is key to enjoying your homemade Instant Pot yogurt for an extended period and ensuring you always have a starter for future batches. Here are some essential tips:
- Refrigeration for Freshness: Once your yogurt has been chilled, transfer it into clean, airtight containers. Store these in the refrigerator, where your homemade yogurt will remain fresh and delicious for up to 14 days. It’s normal for a small amount of whey to separate over time; simply give it a good stir before serving to reincorporate the liquid and restore its creamy texture.
- Save Your Starter: To ensure you can easily make your next batch, remember to set aside a small amount of your freshly made yogurt before consuming or flavoring the entire batch. You’ll need 2 tablespoons of this plain, unflavored yogurt with active cultures (or 3 tablespoons if you made nonfat yogurt) to use as the starter for your subsequent Instant Pot yogurt recipe.
- Freeze Starter for Longevity: This is an incredibly valuable tip for continuous yogurt making! Immediately after your Instant Pot yogurt has incubated and chilled, set aside your desired starter amount and freeze it. A clean ice cube tray is perfect for this; each cube typically holds 1 tablespoon, making it convenient for future batches. Once frozen solid, transfer the yogurt cubes to a freezer-safe bag or container. When you’re ready to make a new batch, simply thaw the necessary amount of frozen starter in the refrigerator overnight. This preserves the active cultures, ensuring a potent starter whenever you need it.
Instant Pot Yogurt FAQs: Troubleshooting & Expert Answers
The most common reason for runny yogurt is incorrect incubation temperature. Chances are your Instant Pot was set to incubate on “LOW” rather than “NORMAL.” The “NORMAL” setting maintains the optimal temperature for cultures to thrive. To remedy this, if the yogurt is still within a few hours of completion, you might try setting it to “NORMAL” for a few more hours. However, for best results, it’s often better to start the process over. You can reuse the same milk if it hasn’t spoiled, but add an additional tablespoon of fresh starter to ensure plenty of active cultures.
Ideally, after 8-10 hours of incubation, you should promptly remove the inner pot from the Instant Pot and refrigerate the yogurt. Leaving it for up to 2 hours beyond the incubation time is generally acceptable and won’t significantly impact the yogurt. However, if left at warm temperatures for much longer than that (e.g., 4+ hours), the yogurt can become excessively tangy, develop an undesirable texture, or even spoil. Beyond 2-3 hours of accidental prolonged incubation, it’s recommended to err on the side of caution and discard the batch.
Unfortunately, if you incubated your milk without adding the prepared yogurt or starter, the milk has simply been held at a warm temperature, not fermented. The essential active cultures needed to convert the milk into yogurt are missing. In this scenario, it is best to discard the milk and start the process over with fresh milk and, importantly, the active starter.
Yes, you can use flavored yogurt as a starter, provided it explicitly states that it contains “active live cultures” on the label. However, be aware that using flavored yogurt will impart a slight flavor from that original yogurt (e.g., vanilla, strawberry) to your entire batch of homemade yogurt. For the purest and most neutral plain yogurt, it’s always best to use an unflavored, plain yogurt starter.
Yes, using the Instant Pot lid with its sealing ring is beneficial during both the heating and incubation phases of yogurt making. While pressure isn’t built for yogurt, the sealed lid helps to prevent condensation from dripping back into the yogurt, which can make it watery. More importantly, it helps maintain a stable and consistent temperature inside the pot, which is vital for proper bacterial fermentation. Alternatively, some users prefer to use a glass lid specifically designed for their Instant Pot, which also helps prevent condensation and maintain temperature.
Explore More Instant Pot Culinary Essentials
Once you’ve mastered homemade yogurt, expand your Instant Pot repertoire with these other essential and easy-to-make recipes:
- Fluffy Instant Pot Quinoa
- Perfectly Tender Instant Pot Baked Potatoes
- Sweet and Creamy Instant Pot Baked Sweet Potatoes
- Wholesome Instant Pot Brown Rice
- Effortless Instant Pot Hard-Boiled Eggs
Did you make this recipe?
If you enjoyed this delightful homemade Instant Pot yogurt, please share your experience! We’d love to hear from you. Leave a comment below with a 5-star review to help others discover this fantastic recipe. Thank you for your support!
Instant Pot Yogurt
Rate
Video Tutorial
Ingredients
- ½ gallon milk, see recipe notes if using skim milk
- 2 tablespoons prepared yogurt with active cultures
Instructions
-
Sanitize the inner pot by pouring boiling water into the inner pot and let sitting for 10 minutes. Alternatively, pour 2 cups of tap water into the inner pot, secure the lid on the inner pot, and set to pressure cook for 3 minutes on high pressure. Do a quick release of pressure, drain off the water, dry out the inner pot, and return to the unit.
-
Pour the milk into inner pot of Instant Pot, place the lid on the Instant Pot (the vent can be sealed or open for this function). Push the ‘Yogurt’ button until the screen reads ‘boil’. (Usually, you will need to hit the yogurt button two times; if that does not work, hit the adjust button). This process will take 30-60 minutes depending on your model.

-
Once the Instant Pot beeps that the boil cycle is complete, carefully remove the lid and test the temperature. It should be between 180-190℉ (82-88℃). Let the inner pot sit in instant pot for 5 minutes and then remove the inner pot.
-
Allow the milk to cool in the inner pot to approximately 105-115℉ (41-46℃). This takes about 1 hour if left on the counter or can be sped up to 5-10 minutes, by placing the inner pot into a bowl of ice water.
-
Gently skim off the “skin” on the yogurt and discard and then whisk in 2 tablespoons of starter (or 3 tablespoons if using skim milk) until fully incorporated.
-
Place the inner pot back into the the Instant Pot—be sure to dry it off if you had it in ice bath. Secure the lid on the pressure cooker. Hit the ‘Yogurt’ button again and then hit adjust (or yogurt) until the screen shows NORMAL (not low) and then use the +/- buttons to adjust to 8:00 (for 8 hours) or 10:00 for tangy yogurt. Hit start if needed by your model.
-
Once the pressure cooker beeps that the yogurt cycle is complete, remove the inner pot from the unit and cover it with plastic wrap. Refrigerate for 8 hours before stirring or transferring to individual containers.
-
Store Instant Pot yogurt in airtight containers in the refrigerator for up to 14 days. Be sure to set aside 2-3 tablespoons to make your next batch of Instant Pot yogurt.
Equipment
-
Electric Pressure Cooker with Yogurt Function (this is the least expensive, most reliable model)
-
Cheesecloth (for making Greek yogurt)
-
Digital Instant-Read Thermometer (this one has reliable temperature readings)
-
Yogurt Storage Containers (great for yogurt and overnight oats)
Notes
Using Skim Milk: If you choose to use skim milk, increase the starter quantity to 3 tablespoons. Due to the lower fat content, skim milk yogurt will naturally produce more whey, so you may need to drain off excess liquid after chilling to achieve your desired consistency.
For Greek Yogurt: To make a thick, Greek-style yogurt, strain the incubated and thoroughly chilled yogurt. Place it in a strainer lined with cheesecloth and position it over a large mixing bowl in the fridge. Allow it to drain overnight for best results.
To Sweeten/Flavor: Always add sweeteners, vanilla extract, or any other flavorings AFTER the yogurt has fully set and chilled in the refrigerator for at least 8 hours. This prevents any disruption to the fermentation process and ensures optimal texture.
Boil function not working? If you find that your milk isn’t consistently reaching the target temperature of 180-190℉ (82-88℃) after the Instant Pot’s “boil” cycle, you can switch to the “Saute” function for a few minutes. When doing this, watch the milk VERY closely and stir it often to prevent scorching.
Nutritional values are approximate and have been calculated using 2% milk. The serving size is approximately 4 ounces.
Nutrition Information
Carbohydrates: 5g
Protein: 3g
Fat: 2g
Saturated Fat: 1g
Cholesterol: 9mg
Sodium: 55mg
Potassium: 165mg
Sugar: 5g
Vitamin A: 120IU
Vitamin C: 0.2mg
Calcium: 142mg
Nutrition information is automatically calculated, so should only be used as an approximation.
Tried this recipe?
Mention @amindfullmom or tag #amindfullmom!
This recipe was originally published in 2018 and thoroughly updated in 2025 to provide the most current and comprehensive guide to making Instant Pot yogurt.