
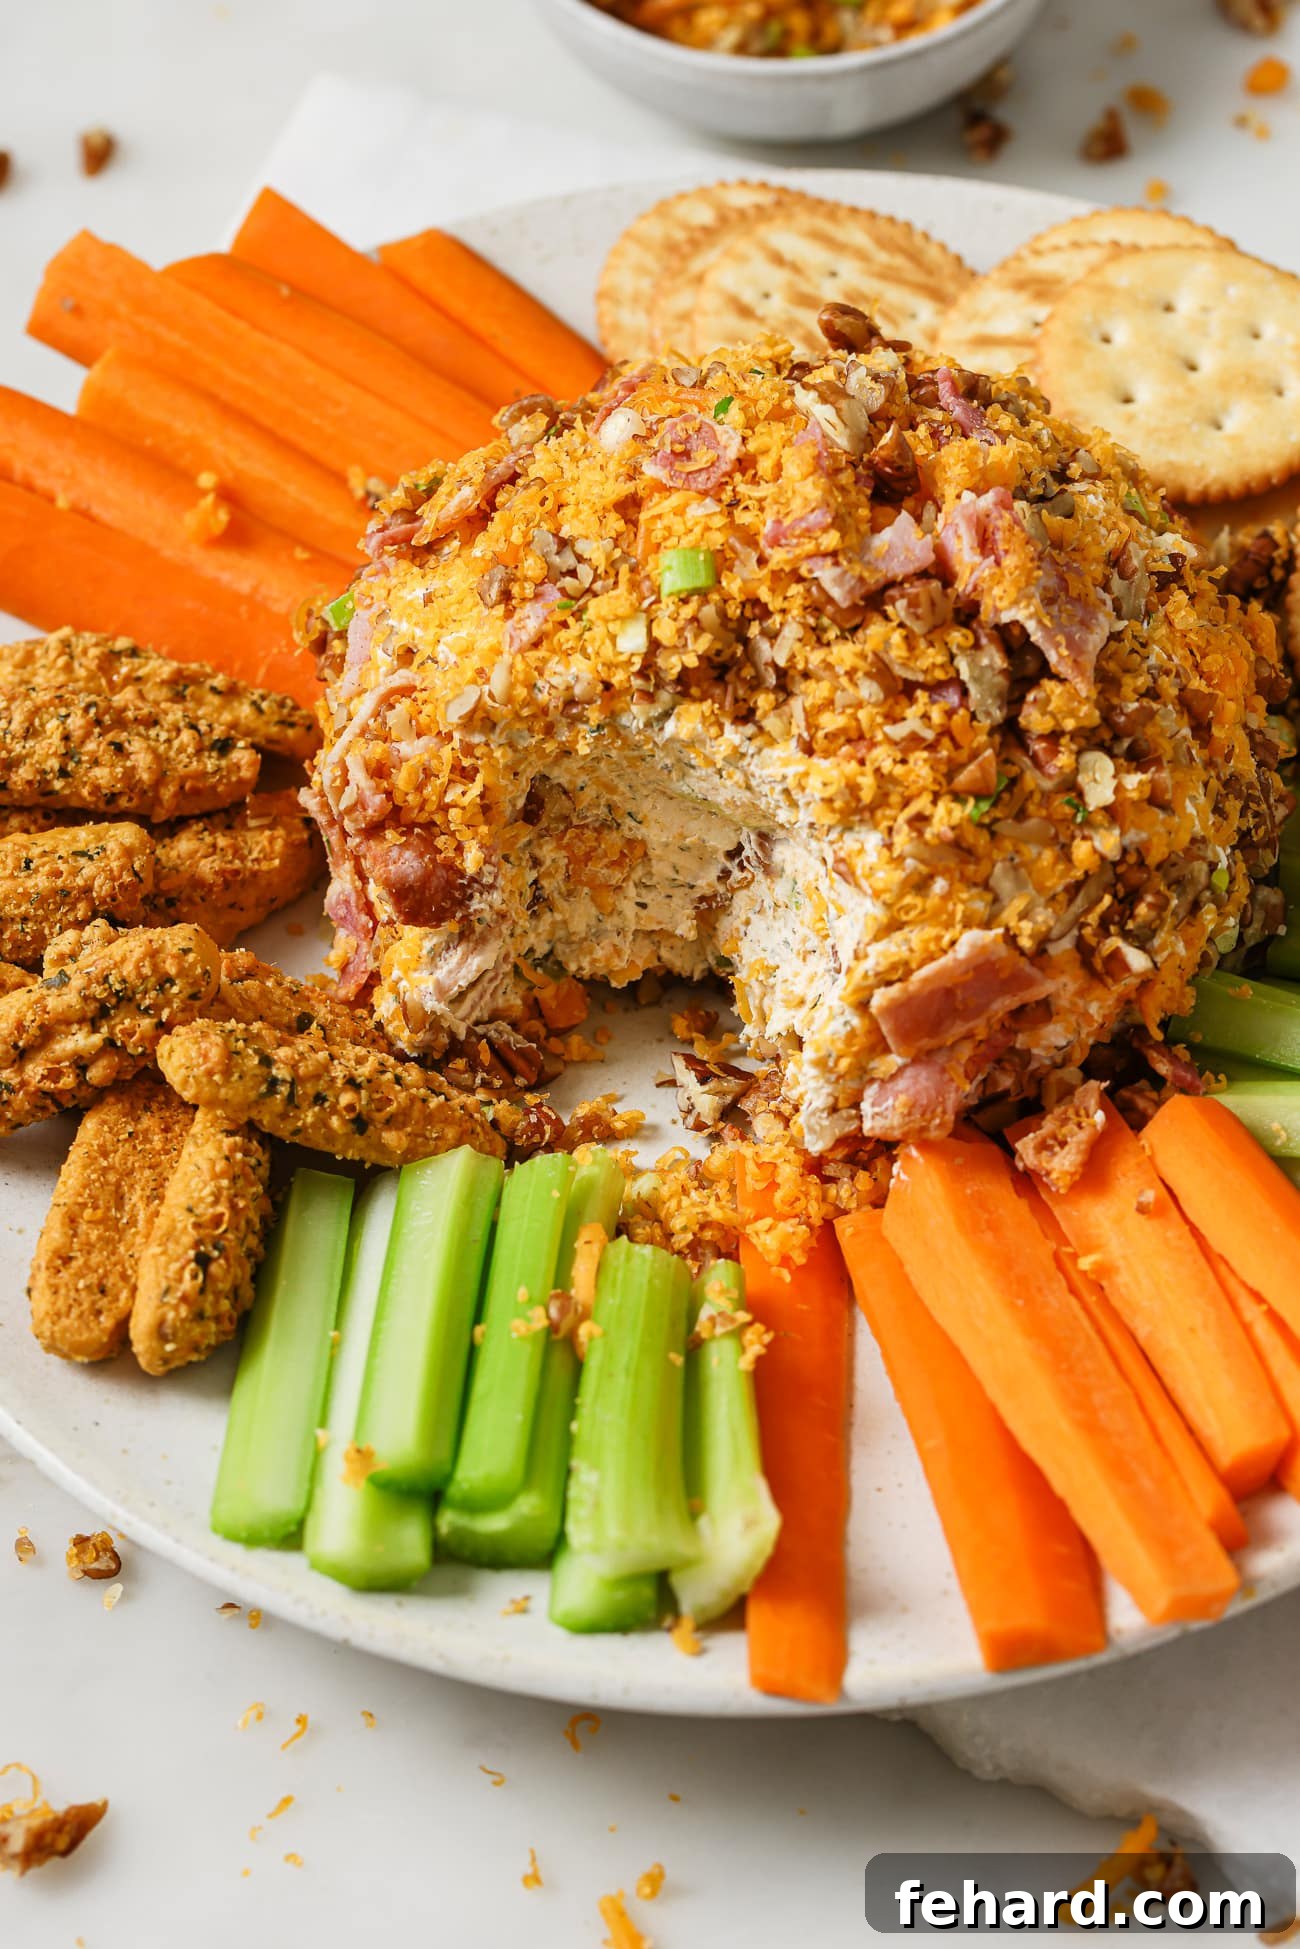
A classic Cheese Ball appetizer is more than just a dish; it’s a timeless symbol of hospitality and joyous gatherings. With its creamy texture, savory flavors, and effortlessly elegant presentation, this easy cheese ball recipe guarantees to be a showstopper at any event. Featuring a delightful blend of three distinct cheeses, crispy bacon, and crunchy chopped pecans, this homemade cheese ball is packed with flavor and irresistible charm. It’s the ultimate addition to your holiday table, a perfect centerpiece for game day, or a welcome guest at any potluck.
For those seeking a stress-free yet impressive appetizer, a beautifully crafted cheese ball is an absolute go-to. Its quick preparation time and versatile nature make it a favorite for busy hosts and hostesses. If you’re looking to diversify your party spread this season, don’t forget to explore other delightful options such as savory Stuffed Mushrooms, elegant Baked Brie with Cranberries, or crowd-pleasing Cocktail Meatballs. However, once you experience the superior taste and ease of preparing your own homemade cheese ball, you’ll likely never opt for a store-bought version again.
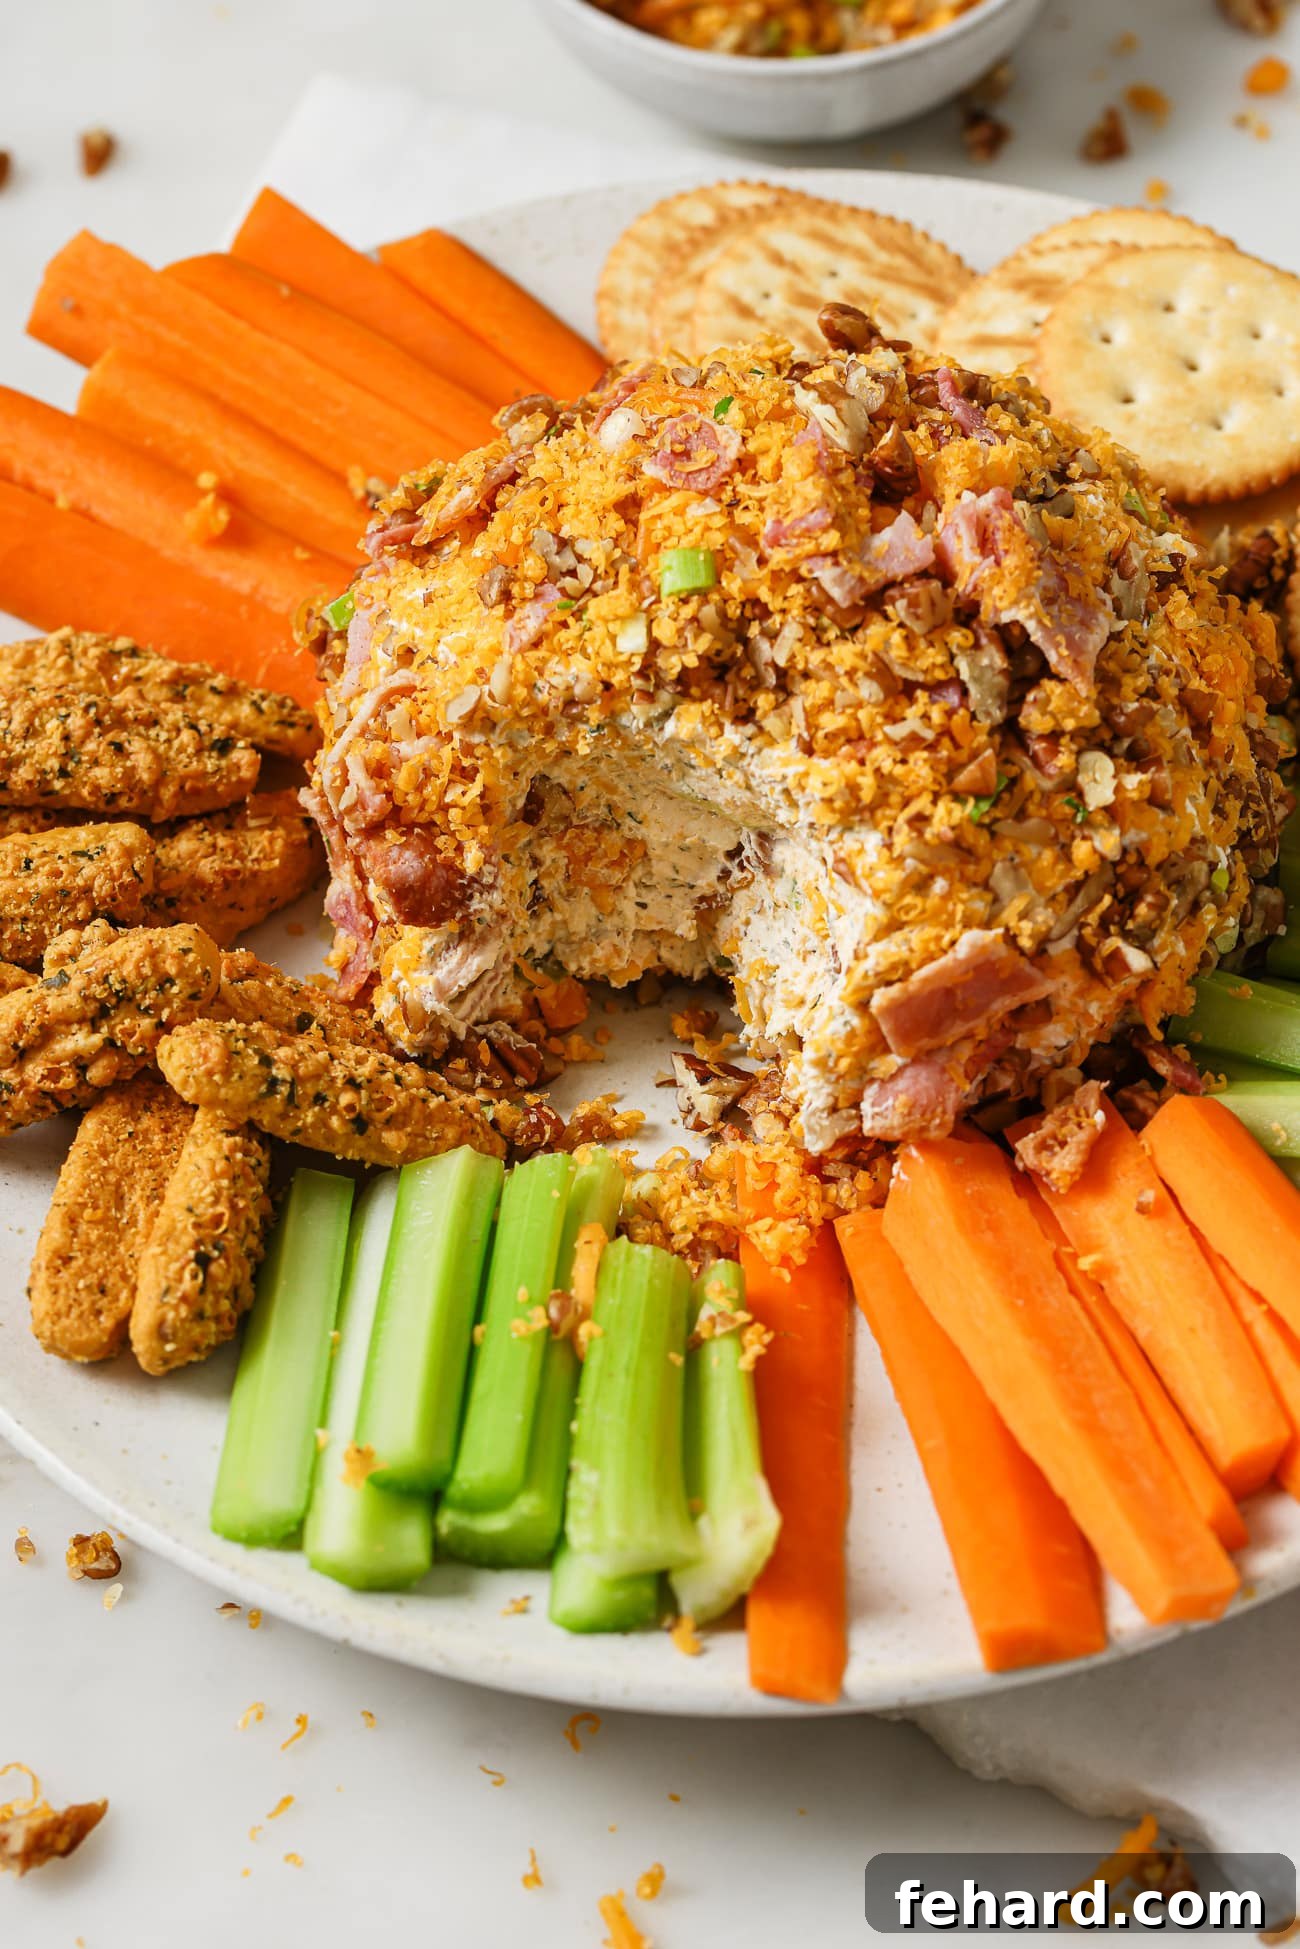
One of the many reasons this particular cheese ball recipe is so beloved is its incredible convenience as a make-ahead appetizer. Whether you need a festive snack, a delectable spread, or a satisfying dip, this recipe has you covered. The active preparation takes merely 10 minutes, allowing you ample time to assemble it in advance and store it in the refrigerator. This strategic planning means you can enjoy more time with your guests, knowing a stunning and flavorful appetizer is ready to serve at a moment’s notice. Let’s dive into creating this delightful party staple!
Crafting the Perfect Easy Cheese Ball
Creating a delicious and impressive cheese ball doesn’t require culinary expertise, just a few quality ingredients and a simple, straightforward process. This recipe focuses on maximizing flavor and achieving a wonderfully smooth, spreadable texture that will have everyone reaching for more. From selecting the right cheeses to perfecting the flavorful coating, we’ll guide you through each step to ensure your homemade cheese ball is a resounding success.
Essential Ingredients for a Flavorful Cheese Ball
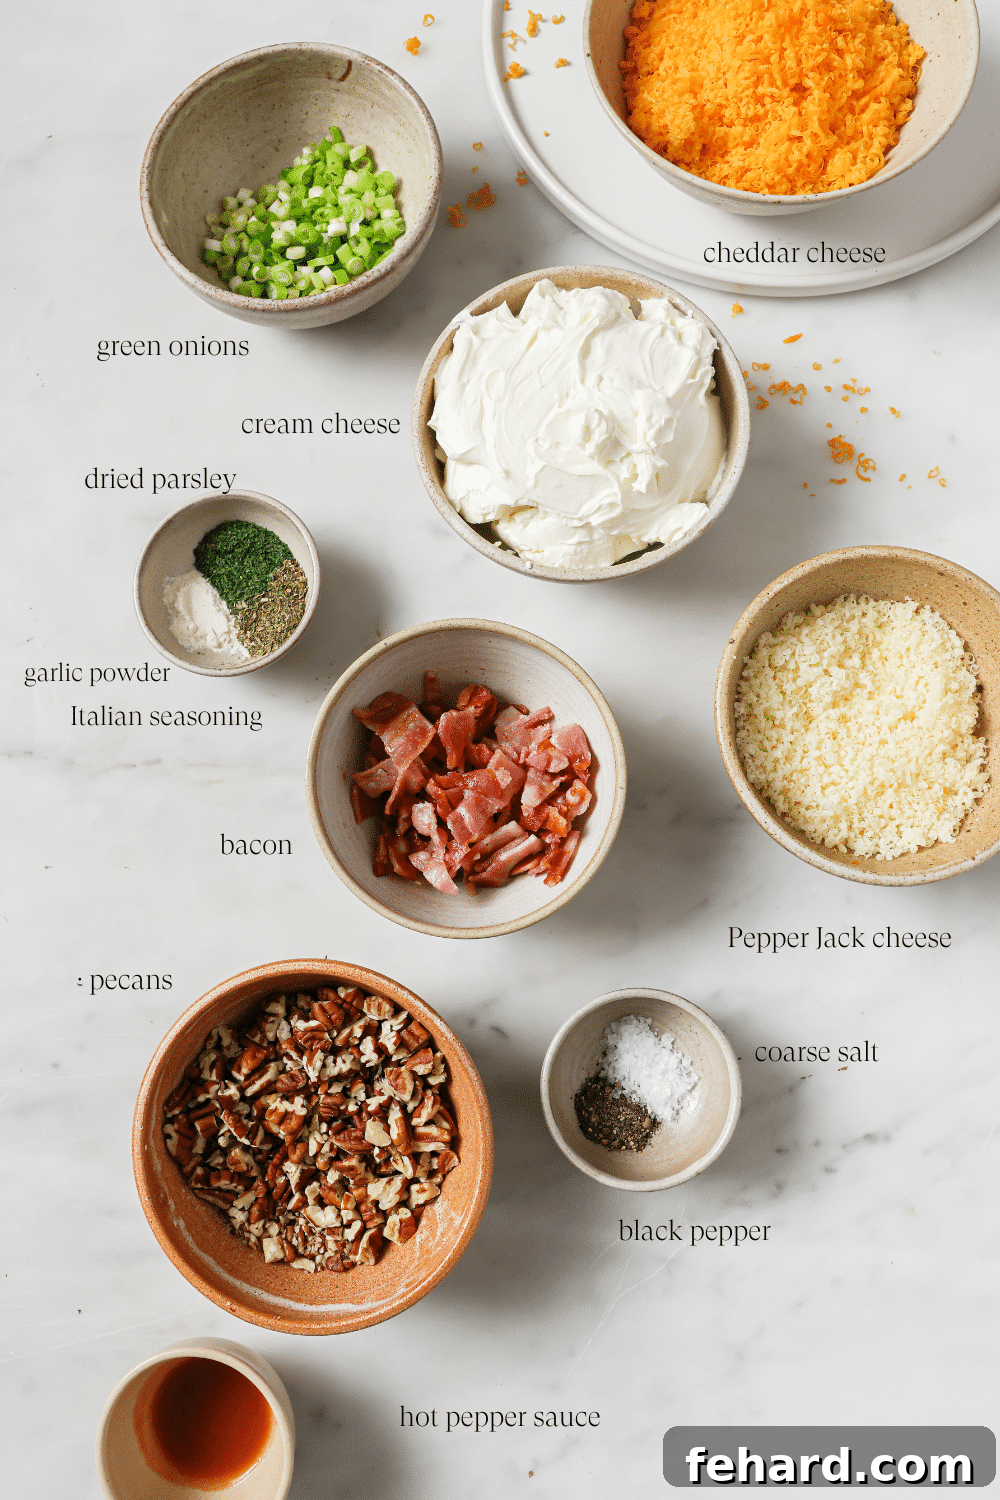
The secret to an exceptional cheese ball lies in the quality and combination of its ingredients. Each component plays a vital role in creating a harmonious blend of creamy, savory, and crunchy textures. Here’s a closer look at what you’ll need to assemble this crowd-pleasing appetizer:
- Cream Cheese: You’ll need 16 oz of full-fat cream cheese, brought to room temperature. This is the essential base, providing the signature creamy and tangy foundation. Room temperature cream cheese is crucial for achieving a smooth, lump-free mixture that incorporates easily with other ingredients.
- Grated Cheese: A dynamic duo of freshly grated sharp cheddar cheese and zesty Pepper Jack cheese forms the heart of our cheese ball. Sharp cheddar offers a robust, classic cheese flavor, while Pepper Jack introduces a subtle heat and creamy melt. Always opt for block cheese and grate it yourself; pre-shredded varieties often contain starches that can affect texture and flavor.
- Green Onion: Finely chopped green onion (scallions) adds a crisp, bright, and slightly pungent note that cuts through the richness of the cheeses, providing a refreshing counterpoint.
- Bacon: Crispy, savory bacon is a non-negotiable ingredient, infusing the cheese ball with a smoky, salty depth that is utterly addictive. Feel free to use your preferred type of bacon—thick-cut, regular, or even good quality bacon bits if you’re short on time. Ensure it’s cooked until perfectly crisp and then finely diced.
- Hot Sauce or Worcestershire Sauce: For a subtle kick and enhanced depth of flavor, a touch of hot pepper sauce is incorporated. If you prefer a milder taste or a more umami richness, 2 tablespoons of Worcestershire sauce can be used as an excellent alternative. Adjust the amount to your spice preference.
- Seasonings: A carefully selected blend of dried parsley, dried Italian seasoning, garlic powder, salt, and black pepper elevates the flavor profile. Dried parsley adds a touch of fresh herbiness, Italian seasoning brings an aromatic medley, and garlic powder provides a warm, savory undertone. Season liberally to taste, but remember you can always add more, but you can’t take it away!
- Chopped Pecans: These provide an essential textural contrast and a rich, buttery flavor to the exterior coating. The crunch of pecans beautifully complements the creamy interior of the cheese ball. While pecans are traditional, walnuts or even a mix of nuts can also be used.
Step-by-Step Instructions to Make Your Cheese Ball
Follow these simple steps to create a show-stopping cheese ball that will impress your guests and delight their taste buds. Precision and a little patience during chilling are key to the perfect result.
1. Combine and Shape the Cheese Mixture:
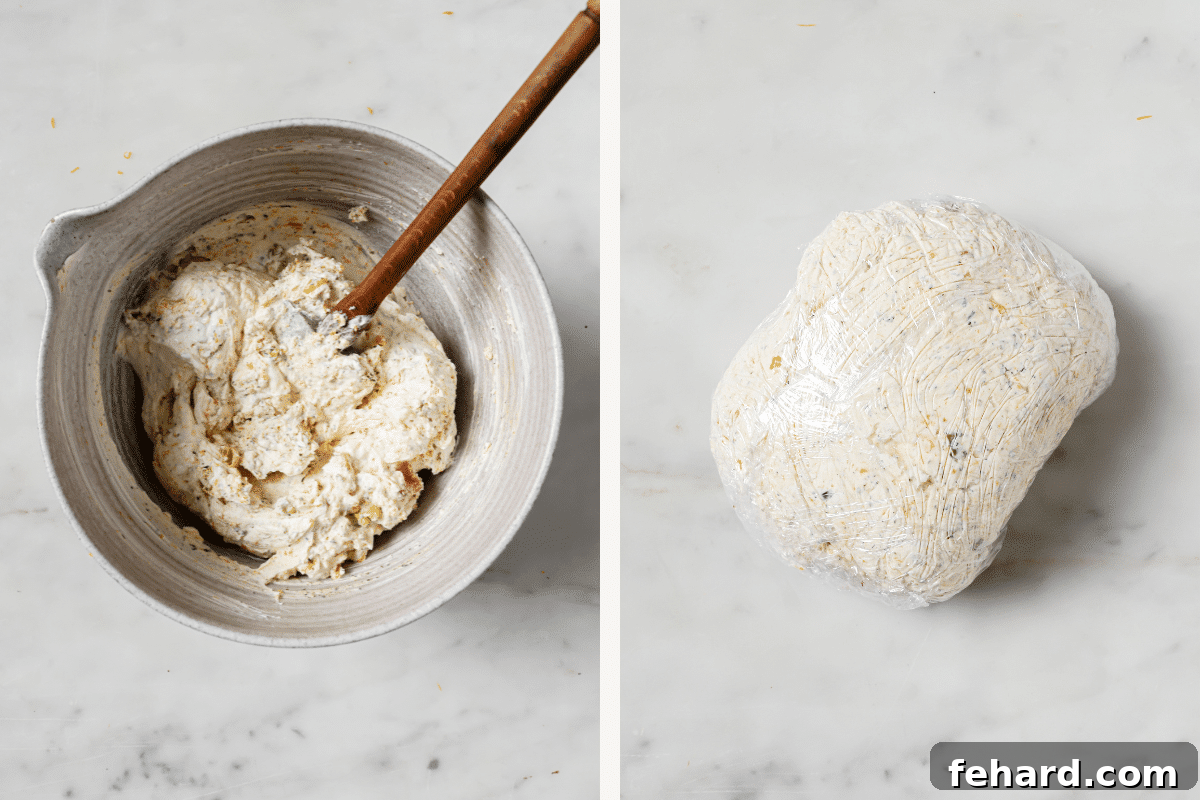
- In a large, sturdy mixing bowl, combine the softened 16 oz cream cheese, 1 cup of the freshly grated sharp cheddar cheese, the ½ cup of finely grated Pepper Jack cheese, half of the chopped green onions, half of the crispy, chopped bacon, 1 teaspoon of hot pepper sauce (or 2 tablespoons of Worcestershire sauce for a milder flavor), 1 teaspoon of dried parsley, 1 teaspoon of dried Italian seasoning, ½ teaspoon of garlic powder, and a pinch of salt and black pepper to start.
- Using a robust spatula or a wooden spoon, thoroughly combine all the ingredients. Mix until the mixture is smooth, creamy, and all components are well incorporated without any visible lumps of cream cheese. This ensures a consistent texture and flavor throughout your cheese ball.
- Lay out a large sheet of plastic wrap on a clean, flat surface. Carefully transfer the entire cheese mixture from the bowl onto the center of the plastic wrap.
- Bring the edges of the plastic wrap together, using them to help you gently shape and roll the mixture into a compact, symmetrical ball. Wrap the cheese ball tightly in the plastic wrap, ensuring no air pockets remain. This tight wrapping helps it maintain its shape during chilling. Refrigerate the wrapped cheese ball for at least 1-2 hours, or until it becomes firm to the touch. This chilling period is crucial not only for firming up the ball but also for allowing the flavors to meld and deepen beautifully.
2. Prepare the Coating and Cover the Cheese Ball:
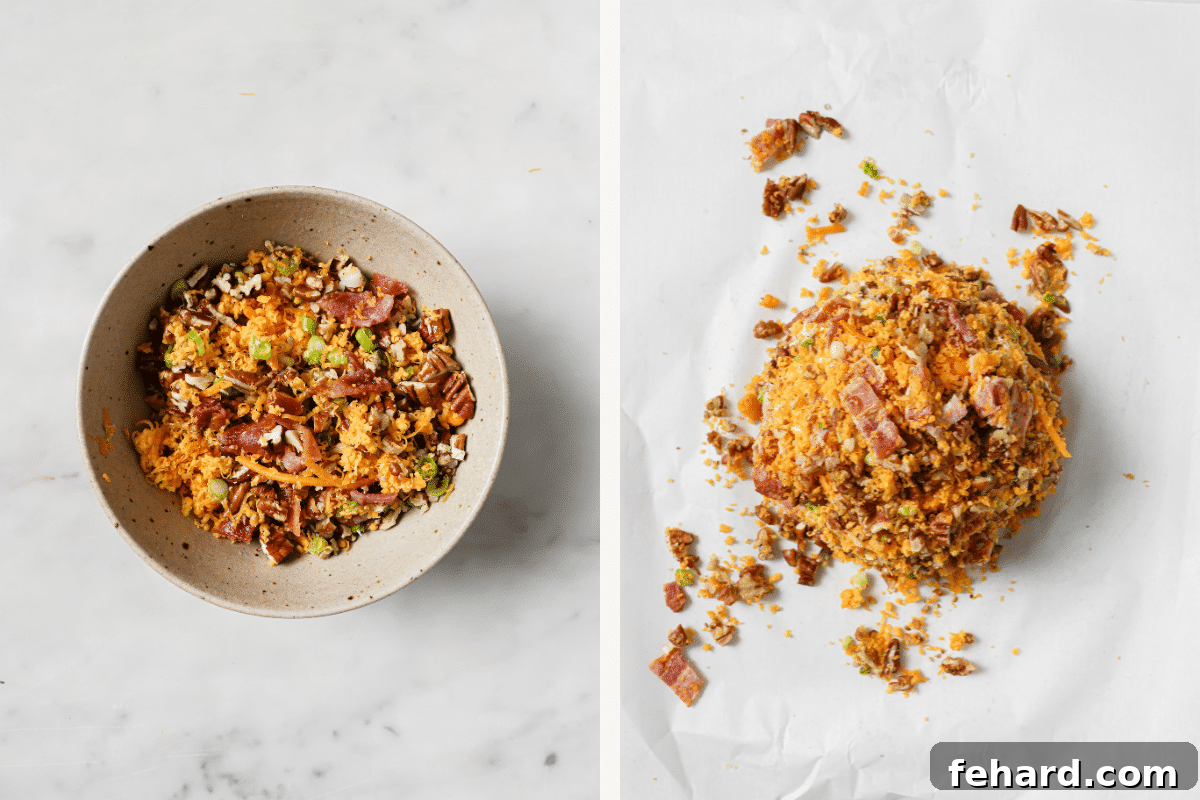
- While the cheese ball is chilling in the refrigerator, take this time to prepare the flavorful coating mixture. In a separate shallow bowl, combine the remaining 1 cup of grated cheddar cheese, the ⅔ cup of chopped pecans, the rest of the chopped green onions, and the remaining diced bacon. Mix these ingredients thoroughly to ensure an even distribution.
- Once your cheese ball is firm and adequately chilled, carefully unwrap it from the plastic wrap.
- Place the unwrapped cheese ball into the shallow bowl with the coating mixture. Roll the cheese ball around, using your hands to gently press the coating onto all sides until it is completely and evenly covered. Ensure the coating adheres well, creating a beautiful and appetizing exterior.
3. Serve and Enjoy:
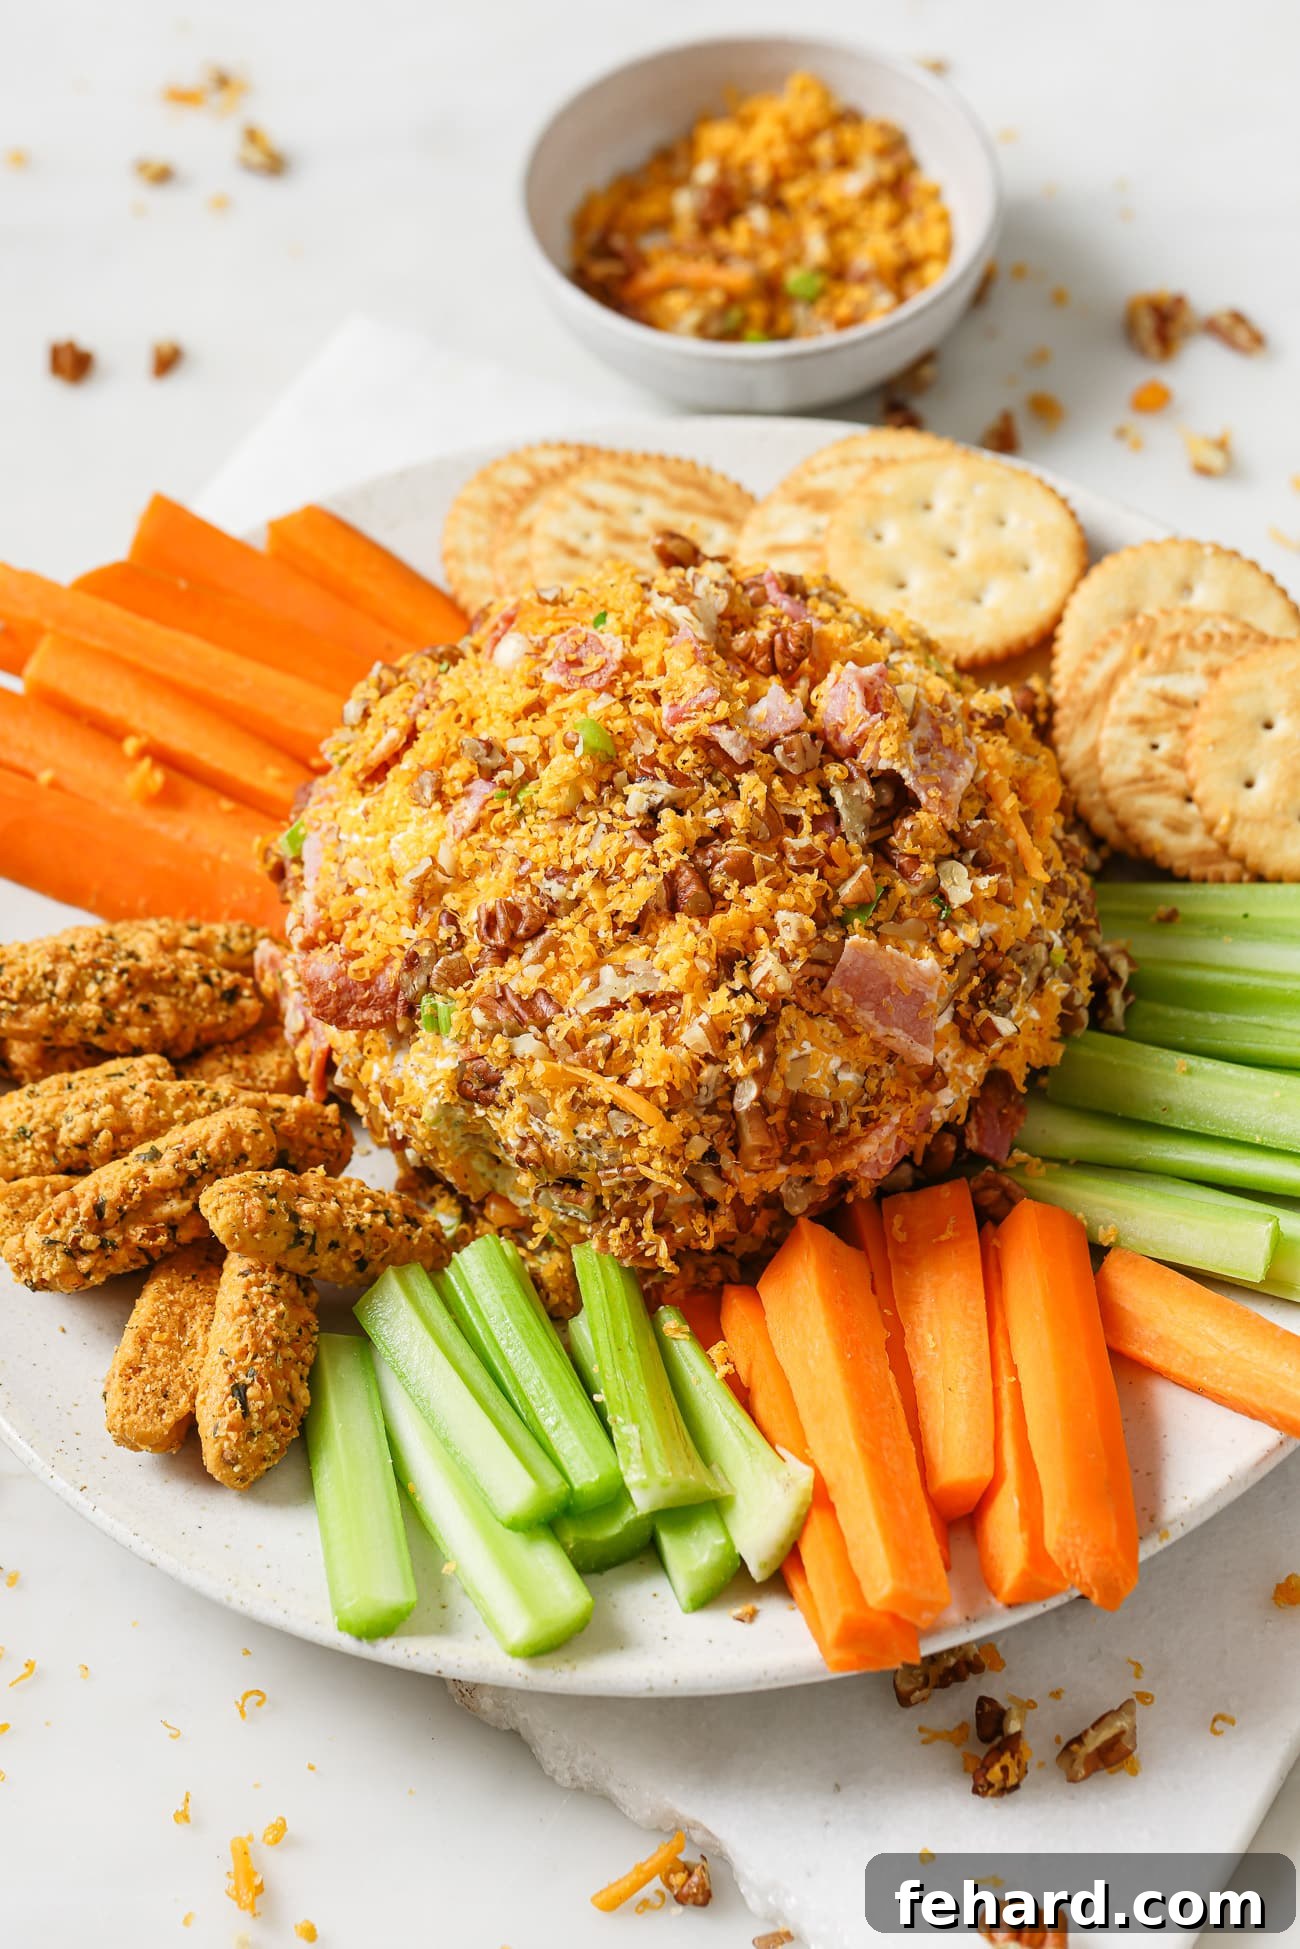
- Carefully transfer the fully coated cheese ball onto your preferred serving plate or platter. For optimal freshness and to prevent it from drying out, cover it loosely with plastic wrap and keep it refrigerated until you are ready to serve.
- For the best flavor and a perfectly spreadable texture, allow the cheese ball to sit at room temperature for about 15-20 minutes before presenting it to your guests. Serve with an abundant assortment of crisp crackers, crunchy breadsticks, sturdy pita chips, or an array of fresh, vibrant vegetable slices like carrot sticks, celery, cucumber rounds, and cherry tomatoes. Enjoy this incredibly satisfying and easy-to-make appetizer!
Tips for Cheese Ball Perfection
- Shred Your Own Cheese: This tip cannot be emphasized enough. Pre-shredded cheeses often contain anti-caking agents like cellulose, which can give your cheese ball a slightly grainy texture and dull the vibrant cheese flavor. Freshly shredded cheese melts better and blends seamlessly, resulting in a creamier, more delicious end product.
- Room Temperature Cream Cheese is Key: Ensuring your cream cheese is completely softened to room temperature before you begin mixing is vital. Cold cream cheese will be lumpy and difficult to incorporate smoothly with other ingredients, leading to an uneven texture.
- Invest in a Good Cheese Knife: When serving, especially at a party, a proper cheese knife or spreader makes a world of difference. It allows guests to easily scoop out a portion of the cheese ball without breaking their crackers, ensuring a more elegant and enjoyable experience.
- Customization is Encouraged: This cheese ball recipe is wonderfully adaptable. Feel free to experiment with different types of shredded cheeses, varying herbs, or unique add-ins to tailor it to your guests’ preferences or match a specific theme. Think outside the box for a truly unique creation!
- Don’t Overmix: While you want a smooth and well-incorporated mixture, avoid overmixing the cheese ball. Overworking the cream cheese can sometimes lead to a slightly tougher texture. Mix until just combined and smooth.
- Perfect Serving Temperature: While chilling is essential for firming, serving the cheese ball straight from the fridge can make it too hard to spread. Allow it to sit at room temperature for 15-20 minutes before serving so it softens slightly and becomes perfectly scoopable.
Storing and Freezing Your Homemade Cheese Ball
One of the many benefits of making a cheese ball is its excellent shelf life, allowing you to prepare it well in advance. Proper storage is key to maintaining its freshness and delicious flavor.
- To Store in the Refrigerator: Once assembled and coated, store your cheese ball in an airtight container or wrap it meticulously in several layers of plastic wrap. This prevents it from drying out and absorbing other odors from your refrigerator. When properly stored, a cheese ball can last for several days, typically up to 2 weeks, depending on the freshness of the ingredients used. Always check for any off smells or discoloration before serving.
- To Freeze for Longer Storage: While cheese balls can be frozen, be aware that freezing and thawing might subtly alter the texture, making it slightly softer upon defrosting. If you plan to prepare it significantly in advance (beyond a week), freezing is a good option. To freeze, wrap the un-coated cheese ball tightly in multiple layers of plastic wrap, then place it inside a freezer-safe bag, pressing out as much air as possible. You can store it in the freezer for up to 1 month. When ready to use, thaw it overnight in the refrigerator, then prepare the coating and roll it as per the instructions before serving. If the texture is softer after thawing, it can still be enjoyed as a spread or incorporated into other recipes.

Perfect Pairings: What To Serve with a Cheese Ball
A gourmet cheese ball is incredibly versatile, making it the perfect partner for a wide array of dippers and accompaniments. The key is to offer a variety of textures and flavors to complement its rich, creamy goodness. Here are some fantastic suggestions to elevate your serving experience:
- Crackers: The quintessential pairing! Serve this classic appetizer with an assortment of your favorite crackers. Think buttery Ritz crackers, crisp water crackers, wheat thins, or multigrain varieties. For a delicious gluten-free option, consider homemade low-carb almond flour crackers.
- Chips: Expand your dipping options with various chips. Sturdy tortilla chips, crunchy pita chips, or savory pretzel chips offer a satisfying crunch and a different flavor profile.
- Garlic Bread and Crostini: Warm, crunchy garlic bread slices or toasted baguette rounds (crostini) offer a delightful contrast to the creamy, savory cheese ball. The warmth and subtle garlic flavor are a perfect match.
- Fresh Vegetables: For a refreshing and healthy accompaniment, arrange a colorful platter of fresh sliced vegetables. Carrots, celery sticks, crisp cucumber rounds, vibrant bell pepper strips, crisp snap peas, and sweet cherry tomatoes are all excellent choices that provide a lovely crunch and a palate cleanse.
- Fruit Enhancements: Add a touch of natural sweetness and freshness with fruit. Slices of crisp apples or pears, juicy red or green grapes, and fresh berries can provide a wonderful counterpoint to the rich cheese, creating a balanced flavor experience.
- As a Centerpiece on a Cheese Board: Elevate your entertaining by featuring this stunning cheese ball as the star attraction of your holiday cheese board. Surround it with other cheeses, cured meats, olives, pickles, and additional fresh fruit for an abundant and impressive display.
- Wine and Beverage Pairings: Consider pairing your cheese ball with light-bodied white wines such as Sauvignon Blanc or Pinot Grigio, which can cut through the richness. For red wine lovers, a light Pinot Noir or a dry Rosé would also work beautifully. Craft beers, especially lighter lagers or pilsners, can also be excellent complements.
Creative Cheese Ball Recipe Variations
The beauty of a cheese ball lies in its adaptability. This basic recipe serves as an excellent canvas for countless flavor combinations. Don’t hesitate to get creative and experiment with these variations to suit different tastes or occasions:
- Spicy Sensation Cheese Ball: For those who love a bit of heat, kick things up a notch! Incorporate finely diced jalapeños, serrano peppers, or even a dash of cayenne pepper directly into the cheese mixture. You can also double the amount of hot pepper sauce or add a sprinkle of red pepper flakes to the exterior coating for an extra fiery crunch.
- Herb Garden Cheese Ball: Infuse your cheese ball with the aromatic freshness of various herbs. Mix in a generous amount of finely minced fresh herbs such as thyme, rosemary, chives, dill, or a combination. A tablespoon of fresh lemon zest can also brighten the flavors beautifully. This variation is particularly appealing for spring or summer gatherings.
- Sweet & Savory Fruit and Nut Cheese Ball: Introduce a delightful sweetness by mixing in dried cranberries, chopped dried cherries, or finely diced apricots into the cheese mixture. For the coating, you could use a mix of chopped pistachios, walnuts, and a light drizzle of honey just before serving. This version pairs wonderfully with champagne or dessert wines.
- Tangy Goat Cheese Ball: For a lighter, tangier, and distinctly European-inspired flavor, substitute half or all of the cream cheese with soft goat cheese. The goat cheese will provide a delightful piquant note that is incredibly refreshing. If you happen to have leftover goat cheese, consider trying my spinach, mushroom, and goat cheese slab frittata for another delicious meal.
- Smoky BBQ Cheese Ball: Create a smoky, savory profile by adding a tablespoon of smoked paprika and a teaspoon of your favorite BBQ rub to the cheese mixture. For the coating, consider using crushed crispy fried onions or even finely crushed smoky potato chips for an irresistible crunch.
- Mediterranean Inspired Cheese Ball: Transport your taste buds to the Mediterranean by incorporating crumbled feta cheese, finely chopped sun-dried tomatoes (oil-packed and drained), and pitted Kalamata olives into the cheese base. A sprinkle of dried oregano or fresh basil in the mix would complete this flavorful variation.
More Holiday Appetizers You’ll Love
Cauliflower Bites Recipe
30 mins
Eggplant Pizza Bites Recipe
30 mins
Easy Deviled Eggs Recipe
20 mins
Cauliflower Muffins Recipe
45 mins
Irresistible Cheese Ball
Olivia Ribas
8 people
10 minutes
2 hours
0 minutes
2 hours 10 minutes
Ingredients
- 16 oz. cream cheese at room temperature
- 2 cups freshly grated sharp cheddar cheese divided (avoid pre-shredded for best results)
- ½ cup finely grated Pepper Jack cheese
- ¼ cup chopped green onions divided
- 6 slices bacon cooked crispy and chopped, divided
- 1 teaspoon hot pepper sauce (or Worcestershire sauce for less heat)
- 1 teaspoon dried parsley
- 1 teaspoon dried Italian seasoning
- ½ teaspoon garlic powder
- Salt and freshly ground black pepper to taste
- 2/3 cup chopped pecans (for coating)
Instructions
-
In a large mixing bowl, combine the softened cream cheese, 1 cup of the grated sharp cheddar cheese, the Pepper Jack cheese, half of the chopped green onions, half of the cooked and chopped bacon, hot pepper sauce (or Worcestershire), dried parsley, Italian seasoning, garlic powder, and a generous pinch of salt and freshly ground black pepper.
-
Using a sturdy spatula or a hand mixer on low speed, mix all the ingredients thoroughly until they are smooth and well incorporated. Ensure there are no lumps of cream cheese.
-
Lay out a large sheet of plastic wrap on a clean work surface. Carefully transfer the entire cheese mixture onto the center of the plastic wrap.
-
Gather the edges of the plastic wrap and use them to gently shape and roll the cheese mixture into a compact ball. Wrap it tightly to prevent air exposure and refrigerate for at least 1-2 hours, or until the cheese ball is firm enough to handle easily. This chilling time is crucial for both firming the ball and allowing the flavors to meld beautifully.
-
While your cheese ball is chilling, prepare its delightful coating. In a shallow bowl, combine the remaining 1 cup of grated cheddar cheese, the chopped pecans, the rest of the chopped green onions, and the remaining diced bacon. Mix these coating ingredients well.
-
Once the cheese ball is firm, unwrap it from the plastic wrap. Roll the entire cheese ball in the prepared coating mixture, ensuring it is evenly covered on all sides. Gently press the coating onto the cheese ball to make sure it adheres well and creates a beautiful, textured exterior.
-
Carefully place the fully coated cheese ball onto your chosen serving plate.
-
Cover and refrigerate until ready to serve. Serve with crackers, breadsticks, or fresh vegetable slices.
Notes
- For superior flavor and texture, always shred your own cheese instead of using pre-shredded varieties, which often contain anti-caking agents.
- Ensure your cream cheese is at room temperature before mixing. This ensures a smooth, lump-free mixture that’s easy to combine with other ingredients.
- When serving, provide a cheese knife or spreader. This makes it easier for guests to serve themselves without breaking crackers and ensures a neat presentation.
- Feel free to customize your cheese ball! Experiment with different types of shredded cheeses, add various herbs, spices, or even a touch of sweetness with dried fruits.
- To Store: Keep the cheese ball in an airtight container or wrapped tightly in plastic wrap. It will stay fresh in the refrigerator for up to 2 weeks.
- To Freeze: Wrap the cheese ball tightly in plastic wrap, then store it in a freezer-safe bag for up to 1 month. Thaw in the refrigerator overnight before serving.
Nutrition Information
Calories: 366kcal,
Carbohydrates: 4g,
Protein: 11g,
Fat: 35g,
Cholesterol: 84mg,
Sodium: 914mg,
Potassium: 101mg,
Fiber: 1g,
Sugar: 3g
Nutrition information is automatically calculated and should be used as an approximation.