
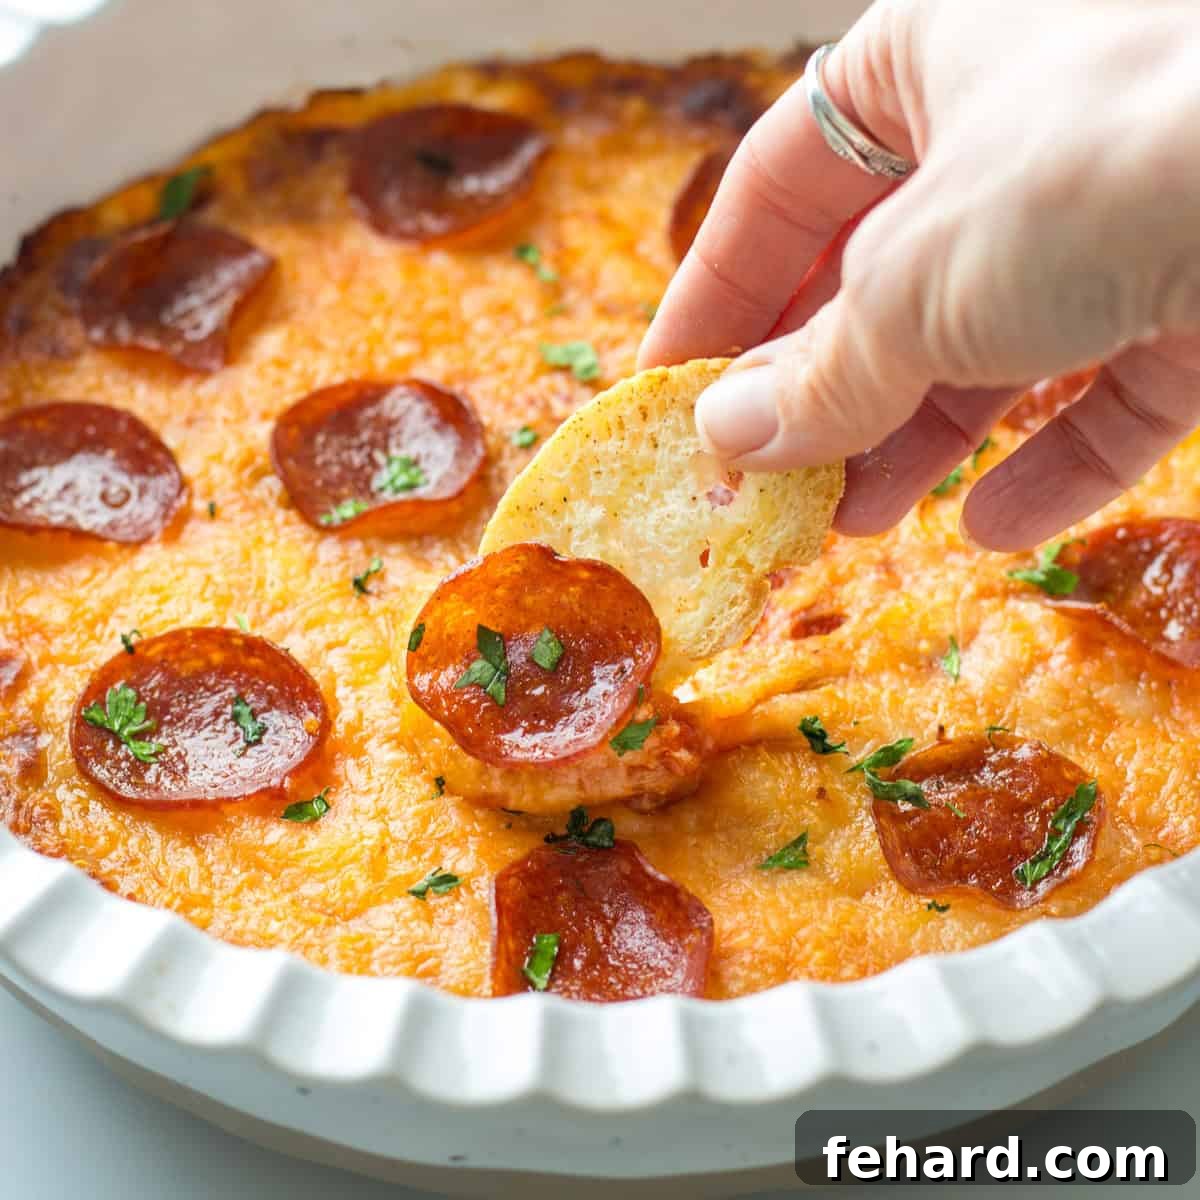
Prepare to amaze your guests with this incredible Baked Pizza Dip – an appetizer so irresistibly creamy, cheesy, and bursting with flavor, it consistently receives rave reviews. Imagine a rich, savory base generously layered with tangy pizza sauce, abundant amounts of perfectly melted mozzarella, and all your cherished pizza toppings. Baked until golden and bubbling, this dip is a true showstopper. Served hot with crispy, toasted baguette slices or your favorite dippers, it scoops like a dream and is guaranteed to disappear in a flash, making it the ultimate crowd-pleaser for any gathering.
If you’re a fan of creative pizza-inspired dishes that go beyond the traditional slice, you’ll love exploring some of my other popular recipes. Don’t miss out on my delightful Pizza Bread, the comforting Pizza Pasta, the ultimate comfort food Pizza Grilled Cheese, and the hearty Pizza Meatloaf. Each offers a unique and delicious way to enjoy those beloved pizza flavors.

Why This Pizza Dip Will Be Your New Favorite Appetizer
While this recipe might seem straightforward, a few key techniques and ingredient choices elevate it from good to absolutely phenomenal. These simple yet crucial tips ensure your pizza dip achieves the perfect blend of flavor, consistency, and a truly irresistible quality that will have everyone asking for the recipe.
The Secret to Unbeatable Flavor and Texture
- Cottage Cheese for a Depth of Flavor: This might surprise you, but cottage cheese is the secret ingredient that truly transforms the dip’s base. Its inherent saltiness and cheesy notes contribute a more complex, authentic pizza flavor compared to using alternatives like Greek yogurt or sour cream. It also adds a wonderful texture that makes the dip hearty yet smooth.
- Room Temperature Cream Cheese is Non-Negotiable: For a consistently creamy and lump-free dip, ensure your cream cheese is at room temperature before blending. This allows it to mix seamlessly with the other ingredients, creating a perfectly smooth foundation for your pizza dip. Skipping this step can result in a lumpy texture, detracting from the overall experience.
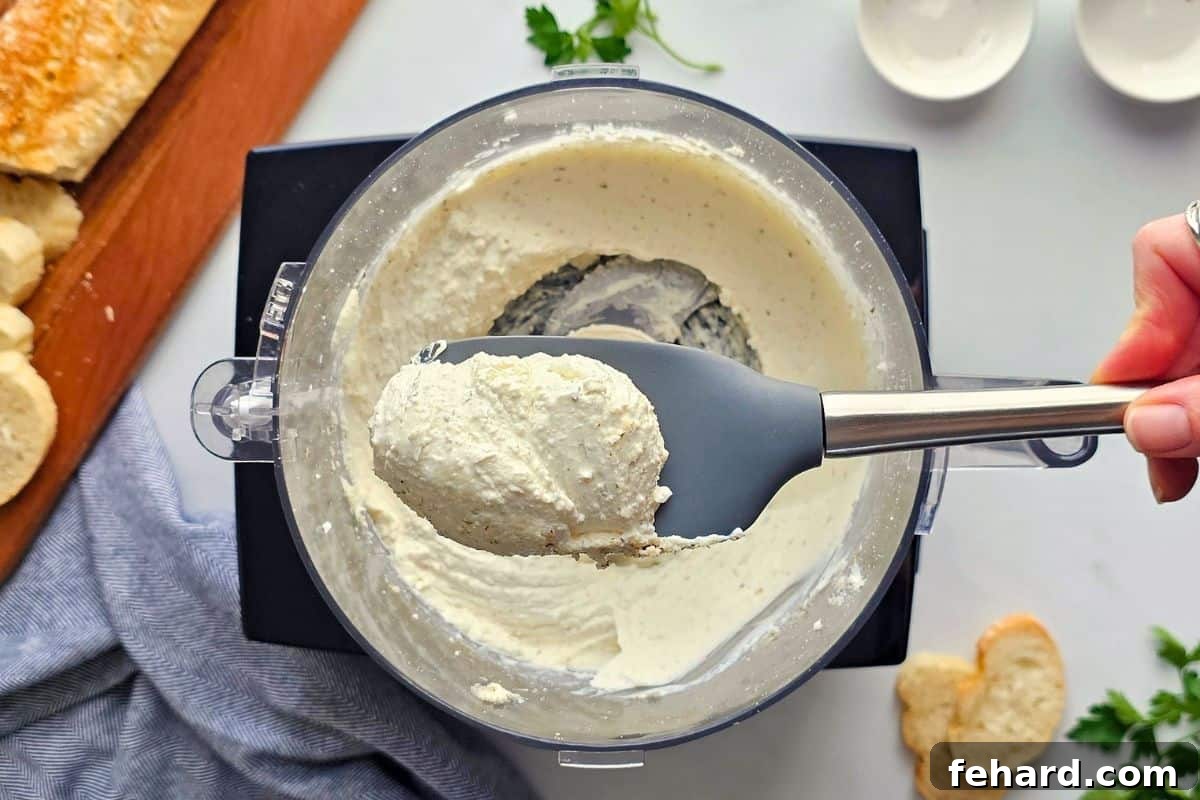
- Utilize a Food Processor for Ultimate Smoothness: While you might be tempted to mix by hand, a food processor is your best friend here. It quickly and effortlessly blends the cottage cheese, cream cheese, Parmesan, and seasonings into a homogenous, perfectly smooth, and cohesive base. This speed and efficiency save you time and guarantee the ideal texture.
- Choose a Shallow Baking Dish: The type of baking dish you use makes a significant difference. A shallow dish, such as a pie plate or a shallow square baking dish, is ideal. This design ensures that every scoop of dip boasts the perfect ratio of melty cheese to rich sauce to creamy base, offering a balanced and delightful bite every time.
Master the Art of Homemade Pizza Dip: Step-by-Step Guide
Creating this irresistible pizza dip is surprisingly simple, and I’ll walk you through each step, offering insider tips to ensure your dip is a resounding success. Get ready to bake a batch of cheesy, bubbly perfection!
Step One: Crafting the Silky-Smooth Cream Cheese Base
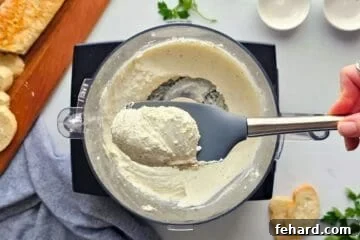
The foundation of this amazing pizza dip is its rich, creamy base. To achieve the perfect silky-smooth texture, it is highly recommended to use a food processor. Simply combine the room temperature cream cheese, cottage cheese (remembering our secret ingredient!), grated Parmesan cheese, and a harmonious blend of seasonings including garlic powder, dried oregano, dried basil, and optional crushed red pepper flakes. Process these ingredients until they are thoroughly blended and incredibly smooth. Scrape down the sides of the bowl as needed to ensure everything is incorporated evenly, creating a cohesive and flavorful base.
Step Two: Layering Your Pizza Perfection
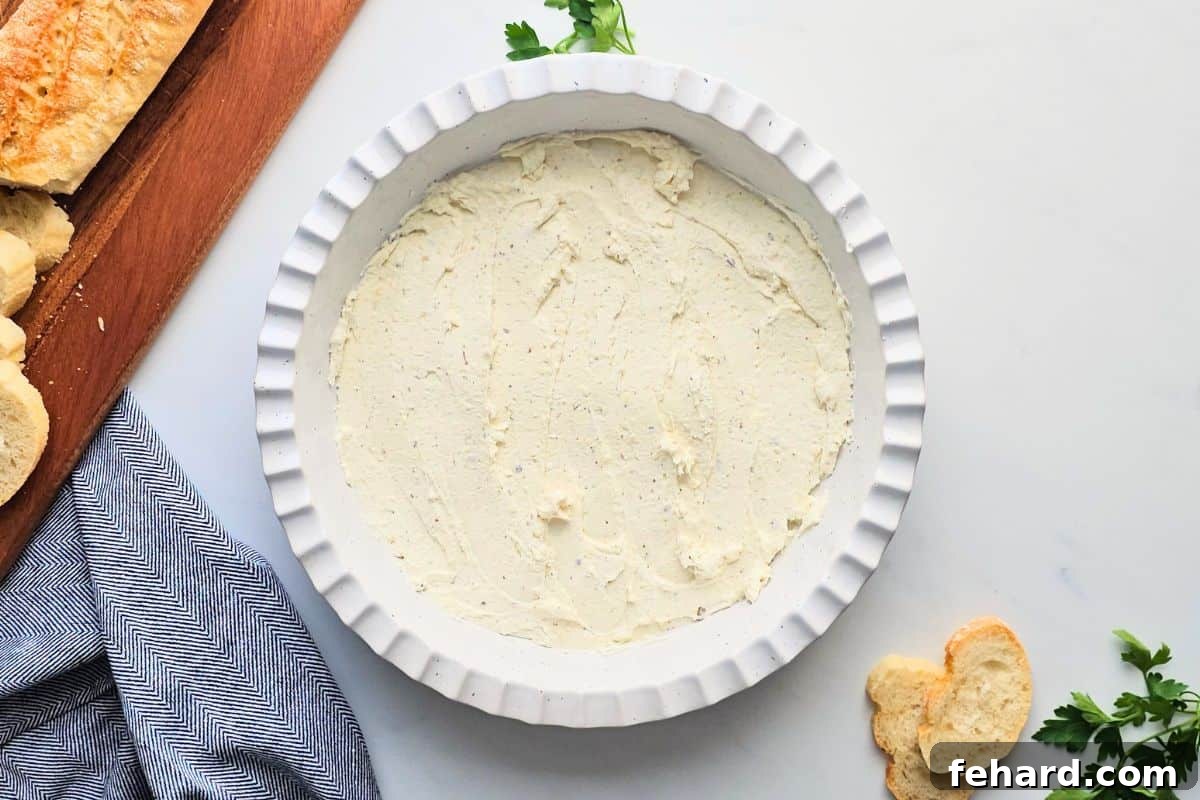
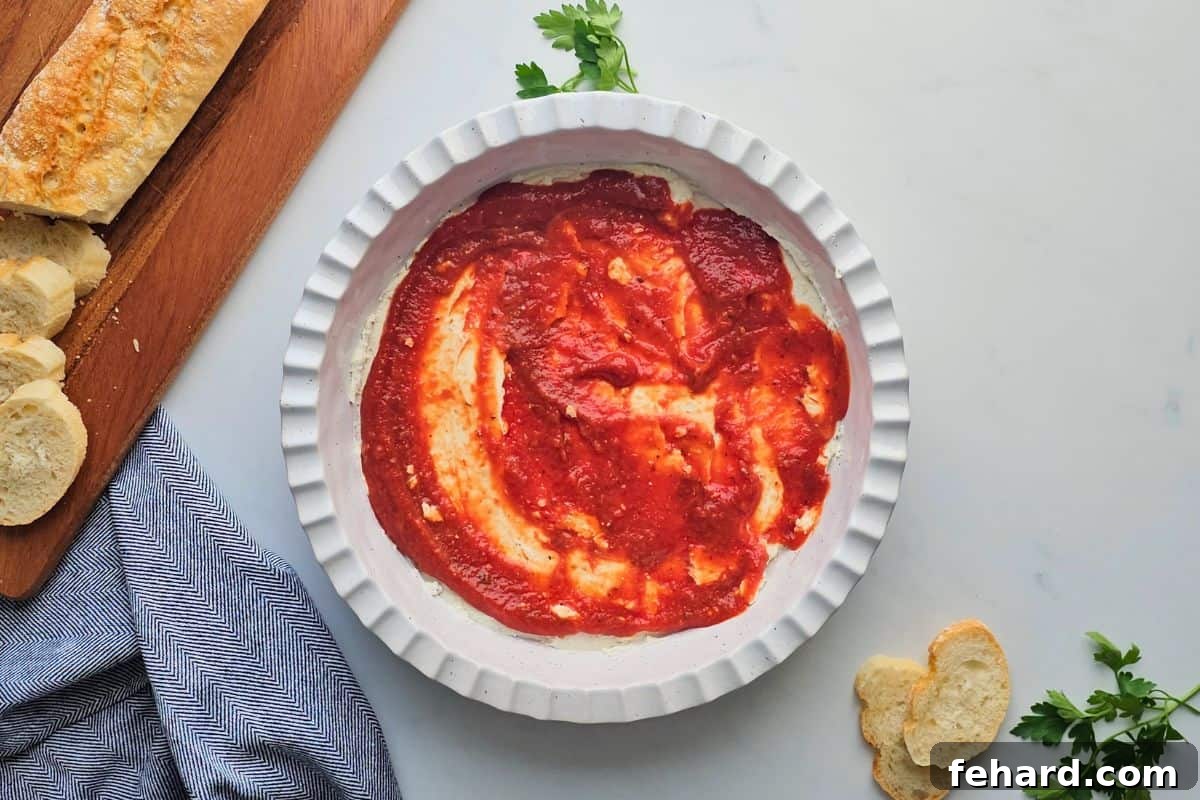
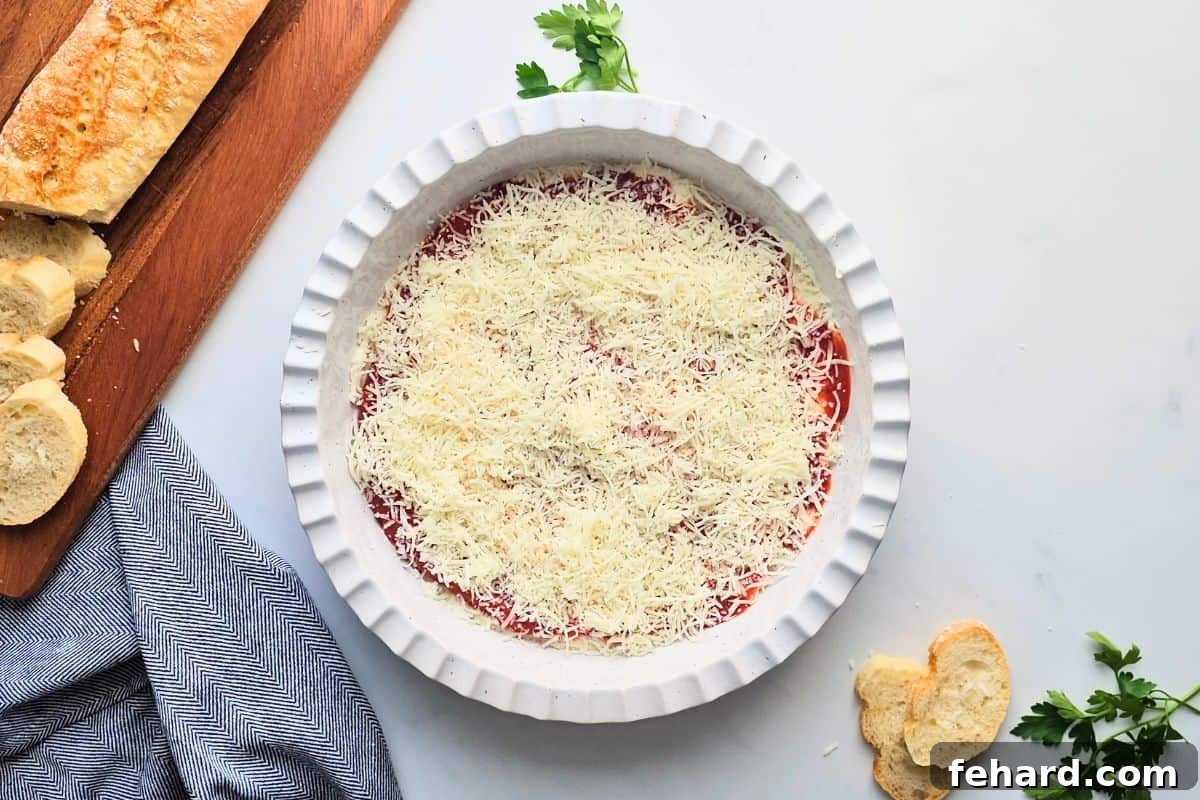
Once your creamy base is ready, spread it evenly and thinly into your chosen shallow baking dish, such as a 9-inch pie plate. Aim for an even layer to ensure consistent heating and a balanced dip-to-topping ratio in every bite. Next, generously top this base with an even layer of your favorite pizza sauce. Whether homemade or store-bought, a good quality sauce is crucial for that authentic pizza flavor. Finally, sprinkle an ample amount of shredded mozzarella cheese over the sauce. This is where the magic truly begins as the cheese will melt into a luscious, gooey layer during baking.
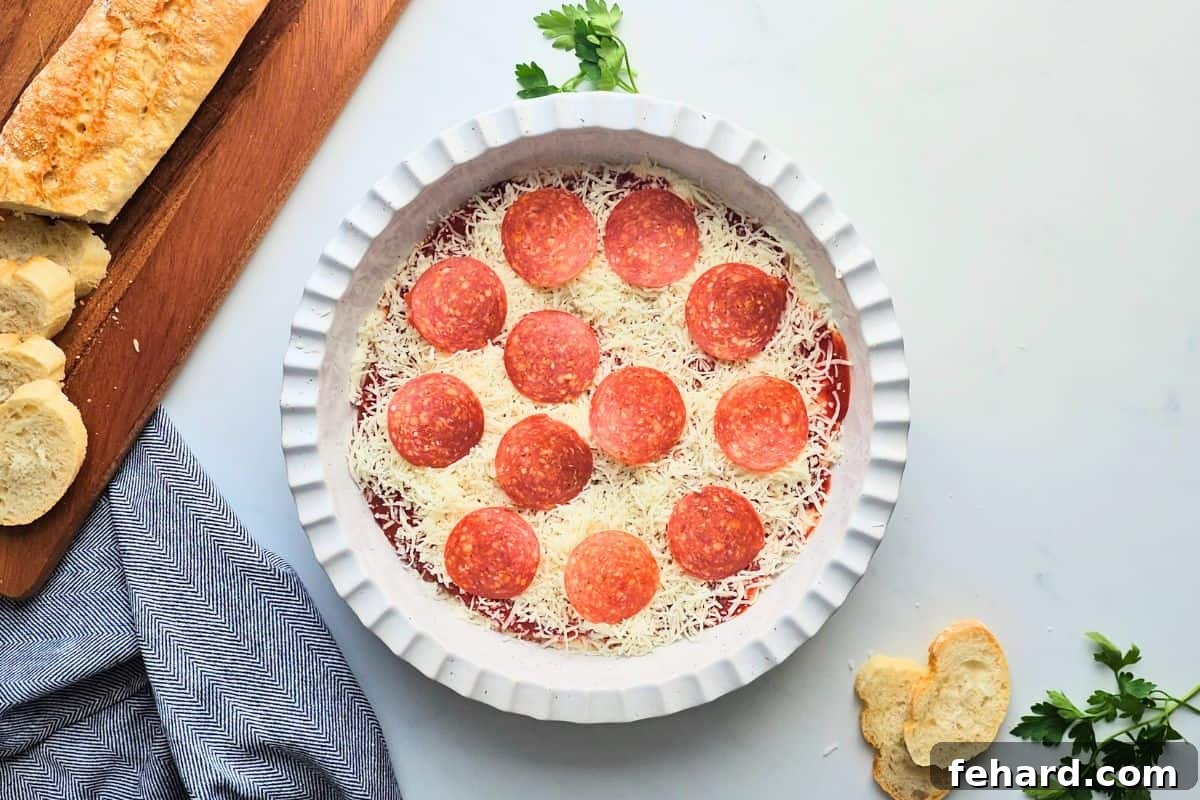
This is also the perfect moment to add your desired pizza toppings, or you can keep it simple with just cheese and sauce. My family often opts for classic pepperoni, which crisps up beautifully in the oven and adds a delightful salty kick. However, feel free to get creative! Sliced black olives, sautéed mushrooms, diced bell peppers, red onions, or even cooked and crumbled Italian sausage are all fantastic additions that will make your pizza dip uniquely yours. Layer them evenly over the mozzarella for a visually appealing and flavorful dip.
Step Three: Baking to Golden, Bubbly Perfection
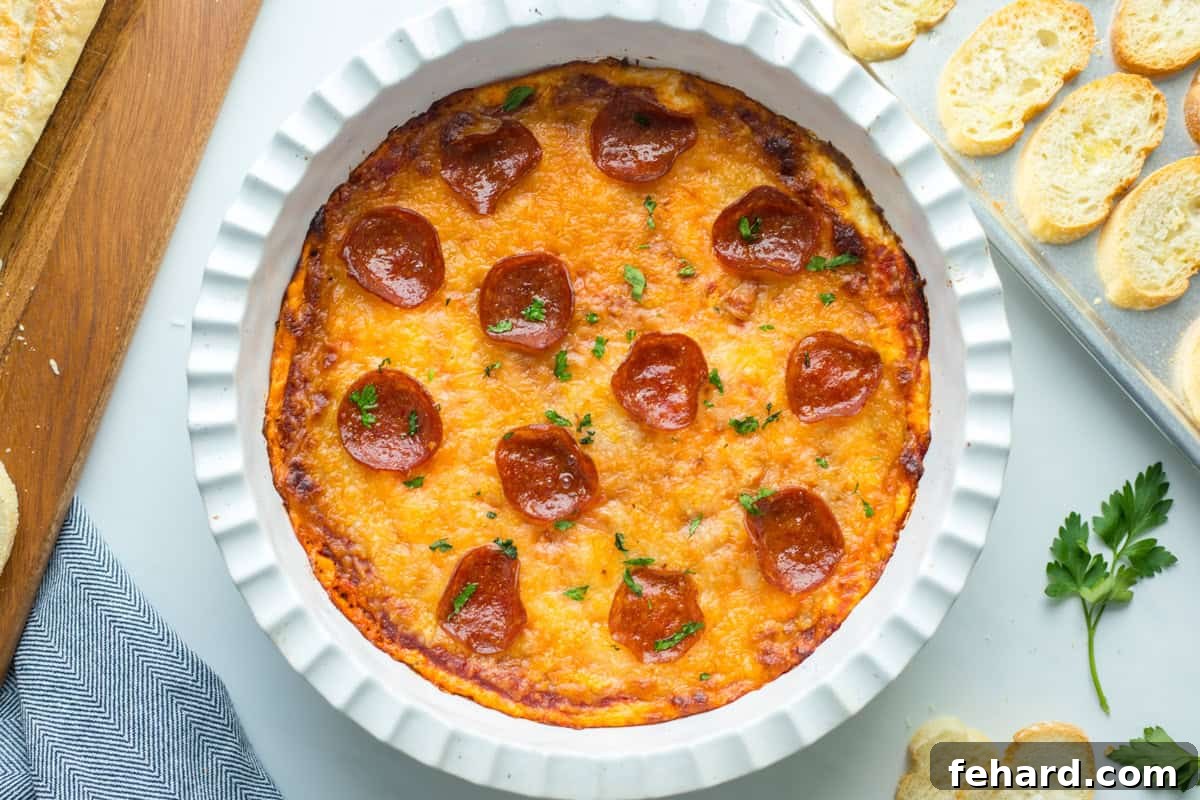
With all your layers beautifully assembled, it’s time to transform this dish into a warm, bubbly, and incredibly inviting appetizer. Place your prepared pizza dip into the preheated oven and bake until the cheese has completely melted, forming a gooey, irresistible blanket, and the edges begin to brown slightly. The bubbling action indicates that the dip is heated through and ready to be devoured. For an extra golden-brown, slightly crispy top layer, you can briefly broil the dip for a minute or two at the very end. However, extreme caution is advised during this step; cheese can go from perfectly golden to unfortunately burnt in a matter of seconds, so keep a close eye on it!
Don’t Forget the Dippers: Perfectly Toasted Crostini
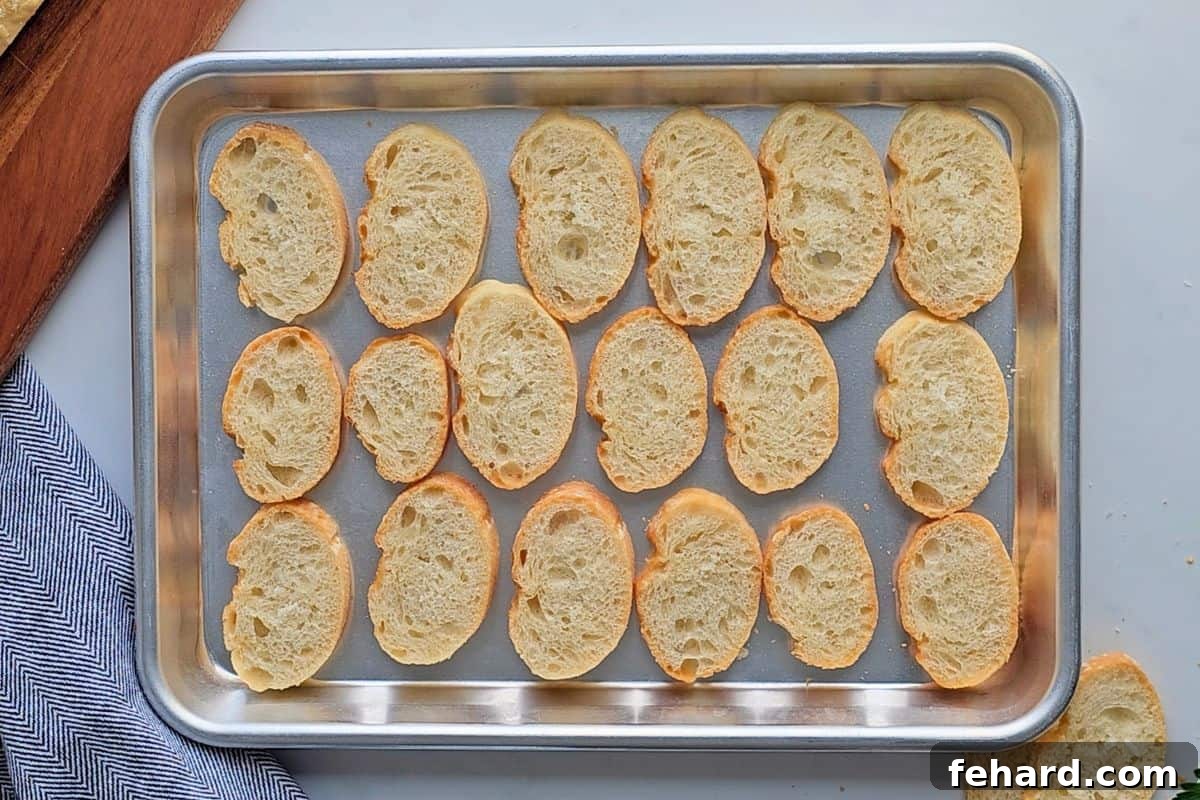
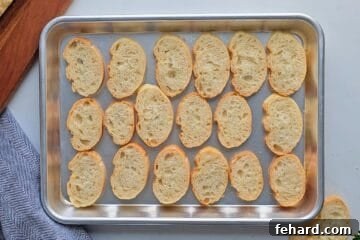
While your mouth-watering pizza dip is baking to perfection, take a few minutes to prepare the ideal accompaniment: homemade crostini. Slice a fresh baguette into uniform ½-inch thick rounds. Arrange these slices on a baking sheet, lightly drizzle them with good quality extra virgin olive oil, and then sprinkle them with a touch of garlic powder for an aromatic kick. Pop them into the oven alongside or right after the dip, baking for just 5-7 minutes until they are lightly golden and perfectly crisp. These homemade crostini are far superior to store-bought options, providing the perfect crunchy vehicle for scooping up every last bit of the cheesy, saucy dip.
Endless Customization: Tailor Your Pizza Dip to Any Taste
One of the best aspects of this pizza dip recipe is its incredible versatility. You can easily adapt it to suit different preferences, dietary needs, or whatever ingredients you have on hand. Don’t be afraid to experiment and make it your own!
- Ingredient Swaps for Your Creamy Base: While I wholeheartedly recommend cottage cheese for its unique flavor contribution, you do have alternatives. If cottage cheese isn’t available or preferred, you can use plain Greek yogurt (full-fat for best results) or full-fat sour cream. Keep in mind that these options are less salty than cottage cheese, so you will need to adjust the seasonings. I suggest adding an extra pinch of salt (about ½ teaspoon) and increasing the grated Parmesan cheese to ⅓ cup to compensate for the flavor difference. Always avoid fat-free versions, as they can cause the dip to separate during baking.
- A World of Topping Possibilities: The topping choices are truly endless and allow you to capture the essence of your favorite pizza combinations. Beyond classic pepperoni, consider adding:
- Meats: Fully cooked and crumbled Italian sausage, crispy bacon bits, diced cooked chicken, or even mini meatballs.
- Vegetables: Sliced black or green olives, sweet banana peppers, finely diced red or green bell peppers, sautéed onions, canned or fresh sautéed mushrooms (ensure they are well-drained to prevent a watery dip).
- Spicy Kick: A little extra crushed red pepper flakes or finely chopped jalapeños can elevate the heat.
- Herbs: Fresh basil or oregano added after baking can provide a vibrant finishing touch.
- Creative Serving Suggestions: While crostini are fantastic, there are many other great dippers for your pizza dip:
- Crackers: Any sturdy cracker, from butter crackers to wheat thins, works wonderfully.
- Pita Chips: Their hearty crunch and slightly savory flavor are a perfect match.
- Breadsticks: Soft or crispy, breadsticks are excellent for scooping up generous amounts of dip.
- Fresh Veggies: For a lighter option, offer carrot sticks, celery sticks, bell pepper strips (red, yellow, orange), cucumber slices, or cherry tomatoes.
- Warm Tortillas: Cut flour tortillas into wedges, bake until crispy, and serve alongside.
- Leftover Dip Storage: Should you be lucky enough to have any leftovers, store them in an airtight container in the refrigerator for up to 4 days. When ready to enjoy again, you can easily reheat it in the microwave or oven until warm and bubbly. Cover with foil if reheating in the oven to prevent drying out.
Make-Ahead & Storage Tips
Planning a party or simply want to save time? This pizza dip is perfect for preparing in advance! You can assemble the entire dip, up to the point of baking, cover it tightly with plastic wrap, and store it in the refrigerator for up to 24 hours. When you’re ready to bake, simply remove it from the fridge and allow it to come closer to room temperature for about 20-30 minutes before baking as directed. This helps ensure even heating.
As mentioned, any leftover dip should be stored in an airtight container in the refrigerator. It will stay fresh for up to 4 days. To reheat, you can either warm individual portions in the microwave or place the entire dish back in the oven at 350°F (175°C) until heated through and bubbly. If reheating in the oven, you might want to cover it with foil to prevent the top from drying out or over-browning.
Frequently Asked Questions (FAQ) About Pizza Dip
Can I use a different type of cheese?
Absolutely! While mozzarella is classic for its meltiness, you can enhance the flavor profile by adding a mix of cheeses. Provolone adds a sharper, saltier note, while a little bit of smoked gouda or cheddar can introduce a richer, more complex taste. For the base, a good quality grated Parmesan is essential.
What kind of pizza sauce is best?
Use your favorite pizza sauce! A good quality store-bought marinara or pizza sauce works perfectly. If you have a go-to homemade pizza sauce recipe, even better! The key is to use a sauce with a robust tomato flavor that isn’t too watery, as excess moisture can affect the dip’s consistency.
How can I make this pizza dip spicier?
To add a fiery kick, increase the amount of crushed red pepper flakes in the base. You could also mix in a pinch of cayenne pepper, or top the dip with finely diced jalapeños (fresh or pickled) before baking. A drizzle of hot honey or chili oil after baking also works wonders!
Can I make individual pizza dips?
Yes, for individual servings, you can use small ramekins or oven-safe ceramic bowls. Adjust baking time accordingly; they will likely bake faster than a larger dish. This is a fantastic idea for portion control or for a more elegant presentation at a dinner party.
What’s the best way to serve pizza dip at a party?
Serve it hot, straight from the oven! Place the baking dish on a heat-proof trivet in the center of your appetizer spread. Surround it with an array of dippers – crostini, crackers, breadsticks, and fresh vegetables – to give your guests options. A small serving spoon can also be provided, though most people will enjoy scooping directly with their chosen dipper.
More Party-Favorite Dip Recipes
Looking for more delicious dips to complete your party spread? These recipes are proven crowd-pleasers that are easy to make and guaranteed to be a hit:
- The Most Amazing Taco Dip
- Classic Reuben Dip
- Hearty Rotel Sausage Dip
- Easy Homemade Chip Dip
Easy Baked Pizza Dip Recipe
This pizza dip is easy to make with a creamy base, pizza sauce, melty cheese, and your favorite pizza toppings. Perfect for parties or game days.
By: Kristen Chidsey
Servings: 12
Prep time: 5 mins
Cook time: 20 mins
Total time: 25 mins
Ingredients
For the Pizza Dip
- 8 ounces cream cheese, at room temperature
- ½ cup cottage cheese (full-fat or reduced fat)
- ¼ cup grated parmesan cheese
- 1 teaspoon garlic powder
- ½ teaspoon dried oregano
- ½ teaspoon dried basil
- ⅛ teaspoon crushed red pepper flakes, optional
- 1 cup pizza sauce
- 1½ cups shredded mozzarella cheese
- Pizza toppings of choice (e.g., pepperoni, olives, mushrooms)
Toasted Crostini (Optional)
- 1 (12-ounce) baguette
- Extra virgin olive oil, to drizzle
- Garlic powder, to sprinkle
Instructions
-
Preheat the oven to 400℉ (200°C).
-
In a food processor fitted with an s-blade, combine 8 ounces cream cheese, ½ cup cottage cheese, ¼ cup grated parmesan cheese, 1 teaspoon garlic powder, ½ teaspoon dried oregano, ½ teaspoon dried basil, and ⅛ teaspoon crushed red pepper flakes (if using) until smooth and creamy.

-
Spread the cream cheese mixture out into an even, thin layer in a 9-inch pie plate (or 9-inch square baking dish). Top with an even, thin layer of pizza sauce, then cover with an even layer of shredded mozzarella cheese. Add your preferred pizza toppings over the mozzarella.
-
Bake for 18-22 minutes, or until the cheese has melted, is bubbly, and has browned slightly. For extra browning, you can broil for 1-2 minutes, watching carefully to prevent burning.


For the Crostini
-
Slice a baguette into ½-inch thick slices and place them on a baking sheet. Lightly drizzle with olive oil and sprinkle with garlic powder. Bake at 400℉ (200°C) for 5-7 minutes until lightly golden and crisp. Serve immediately with the hot pizza dip.
Notes
Cottage Cheese: Use full-fat or reduced-fat cottage cheese for the best consistency and flavor. Avoid fat-free versions, as they can cause the dip to separate during baking. If substituting with plain Greek yogurt or full-fat sour cream, add about ½ teaspoon of salt and increase the Parmesan cheese to ⅓ cup to maintain a similar flavor profile.
Options for Toppings: Get creative with your toppings! Consider cooked and crumbled Italian sausage, crispy bacon, sliced black or green olives, diced onions, chopped bell peppers, or well-drained sautéed mushrooms. Ensure any meat toppings are fully cooked before adding them to the dip.
Leftover Dip: Store any remaining dip in an airtight container in the refrigerator for up to 4 days. Reheat gently in the microwave or oven until warm and bubbly again.
Nutrition
- Calories: 104 kcal
- Carbohydrates: 4 g
- Protein: 7 g
- Fat: 7 g
- Saturated Fat: 4 g
- Polyunsaturated Fat: 0.3 g
- Monounsaturated Fat: 2 g
- Cholesterol: 25 mg
- Sodium: 321 mg
- Potassium: 138 mg
- Fiber: 0.4 g
- Sugar: 2 g
- Vitamin A: 329 IU
- Vitamin C: 1 mg
- Calcium: 131 mg
- Iron: 0.4 mg
Nutrition information is automatically calculated and should only be used as an approximation.