
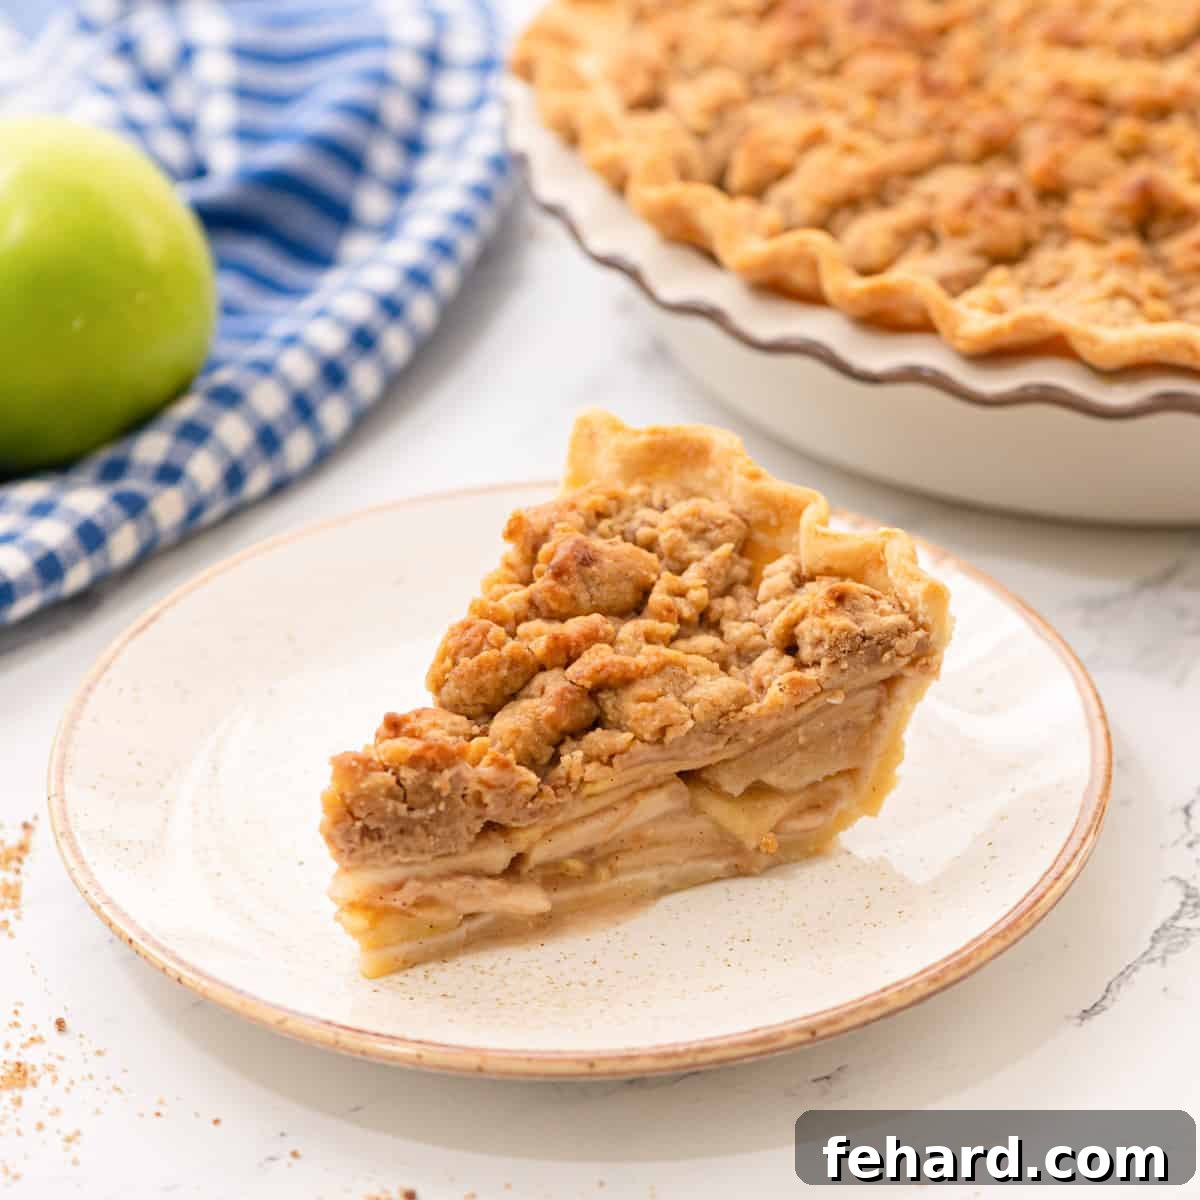
The Ultimate Homemade Dutch Apple Pie: A Recipe for Sweet & Tart Perfection
Imagine a dessert that perfectly marries the comforting tradition of classic apple pie with the irresistible crunch of a buttery crisp. That’s exactly what you get with our Dutch Apple Pie. This recipe elevates homemade apple pie to an art form, featuring a tender, flaky crust, a meticulously balanced sweet and tart apple filling, and a generous, golden streusel topping that’s simply divine. It’s the ultimate autumnal treat, surprisingly easy to achieve, and guaranteed to become a family favorite.
This particular Dutch Apple Pie recipe stands out because it takes everything you adore about a classic fruit pie and enhances it with a rich, crumbly streusel, creating a symphony of textures and flavors in every bite. Whether you’re an experienced baker or new to the kitchen, our detailed guide and expert tips will ensure your Dutch Apple Pie is nothing short of spectacular.
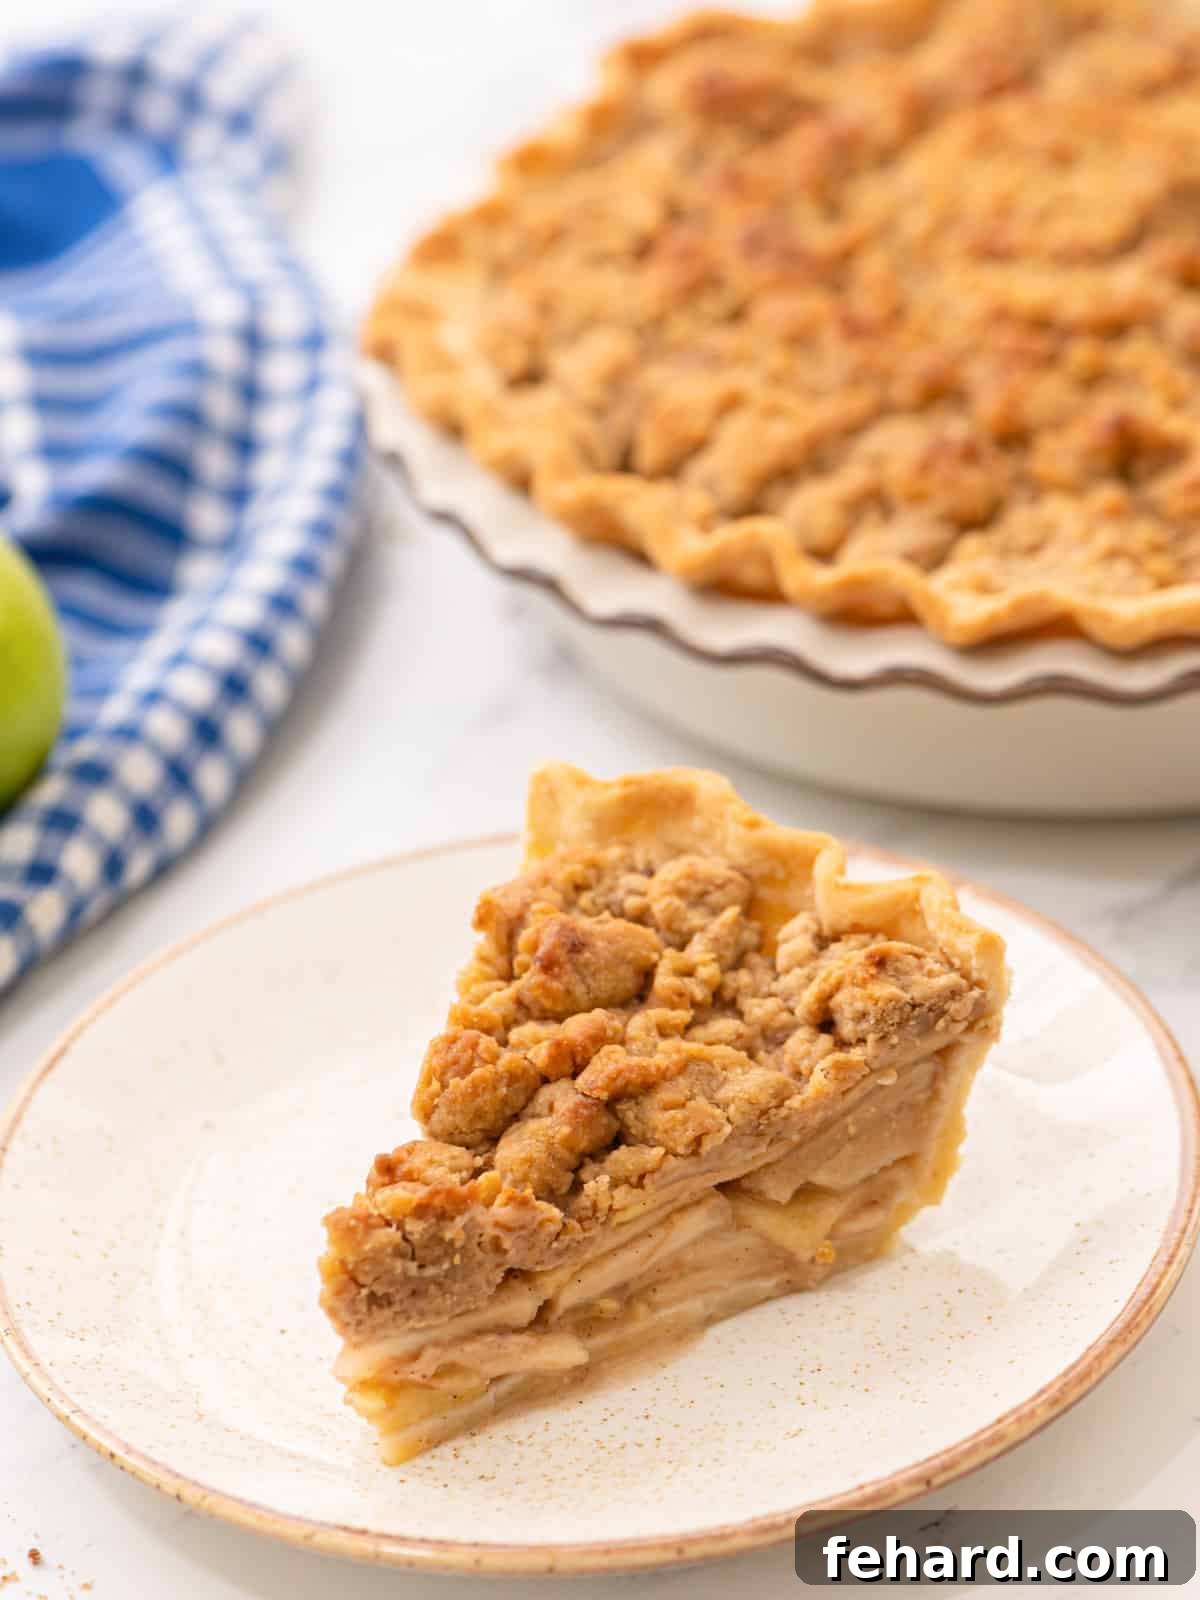
The Secrets to an Unforgettable Dutch Apple Pie
Creating a truly memorable Dutch Apple Pie isn’t just about following steps; it’s about understanding the nuances that elevate a good pie to a great one. These key insights will help you achieve perfection every time:
- Embrace a Mix of Apples for Optimal Flavor and Texture: The foundation of any superb apple pie is the apples themselves. For this recipe, we highly recommend a combination of Granny Smith apples and Golden Delicious apples. Granny Smiths bring a bright, tart flavor and firmness that holds up wonderfully during baking, preventing a mushy filling. Golden Delicious apples, on the other hand, offer natural sweetness and soften beautifully, contributing a tender counterpoint. This blend ensures a complex, balanced flavor profile that isn’t overly sweet or tart, with a delightful textural contrast. Other excellent choices include Honeycrisp for crispness or Fuji for sweetness.
- Keep the Butter in Your Streusel Topping Cold: This is a golden rule for achieving that quintessential crumbly streusel. When you use cold, cubed butter and work it into the dry ingredients with your fingertips, it creates tiny pockets of butter. As these pockets slowly melt in the oven, they release steam, which is essential for developing a light, crisp, and beautifully caramelized crumb topping. Using warm or softened butter will result in a denser, less appealing streusel.
- Thoroughly Chill Your Pie Crust: Regardless of whether you’re using a homemade pie crust or a store-bought one, chilling is paramount. A well-chilled pie crust ensures that the butter within the dough remains solid until it hits the hot oven. This controlled melting process generates steam, which separates the layers of dough, resulting in an exquisitely flaky and tender crust. A warm crust is more prone to shrinking and can become tough or soggy.
- Opt for Freshly Grated Nutmeg: While pre-ground nutmeg is convenient, it pales in comparison to the vibrant aroma and depth of flavor delivered by freshly grated nutmeg. Grating a whole nutmeg bulb just before use releases its potent, warm, and slightly peppery notes, adding a sophisticated layer of spice that truly enhances the apple filling and streusel topping. It’s a small effort with a huge reward in terms of flavor.
- Use a 9-inch Deep-Dish Pie Pan: This recipe is designed to yield a generous, substantial pie, meaning you’ll have an abundance of both apple filling and streusel. A 9-inch deep-dish pie pan provides the necessary volume to accommodate all these delicious layers without overflowing during baking, ensuring your pie cooks evenly and beautifully.
- Protect Your Oven with a Rimmed Baking Sheet: As your Dutch Apple Pie bakes, the apples will release juices, and the buttery streusel may bubble and expand. Placing the pie on a rimmed baking sheet before sliding it into the oven acts as a safeguard, catching any potential drips or overflows. This simple step prevents a messy oven and ensures easy cleanup, allowing you to focus on the glorious aroma filling your kitchen.
Glowing 5-Star Reader Review
“I have never been good at making apple pies, but this one just looked so good, I decided to give it another try. I’m so thankful that I did because it was fantastic. Thank you!” – Jessica ⭐⭐⭐⭐⭐
How to Make This Irresistible Dutch Apple Pie: A Detailed Guide
Creating this homemade Dutch Apple Pie is a joyful and straightforward process. Follow these step-by-step instructions, incorporating our expert tips, to ensure a truly perfect pie that will impress everyone.
Step One: Preparing the Foundation – Your Flaky Pie Crust
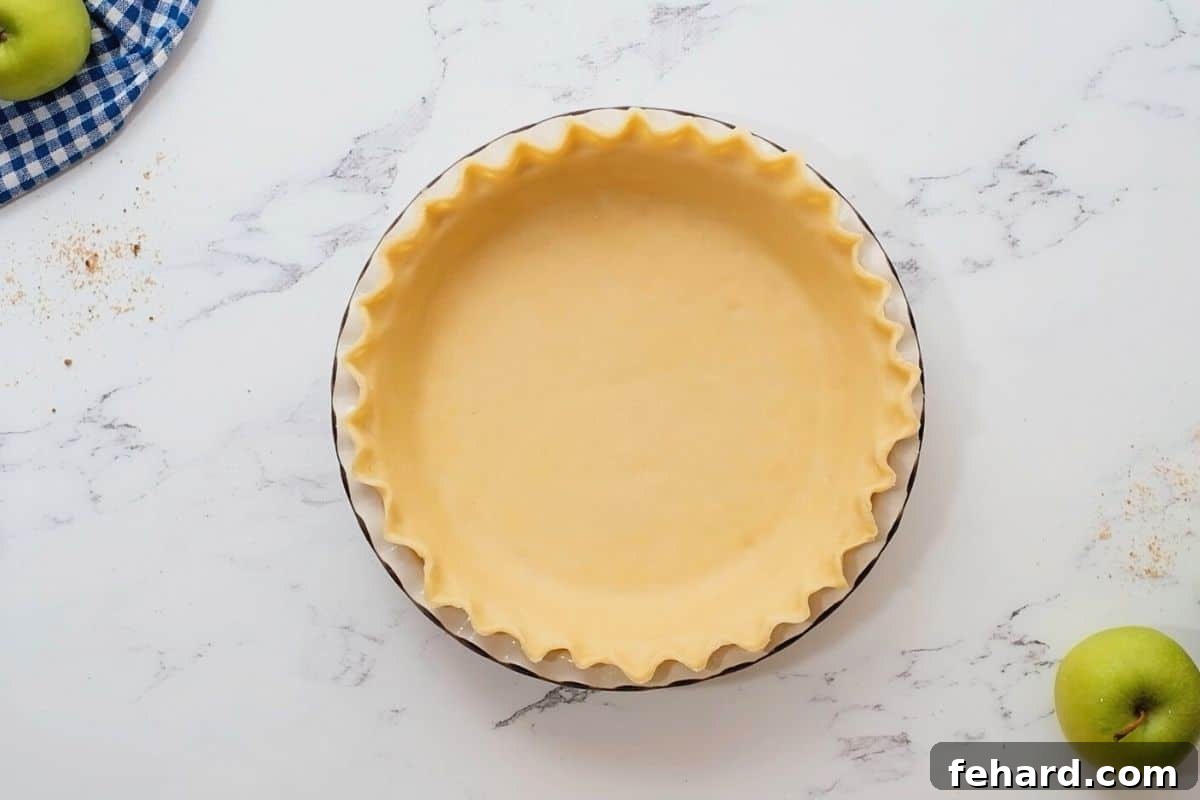
A great pie begins with a great crust. The key to success here is temperature. Cold dough makes for a flaky, tender crust that holds its shape beautifully.
- If you are using homemade pie dough or refrigerated store-bought dough, ensure it is thoroughly chilled before you begin rolling it out. This stiffness from the cold butter is what creates those coveted flaky layers.
- Once you’ve carefully rolled out your dough and gently fitted it into your 9-inch deep-dish pie pan, crimping the edges as desired, place the pie pan back into the freezer for 15 minutes. This quick chill further solidifies the butter, setting the crust’s structure and minimizing shrinkage during baking.
- Tip for Frozen Pie Crusts: If you’re starting with a frozen pie crust, simply let it thaw for about 15 minutes in the refrigerator. This will make it pliable enough to accommodate the filling without becoming too warm.
Step Two: Crafting the Heart of the Pie – Preparing the Apple Filling
The apple filling is the soul of your pie, a harmonious blend of sweet, tart, and spiced notes. Careful preparation ensures even cooking and robust flavor.
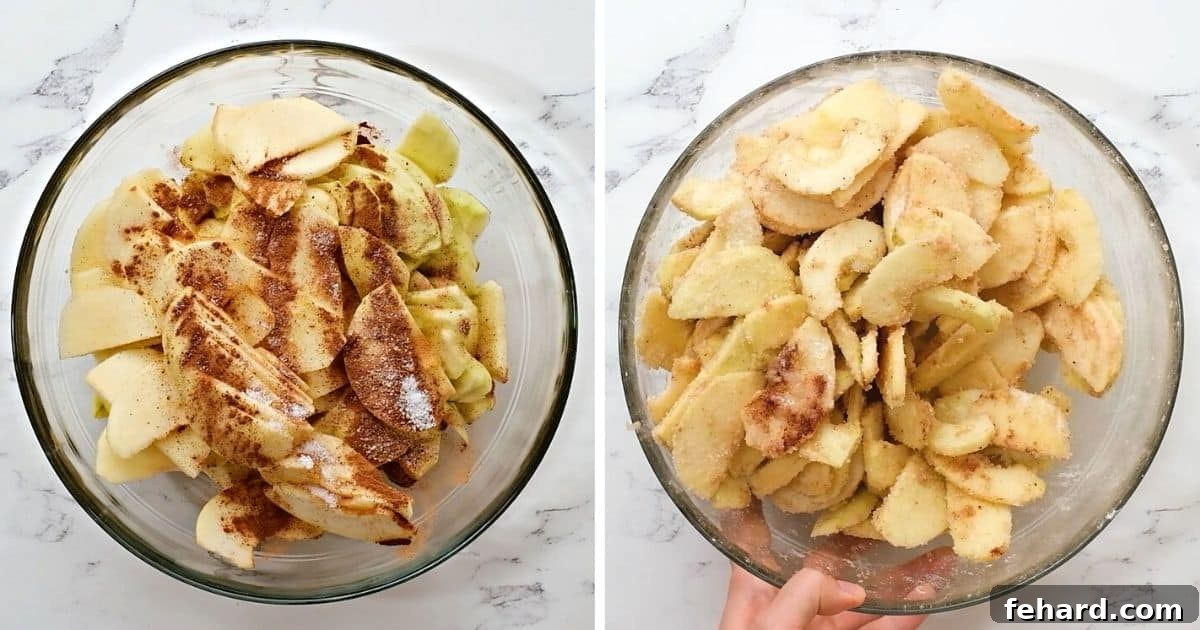
- Begin by peeling, coring, and slicing your chosen apples into consistent ¼-inch thick slices. Uniformity in thickness is incredibly important as it ensures all the apples cook at the same rate, preventing some from being overly soft while others remain firm.
- In a large mixing bowl, gently toss the sliced apples with the granulated sugar, all-purpose flour, ground cinnamon, a pinch of freshly grated nutmeg, a touch of salt, and the fresh lemon juice. The flour helps to thicken the juices, while the lemon juice brightens the apple flavor and prevents them from browning excessively.
- Precision Cutting Tip: Dedicate a little extra time to slicing your apples thinly and evenly. This attention to detail will pay off with a perfectly tender, consistent apple filling in your baked pie.
Step Three: Building the Crowning Glory – Preparing the Buttery Streusel
The streusel topping is what makes this pie distinctively “Dutch” and utterly delectable. Its crumbly, buttery texture provides a wonderful contrast to the soft apple filling.
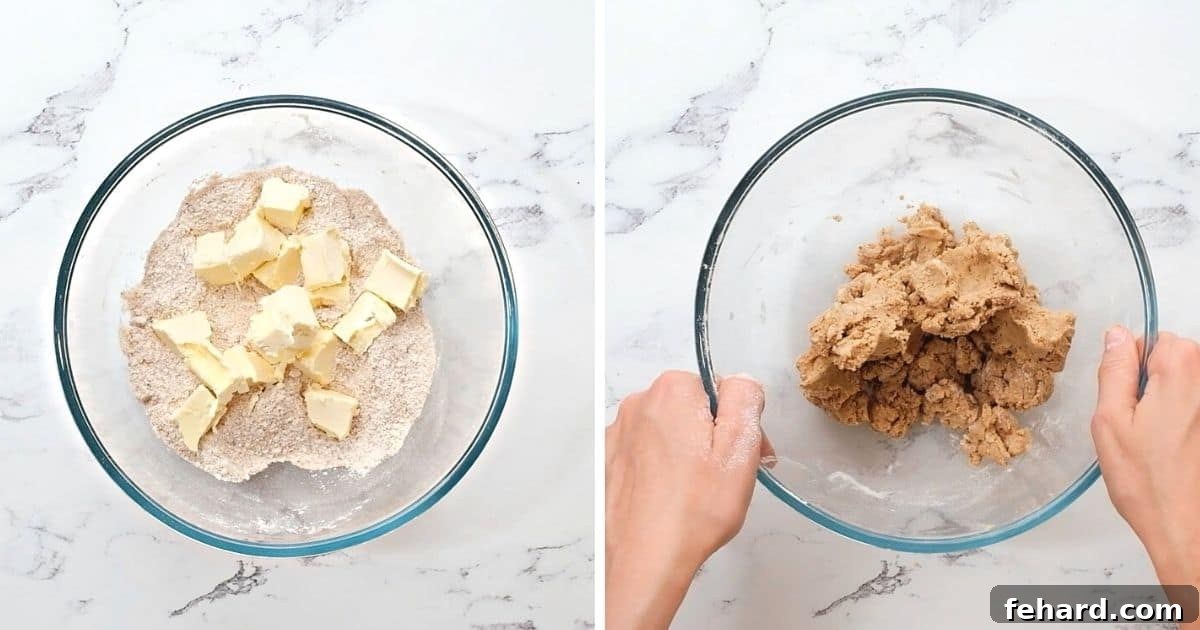
- In a medium bowl, combine the light brown sugar, all-purpose flour, ground cinnamon, and freshly grated nutmeg. Whisk these dry ingredients together thoroughly to ensure the spices are evenly distributed.
- Now, add the cubed, cold unsalted butter to the mixture. Using your fingertips, or a pastry blender, work the butter into the dry ingredients. Continue mixing until the mixture resembles coarse crumbs, with some pieces of butter still visible, roughly pea-sized. This technique prevents the butter from fully incorporating and is crucial for a perfectly crisp, crumbly streusel.
- Resist the urge to overmix, as this can warm the butter too much and result in a less desirable, doughy topping. The small pieces of cold butter will melt and caramelize during baking, creating that irresistible texture.
Step Four: The Grand Assembly – Bringing Your Dutch Apple Pie Together
With all your components ready, it’s time to assemble your pie. This step is quick and straightforward, bringing you closer to a baked masterpiece.
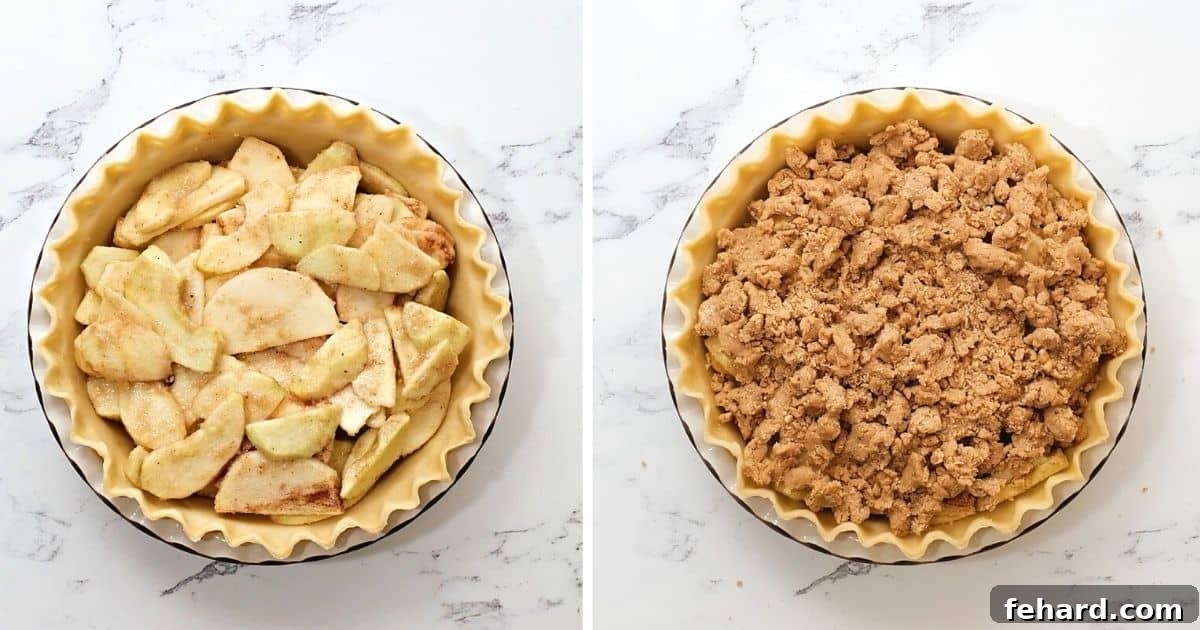
- Carefully spoon the spiced apple filling into your chilled pie crust. Arrange the apples in a slight dome, as they will cook down considerably during baking.
- Crucial Tip: As you transfer the apples, be sure to leave any accumulated excess liquid behind in the mixing bowl. This moisture, if added to the pie, can seep into the crust and lead to a disappointing soggy bottom.
- Once the apples are nestled in their crust, generously sprinkle the prepared streusel topping evenly over the entire surface. Ensure complete coverage to create that beautiful, golden crumb blanket.
Step Five: The Magic of Baking – Achieving Golden Perfection
This is where your kitchen fills with the most incredible aromas. Baking your pie to perfection requires attentiveness to ensure a golden crust and tender apples.
- Before placing your pie in the oven, set the entire pie pan onto a rimmed baking sheet. This is a critical step to catch any delicious apple juices or melted butter that might bubble over as the pie bakes, preventing a sticky mess in your oven.
- Bake the pie in your preheated oven at 375℉ (190℃) for approximately 50 to 60 minutes. Baking times can vary depending on your oven and the specific apples used, so monitor your pie closely.
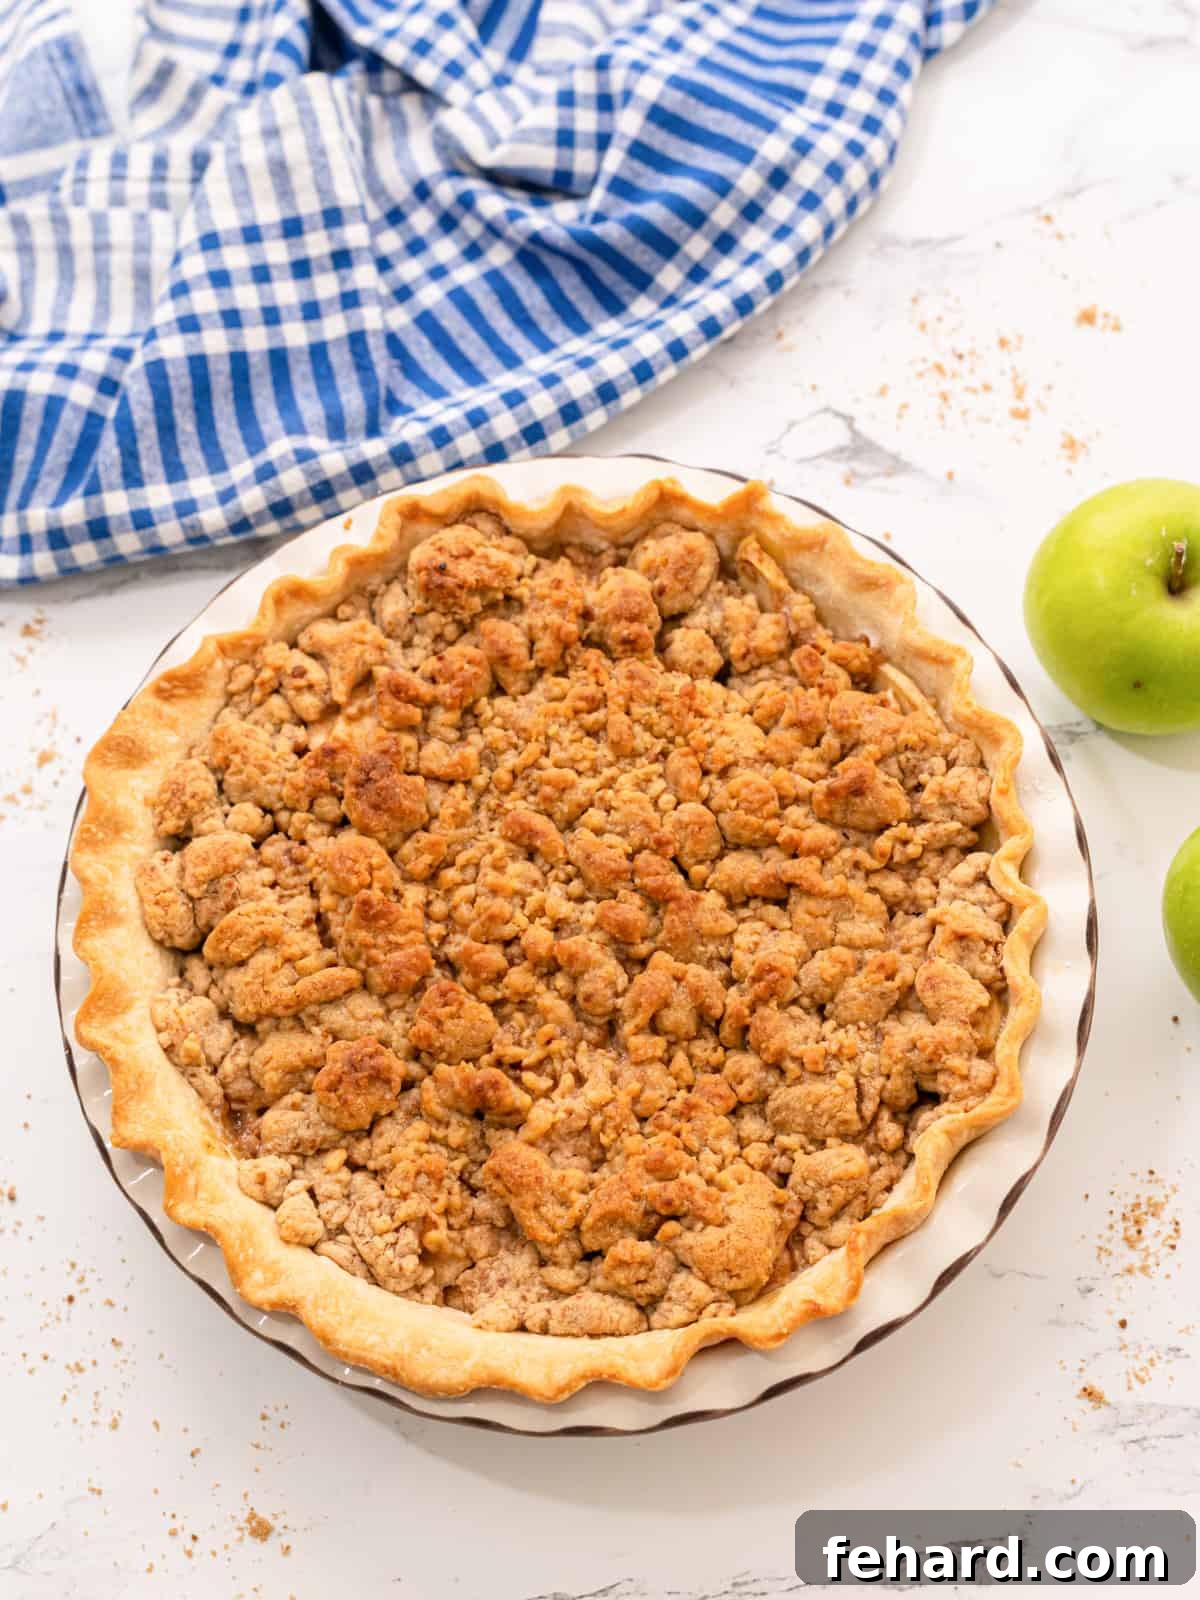
- Your Dutch Apple Pie is ready when the filling is visibly bubbling through the streusel (indicating the apples are tender and the juices have thickened), and the streusel topping has achieved a beautiful, rich golden brown hue.
- Crust and Streusel Protection: Around 35-40 minutes into the baking cycle, check on your pie. If you notice the streusel topping or the edges of the pie crust browning too quickly, loosely cover the entire pie with aluminum foil. This will shield those areas from direct heat, allowing the apples to finish cooking thoroughly without burning the delicate topping or crust. Continue baking for an additional 10-15 minutes, or until the apples are fork-tender when gently pierced.
Step Six: The Hardest Part – Cooling and Serving Your Masterpiece
Patience truly is a virtue in this final step. Allowing your pie to cool properly is essential for the filling to set, ensuring beautiful, clean slices and optimal flavor development.
- Once removed from the oven, resist the immediate temptation to slice into your pie. Transfer it to a wire rack and allow it to cool until it is just slightly warm or has reached room temperature. This crucial cooling period allows the apple filling to fully set and thicken, preventing it from being runny and ensuring each slice holds its shape perfectly.
- Serve your Dutch Apple Pie plain, appreciating its inherent deliciousness. Or, for an extra touch of decadence, elevate it with your favorite toppings! A generous scoop of creamy vanilla ice cream, a dollop of fluffy homemade whipped cream, or a luscious drizzle of warm caramel sauce are all classic and fantastic accompaniments that will take your dessert experience over the top.
Expert Tips for Dutch Apple Pie Success & Troubleshooting
Even with the best recipe, a few extra insights can make your baking experience smoother and your final pie even more stellar. Here’s how to master your Dutch Apple Pie:
- Conquering the Soggy Bottom: The bane of many pie bakers! To prevent a soggy bottom crust, ensure your pie dough is very cold before adding the filling. Also, always discard any excess liquid that the spiced apples may release while sitting. Baking the pie on the lowest rack position in your oven can also help by providing more direct heat to the bottom crust, encouraging it to crisp up.
- Perfecting the Streusel Texture: The ideal streusel is delightfully crumbly, not clumpy or paste-like. The key is to use cold butter and avoid overworking the mixture. If your kitchen is particularly warm, consider chilling your prepared streusel for 10-15 minutes before sprinkling it over the apples. This helps maintain the butter’s coolness.
- Knowing When Your Pie is Truly Done: Beyond the golden streusel, the primary indicator of a cooked pie is a visibly bubbling filling. This signals that the apple juices have thickened, and the apples themselves are tender. If the top browns too quickly, tenting with foil is crucial to allow the apples to finish cooking without burning the crust or streusel. Don’t rush the baking process!
- The Importance of Cooling: As tempting as it is to slice a hot pie, patience is rewarded. Proper cooling allows the starches in the apple juices to gel and set, resulting in a firm, sliceable filling that doesn’t ooze out. It also allows the complex flavors to fully develop and meld.
Delicious Variations and Customizations for Your Dutch Apple Pie
While this classic Dutch Apple Pie recipe is perfect on its own, it also serves as a fantastic canvas for your culinary creativity. Feel free to experiment with these delightful variations:
- Nutty Streusel: For an added layer of crunch and flavor, incorporate ½ cup of finely chopped pecans, walnuts, or even sliced almonds into your streusel topping. Toasting the nuts lightly before adding them can enhance their flavor further.
- Elevated Spices: If you love a more complex spice profile, consider adding a tiny pinch of ground cloves, allspice, or a dash of cardamom to both the apple filling and the streusel for a deeper, more aromatic experience.
- Caramel Drizzle Delight: After spooning the apple filling into the crust, drizzle about ¼ cup of high-quality homemade or store-bought caramel sauce over the apples before sprinkling on the streusel. The caramel will melt and mingle with the apple juices for an extra-rich treat.
- Berry Apple Blend: Introduce a seasonal twist by adding ½ cup of fresh or frozen (not thawed) cranberries, raspberries, or blackberries to the apple filling mixture. This adds a burst of tartness and beautiful color.
- Boozy Apples: For an adult twist, add a tablespoon of good quality bourbon, dark rum, or apple brandy to the apple filling. The alcohol evaporates during baking, leaving behind a subtle, sophisticated depth of flavor.
Storage and Reheating Instructions for Your Dutch Apple Pie
Ensuring your delicious Dutch Apple Pie stays fresh and ready to enjoy is simple with these storage and reheating tips.
- Room Temperature Storage: Once your Dutch Apple Pie has cooled completely to room temperature, you can store it loosely covered with plastic wrap or aluminum foil on your kitchen counter for up to 2 days.
- Refrigerator Storage: For extended freshness, transfer the cooled pie to an airtight container or cover it tightly with plastic wrap and aluminum foil. It will keep well in the refrigerator for up to 5 days. Chilling also helps the filling set even more firmly.
- Freezing for Later Enjoyment: You can absolutely freeze a baked Dutch Apple Pie! Once it’s completely cooled, wrap the entire pie (or individual slices) tightly first in plastic wrap, then in heavy-duty aluminum foil. Label and date it. It can be stored in the freezer for up to 3 months. When ready to enjoy, thaw overnight in the refrigerator before reheating.
- Reheating for Warm Indulgence: To enjoy a warm slice reminiscent of freshly baked pie, reheat individual portions. Place a slice on a microwave-safe plate and microwave for 20-30 seconds, or until just warmed through. For a crispier streusel topping, place slices in a preheated oven at 300°F (150°C) for 10-15 minutes, or until warmed to your liking.
Frequently Asked Questions About Dutch Apple Pie
- What is the main difference between Dutch Apple Pie and traditional American Apple Pie?
- The primary distinguishing feature of Dutch Apple Pie is its topping. While traditional American apple pie typically features a full top crust (often decorative with a lattice pattern), Dutch Apple Pie is defined by its signature sweet, buttery, and crumbly streusel topping, which usually consists of flour, sugar, butter, and often spices like cinnamon and nutmeg. This streusel provides a delightful textural contrast to the soft apple filling below.
- Can I use only one type of apple in this recipe?
- While you technically could, using a combination of sweet and tart apples (like Granny Smith and Golden Delicious) is highly recommended for the best flavor and texture. This blend offers a more complex taste profile and ensures that the filling has varying degrees of firmness, preventing it from becoming a uniform mush. If you must use only one, opt for a firm, flavorful variety such as Honeycrisp, Braeburn, or Fuji, and adjust sugar levels if needed.
- How can I prevent my pie crust from becoming soggy?
- Preventing a soggy bottom is a common concern. Key strategies include ensuring your pie crust is very cold before adding the filling, discarding any excess liquid that accumulates from the apple mixture (as noted in Step Four), and baking your pie on the bottom third of the oven rack to maximize direct heat to the base. Some bakers also pre-bake (blind bake) their crust, or brush the bottom with a thin layer of egg white or melted butter before filling for extra moisture protection.
- Is it possible to prepare Dutch Apple Pie ahead of time?
- Yes, absolutely! You can prepare the apple filling and the streusel topping up to a day in advance and store them separately in airtight containers in the refrigerator. For the best fresh-baked experience, assemble and bake the pie just before you plan to serve it. A fully baked pie can also be stored for a couple of days at room temperature or up to five days in the refrigerator, with reheating instructions provided above.
- What are the best apple varieties for a truly outstanding Dutch Apple Pie?
- For an ideal balance of flavor and texture, a mix of apples is paramount. We recommend combining tart and firm apples like Granny Smith with sweeter, softer varieties such as Golden Delicious, Honeycrisp, Fuji, or Gala. Granny Smith provides the necessary tang and structure, while the sweeter apples contribute depth and tenderness, ensuring a filling that’s both flavorful and texturally appealing.
Explore More Comforting Seasonal Apple Recipes
If the warm, spiced flavors of this Dutch Apple Pie have captured your heart, you’ll love exploring other delightful ways to enjoy apples. These recipes are perfect for any occasion and celebrate the versatility of this beloved fruit:
- Classic Baked Apples
- Old-Fashioned Apple Crisp
- Fragrant Apple Cinnamon Bread
- Wholesome Applesauce Muffins
- Quick & Easy Instant Pot Applesauce
- Rich Instant Pot Apple Butter
- Savory Pork Chops with Caramelized Apples
Dutch Apple Pie Recipe
By: Kristen Chidsey
Servings: 10
Prep Time: 30 minutes
Cook Time: 1 hour
Chill Time: 30 minutes
Total Time: 2 hours
Average Rating: 5 out of 5 stars (from 12 votes)
Pin Recipe |
Rate Recipe |
Print Recipe
Made with a flaky pie crust, a perfectly sweet and tart apple pie filling, and a rich, buttery streusel, this Dutch Apple Pie recipe delivers everything you crave in a classic apple dessert.
Recipe Video
Watch this video for a visual guide to making your Dutch Apple Pie:
(Note: The video content is a placeholder. Please replace with your actual recipe video embed.)
Ingredients
For the Crust
- 1 (9-inch) deep-dish pie crust, frozen or chilled
For the Apple Filling
- 4 cups golden delicious apples, peeled, cored, and sliced into ¼-inch thick slices (approximately 4 small apples)
- 4 cups Granny Smith apples, peeled, cored, and sliced into ¼-inch thick slices (approximately 4 small apples)
- 1 tablespoon fresh lemon juice
- ½ cup granulated sugar
- ¼ cup all-purpose flour
- ½ teaspoon ground cinnamon
- ⅛ teaspoon freshly grated nutmeg
- ⅛ teaspoon table salt
For the Crumb Topping
- ½ cup light brown sugar
- ¾ cup all-purpose flour
- ¼ teaspoon ground cinnamon
- ¼ teaspoon freshly grated nutmeg
- ½ cup unsalted butter, cold and cubed
Units: US Customary (Click here for Metric conversion – (Note: Link for metric conversion is a placeholder))
Instructions
- Preheat your oven to 375℉ (190℃). Position an oven rack in the bottom third of the oven.
- In a large mixing bowl, combine the sliced apples with 1 tablespoon lemon juice, ½ cup granulated sugar, ¼ cup all-purpose flour, ½ teaspoon ground cinnamon, ⅛ teaspoon freshly grated nutmeg, and ⅛ teaspoon table salt. Toss gently until the flour, spices, and sugar evenly coat the apple slices. Set this mixture aside while you prepare the crumb topping.
- In a separate medium bowl, combine ½ cup light brown sugar, ¾ cup all-purpose flour, ¼ teaspoon ground cinnamon, and ¼ teaspoon freshly grated nutmeg. Stir until thoroughly mixed. Add ½ cup of cold, cubed unsalted butter to the mixture. Using your fingers, work the butter into the dry ingredients until coarse crumbs form and the butter is well distributed, resembling pea-sized pieces.
- Spoon the apple mixture into your chilled pie crust. Be sure to leave behind any excess liquid that may have accumulated at the bottom of the apple bowl; adding this liquid could lead to a soggy crust. Evenly sprinkle the prepared crumb topping over the entire surface of the apple mixture.
- Place the assembled pie onto a rimmed baking sheet. This tray will catch any liquid that might bubble over during baking. Bake for 50 to 60 minutes, or until the apple filling is visibly bubbling and the crumb topping is beautifully golden brown. After approximately 35-40 minutes of baking, check the pie. If the streusel topping or the edges of the crust are browning too quickly, loosely cover the pie with aluminum foil and continue baking for another 10-15 minutes, or until the apples are fork-tender.
- Once baked, remove the pie from the oven and allow it to cool completely on a wire rack to room temperature before slicing and serving. This crucial cooling time allows the filling to set properly, ensuring clean, beautiful slices.
Equipment
- 9-inch Deep-Dish Pie Pan
Notes
- Frozen Pie Crust: If using a frozen 9-inch deep pie crust, allow it to thaw in the refrigerator for 15 minutes before proceeding with the recipe steps.
- Pie Plate Size: This recipe is specifically designed for a deep-dish 9-inch pie dish, which provides ample space for both the generous apple filling and the streusel topping.
- Apple Variety: The recipe calls for a total of 8 cups of apples, ideally a balanced mix of 4 cups Granny Smith and 4 cups Golden Delicious for best results.
- Storage: Fully cooled Dutch Apple Pie can be stored in an airtight container for 2 days at room temperature or up to 5 days in the refrigerator. For freezing instructions, refer to the detailed “Storage and Reheating Instructions” section above.
Nutrition Information
(Per serving, approximate)
- Calories: 338 kcal
- Carbohydrates: 53 g
- Protein: 3 g
- Fat: 14 g
- Saturated Fat: 7 g
- Polyunsaturated Fat: 1 g
- Monounsaturated Fat: 4 g
- Trans Fat: 1 g
- Cholesterol: 24 mg
- Sodium: 184 mg
- Potassium: 157 mg
- Fiber: 3 g
- Sugar: 31 g
- Vitamin A: 338 IU
- Vitamin C: 5 mg
- Calcium: 25 mg
- Iron: 1 mg
Nutrition information is an automatic calculation and should only be used as an approximation. Actual values may vary.
Did you make this delightful Dutch Apple Pie?
If you enjoyed preparing and savoring this recipe, please take a moment to leave a comment and a 5-star review at the bottom of this post. Your feedback is incredibly valuable to us and other home bakers!
We love seeing your creations! Share your beautiful Dutch Apple Pie photos on Instagram and mention @amindfullmom or tag #amindfullmom!