
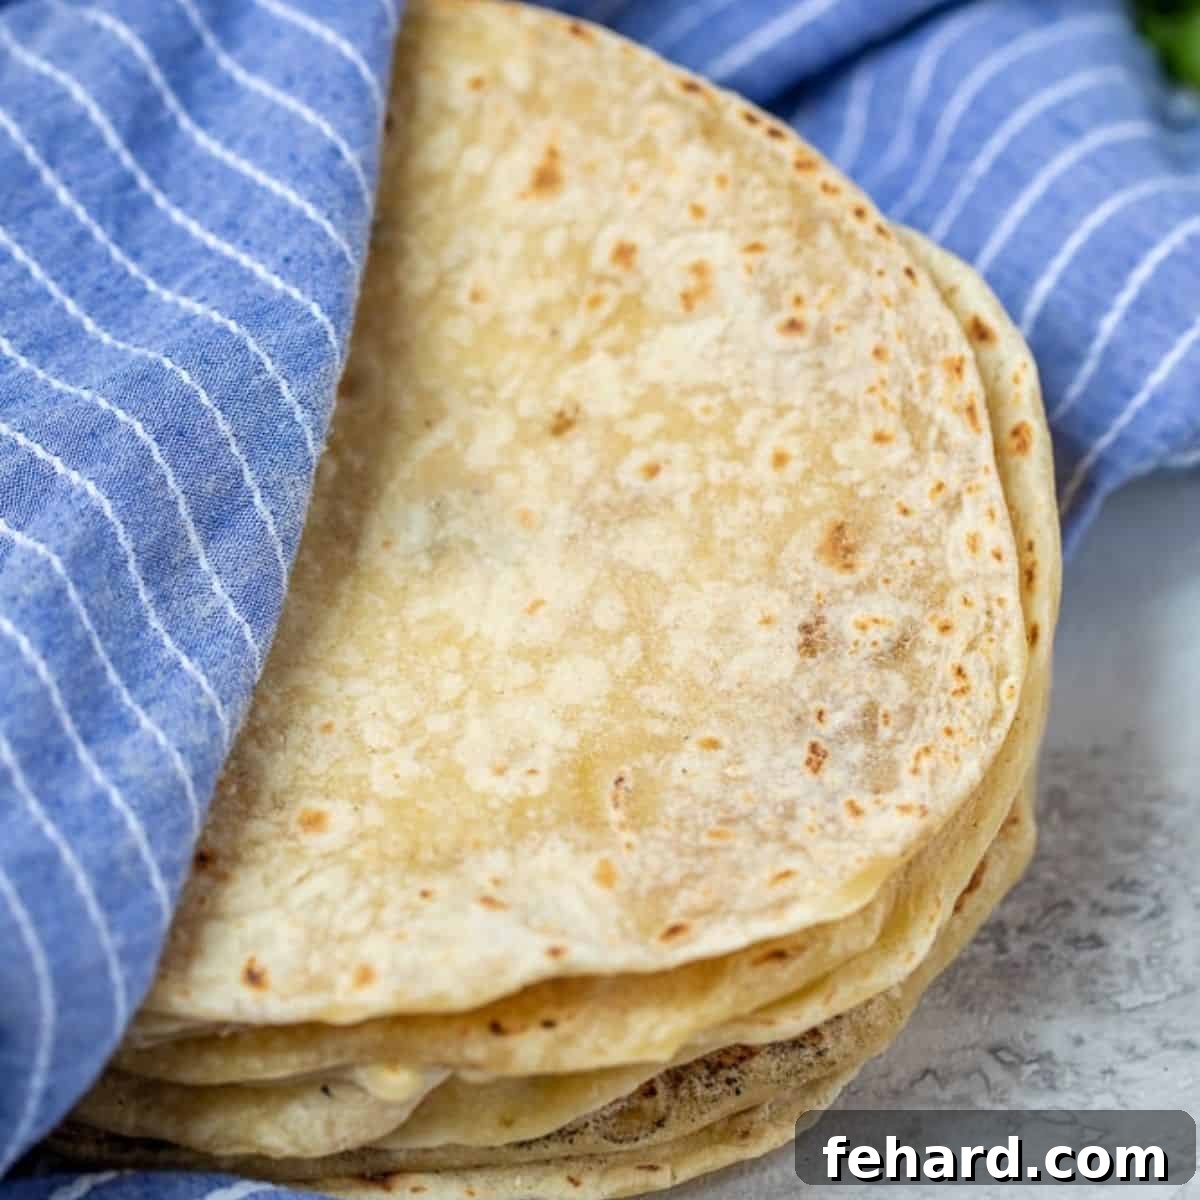
Unlock the secret to incredibly soft, tender, and flavorful flour tortillas right in your own kitchen! With just four simple ingredients, you can easily create these homemade delights that are perfect for everything from vibrant tacos and hearty burritos to fresh wraps and savory enchiladas. Say goodbye to store-bought and hello to the unparalleled taste and texture of freshly made tortillas!
There’s an undeniable magic in swapping out commercially produced tortillas for their homemade counterparts. The difference in taste and texture is profound, elevating everyday meals like beef tacos, bean burritos, and chicken enchilada casserole to a whole new level of deliciousness. Once you experience the warmth and pliability of a tortilla made from scratch, you’ll wonder why you ever settled for anything less.
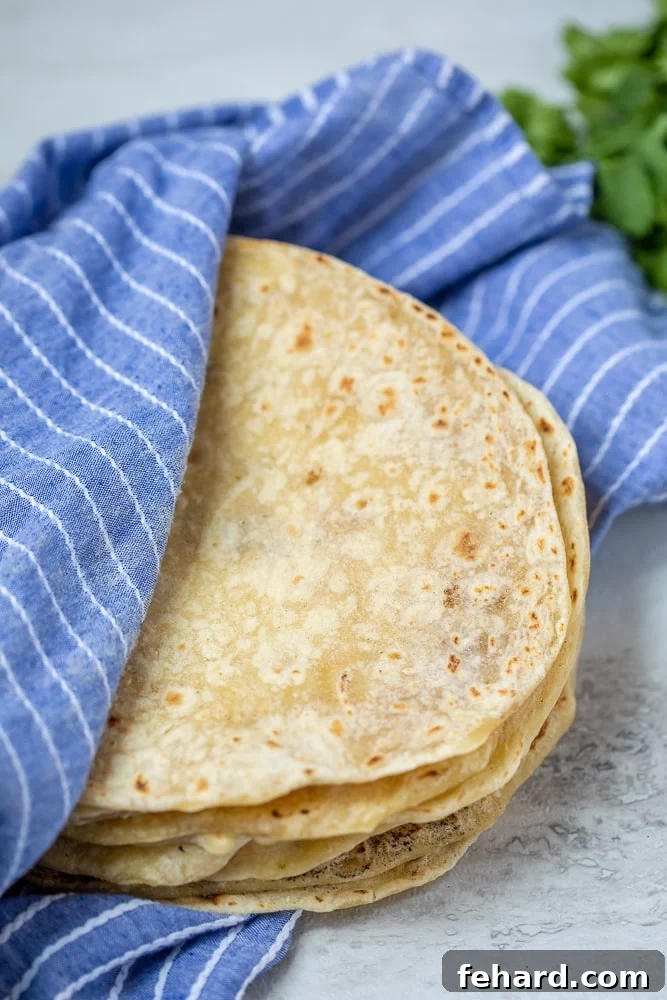
Flour tortillas are a cornerstone of Tex-Mex cuisine, forming the essential base for beloved dishes such as Shredded Chicken Tacos and Vegetarian Fajitas. Beyond traditional Mexican and Tex-Mex fare, their versatility extends to everyday meals, making them ideal for creating delightful sandwich wraps like an Avocado Tuna Wrap or a wholesome Veggie Wrap. While countless varieties of flour tortillas fill supermarket shelves, embarking on the journey of making them at home is truly the best approach. This recipe not only promises tortillas with superior flavor and an exquisitely soft texture but also utilizes simple, wholesome ingredients you can trust.
Why You Will Love Making Your Own Homemade Tortillas
Embracing the art of homemade flour tortillas brings a wealth of benefits that far outweigh the minimal effort required. Here’s why these fresh, tender discs will quickly become a staple in your kitchen:
- Better For You: Unlike many store-bought options that often contain hydrogenated oils, lard, and various preservatives, these homemade flour tortillas are crafted with simple, natural ingredients. You can feel good about serving a healthier, more transparent product to your family, free from artificial additives.
- Unbeatable Flavor: Nothing quite compares to the pure, fresh taste of a tortilla made from scratch. The nuanced flavors of flour, salt, oil, and water combine to create a taste profile that is miles apart from pre-packaged alternatives. Each bite offers a clean, authentic flavor that enhances any dish it accompanies.
- Perfect Texture Every Time: This carefully developed recipe consistently yields tortillas that are wonderfully soft and tender, with just the right amount of chew and often a few delightfully crisp, browned edges from the skillet. This ideal balance makes them pliable enough to wrap without tearing, yet sturdy enough to hold your favorite fillings.
- Surprisingly Easy to Make: Many home cooks are intimidated by the idea of making dough, but flour tortillas are remarkably forgiving and straightforward. This particular dough requires no lengthy proofing periods or extensive kneading, unlike many bread recipes. It comes together quickly and easily, making it an accessible project even for novice bakers. The simplicity of the process will genuinely surprise you!
Essential Ingredients for Your Flour Tortillas
Crafting delicious homemade flour tortillas requires only four basic ingredients, which you likely already have stocked in your pantry and kitchen. The quality of these simple components plays a significant role in the final outcome, so choosing wisely is key.
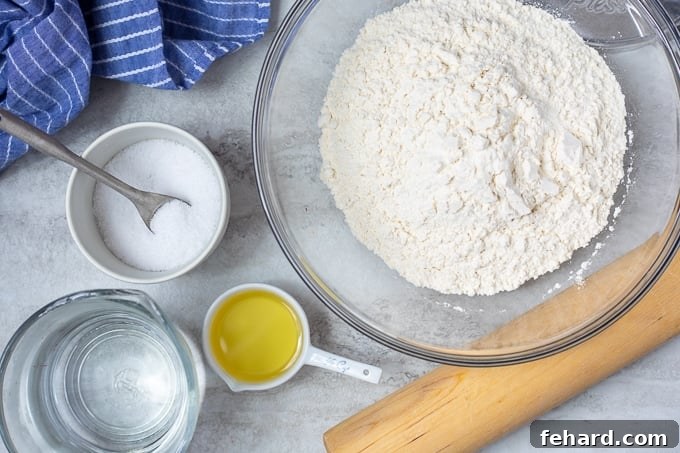
- Flour: For the best results in terms of texture and lightness, I highly recommend using either whole white wheat flour or unbleached all-purpose flour. Whole white wheat flour is a fantastic choice if you’re aiming for a 100% whole grain option, as it boasts a lighter flavor and produces a softer tortilla compared to traditional whole wheat flour (which is made from red wheat berries). If you opt for flour labeled simply “whole wheat flour,” consider blending it with an equal amount of all-purpose flour. This balance will help maintain the tortillas’ light, soft consistency and prevent the stronger, nutty flavor of red wheat from becoming overpowering.
- Oil: Canola oil is my top recommendation for achieving the ideal texture and taste in these tortillas. Its neutral flavor allows the subtle notes of the flour to shine through, while its consistency contributes to the dough’s pliability. However, if canola oil isn’t readily available, vegetable oil or even a light olive oil can serve as suitable substitutes in a pinch.
- Water: The temperature of your water is crucial for successful dough formation. You want the water to be comfortably warm to the touch – not cold, which can make the dough stiff, and certainly not boiling, which can cook the flour. Warm water helps the gluten relax and the dough come together more quickly and smoothly, resulting in a more workable and elastic consistency.
- Salt: Kosher salt is preferred for its clean taste and coarser crystals, which distribute well throughout the dough. If kosher salt isn’t on hand, standard table salt will work perfectly fine in this tortilla recipe. Just ensure it’s evenly incorporated to enhance the overall flavor.
No Baking Powder? While many recipes suggest adding baking powder for lighter, fluffier tortillas, extensive testing has shown a negligible difference in the final product. Therefore, I find it unnecessary to include it, simplifying the recipe even further without compromising quality.
Step-by-Step Guide: Crafting Your Own Flour Tortillas
Making homemade flour tortillas is a straightforward and rewarding process. Follow these simple steps to create soft, delicious tortillas from scratch:
- Combine Dry Ingredients: In a large mixing bowl, begin by thoroughly whisking together the flour and salt. Ensure the salt is evenly distributed throughout the flour, which helps in seasoning the tortillas uniformly.
- Add Wet Ingredients: Create a shallow well in the center of the flour mixture. Pour the warm water and oil directly into this well. This method helps to gradually incorporate the liquids into the dry ingredients.
- Form the Dough: Using a sturdy wooden spoon or your hands, gently combine the ingredients. It won’t take long for the mixture to come together and form a cohesive dough. Continue mixing until no dry pockets of flour remain.
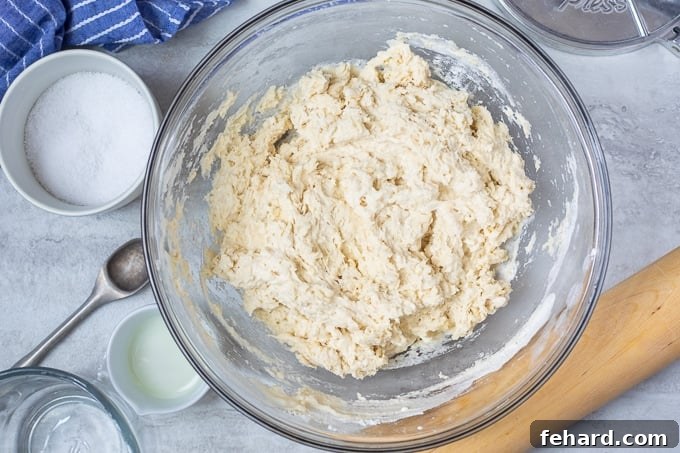
- Light Kneading and Resting: Turn the freshly formed dough out onto a lightly floured surface. Knead the dough just until it forms a smooth, elastic ball. This typically takes only about one to two minutes; over-kneading is not necessary. Once the dough ball is smooth, cover it with a clean kitchen towel or plastic wrap. Allow it to rest for at least 15 minutes. This resting period is crucial as it allows the gluten to relax, making the dough much easier to roll out.
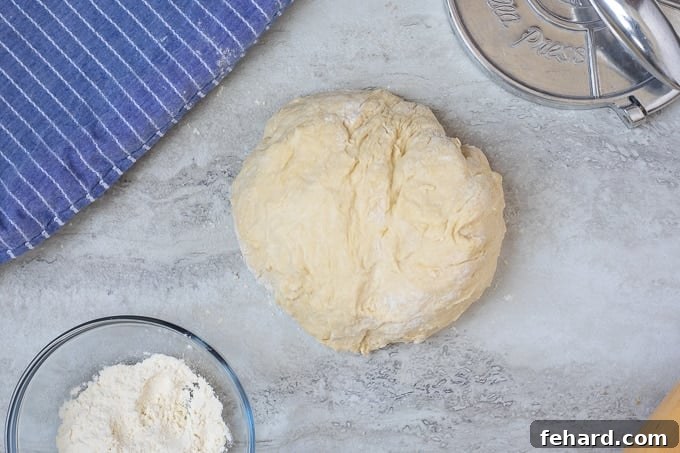
- Divide the Dough: After the dough has rested, divide it into even balls. The number of balls will determine the size of your finished tortillas:
- For 6-inch tortillas, this recipe will yield approximately 12 tortillas.
- For 9-inch tortillas, this recipe will yield approximately 8 tortillas.
- Keep Dough Moist: Once the dough is shaped into individual balls, it’s important to keep them covered with a clean kitchen towel, a slightly damp paper towel, or plastic wrap. This prevents the dough from drying out and ensures it remains soft and pliable as you work through rolling out each tortilla one by one.
- Roll Out Tortillas: On a lightly floured surface or a piece of parchment paper, gently flatten each dough ball with your hand before rolling. Then, use a rolling pin to roll each ball into a 6-inch or 9-inch circle, working from the center outwards to achieve an even thickness. Don’t worry about perfect circles; deliciousness is the goal! Alternatively, for perfectly round and consistently thin tortillas, a tortilla press can be used.
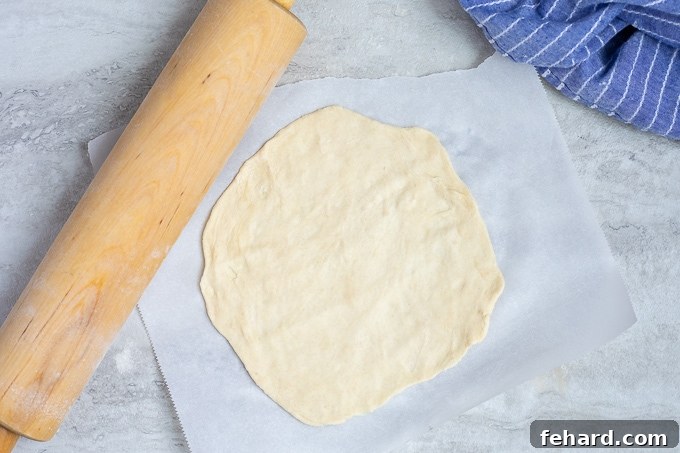
- Preheat Your Pan: Place a heavy-duty skillet, a reliable nonstick griddle, or a cast-iron pan over medium-high heat. Allow it to preheat thoroughly until hot.
- Cook the Tortillas: Before placing a tortilla on the hot pan, gently dust or brush off any excess flour from its surface. This prevents the flour from burning in the pan and affecting the taste. Carefully place the tortilla onto the heated pan. Cook for approximately 60 seconds, or until small bubbles begin to form across the surface of the dough. Flip the tortilla and cook for an additional 30 seconds, or until appealing golden brown spots appear on both sides.
- Keep Warm: As each tortilla finishes cooking, immediately remove it from the skillet and transfer it to a tortilla warmer or wrap it snugly in a clean kitchen towel. This step is vital to ensure the tortillas stay warm, soft, and pliable while you continue shaping and cooking the remaining dough balls.
- Repeat the Process: Continue this rolling and cooking cycle until you have transformed all of your dough balls into fresh tortillas. For efficiency, many find it helpful to roll out the next tortilla while one is currently cooking in the pan.
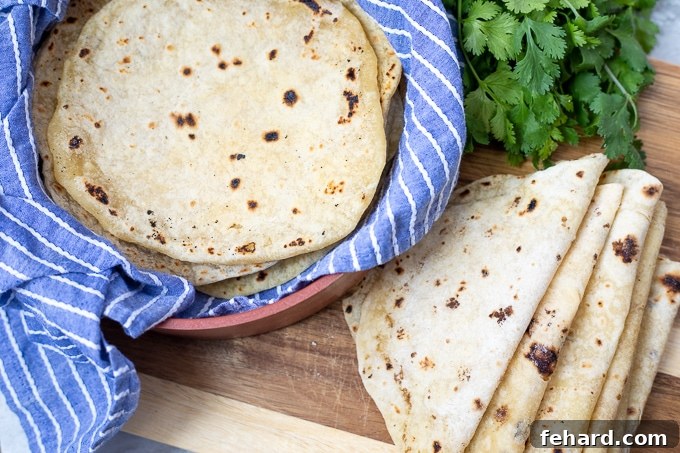
∗ Important Tips for Achieving Perfect Homemade Tortillas ∗
While the process of making flour tortillas is quite simple, a few key tips can make all the difference in ensuring a successful and delicious outcome every time.
- Always Use Warm Water: The temperature of your water truly matters. It should be warm to the touch, but not boiling hot. Warm water aids in hydrating the flour more effectively and helps the dough come together much faster, resulting in a smooth and easy-to-work-with consistency.
- Roll Out Each Tortilla Evenly: Don’t stress about achieving a perfectly round circle – your tortillas will still be incredibly delicious regardless of their shape! However, it is crucial to ensure that you roll out each tortilla to an even thickness from the center to the outer edges. If the edges remain thicker than the center, your tortillas will not cook uniformly, leading to some parts being undercooked or tough.
- Remove Excess Flour: Before placing your raw tortilla onto the hot pan, make sure to gently dust or brush off any excess flour. This simple step is vital to prevent the flour from burning in your skillet, which can create bitter flavors and leave dark, charred residue on your pan. I find it’s also beneficial to wipe out my skillet with a dry cloth after cooking every two to three tortillas to remove any accumulated flour.
- Keep Cooked Tortillas Warm and Soft: As soon as a tortilla is cooked, it’s important to transfer it to a tortilla warmer or wrap it snugly in a clean kitchen towel. This helps trap the steam and moisture, keeping your tortillas wonderfully soft and pliable while you finish cooking the rest of the batch. Without this step, they can quickly dry out and become stiff.
- Monitor Your Heat Closely: The ideal cooking temperature is key for those desirable golden-brown spots. If you notice your tortillas aren’t developing any golden spots on their surface, it’s an indication that your pan isn’t hot enough, so increase the heat slightly. Conversely, if the spots are turning black too quickly, the heat is too high, and you should reduce it. Adjust as needed for consistent results.
Storing Fresh Homemade Flour Tortillas
For the ultimate experience, I highly recommend enjoying your homemade tortillas fresh off the skillet. However, these versatile discs can also be prepared in advance and stored for several days, or even frozen for convenient future use.
- To Store Cooked Tortillas: Once your tortillas have cooled completely to room temperature, transfer them to an airtight container or a resealable plastic bag. They can be stored at room temperature for up to 24 hours. For longer freshness, refrigerate them for up to 5 days. To reheat, simply place one or two tortillas on a heat-safe plate, cover them with a slightly damp paper towel, and microwave for 10-20 seconds until they are warm and soft again. You can also quickly warm them in a dry skillet over medium heat for a few seconds per side.
- To Freeze Cooked Tortillas: Prepare the tortillas as directed and allow them to cool completely. To prevent them from sticking together, layer individual tortillas between sheets of parchment paper or wax paper. Then, place the stacked tortillas into a freezer-safe bag, ensuring to remove as much air as possible before sealing. Store them in the freezer for up to 3 months. When ready to use, remove the desired number of frozen tortillas from the bag. You can either defrost them overnight in the refrigerator or warm them individually directly from frozen in the microwave (with a damp paper towel) or in a dry skillet over medium heat until pliable.
Creative Ways to Serve Your Homemade Flour Tortillas
The beauty of homemade flour tortillas lies in their incredible versatility. You can use them in virtually any application where you would typically reach for store-bought tortillas. From foundational Tex-Mex dishes to creative new culinary explorations, the possibilities are truly endless. Here are a few favorite recipes and ideas to inspire your next meal:
- Classic Tacos: Fill with seasoned ground beef, shredded chicken, or savory beans for a quick and satisfying meal.
- Hearty Burritos: Load up with rice, beans, cheese, and your favorite protein for a fulfilling handheld feast.
- Crispy Quesadillas: Melt cheese and other fillings between two tortillas for a delightfully gooey and crispy treat.
- Savory Enchiladas: Roll up your favorite fillings and smother them in sauce for a comforting baked dish.
- Vegetarian Enchiladas
- Easy Chicken Enchiladas
- Salsa Verde Enchiladas
- Flavorful Fajitas: Serve alongside sizzling chicken, beef, or vegetables.
- Honey Lime Chicken Fajitas
- Instant Pot Chicken Fajitas
- Lunch Wraps: Perfect for everyday sandwiches, from deli meats to fresh veggie combinations.
- Unique Casseroles: Incorporate them into layered bakes for a Tex-Mex twist.
- Mexican Lasagna
- Quick Snacks: Cut into wedges, bake or fry until crispy, and serve with salsa or guacamole.
- Breakfast Burritos: A great way to start the day with eggs, cheese, and your favorite breakfast fillings.
Frequently Asked Questions About Homemade Tortillas
- Can I use a stand mixer to make the dough?
- Absolutely! While the recipe is easy enough for hand mixing, a stand mixer with a dough hook attachment can certainly be used. Mix on low speed until the ingredients are well combined and a cohesive dough forms, usually just a couple of minutes. Be careful not to overmix.
- What if my dough is too sticky or too dry?
- Dough consistency can vary slightly depending on factors like flour type and humidity. If your dough is too sticky, add a tablespoon of flour at a time until it’s workable but still soft. If it’s too dry and crumbly, add a teaspoon of warm water at a time until it comes together. The ideal dough should be soft, pliable, and only slightly tacky.
- Do I need a tortilla press?
- No, a rolling pin works perfectly fine! A tortilla press offers convenience and helps create perfectly round, uniformly thin tortillas with less effort, but it’s not essential. If using a rolling pin, focus on rolling from the center outwards and rotating the dough frequently to achieve an even thickness.
- Why are my tortillas stiff or hard?
- Stiff tortillas can often be attributed to a few factors:
- Overcooking: Cooking tortillas for too long can dry them out and make them tough. Stick to the suggested cooking times (60 seconds per side, then 30 seconds after flipping) and watch for bubbles and golden spots.
- Not enough oil: Oil contributes to the pliability of the dough. Ensure you’re using the correct amount.
- Dough too dry: If the initial dough was too dry, the tortillas might not achieve the desired softness. Refer to the tip about adjusting dough consistency.
- Not kept warm: Allowing cooked tortillas to cool uncovered will make them stiff. Always place them in a tortilla warmer or wrap them in a towel immediately after cooking.
- Can I make this recipe gluten-free?
- Yes, you can often substitute a 1:1 gluten-free all-purpose flour blend for the regular flour. Keep in mind that gluten-free dough might behave a bit differently and may require slight adjustments to the water content. The texture might also be slightly different, but you can still achieve delicious results.
- How thin should I roll the tortillas?
- Aim for them to be as thin as possible without tearing, typically about 1/16 to 1/8 inch thick. The thinner they are, the softer and more pliable they will be once cooked. Practice makes perfect when it comes to rolling!
So, if you are truly searching for the BEST-tasting flour tortillas, the journey into making them at home is undoubtedly the way to go! I wholeheartedly encourage you to give this simple yet transformative recipe a try. Please share your experiences and how it went in the comments below – I’d love to hear from you.
Flour Tortillas
Rate
Made with just 4 ingredients, these homemade flour tortillas are soft, tender, and so much tastier than store-bought.
Video
A video tutorial for making these flour tortillas would be displayed here.
Ingredients
- 3 cups all-purpose flour, plus more for rolling
- 1 teaspoon kosher salt
- 3 tablespoons canola oil
- 1 cup warm water
Instructions
-
Whisk together 3 cups all-purpose flour with 1 teaspoon kosher salt until the salt is well distributed throughout the flour.
-
Make a well in the flour and add 3 tablespoons canola oil and 1 cup warm water. Using your hands or a wooden spoon mix until incorporated.
-
Turn the mixture out onto a lightly floured surface and knead several times to form the dough into a smooth ball. If your dough is sticking to your hands, add more flour, 1 tablespoon at a time. Cover the dough with a clean towel and let rest for 15 minutes, or up to 2 hours.
-
Once rested, divide the dough into even balls. For 6-inch tortillas, form 12 dough balls. For 9-inch tortillas, form 8 dough balls. Cover the dough balls with a kitchen towel, damp paper towel, or plastic wrap so that the dough stays soft and moist while you work to roll out the tortillas one at a time.
-
Preheat a heavy-duty skillet, cast-iron skillet, or griddle over medium-high heat.
-
Flatten each dough ball into a circle shape, using your hands. Then on a lightly floured surface, roll the tortillas into a 6-inch or 9-inch circle, working from the center to the outer edge using a rolling pin. Alternatively, use a tortilla press to evenly press the tortillas. Do not stress about forming a perfect circle, but do be sure you roll out each tortilla evenly. If the edges are thicker than the center, the tortillas will not cook evenly.
-
Gently dust or brush off excess flour on the tortilla using a pastry brush and then add the tortilla to the heated pan. Cook for 60 seconds or until little bubbles form in the dough and flip and cook for an additional 30 seconds. If you find your tortillas are not forming golden spots, increase the heat. If the spots are turning black, decrease the heat.
-
Remove the tortillas from the skillet and place the tortilla in a tortilla warmer or wrapped in a kitchen towel to keep warm and soft.
-
Repeat the process with each dough ball. I find it is best to wipe out my skillet after cooking 2-3 tortillas to remove any accumulated flour in the pan.
-
Serve as desired.
Notes
Flour: Feel free to use whole white wheat flour in place of the all-purpose flour to keep these tortillas 100% whole grain. If needed a 1:1 gluten-free all-purpose flour works.
Oil: Vegetable oil or olive oil can be used in place of the canola oil.
Tip for Rolling: If you would like to roll out all your tortillas before cooking, stack rolled tortillas in between parchment or wax paper until ready to cook. Cook immediately.
Storage:
- To Store Prepared Tortillas: Once cooled completely, transfer to an airtight container or bag and store at room temperature for 24 hours or in the refrigerator for up to 5 days. To reheat the tortillas, place one or two tortillas on a heat-safe plate, cover with a slightly damp paper towel, and microwave for 10-20 seconds.
- To Freeze Prepared Tortillas: Prepare the tortillas as directed and allow them to cool completely. Layer tortillas between sheets of parchment or wax paper and then place them in a freezer-safe bag. Remove the air, seal the bag, and store them in the freezer for up to 3 months. Remove as many frozen tortillas from the bag as desired and either defrost in the fridge overnight or warm individually in the microwave or dry skillet.
Nutrition
Calories: 145kcal | Carbohydrates: 24g | Protein: 3g | Fat: 4g | Saturated Fat: 1g | Sodium: 194mg | Potassium: 33mg | Fiber: 1g | Sugar: 1g | Calcium: 5mg | Iron: 1mg
Nutrition information is automatically calculated, so should only be used as an approximation.
Tried this recipe? Mention @amindfullmom or tag #amindfullmom!