
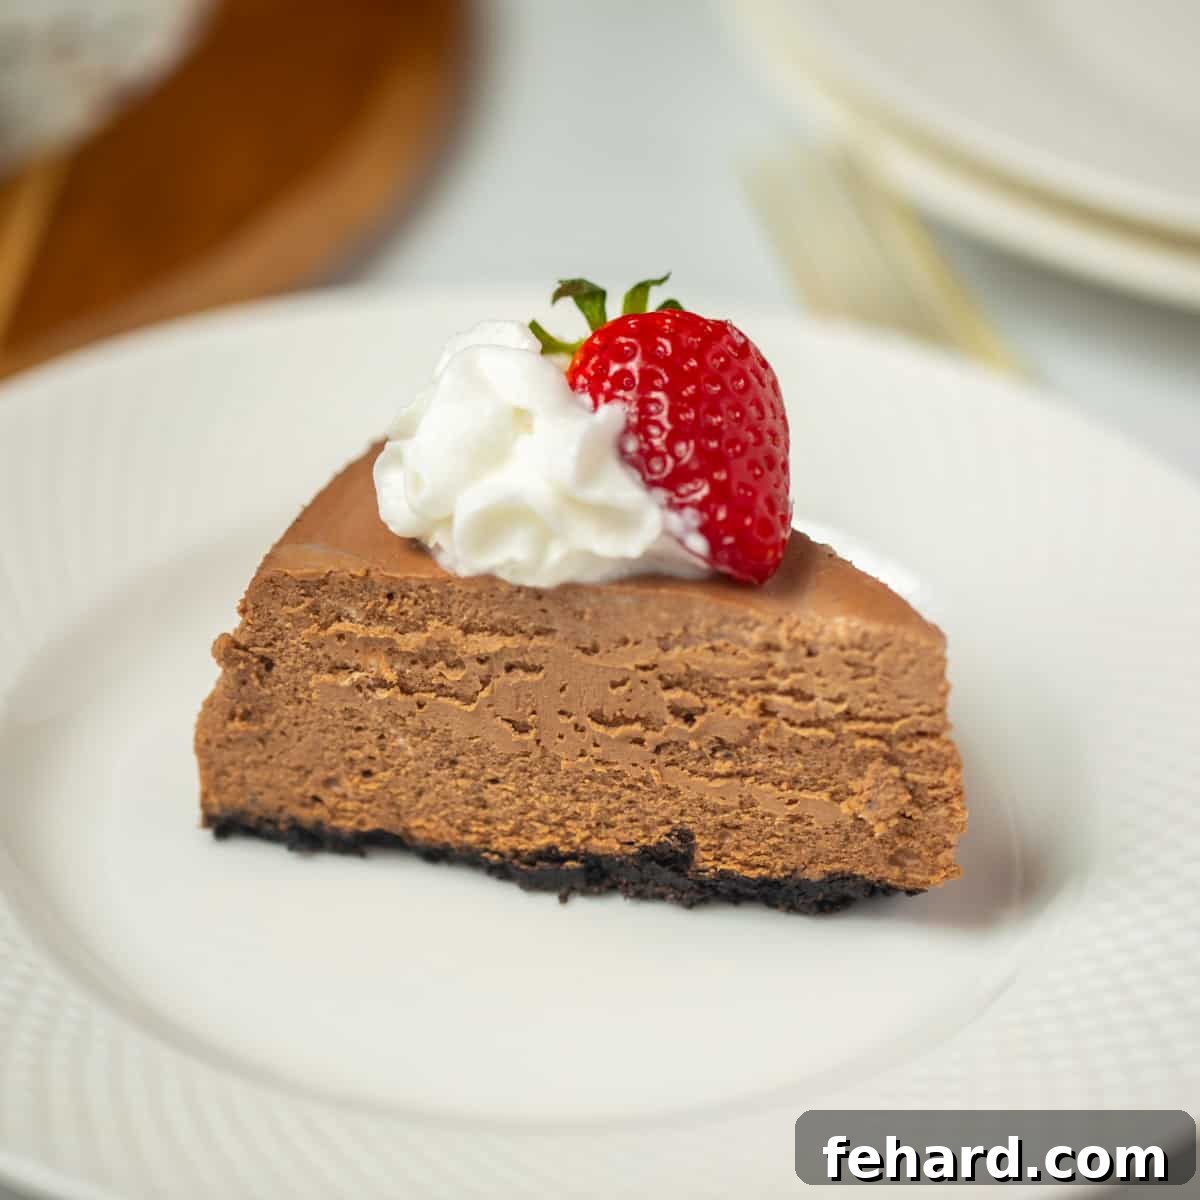
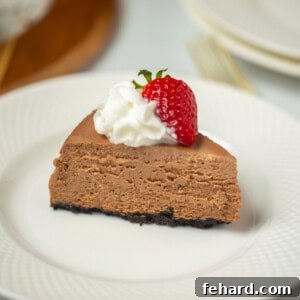
Unlock the secret to an irresistibly rich, luxuriously creamy, and perfectly smooth chocolate cheesecake, effortlessly made in your Instant Pot. This Instant Pot Chocolate Cheesecake, complete with a delightful Oreo Cookie Crust, is not just a dessert—it’s an experience. Prepare to impress with an outrageously delicious recipe that redefines homemade indulgence.
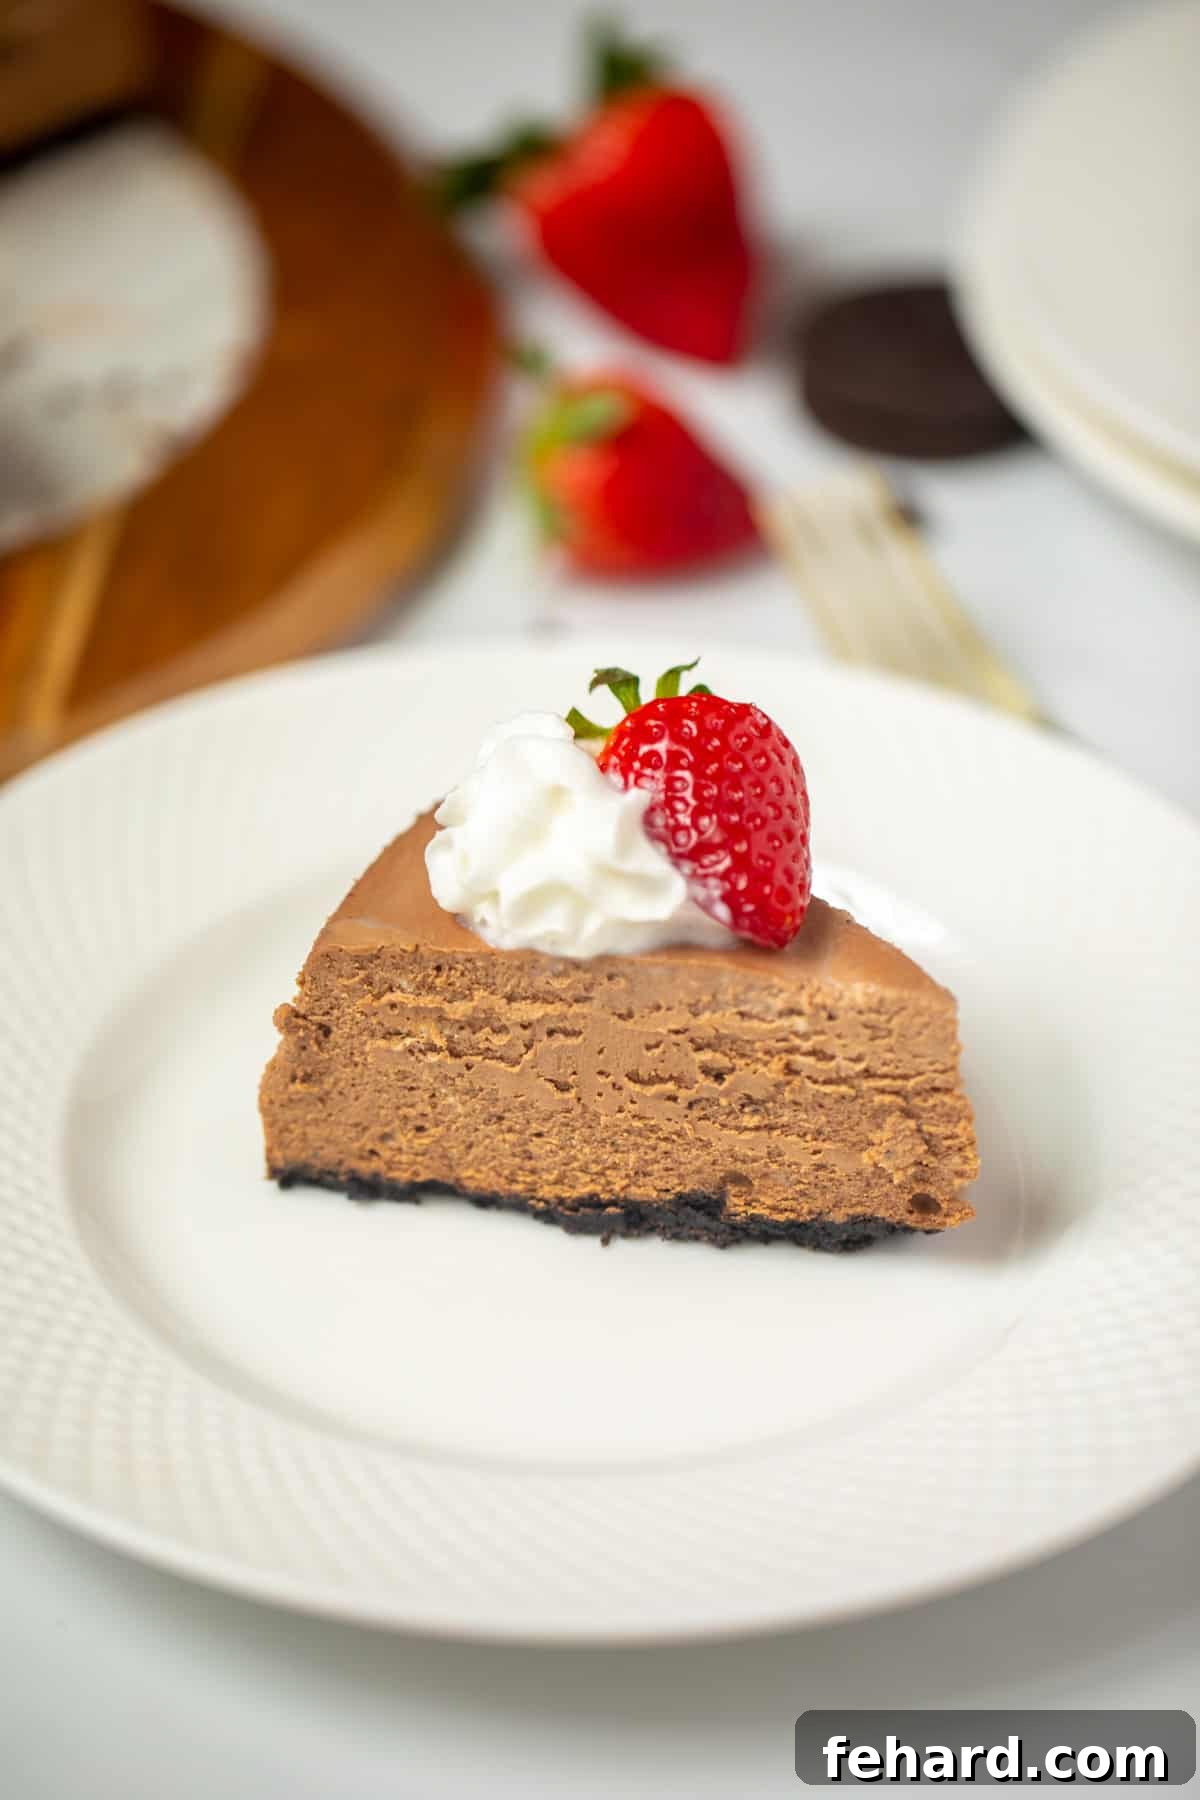
While my heart holds a special place for classic Instant Pot Cheesecake, the comforting spices of Instant Pot Pumpkin Cheesecake, and the unique charm of Instant Pot Carrot Cake Cheesecake, this Chocolate Cheesecake has truly stolen the spotlight. Its deep chocolate flavor and silken texture are simply unparalleled.
From the satisfying crunch of its chocolate cookie crust to the meltingly rich, creamy chocolate filling, every bite of this cheesecake is pure perfection. Much like my beloved recipes for Instant Pot Lava Cakes and Dark Chocolate Panna Cotta, this dessert is an absolute dream come true for any chocolate enthusiast.
Why This is The Best Instant Pot Chocolate Cheesecake Recipe
My recipe for Instant Pot Chocolate Cheesecake consistently receives rave reviews, and for several compelling reasons:
- Made with Authentic, Melted Chocolate (Enhanced by Coffee): Forget cocoa powder! For a truly decadent chocolate cheesecake, we use real chocolate, carefully melted with a touch of coffee. Don’t be deterred by the coffee; much like in my homemade brownie recipe, coffee acts as a secret ingredient, subtly deepening and enhancing the chocolate’s natural richness without imparting a strong coffee flavor. It’s a flavor amplifier, not a primary taste.
- Infused with Tangy Sour Cream for Unbeatable Creaminess: The inclusion of sour cream is a game-changer. It introduces a subtle tang that masterfully balances the sweetness and intense chocolate notes of the cheesecake, preventing it from being overly rich. Moreover, sour cream is essential for achieving that ultra-smooth, unbelievably creamy texture we all crave in a perfect cheesecake.
- Perfectly Cooked in the Instant Pot for Flawless Texture: The Instant Pot is an ideal environment for cooking cheesecakes. Traditional cheesecakes often require a water bath in the oven to ensure even cooking and prevent cracks by providing moist heat. An electric pressure cooker naturally mimics these conditions, but in a much more controlled and consistent manner. This results in a cheesecake with the most wonderfully creamy, perfectly consistent texture, and significantly reduces the risk of unsightly cracks on the surface. It’s truly cheesecake perfection, every time.
- Naturally Sweetened, Not Overpowering: This chocolate cheesecake derives all its sweetness from the quality melted chocolate and the flavorful cookie crust. We intentionally avoid adding extra granulated sugar to the batter. The result is a beautifully balanced dessert that satisfies your sweet tooth without being cloyingly sweet, allowing the complex chocolate flavors to shine through.
Table of Contents
- Instant Pot Chocolate Cheesecake Recipe
- Key Ingredients for Your Chocolate Cheesecake
- Step-By-Step Guide: How to Make Instant Pot Chocolate Cheesecake
- How to Store Your Instant Pot Chocolate Cheesecake
- Delicious Variations on Chocolate Cheesecake
- Frequently Asked Questions About Chocolate Cheesecake
- More Irresistible Dessert Recipes
Key Ingredients for Your Chocolate Cheesecake
Success in baking, especially with cheesecake, often boils down to using the right ingredients and preparing them correctly. Here’s what you’ll need and some crucial tips:
- Cream Cheese: The foundation of any great cheesecake! It is absolutely vital that your cream cheese is at ROOM TEMPERATURE. Cold cream cheese will result in a lumpy batter, no matter how much you mix. Use full-fat or reduced-fat cream cheese for the best results; however, DO NOT use fat-free cream cheese, as its consistency will compromise the texture of your finished cheesecake.
- Sour Cream: As mentioned, sour cream is essential for balancing the rich flavors and contributing to that desirable creamy texture. Again, opt for full-fat or reduced-fat sour cream. Avoid fat-free sour cream for the same reasons as the cream cheese.
- Chocolate: This recipe calls for semi-sweet chocolate. Chocolate chips or chocolate chunks are highly recommended as they melt quickly and evenly. It’s important to avoid bittersweet chocolate, which can make the cheesecake too firm, or milk chocolate, which can be overly sweet and alter the desired tang.
- Coffee: Your choice of coffee can be decaf or regular. Instant coffee, dissolved in hot water, works just as effectively. The key is its warmth to melt the chocolate and its ability to enhance the chocolate’s depth, not to dominate the flavor profile.
- Chocolate Sandwich Cookies (Oreo Crust): A chocolate cookie crust is a signature element of this cheesecake. While Oreo cookies are a popular choice, feel free to use any brand of chocolate sandwich cookies you prefer. There are many excellent organic brands available that are made without high-fructose corn syrup, offering a healthier alternative without sacrificing flavor.
Step-By-Step Guide: How to Make Instant Pot Chocolate Cheesecake
Step One: Perfectly Melt the Chocolate
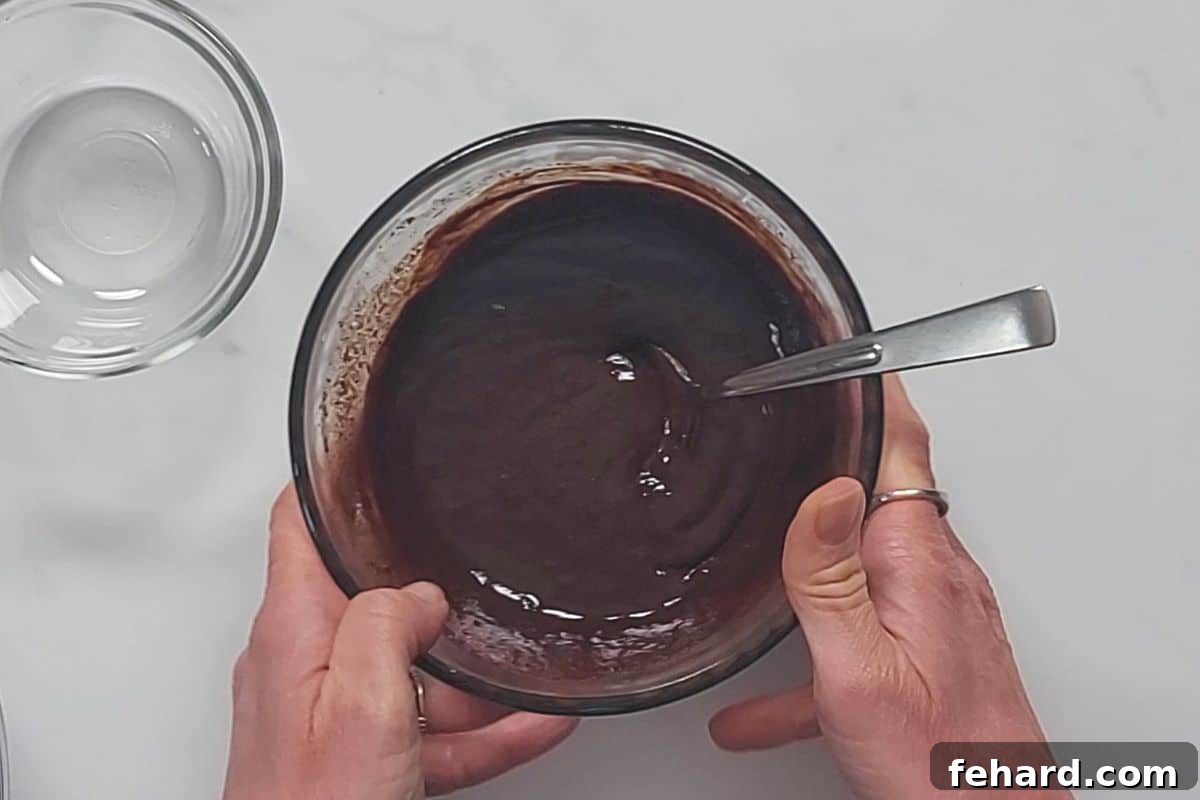
Begin by melting the chocolate for your cheesecake batter. This crucial step allows the melted chocolate ample time to cool before being incorporated into the cream cheese mixture. Adding hot chocolate to the batter could cause it to curdle, ruining the smooth consistency.
- Pour the hot coffee directly over your semi-sweet chocolate chips or chunks in a heat-proof bowl. Stir continuously until the chocolate is completely melted and smooth. If you encounter any stubborn unmelted pieces, microwave the mixture for short 30-second intervals, stirring after each, until it reaches a creamy, uniform consistency. Once fully melted, set this mixture aside to cool while you prepare the crust.
Step Two: Crafting the Perfect Oreo Cookie Crust
You have the option to either freeze your crust for a quick set or bake it for a crisper texture. I personally lean towards baking for that extra crispness, but both methods yield delicious results.
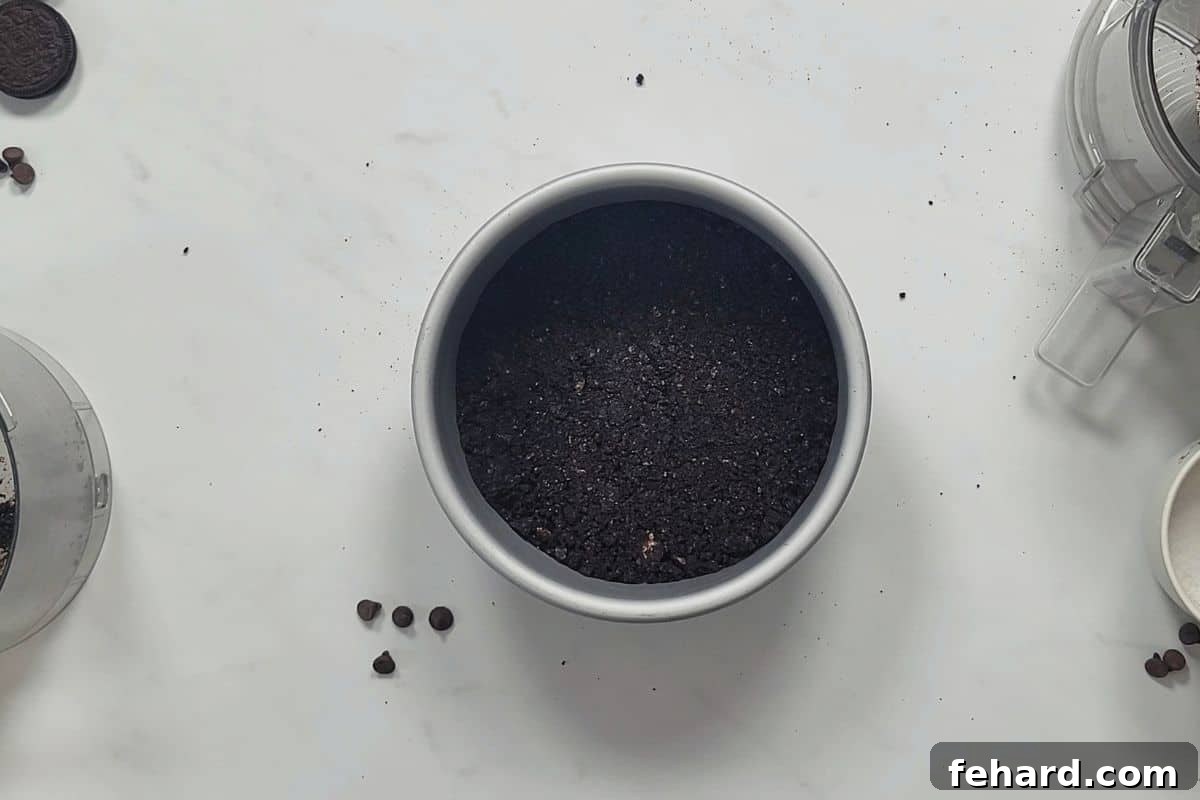
- To create fine crumbs, process the chocolate sandwich cookies in a food processor equipped with a metal S-blade. Pulse until the cookies are uniformly pulverized into fine crumbs. If you don’t have a food processor, an alternative method is to place the cookies in a gallon-sized freezer bag and crush them thoroughly with a rolling pin until fine.
- Add the melted butter to the cookie crumbs. If using a food processor, pulse until the crumbs are thoroughly moistened and resemble wet sand. If mixing by hand, combine the cookie crumbs and melted butter in a medium mixing bowl, stirring until well incorporated.
- Transfer the buttered cookie mixture into a 7×3 inch springform pan. Use the bottom of a glass or your fingers to press the crumbs firmly and evenly across the bottom of the pan, forming a compact crust.
- Once pressed, place the crust into the freezer to chill while you prepare the cheesecake batter. Alternatively, for a crunchier crust, you can bake it in a preheated oven at 325°F (165°C) for 10 minutes.
Step Three: Preparing the Silky Cheesecake Batter
Achieving a perfectly smooth and creamy cheesecake batter hinges on one critical factor: ensuring all your dairy ingredients are at room temperature. If they are cold, your batter will inevitably be lumpy and lack the desired consistency. Patience is key here – do not rush this process.
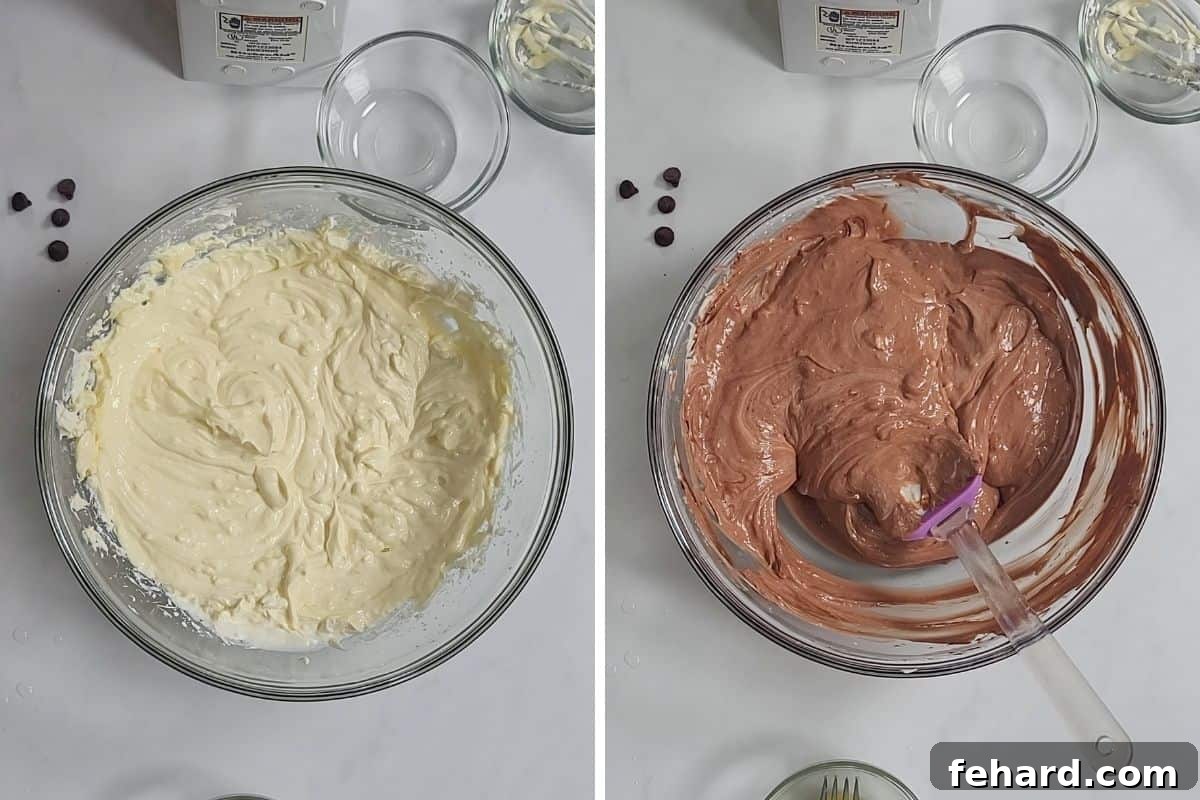
- In a large mixing bowl, combine the softened cream cheese, cornstarch, and vanilla extract. Using a handheld mixer on medium-low speed, beat the mixture until it is completely smooth. Be careful not to overmix, as incorporating too much air can negatively affect the cheesecake’s texture.
- Reduce the mixer speed to low. Add the room temperature sour cream and the now-cooled melted chocolate mixture to the batter. Mix just until combined, which should only take about 15-20 seconds.
- In a separate small bowl, lightly whisk the eggs. Gently add the whisked eggs to the cheesecake batter and mix on low speed for only a few seconds, just until barely incorporated. Again, be extremely cautious not to overmix after adding the eggs, as this is a common cause of a curdled or tough cheesecake texture.
Step Four: Assembling Your Chocolate Cheesecake
With your crust prepared and batter mixed, it’s time for assembly. Your crust should now be either chilled from the freezer or cooled from baking, ready to receive the luscious chocolate filling.
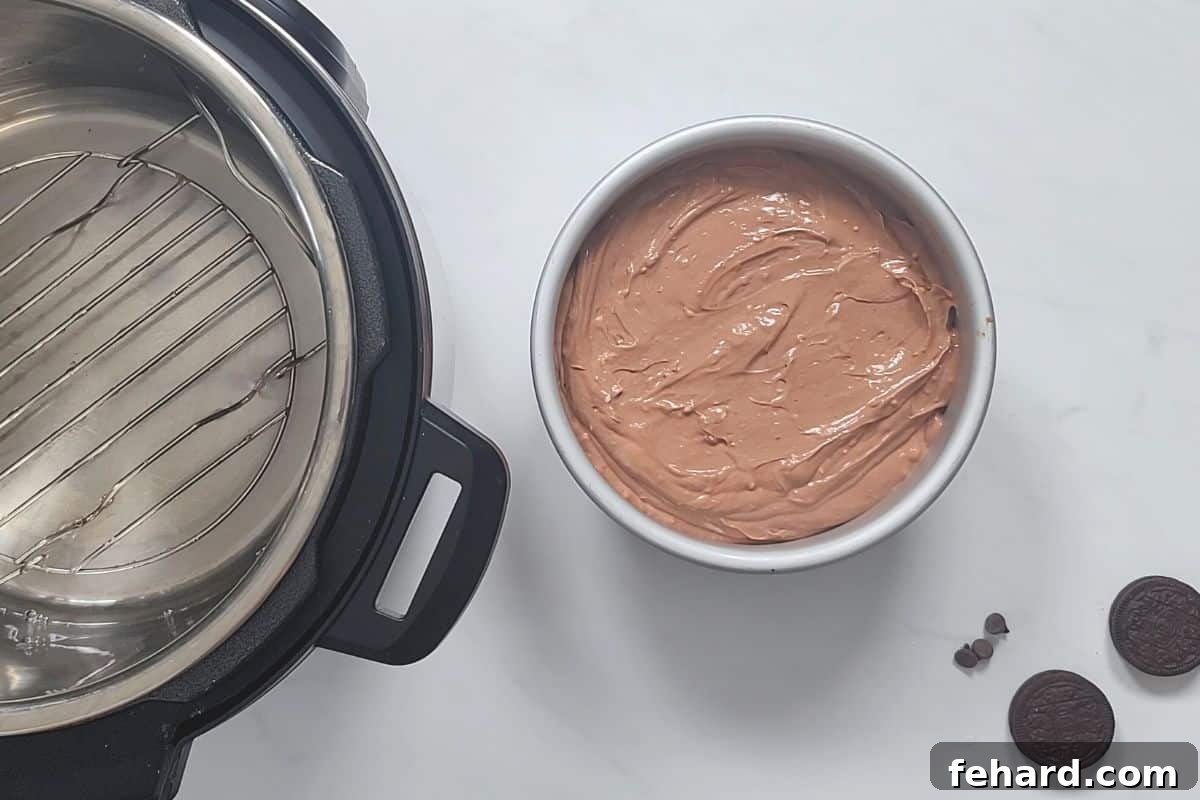
- Carefully pour the creamy cheesecake batter evenly over the prepared Oreo crust in the springform pan. Gently tap the filled pan on your counter a few times. This helps to release any trapped air bubbles, which can cause imperfections in the finished cheesecake’s surface. Pop any remaining surface bubbles with a fork or toothpick.
Step Five: Pressure Cooking for Perfection
While some cheesecakes can be cooked uncovered in the Instant Pot, for this particular chocolate rendition, I’ve found that covering it with aluminum foil yields the best results. I will provide cooking times for both options.
- Place a metal trivet (or a steamer rack) inside the inner pot of your pressure cooker. Pour 1.5 cups of cold tap water into the bottom of the pot. Carefully place the foil-covered springform pan containing the cheesecake onto the trivet. If desired, you can create a foil sling to make it easier to lower and lift the pan.
- Secure the Instant Pot lid, ensuring the vent knob is set to the “Sealing” position. Set your pressure cooker to cook on HIGH pressure for 45 minutes if the cheesecake is covered with foil, or 35 minutes if you choose to leave it uncovered.
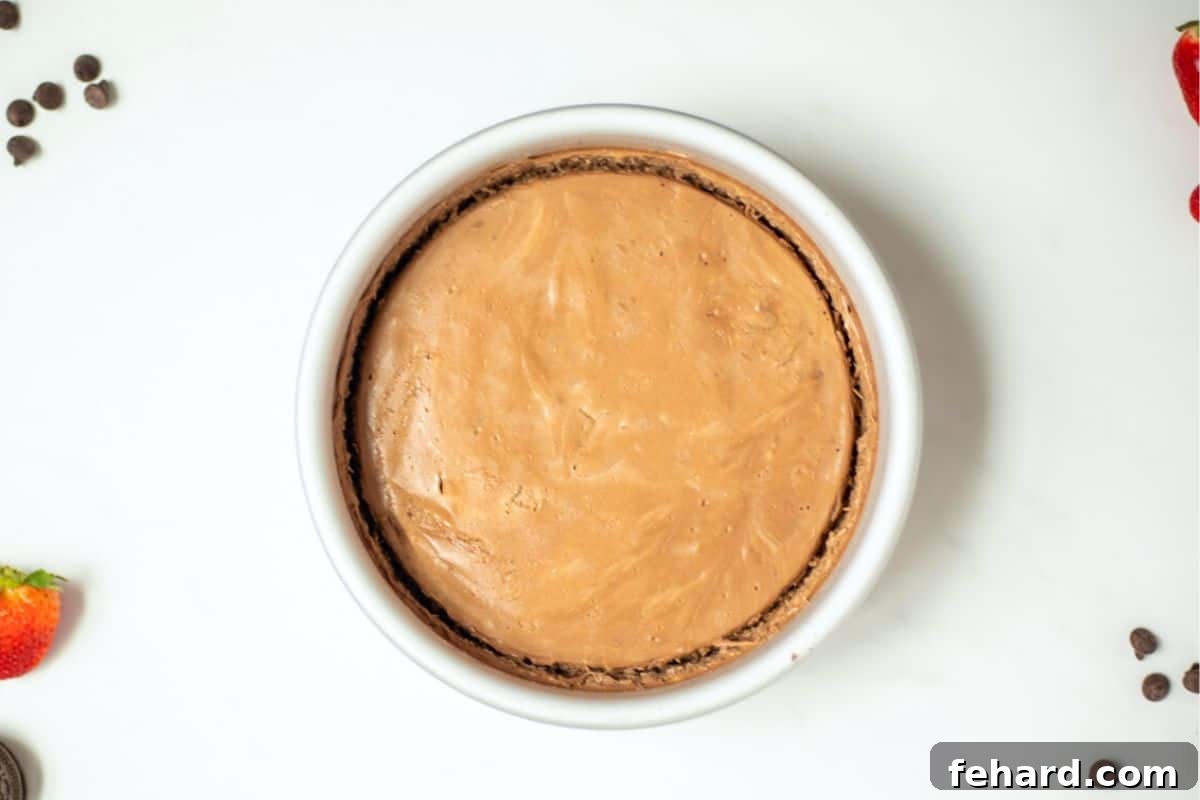
- Once the cooking time is complete, it is absolutely crucial to allow the pressure to release naturally. Do NOT perform a quick release. A sudden drop in pressure can cause your cheesecake to crack and prevent it from setting up with that desired velvety texture. Wait until the float valve drops completely on its own, indicating all pressure has been released.
- Carefully remove the cheesecake from the Instant Pot. Let it rest on a wire rack for 10 minutes. Gently remove the foil. If you notice any moisture on the surface of the cheesecake, dab it very carefully with a paper towel. Finally, run a thin knife around the edge of the springform pan to gently loosen the cheesecake from the sides, which helps prevent sticking as it chills.
Step Six: The Essential Chill for Flavor and Texture
While it’s tempting to dig in immediately, cheesecake is always best after it has been properly refrigerated. This extended chilling period is vital, allowing the flavors to meld beautifully and the cake to fully cool and set, resulting in that iconic dense, creamy texture.
- To prevent condensation from forming on the cheesecake’s surface during refrigeration, I recommend covering it first with a clean kitchen towel, then sealing it tightly with a layer of plastic wrap or aluminum foil. Refrigerate the cheesecake for a minimum of 12 hours. For optimal flavor and texture, chilling it overnight is highly recommended.
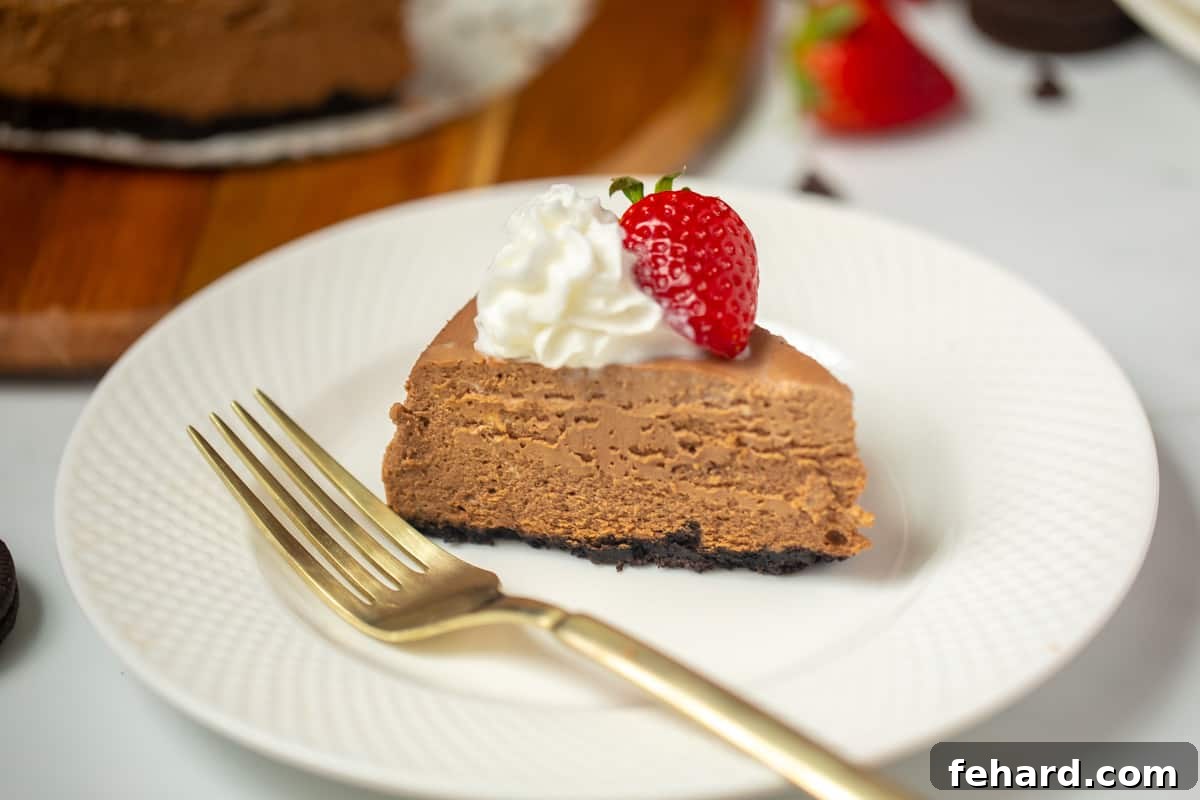
- Once thoroughly chilled, remove the cheesecake from the refrigerator about 30 minutes before serving to allow it to soften slightly. Slice and serve it plain to appreciate its pure chocolate goodness, or enhance it further with a dollop of homemade whipped cream and a drizzle of rich chocolate syrup, if desired.
How to Store Your Instant Pot Chocolate Cheesecake
Proper storage ensures your Instant Pot Chocolate Cheesecake remains delicious for days. It can be kept in an airtight container in the refrigerator for up to 4 days. For longer storage, this cheesecake freezes beautifully. Wrap individual slices or the whole cheesecake tightly in plastic wrap, then in aluminum foil, and store in the freezer for up to 30 days. Remember to defrost it slowly in the refrigerator—never in the microwave—as rapid thawing will ruin its exquisite texture.
Delicious Variations on Chocolate Cheesecake
This Instant Pot Chocolate Cheesecake recipe is a fantastic base for creativity! Here are some delightful variations to experiment with:
- Mint Chocolate Cheesecake: For a refreshing twist, add ½ teaspoon of pure mint extract to the cheesecake batter along with the vanilla. Garnish with fresh mint leaves or crushed peppermint candies.
- Caramel Toffee Chocolate Cheesecake: Elevate the richness by topping the baked and chilled cheesecake with a generous drizzle of warm caramel sauce and a sprinkle of crunchy toffee bits just before serving.
- Bailey’s Chocolate Cheesecake: Substitute the coffee with ¼ cup of warm Bailey’s Irish Cream to melt the chocolate. This adds a sophisticated, boozy depth of flavor that pairs beautifully with chocolate.
- Mocha Cheesecake: Intensify the coffee-chocolate fusion by using strong espresso in place of regular coffee when melting the chocolate. This will give the finished cheesecake a more pronounced mocha flavor.
- Gluten-Free Chocolate Cheesecake: Easily adapt this recipe for dietary needs by using gluten-free chocolate sandwich cookies for the crust. Ensure all other ingredients are certified gluten-free.
Frequently Asked Questions About Chocolate Cheesecake
Absolutely! If Oreo cookies aren’t available or preferred, you can readily use 1 cup of finely crushed graham crackers or chocolate wafer crumbs in place of the chocolate sandwich cookies for the crust. The preparation method remains the same.
The coffee in this recipe is primarily used to enhance and deepen the rich flavor of the chocolate, acting as a background note rather than a dominant one. There is a very slight, barely detectable undertone of coffee, but it won’t taste overtly like a coffee-flavored cheesecake.
More Irresistible Dessert Recipes
If you loved this Instant Pot Chocolate Cheesecake, you might also enjoy these other delightful desserts:
- Classic Cheesecake Recipe
- Moist Sour Cream Banana Cake
- Nostalgic Hot Milk Cake
- Homemade Dairy-Free Fudgesicles
- Adorable Mini Cheesecakes
Did you make this recipe?
If you’ve whipped up this delightful Instant Pot Chocolate Cheesecake, we’d love to hear from you! Please consider leaving a comment and a 5-star review below. Your feedback helps us and other home cooks!
Instant Pot Chocolate Cheesecake Recipe
Rating: 4.91 out of 5 stars (10 votes)
By: Kristen Chidsey
Servings: 10
Prep time: 15 mins | Cook time: 45 mins | Pressure Time + Chilling: 20 mins + 12 hrs | Total time: 13 hrs 20 mins
Instant Pot Chocolate Cheesecake is tangy, rich, and super creamy! It is a chocolate lover’s dream come true!
Rate Recipe
Print Recipe
Ingredients
Chocolate Crust
- 12 chocolate sandwich cookies
- 3 tablespoons melted butter
Chocolate Cheesecake Batter
- 1 cup semisweet chocolate chips
- ¼ cup coffee, hot and strong
- 16 ounces cream cheese, softened
- ⅓ cup sour cream, at room temperature
- 1 tablespoon cornstarch
- 1 teaspoon vanilla extract
- 2 large eggs, at room temperature
Instructions
- Place 1 cup semisweet chocolate chips in a medium bowl and pour ¼ cup hot coffee over the chocolate. Stir the mixture until the chocolate has fully melted and is smooth. If needed, microwave for 30 seconds and stir again until creamy. Set aside to cool completely.
- For the crust, process 12 chocolate sandwich cookies in a food processor until they form fine crumbs. Alternatively, place cookies in a large freezer bag and crush with a rolling pin. Add 3 tablespoons melted butter to the crumbs and pulse or mix until the mixture resembles wet sand.
- Lightly grease a 7-inch springform pan or line the bottom with parchment paper. Pour the cookie mixture into the pan and press it firmly and evenly across the bottom using your hands or the bottom of a glass. Place the crust into the freezer to chill while preparing the cheesecake batter. (Alternatively, you can bake the crust for 10 minutes at 325°F (165°C) for a crunchier result.)
- In a large bowl, combine 16 ounces softened cream cheese, 1 tablespoon cornstarch, and 1 teaspoon vanilla extract. Using a handheld mixer on medium-low speed, beat until the mixture is smooth, being careful not to overmix, which can incorporate too much air.
- On low speed, mix in ⅓ cup room temperature sour cream and the cooled melted chocolate mixture into the batter until just combined (about 15-20 seconds).
- In a small separate bowl, whisk 2 large eggs lightly. Add the whisked eggs to the cheesecake batter and mix on low speed just until lightly combined. Again, avoid overmixing once the eggs are added to prevent a curdled consistency.
- Remove the crust from the freezer or oven. Pour the cheesecake batter evenly over the crust. Gently tap the pan on the counter a few times to release air bubbles, then pop any remaining surface bubbles with a fork or toothpick. Cover the pan tightly with aluminum foil.
- Pour 1 ½ cups of cold tap water into the inner pot of your pressure cooker. Place the metal trivet in the inner pot. Carefully place the covered cheesecake pan on top of the trivet (a foil sling can assist with lowering and lifting). Close the lid, ensure the vent knob is sealed, and set to cook on High Pressure for 45 minutes if covered with foil, or 35 minutes if uncovered.
- Once cooking time has elapsed, allow the pressure to release naturally (NPR) FULLY. Do not quick release, as this can cause cracking and affect the texture. Wait until the float valve drops completely. You can check the cheesecake for doneness; if the center is still too jiggly, return the lid and cook for an additional 5 minutes on High Pressure, followed by a full natural release.
- Carefully remove the cheesecake from the Instant Pot and let it rest on a wire rack for 10 minutes. Remove the foil. If any moisture is present on the surface, gently dab it with a paper towel. Gently run a thin knife around the edge of the springform pan to loosen the cheesecake from the sides.
- To prevent condensation, cover the cheesecake first with a clean kitchen towel, then with a layer of plastic wrap or foil. Refrigerate for at least 12 hours, or ideally overnight, before serving.
- Remove the cheesecake from the refrigerator about 30 minutes before serving. Slice and serve plain, or with whipped cream, fresh berries, or chocolate syrup.
Equipment
- Electric Pressure Cooker (6 or 8 quart)
- 7 inch springform pan
- Food Processor (optional, for crushing cookies)
Notes
- Cream Cheese: Ensure your cream cheese is at room temperature for a smooth, lump-free batter.
- Crust: If you don’t have a food processor, you can easily crush the cookies in a gallon-sized bag with a rolling pin. Mix the crumbs with melted butter using a handheld mixer on low speed or a spoon.
- Storage: This cheesecake will keep beautifully in the refrigerator for up to 4 days. For longer storage, it can be frozen for up to 30 days. Always defrost frozen cheesecake slowly in the refrigerator to maintain its texture; never use the microwave.
- If cooking at higher elevations, please refer to Instant Pot High Altitude Conversion guidelines for potential adjustments to cooking times.
Nutrition
Calories: 358kcal
Carbohydrates: 34g
Protein: 7g
Fat: 22g
Saturated Fat: 12g
Cholesterol: 70mg
Sodium: 336mg
Potassium: 263mg
Fiber: 2g
Sugar: 26g
Vitamin A: 447IU
Calcium: 93mg
Iron: 3mg
Nutrition information is automatically calculated and should be used as an approximation only.
Tried this recipe?
Mention @amindfullmom or tag #amindfullmom!