
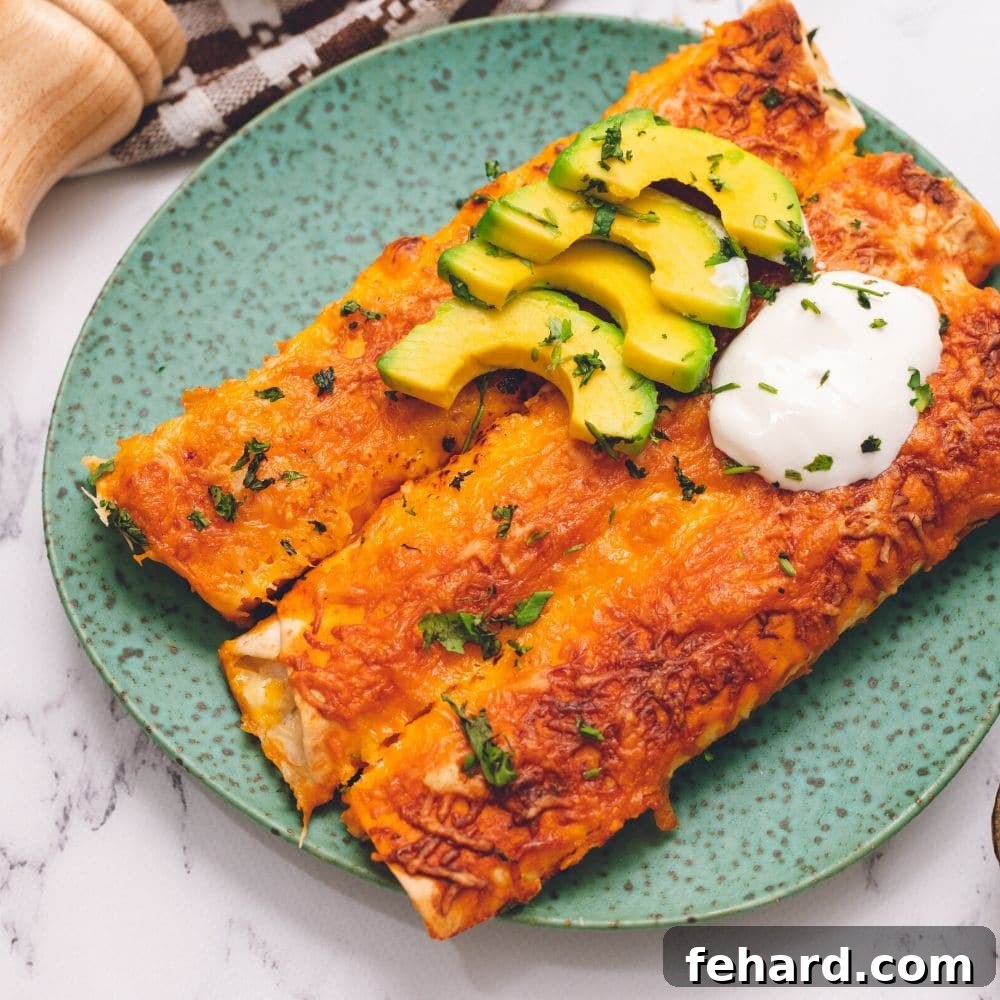
Easy & Delicious Creamy Chicken Enchiladas: A Family Favorite Recipe
Indulge in the irresistible flavors of these easy-to-make Chicken Enchiladas, featuring tender shredded chicken, a luscious cream cheese filling, and a perfectly spiced homemade enchilada sauce. This recipe promises a fast, flavorful, and incredibly satisfying meal that will become a staple in your kitchen.
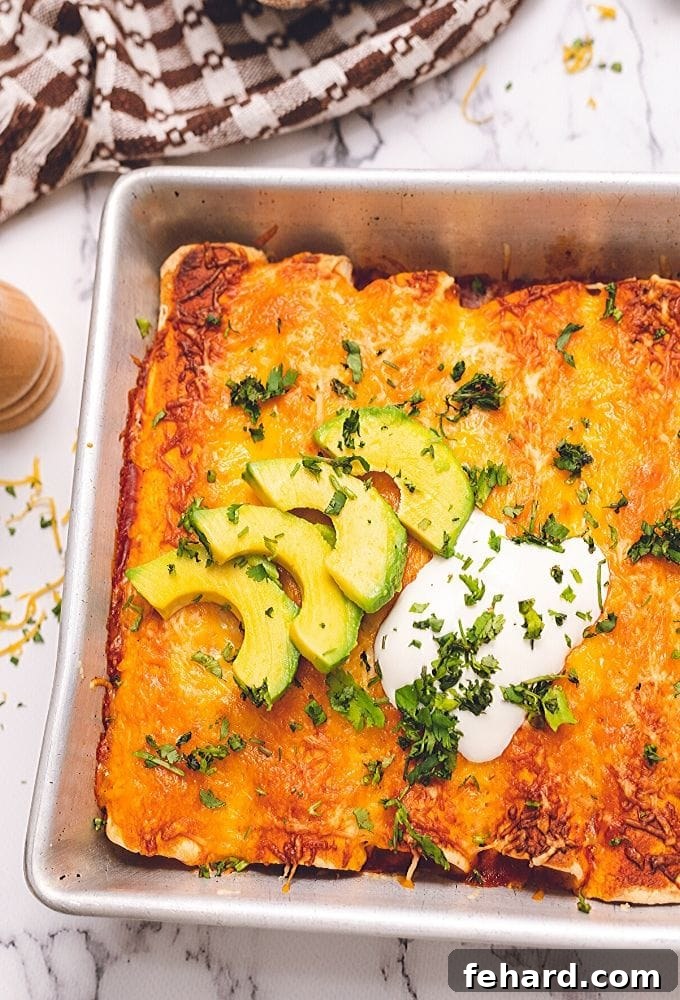
Some recipes aren’t just meals; they’re memories. For me, these homemade chicken enchiladas hold a special place, evoking cherished moments from my childhood. Growing up, my mom would prepare these flavorful enchiladas almost every week, a testament to their incredible taste and effortless preparation. It was one of those rare dishes that all four of us kids eagerly devoured, a feat any parent can appreciate!
Whether you’re seeking a brilliant way to transform leftover rotisserie chicken or simply searching for a simple, yet intensely flavorful family meal, these creamy chicken enchiladas are guaranteed to impress. They bring together a harmonious blend of savory chicken, creamy cheese, and mild green chilies, all wrapped in soft tortillas and baked in a rich sauce. It’s comfort food at its finest, made accessible for even the busiest cooks.
Why These Chicken Enchiladas Are a Must-Try
What makes this chicken enchilada recipe stand out? It’s the perfect synergy of convenience and exceptional flavor. We start with pre-cooked shredded chicken, which drastically cuts down on prep time. The magic truly happens with the creamy filling – a delightful blend of softened cream cheese, diced green chilies, and savory spices. This creates a rich, tangy, and subtly spicy core that complements the chicken beautifully. Topped with your favorite enchilada sauce and a generous layer of melted cheese, every bite is a perfect balance of textures and tastes.
- Effortless Preparation: Utilizing pre-cooked chicken makes this recipe incredibly fast to assemble.
- Irresistible Creamy Filling: The combination of cream cheese and green chilies creates a unique, satisfying flavor.
- Family-Friendly: Mild enough for kids, yet flavorful enough for adults.
- Versatile: Easily adaptable to dietary needs and ingredient availability.
- Make-Ahead & Freezer-Friendly: Perfect for meal prepping or quick dinners later.
Essential Ingredients for Perfect Chicken Enchiladas
Crafting truly delicious chicken enchiladas starts with quality ingredients. Here’s a closer look at what you’ll need and tips for making the best choices:
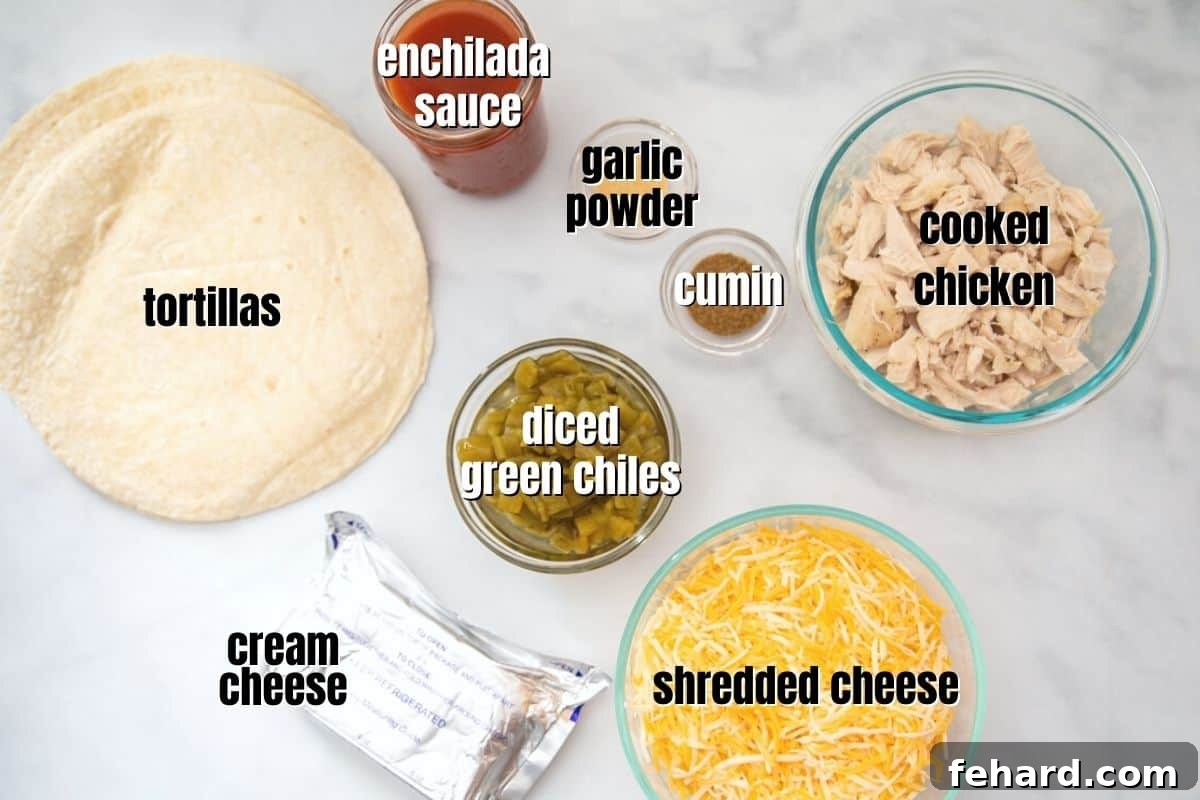
- Shredded Chicken: The cornerstone of this recipe! Any leftover cooked chicken works wonderfully. For ultimate convenience and flavor, I often reach for a store-bought rotisserie chicken or shred chicken cooked in an oven or Instant Pot. Aim for about 2 cups of shredded chicken.
- Cream Cheese: This is the secret to the incredibly creamy and rich filling. Always use full-fat or low-fat cream cheese, and ensure it’s softened to room temperature before mixing. This makes it far easier to incorporate smoothly into the chicken mixture, preventing lumps. Avoid fat-free cream cheese, as it significantly compromises the texture and flavor.
- Green Chiles: A 4-ounce can of diced green chiles adds a fantastic mild, earthy flavor and a subtle hint of warmth to the enchilada filling. Even those sensitive to spice will find this level of heat palatable and delicious. Remember to use them undrained to retain all the flavor.
- Enchilada Sauce: While your favorite store-brand red enchilada sauce will work well, I highly recommend trying my homemade enchilada sauce. It’s surprisingly simple to prepare, free from unnecessary MSG and preservatives, and offers a depth of flavor that’s truly unmatched. Using a quality sauce is crucial for the overall taste of your enchiladas.
- Tortillas: The choice of tortilla can impact the final texture. Flour tortillas are classic for a soft, pliable enchilada experience. However, feel free to use corn tortillas for a more traditional Mexican flavor profile (note: corn tortillas may require a quick dip in warm oil or sauce to become pliable and prevent tearing), or gluten-free tortillas for dietary needs. Eight-inch tortillas are ideal for this recipe.
- Cheese: A blend of cheeses delivers the best flavor and melt. I typically use a combination of shredded cheddar cheese and Monterey Jack cheese for their excellent melting properties and savory taste. Colby or a Mexican blend would also be delicious alternatives. Freshly shredding your cheese often melts better than pre-shredded varieties.
- Spices: Simple seasonings like salt and cumin are enough to elevate the filling, enhancing the natural flavors of the chicken and chiles.
Recipe Modifications & Creative Variations
This chicken enchilada recipe is wonderfully flexible, allowing you to easily adapt it to your preferences or what you have on hand. Don’t hesitate to get creative!
- No Pre-Cooked Chicken? No Problem! If you don’t have leftover chicken, you can quickly parboil chicken breasts or thighs. Place about 1 pound of boneless, skinless chicken in a large saucepan, cover with cold water, bring to a boil, then reduce heat to medium and simmer for 10-15 minutes, or until the chicken reaches an internal temperature of 165°F (74°C). Remove, shred, and it’s ready for your enchiladas.
- Gluten-Free Chicken Enchiladas: To make this dish entirely gluten-free, simply opt for your favorite gluten-free tortillas and ensure that your chosen enchilada sauce is certified gluten-free. The rest of the ingredients are naturally gluten-free.
- Craving a Different Flavor Profile? If you’re a fan of a brighter, tangier taste, try my recipe for Salsa Verde Enchiladas. Substituting red enchilada sauce with a vibrant salsa verde sauce offers a refreshing twist.
- Make it a Casserole! For an even quicker assembly, skip the individual rolling and turn this into an Easy Chicken Enchilada Casserole. Layer the torn tortillas, chicken filling, sauce, and cheese in a baking dish for a delicious, deconstructed version.
- Add More Veggies: Boost the nutritional value by adding finely diced bell peppers, corn, or black beans to the chicken and cream cheese filling. Sautéing the bell peppers slightly before adding them will enhance their flavor and texture.
- Spice it Up: For those who love a bit more heat, a pinch of cayenne pepper in the filling or a dash of hot sauce over the top before baking will do the trick.
Step-by-Step Guide: How to Make Chicken Enchiladas
Creating these creamy chicken enchiladas is straightforward. Follow these simple steps for a truly delightful meal:
- Prepare Your Oven and Dish: Preheat your oven to 350°F (175°C). Lightly grease a 9×13 inch baking dish with cooking spray. If you prefer softer enchiladas, spread a very thin layer of enchilada sauce on the bottom of the dish; otherwise, skip this step for crispier bottoms.
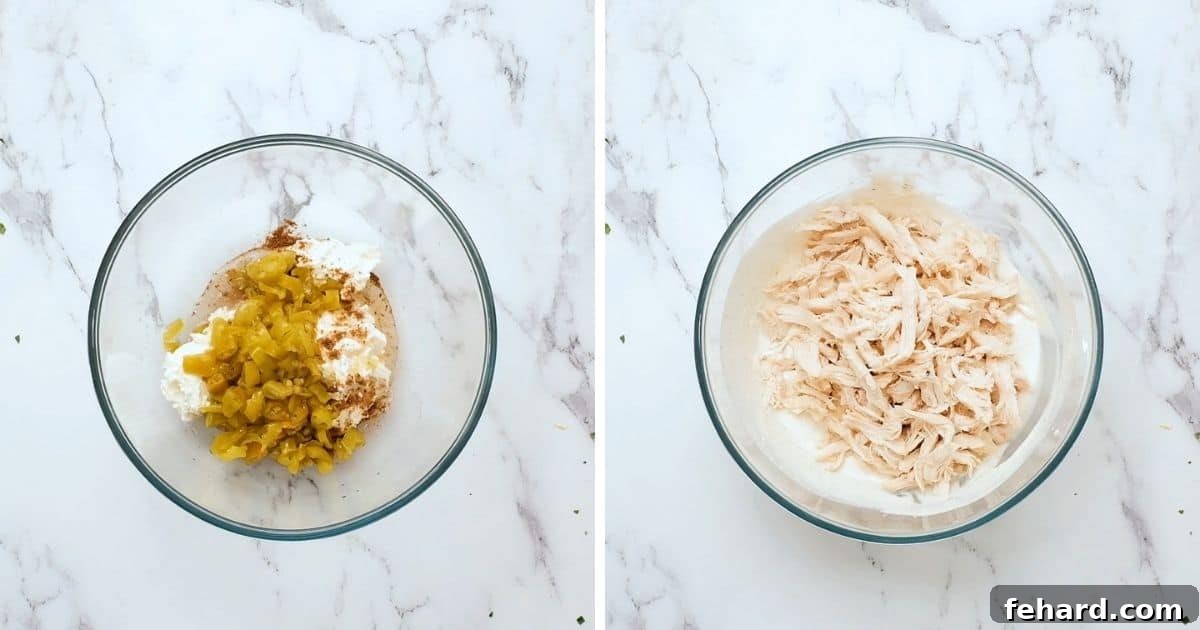
- Mix the Creamy Filling: In a large mixing bowl, combine the softened cream cheese, diced green chiles (undrained), salt, and cumin. Mix thoroughly until all ingredients are well combined and smooth.
- Add the Chicken: Gently fold in the shredded chicken into the cream cheese mixture. Ensure the chicken is evenly coated with the rich filling.
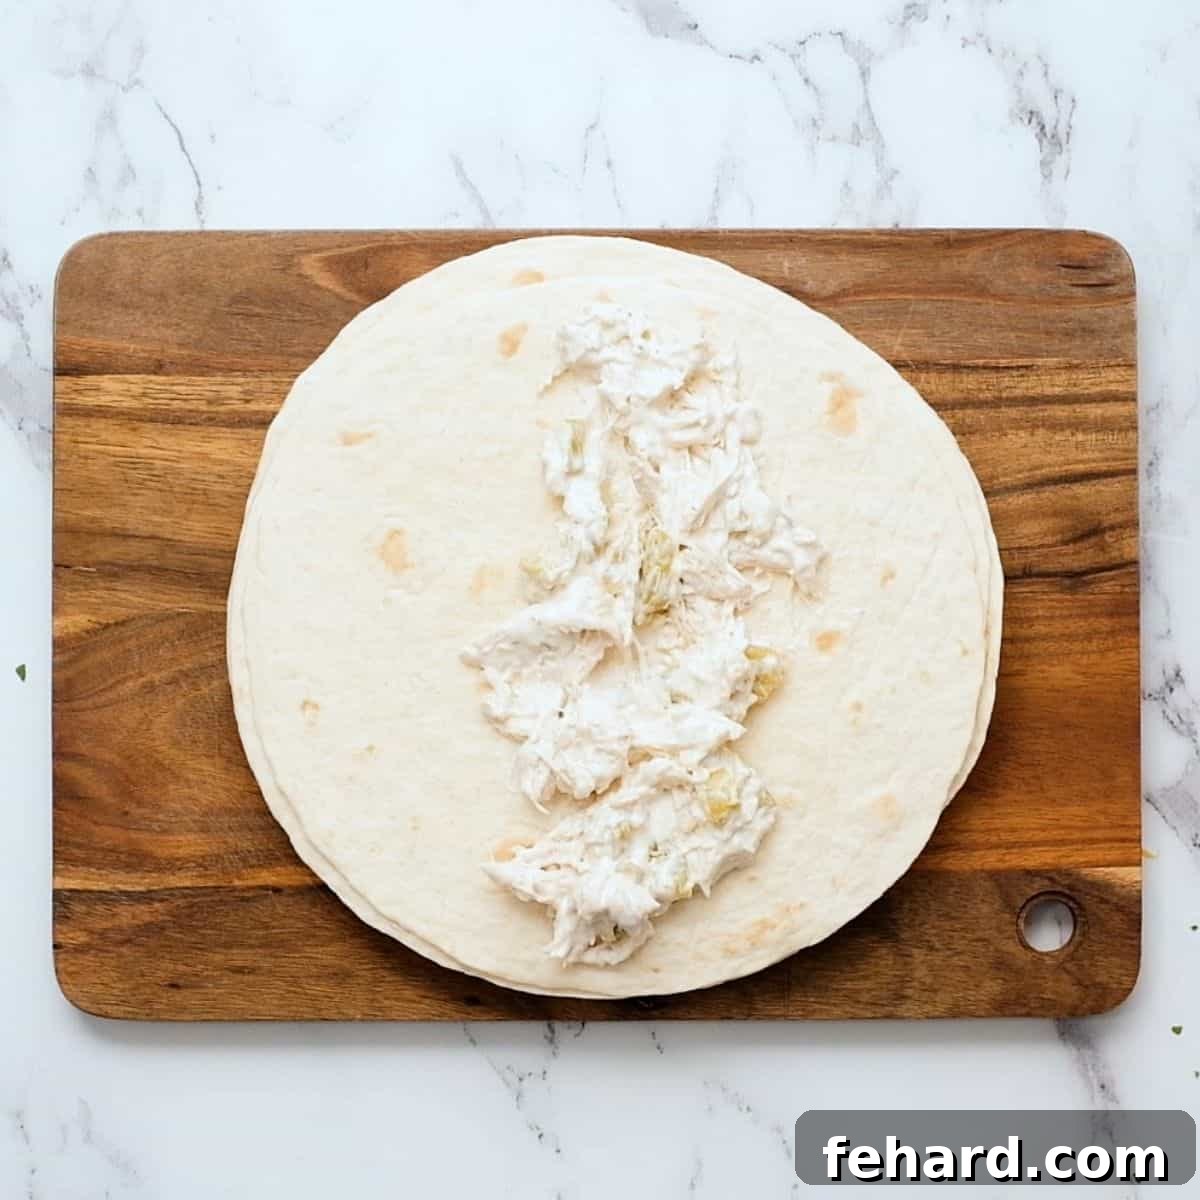
- Assemble the Enchiladas: Take one tortilla at a time and place approximately ⅓ cup of the chicken mixture down the center. Roll up the tortilla tightly and place it seam-side down in your prepared baking dish. Repeat with the remaining tortillas, arranging them snugly in the pan.
- Sauce and Cheese: Pour the enchilada sauce evenly over the rolled tortillas, ensuring they are well coated. Then, generously sprinkle both the shredded cheddar and Monterey Jack cheeses over the top.
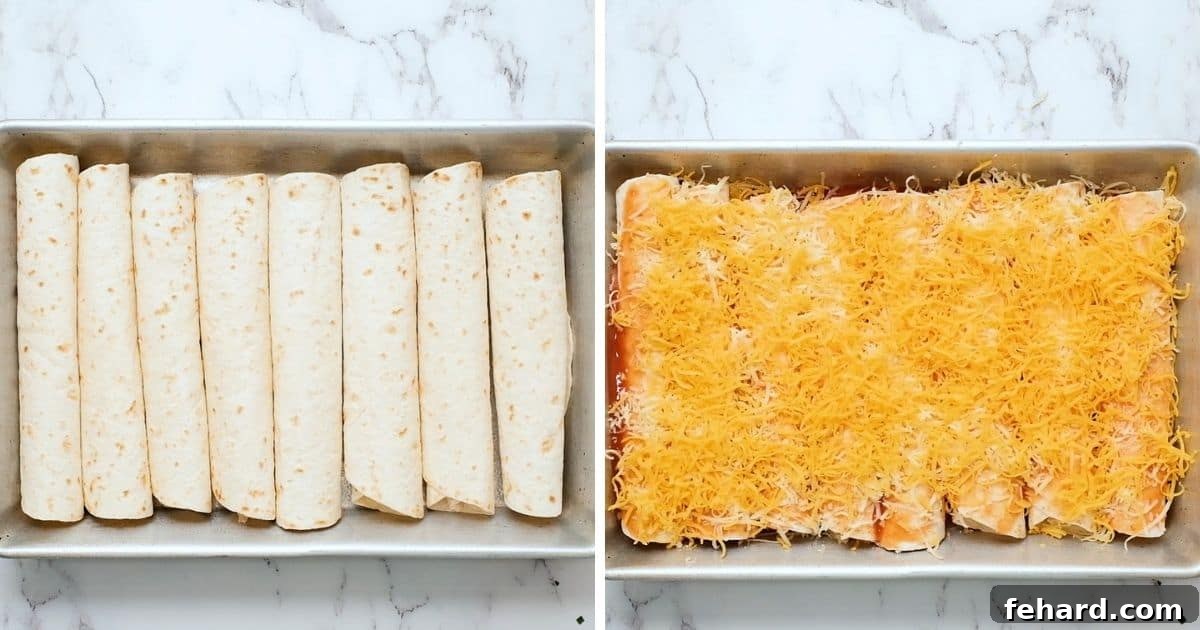
- Bake to Perfection: Bake, uncovered, for 20-25 minutes, or until the cheese is bubbly, melted, and lightly golden brown. For softer enchiladas, you can cover the dish with foil for the first 10-15 minutes of baking, then remove for the remaining time to allow the cheese to brown.
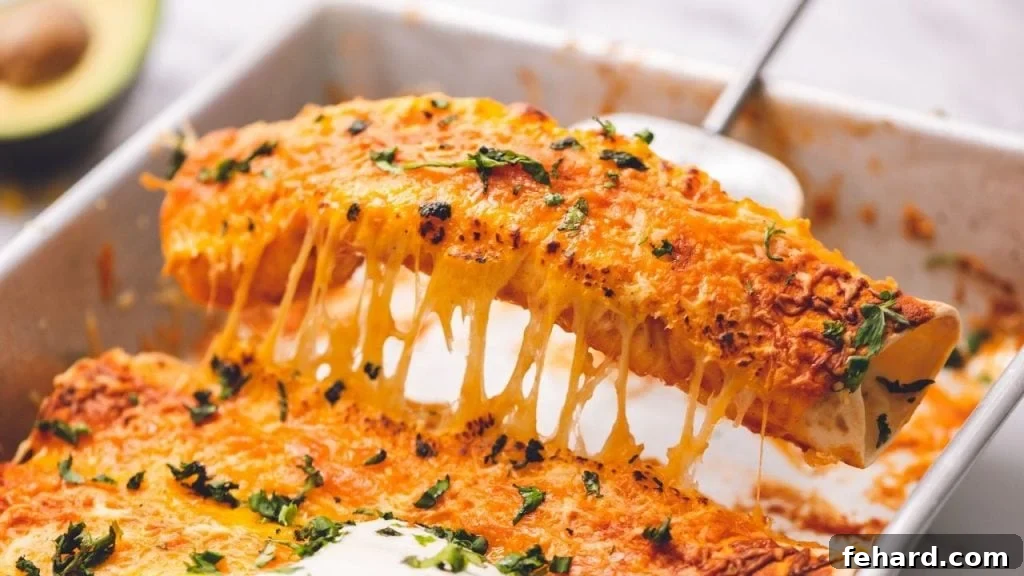
- Serve: Let the enchiladas rest for a few minutes before serving. Garnish with your favorite toppings and enjoy!
Elevate Your Meal: Delicious Serving Suggestions
These chicken enchiladas are incredibly satisfying on their own, but pairing them with a few fresh sides can elevate your meal into a complete fiesta! Here are some fantastic suggestions:
- Classic Toppings: A dollop of sour cream or Greek yogurt, fresh diced tomatoes, finely chopped red onions, and a sprinkle of fresh cilantro are essential for brightening the flavors.
- Avocado Goodness: Slices of ripe avocado or a generous scoop of homemade guacamole add a creamy, healthy element that perfectly balances the rich enchiladas.
- Salsas & Sauces: Beyond the enchilada sauce, consider a side of fresh pico de gallo or a zesty salsa verde for an extra kick of flavor.
- Hearty Sides: Round out the meal with a side of fluffy Instant Pot Rice and Beans or a refreshing Mexican Corn Salad.
- Fresh & Green: A simple green salad with a light vinaigrette can cut through the richness of the enchiladas and add a refreshing crunch.
- Beverage Pairing: A cool glass of horchata, a vibrant agua fresca, or even a Tropical Kale Smoothie can complement the meal beautifully.
Mastering the Perfect Texture: How to Prevent Soggy Enchiladas
Achieving that ideal balance of soft, flavorful tortillas without them becoming mushy or falling apart is key to perfect enchiladas. While some prefer a very soft texture, nobody enjoys soggy, disintegrating tortillas. These expert tips will help you create enchiladas that are deliciously saucy yet hold their shape beautifully, offering a crispy exterior and a tender interior.
- Strategic Sauce Placement is Key: Many recipes instruct to pour enchilada sauce into the bottom of the baking dish. However, for crispy enchiladas, it’s best to avoid putting sauce on the bottom entirely. Placing enchiladas directly on a sauced layer causes them to steam from below, resulting in overly soft and soggy tortillas that can break apart easily. Instead, simply cover the top of your rolled enchiladas generously with sauce and cheese. You’ll still get all the incredible flavor without the mushy bottoms. If you prefer a slightly softer, yet still intact, tortilla, a very thin layer of sauce on the bottom can be acceptable.
- Baking Uncovered for a Crispy Finish: To achieve a slightly crispy tortilla and a beautifully browned, bubbly cheese topping, do NOT cover your enchiladas with foil during baking. Covering traps steam, turning your baking dish into a steamer and making the tortillas soft and potentially soggy. Allow them to bake uncovered for the full duration.
- For Softer, Yet Not Soggy Enchiladas: If you desire a softer tortilla but still want to avoid total sogginess, cover the dish loosely with foil for the first 10-15 minutes of baking, then remove the foil for the remaining 10-15 minutes. This allows the tortillas to soften slightly without steaming excessively and still gives the cheese a chance to brown.
- When Baking from Frozen: The only exception to covering is when baking from a frozen state. In this case, keep the enchiladas covered for the majority of the baking time (typically an hour) to ensure they cook through without drying out. Remove the foil for the last 20-25 minutes to achieve a nice golden top.
- Warm Tortillas (Optional but Recommended): Lightly warming your tortillas before rolling them can make them more pliable and less prone to tearing, especially if using corn tortillas. A quick stack in the microwave for 30 seconds or wrapping them in foil and placing in a warm oven for a few minutes works wonders. This also helps prevent cracking when rolling, ensuring a secure seal for your filling.
- Don’t Overcrowd the Pan: While you want the enchiladas to be snug in the baking dish, avoid cramming them in too tightly. Leaving a little room allows for better air circulation, which contributes to less steaming and a better texture.
Effortless Meal Prep: Preparing Chicken Enchiladas in Advance
These chicken enchiladas are an excellent choice for meal planning and batch cooking. You can assemble them ahead of time or freeze them for a quick, convenient meal later.
- Make Ahead (Refrigeration): You can fully assemble these enchiladas up to 48 hours before you plan to bake them. Simply prepare the enchiladas as directed, rolling and placing them into a greased baking pan. Cover the pan tightly with aluminum foil and refrigerate for up to 2 days. When you’re ready to cook, remove the pan from the fridge while your oven preheats. Remove the foil, then cover with enchilada sauce and cheese. Bake at 350°F (175°C) for 30-35 minutes, or until thoroughly warmed through and the cheese is bubbly.
- To Freeze Chicken Enchiladas: For a freezer-friendly meal, assemble the enchiladas in a pan that is safe for both freezing and baking. Once the chicken enchiladas are rolled and arranged in the pan, cover them tightly with aluminum foil (you might want a double layer to prevent freezer burn). Freeze for up to 1 month. When you’re ready to enjoy them, preheat your oven to 350°F (175°C). Bake the frozen enchiladas, still covered with foil, for 1 hour. Then, remove the foil and continue baking for an additional 20-25 minutes, or until the cheese is melted and golden, and the enchiladas are heated through to the center.
More Tex-Mex Favorites to Explore
If you loved these creamy chicken enchiladas, you’re sure to enjoy these other delightful Tex-Mex inspired recipes:
- Flavorful Tex-Mex Chicken Skillet
- Easy Crockpot Salsa Chicken
- Hearty Taco Pasta
- Refreshing Taco Salad
- Quick Shredded Chicken Tacos
- Simple Ground Turkey Taco Skillet
Frequently Asked Questions About Chicken Enchiladas
- Can I use corn tortillas instead of flour?
- Yes, absolutely! For a more traditional flavor, corn tortillas work great. To prevent them from cracking when rolling, lightly warm them in the microwave for 15-30 seconds, or quickly dip them in warm enchilada sauce or oil before filling.
- What’s the best way to shred chicken?
- If you’re using cooked chicken, you can shred it easily with two forks. For a quicker method, place cooked chicken breasts or thighs in a stand mixer with the paddle attachment and mix on low speed for about 30-60 seconds until shredded. You can also use a hand mixer.
- Can I make these enchiladas spicier?
- Definitely! Add a pinch of cayenne pepper or a dash of your favorite hot sauce to the chicken and cream cheese filling. You can also use a “hot” enchilada sauce instead of mild.
- How do I store leftover chicken enchiladas?
- Leftovers can be stored in an airtight container in the refrigerator for up to 3 days. Reheat individual servings in the microwave or cover with foil and warm in the oven at 300°F (150°C) until heated through.
- Can I add vegetables to the filling?
- Yes, finely diced bell peppers, corn, black beans, or even sautéed onions can be a delicious addition to the chicken filling. Just make sure any added vegetables are cooked or drained well so they don’t add too much moisture.
Need more inspiration for planning meals that your family will love? Sign up for my FREE Meal Plans and each week you will get a meal plan with a shopping list.
If you enjoyed these Easy Creamy Chicken Enchiladas, I would love for you to leave a comment and a rating! Your feedback helps other home cooks discover delicious recipes.
Chicken Enchiladas Recipe
A simple and utterly delicious recipe for chicken enchiladas, featuring a creamy, mildly spiced filling and tender shredded chicken, baked to perfection.
Servings: 8
Prep Time: 10 minutes
Cook Time: 20-25 minutes
Total Time: 30-35 minutes
Author: Kristen Chidsey
Ingredients
- 2 cups shredded cooked chicken
- 8 ounces cream cheese, softened
- 4 ounces canned diced green chiles, undrained
- ½ teaspoon salt
- 1 teaspoon ground cumin
- 8 flour tortillas, 8-inch size (homemade flour tortillas are great!)
- 1 cup enchilada sauce (your favorite red sauce or homemade)
- 1 cup shredded cheddar cheese
- 1 cup shredded Monterey Jack cheese
Instructions
- Preheat oven to 350°F (175°C). Lightly grease a 9×13 inch baking dish with cooking spray. For crispier enchiladas, skip applying sauce to the bottom of the dish. For softer results, spread a thin layer of sauce.
- In a large mixing bowl, combine the softened cream cheese, diced green chiles, salt, and cumin until well combined and smooth.
- Add the shredded chicken to the cream cheese mixture and mix thoroughly until the chicken is evenly coated.
- Place approximately ⅓ cup of the chicken mixture down the center of each tortilla. Roll up each tortilla and place it seam-side down in the prepared baking dish.
- Pour the 1 cup of enchilada sauce evenly over the rolled tortillas. Then, sprinkle generously with the shredded cheddar cheese and Monterey Jack cheese.
- Bake, uncovered, for 20-25 minutes, or until the cheese is bubbly, melted, and lightly golden brown. (For softer enchiladas, bake covered for the first 10 minutes, then remove foil for the remaining 10-15 minutes).
- Serve immediately, garnished with fresh cilantro, sour cream, avocado slices, or other desired toppings.
Notes
- Cream Cheese Tip: Ensure your cream cheese is at room temperature for easy mixing. Full-fat or low-fat varieties are recommended; avoid fat-free.
- Chicken Prep: If you don’t have pre-cooked chicken, you can parboil about 1 pound of boneless, skinless chicken breasts or thighs. Boil for 10-15 minutes until internal temperature reaches 165°F (74°C), then shred.
- Tortilla Flexibility: Gluten-free tortillas can be easily substituted for flour tortillas if needed.
- Storage: Leftover enchiladas can be refrigerated in an airtight container for up to 3 days.
- Advance Preparation: Assemble enchiladas up to 48 hours ahead. Cover with foil and refrigerate. When baking, remove foil, add sauce and cheese, and bake at 350°F (175°C) for 30-35 minutes.
- Freezing Instructions: Assemble in a freezer-safe dish, cover tightly with foil, and freeze for up to 1 month. Bake frozen, covered, at 350°F (175°C) for 1 hour, then uncover and bake for an additional 20-25 minutes until heated through and bubbly.
Nutrition Facts (per serving, estimated)
Calories: 322 kcal | Carbohydrates: 21g | Protein: 20g | Fat: 13g | Saturated Fat: 6g | Cholesterol: 70mg | Sodium: 724mg | Potassium: 227mg | Fiber: 1g | Sugar: 5g | Vitamin A: 618IU | Vitamin C: 1mg | Calcium: 288mg | Iron: 2mg
Nutrition information is automatically calculated and should only be used as an approximation.