
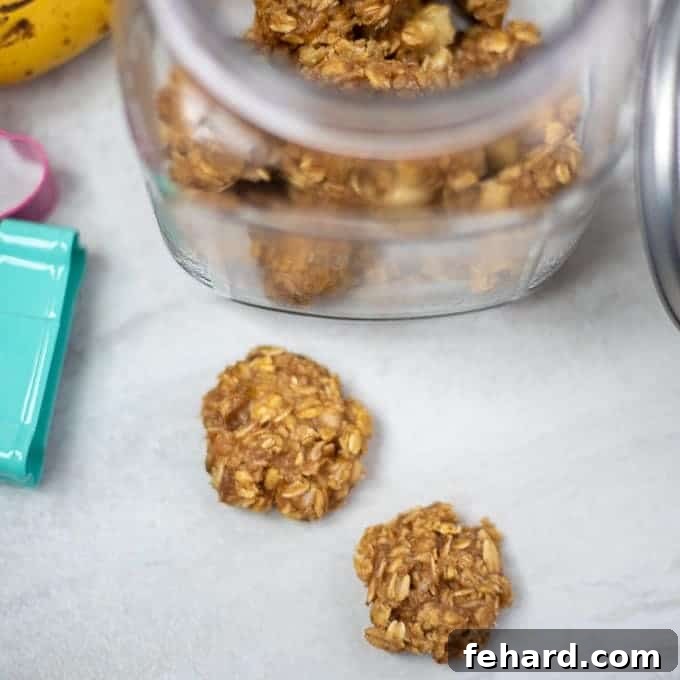
Treat your beloved canine companion to the ultimate homemade delight: Peanut Butter Oatmeal Dog Treats! These wholesome dog cookies are crafted with just four simple, natural ingredients, making them incredibly easy to prepare and a guaranteed hit with dogs of every size and breed. Say goodbye to store-bought fillers and preservatives, and hello to fresh, healthy goodness!
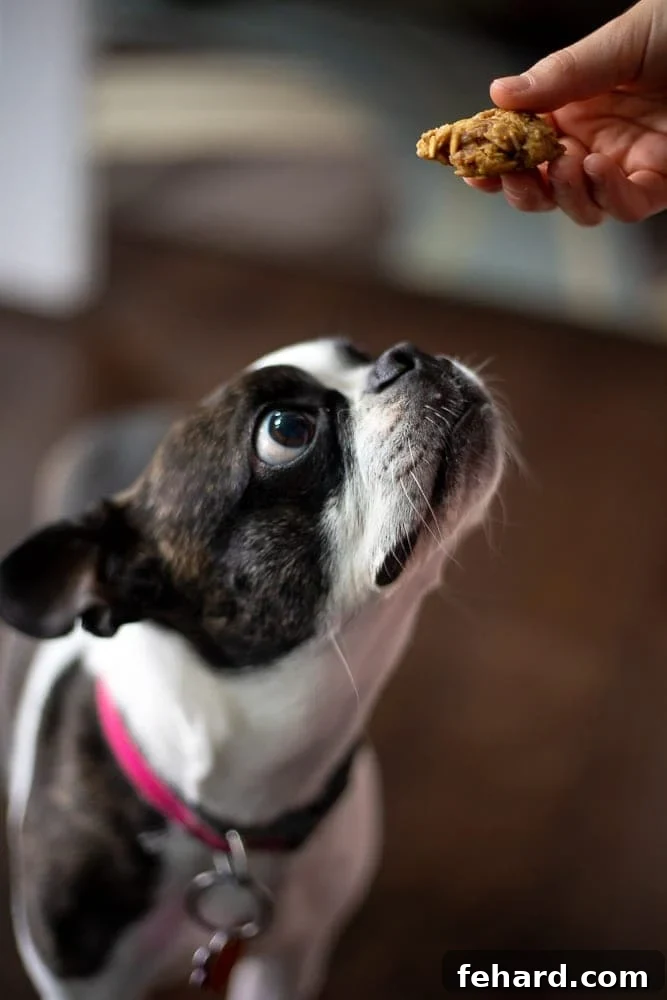
For any dog owner, the well-being and happiness of their furry family member are top priorities. In our home, our delightful Boston Terrier, Bailey, holds a special place in our hearts. From cozy cuddles and engaging daily walks to her plush dog bed, we ensure she lives a truly pampered life. And what’s a pampered life without delicious, wholesome homemade dog treats?
Bailey, like many dogs (and humans!), has always had a bit of a sensitive stomach. This has led us to adopt a strict gluten-free, corn-free, and dairy-free diet for her. While it might sound restrictive, believe me, Bailey thrives on it! She certainly doesn’t feel deprived, especially since we regularly whip up these Peanut Butter Oatmeal Dog Treats – or “Dog Cookies,” as my kids affectionately call them. These treats not only cater to her dietary needs but are also packed with flavor she adores, making them the perfect solution for happy, healthy snacking.
Why Choose Homemade Dog Treats Over Store-Bought?
Making your own dog treats offers numerous benefits that extend far beyond just saving money. It’s an act of love that ensures your dog receives the best possible nutrition without any hidden nasties. Here’s why homemade is always a superior choice:
- Full Control Over Ingredients: When you make treats at home, you know exactly what goes into them. This means no artificial colors, flavors, preservatives, or questionable fillers that are often found in commercial dog treats. You can choose high-quality, human-grade ingredients that support your dog’s health.
- Addressing Dietary Sensitivities: For dogs like our Bailey with sensitive stomachs, allergies, or specific dietary restrictions (such as gluten-free, corn-free, or dairy-free), homemade treats are a lifesaver. You can tailor recipes precisely to their needs, preventing adverse reactions and promoting better digestion.
- Enhanced Freshness and Quality: Store-bought treats can sit on shelves for months, losing their nutritional value and appeal. Homemade treats are made fresh, ensuring maximum potency of vitamins and minerals, and a taste that dogs simply can’t resist.
- Cost-Effectiveness: While initially some ingredients might seem to add up, in the long run, making treats at home is often more economical than constantly buying premium-quality commercial options, especially if your dog goes through treats quickly.
- Bonding Experience: The process of preparing special treats for your dog can be a wonderful bonding experience. Your dog will undoubtedly appreciate the effort and love you put into their snacks.
- Customization and Variety: Once you master a basic recipe like these peanut butter oatmeal treats, you can experiment with other dog-safe ingredients to introduce variety and cater to your dog’s specific preferences.
The Power of Four: Essential Ingredients for Healthy Dog Treats
The beauty of these easy dog treats lies in their simplicity and the natural goodness of just four ingredients. Each component is carefully chosen not only for its palatability but also for its health benefits for your furry friend. These are staple items you likely already have in your pantry, making these natural dog treats incredibly convenient to whip up anytime.
- Rolled Oats (1 cup): A fantastic source of dietary fiber, oats aid in healthy digestion and can help regulate blood sugar levels. They are naturally gluten-free, but if your dog has a severe gluten sensitivity, opt for certified gluten-free rolled oats to be extra safe. Oats also provide a good source of energy and a hearty texture to these oatmeal dog treats.
- Ripe Banana (½ cup mashed, ~1 large banana): Bananas are a superfood for dogs, offering a rich supply of potassium, vitamins C and B6, and fiber. They act as a natural sweetener, reducing the need for added sugars, and serve as an excellent binding agent in the dough. Plus, most dogs absolutely love the taste of bananas!
- Natural Peanut Butter (3 tablespoons): This is the star ingredient for flavor! Peanut butter is packed with protein and healthy fats, crucial for your dog’s energy and coat health. Crucially, always ensure your peanut butter is 100% natural and free from xylitol. Xylitol is a sugar substitute that is highly toxic to dogs, even in small amounts. Always read the label carefully! Opt for creamy peanut butter for easier mixing.
- Large Egg (1): Eggs are an excellent source of protein, essential amino acids, and healthy fats. They play a vital role in binding the ingredients together, giving the cookies their perfect structure. Cooked eggs are easily digestible for dogs and contribute to their overall nutritional intake.
All these ingredients are widely recognized as safe for dogs to consume in moderation. With these wholesome components, you’re not just making a treat; you’re crafting a nutritious snack that supports your dog’s health and happiness.
How to Make the Best Homemade Dog Treats: A Simple Guide
Making these DIY dog treats is incredibly straightforward and requires minimal effort, making it a perfect activity for even beginner bakers. Follow these simple steps to create delicious and healthy dog cookies that your furry friend will adore.
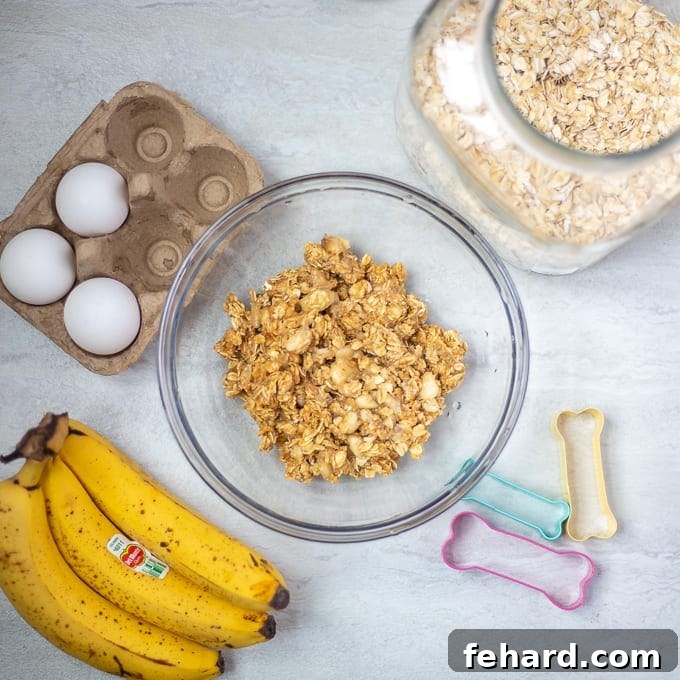
- Step 1: Preheat and Prepare. Begin by preheating your oven to 350°F (175°C). Line a baking sheet with a silicone mat or parchment paper. This prevents sticking and makes cleanup a breeze.
- Step 2: Mash and Mix Wet Ingredients. In a large mixing bowl, crack and whisk the large egg until it’s lightly beaten. Add the mashed ripe banana and the natural, xylitol-free peanut butter. Using a fork or a sturdy spoon, thoroughly mash the banana while simultaneously mixing it with the egg and peanut butter. Continue mixing until you have a smooth, uniform, and well-combined wet mixture. There should be no large lumps of banana remaining.
- Step 3: Incorporate Dry Ingredients. Add the rolled oats to the wet mixture. Stir vigorously until the oats are fully moistened and evenly distributed throughout the batter. The mixture should be thick enough to hold its shape when scooped, similar to a traditional cookie dough.
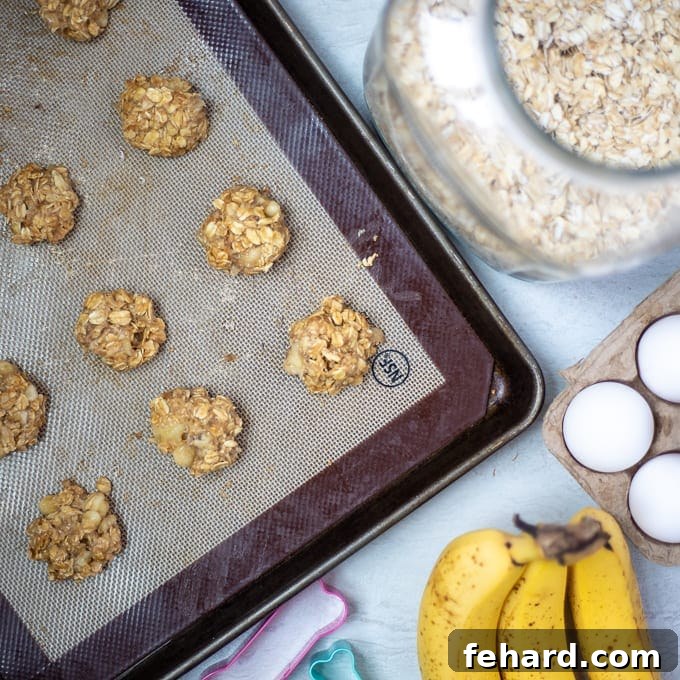
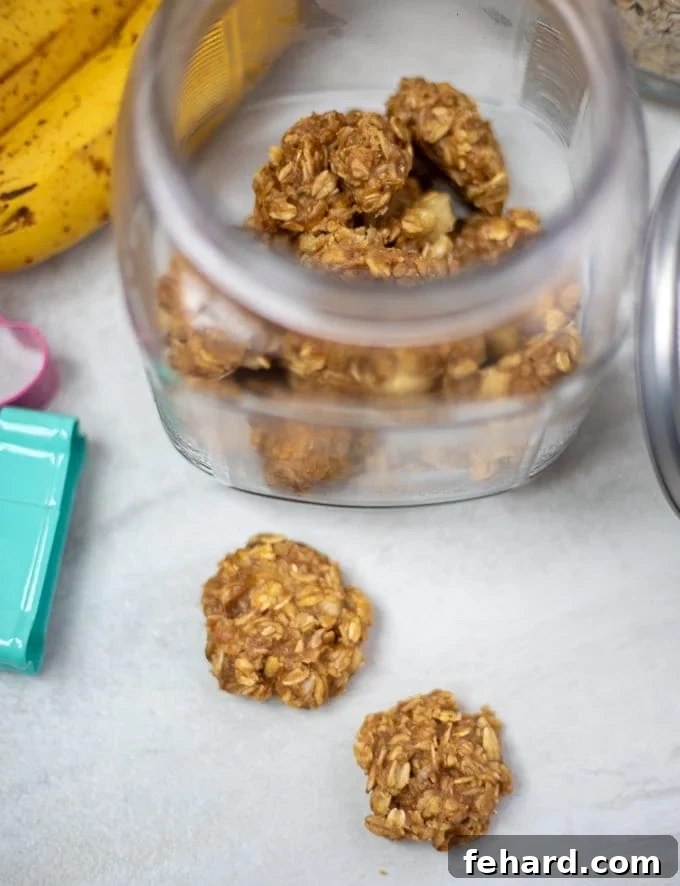
- Step 4: Form the Treats. Scoop out approximately one tablespoon of the batter for each treat and place it onto your prepared baking sheet. Using the back of a fork, gently flatten each scoop, creating a classic peanut butter cookie appearance. This also ensures even baking. You can vary the size slightly depending on your dog’s preference, but remember to adjust baking time accordingly for larger treats.
- Step 5: Bake to Perfection. Transfer the baking sheet to the preheated oven and bake for 10-12 minutes. The cookies should be lightly golden brown at the edges and firm to the touch. Baking time may vary slightly depending on your oven and the exact thickness of your treats.
- Step 6: Cool Completely. Once baked, remove the dog cookies from the oven and transfer them to a wire rack to cool completely. This is a crucial step; allowing them to cool thoroughly helps them firm up and achieve the desired texture. Serving them warm might make them too soft.
- Step 7: Store for Freshness. Once fully cooled, store your homemade dog cookies in an airtight container. They will stay fresh at room temperature for up to 3-5 days. For extended freshness, keep them in the refrigerator for up to 7-10 days.
Tips for Success and Variations for Your Dog Treats
While the basic recipe is incredibly simple, a few tips can help you achieve the best results and even customize these healthy dog treats to your pup’s liking.
- Peanut Butter Pointers: Always double-check that your peanut butter contains NO xylitol. This artificial sweetener is highly toxic to dogs. Natural, creamy peanut butter with only peanuts (and maybe salt) as ingredients is ideal. You can also use a chunky variety if you don’t mind a slightly textured treat.
- Oat Flour for Puppies: For puppies or dogs with dental sensitivities, you can easily modify the oats. Simply blend the rolled oats in a food processor until they form a fine oat flour before adding them to the wet ingredients. This creates a softer, smoother treat.
- Using Molds for Fun Shapes: If you’re going the oat flour route (which results in a slightly thinner batter), or just want to add a playful touch, use silicone molds (like cute dog bone shapes or paw prints). Fill the molds with the batter and bake at 350°F (175°C) for 12-15 minutes. Let them cool in the mold for about 5 minutes before gently flipping them out.
- Flavor Boosters (Dog-Safe Add-ins): Once you’re comfortable with the basic recipe, consider adding small amounts of other dog-safe ingredients for variety. A tablespoon or two of pumpkin puree (plain, unsweetened), shredded carrots, or even a sprinkle of chia seeds can add extra nutrients and flavor. Always research new ingredients to ensure they are safe for canine consumption.
- Adjusting Consistency: If your batter seems a little too wet (perhaps your banana was very ripe and large), you can add a tiny bit more oat flour or a few extra rolled oats. If it’s too dry, a splash of water or a tiny bit more mashed banana can help.
Storage Solutions for Maximum Freshness
Proper storage is key to keeping your Peanut Butter Oatmeal Dog Treats fresh and delicious for your dog. Follow these guidelines for optimal shelf life:
- Room Temperature: Once completely cooled, these homemade dog treats can be stored in an airtight container on your countertop for up to 3 days. Ensure they are fully cool to prevent condensation, which can lead to mold.
- Refrigerator Storage: For extended freshness, place the cooled treats in an airtight container and store them in the refrigerator. They will last well for up to 7-10 days. This is generally recommended if you make a larger batch.
- Freezing for Long-Term: To enjoy these treats for months, they freeze beautifully! Once completely cooled, arrange the treats in a single layer on a baking sheet and flash freeze them for about an hour. Once solid, transfer them to an airtight, freezer-safe container or a resealable freezer bag. They can be stored in the freezer for up to 3 months.
- Thawing Frozen Treats: When your dog is ready for a frozen treat, simply pull one or two out of the freezer and let them defrost at room temperature for 15-30 minutes, or in the refrigerator overnight. Always ensure they are fully thawed before serving.
Frequently Asked Questions About Homemade Dog Treats
Got questions? We’ve got answers to some of the most common inquiries about making these healthy dog cookies.
- Q: Are these homemade dog treats safe for humans to eat?
A: Absolutely! Since these treats are made with wholesome, human-grade ingredients like oats, banana, peanut butter, and egg, they are perfectly safe for human consumption. In fact, many people find them quite tasty! We won’t judge if you sneak one for yourself. - Q: Can I use quick oats instead of rolled oats?
A: Yes, you can use quick oats. The texture might be slightly different, potentially a bit softer, but they will still work perfectly in the recipe. If using instant oats, make sure they are plain and unsweetened. - Q: My dog has a peanut allergy. Can I substitute the peanut butter?
A: If your dog has a peanut allergy, almond butter can be a safe alternative, provided it is also natural and xylitol-free. Always consult your veterinarian before introducing new ingredients, especially if your dog has known allergies. - Q: How can I make these treats crunchy?
A: For crunchier treats, you can bake them for a longer period at a slightly lower temperature (e.g., 300°F/150°C for 20-25 minutes), or bake them until firm and then dehydrate them in a very low oven or a food dehydrator until they reach your desired crispness. - Q: What if my dog doesn’t like bananas?
A: While most dogs enjoy bananas, if yours doesn’t, you can try substituting the banana with unsweetened applesauce or plain pumpkin puree (not pumpkin pie filling). These will also act as a binding agent and add natural sweetness. - Q: Can I add any other ingredients to make them extra special?
A: Yes, in moderation, you can add small amounts of other dog-safe ingredients like finely grated carrot, a pinch of cinnamon (which is good for dogs), or even some shredded unsweetened coconut. Always verify that any new ingredient is safe for dogs.
Spoil Your Pup with Love and Homemade Goodness!
There’s immense joy in knowing you’re providing your beloved dog with the very best, and these Peanut Butter Oatmeal Dog Treats are a testament to that. Easy to make, incredibly healthy, and absolutely irresistible to canines, this recipe empowers you to take control of your pet’s diet, ensuring they get only wholesome, natural ingredients. No more worrying about mystery additives or harmful fillers – just pure, simple goodness crafted with love.
Whether you’re catering to a sensitive stomach like Bailey’s or simply want to shower your furry friend with a delicious, nutritious snack, these homemade dog treats are the perfect solution. So, roll up your sleeves, gather your four simple ingredients, and get ready to bake some happiness! Your dog will thank you with wagging tails and happy barks.
We’d love to hear about your experience! How do you spoil your dog with these delightful dog cookies? Share your stories and tips!
Peanut Butter Oatmeal Dog Treats
Kristen Chidsey
12 medium treats
5 mins
10-12 mins
15-17 mins
Rate This
Print Recipe
These Peanut Butter Oatmeal Dog Treats are the perfect wholesome snack for your dog! Made with only four natural ingredients, these easy dog cookies are a fantastic homemade alternative to store-bought options.
Ingredients
- 1 large egg
- ½ cup mashed ripe banana (~1 large banana)
- 3 tablespoons creamy, natural peanut butter (Xylitol-free!)
- 1 cup rolled oats (certified gluten-free if needed)
Instructions
- Preheat oven to 350°F (175°C). Line a baking sheet with a silicone mat or parchment paper.
- In a large mixing bowl, whisk the egg. Add the mashed banana and natural peanut butter, then mix until the banana is thoroughly mashed and all ingredients are well combined.
- Stir in the rolled oats until they are fully moistened and evenly distributed throughout the batter.
- Scoop rounded tablespoons of batter onto the prepared baking sheet. Flatten each scoop slightly with a fork, resembling traditional peanut butter cookies.
- Bake for 10-12 minutes, or until the edges are lightly golden and the treats are firm to the touch.
- Allow the cookies to cool completely on a wire rack before serving to your dog.
Notes
- Storage: Once cooled, these homemade dog treats can be stored in an airtight container for 3-5 days at room temperature. They will last for up to 7-10 days in the refrigerator.
- Puppy-Friendly Modification: For puppies or a softer texture, use a food processor to blend the rolled oats into a fine oat flour before adding them to the other ingredients. The batter will be slightly thinner, making it ideal for baking in silicone molds (like these cute dog bones). If using molds, bake at 350°F (175°C) for 12-15 minutes. Let cool in the mold for 5 minutes before flipping out.
- Freeze Dog Treats: For long-term storage, allow the treats to cool completely. Place them in an airtight freezer-safe container or bag and store them in the freezer for up to 3 months. Thaw individual treats at room temperature or in the refrigerator before giving them to your dog.
- These treats are made with human-grade ingredients and are safe for humans to enjoy as well!
Nutrition (per treat, approx.)
Please note: Nutrition information is an approximation based on the ingredients and serving size. Actual values may vary.
- Calories: 54 kcal
- Carbohydrates: 5g
- Protein: 2g
- Fat: 2g
- Cholesterol: 13mg
- Sodium: 23mg
- Potassium: 55mg
- Vitamin A: 20 IU
- Calcium: 7mg
- Iron: 0.4mg