
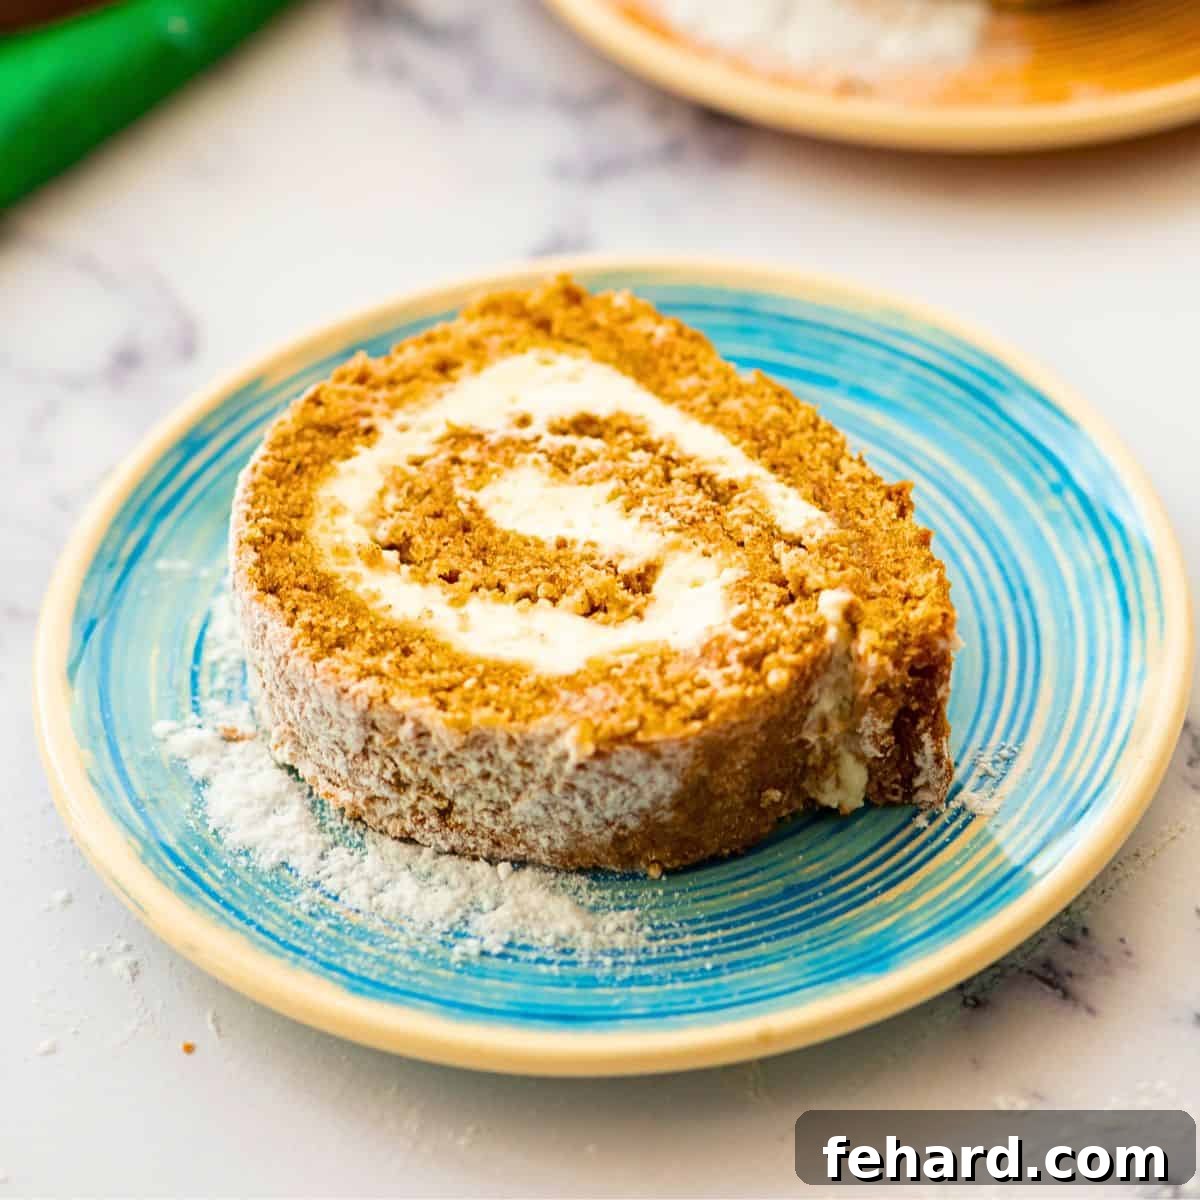
There’s a reason the Pumpkin Roll remains a beloved classic, especially during the festive fall and winter seasons. Imagine a tender, perfectly spiced pumpkin cake, delicately rolled around a rich and tangy cream cheese filling – a delightful combination that’s as impressive to look at as it is to eat. This comprehensive guide will show you how to create a flawless pumpkin roll, simplifying what many consider a challenging dessert into an **easy make-ahead treat** that’s truly **simple enough for beginners**. Get ready to impress your guests and savor every delicious bite!
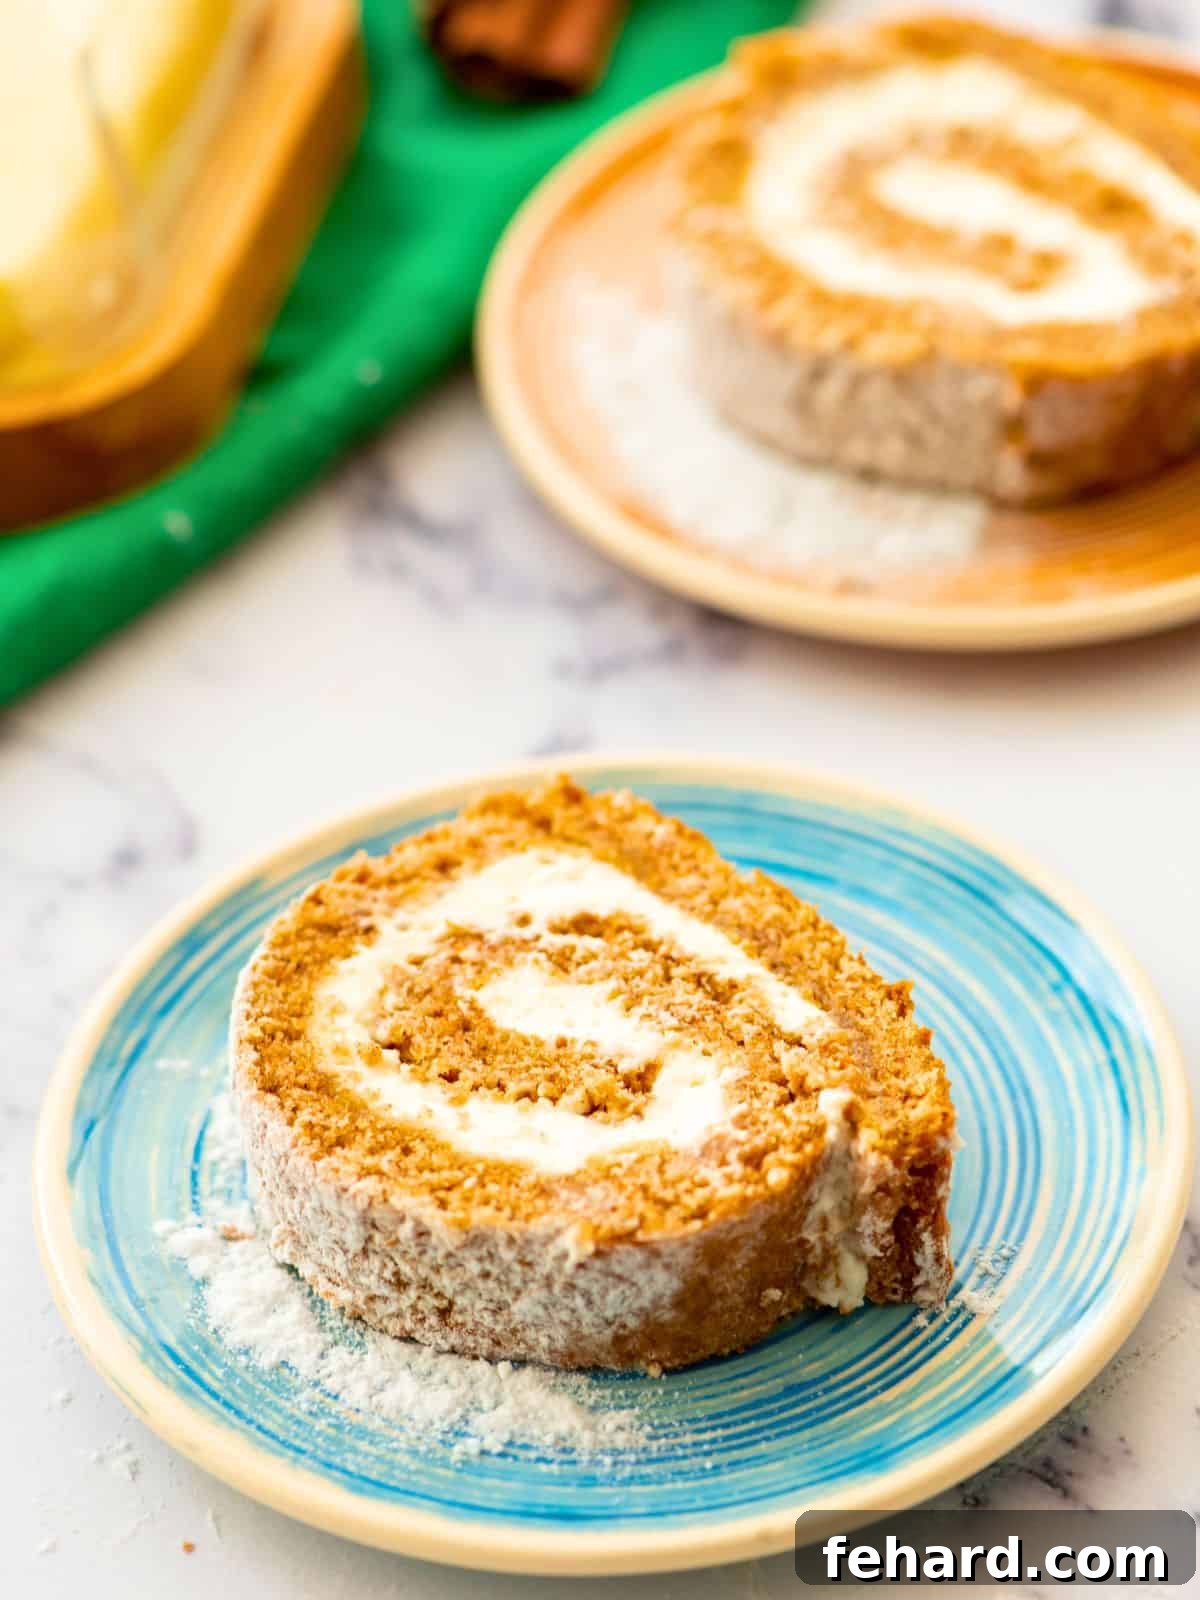
Unlock the Secrets to a Flawless Pumpkin Roll: Expert Tips
For years, this pumpkin roll recipe has been a treasured family staple, gracing our tables from Thanksgiving feasts to festive Christmas gatherings, or even just as a delightful “just because” treat. I’m thrilled to share my tried-and-true techniques that ensure a perfect, crack-free pumpkin roll every time. Before we dive into the step-by-step instructions, let’s explore a few crucial tips that will elevate your baking game and guarantee a show-stopping dessert:
- The Zesty Secret: A Touch of Lemon Juice. While many traditional pumpkin roll recipes, including the famous Libby’s version, might omit this ingredient, a small addition of lemon juice is my family’s cherished secret. This subtle citrus note doesn’t make the cake taste distinctly lemony; instead, it works wonders by brightening and enhancing the natural pumpkin and spice flavors, making them truly pop. It adds a delightful complexity and freshness that sets this recipe apart from the rest.
- Roll While Warm, Not Hot. This is arguably the most critical step for achieving a beautiful, crack-free roll without any tears or breaks. As soon as your pumpkin cake emerges from the oven, resist the urge to let it cool completely flat. Instead, immediately transfer it to a clean kitchen towel dusted generously with powdered sugar and gently roll it into a log. The residual heat from the freshly baked cake makes its delicate structure incredibly flexible and pliable, allowing it to conform to the rolled shape without breaking. Furthermore, a towel is less likely to stick to the warm cake than parchment paper, ensuring a smooth and easy unrolling later for filling.
- Room Temperature is Key for a Creamy Filling. For an incredibly smooth, velvety, and lump-free cream cheese frosting, always ensure both your cream cheese and unsalted butter are at true room temperature. Cold ingredients will inevitably result in a clumpy, uneven filling that is difficult to beat and spread. Planning ahead for this step by letting your ingredients soften on the counter for at least an hour will guarantee a luxurious, spreadable texture that perfectly complements the spiced pumpkin cake.
- Patience Pays Off: Chill Thoroughly Before Slicing. While the irresistible aroma of a freshly made pumpkin roll is tempting, allowing it to chill for at least 4 hours (and ideally overnight) is absolutely essential. This crucial chilling period serves two vital purposes: first, it allows the distinct flavors of the spiced pumpkin cake and the rich cream cheese filling to meld together beautifully, creating a more harmonious and delicious dessert experience. Second, and more practically, a thoroughly chilled roll becomes firm enough to slice cleanly and easily, resulting in those perfect, elegant spirals you see in bakeries. This also makes it one of my favorite make-ahead Thanksgiving recipes, saving you precious time on busy holiday mornings.
Step-by-Step Guide: How to Craft Your Own Perfect Pumpkin Roll
Many home bakers find the idea of preparing a cake roll somewhat intimidating, often fearing cracks, sticking, or a less-than-perfect spiral. However, there’s absolutely no reason to shy away from making a truly spectacular Homemade Pumpkin Roll. With my detailed instructions, helpful visuals, and proven tips, you’ll discover that rolling the cake is far simpler than you might imagine. This recipe will guide you to a beautiful presentation worthy of any high-end bakery. Let’s walk through each stage of the process together to ensure your success.
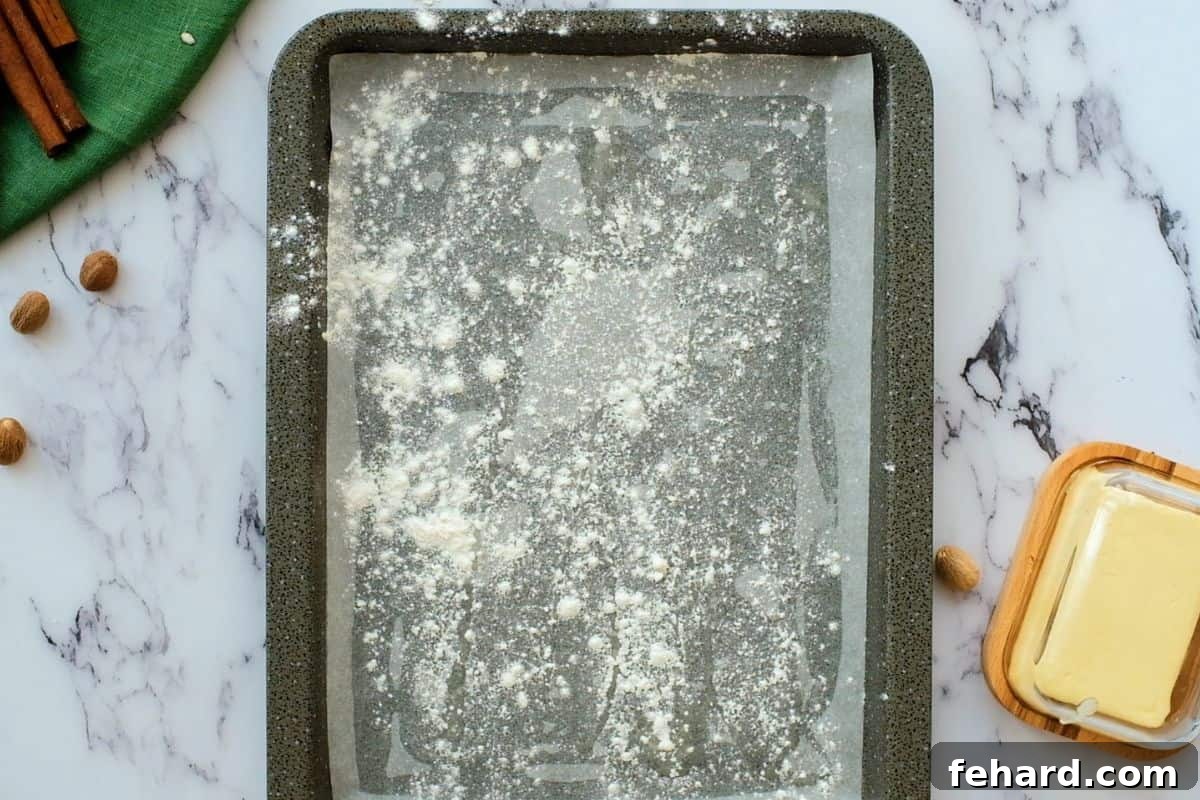
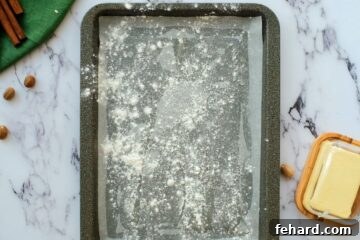
- Prepare Your Pan with Precision. Begin by preheating your oven to 375℉ (190℃). For a delicate cake that releases flawlessly every single time, meticulous pan preparation is paramount. First, lightly spray a 15×10-inch jelly-roll pan with a good quality cooking spray. Next, line the entire pan with a sheet of parchment paper, ensuring it covers the bottom and extends slightly up all four sides – this acts as a crucial barrier. Then, grease the parchment paper itself generously with either soft butter or additional non-stick spray. Finally, lightly dust the greased parchment with a thin coating of all-purpose flour, tapping out any excess. This comprehensive, four-step process may seem a bit particular, but it genuinely guarantees your tender pumpkin cake will release cleanly from the pan, preventing frustrating tears or sticking that can derail your beautiful roll.
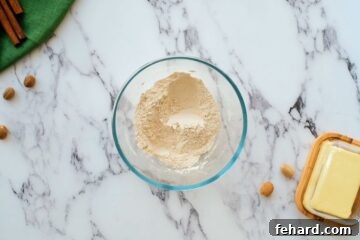
- Whisk Together the Dry Ingredients. In a small, separate bowl, combine all your essential dry ingredients: ¾ cup all-purpose flour, 1 teaspoon ground cinnamon, ½ teaspoon ground nutmeg, ½ teaspoon ground ginger, ½ teaspoon table salt, 1 teaspoon baking powder, and ½ teaspoon baking soda. Whisk them thoroughly until they are uniformly combined. This step is important for ensuring an even distribution of the leavening agents and warming spices throughout the cake batter, which contributes to a consistently flavorful and airy cake. Set this perfectly blended dry mixture aside for later use.
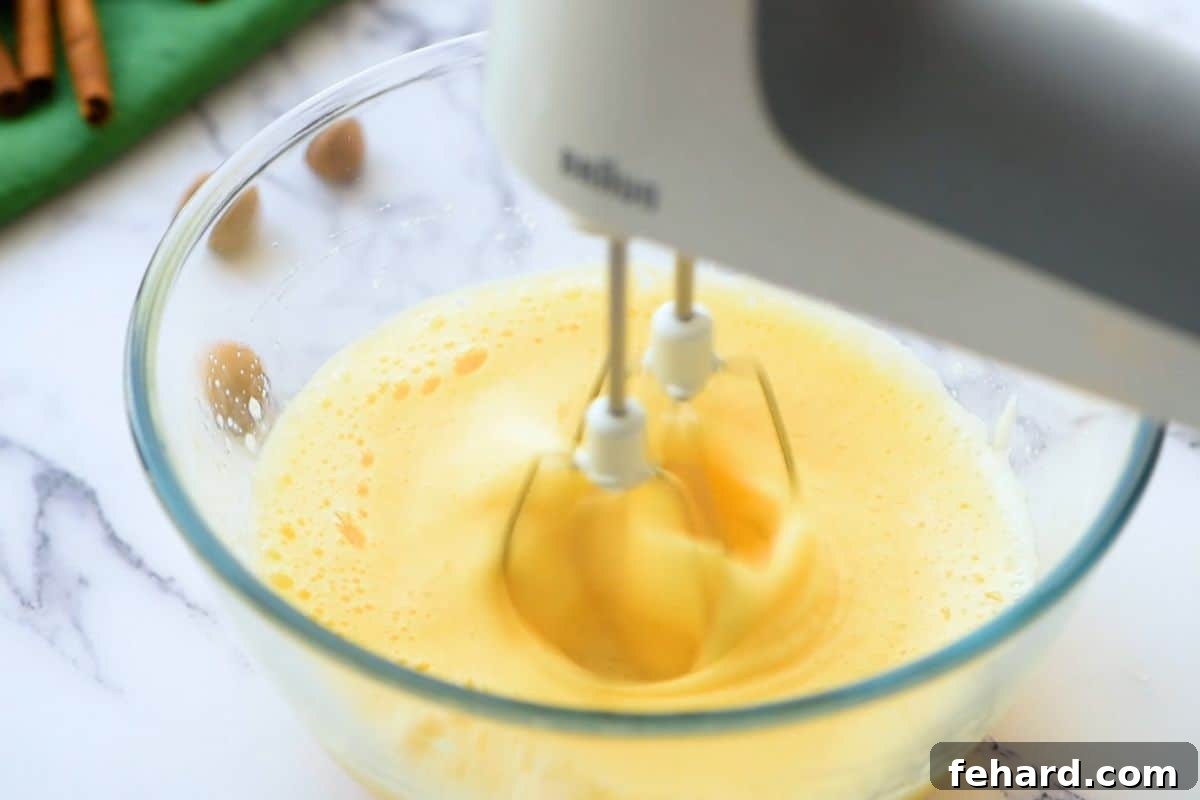
- Whip Eggs to Perfection for an Airy Cake. This step is fundamental for achieving the pumpkin cake’s signature light, airy, and pliable texture – crucial for a crack-free roll. In a large mixing bowl, beat 3 large eggs vigorously with a handheld mixer (or a stand mixer fitted with the whisk attachment) on medium speed for a good 3-5 minutes. Continue beating until the eggs become visibly light in color, significantly thicker, and wonderfully fluffy. This extensive beating incorporates a substantial amount of air into the eggs, creating a stable foam that gives the cake its characteristic sponge-like consistency. This aeration is precisely what makes the cake flexible enough to roll without cracking or breaking later on.
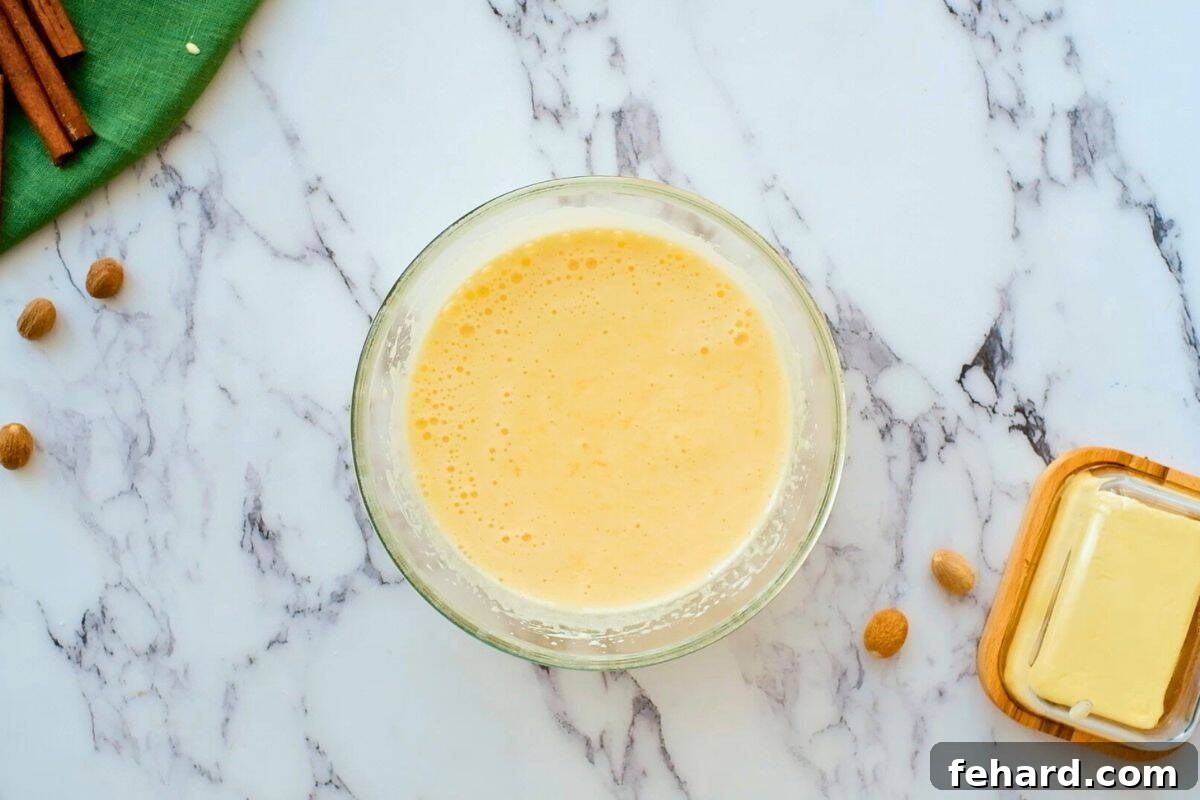
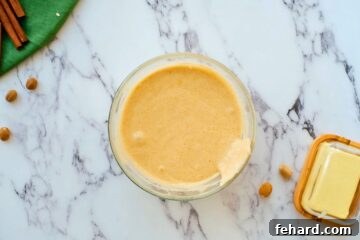
- Integrate Wet Ingredients with Care. Once your eggs are beautifully whipped and fluffy, gradually add 1 cup of granulated sugar to the egg mixture while continuing to beat on medium speed. It’s crucial to add the sugar slowly, allowing it sufficient time to fully dissolve and integrate into the eggs. This contributes to a smooth batter and prevents a grainy texture in the final cake. Continue beating until the mixture is well combined and thick. Then, stir in 1 teaspoon of fresh or good quality refrigerated lemon juice, followed by ⅔ cup of pure pumpkin puree (ensure it’s not pumpkin pie filling). Beat again on medium speed just until the pumpkin puree is fully incorporated and the mixture is uniformly smooth and orange. Avoid overmixing at this stage to maintain the airiness of the eggs.
Baking Tip: Go Slow with Sugar
Adding the granulated sugar slowly and incrementally to the whipped egg mixture is a tiny but vital detail. This ensures that each sugar crystal completely dissolves, resulting in a perfectly uniform and smooth batter. Rushing this step can lead to a slightly grainy texture in your finished pumpkin cake, so take your time here!
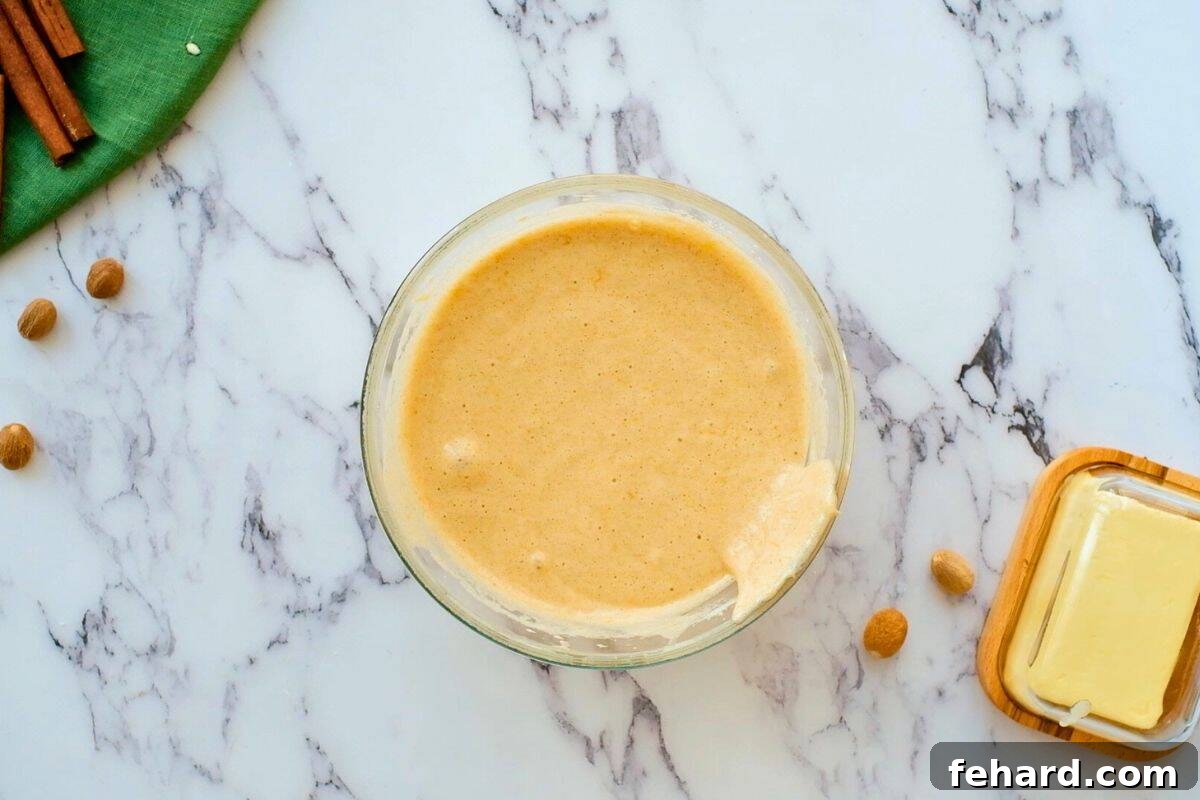
- Gently Fold in the Dry Ingredients. Now, it’s time to combine your wet and dry mixtures to form the cake batter. Add the previously prepared flour and spice mixture to the pumpkin-egg mixture in the large bowl. Using a rubber spatula, gently fold the dry ingredients into the wet until everything is just incorporated. The key here is to use a very light touch and avoid overmixing; excessive stirring can quickly deflate the air you worked so hard to incorporate into the eggs, leading to a dense cake that is unfortunately prone to cracking. Mix just enough until no streaks of flour remain, ensuring the cake remains wonderfully light and fluffy.
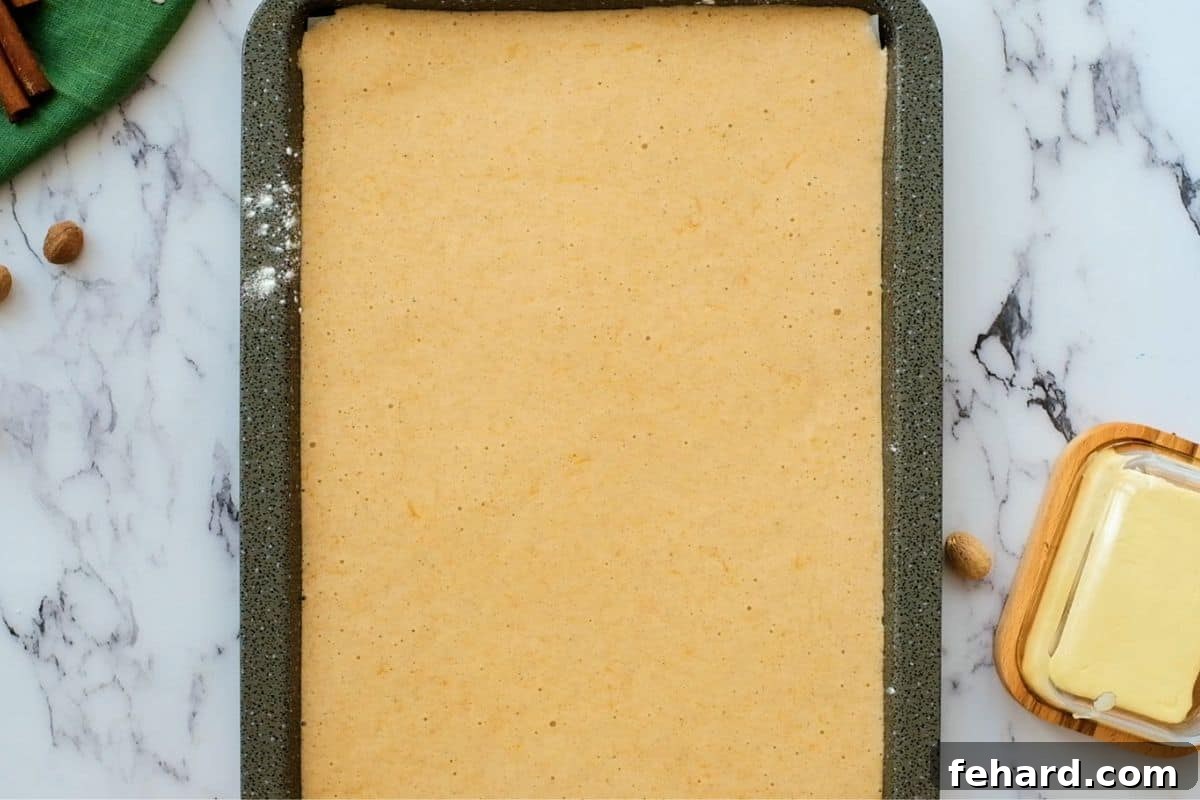
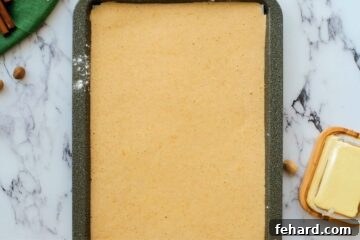
- Bake to a Golden Perfection. Carefully pour the delicate pumpkin cake batter into your meticulously prepared jelly-roll pan, spreading it evenly from corner to corner with an offset spatula. Ensure the batter is uniformly distributed for even baking. Bake for a mere 13-15 minutes in your preheated oven. This is a thin sheet cake, so it cooks very quickly. You’ll know it’s perfectly done when the center of the cake springs back gently when lightly touched with your finger, and the edges appear lightly golden. It’s crucial to avoid overbaking, as a dry cake will inevitably be stiff and much more likely to crack when rolled.
- Prepare Your Rolling Towel. While the cake is baking, prepare your “rolling station” to be ready the instant the cake is out of the oven. Lay out a clean, lint-free kitchen towel (a simple tea towel or thin dish towel works best, avoid terry cloth as it might leave fibers) flat on your countertop. Generously dust the entire surface of the towel with powdered sugar. This sugary layer will serve two vital purposes: it prevents the warm cake from sticking to the towel, and it also imparts a beautiful, subtle sweetness and an elegant finished look to the outer surface of your rolled cake. Have it smoothed out and ready to go.
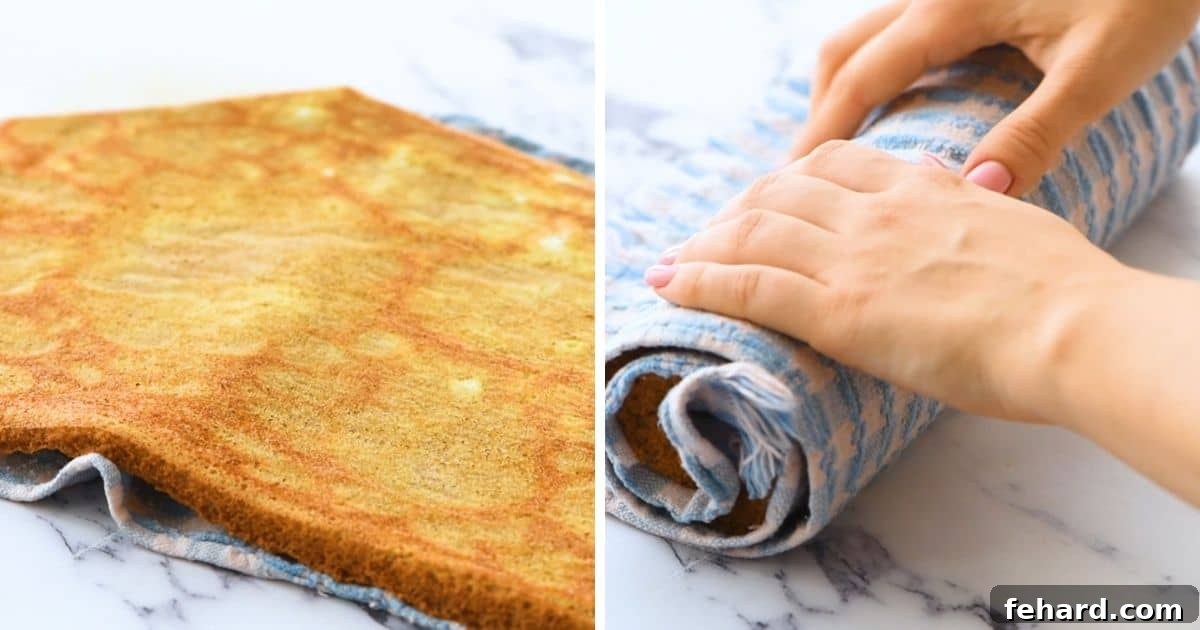
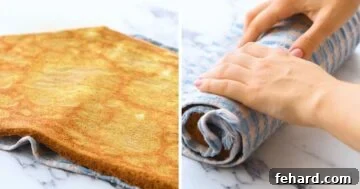
- The Crucial Roll: Shaping Your Cake. This is the moment of truth that often causes apprehension, but it’s simpler than you think! As soon as the cake is removed from the oven, immediately invert the prepared towel (powdered sugar side down) directly onto the hot cake in the pan. Carefully flip the entire pan and towel assembly upside down onto your counter or a cooling rack. Gently and slowly peel off the parchment paper from the bottom of the cake – it should come away easily thanks to your diligent pan preparation. Starting from one of the shorter ends of the cake, carefully and gently roll the cake and the towel together into a snug log. Don’t press too hard, just firm enough to create a tight coil. Allow this towel-wrapped cake log to cool completely at room temperature, which can take 1-2 hours. Cooling it in this rolled shape is absolutely essential as it “trains” the cake to maintain its spiral form, making the final unrolling and filling much easier and greatly reducing the risk of cracks.
Time-Saving Tip: Speed Up Cooling
If you’re short on time and need to speed up the cooling process, you can accelerate it. After the initial roll, carefully transfer the towel-wrapped cake log to the refrigerator. Chilling it this way can significantly reduce the cooling time, allowing you to proceed with preparing and spreading the filling much sooner.
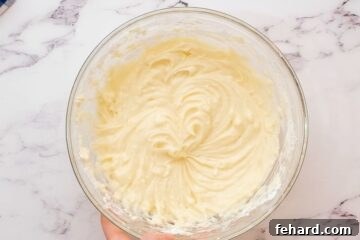
- Whip Up the Dreamy Cream Cheese Filling. While your cake is cooling completely, prepare the star of the show: the creamy, tangy, and irresistibly smooth cream cheese filling. In a medium mixing bowl, combine the softened cream cheese, softened unsalted butter, powdered sugar, and a generous splash of vanilla extract. Beat these ingredients with a stand mixer or a handheld mixer on medium speed until the mixture is incredibly smooth, light, and wonderfully fluffy. Make sure there are absolutely no lumps of cream cheese or butter, as this will result in a grainy frosting. This rich and tangy filling perfectly balances the sweetness and warming spices of the pumpkin cake, creating a harmonious flavor profile.
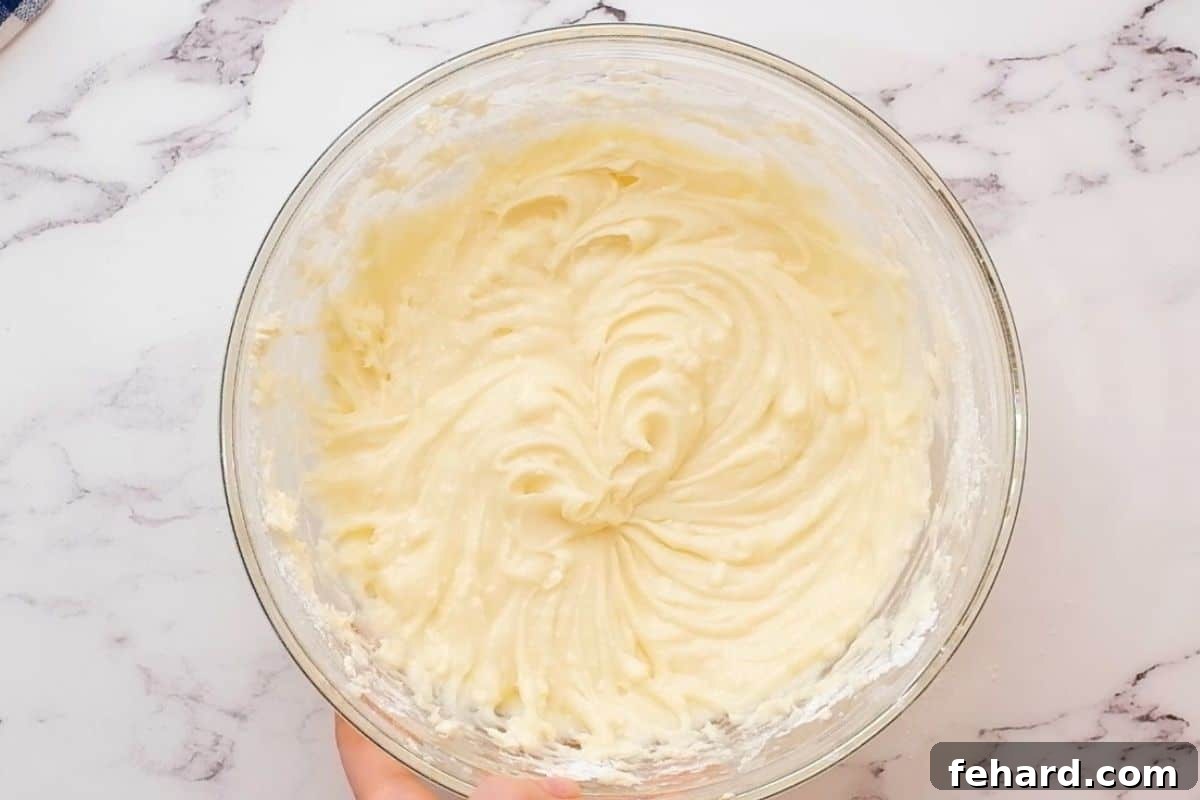
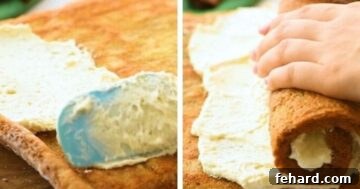
- Assemble for a Stunning Swirl. Once the cake is completely cool to the touch, gently unroll it from the towel onto a clean surface (like a large cutting board or baking sheet). Be careful not to force it, as it will naturally want to retain its rolled shape. Evenly spread the prepared cream cheese filling over the entire surface of the cake, leaving about a 1-inch border around all the edges. This small margin helps prevent the filling from squeezing out excessively when you re-roll. Then, starting from the same short end you began with, carefully re-roll the cake (this time without the towel) into a tight log. Don’t worry if the very ends look a little rustic or uneven; you can always trim them off for a cleaner, more professional presentation just before serving.
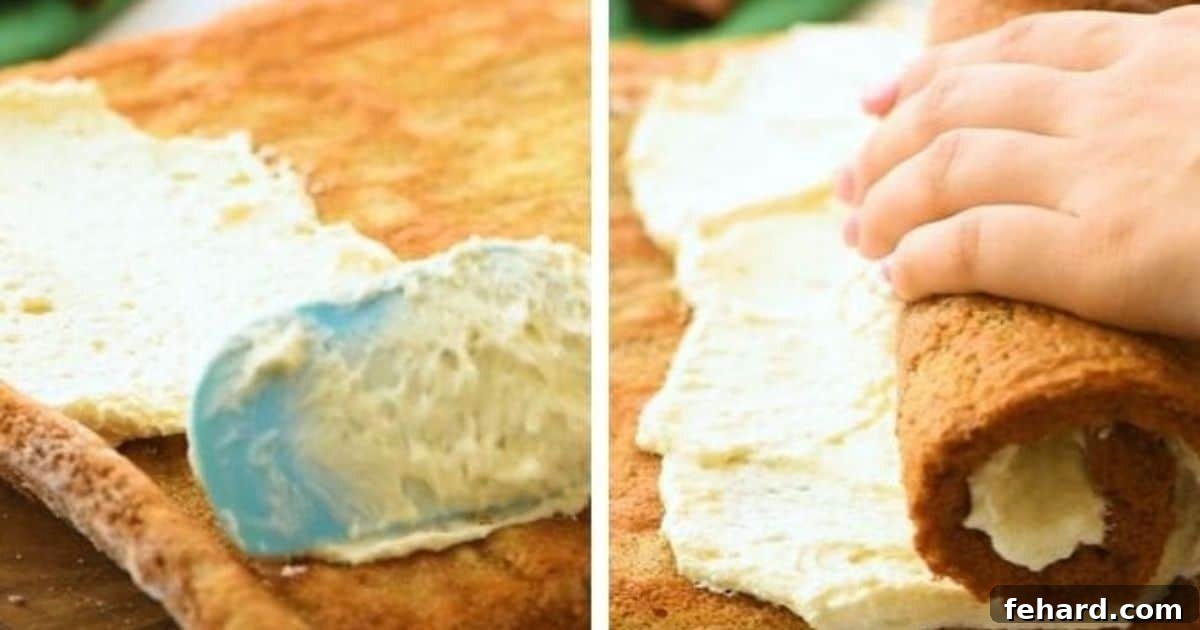
- The Essential Chill. To allow the flavors to truly meld and for the cake to firm up, making slicing a breeze, wrap the assembled pumpkin roll tightly in plastic wrap. Ensure it’s fully covered from all angles to prevent it from drying out or absorbing any refrigerator odors. Refrigerate for at least 4 hours, or ideally, overnight. This chilling period is absolutely crucial not just for achieving clean, neat slices, but also for deepening and enhancing the delicious interplay of flavors between the spiced pumpkin cake and the rich, tangy cream cheese filling.
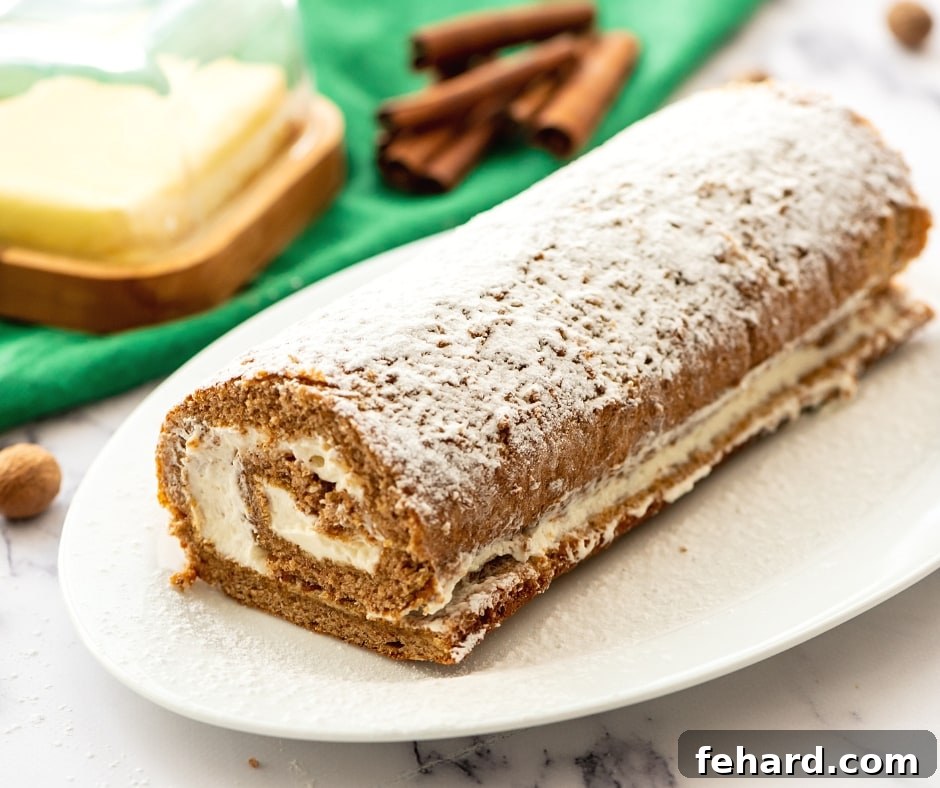
- Finishing Touch: Powdered Sugar Dusting. Just before you’re ready to slice and serve your magnificent pumpkin roll, give it a final, elegant dusting of powdered sugar. Use a fine mesh strainer for an even, delicate coating that adds a beautiful visual appeal and a delightful hint of extra sweetness. Once dusted, you can confidently slice it into beautiful rounds and serve immediately to appreciative guests.
Storage Instructions: Keeping Your Pumpkin Roll Fresh
One of the many fantastic qualities of a homemade pumpkin roll is its excellent make-ahead potential, making it a perfect candidate for busy holiday meals like Thanksgiving, Christmas, or any special occasion. It stays wonderfully fresh in the refrigerator for several days and freezes beautifully for longer enjoyment. For the best presentation, I always recommend waiting to slice your pumpkin roll until just before you plan to serve it, as pre-sliced pieces can dry out more quickly.
- Refrigerate: For short-term storage, wrap the entire pumpkin roll tightly in plastic wrap immediately after chilling. Ensure it’s fully sealed to prevent it from drying out or absorbing other aromas from the fridge. Store it in the refrigerator for up to 4 days. When you’re ready to serve, unwrap, give it a fresh dusting of powdered sugar if desired, then slice into elegant rounds and enjoy.
- To Freeze: To extend its delicious life even further, you can easily freeze your pumpkin roll. First, wrap the roll securely in a layer of plastic wrap, ensuring it’s completely sealed. Then, add a second protective layer of aluminum foil for extra defense against freezer burn. Place the double-wrapped roll into a freezer-safe bag or an airtight container. It can be safely stored in the freezer for up to 3 months. To thaw, simply transfer the frozen roll to the refrigerator overnight. Once completely thawed, unwrap, dust with powdered sugar, slice, and serve as usual.
Frequently Asked Questions About Pumpkin Roll
Here are answers to some common questions that often arise when making this delightful pumpkin roll:
- Why did my pumpkin roll crack? The most common culprits for cracks are overbaking the cake (which dries it out and makes it brittle and inflexible), or not rolling the cake immediately after it comes out of the oven. Rolling it while warm helps it “learn” the spiral shape and remain pliable. Additionally, ensure you beat your eggs sufficiently to incorporate enough air, as this also contributes significantly to a flexible, resilient cake structure.
- Can I use pumpkin pie filling instead of pure pumpkin puree? No, it’s crucial to use 100% pure pumpkin puree for this recipe. Pumpkin pie filling is already sweetened and spiced, and it contains other ingredients (like thickeners) that will alter the texture, moisture, and flavor balance of the cake roll, leading to undesirable results.
- How far in advance can I make a pumpkin roll? This pumpkin roll is an excellent make-ahead dessert! You can prepare the entire roll, including the filling, 2-3 days in advance and store it tightly wrapped in plastic in the refrigerator. The flavors actually deepen and improve with a little time. For longer planning, you can freeze it as described in the storage section.
- What if I don’t have a specific jelly roll pan? While a 15×10-inch jelly-roll pan is ideal, a standard baking sheet with raised edges (approximately 10×15 inches or similar dimensions, with at least a 1-inch lip to contain the batter) can often work as a substitute. Be aware that you might need to adjust baking time slightly depending on the exact dimensions and how thin the cake spreads.
- Can I make this pumpkin roll gluten-free? While this specific recipe hasn’t been rigorously tested with gluten-free flour, many readers have reported success using a high-quality 1:1 gluten-free baking blend that contains xanthan gum. However, results may vary in terms of final cake texture and its ability to roll without cracking, so proceed with caution and perhaps a test batch if possible.
Explore More Delicious Pumpkin Recipes
If you’ve fallen in love with the comforting flavors of this pumpkin roll, you’re in for an even greater treat! Pumpkin is an incredibly versatile ingredient, perfect for a wide array of both sweet and savory dishes that celebrate the essence of fall and winter. Here are some more of my favorite pumpkin-inspired recipes to keep your seasonal baking festive, flavorful, and exciting:
- Homemade Pumpkin Pie
- Pumpkin Cake with Cream Cheese Frosting
- Whole Wheat Pumpkin Muffins
- Instant Pot Pumpkin Cheesecake
- Pumpkin Chocolate Chip Cookies
Classic Pumpkin Roll with Cream Cheese Filling
Kristen Chidsey
12 Servings
20 mins
15 mins
2 hrs (minimum)
2 hrs 35 mins
Pin Recipe
Leave a Review
Print Recipe
This delightful Pumpkin Roll combines a fluffy, perfectly spiced pumpkin cake with a rich and tangy cream cheese filling. It’s a visually impressive dessert that’s surprisingly easy to make and ideal for any autumn or winter celebration, especially Thanksgiving or Christmas. Follow our expert tips for a crack-free roll every time!
Recipe Video
For visual guidance, watch our step-by-step video tutorial on making this pumpkin roll! (Link to video if available externally)
Ingredients
For the Pumpkin Sheet Cake
- Butter or nonstick spray, for greasing pan
- Powdered sugar, for dusting the towel
- ¾ cup all-purpose flour, plus a few teaspoons for preparing sheet pan
- 1 teaspoon ground cinnamon
- ½ teaspoon ground nutmeg
- ½ teaspoon ground ginger
- ½ teaspoon table salt
- 1 teaspoon baking powder
- ½ teaspoon baking soda
- 3 large eggs
- 1 cup granulated sugar
- 1 teaspoon lemon juice, fresh or refrigerated
- ⅔ cup pure pumpkin puree (not pumpkin pie filling)
For the Cream Cheese Filling
- 1 teaspoon vanilla extract
- 4 tablespoons unsalted butter, softened
- 6 ounces cream cheese, softened
- 1 cup powdered sugar
Instructions
For the Cake
-
Preheat the oven to 375℉ (190℃). Prepare a 15 x 10-inch jelly-roll pan by spraying it with cooking spray, lining it with parchment paper, greasing the parchment paper with butter or nonstick spray, and then lightly dusting with flour, tapping off any excess. This multi-step process ensures a clean release of the delicate cake.

-
Lay a clean, lint-free linen towel on your counter and sprinkle it generously and evenly with confectioners’ sugar. This will be used immediately after the cake bakes to prevent sticking and aid in rolling.
-
In a small bowl, whisk together the ¾ cup all-purpose flour, 1 teaspoon ground cinnamon, ½ teaspoon ground nutmeg, ½ teaspoon ground ginger, ½ teaspoon table salt, 1 teaspoon baking powder, and ½ teaspoon baking soda until thoroughly combined. Set this dry mixture aside.
-
In a large mixing bowl, beat 3 large eggs using a handheld or stand mixer on medium speed for about 5 minutes, or until they are light, thick, and fluffy. This incorporates crucial air. Slowly add 1 cup granulated sugar and 1 teaspoon lemon juice, continuing to mix until well combined and the sugar is dissolved. Stir in ⅔ cup pure pumpkin puree on medium speed until just incorporated, being careful not to overmix.
-
Add the prepared dry flour mixture to the wet pumpkin mixture. Using a spatula, gently fold the dry into the wet ingredients until just combined and no streaks of flour remain. Be gentle to maintain the airy texture of the batter.
-
Spread the cake batter evenly into the prepared jelly-roll pan using an offset spatula. Bake for 13-15 minutes, or until the cake springs back when lightly touched in the center. Avoid overbaking.
-
Immediately upon removing the cake from the oven, invert it onto the sugar-dusted towel. Carefully peel off the parchment paper. Starting from a short end, gently roll the cake and the towel together into a log. Allow the cake to cool completely in this rolled position, which helps it set its shape without cracking.

For the Cream Cheese Filling
-
In a medium mixing bowl, cream together 6 ounces softened cream cheese, 4 tablespoons softened unsalted butter, and 1 teaspoon vanilla extract using a handheld mixer on medium speed until the mixture is completely smooth and free of lumps.
-
Sift 1 cup powdered sugar over the cream cheese mixture, then mix on low speed until fully incorporated, creamy, and smooth. The filling should be thick enough to spread easily.
Assemble the Pumpkin Roll
-
Once the cake is completely cool, gently unroll it from the towel onto a clean surface. Spread the prepared cream cheese filling evenly over the entire surface of the cake, leaving about a 1-inch border from the edges. Carefully re-roll the cake into a tight log (without the towel this time). Trim the ends for a neat finish if desired.
-
Wrap the assembled pumpkin roll tightly in plastic wrap to prevent drying. Refrigerate for at least 4 hours, or ideally overnight, to allow the flavors to meld and the cake to firm up for easier slicing.
-
Before serving, remove the chilled pumpkin roll from the refrigerator and let it sit at room temperature for 15-30 minutes for optimal flavor and texture. Dust generously with powdered sugar using a fine mesh strainer. Slice into beautiful rounds and serve immediately.
Equipment You’ll Need
- Jelly roll pan (15×10 inches)
- Parchment Paper
- Handheld or stand mixer
- Mixing bowls (small, medium, large)
- Spatula and/or offset spatula
- Clean, lint-free kitchen towel
- Fine mesh strainer (for dusting powdered sugar)
Recipe Notes & Tips for Success
Optimal Serving Temperature: Pumpkin Roll is truly at its best when served completely chilled. The flavors are more pronounced, and the texture is perfect for slicing.
Pumpkin Spice Shortcut: If you don’t have individual spices on hand, you can substitute the ground cinnamon, nutmeg, and ginger with 2 teaspoons of homemade pumpkin pie spice or a good quality store-bought blend.
Using Homemade Pumpkin Puree: If you’re using homemade pumpkin puree, it often contains more moisture than canned versions. To ensure your cake isn’t too wet, place the homemade puree in a fine-mesh strainer lined with cheesecloth over a large bowl. Refrigerate for a couple of hours to allow any excess moisture to drain off. Measure out ⅔ cup of the drained puree and use as directed in the recipe.
Storage Best Practices: For short-term storage, wrap the pumpkin roll tightly in plastic wrap and keep it in the refrigerator for 3-4 days. To freeze for longer enjoyment, first wrap the roll securely in plastic wrap, then add an outer layer of foil. Place it in a freezer-safe bag and freeze for up to 3 months. Thaw overnight in the refrigerator before serving, then dust with powdered sugar.
This recipe has been thoughtfully adapted from the classic Pumpkin Roll found on Libby’s canned pumpkin puree, with personal enhancements for superior flavor and texture.
Nutrition Information (Approximate Per Serving)
Carbohydrates: 35 g
Protein: 4 g
Fat: 7 g
Saturated Fat: 4 g
Cholesterol: 59 mg
Sodium: 260 mg
Potassium: 120 mg
Fiber: 1 g
Sugar: 28 g
Vitamin A: 2373 IU
Vitamin C: 1 mg
Calcium: 49 mg
Iron: 1 mg
Nutrition information is automatically calculated and should be used as an approximation only.