
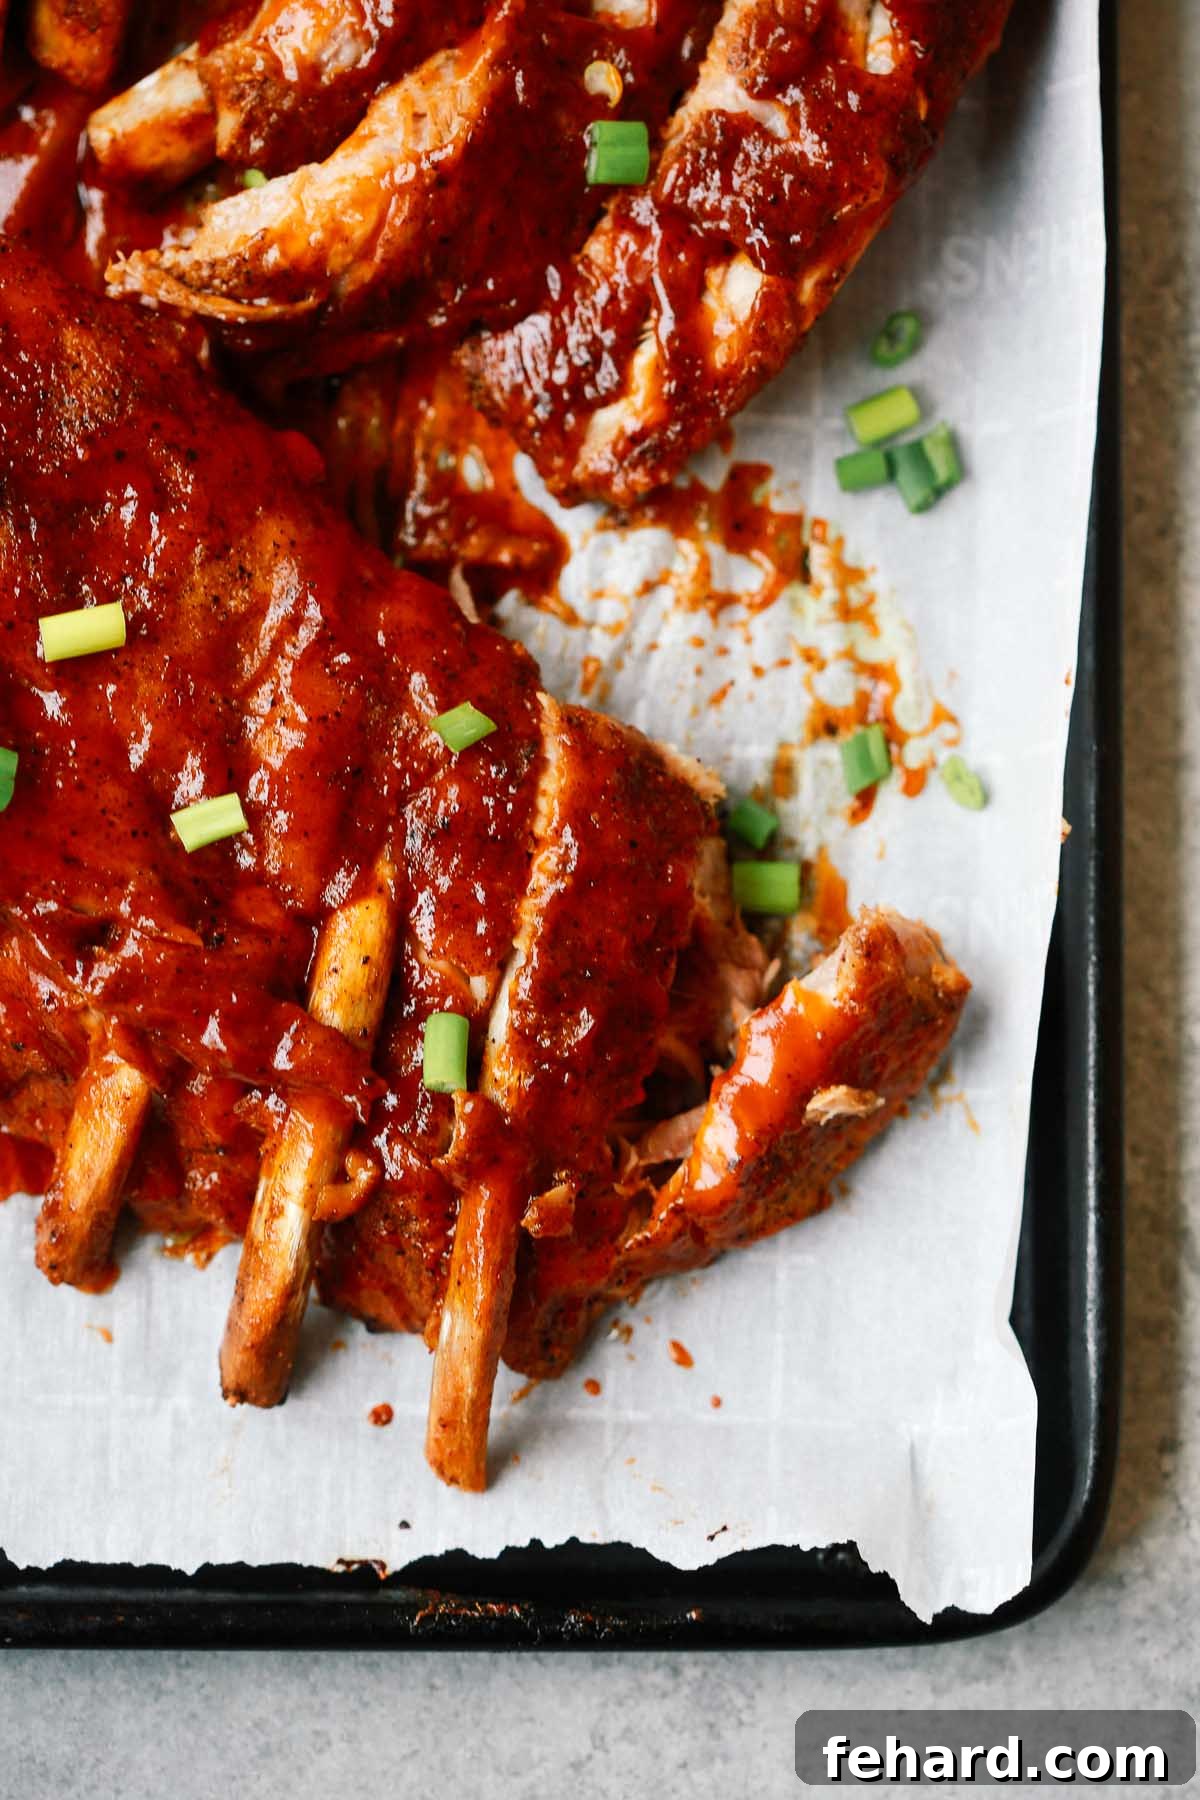
Craving succulent, fall-off-the-bone ribs but short on time? Look no further! These Easy Instant Pot Ribs are your ticket to enjoying incredibly tender, flavor-packed ribs in a fraction of the traditional cooking time. Forget long hours slaving over a smoker or oven; with your pressure cooker, you’ll achieve results that taste like they took all day, but are ready remarkably fast. This recipe promises not just speed, but a deeply satisfying, finger-licking good meal that will quickly become a family favorite. Get ready to transform your weeknight dinners or impress guests with minimal effort.
If you’re a fan of delicious ribs, be sure to explore more of my tried-and-true recipes, like my Oven Baked Ribs for a classic approach, or my Slow Cooker Ribs when you prefer a hands-off, all-day simmer.
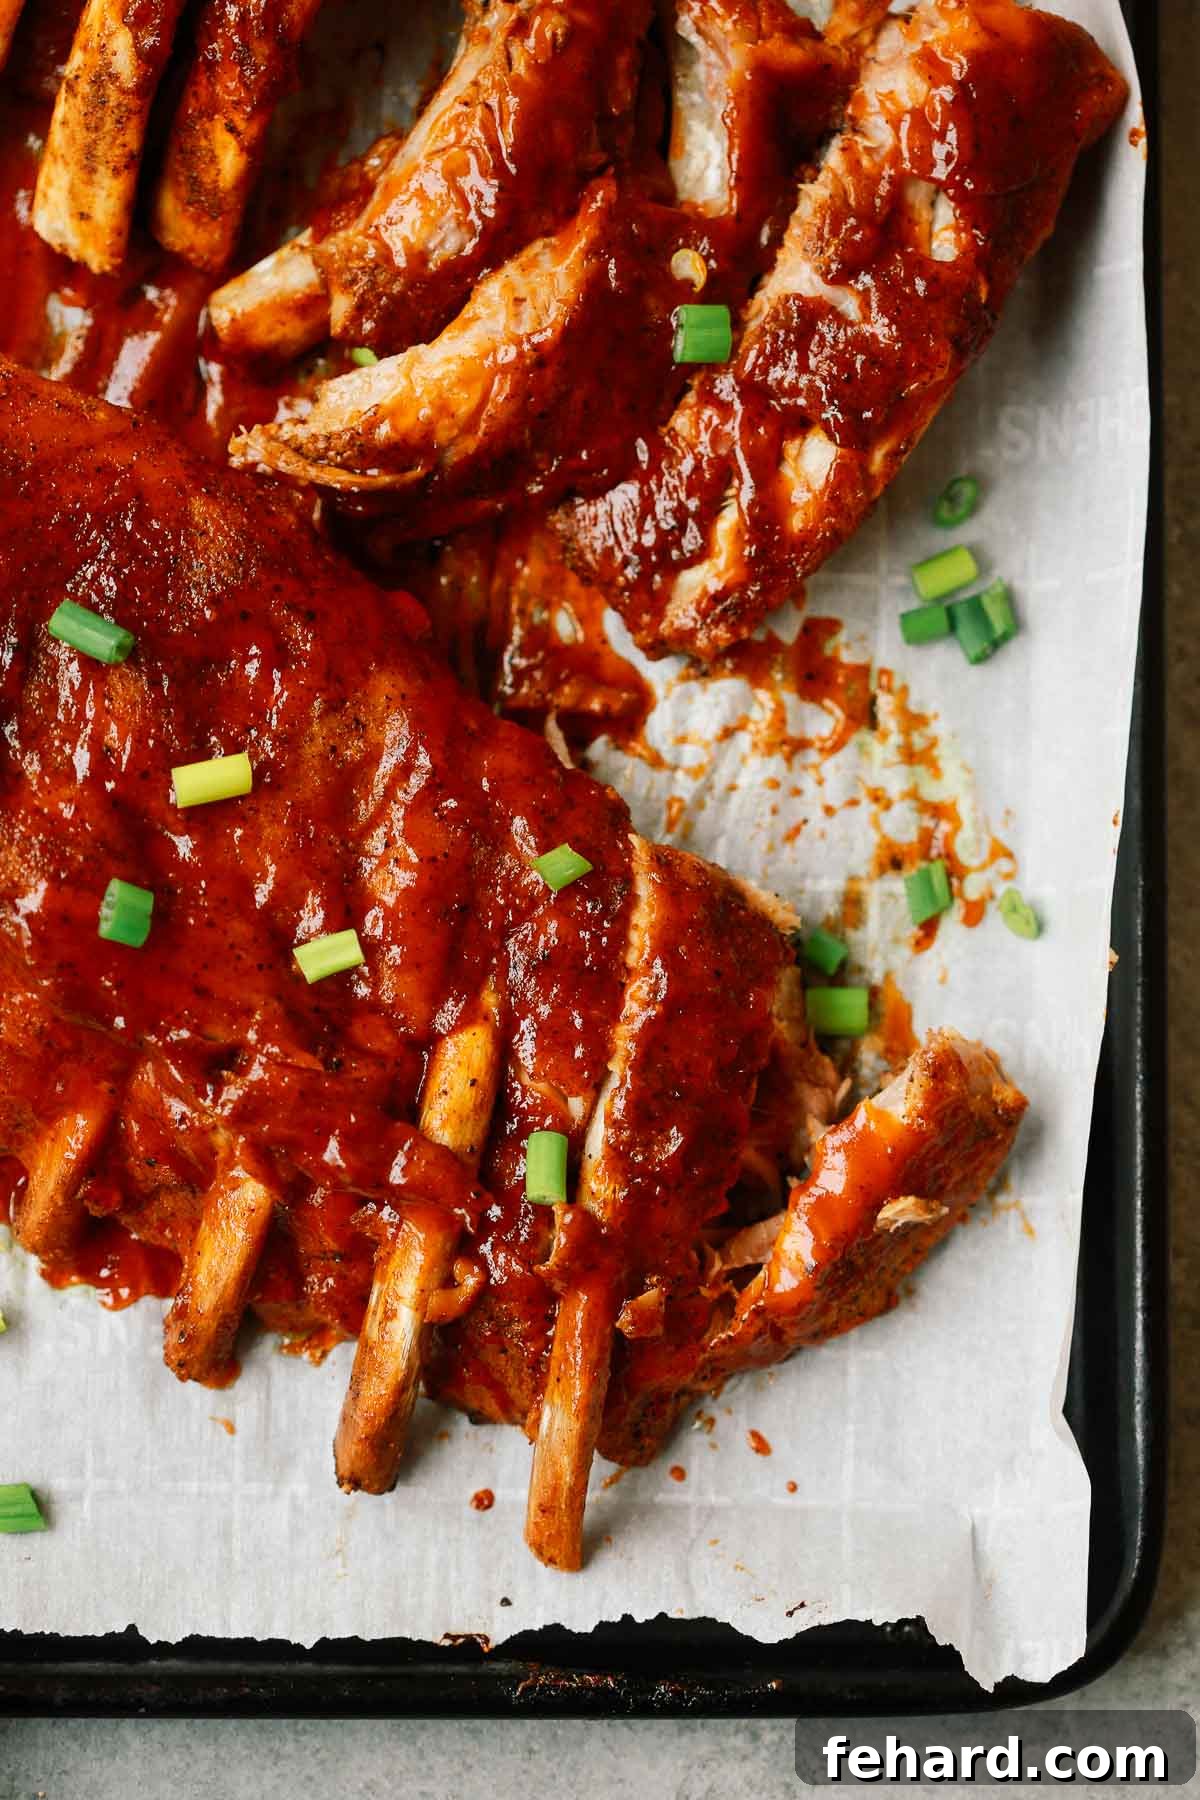
Why the Instant Pot is a Game-Changer for Ribs
If you haven’t yet discovered the magic of making ribs in your Instant Pot, you’re in for a delightful surprise! Traditionally, achieving truly tender ribs requires extended cooking times, whether through slow smoking, baking, or braising. While these methods yield fantastic results, they often demand patience and foresight—luxuries we don’t always have. That’s where the Instant Pot steps in as a culinary superhero, drastically cutting down cooking duration without compromising on tenderness or flavor.
The pressure cooker environment creates intensely moist heat, forcing liquids and flavors deep into the meat, resulting in ribs that are unbelievably juicy and literally fall off the bone. This easy Instant Pot ribs recipe skips lengthy marinating, allowing you to go from raw ribs to a mouth-watering meal in under an hour of active cooking. Yes, you read that right: approximately 25-30 minutes under pressure, plus a bit of time for pressure to build and release, and a quick broil for that perfect caramelized finish. This efficiency makes it possible to enjoy gourmet-quality ribs even on the busiest weeknights. So, the next time you spot a great deal on a rack of ribs, know that a delicious dinner is just minutes away, not hours!
Even if you don’t own an Instant Pot, don’t despair! You can still enjoy fantastic ribs. The initial cooking steps for membrane removal and applying the rub remain the same. Instead of pressure cooking, you can finish your ribs on a traditional BBQ grill for that smoky char or under the broiler if you prefer an indoor option.
Choosing the Right Ribs for Instant Pot Perfection
When it comes to ribs, the options can sometimes seem a bit overwhelming. You’ll typically encounter three main types: spare ribs, St. Louis-style ribs, and baby back ribs. Each offers a unique texture and flavor profile, but for the ultimate Instant Pot experience, I highly recommend opting for baby back ribs. Here’s a breakdown to help you understand why:
- Baby Back Ribs: These are my top choice for pressure cooking, and for this recipe specifically. They are cut from the loin area of the pig, closer to the backbone, which is why they are often referred to as “loin ribs.” Baby backs are shorter, more curved, and boast a higher meat-to-bone ratio compared to spare ribs. Their leaner profile means they cook faster and absorb flavors beautifully under pressure, resulting in exceptionally tender and juicy meat. While they might be slightly pricier per pound, their superior tenderness and quicker cooking time make them well worth the investment for a truly satisfying meal.
- St. Louis-Style Ribs: These are spare ribs that have been trimmed to a more uniform, rectangular shape by removing the sternum bone and cartilage. This makes them easier to handle and cook evenly, but they still retain the characteristics of spare ribs. They come from the belly of the pig, so they tend to be fattier and larger than baby backs, requiring a bit more cooking time.
- Spare Ribs: These are cut from the belly section of the pig, just below the loin. They are larger, straighter, and contain more fat and cartilage than baby back ribs. While incredibly flavorful, they typically require a longer cooking duration to break down the connective tissues and achieve desired tenderness. If you choose to use spare ribs or St. Louis-style ribs in your Instant Pot, you might need to increase the pressure cooking time by 5-10 minutes to ensure they reach that coveted fall-off-the-bone stage. Always adjust cooking times based on the thickness and type of ribs you’re working with.
No matter which cut you choose, ensure your ribs look fresh and have good marbling for the best results. For this recipe, focusing on baby back ribs will give you the quickest and most consistent path to perfect Instant Pot Ribs.
Essential Ingredients for Your Instant Pot Ribs
Crafting delicious Instant Pot Ribs requires a handful of key ingredients that work together to create that unforgettable taste and texture. Each component plays a vital role in achieving tender, smoky, and perfectly glazed ribs. Here’s what you’ll need, along with some tips for selecting and using them:
- Baby back pork ribs: As discussed, baby back ribs are highly recommended for their tenderness and optimal cooking time in the Instant Pot. Aim for racks that are well-marbled but not excessively fatty. While they may cost a little more, the quality and faster cooking make them a worthwhile investment. If using spare ribs or St. Louis-style, be prepared to adjust your pressure cooking time slightly.
- Beef broth: This forms the essential liquid base for your pressure cooker. It not only prevents the Instant Pot from seizing but also infuses the ribs with a deeper, richer flavor during the high-pressure cooking process. You can use low-sodium broth to control the overall saltiness of your dish.
- Liquid smoke: This is your secret weapon for imparting an authentic, smoky barbecue flavor without needing a smoker. Liquid smoke is a natural byproduct created by condensing the smoke from burning wood into a liquid form. Just a small amount goes a long way in giving your ribs that backyard BBQ essence, enhancing their overall depth of flavor.
- Barbecue Sauce: Choose your favorite store-bought barbecue sauce to finish these ribs. Whether you prefer a sweet, tangy, spicy, or smoky variety, this is where you can truly personalize the flavor. I often opt for a sugar-free barbecue sauce to keep the recipe low carb and keto-friendly, but any high-quality sauce will work beautifully.
- For the rub: A robust dry rub is crucial for building layers of flavor. My go-to blend includes:
- Garlic powder: Adds a savory, aromatic base.
- Onion powder: Complements the garlic with another layer of savory depth.
- Paprika: Provides color and a mild, sweet peppery note. You can use smoked paprika for an extra layer of smokiness.
- Kosher salt: Essential for seasoning the meat and enhancing all other flavors.
- Cracked black pepper: Adds a subtle heat and pungent aroma.
- Cumin: Imparts an earthy, warm spice that pairs wonderfully with pork.
- Chili powder: Offers a mild warmth and a complex blend of spices. Adjust the quantity to your preferred level of heat.
- Optional: Brown sugar: While I’ve designed this recipe to be sugar-free, a touch of brown sugar (or a brown sugar substitute) can be added to the rub for those who enjoy a sweeter, more caramelized crust. It will certainly enhance the classic BBQ flavor.
How to Make Tender Ribs in Your Instant Pot
Making incredible ribs in the Instant Pot is surprisingly straightforward. Follow these steps to achieve perfectly tender, flavorful results every time.
Preparing the Ribs: The Crucial Membrane Removal
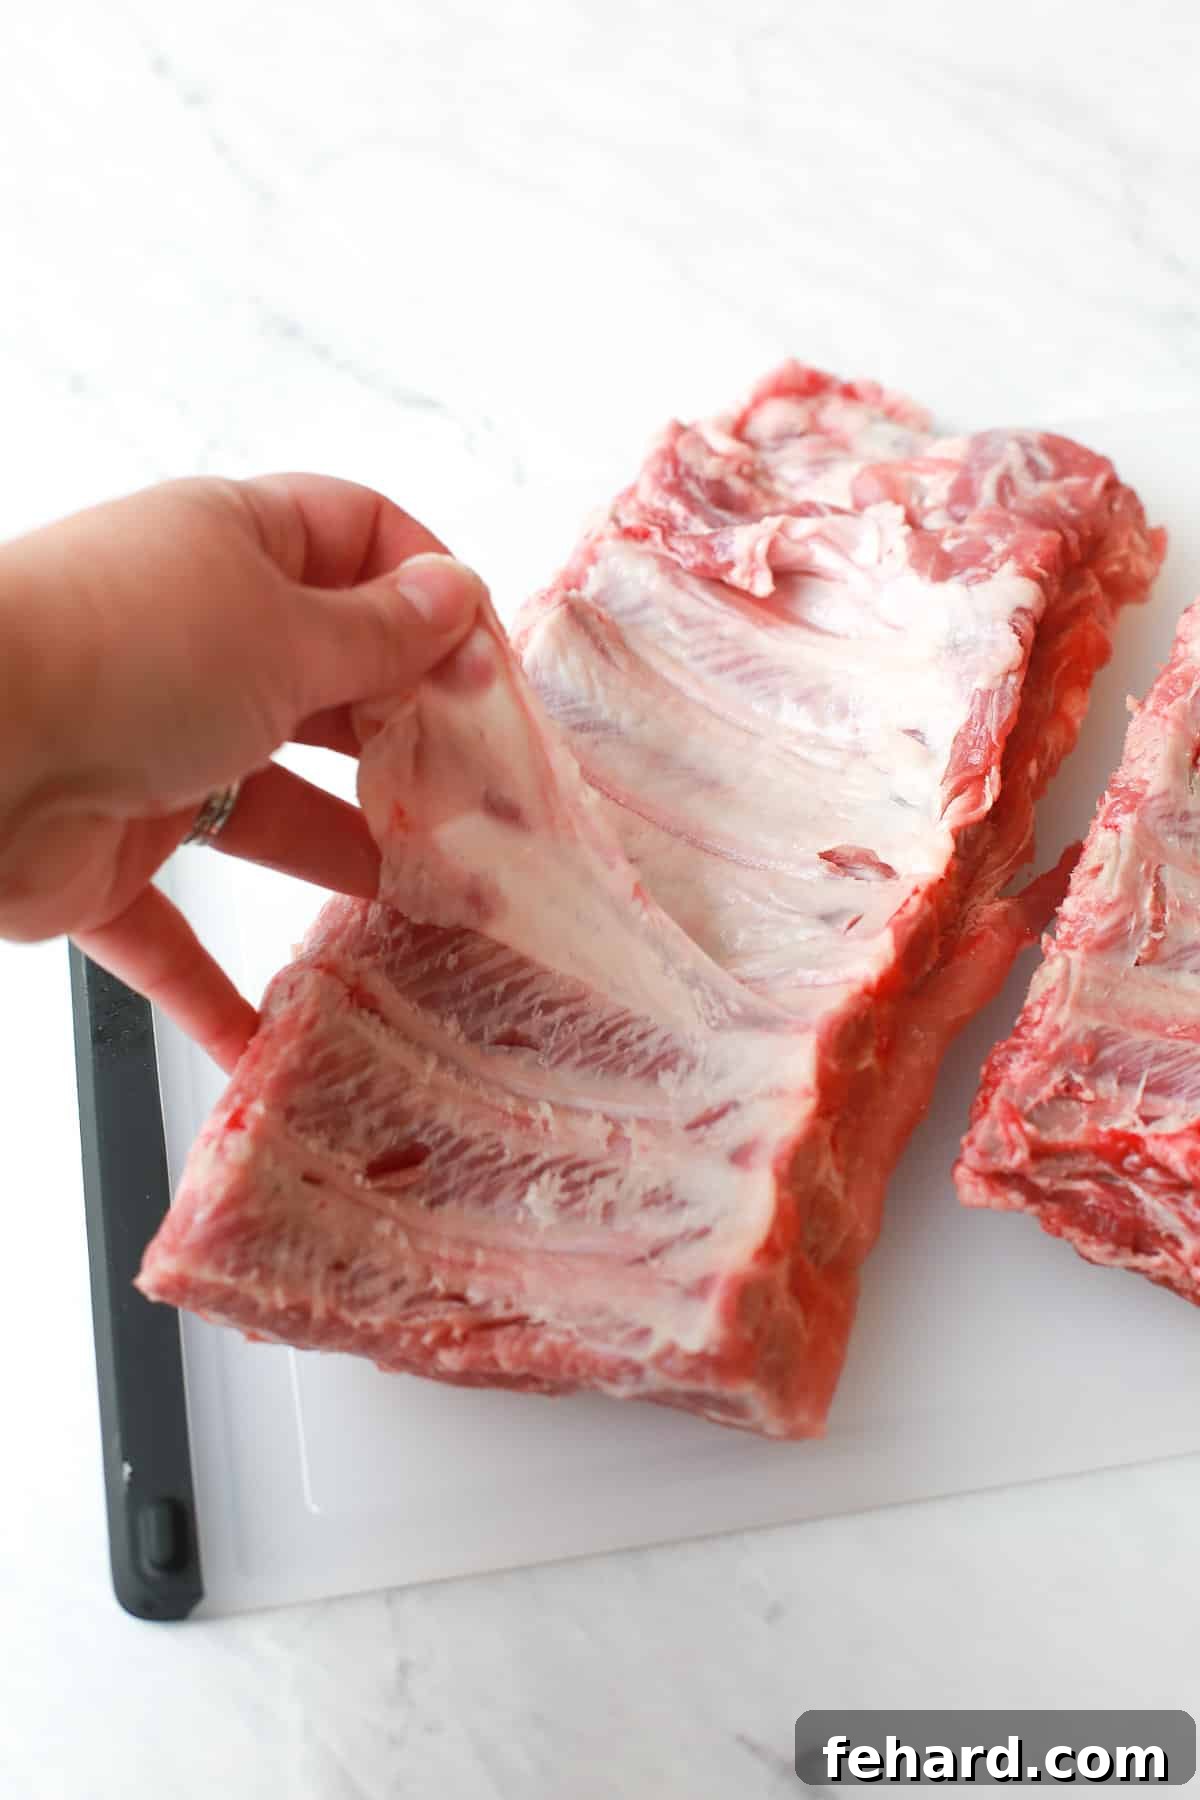
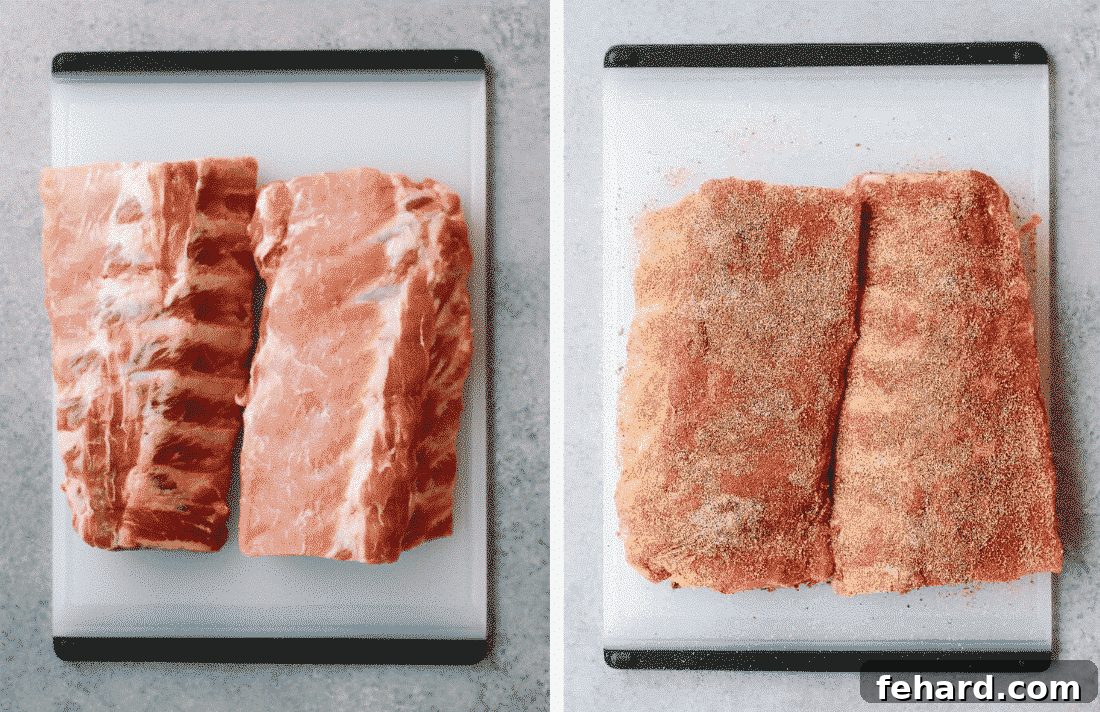
Before you even think about seasoning or cooking, there’s one vital step that ensures your ribs are as tender and enjoyable as possible: removing the membrane. This thin, silverskin layer is located on the back (bone side) of the ribs. While often overlooked, leaving it on can result in tough, chewy ribs that don’t absorb flavor as effectively. It only takes a few seconds and makes a huge difference in the final texture of your dish.
To remove it, simply use a small knife or the handle of a spoon to gently lift a corner of the membrane from one end of the rack. Once you have a good grip, use a paper towel for better traction and steadily pull the membrane away from the bones. It should peel off in one or two pieces. Don’t skip this step – it’s a small effort for a big reward in tenderness and taste!
Crafting and Applying the Flavorful Dry Rub
The dry rub is where much of the initial flavor for your ribs comes from. A well-applied rub creates a delicious crust and infuses the meat with aromatic spices.
- Mix the Rub: In a small bowl, combine your garlic powder, onion powder, paprika, kosher salt, cracked black pepper, cumin, and chili powder. If you’re adding brown sugar, mix it in now.
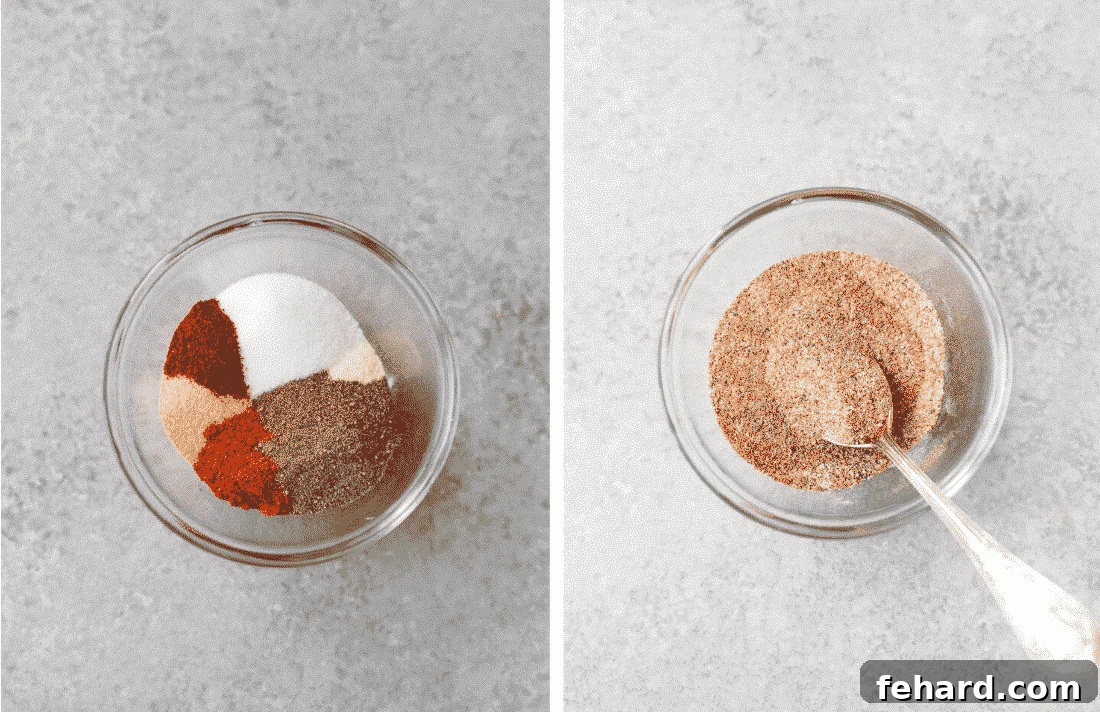
- Season Thoroughly: Liberally sprinkle the spice rub all over the ribs. Don’t be shy! Use your hands to massage the rub into all sides of the meat—the top, bottom, and edges. Ensure every crevice is covered; this creates a deeply flavorful crust that will be locked in during pressure cooking.
Pressure Cooking to Perfection
This is where the Instant Pot truly shines, transforming tough ribs into melt-in-your-mouth goodness in record time.
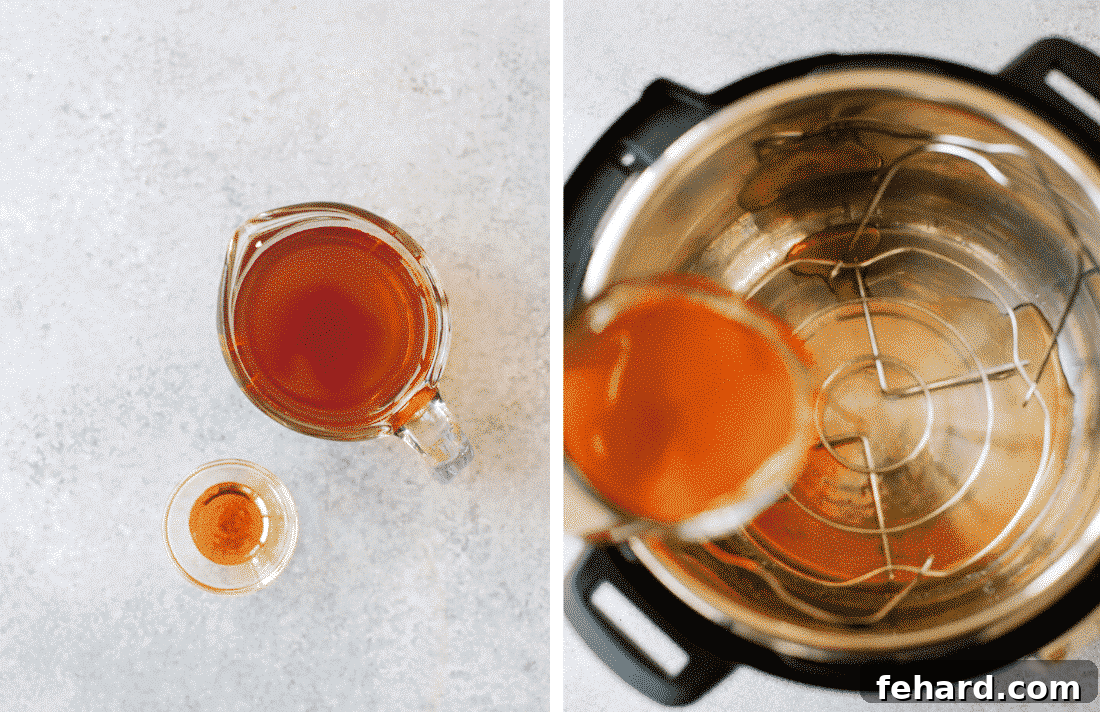
- Prepare the Liquid Base: In a large measuring cup, combine the beef broth and liquid smoke. Stir them well to ensure the smoky essence is evenly distributed. This flavorful liquid will create the steam needed for pressure cooking and impart a wonderful aroma to your ribs.
- Set Up the Instant Pot: Place the trivet (the metal rack that comes with your Instant Pot) at the bottom of your 6-quart (or larger) Instant Pot. Pour the beef broth mixture into the pot, ensuring the liquid sits below the trivet. The trivet keeps the ribs elevated out of the liquid, allowing them to steam rather than boil, which helps retain their shape while still achieving tenderness.
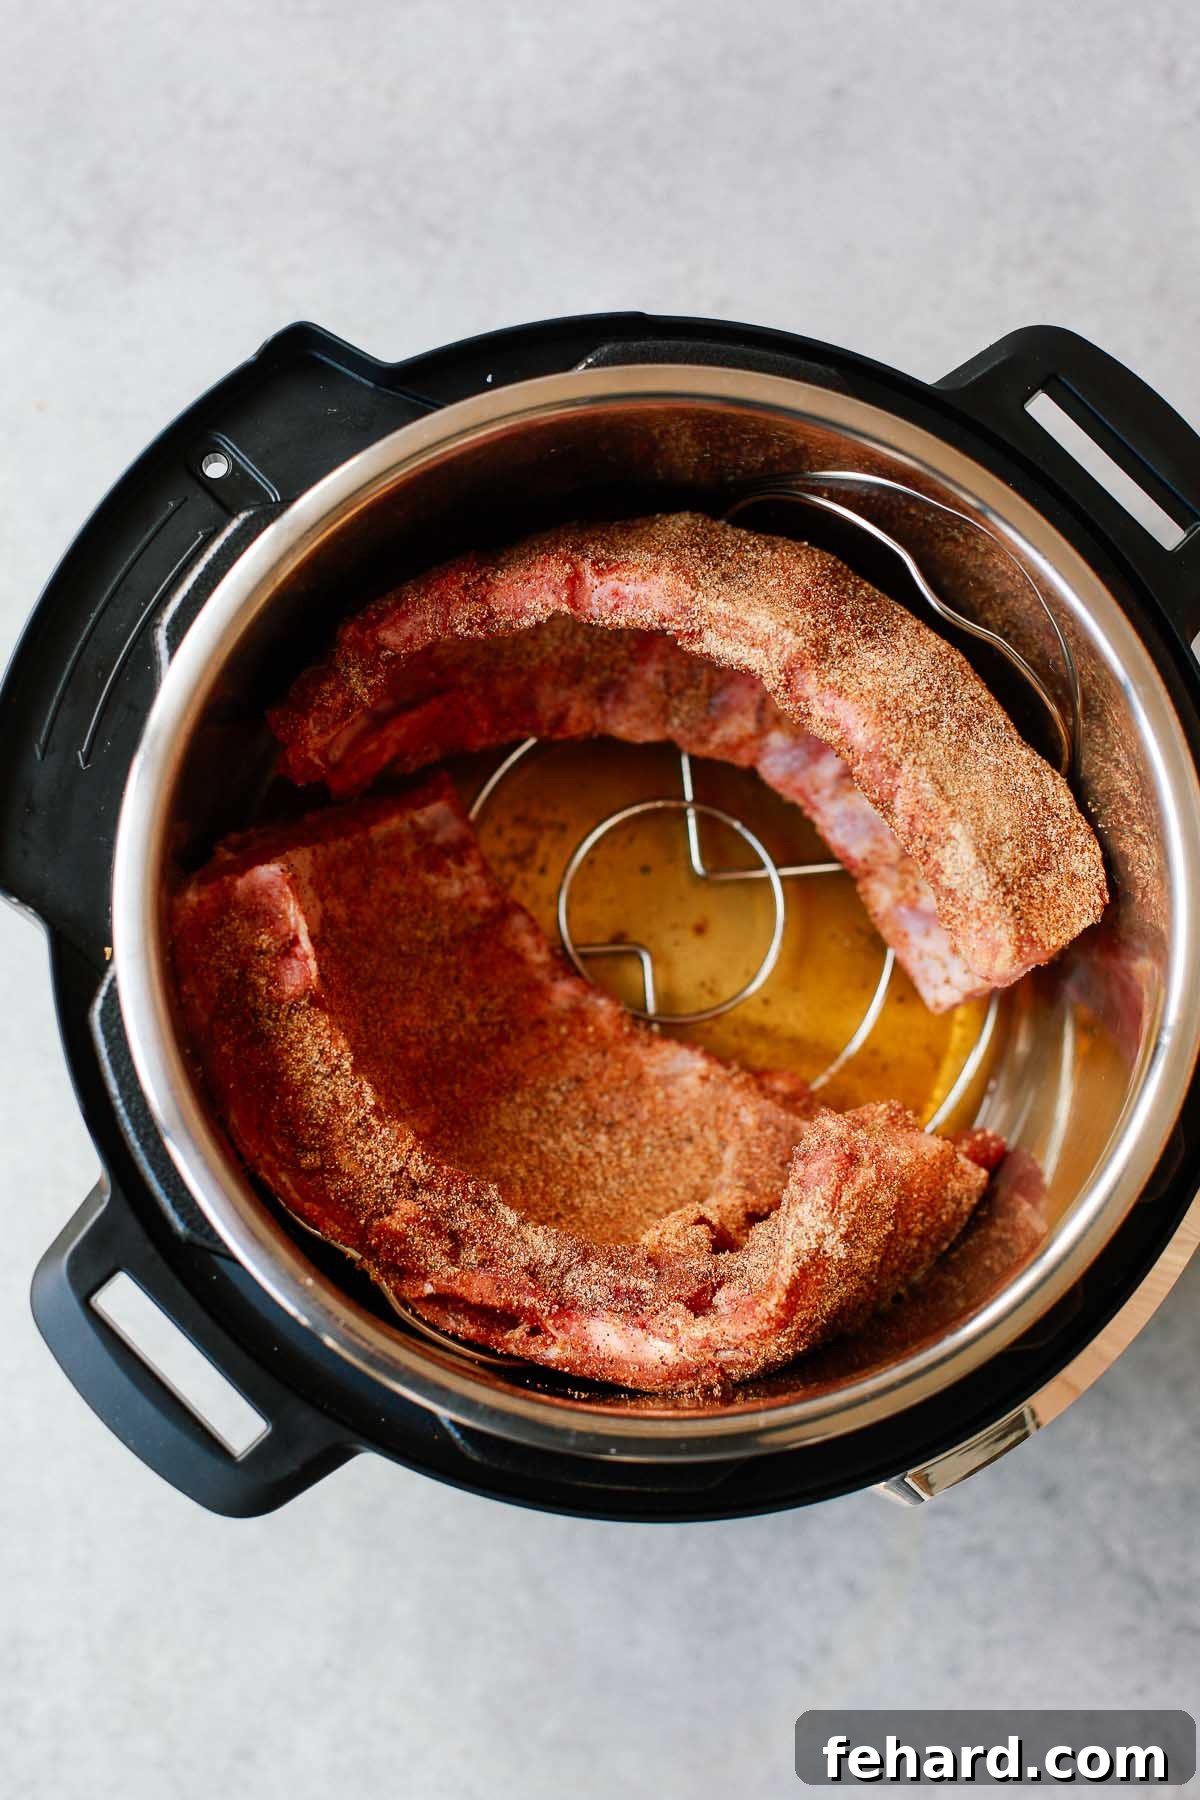
- Arrange the Ribs: Carefully place the seasoned ribs inside the Instant Pot, standing them upright on the trivet. You can coil them into a circle if needed to fit. Don’t overcrowd the pot; ensure there’s enough space for the steam to circulate.
- Cook Under Pressure: Secure the Instant Pot lid, ensuring it’s locked into place, and set the steam release vent to the “Sealing” position. Select the “Manual” or “Pressure Cook” setting, adjust the pressure to “High,” and set the cooking time for 25-30 minutes. The exact time can vary slightly depending on the thickness of your ribs and how “fall-off-the-bone” you prefer them. Once the cooking cycle is complete, allow a Natural Pressure Release (NPR) for 5 minutes. This means you do nothing and let the pressure decrease naturally. After 5 minutes, carefully perform a Quick Release (QR) by moving the vent to the “Venting” position to release any remaining steam. Once the float valve drops, it’s safe to open the lid.
The Finishing Touch: Broiling for Crispy Edges
While the Instant Pot delivers incredible tenderness, a quick broil adds that irresistible caramelization and char that truly elevates your ribs.
- Preheat the Broiler: Set your oven to the “Broil” setting (usually high). Prepare a large baking sheet by lining it with parchment paper or aluminum foil for easy cleanup.
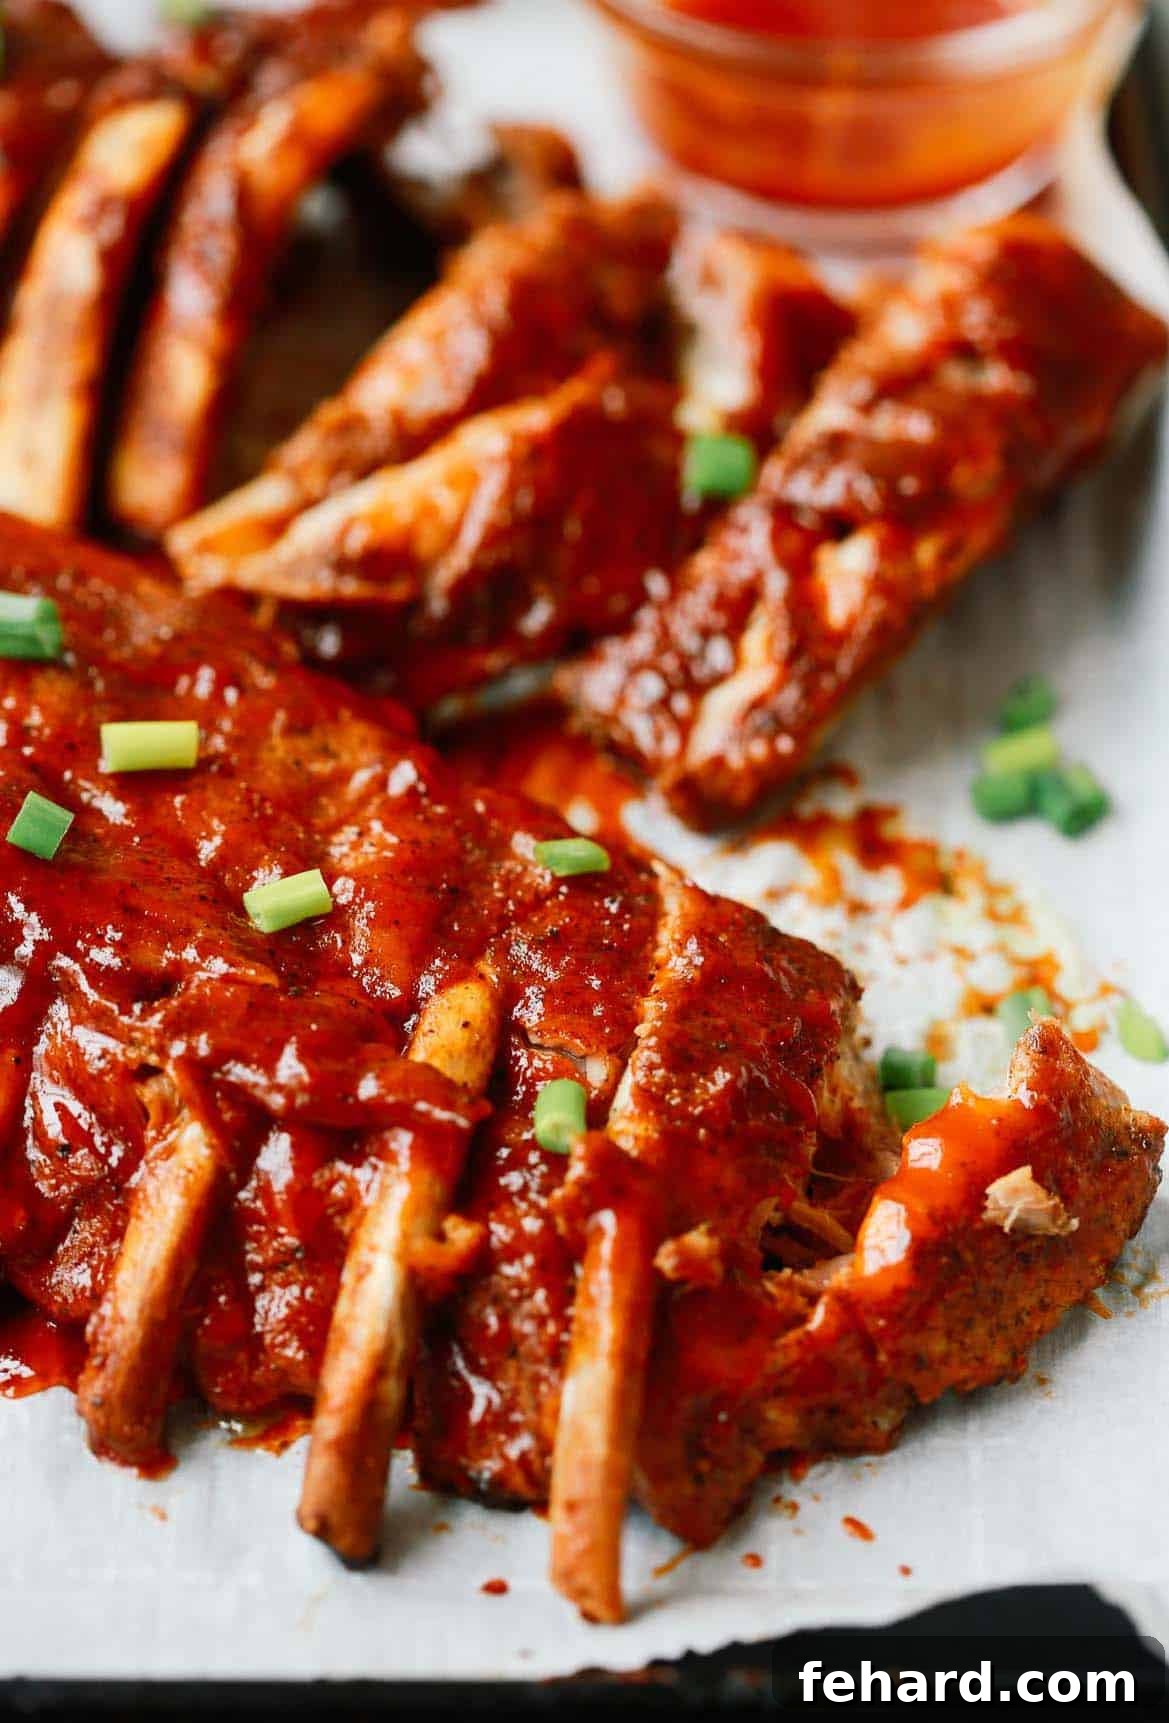
- Sauce and Broil: Carefully transfer the cooked ribs from the Instant Pot to the prepared baking sheet. They will be very tender, so handle them gently. Generously brush both sides of the ribs with your favorite barbecue sauce. The sauce will caramelize under the broiler, creating a sticky, glossy finish.
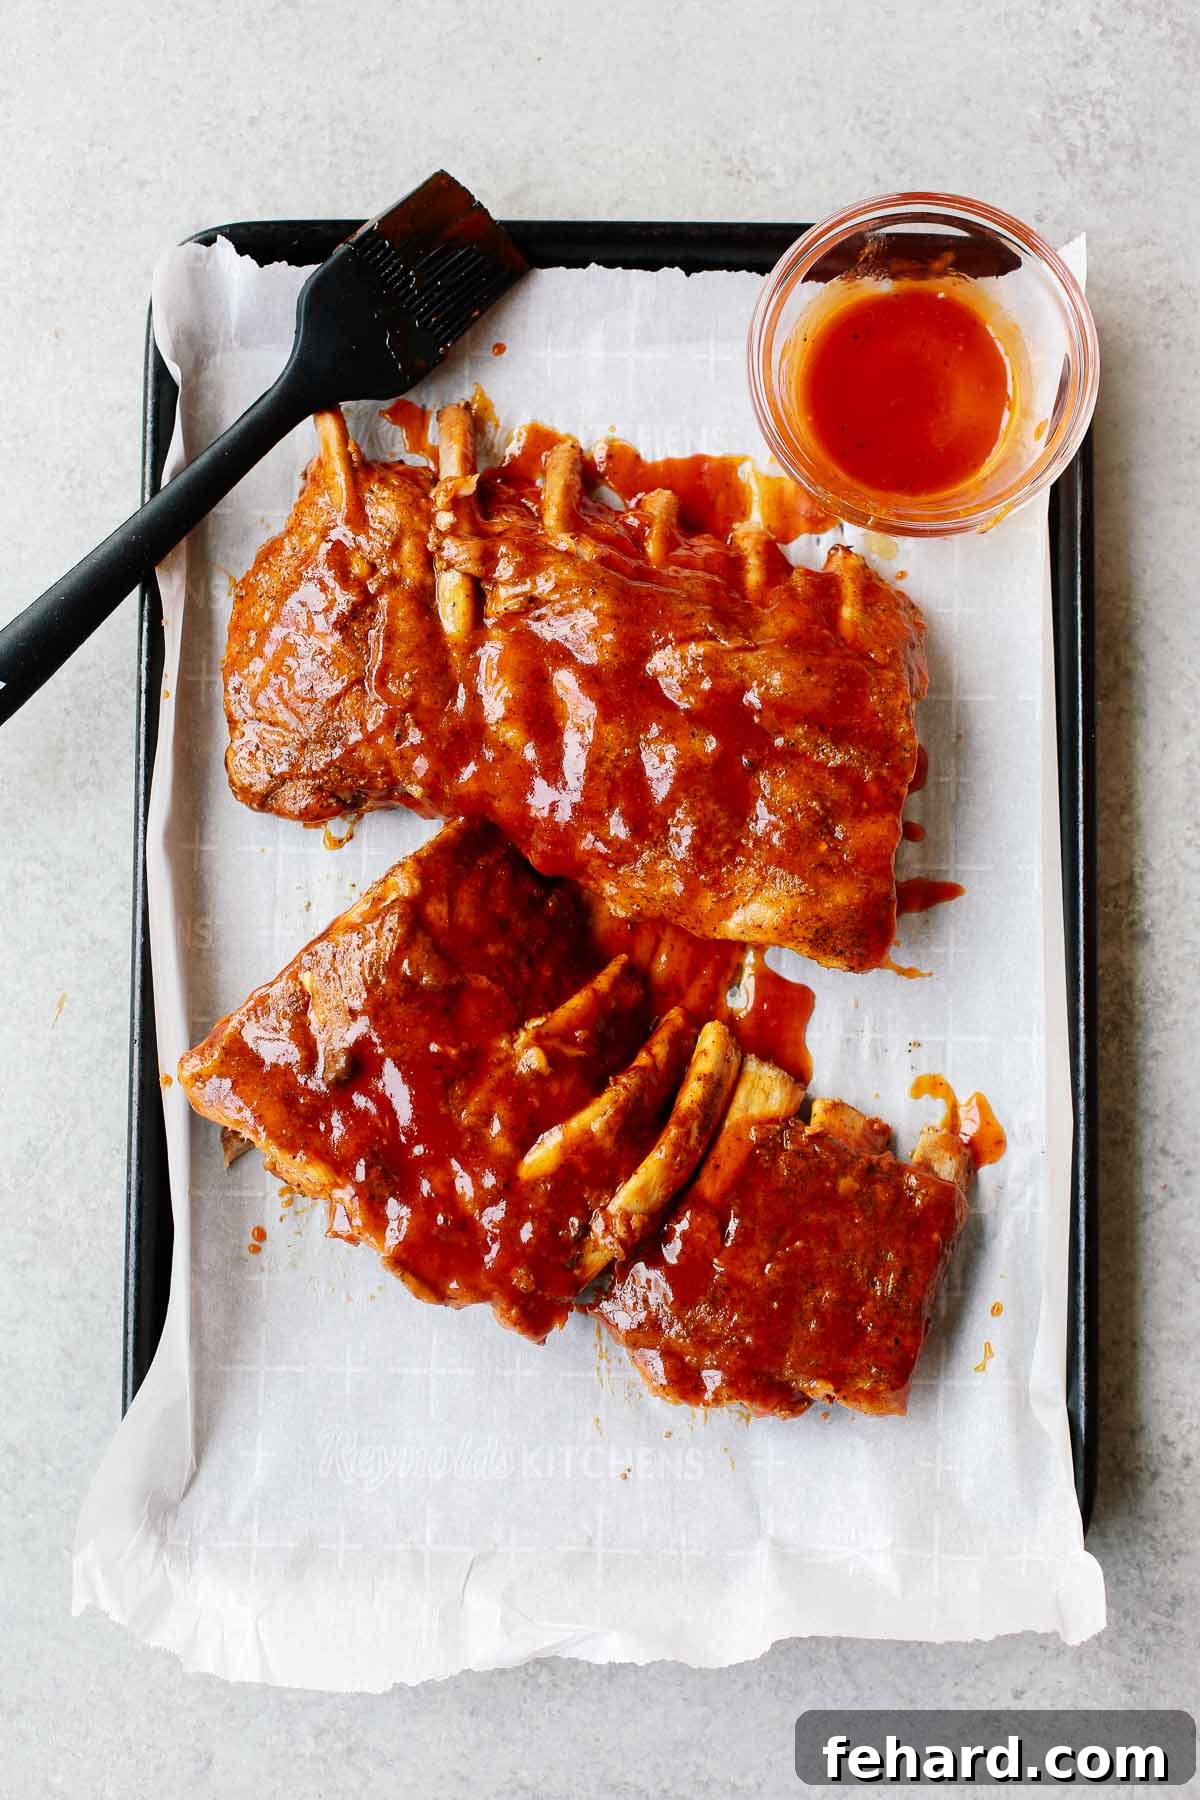
- Watch Carefully: Place the baking sheet in the oven, about 6-8 inches from the broiler element. Broil for approximately 2-5 minutes, keeping a very close eye on them to prevent burning. The goal is to get a nice char and caramelization on the sauce, not to burn the meat. Remove when they reach your desired level of crispiness. Enjoy your perfectly cooked, unbelievably tender ribs!
Troubleshooting & Tips for the Best Instant Pot Ribs
Even with a straightforward recipe, a few common questions or scenarios might arise. Here are some tips to ensure your Instant Pot Ribs turn out perfectly every time:
- Ribs Not Tender Enough? If your ribs aren’t as fall-off-the-bone as you’d like, it’s usually a matter of insufficient cooking time. You can return them to the Instant Pot for an additional 5-10 minutes under high pressure. Ensure there’s still enough liquid in the pot, then perform a quick release. Remember, rib thickness varies, so adjusting time is sometimes necessary.
- Overcooked Ribs? While rare with the Instant Pot, if ribs are mushy, it indicates they were cooked too long. Start with the recommended 25-minute cook time for baby back ribs and adjust only slightly for your next batch.
- What if I don’t have liquid smoke? While liquid smoke adds a wonderful authentic flavor, it’s not strictly essential. Your ribs will still be delicious without it, just without that characteristic smoky undertone. You could also use a smoked paprika in your rub for a hint of smokiness.
- Can I double the recipe? You can definitely cook multiple racks of ribs in your Instant Pot, provided they fit comfortably without going above the max fill line. Stand them upright around the trivet, coiling them if necessary. The cooking time generally remains the same for the ribs themselves, but the Instant Pot may take longer to come to pressure.
- For Extra Flavor: Consider adding a tablespoon of apple cider vinegar to the beef broth mixture. Its acidity helps tenderize the meat and adds a tangy depth. You can also experiment with different spice rubs or even a little brown sugar in the rub for extra caramelization.
- Customizing Your Broil: Don’t limit yourself to just one layer of barbecue sauce. After the initial broil, you can pull the ribs out, apply another layer of sauce, and broil for another minute or two for an even thicker, more intensely caramelized coating.
With these tips, you’re well on your way to mastering Instant Pot Ribs!
What to Serve with Your Fall-Off-The-Bone Ribs
These incredibly flavorful Instant Pot Ribs pair wonderfully with a variety of classic side dishes. Here are some perfect accompaniments to complete your meal:
- Creamy Mashed Potatoes: A comforting and classic choice, Creamy Mashed Potatoes provide a smooth counterpoint to the rich, saucy ribs, perfect for soaking up every last bit of flavor.
- Savory Mashed Sweet Potatoes: For a slightly different twist, Savory Mashed Sweet Potatoes offer a hint of natural sweetness that complements the barbecue sauce beautifully.
- Easy Coleslaw: A crisp and refreshing Easy Coleslaw Recipe cuts through the richness of the ribs with its tangy crunch, providing a delightful textural contrast.
- Healthy Potato Salad: Lighten things up with a Healthy Potato Salad Recipe. Its creamy texture and refreshing flavors make it an ideal side for a hearty rib dinner.
- Corn on the Cob: Sweet, juicy corn on the cob is a quintessential BBQ side that’s always a hit.
- Garlic Bread: Warm, buttery garlic bread is excellent for dipping into any leftover barbecue sauce or juices.
- Pasta Salad: A vibrant pasta salad can add a refreshing and substantial element to your plate.
- Green Salad: A simple mixed green salad with a light vinaigrette offers a fresh and healthy balance to the meal.
Choose one or several of these delicious sides to create a well-rounded and satisfying feast!
Storing, Reheating, and Freezing Instant Pot Ribs
Enjoying delicious ribs shouldn’t be a one-time affair. With proper storage, you can savor these Instant Pot Ribs as leftovers or have them ready for another meal.
- To Store: If you find yourself with any delicious leftovers, allow the ribs to cool completely before transferring them to an airtight container. Store them in the refrigerator for up to 3-5 days. This will help maintain their flavor and texture.
- To Reheat: For best results, reheat ribs gently. You can warm them in the oven at 250-300°F (120-150°C) until heated through, adding a splash of broth or water to the pan and covering with foil to prevent drying out. Alternatively, a microwave can be used for quicker reheating, but be mindful not to overcook them, which can make them tough.
- To Freeze: Once your cooked ribs have cooled completely, wrap them tightly in plastic wrap, then place them in a freezer-safe bag or an airtight container. They can be frozen for up to 3 months. When ready to enjoy, thaw them overnight in the refrigerator before reheating using the oven method.
Having a stash of these amazing ribs in your fridge or freezer means you’re always just minutes away from a satisfying meal!
Frequently Asked Questions About Instant Pot Ribs
How long does it take for ribs to cook in an Instant Pot?
Baby back ribs typically cook for 25-30 minutes under high pressure in an Instant Pot, followed by a 5-minute natural pressure release and then a quick release. This results in incredibly tender, fall-off-the-bone ribs. Thicker cuts like spare ribs might require an additional 5-10 minutes.
Do I need to add water to the Instant Pot for ribs?
Yes, you absolutely need liquid in the Instant Pot for it to come to pressure and cook safely. This recipe calls for 1 cup of beef broth mixed with liquid smoke, which provides both flavor and the necessary liquid for steam generation.
Can I cook frozen ribs in the Instant Pot?
While technically possible, it’s generally recommended to thaw ribs before cooking in the Instant Pot for the best and most consistent results. If you must cook from frozen, you will need to significantly increase the pressure cooking time (possibly up to 45-55 minutes), and the texture may not be as ideal.
What does “fall-off-the-bone” mean for ribs?
“Fall-off-the-bone” refers to ribs that are so tender, the meat easily separates from the bone with minimal effort, often just by touching it. This is considered the pinnacle of tenderness for many rib enthusiasts and is readily achievable with the Instant Pot.
Is it necessary to broil ribs after the Instant Pot?
While the ribs are fully cooked and tender after the Instant Pot, broiling them is highly recommended. It helps to caramelize the barbecue sauce, creating a sticky, slightly charred crust that adds a wonderful depth of flavor and texture, mimicking the finish of grilled ribs.
Can I make these ribs without liquid smoke?
Yes, you can make them without liquid smoke. The ribs will still be delicious and tender, but they will lack that characteristic smoky flavor profile. If you desire a hint of smokiness, consider adding smoked paprika to your dry rub.
I hope these FAQs help you make the best Instant Pot Ribs ever!
More Delicious Instant Pot Recipes:
The Instant Pot is a versatile tool for creating a variety of delicious meals quickly and efficiently. If you love the ease of pressure cooking, be sure to check out these other fantastic recipes:
- Instant Pot Pot Roast Recipe
- Instant Pot Sirloin Steak Strips Recipe
- Instant Pot Short Ribs Recipe
Easy Instant Pot Ribs Recipe
These Easy Instant Pot Ribs are fall-off-the-bone tender and finger licking good! You’re not going to believe how quick and easy cooking your ribs in the pressure cooker is with this recipe!
Author: Olivia Ribas
Servings: 2 people
Prep Time: 10 minutes
Cook Time: 30 minutes
Total Time: 40 minutes
Ingredients
For the ribs
- 2 pounds baby back pork ribs
- 1 cup beef broth
- ½ teaspoon liquid smoke
- 1/2 cup sugar-free Barbecue Sauce (or your favorite store-bought sauce)
For the Rub
- 1 teaspoon garlic powder
- 1 teaspoon onion powder
- 2 teaspoons paprika
- 1 teaspoon salt
- 1 teaspoon cracked black pepper
- 1/2 teaspoon cumin
- 1 teaspoon chili (optional)
Instructions
- First, peel off the tough membrane on the back of the ribs. Slide a butter knife under the membrane and over a bone. Lift and loosen the membrane until it tears, then grip it firmly (using a paper towel for grip) and pull it off.
- In a small bowl, mix together garlic powder, onion powder, paprika, salt, black pepper, cumin, and chili powder. Sprinkle this seasoning and rub it generously all over the ribs, covering all sides.
- In a large measuring cup, pour in the beef broth and liquid smoke and stir well to combine.
- Place the metal rack/trivet (that comes with the Instant Pot) in the bottom of a 6-quart Instant Pot. Pour in the beef broth mixture. Place the seasoned ribs inside the pot, standing them upright on the trivet.
- Secure the lid, lock it, and ensure the vent is set to the sealing position. Select the manual setting, adjust pressure to high, and set the cooking time for 25 minutes. (Mine took about 15 minutes to reach pressure). After the 25 minutes are up, allow a natural pressure release for 5 minutes. Then, do a quick release by moving the valve to venting to release any remaining steam. Once the steam is gone and the float valve drops, you can safely open the Instant Pot.
- Set your oven to broil. Line a large baking sheet with parchment paper. Carefully transfer the cooked ribs to the prepared baking sheet, then brush them generously with barbecue sauce.
- Place the ribs in the oven under the broiler for about 2-3 minutes, watching closely to prevent burning. Enjoy your perfectly tender and saucy ribs!
Notes
- Removing the membrane only takes a few seconds and drastically improves the texture of your ribs, so don’t skip it!
- Ensure you rub the spices thoroughly on all sides of the ribs, not just the meaty top, for maximum flavor penetration.
- Natural release means allowing the Instant Pot to depressurize on its own for a specified period before manually releasing any remaining pressure.
- To store: If you have leftovers, transfer the cooled ribs to an airtight container and refrigerate for up to 5 days.
- To reheat: Ribs can be reheated in the oven (covered, low heat with a splash of liquid) or quickly in the microwave.
- To freeze: Once completely cooled, wrap ribs tightly in freezer-safe packaging (bag or container) and freeze for up to 3 months. Thaw in the refrigerator before reheating.
Nutrition
Serving: 1/2 rack, Calories: 762kcal, Carbohydrates: 10g, Protein: 42g, Fat: 59g, Sodium: 1561mg, Potassium: 280mg, Fiber: 1g, Sugar: 4g
Nutrition information is automatically calculated, so should only be used as an approximation.