
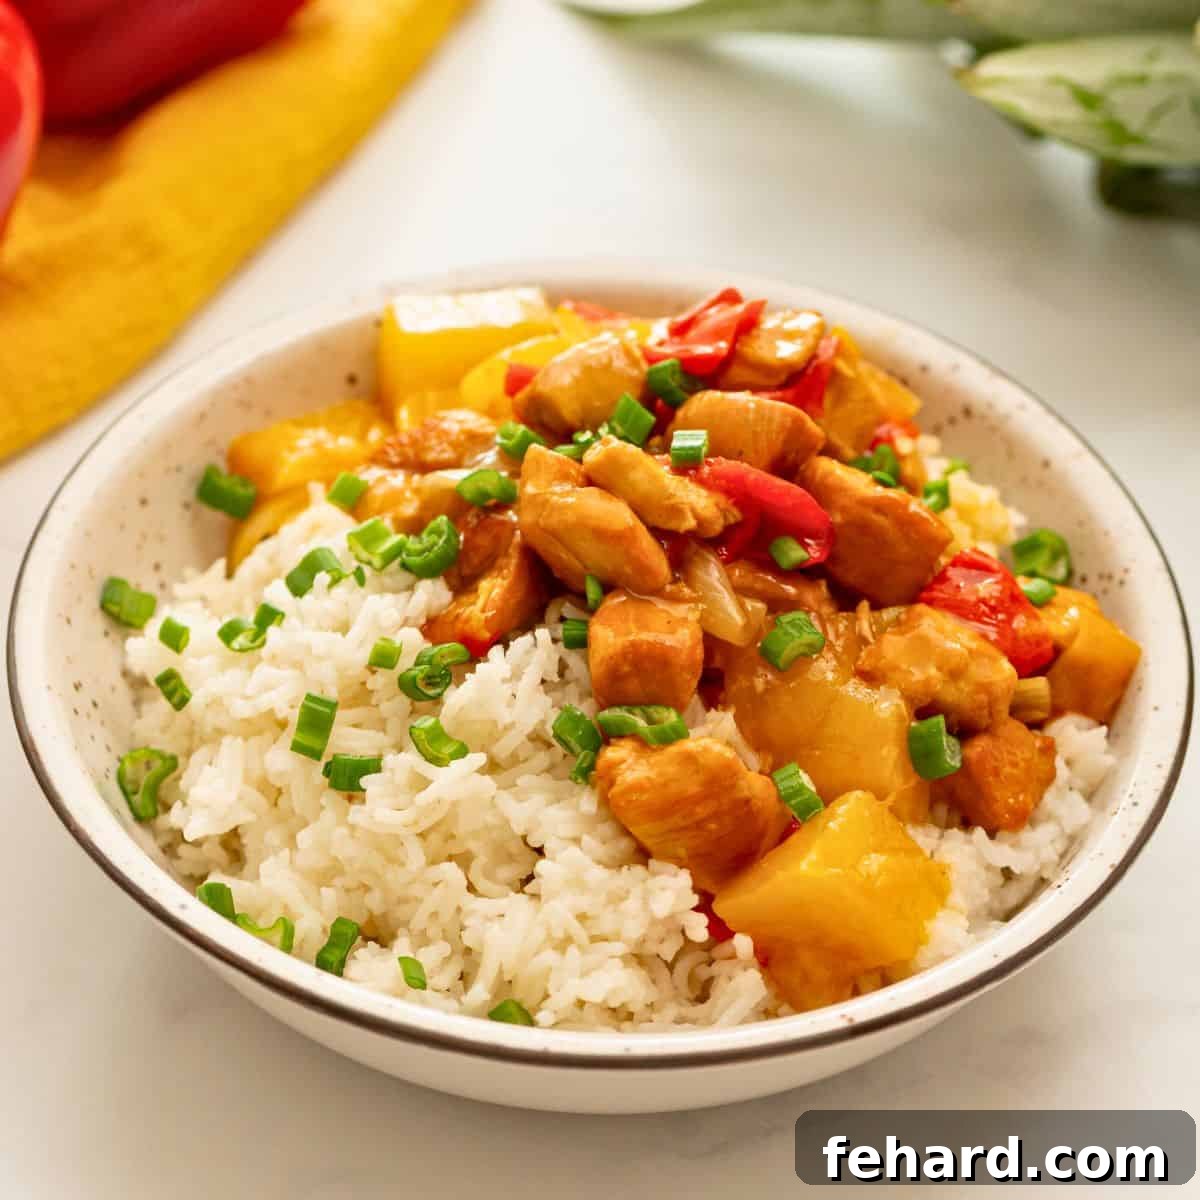
Instant Pot Sweet and Sour Chicken is an absolute game-changer for busy weeknights, delivering an incredibly flavorful and satisfying meal that the whole family will adore. Imagine succulent, tender chicken pieces, vibrant sweet bell peppers, and juicy fresh pineapple, all perfectly cooked and coated in a delightful homemade sweet and sour sauce. What makes this recipe truly exceptional? The ingenious pot-in-pot method allows you to cook fluffy white rice right alongside your chicken, transforming this into a winning all-in-one Instant Pot dinner recipe. Say goodbye to multiple pots and pans and hello to seamless, delicious home cooking!
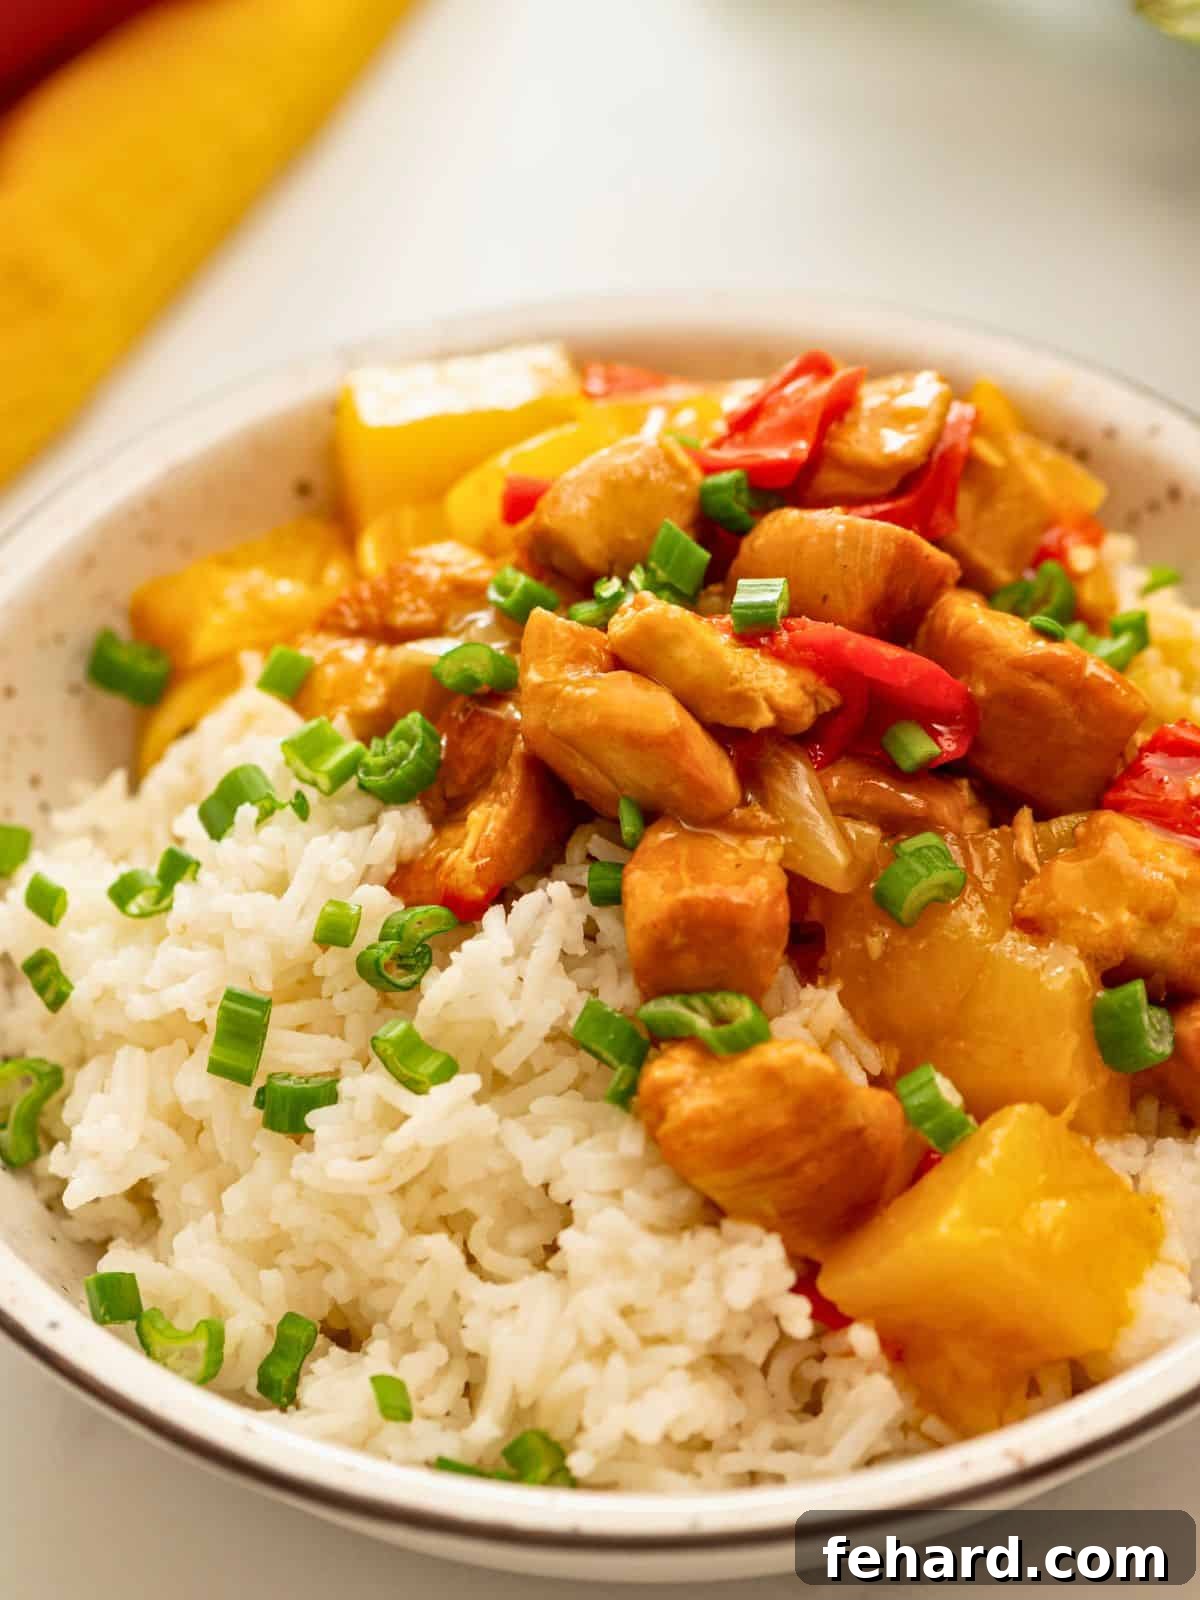
Why You’ll Fall in Love with Instant Pot Sweet and Sour Chicken

This Instant Pot Sweet and Sour Chicken recipe has quickly become a staple in my kitchen, and for good reason! It’s one of those recipes that truly delivers on taste, convenience, and wholesome goodness. Here are just a few reasons why it’s a guaranteed favorite:
- A Healthier & More Flavorful Takeout Alternative: Forget the greasy, overly sweet versions from restaurants. Just like my popular recipes for Instant Pot Beef and Broccoli, Instant Pot Orange Chicken, and Instant Pot Mongolian Beef, this sweet and sour chicken is crafted with fresh, everyday ingredients, allowing you to control the sugar and sodium content. The result is a lighter, fresher, and undeniably better-tasting dish that satisfies those takeout cravings guilt-free.
- Effortless All-in-One Cooking with Pot-in-Pot: The magic of the Instant Pot truly shines here! Utilize the innovative pot-in-pot method to cook perfectly fluffy rice right in the same pot, simultaneously with your chicken and vegetables. This not only saves you time and effort but also minimizes cleanup, making dinner prep and post-meal chores a breeze.
- Customizable for Every Palate & Dietary Need: This recipe is incredibly versatile! You can easily swap boneless, skinless chicken breasts for tender chicken thighs, adjust the vegetables to your family’s preferences (e.g., add broccoli or snow peas), or even make it completely refined sugar-free and gluten-free. This adaptability ensures that everyone at the table can enjoy a meal tailored to their taste and dietary requirements.
- The Secret to an Unforgettable Sauce: The homemade sweet and sour sauce is the star of this dish. My special ingredient, apricot all-fruit jam, beautifully mimics the complex, fruity notes of traditional duck sauce without any added sugars or artificial preservatives. This provides an incredible depth of flavor and a natural sweetness that makes the sauce truly irresistible, all while keeping the dish wholesome and balanced.
Happy Cooking! xo Kristen
Understanding Your Ingredients for Perfect Sweet & Sour Chicken
Crafting a delicious sweet and sour chicken dish starts with selecting the right ingredients. Each component plays a vital role in achieving that perfect balance of flavors and textures. Here’s a closer look at what you’ll need and why:
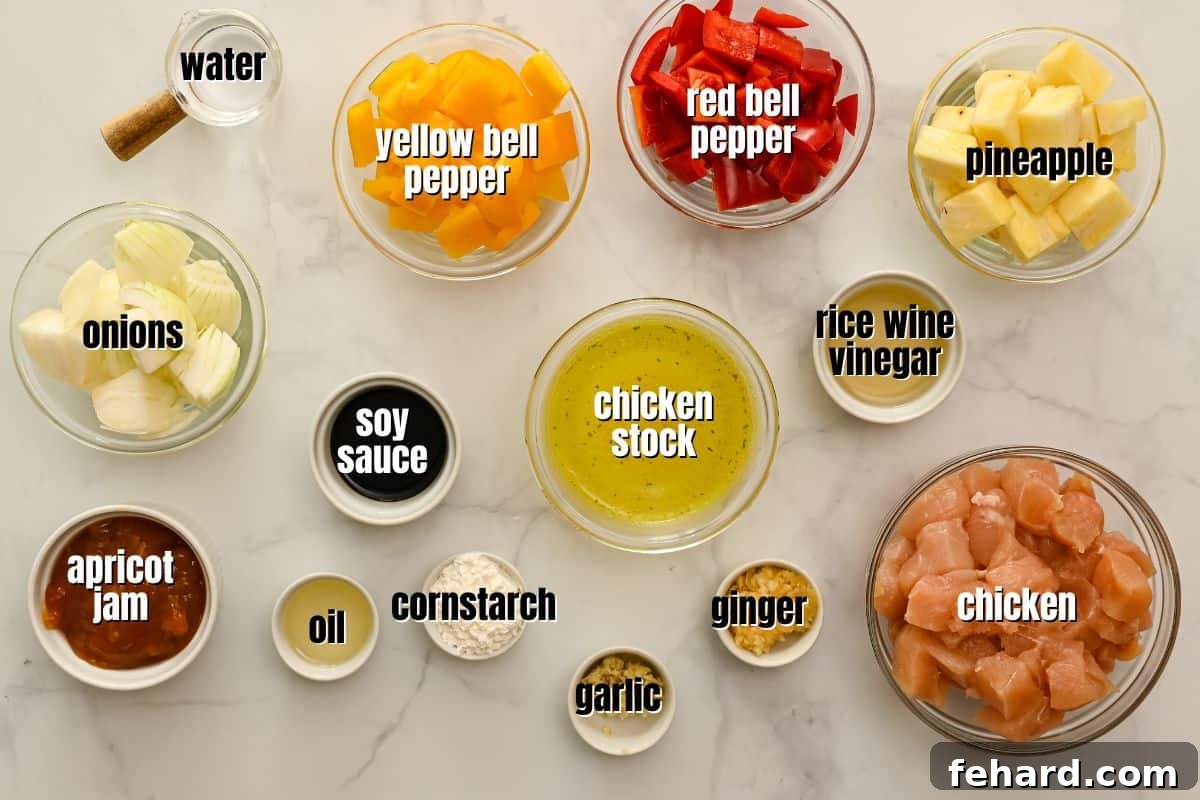
- Chicken: You have flexibility here! Boneless, skinless chicken breasts, thighs, or even tenders all work wonderfully. Chicken breasts offer a leaner option, while thighs provide richer flavor and tend to stay exceptionally tender under pressure. Cut them into 1-inch chunks for even cooking and easy serving.
- Aromatics: Fresh Ginger and Garlic: These are non-negotiable for authentic Asian-inspired flavors. Freshly minced garlic and grated ginger infuse the sauce with a bright, pungent, and warm undertone that can’t be replicated with dried powders. Do not be tempted to use ground ginger powder, as its flavor profile is significantly different and less vibrant.
- Apricot Jam/Preserves: This is my “secret sauce” ingredient! I highly recommend using apricot jam or preserves sweetened only with fruit juice (often labeled “all-fruit”) to maintain better control over the overall sugar content. However, any quality apricot jam you have on hand will work, lending a beautiful fruity sweetness and body to the sauce, mimicking duck sauce’s complexity.
- Colorful Bell Peppers: Red, yellow, and orange bell peppers are your best choice. They offer a delightful sweetness and a vibrant pop of color to the dish. I advise against using green bell peppers, as they tend to be more bitter and less sweet, which can alter the desired flavor profile of a sweet and sour sauce.
- Fresh Pineapple: While convenient, canned pineapple chunks often become mushy and fall apart under pressure. For the best texture and bright, fresh flavor, opt for fresh pineapple slices or chunks. They hold their shape beautifully and add a wonderful burst of tropical sweetness that complements the sauce perfectly.
- Chicken Stock/Water: A little liquid is essential in the Instant Pot to thin the sauce to the right consistency and, crucially, to prevent a “burn” notice from occurring. Low-sodium chicken stock adds more depth of flavor, but water works fine if that’s all you have.
- Rice Wine Vinegar/Rice Vinegar: This mild, slightly sweet vinegar is a cornerstone of many Asian dishes, providing the essential “sour” component of our sauce without being overly harsh. If rice vinegar isn’t available, apple cider vinegar or white distilled vinegar can be used as a substitute, though they may slightly alter the flavor profile.
- Low-Sodium Soy Sauce: This provides the savory, umami depth. Using low-sodium ensures you can control the saltiness of the dish and avoid it becoming too overpowering.
- Cornstarch and Water (Slurry): This is used at the end to thicken the sauce to that classic, glossy, sticky consistency that sweet and sour chicken is known for.
How to Master Instant Pot Sweet & Sour Chicken: A Step-by-Step Guide
Preparing this Instant Pot Sweet and Sour Chicken is surprisingly straightforward, even for novice pressure cooker users. If you’re new to the Instant Pot or need a refresher on its various functions, I highly recommend starting with my comprehensive guide for using an Instant Pot to ensure the best results for this and all your future recipes. The full, detailed recipe card is available below, but here’s a breakdown of the process:
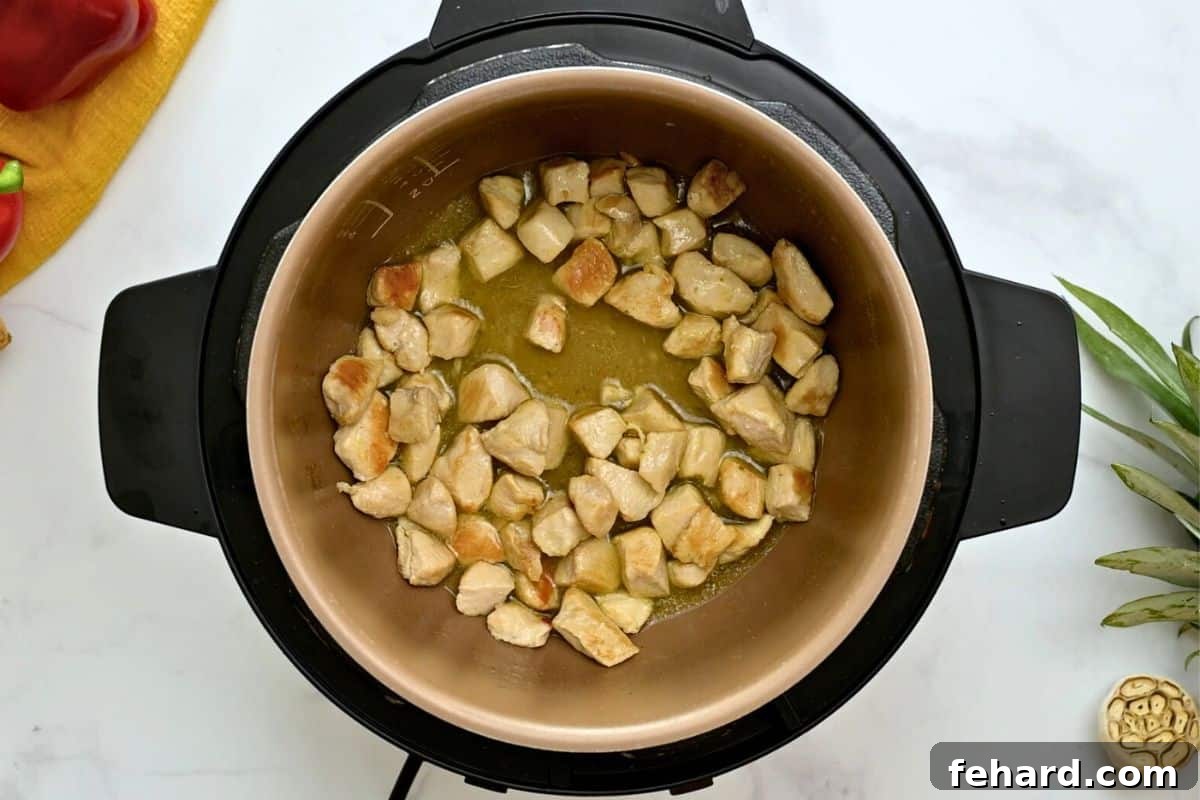
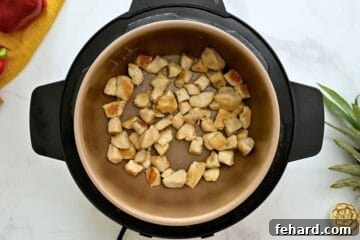
- Step 1: Sautéing the Chicken for Flavor: While optional, sautéing the chicken first adds a beautiful golden-brown sear and enhances the texture of the meat, contributing a richer flavor to the overall dish. Heat a touch of canola oil in your Instant Pot on the Sauté function and brown the chicken chunks for a few minutes until lightly caramelized on all sides. Once done, hit CANCEL.
- Step 2: Deglazing the Inner Pot – A Crucial Step: This step is vital to prevent the dreaded “burn” notice. After sautéing, add your chicken stock (or water) to the inner pot. Use a wooden spoon or a sturdy spatula to vigorously scrape up any browned bits that may have stuck to the bottom of the pot. These bits are packed with flavor, and dissolving them into the liquid is key for a successful pressure cook. Stir the liquid thoroughly into the chicken.
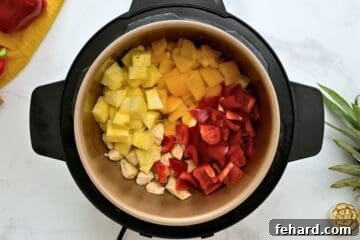
- Step 3: Layering Your Vibrant Ingredients: Carefully add the diced bell peppers, onions, and fresh pineapple chunks over the chicken in the inner pot. Try to layer them evenly, but avoid stirring them into the chicken and deglazing liquid too much at this point, as this can help prevent issues with the pressure build-up.
- Step 4: Whisking Up the Signature Sweet and Sour Sauce: In a separate small bowl, combine the apricot jam, low-sodium soy sauce, rice wine vinegar, minced garlic, and freshly grated ginger. Whisk these ingredients together until thoroughly combined and smooth. Once mixed, pour this delicious sauce over the ingredients in the Instant Pot and gently toss everything to ensure the chicken and vegetables are well coated.
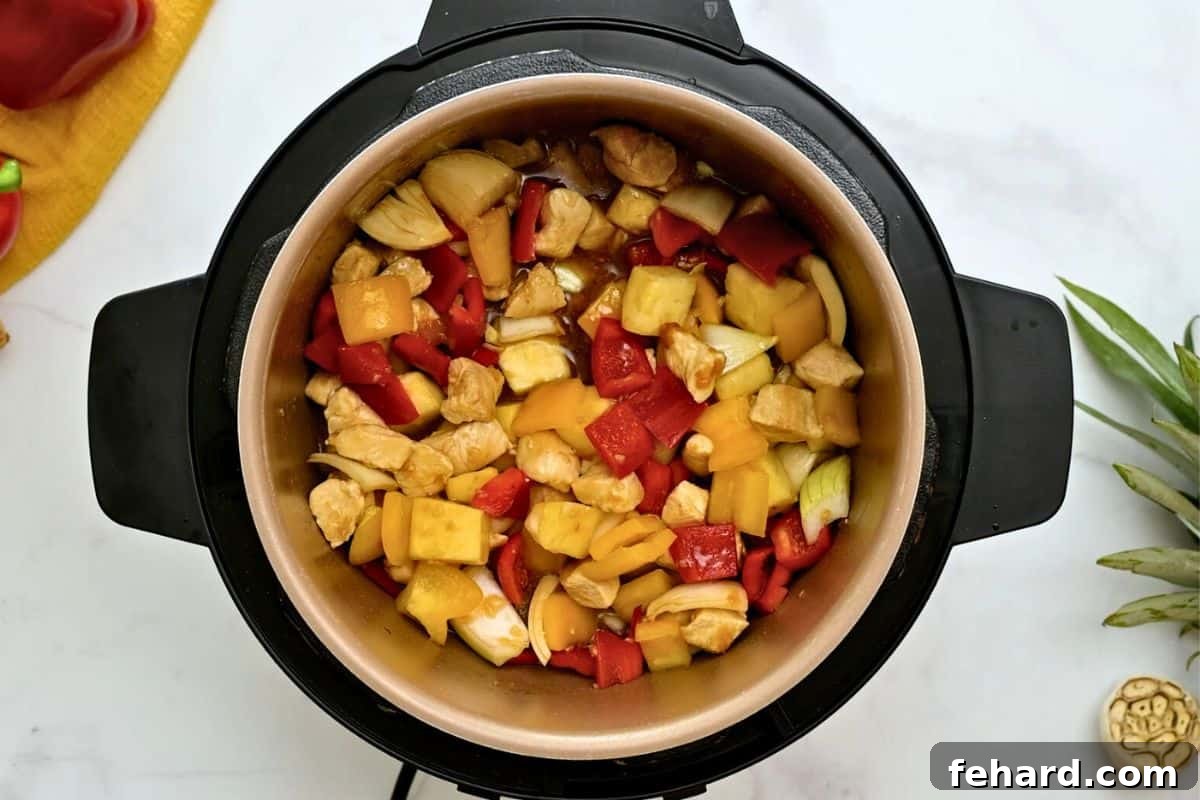
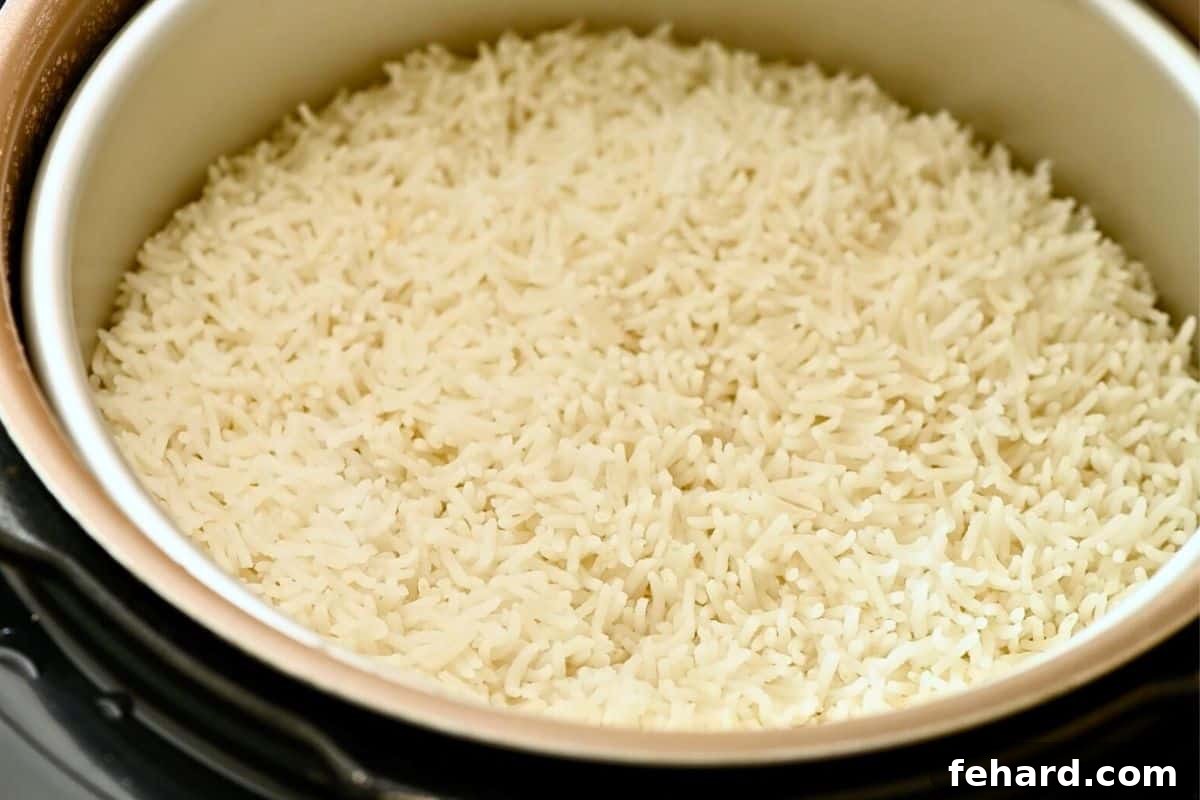
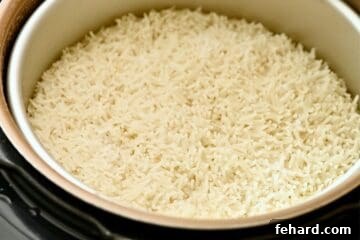
- Step 5: The Pot-in-Pot Rice Method (Optional but Recommended): For the ultimate convenience, you can cook rice simultaneously! Place a heat-safe trivet over the chicken and vegetables. In a separate heat-safe stainless steel bowl or cake pan, combine 1 cup of well-rinsed long-grain white rice with an equal amount of water (1 cup). Place this bowl on the trivet. The rice needs a bit longer due to the indirect heat and the stainless steel bowl, so the pressure cooking time of 5 minutes with a subsequent 10 minutes of natural pressure release will cook it perfectly.
- Step 6: Pressure Cooking with Natural Pressure Release: Secure the lid on your Instant Pot, making sure the vent knob is set to the “Sealing” (or “Locked”) position. Set the Instant Pot to cook on HIGH pressure for 5 minutes. Once the cooking cycle is complete, resist the urge to immediately release the pressure. Allowing a natural pressure release (NPR) for at least 10 minutes is crucial. This gentle release helps the chicken stay incredibly tender and ensures your rice (if using the pot-in-pot method) remains perfectly fluffy. It’s perfectly fine to let it sit on the “Keep Warm” function during this time.
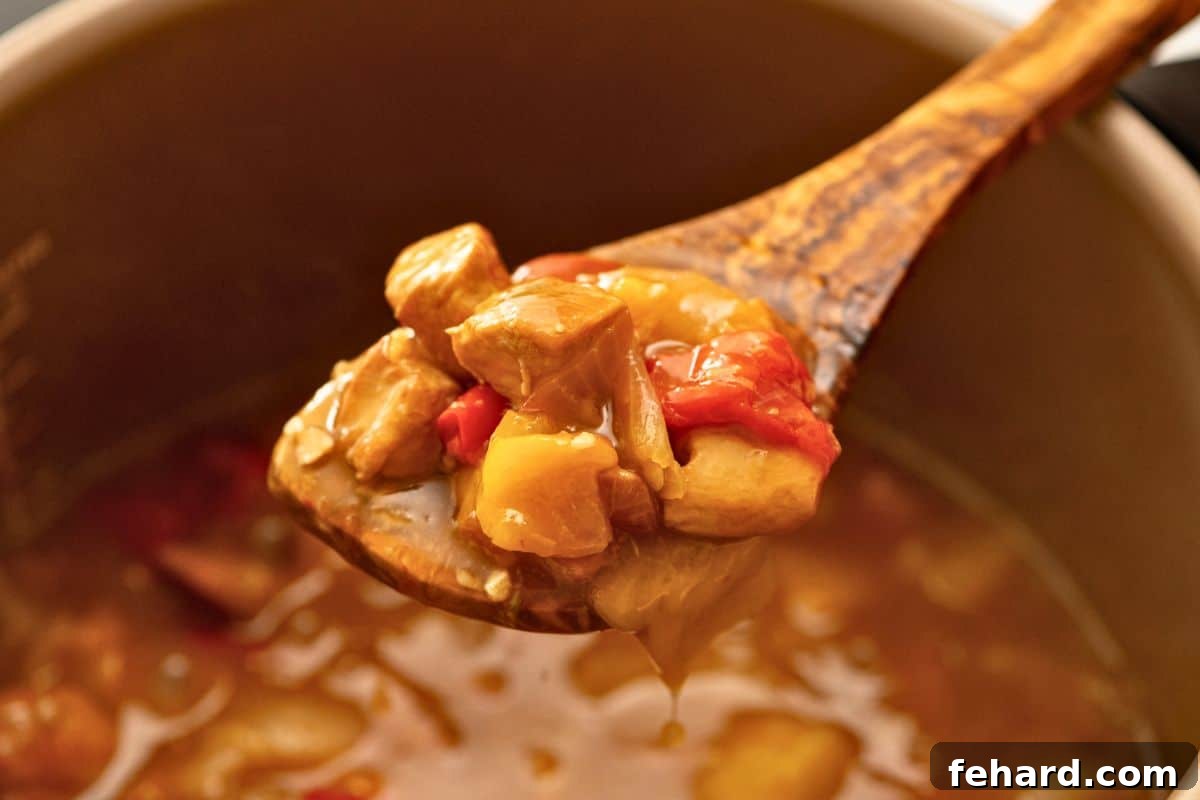
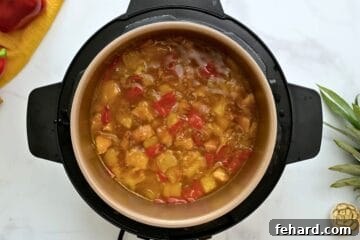
- Step 7: Achieving the Perfect Sauce Consistency: After the pressure has naturally released and you’ve removed the rice (if cooking it), you’ll notice the sauce is quite thin. To give it that classic thick, sticky, and glossy sweet and sour consistency, turn the Instant Pot back to the Sauté function. While the sauce comes to a gentle boil, prepare a cornstarch slurry by whisking 1 tablespoon of cornstarch with 2 tablespoons of cold water until smooth. Slowly whisk this slurry into the bubbling sauce in the pot. Stir continuously for just a couple of minutes until the sauce visibly thickens to your desired consistency. This small effort makes a significant difference in the final texture and appeal of the dish! Once thickened, hit CANCEL to turn off the Instant Pot.
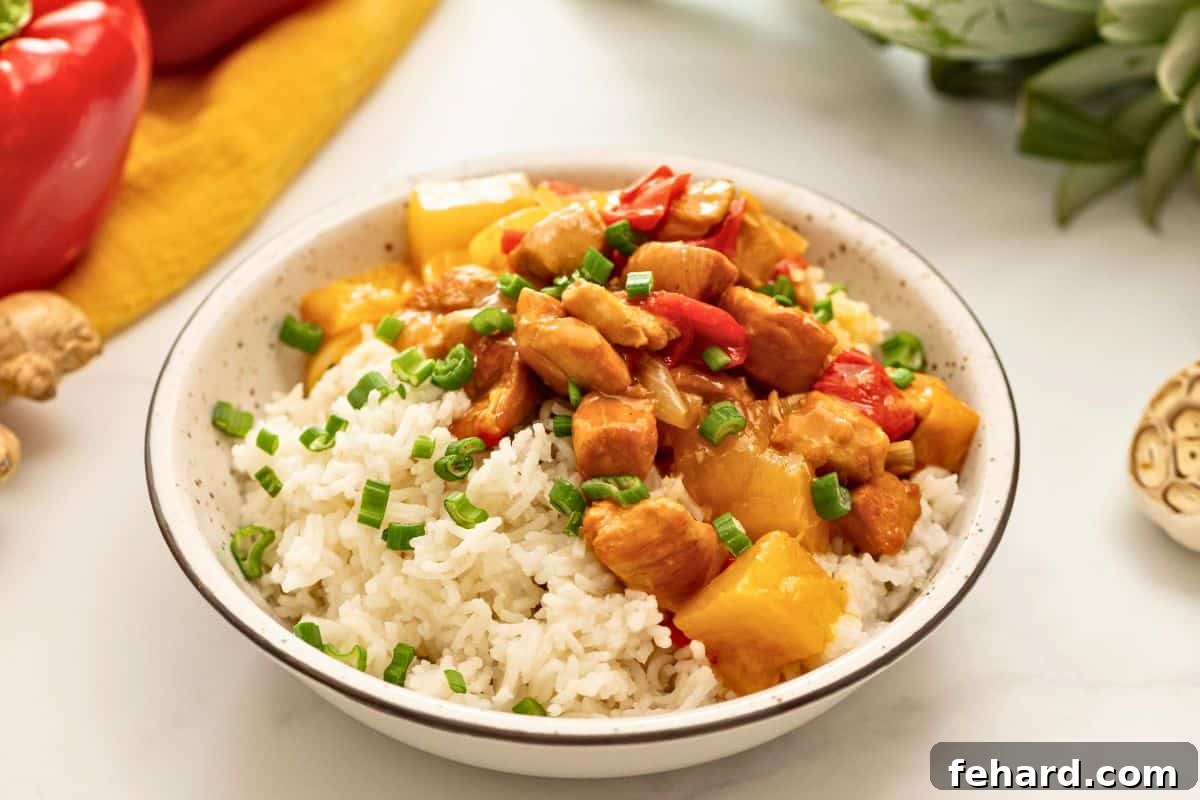
- Step 8: Serving Your Delicious Meal: Ladle generous portions of the luscious sweet and sour chicken over the freshly steamed rice. For an extra touch of flavor and visual appeal, garnish with a sprinkle of toasted sesame seeds and thinly sliced green onions. Serve immediately and enjoy a truly satisfying homemade meal!
Customizing Your Sweet and Sour Experience
One of the best aspects of this Instant Pot Sweet and Sour Chicken recipe is its flexibility. Feel free to adapt it to your taste, dietary needs, or what you have on hand.
- Make it Gluten-Free: If you or your family members require a gluten-free diet, simply swap the regular soy sauce for an equal amount of tamari or gluten-free soy sauce. These alternatives offer the same savory depth without the gluten.
- Corn-Free Thickening: For those with corn allergies or who prefer a corn-free option, replace the cornstarch in the slurry with an equal amount of arrowroot powder or tapioca starch. Both will effectively thicken the sauce to a beautiful, glossy consistency.
- Substitute for Apricot Jam: If apricot jam isn’t available, or if you prefer a different flavor, you can substitute it with ¼ cup ketchup combined with ¼ cup brown sugar. This combination will provide a similar sweet and tangy base for the sauce.
- Adding a Kick of Spice: The base recipe for this sauce is on the sweeter side, which is perfect for children or those who prefer milder flavors. If you enjoy a bit of heat, you have options! You can add ½ tablespoon of Sriracha or ½ teaspoon of crushed red pepper flakes to the sauce mixture before pressure cooking for an all-over spicy kick. Alternatively, for individual control, offer Sriracha or chili flakes at the table so each person can customize their spice level.
- Hate Peppers, Onions, or Pineapple? No Problem!: While the added vegetables and fruit contribute wonderful flavor, texture, and natural sweetness to the sauce, this Sweet and Sour Chicken is still incredibly delicious without them. If you (or picky eaters) prefer to omit any of these ingredients, you will need to add an additional ¼ cup of chicken broth or water to the Instant Pot to compensate for the liquid they would have released during cooking. This ensures adequate liquid for pressure build-up and prevents a “burn” notice.
- Add More Veggies: Want to boost the nutritional content? Feel free to add quick-cooking vegetables like broccoli florets, snap peas, or sliced carrots during the last minute of sautéing or directly before pressure cooking.
Storage and Reheating Tips for Leftovers
This Instant Pot Sweet and Sour Chicken makes fantastic leftovers, perfect for meal prepping or a quick lunch the next day. Here’s how to store and reheat it properly:
- Refrigerate: Allow the sweet and sour chicken to cool completely before transferring it to an airtight container. It can be stored safely in the refrigerator for up to 3 days. This makes it an excellent option for meal prep throughout the week.
- Freezing: I generally do not recommend freezing Instant Pot Sweet and Sour Chicken. The bell peppers and pineapple tend to break down significantly in texture when frozen and then thawed in the sauce, resulting in a less appealing consistency. If you must freeze, consider freezing just the chicken and sauce, adding fresh bell peppers and pineapple when reheating.
- Reheat: For best results, reheat leftovers gently. You can warm it on low heat in a skillet on the stovetop, using the Sauté function on your Instant Pot for a few minutes until heated through, or simply microwave individual portions for 1-2 minutes, stirring halfway, until hot.
More Incredible Instant Pot Chicken Recipes You’ll Love
The Instant Pot is a phenomenal tool for preparing quick, flavorful, and healthy chicken dishes. If you enjoyed this Sweet and Sour Chicken, be sure to explore some of my other popular Instant Pot chicken recipes for more easy meal ideas:
- Instant Pot Chicken and Dumplings: A comforting classic made easy.
- Instant Pot Chicken Noodle Soup: Perfect for chilly days or when you need a boost.
- Instant Pot Chicken Tacos: Fast, flavorful, and perfect for taco night!
- Instant Pot Chicken Breast (Fresh or Frozen): A foundational recipe for perfectly cooked chicken every time.
- Instant Pot Butter Chicken: Rich, creamy, and wonderfully aromatic.
- Instant Pot Burrito Bowl: Customizable and great for meal prep.
- Instant Pot Chicken and Rice: Another fantastic all-in-one meal solution.
Did you make this recipe?
If you enjoyed this delicious Instant Pot Sweet and Sour Chicken recipe, please consider leaving a comment with a 5-star review at the bottom of the post. Your feedback helps others discover and enjoy these recipes too!
Instant Pot Sweet and Sour Chicken Recipe
Kristen Chidsey
6
5 minutes
10 minutes
15 minutes
30 minutes
Print Recipe

Video
Ingredients
For the Sweet & Sour Chicken:
- ½ tablespoon canola oil
- 1 pound boneless, skinless chicken breasts, cut into 1-inch chunks
- 1 medium onion, diced into 1-inch chunks
- 1 medium red bell pepper, diced into 1-inch chunks
- 1 medium yellow bell pepper, diced into 1-inch chunks
- 1 cup fresh pineapple, diced into 1-inch chunks
- 1 tablespoon minced garlic
- ½ cup low sodium chicken stock (for 3 or 6-quart Instant Pot)
- ¾ cup low sodium chicken stock (for 8-quart Instant Pot)
- ½ cup apricot jam/preserves (preferably all-fruit)
- 2 tablespoons low-sodium soy sauce
- 1 teaspoon freshly grated ginger
- ¼ cup rice wine vinegar
For the Pot-in-Pot Rice (Optional):
- 1 cup long grain white rice, rinsed very well
- 1 cup water, for rice
For Thickening the Sauce:
- 1 tablespoon cornstarch
- 2 tablespoons water, for cornstarch slurry
Instructions
-
Turn the Instant Pot to “Sauté” mode, add ½ tablespoon canola oil, and allow it to heat for 1-2 minutes. Once hot, add the 1 pound boneless, skinless chicken breasts (cubed) to the inner pot and sauté for 2-3 minutes, or until lightly browned on all sides. When browned, press “CANCEL” to turn off the Instant Pot.

-
Add ½ cup low sodium chicken stock (for 3 or 6-quart model) or ¾ cup low sodium chicken stock (for 8-quart model) to the inner pot. Use a wooden spoon or spatula to scrape up all the browned bits from the bottom of the pot. This is crucial for flavor and to prevent a “burn” notice.
-
Evenly add the 1 medium diced onion, 1 medium diced red pepper, 1 medium diced yellow pepper, and 1 cup diced fresh pineapple to the inner pot, layering them over the chicken.
-
In a small bowl, whisk together the ½ cup apricot jam/preserves, 2 tablespoons low-sodium soy sauce, 1 tablespoon minced garlic, 1 teaspoon freshly grated ginger, and ¼ cup rice wine vinegar until well combined. Pour this mixture over the ingredients in the inner pot and gently stir to coat everything.
-
If you wish to cook rice simultaneously (pot-in-pot method), place a heat-safe trivet above the chicken and vegetables. In a stainless steel bowl or cake pan, combine 1 cup well-rinsed long grain white rice with 1 cup water, and carefully place this pan on the trivet.
-
Secure the lid on the pressure cooker, ensuring the vent knob is sealed or locked. Set to cook on HIGH pressure for 5 minutes. (Press “Manual” or “Pressure Cook” and adjust time using +/- buttons.)
-
Once the cooking time completes, allow the pressure to release naturally for at least 10 minutes. This helps keep the chicken tender and the rice (if cooking) fluffy. You can leave it on “Keep Warm” during this time.
-
After natural pressure release, carefully remove the lid. If you cooked rice, remove the rice bowl and trivet from the inner pot.
-
Press “CANCEL” to turn off the “Keep Warm” function, then press “Sauté.” Allow the sauce to come to a boil. Meanwhile, whisk together 1 tablespoon cornstarch with 2 tablespoons cold water until dissolved, creating a slurry. Whisk the cornstarch slurry into the bubbling sauce. Stir constantly for 1-2 minutes until the sauce has thickened to your desired consistency. Once thickened, press “CANCEL” to turn off the Instant Pot.
-
Serve the delicious sweet and sour chicken over the cooked rice. Garnish with toasted sesame seeds and sliced green onions, if desired. Enjoy!



Equipment
-
Electric Pressure Cooker (6 or 8 quart)
-
7×4-inch heat-safe cake pan (perfect for pot-in-pot rice!)
Notes
Amount of Liquid: Don’t worry if the liquid seems low before pressure cooking. The peppers, onions, and pineapple release a significant amount of liquid during the cooking process. Combined with the chicken stock, soy sauce, vinegar, and jam, you’ll have more than enough liquid to build pressure and prevent a “burn” notice.
Corn-Free Modifications: For those with a corn allergy or preference, use tapioca starch or arrowroot powder in place of cornstarch for thickening the sauce. Use an equal amount.
Gluten-Free Modifications: To make this dish entirely gluten-free, ensure you use gluten-free soy sauce, Tamari, or coconut aminos as a substitute for regular soy sauce.
Apricot Jam: I highly recommend using “Apricot All Fruit” jam as it’s typically sweetened with fruit juice, offering a healthier option. However, any apricot jam or preserves will work for the recipe. As an alternative, you can replace the jam with a mixture of ¼ cup ketchup and ¼ cup brown sugar.
Ginger: Freshly grated ginger provides the best flavor. If you do not have fresh ginger, please do NOT substitute with powdered ginger, as the flavor is not comparable. It’s better to omit it entirely if you don’t have fresh.
Increasing Spice Level: This recipe yields a sweet and mild dish, which is fantastic for kids or sensitive palates. If you desire more heat, add ½ tablespoon of Sriracha or your preferred hot sauce to the sauce mixture before pressure cooking. You can also serve Sriracha on the side for individual customization.
Storage: Cooled leftovers should be transferred to an airtight container and can be stored in the refrigerator for up to 3 days. Reheat gently on the stovetop, in the Instant Pot on Sauté mode, or in the microwave.
Nutrition Information (Approximate Per Serving)
Carbohydrates: 19g
Protein: 17g
Fat: 3g
Cholesterol: 48mg
Sodium: 425mg
Potassium: 445mg
Fiber: 1g
Sugar: 11g
Vitamin A: 700IU
Vitamin C: 77.6mg
Calcium: 18mg
Iron: 0.8mg
Nutrition information is automatically calculated and should only be used as an approximation. It may vary based on specific ingredients and brands used.
Tried this recipe?
Mention @amindfullmom or tag #amindfullmom! We love to see your creations!
This post was originally shared in 2021 and thoroughly updated in 2025 with enhanced tips, more detailed instructions, and fresh insights to provide the best possible reader experience.