

Prepare to revolutionize your weeknight dinners and game-day feasts with this incredible Instant Pot Chili recipe. This isn’t just any chili; it’s the ultimate quick and easy chili, delivering a depth of flavor that usually takes hours of slow simmering, all thanks to the magic of your Instant Pot. Crafted with succulent beef, wholesome beans, and a robustly seasoned tomato base, this simple yet profoundly satisfying recipe guarantees bold, comforting flavors every single time. Best of all, from start to finish, you can have this delicious meal on your table in under an hour!
Drawing inspiration from cherished family recipes, particularly my beloved Crockpot Chili, this Instant Pot version has quickly ascended to the top of our family’s all-time favorite meals list. Whether it’s for an exciting football game gathering, a friendly potluck, or just a cozy night in, this is the chili recipe I consistently rely on to bring warmth and joy to the table. Its ease of preparation and rich taste make it a staple you’ll want to revisit again and again.

Why This Instant Pot Chili Will Become Your New Favorite
This Instant Pot Chili isn’t just a personal family favorite; it’s also a celebrated reader favorite, earning rave reviews and even winning chili cook-offs. What makes this recipe an absolute stand-out, promising a delightful culinary experience with minimal effort? Let’s explore the compelling reasons why you’ll fall in love with this one-pot wonder:
- Unforgettable Classic Flavors: At its heart, this chili boasts an abundance of savory beef, perfectly balanced with just the right amount of tender beans, all enveloped in a rich, tomato-based sauce. The secret to its incredible taste lies in our meticulously crafted chili seasoning, which transforms simple ingredients into a deeply soul-satisfying and delicious meal that will evoke nostalgic comfort with every spoonful. This isn’t just a meal; it’s an experience of robust, traditional chili flavor.
- Effortless One-Pot Preparation: Say goodbye to multiple pots and endless cleanup! The Instant Pot truly shines here, handling every step of the cooking process with remarkable efficiency. From expertly sautéing your ground meat and onions to deglazing the pot and developing those complex, layered flavors, your pressure cooker does it all. This means you’re left with only one pot to wash, making dinner prep and post-meal cleanup a breeze – a huge win on busy weeknights.
- Achieve “Slow-Cooked” Flavor in Record Time: Traditional chili often requires hours of gentle simmering to develop its signature rich, mellow flavors. The Instant Pot bypasses this lengthy process, utilizing high-pressure cooking to infuse and deepen all the ingredients’ flavors in an incredibly short timeframe. It seals in moisture and aromatics, resulting in a robust, knock-out chili that tastes like it’s been lovingly slow-cooked all day, but is ready in under an hour. It’s the perfect solution when you crave authentic chili flavor without the wait.
- Versatile and Customizable: This recipe provides a fantastic foundation that can be easily adapted to your dietary needs or flavor preferences. Whether you want to adjust the spice level, swap out proteins, incorporate extra vegetables, or even make it gluten-free, this chili is incredibly forgiving and open to modification. It ensures you can tailor it perfectly to suit your taste and any occasion.
- Perfect for Any Occasion: From bustling weeknights when time is short to large gatherings like football parties, potlucks, or simply a quiet, cozy evening at home, this Instant Pot Chili is always a crowd-pleaser. Its comforting, hearty nature makes it a go-to dish for any season and any event, bringing warmth and satisfaction to all who enjoy it.
A 5-Star Reader Endorsement
“Absolutely delicious. Easy to prepare in a few minutes. Best chili anyone could want. Just follow the instructions and not reinvent the wheel.” –Art ⭐⭐⭐⭐⭐
Essential Ingredients for Your Perfect Instant Pot Chili
This Instant Pot chili recipe calls for a thoughtful blend of classic ingredients you’d expect, alongside a few nuanced additions that are key to building truly complex and satisfying flavors. Each component plays a vital role in achieving that rich, hearty, and utterly delicious chili you’re craving. Sourcing quality ingredients is the first step towards a fantastic meal.
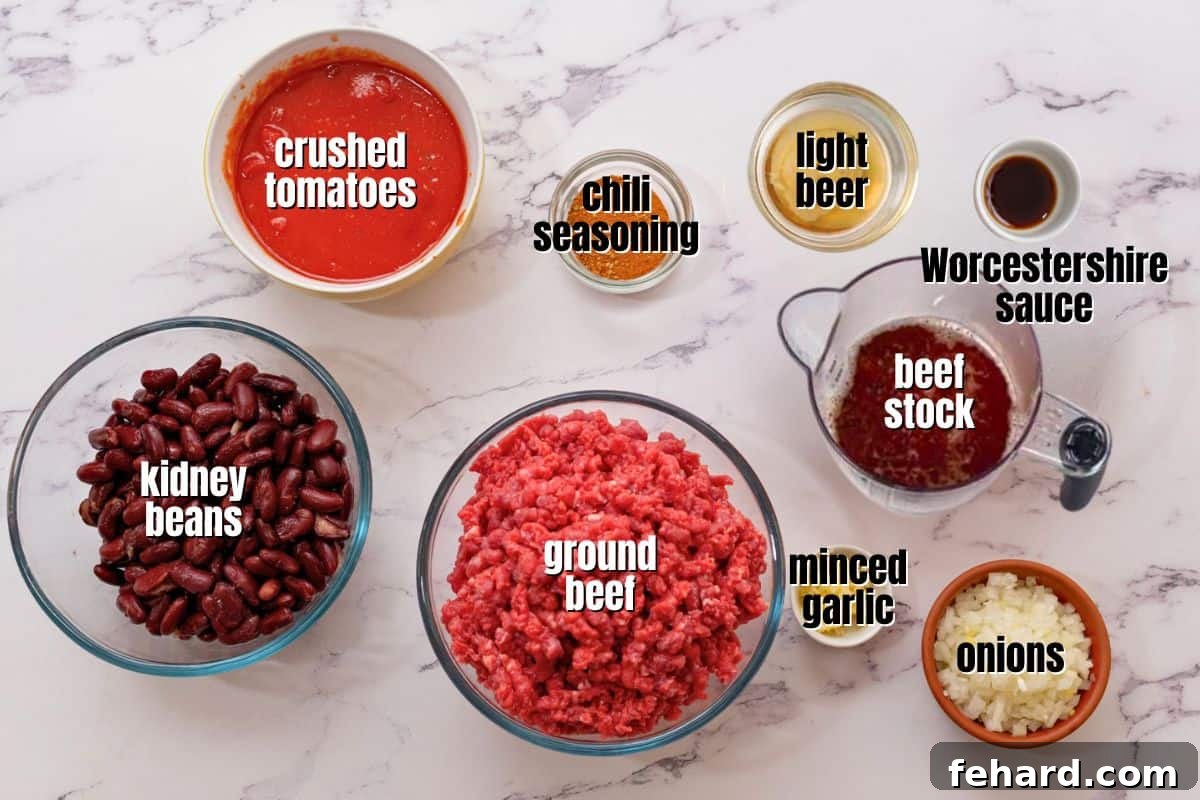
- Ground Meat: While ground beef is the traditional and most popular choice, feel free to use ground turkey, chicken, or bison for a leaner alternative. I personally recommend using 85/15 ground beef. This specific fat content provides ample flavor to the chili without making it excessively greasy, ensuring a rich mouthfeel. If opting for a leaner meat (like 90/10 or higher), you might want to add a touch of olive oil when browning to ensure proper sautéing and flavor development.
- Onion + Garlic: These aromatic powerhouses form the foundational flavor base of our chili. Finely diced yellow onion and minced garlic are sautéed to sweet perfection, releasing their fragrant oils and setting the stage for the rich flavors to come. Their initial sauté is crucial for building deep, savory notes that permeate the entire dish.
- Beans: Kidney beans, whether dark, light, or a combination of both, are the quintessential chili bean and my preferred choice for their creamy texture and ability to absorb and carry flavor. However, red beans or pinto beans also work wonderfully, offering slight variations in texture and taste. Always remember to rinse and drain your canned beans thoroughly before adding them to remove excess sodium and improve digestibility.
- Beer (Optional, but Recommended): A pale lager, such as Corona or Coors, introduces a subtle tang and an incredible depth of flavor that truly elevates the chili beyond the ordinary. The alcohol cooks off during the deglazing process, leaving behind a complex, slightly malty, and savory note. If you prefer to avoid alcohol or don’t have beer on hand, simply substitute it with an equal amount of additional beef stock.
- Beef Stock: Essential for both thinning the chili to the perfect consistency and preventing the dreaded “burn notice” on your Instant Pot. Low-sodium beef stock is recommended, as it allows you to control the overall saltiness of the dish while still boosting that robust, beefy essence. It provides the necessary liquid for pressure cooking and adds another layer of flavor.
- Tomatoes: Crushed tomatoes are my go-to for this recipe, especially fire-roasted crushed tomatoes, as they add a smoky depth and a velvety texture to the chili. They also ensure a smooth consistency, which is perfect for picky eaters who might object to chunky diced tomatoes. If you prefer a chunkier chili with more texture, diced tomatoes can certainly be used instead.
- Chili Seasoning: This is where the magic happens! My homemade chili seasoning blend is non-negotiable for achieving the best flavor. It’s meticulously designed to surpass store-bought packets, offering a perfectly balanced profile of spices. You likely already have all the necessary ingredients in your pantry to whip it up, typically including chili powder, cumin, cayenne, garlic powder, onion powder, salt, and pepper.
- Worcestershire Sauce: A small but mighty ingredient, Worcestershire sauce adds an umami punch and a delightful depth of flavor that rounds out the chili beautifully. It’s a secret weapon for enriching savory dishes, contributing a complex, tangy, and slightly sweet note.
Instant Pot Size Matters for Best Results
This versatile chili recipe is designed to work flawlessly in various Instant Pot sizes, including 3, 6, 8, or 10-quart pressure cookers. For larger gatherings, meal prepping, or simply to ensure you have plenty of delicious leftovers, feel free to double the recipe if you are using an 8 or 10-quart Instant Pot model. Always ensure you do not fill your Instant Pot past the max fill line.
Step-by-Step Guide: How to Craft the Best Instant Pot Chili
Ready to create a truly spectacular Instant Pot Chili that tastes like it simmered all day? Let’s walk through the process together. Think of this section as having me right there with you in the kitchen, guiding you through each simple step to ensure your chili turns out perfectly delicious. This recipe is designed for ease, even for Instant Pot beginners, so let’s get cooking!
- Brown the Meat with Onions: Begin by setting your Instant Pot to the “Sauté” function on normal or medium heat. Allow the inner pot to heat up for a minute or two until it’s hot. Add your chosen ground meat (beef, turkey, chicken, or bison) along with the finely diced yellow onion. Use a sturdy wooden spoon or spatula to break the meat into bite-sized pieces as it cooks. Continue to sauté, stirring occasionally, until the meat is thoroughly browned and the onions have softened and become translucent, which usually takes about 5-7 minutes. Once the meat is almost completely browned and the onions are soft, stir in the minced garlic. Allow the garlic to toast lightly for just one minute – resist the urge to add it earlier, as burnt garlic can impart a bitter and unpleasant taste to your entire dish. If your meat has released a significant amount of excess grease, carefully drain it off at this stage to prevent your chili from becoming too oily.
A Crucial Note on Adding Garlic
It’s a common mistake to add garlic at the very beginning of the sauté process. However, garlic burns much faster than onions or ground meat. Burnt garlic will unfortunately impart an unpleasant, bitter flavor that can ruin your entire dish. For the best aromatic results, add minced garlic only after the meat is nearly browned and the onions are softened, allowing it to toast lightly for just 1-2 minutes to release its fragrant oils without burning.
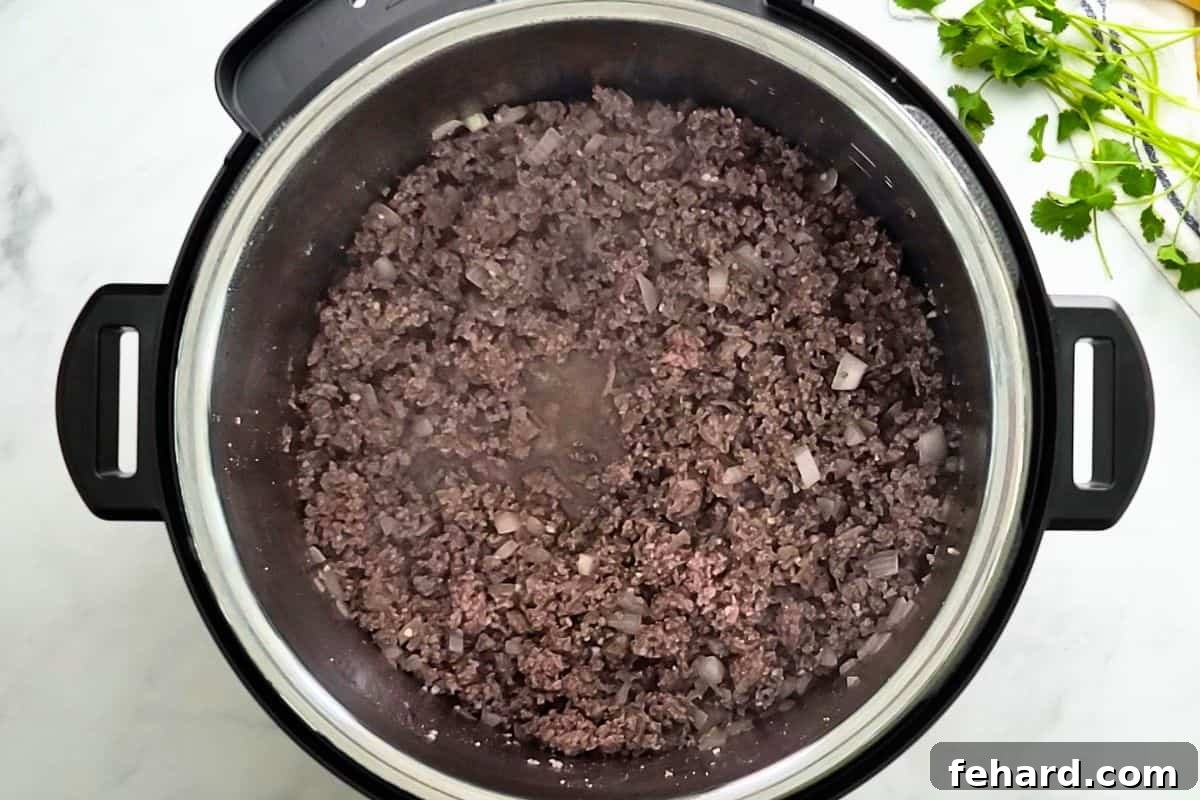
- Deglaze the Inner Pot: This step is absolutely crucial for both maximizing flavor and to prevent the dreaded “burn notice” on your Instant Pot. While the Instant Pot is still on “Sauté” (or you can restart sauté briefly after hitting cancel), carefully pour in the beer (or additional beef stock if substituting). Immediately use a sturdy wooden spoon or spatula to vigorously scrape up all the flavorful browned bits that have stuck to the bottom of the inner pot. These bits, known as “fond,” are packed with intense flavor and must be fully dislodged to integrate into your chili and prevent scorching. Let the mixture simmer for about 1-2 minutes, allowing the liquid to reduce slightly and the flavors to deepen. Once thoroughly deglazed and no bits remain on the bottom, hit the “Cancel” button to turn off the sauté function.
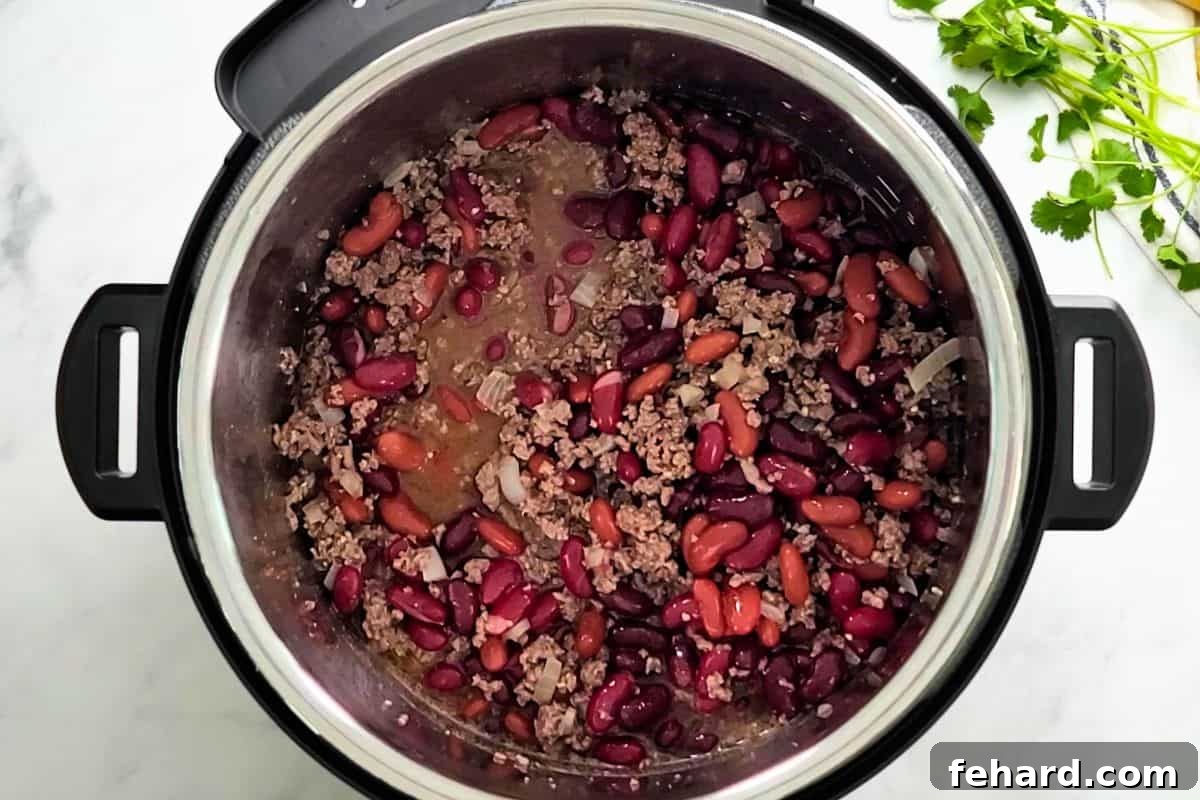
- Carefully Layer the Ingredients: Now it’s time to assemble your chili for pressure cooking! Add the rinsed and drained beans, your homemade chili seasoning, the Worcestershire sauce, and the beef stock to the Instant Pot. Stir these ingredients well to combine them thoroughly with the browned meat and deglazing liquid. This ensures even seasoning and moisture distribution throughout the base. Next, gently pour the crushed tomatoes (or diced tomatoes, if using) over the top of the other ingredients. This is a critical step: DO NOT STIR THE CHILI AGAIN after adding the tomatoes. Leaving the tomatoes on top prevents them from directly touching the bottom of the pot, which significantly reduces the risk of a “burn notice” during pressure cooking. This layering technique is essential for Instant Pot success with thick sauces.
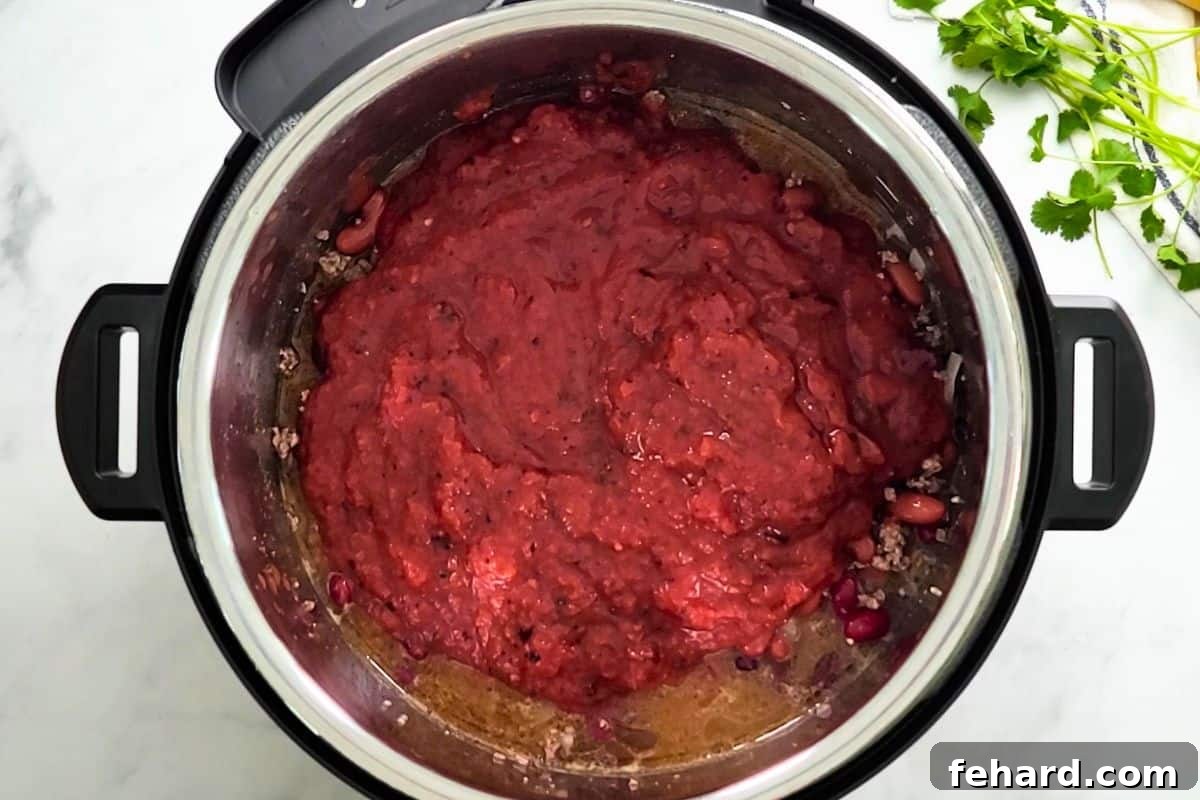
- Pressure Cook to Perfection: Secure the lid on your Instant Pot, ensuring that the venting valve is in the “Sealing” position. Select the “Manual” or “Pressure Cook” function and set the cooking time to 15 minutes on HIGH pressure. While 15 minutes may seem incredibly short for a hearty chili, the intense heat and pressure inside the pot work wonders, infusing all the flavors deeply into the ingredients and tenderizing the beef and beans remarkably fast. This quick cook time is truly a game-changer for a classic dish, mimicking hours of simmering in a fraction of the time!
- Allow Natural Pressure Release (NPR) for Optimal Results: Once the 15-minute cooking cycle is complete, the Instant Pot will typically switch to “Keep Warm.” It is crucial to allow for at least 15 minutes of Natural Pressure Release (NPR) before attempting to open the pot. Chili contains a significant volume of liquid, and a quick release (QR) immediately after cooking could lead to a messy spray of hot liquid and potentially dry out the ingredients. Natural pressure release allows the pressure to gradually dissipate, resulting in a safer and cleaner opening, and it helps the chili’s flavors meld even further. After a minimum of 15 minutes of NPR, you can then proceed with a Quick Release if any pressure remains by carefully turning the venting knob from “Sealing” to “Venting” using a long-handled utensil to protect your hands from the escaping steam. Once the float valve drops, it’s safe to open the lid. Give your perfectly cooked chili a good stir, and it’s ready to serve!
Understanding Natural Pressure Release (NPR)
Natural Pressure Release (NPR) simply means you leave the Instant Pot undisturbed after the cooking cycle finishes. The pressure will gradually decrease on its own. You’ll know it’s safe to open the lid when the float valve (a small metal pin on the lid) drops down. This method is often preferred for liquid-heavy dishes like chili and soups, as it prevents sudden sprays of hot liquid and can lead to more tender, flavorful results by allowing the ingredients to rest in the cooking liquid.
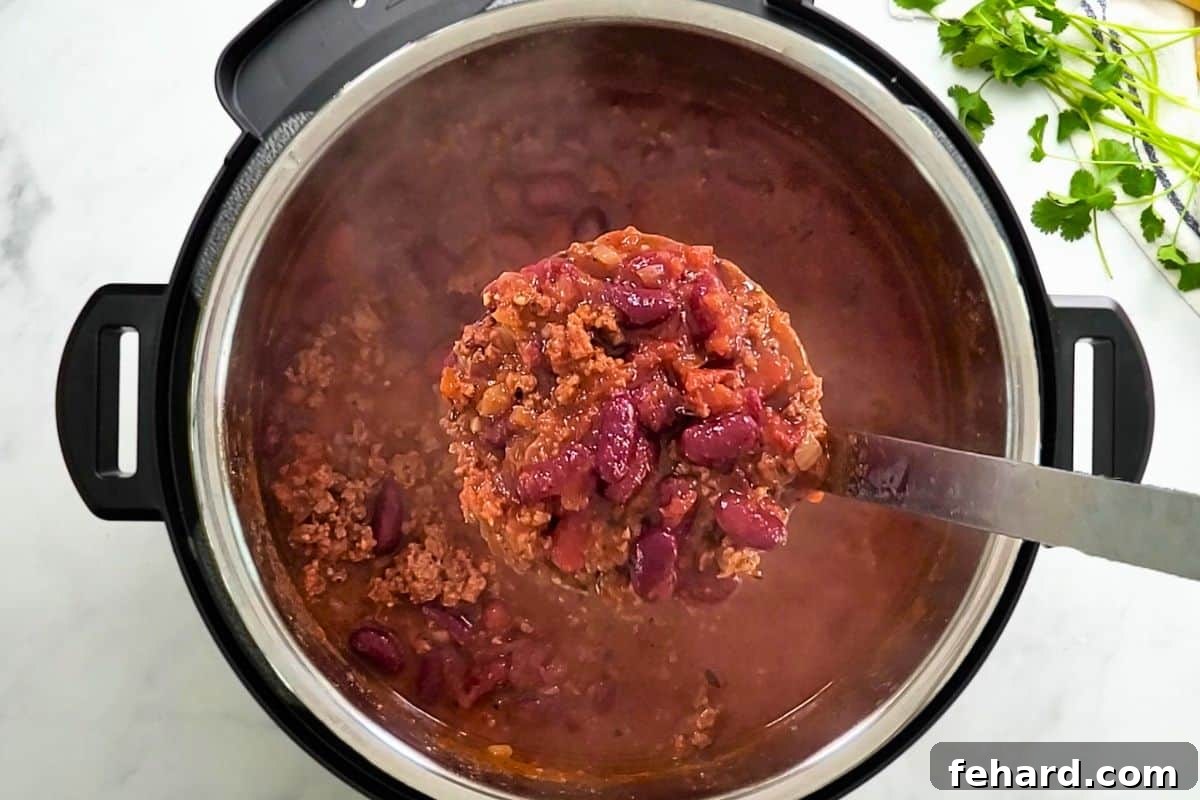
Watch and Learn: Instant Pot Chili Video Guide
For those who benefit from visual learning, I invite you to join me in my kitchen! This step-by-step video presentation will guide you through the entire process of making my family’s favorite Instant Pot Chili. See firsthand how simple it is to achieve such rich flavors and a perfectly cooked dish, taking all the guesswork out of your cooking.
Elevate Your Meal: Delicious Serving Suggestions for Instant Pot Chili
This Instant Pot Chili is so incredibly flavorful and satisfying on its own that simply ladling it into a bowl and diving in is a perfectly acceptable way to enjoy it. However, if you’re looking to enhance the experience, add some creative flair, or turn it into a more substantial meal, I have a few delightful suggestions to elevate your chili experience and truly make it your own:
- Embrace a Variety of Toppings: Customize each bowl with an array of your favorite chili toppings. Popular choices include generous amounts of shredded cheddar cheese (or a Mexican blend), cool and creamy sour cream or a healthier dollop of Greek yogurt, fresh diced green onions or thinly sliced red onions, vibrant sliced pickled jalapeños for a delightful kick, creamy avocado slices or a scoop of guacamole, and crunchy corn chips or Fritos for irresistible texture. A sprinkle of fresh cilantro also adds a burst of refreshing herbal notes.
- Serve with Classic Cornbread or Warm Biscuits: A true Southern classic pairing, warm, fluffy cornbread is the ideal companion for soaking up every last drop of rich chili. Beyond cornbread, try serving it alongside tender, flaky sweet potato biscuits or savory buttermilk biscuits for a comforting and satisfying combination that everyone will love. The contrast of the warm bread with the hearty chili is simply divine.
- Cincinnati-Style Chili Over Pasta: For a unique and incredibly hearty twist inspired by Cincinnati chili, serve your Instant Pot Chili generously spooned over a bed of cooked spaghetti noodles. It’s a delicious and surprisingly popular way to enjoy chili, especially if you’re looking for a fuller, more substantial meal that combines two comfort food favorites.
- Top Baked Potatoes or Sweet Potatoes: Transform a simple side into a wholesome main course! Spoon a generous helping of warm, savory chili over a fluffy Instant Pot baked potato or a naturally sweet and nutritious Instant Pot sweet potato. Add a dollop of sour cream or Greek yogurt and a sprinkle of cheese for an easy, satisfying, and complete meal that’s both delicious and customizable.
- Reinvent into a Tamale Pie: Make a double batch of this amazing chili, and use the leftovers to create a delectable tamale pie. Simply spread 3-4 cups of the leftover chili evenly into a casserole dish, top it with a rich layer of cornbread batter, and bake according to your tamale pie recipe’s directions. It’s an ingenious and incredibly tasty way to enjoy this chili in a whole new, comforting form.
Customize Your Chili: Easy Modifications and Dietary Adjustments
One of the best aspects of this Instant Pot Chili recipe is its incredible flexibility. It’s remarkably easy to adapt to various dietary preferences or to simply adjust the flavor profile to your liking, ensuring everyone at your table can enjoy a delicious bowl. Here are some simple modifications you can make:
- Reduce Sodium Content: For a healthier, lower-sodium version, opt for low-sodium beef stock, a low-sodium Worcestershire sauce (always check labels carefully), and no-salt-added crushed tomatoes. When preparing your homemade chili seasoning blend, reduce the amount of added salt by half or omit it entirely, then taste and adjust to your preference after the chili has finished cooking.
- Amplify the Spice Level: If you love a chili with a fiery kick, there are several simple yet effective ways to increase the heat. You can add a small minced jalapeño (seeds and membranes removed for moderate heat, or left in for more intense spice) to the beef and onion mixture during the sautéing stage. Alternatively, stir up to ½ teaspoon of cayenne pepper directly into your chili seasoning blend. For an extra fiery chili experience, consider adding a pinch of red pepper flakes along with the other seasonings.
- Make it Gluten-Free: To ensure your chili is entirely gluten-free, it’s important to make specific substitutions and check labels. Use a certified gluten-free beer or simply replace the beer with an equal amount of additional gluten-free beef stock or a dry red wine. Always double-check the label on your Worcestershire sauce, as some brands contain gluten-containing ingredients; ensure you select a certified gluten-free option.
- Vegetarian/Vegan Option: While this particular recipe is meat-based, you can easily adapt it to be vegetarian or vegan. Substitute the ground meat with plant-based ground “meat” crumbles or a hearty combination of extra beans (like black beans, cannellini beans, or chickpeas) and diced sweet potatoes or mushrooms. Replace beef stock with a flavorful vegetable broth, and ensure your Worcestershire sauce is vegan (as some varieties contain anchovies).
There you have it – a phenomenal Instant Pot Chili recipe that my family simply can’t get enough of! It’s quick, incredibly flavorful, and perfectly adaptable for any occasion or preference. I sincerely hope you and your loved ones enjoy this comforting dish as much as we do. Happy cooking! xo-Kristen
Explore More Instant Pot Chili Recipes
While this classic beef and bean chili holds a special place in our hearts, my culinary adventures extend to a wide variety of chili styles! If you’re eager to explore different flavors, ingredients, and textures, I encourage you to try out some of our other cherished Instant Pot chili recipes below. Each offers a unique and delicious twist on this beloved comfort food, promising something new for every palate:
- Instant Pot Sweet Potato Black Bean Chili: A hearty, vibrant, and plant-based option bursting with sweet and savory flavors and delightful textures.
- Instant Pot Lentil Chili: A protein-packed, wholesome, and incredibly satisfying chili that’s both nutritious and full of earthy flavors.
- Instant Pot White Chicken Chili: A lighter, creamy, and subtly spiced chili featuring tender chicken and mild green chilies.
- Instant Pot Red Chicken Chili: A flavorful chicken chili with a classic, robust red sauce, perfect for a delicious twist on tradition.
Loved this recipe?
If you’ve made and enjoyed this fantastic Instant Pot Chili recipe, we’d be absolutely thrilled if you could share your experience! Please consider leaving a comment and a 5-star review at the bottom of the post to help other home cooks discover and enjoy this delicious dish. Your feedback and support are greatly appreciated!
Overall Reader Rating: 4.70 out of 5 stars from 49 votes
Instant Pot Chili Recipe Card
By: Kristen Chidsey
Servings: 8
Prep Time: 10 mins
Cook Time: 15 mins
Pressure Build-Up and Release: 25 mins
Total Time: 55 mins
Rate Recipe |
Print Recipe

This easy recipe for Instant Pot Chili is made with tender beef, savory beans, and a rich, deeply seasoned tomato sauce. It comes together quickly in your pressure cooker, yet delivers a complex depth of flavor that tastes like it has been simmering all day long!
Recipe Video Guide
For a visual walkthrough, watch the full recipe preparation here:
Ingredients
- 2 pounds ground beef, (or ground bison, turkey, or chicken; 85/15 fat percentage recommended for best flavor)
- 1 small yellow onion, diced
- 1 tablespoon minced garlic
- ½ cup light lager beer, such as Coors or Corona (or additional beef stock for substitution)
- 1 cup low-sodium beef stock
- 2 tablespoons Chili Seasoning Blend
- 2 (15 oz) cans kidney beans, rinsed and drained
- 1 teaspoon Worcestershire sauce
- 28 ounces crushed tomatoes, (fire-roasted crushed tomatoes are highly recommended, or diced tomatoes if preferred)
Instructions
-
Turn the Instant Pot to the “Sauté” function. Add 2 pounds ground beef and 1 small diced yellow onion to the inner pot. Cook until the meat is thoroughly browned and the onions are softened (approximately 5-7 minutes), breaking up the meat with a wooden spoon as it cooks.
-
Once the meat is nearly cooked through, add 1 tablespoon minced garlic and continue to sauté for 1 minute longer, just to lightly toast the garlic without burning it. If there’s any significant excess grease, carefully drain it off at this point.
-
With the Instant Pot still on “Sauté,” add ½ cup light lager beer (or additional beef stock) into the inner pot. Immediately use a sturdy wooden spoon to scrape up all the flavorful browned bits (fond) from the bottom of the inner pot. This deglazing step is critical to prevent a “burn notice.” Let the mixture simmer for 1-2 minutes to reduce slightly, then hit “Cancel” to turn off the sauté function.

-
Add 1 cup low-sodium beef stock, 2 tablespoons Chili Seasoning Blend, 2 (15 oz) cans rinsed and drained kidney beans, and 1 teaspoon Worcestershire sauce to the inner pot. Stir these ingredients well to combine them thoroughly with the meat and liquid.
-
Gently top the chili mixture with the 28 ounces of crushed tomatoes (or diced tomatoes). IMPORTANT: DO NOT STIR the tomatoes into the other ingredients at this stage. Leaving the tomatoes on top helps to prevent a “burn notice” during pressure cooking.
-
Secure the Instant Pot lid, ensuring the venting valve is in the “Sealing” position. Select the “Manual” or “Pressure Cook” function and set the cooking time to 15 minutes on HIGH pressure using the +/- buttons to adjust the time.
-
Once the cooking time has elapsed, allow the pressure to release naturally for at least 15 minutes (NPR). After 15 minutes, you may perform a quick release (QR) if any pressure remains by carefully moving the venting knob from “Sealing” to “Venting” using a long-handled utensil to protect your hands from the steam. Once the float valve drops, it is safe to open the lid. Give the chili a good stir to combine all the layers, and serve hot as desired.




Equipment
-
Electric Pressure Cooker (6 or 8 quart recommended for this recipe)
Recipe Notes & Tips for Success
Notes on Ground Meat: This recipe is wonderfully flexible! You can confidently use ground chicken, turkey, beef, or bison for your Instant Pot Chili. For optimal flavor and texture, an 85/15 fat percentage for ground beef is highly recommended as it provides enough richness without making the chili overly greasy. If you choose to use a leaner meat (e.g., 90/10 or 93/7), consider adding about ½ tablespoon of olive oil to the Instant Pot before sautéing the meat and onions to ensure proper browning and flavor development.
Important Note on Tomatoes (Preventing “Burn Notice”): Older versions of this recipe (and some older videos) might suggest stirring the chili after adding the tomatoes. However, newer Instant Pot models are often more sensitive to “burn notices” when thick sauces like tomatoes are directly touching the bottom of the inner pot. To consistently prevent this, I now highly recommend NOT stirring the tomatoes into the other ingredients until *after* the pressure cooking cycle is complete. We particularly love fire-roasted crushed tomatoes for their smoky depth and smooth consistency, but regular crushed tomatoes or even diced tomatoes (fire-roasted or plain) work equally well depending on your preferred chili texture.
Beer Substitution: A light lager, such as Coors or Corona, enhances the chili’s flavor with subtle malty notes that add complexity. If you prefer not to use beer for any reason, an equal amount of dry red wine or additional beef stock can be substituted without compromising the overall deliciousness of the chili. For gluten-free dietary needs, ensure any beer or stock used is certified gluten-free.
Homemade Chili Seasoning Blend: To make the essential and highly flavorful chili seasoning blend for this recipe, simply combine the following spices: 1 tablespoon chili powder, 1 teaspoon ground cumin, ¼ teaspoon cayenne pepper (feel free to adjust this amount to your desired level of heat), ¼ teaspoon garlic powder, ½ teaspoon onion powder, 1 teaspoon salt, and ½ teaspoon black pepper. This blend provides a superior flavor profile compared to most generic store-bought options.
Gluten-Free Modifications: For a completely gluten-free chili, it is crucial to double-check all your ingredients. Ensure any beer used is explicitly labeled gluten-free, or substitute it entirely with gluten-free beef stock or a dry red wine. Additionally, always verify that your Worcestershire sauce brand is certified gluten-free, as some may contain wheat-based ingredients as thickeners or flavorings.
Storage Instructions: Leftover Instant Pot Chili is absolutely fantastic and often tastes even better the next day! Store any cooled chili in an airtight container in the refrigerator for up to 3-4 days. For longer-term storage, chili freezes beautifully. Transfer cooled chili to freezer-safe containers or heavy-duty freezer bags and freeze for up to 3 months. To reheat, simply thaw in the refrigerator overnight and gently warm on the stovetop over low heat or in the microwave until heated through.
Nutrition Information
Per Serving (based on 8 servings):
Calories: 284kcal | Carbohydrates: 38g | Protein: 24g | Fat: 6g | Saturated Fat: 1g | Cholesterol: 35mg | Sodium: 183mg | Potassium: 1146mg | Fiber: 9g | Sugar: 6g | Vitamin A: 215IU | Vitamin C: 12.5mg | Calcium: 82mg | Iron: 5.8mg
Nutrition information is automatically calculated based on the listed ingredients and should be used as an approximation only. Actual values may vary significantly based on specific brands, ingredient substitutions, and preparation methods.
Tried this recipe?
If you’ve made this delicious Instant Pot Chili, we’d love to see your creation! Mention @amindfullmom or tag #amindfullmom on social media. Share your photos and let us know how much you enjoyed it!
Originally published in 2018, this recipe has been thoroughly reviewed and updated in 2025 for clarity, enhanced details, improved SEO, and even better cooking success.