
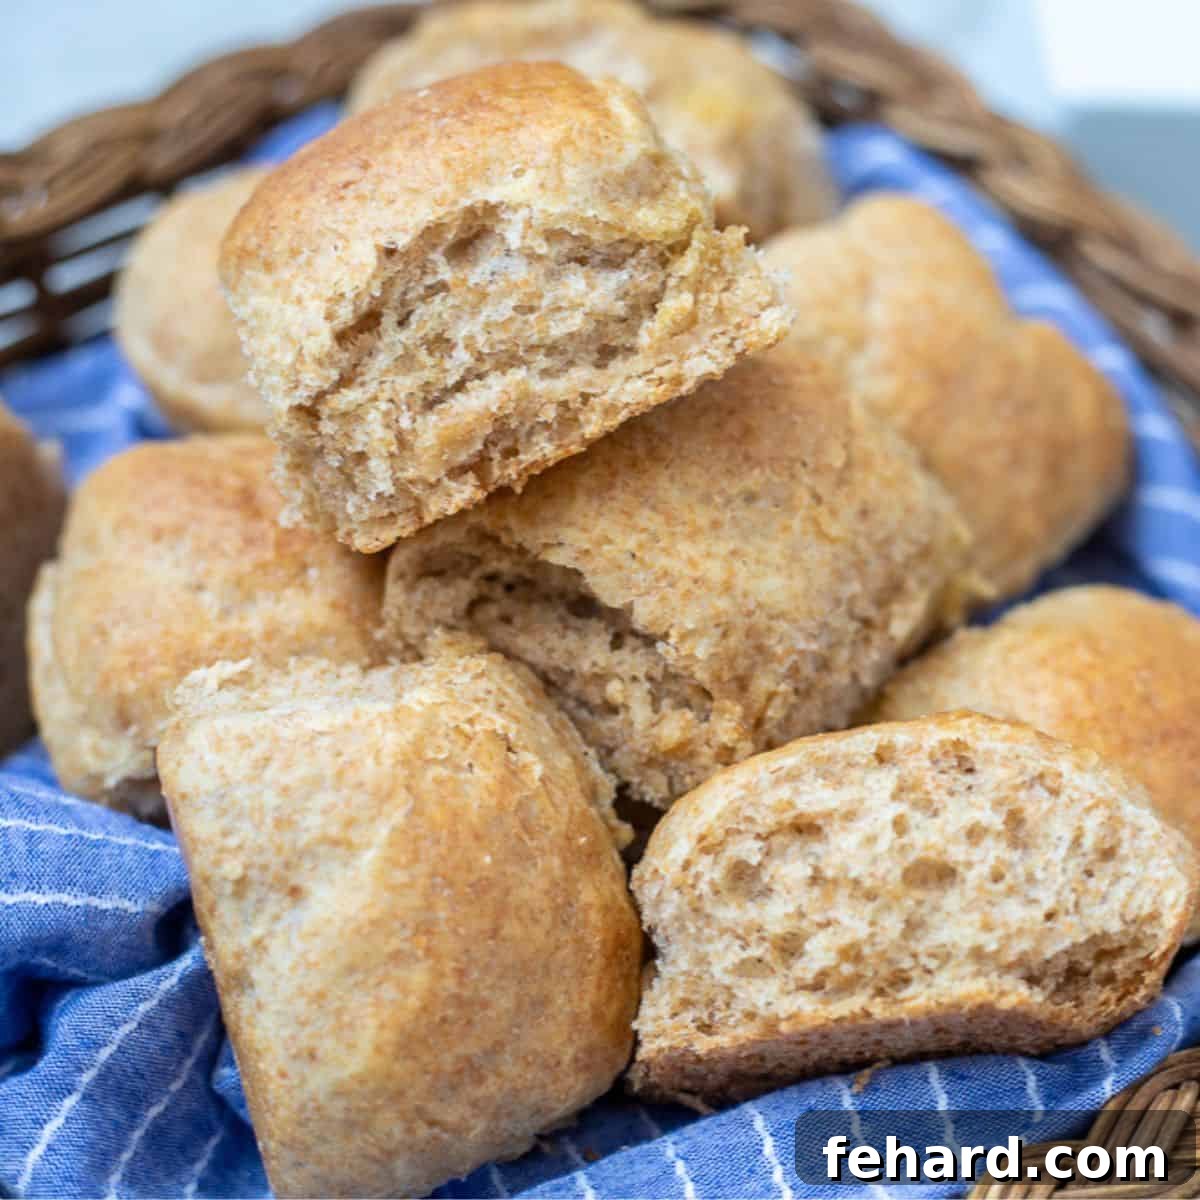
Effortlessly Soft & Fluffy Whole Wheat Rolls with a Touch of Honey
Prepare to be amazed! This recipe definitively proves that soft, incredibly fluffy whole wheat rolls are not just a myth, they’re a delicious reality you can create in your own kitchen. Crafted with 100% whole wheat flour and naturally sweetened with a kiss of golden honey, this easy whole wheat roll recipe yields homemade rolls that are so irresistibly good, they’ll become a staple at your dinner table.
You don’t need to be a seasoned baker to master these pillowy soft wheat rolls. Inspired by our cherished Honey Whole Wheat Bread recipe, this streamlined method comes together with remarkable ease—whether you prefer to mix and knead by hand or harness the convenience of a bread machine. Get ready to enjoy the wholesome goodness and tender texture of fresh, homemade rolls!
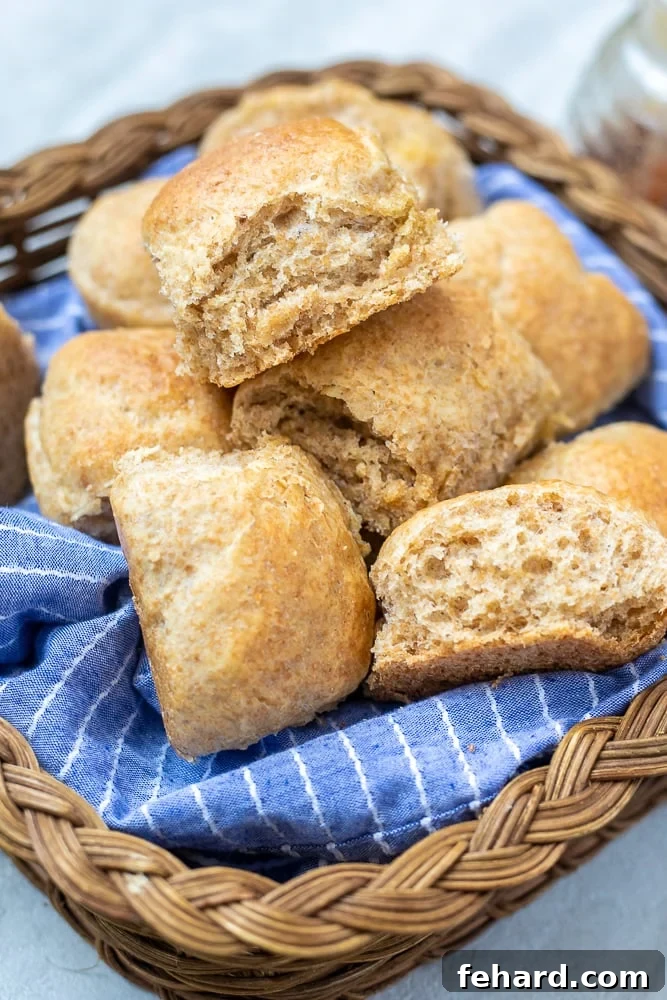
Kristen’s Essential Tips for Achieving Perfectly Fluffy Whole Wheat Rolls

Creating light and airy whole wheat rolls is entirely achievable with a few key techniques. Follow these expert tips to ensure your homemade rolls are consistently soft, tender, and delicious:
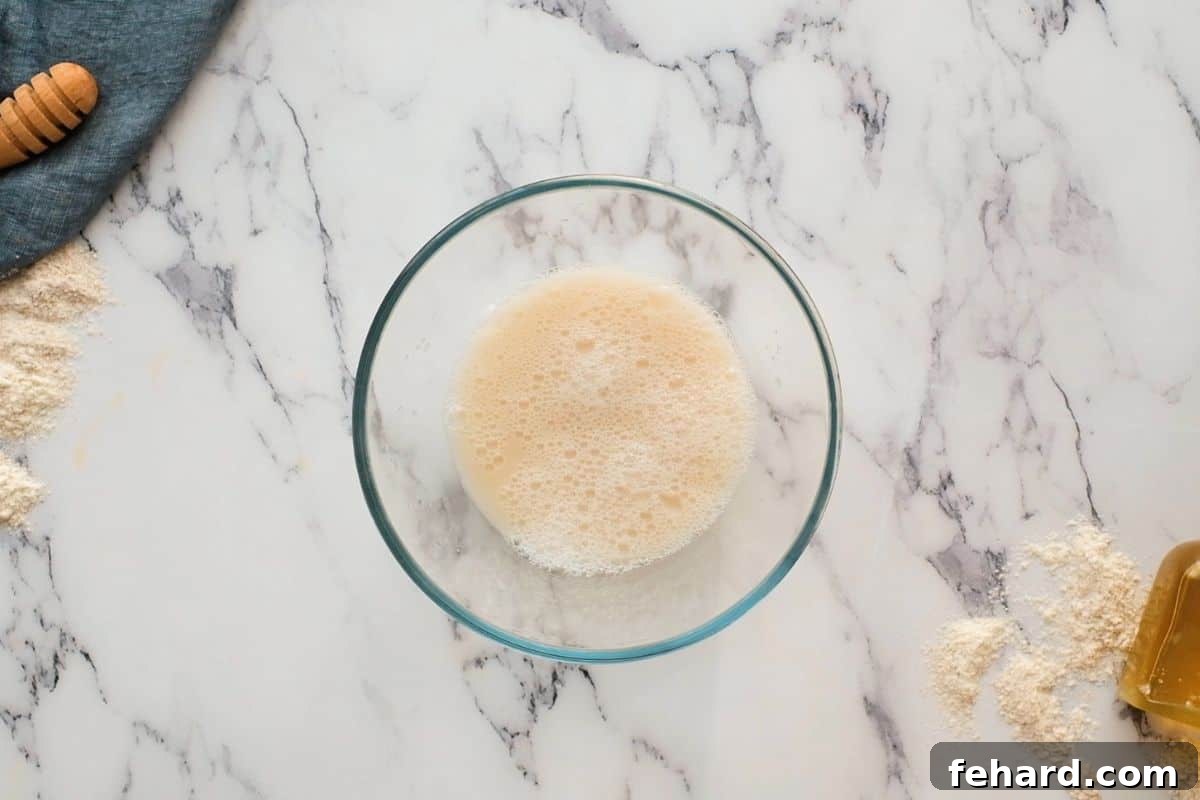
- Always Check Your Yeast: If it doesn’t foam, start over! Active yeast is the cornerstone of any successful bread recipe. When combining yeast with warm water and honey, it should become foamy and bubbly within 5-10 minutes. This visual cue indicates your yeast is active and ready to make your rolls rise beautifully. If you see no activity, your yeast might be expired, or your water was too hot (killing the yeast) or too cold (inhibiting activation). Without active yeast, your rolls will be dense and flat, so this crucial first step ensures success.
- Measure Flour Accurately – Weigh for Best Results. Using too much flour is a common pitfall that leads to heavy, dense rolls. Flour can compact easily, so scooping directly from the bag often adds more than intended. To prevent this, gently spoon the flour into your measuring cup and level it off. For the most precise and consistent results, we highly recommend using a kitchen scale to weigh your flour. This ensures you’re adding the exact amount needed for optimal dough hydration and a perfect texture.
- Incorporate Vital Wheat Gluten. Whole wheat flour, while nutritious, has a lower gluten content compared to white all-purpose flour. Gluten is essential for creating the elastic structure that traps gas during rising, leading to a light and airy texture. Without the addition of vital wheat gluten, whole wheat rolls can often turn out very dense and heavy. A small amount of vital wheat gluten provides that extra structural support, guaranteeing a soft, chewy crumb.
- Avoid Overworking the Dough. Kneading develops the gluten, but there’s a fine line. Knead the dough just until it comes together, feels smooth, and is no longer excessively sticky. As soon as it reaches this stage, stop! Over-kneading can result in a tough, rubbery, and dried-out dough, which inevitably translates into tough, dry rolls. Pay attention to the dough’s feel – it should be pliable and elastic.
- Opt for a Baking Dish over a Sheet Pan. While baking rolls on a flat sheet pan is possible, using a snug baking dish (like a 9×13 or 7×11 inch pan) is highly recommended. The confined space encourages the rolls to push upwards as they rise and bake, rather than spreading outwards. This upward growth helps them maintain a lighter, taller texture and a beautiful shape, preventing them from becoming too flat.
Happy Baking, and enjoy every fluffy bite! Warmly, Kristen
Understanding Your Ingredients: Key to Perfect Whole Wheat Rolls
While you’ll find the complete list of ingredients and their precise quantities in the recipe card below, here’s a closer look at what you need and some helpful tips for making the best selections.
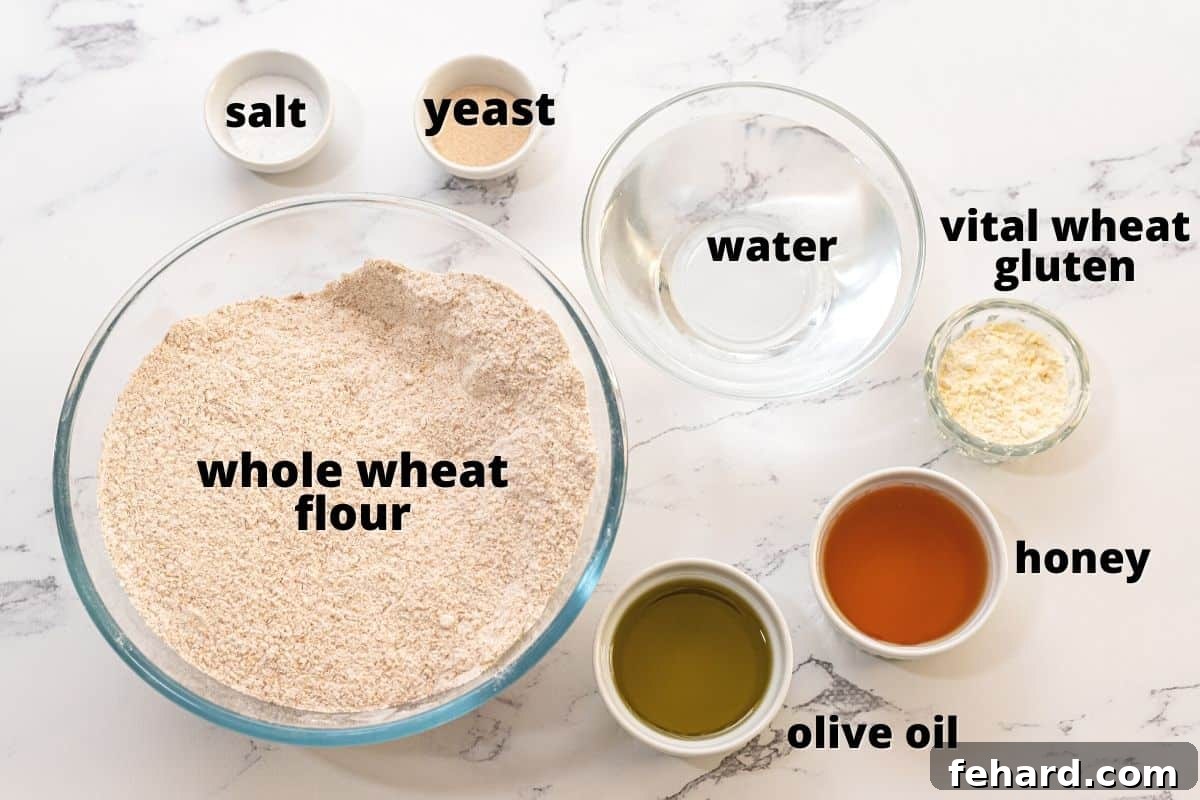
- Whole Wheat Flour: This recipe is specifically formulated for 100% whole wheat flour, which is typically ground from red wheat berries. This provides a robust, nutty flavor and a denser texture than white flour. Alternatively, you can use whole white wheat flour, which is still 100% whole grain but milled from white wheat berries, offering a milder flavor and lighter color that can be more appealing to some palates without sacrificing nutritional benefits.
- Extra Virgin Olive Oil: For the best flavor profile and moistness in your rolls, be sure to use a high-quality extra virgin olive oil. Its mild, fruity notes complement the honey and whole wheat beautifully. While other neutral oils can work, EVOO adds a desirable depth.
- Honey: Beyond just sweetening the rolls, honey plays a crucial role in activating the yeast, providing it with the necessary sugars to thrive and produce gas for rising. It also contributes to the rolls’ tender crumb, beautiful golden-brown crust, and characteristic subtly sweet flavor that makes these rolls truly outstanding.
- Vital Wheat Gluten: As discussed in the tips, vital wheat gluten is indispensable for achieving soft, airy whole wheat rolls. It’s a natural protein derived from wheat flour that, when added, significantly enhances the dough’s elasticity and strength. This extra gluten allows the dough to capture more air bubbles, ensuring your rolls are light and not overly dense. You can typically find vital wheat gluten in the baking aisle of most grocery stores or online.
- Active Dry Yeast: It’s important to use active dry yeast for this recipe, not instant or quick-rise yeast. Active dry yeast requires blooming in warm water, which allows you to confirm its activity before mixing it into the dough. Always double-check the expiration date on your yeast package to ensure it’s fresh and viable for optimal rising.
- Kosher Salt: Salt is vital for enhancing the flavor of the bread and also helps to control yeast activity, preventing the dough from rising too quickly. Kosher salt is preferred for its pure taste and easy dissolution.
Step-by-Step Guide: How to Make Irresistible Whole Wheat Rolls
Follow these detailed instructions to achieve perfect, pillowy whole wheat rolls every time. For exact ingredient quantities and a printable recipe card, please scroll to the bottom of this post.
- Activate the Yeast (Bloom the Yeast): The first critical step is to “bloom” or activate your active dry yeast. In a small bowl, combine the warm water (ensure it’s between 100-110℉ or 38-42℃), honey, and active dry yeast. Stir gently and let this mixture sit undisturbed for 5 to 10 minutes. You’ll know the yeast is active when the mixture becomes visibly foamy and bubbly on the surface. If it doesn’t foam, the yeast is likely inactive (either expired or killed by incorrect water temperature), and you’ll need to start again with fresh yeast and properly warmed water. This step is your insurance for a good rise!
- Prepare the Dough: In a large mixing bowl (or the bowl of a stand mixer), combine the two cups of whole wheat flour, kosher salt, and vital wheat gluten. Whisk these dry ingredients together thoroughly. Once your yeast mixture is actively foamy, add the olive oil to it, then pour the combined wet ingredients into the well of the dry ingredients. Mix everything together with a sturdy wooden spoon or, if using a stand mixer, with the paddle attachment. Continue mixing until the dough just comes together and starts to pull away cleanly from the sides of the mixing bowl. The dough should be soft but manageable. If it feels excessively sticky, add an additional tablespoon of whole wheat flour at a time, mixing after each addition, until the desired consistency is reached.
- Knead the Dough: Kneading is essential for developing the gluten structure that gives bread its elasticity and chewiness. If using a stand mixer, switch from the paddle attachment to the dough hook. Knead on medium-low speed for 5-7 minutes. If kneading by hand, transfer the dough to a lightly floured surface and knead for 8-10 minutes. You’re looking for the dough to become smooth, elastic, and soft to the touch, and it should spring back slightly when gently poked. It should also be less sticky and easy to handle. Remember not to overwork it, as this can lead to tough rolls.
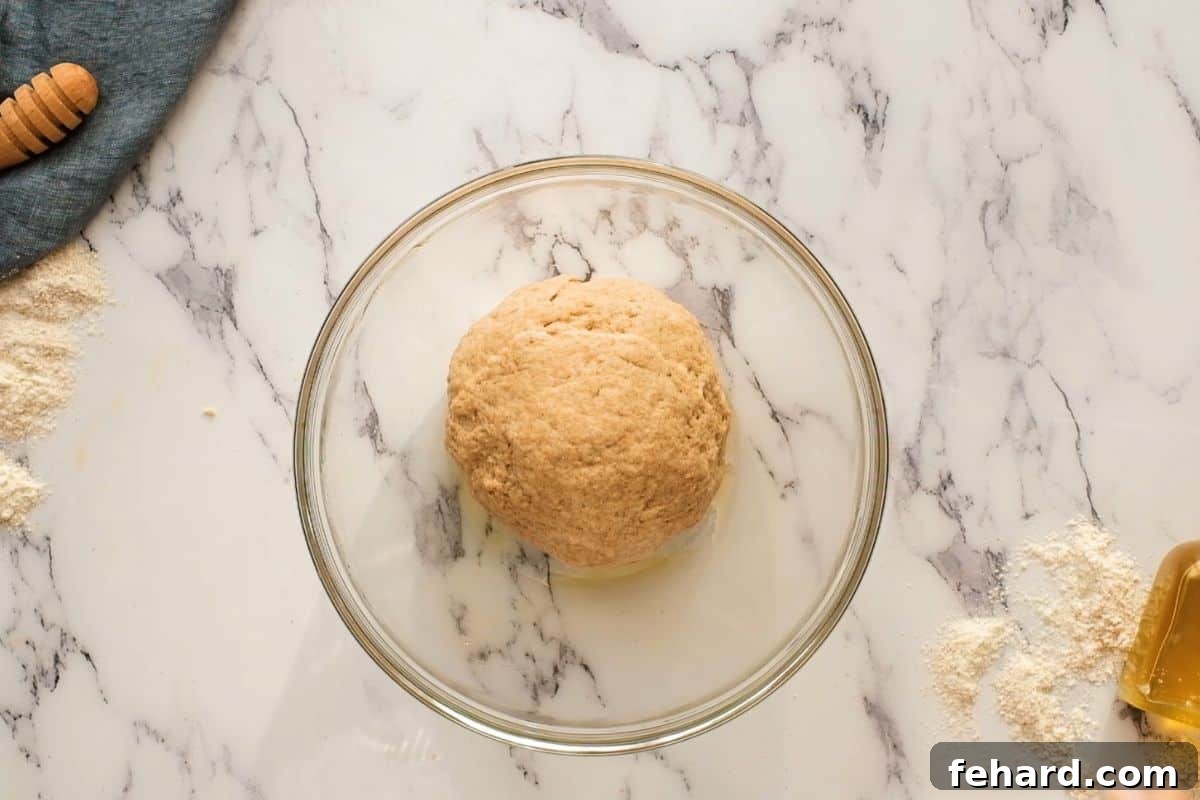
- First Rise (Proofing): Shape the kneaded dough into a neat ball and place it back into a lightly oiled clean bowl, turning it once to coat all sides. Cover the bowl snugly with plastic wrap or a clean kitchen towel to prevent drying. Allow the dough to rise in a warm, draft-free spot until it has doubled in size. This primary proofing process can take anywhere from 60 to 90 minutes, depending on the ambient temperature and humidity in your home. A good indicator is if a gentle poke with your finger leaves a slight indentation that slowly springs back.
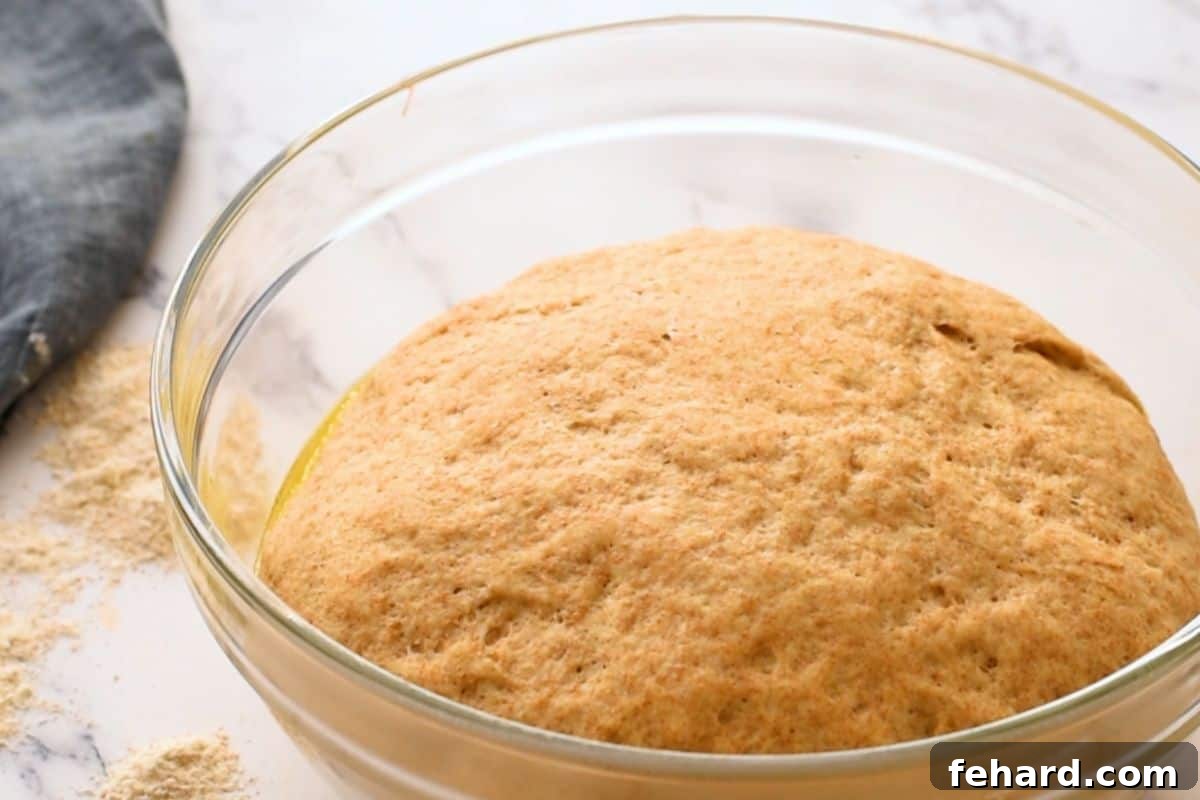
- Shape the Rolls: Once the dough has beautifully risen, gently punch it down to release the air. Turn the dough out onto a lightly floured surface. Using a rolling pin, roll the dough into an even rectangle, roughly ½ inch thick. Now, using a sharp knife or a dough scraper, divide the rectangle into 12 equal sections. For uniformly sized rolls, you can gently weigh each section. Take each section and gently roll it into a smooth, tight ball, tucking the edges under to create a neat, round roll shape.
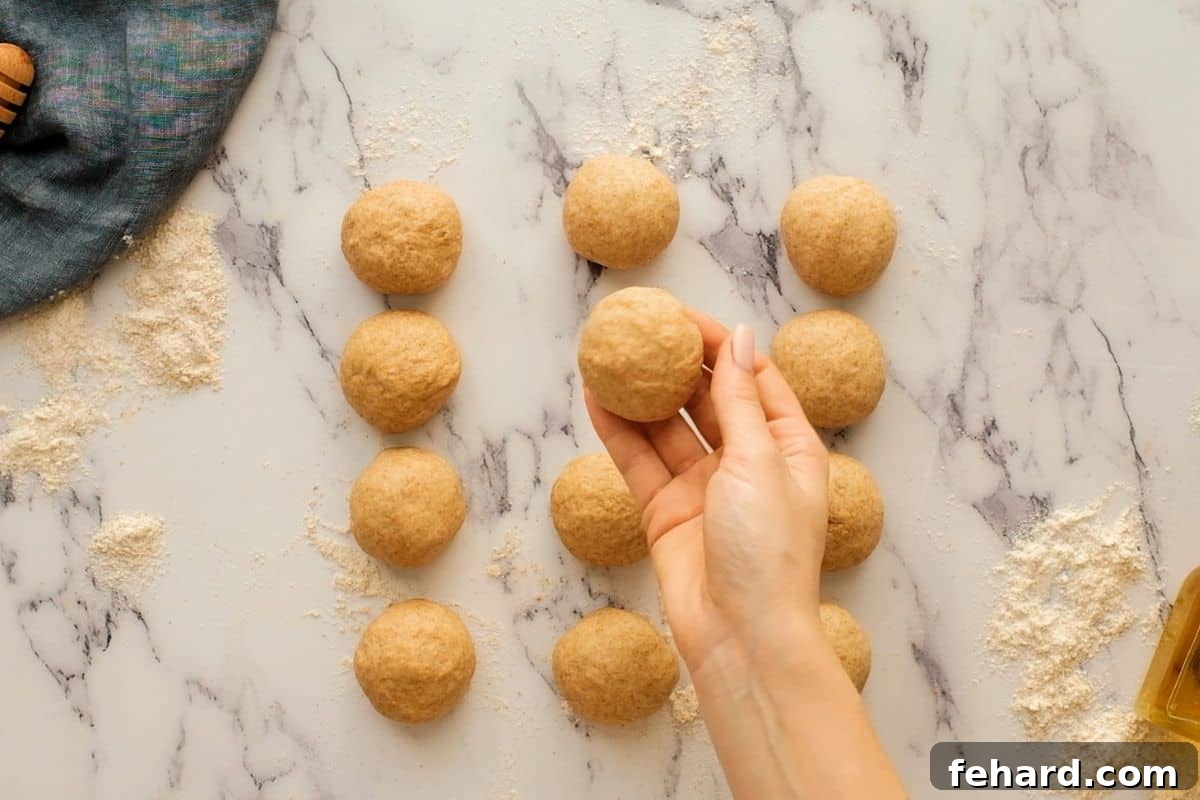
- Second Rise (Final Proof): Lightly grease a 7×11 inch or 9×13 inch baking dish. Arrange the shaped rolls evenly spaced within the prepared dish. Covering them loosely with plastic wrap or a clean kitchen towel, allow them to rise again in a warm, draft-free spot until they have doubled in size. This secondary rise typically takes another 60-90 minutes. The rolls should appear puffy and light.
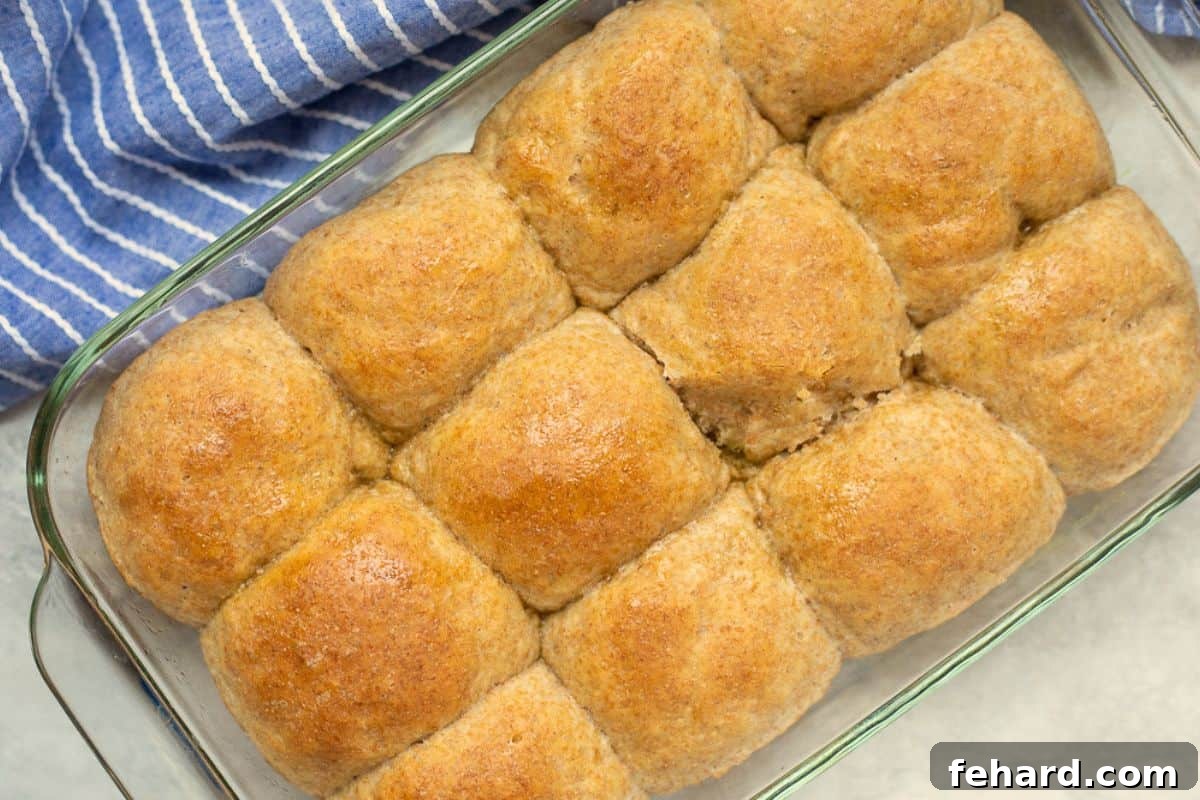
- Bake to Golden Perfection: While the rolls are completing their second rise, preheat your oven to 350℉ (175℃). Once the rolls are fully risen, place the baking dish into the preheated oven. Bake for approximately 18-20 minutes, or until the tops are beautifully golden brown and the internal temperature of the rolls reaches 190℉ (87℃). It’s a good practice to check on your rolls midway through baking; if you notice them browning too quickly, lightly tent the dish with aluminum foil to prevent over-browning while the interior cooks through.
- Serve Warm & Enjoy: Remove the baked rolls from the oven and transfer the pan to a wire cooling rack. Let them cool in the pan for about 5-10 minutes before serving. For an extra touch of deliciousness, you can brush them with a mixture of melted butter or olive oil and a hint of honey, and sprinkle with a pinch of coarse salt. These homemade whole wheat rolls are incredibly versatile and complement nearly any family meal. Whether served alongside a festive holiday feast like Pineapple Glazed Ham or Roasted Turkey, or simply enjoyed with hearty weeknight favorites such as Instant Pot Beef Stew, Potato Corn Chowder, or Broccoli Cheese Soup, their wholesome flavor and tender texture are always a welcome addition.
Effortless Baking: Bread Machine Directions for Whole Wheat Rolls
While making these soft whole wheat rolls by hand is a satisfying process, utilizing a bread machine for the dough cycle makes the preparation incredibly simple and virtually hands-off. Here’s how to adapt the recipe for your bread machine:
- Begin by adding the wet ingredients to your bread machine pan first, followed by the dry ingredients. This typically means adding the warm water, olive oil, and honey.
- Next, add the whole wheat flour, salt, and vital wheat gluten.
- Create a small well in the center of the dry ingredients and carefully add the active dry yeast into this well.
- Secure the bread pan in your machine and select the “Dough” setting. This cycle will typically mix, knead, and complete the first rise for you.
- Once the bread machine cycle is complete, carefully remove the dough from the pan. Gently punch it down to release the air, then turn it out onto a lightly floured surface.
- Shape the dough into a rectangle and divide it into 12 equal sections, then roll each section into a smooth ball as instructed in the main recipe (step 5).
- Place the shaped rolls into your greased baking dish, cover them with a clean towel, and let them rise until doubled in size (the second rise, as in step 7 of the main recipe).
- Finally, bake the rolls according to the temperature and time directions provided in the main recipe (steps 9-11).
Storage & Make-Ahead Tips for Your Whole Wheat Rolls
Enjoying freshly baked rolls is wonderful, but knowing how to store them or prepare them in advance is equally helpful for meal planning. Here are some smart tips to keep your whole wheat rolls fresh and ready for whenever hunger strikes:
- Storing Baked Rolls: Once your rolls have fully cooled to room temperature, place them in an airtight container or a resealable plastic bag. They will stay fresh and soft at room temperature for up to 2 days. For longer storage, you can freeze the baked and cooled rolls in a freezer-safe bag for up to 1 month. Ensure as much air as possible is removed from the bag to prevent freezer burn. Thaw frozen rolls overnight in the refrigerator before reheating.
- Reheating for Freshness: To bring your stored rolls back to their warm, soft glory, there are a couple of options. For oven reheating, place the rolls in a baking dish, cover it loosely with aluminum foil, and bake at 350°F (175°C) for about 10 to 15 minutes, or until warmed through. Alternatively, for a quick reheat, wrap individual rolls in a slightly moistened paper towel and microwave them on a microwave-safe plate for 10-15 seconds, or until they’re warm and tender.
- Freezing Unbaked Dough for Later: If you love the idea of fresh rolls without all the same-day effort, you can freeze the dough after shaping! After shaping your 12 rolls (as in step 6 of the main recipe), flash freeze them on a baking sheet until they are solid (this prevents them from sticking together). Once frozen, transfer the solid dough balls to a freezer-safe bag, removing excess air, and store them in the freezer for up to 3 months. When you’re ready to bake, transfer the frozen dough to your baking dish and thaw overnight in the refrigerator. Then, let the dough rise at room temperature for an extended period, typically 5-8 hours, before baking as directed in the recipe.
Explore More Homemade Bread & Dough Recipes
If you loved making these whole wheat rolls, you’ll surely enjoy expanding your baking repertoire with these other fantastic homemade bread and dough recipes:
- Homemade Whole Wheat Pizza Dough
- Classic Homemade Italian Bread
- Wholesome Whole Wheat Cinnamon Raisin Bread
- The Original Honey Whole Wheat Bread
- Irresistible Homemade Garlic Toast
- Hearty Cranberry Walnut Bread
Made these delicious Whole Wheat Rolls?
We’d love to hear your feedback! If you enjoyed this recipe, please consider leaving a comment with a 5-star review below. Your support helps us share more amazing recipes!
Perfectly Soft Whole Wheat Rolls
Kristen Chidsey
12
20 mins
15 mins
2 hrs
2 hrs 35 mins
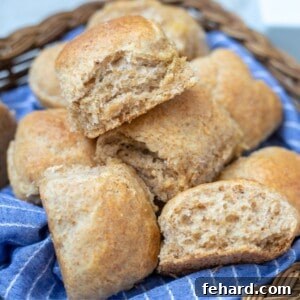
Made with 100% whole wheat flour and kissed with honey, this easy whole wheat roll recipe yields homemade rolls that are irresistibly good.
Ingredients
For Rolls
- ¾ cup warm water, 100-110℉/ 38-42℃
- 2 teaspoons active dry yeast
- 3 tablespoons honey
- 2 cups 100% whole wheat flour, + more as needed
- 3 tablespoons extra virgin olive oil
- 1 tablespoon vital wheat gluten
- 1 teaspoon kosher salt
For Topping (Optional)
- 1 tablespoon extra virgin olive oil, or melted butter
- 1 teaspoon honey, optional
- coarse salt
Instructions
-
Mix together ¾ cup warm water (100-110℉/ 38-42℃), 2 teaspoons active dry yeast, and 3 tablespoons honey. Set aside for minutes, or until the mixture gets creamy and a bit bubbly. If the mixture does not bubble, your water may have been too hot or cold or your yeast was bad and you must start over.
-
Once the yeast mixture has become foamy, add 3 tablespoons extra virgin olive oil to the water mixture.
-
In a separate large bowl, mix together 2 cups 100% whole wheat flour, 1 tablespoon vital wheat gluten, and 1 teaspoon kosher salt.
-
Make a well in the flour mixture and pour in the water mixture. Stir together with a wooden spoon or paddle mixer on a stand mixer until dough just comes together and easily pulls away from the edges of the mixing bowl. If you notice if the dough is too sticky, add 1 tablespoon more flour at a time, until the right consistency is reached.
-
At this point, change the paddle mixer for the dough hook and knead the dough for 5-7 minutes, or until the dough is soft and just pulls away easily from the mixing bowl. Alternatively, knead by hand until the dough is soft but not sticky.
-
Shape the dough into a ball and place it into an oiled bowl and cover it with plastic wrap or a clean kitchen towel. Let rise until doubled, about 1 hour.
-
Once the dough has doubled, turn the dough out onto a lightly floured work surface. Shape the dough into a rectangle about ½ inch thick and then cut into 12 equal rectangles. Shape each rectangle into a ball and place each ball into the greased or buttered 7×11 or 9×13 baking dish, evenly spaced apart.
-
Cover with a kitchen towel and let rise until doubled again, about 60-90 minutes.
-
Preheat oven to 350℉/175℃.
-
Bake the risen rolls for 18-20 minutes or until browned and an internal temperature of rolls reads 190℉/87℃. Check on the rolls after 12 minutes of baking, and loosely cover with foil if browning too quickly.
-
Remove rolls from oven and place pan on wire cooling rack. Let cool for 5 minutes. If desired, combine the 1 tablespoon extra virgin olive oil (or melted butter) and 1 teaspoon honey and then brush over the warm rolls and sprinkle with coarse salt if desired.
Notes
Flour: Measure the flour by scooping your flour out into the measuring cup with a spoon instead of scooping the flour out directly with the measuring cup.
Water: Be sure the water is between 100-110 degrees F. Too cold the yeast will not activate, and too warm the yeast will be killed.
Bread Machine Directions: Add the warm water, followed by the oil, honey, flour, salt, and wheat gluten to the bread pan fitted in the bread machine. Make a well in the ingredients and add in the yeast. Set to the dough setting. Once the cycle is complete, shape the dough into a rectangle and cut it into 12 rolls. Allow the rolls to rise for the 2nd time and then bake according to the recipe.
Storage: Let them cool fully and then place them into a storage container, removing any excess air. Store at room temperature for up to 2 days. Alternatively, freeze the cooled rolls in a freezer-safe bag, removing all excess air, for up to 1 month. Defrost overnight in the refrigerator before enjoying.
Reheat: To enjoy warm rolls, place them in a baking dish, cover with foil and bake at 350°F/175°C until warmed through, about 10 to 15 minutes. Alternatively, wrap individual rolls in a moistened paper towel and place on a microwave-safe plate. Heat for 10-15 seconds, or until warmed through.
Nutrition
Calories: 140kcal
Carbohydrates: 23g
Protein: 4g
Fat: 4g
Saturated Fat: 1g
Sodium: 196mg
Potassium: 44mg
Fiber: 1g
Sugar: 4g
Calcium: 4mg
Iron: 1mg
Nutrition information is automatically calculated, so should only be used as an approximation.