

Honey Whole Wheat Bread: The Ultimate Recipe for Soft & Flavorful Homemade Loaves
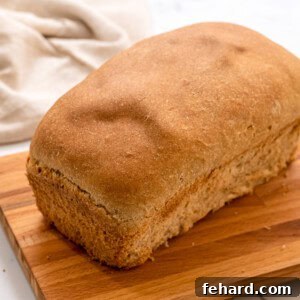
Prepare to experience the absolute best Honey Whole Wheat Bread you’ve ever tasted! This remarkable recipe redefines what whole wheat bread can be, delivering loaves that are incredibly soft, tender, and bursting with a subtle sweetness from golden honey. Forget dense, dry, or cardboard-like whole wheat loaves; this homemade version, crafted with 100% whole wheat flour, is a revelation that will quickly become a cherished staple in your kitchen.

Many shy away from whole wheat bread, associating it with a heavy texture and bland taste. However, this particular recipe is designed to defy those expectations. Our secret lies in meticulous ingredient selection and a perfected method that ensures every slice is moist, airy, and deeply satisfying. Even the most ardent white bread enthusiasts (like my own family!) are converted after just one bite of this delightful honey wheat bread.
Beyond its incredible taste and texture, this versatile bread serves as the perfect foundation for countless culinary creations. Imagine crafting a wholesome avocado chickpea sandwich, elevating a gourmet roasted turkey sandwich, or using it as the base for a comforting homemade stuffing or a decadent French toast casserole. This isn’t just bread; it’s the wholesome, flavorful canvas your culinary dreams are made of!
Discover the Unmatched Quality of This 100% Whole Wheat Bread Recipe
What truly sets this recipe apart from other whole wheat bread variations? It’s a combination of thoughtfully selected ingredients and a refined baking process that prioritizes both health and exceptional taste. Here are the key reasons why this is arguably the best whole wheat bread recipe you will ever encounter:
- Truly 100% Whole Wheat Flour. Unlike many commercial “whole wheat” loaves that often blend whole wheat flour with enriched white flour, our recipe proudly uses only 100% whole grain whole wheat flour. This commitment ensures you receive all the nutritional benefits, including fiber, vitamins, and minerals, from the entire wheat kernel. You get authentic, wholesome goodness without compromise, which is rare to find in store-bought options.
- Remarkably Soft and Flavorful Texture. This bread defies the common misconception that whole wheat must be dense. Kissed with a generous amount of honey, each slice boasts a subtly sweet profile and an astonishingly soft, tender crumb. It’s a delightful paradox—100% whole grain, yet possessing the light and airy qualities typically found in white bread. Many who try it are genuinely surprised by its crave-worthy texture and rich, comforting flavor.
- Uncompromising Quality Control with Wholesome Ingredients. When you bake at home, you control exactly what goes into your food. This recipe is free from common industrial additives like DATEM, high fructose corn syrup, refined sugar, and artificial preservatives. You’ll work with just seven simple, pure ingredients—including water and salt! This simplicity ensures a clean label and a healthier loaf for your family.
- Economical and Rewarding. High-quality, artisan whole wheat bread can be quite expensive, often costing upwards of $10 a loaf. By making this bread at home, you not only ensure superior quality and freshness but also achieve significant cost savings. The satisfaction of pulling a warm, aromatic loaf from your own oven, knowing it’s both delicious and budget-friendly, is truly priceless.
Essential Ingredients for Perfect Honey Whole Wheat Bread
Crafting exceptional whole wheat bread begins with understanding the role of each ingredient. Here’s a detailed look at what you’ll need and why each component is crucial for achieving that perfect soft, flavorful loaf:
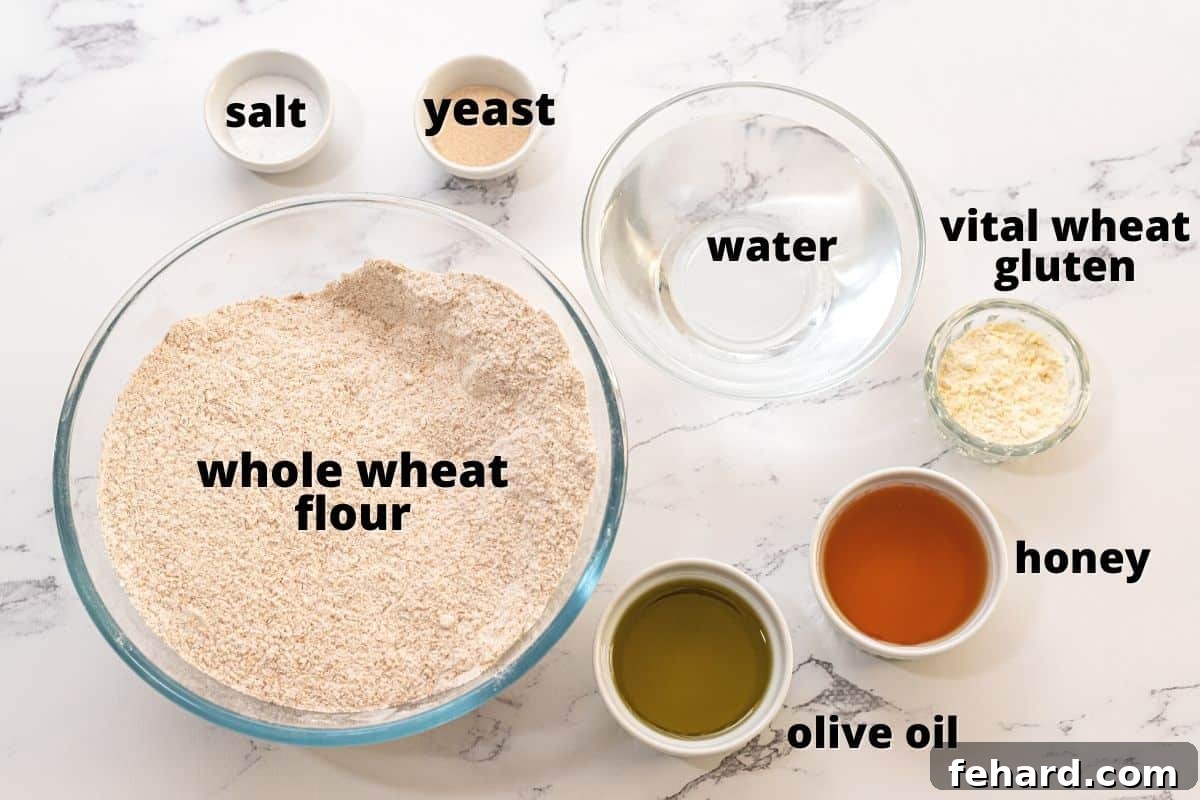
- Whole Wheat Flour: The foundation of this recipe is 100% whole wheat flour. You have the option to use either traditional whole wheat flour (made from red wheat berries) or whole white wheat flour (made from white wheat berries). Both are 100% whole grains, but whole white wheat flour tends to have a milder flavor and lighter color, which can be preferable for some. For best results, consider weighing your flour (576 grams) for accuracy, as volumetric measurements can vary significantly.
- Vital Wheat Gluten: This ingredient is truly a game-changer for whole wheat bread. Vital wheat gluten is a natural protein found in wheat, and adding a small amount significantly improves the elasticity and rise of the dough. Whole wheat flour contains bran, which can interfere with gluten development, leading to denser bread. The added gluten helps counteract this, allowing your whole wheat bread to achieve a wonderfully light and fluffy texture that rivals white bread. While optional, it’s highly recommended for a superior result.
- Honey: Beyond just sweetness, honey is the signature flavor enhancer in this whole wheat bread. It imparts a rich, complex sweetness that complements the nutty notes of whole wheat beautifully. Furthermore, honey contributes to the bread’s golden crust, helps retain moisture, and acts as a food source for the yeast. Any variety of honey will work, but a local wildflower honey can add an extra layer of unique flavor.
- Olive Oil: While canola oil can be used, extra virgin olive oil adds a subtle depth of flavor and richness to the crumb that canola simply cannot match. It also contributes to the bread’s softness and helps keep it fresh for longer. Its healthy fats are an added bonus.
- Yeast: Use active dry yeast for this recipe. It’s crucial to ensure your yeast is fresh and not expired, as old yeast will fail to activate properly, resulting in a dense, flat loaf. Proper activation (blooming) is a key step, ensuring your bread rises beautifully.
- Water: The temperature of your water is paramount for yeast activation. It needs to be lukewarm, specifically between 100-110 degrees F (38-42 degrees C). Water that is too hot (over 115 degrees F) will kill the yeast, preventing the dough from rising. Conversely, water that is too cold (under 100 degrees F) will not properly activate the yeast, leading to a sluggish or non-existent rise. Always test with a thermometer for accuracy.
- Salt: Kosher salt is preferred for its pure flavor and larger crystals, which are easier to measure accurately. If you are using fine table salt, reduce the amount to 1.5 teaspoons, as it is denser and more potent. Salt plays a critical role in controlling yeast activity, enhancing flavor, and strengthening the gluten structure of the dough. When using a bread machine, be careful not to place the salt directly on top of the yeast, as high concentrations of salt can inhibit or kill the yeast.
How to Make Honey Whole Wheat Bread: Step-by-Step
Achieving a perfect loaf of homemade whole wheat bread is a rewarding experience. Follow these detailed steps to ensure exceptional results. You’ll find specific ingredient quantities and precise instructions in the recipe card at the bottom of this post.
Step One: Bloom the Yeast to Perfection
The very first and critical step in making any yeasted bread is blooming the yeast. This process “wakes up” the active dry yeast, ensuring it’s alive and ready to make your bread rise. You’ll dissolve the yeast in warm water with a touch of honey (which acts as food for the yeast). Wait until the mixture becomes wonderfully foamy and bubbly, indicating the yeast is active.
- Temperature is Key: Always ensure your water is lukewarm, ideally between 100-110 degrees F (38-42 degrees C). This temperature range is perfect for yeast activation. If the water is too hot (above 115 degrees F), it will kill the delicate yeast organisms. If it’s too cold (below 100 degrees F), the yeast may not activate at all, or very slowly. Using a kitchen thermometer is highly recommended for accuracy.
- Check Yeast Freshness: An expired yeast packet is a baker’s worst nightmare. Always double-check the expiration date on your yeast. Using old or inactive yeast will result in a dense, flat loaf that fails to rise, no matter how perfectly you execute the other steps. Fresh yeast is vibrant and will produce a robust foam.

Step Two: Combine Your Ingredients
Once your yeast mixture is beautifully foamy, it’s time to bring all the other elements together. In a large mixing bowl (or the bowl of a stand mixer), combine the vital wheat gluten, kosher salt, and 3 cups of the whole wheat flour. Create a well in the center of the dry ingredients. Pour the olive oil and the bloomed yeast mixture into this well. Stir thoroughly, either by hand with a sturdy wooden spoon or on low speed with a dough hook, until all the flour is fully moistened and no dry pockets remain. Gradually add an additional ¾ cup of flour into the dough. The dough should start to come together but may still be a bit sticky. Continue adding flour, ¼ cup at a time, up to another ¾ cup (for a total of 4½ cups), until the dough is no longer excessively sticky and easily pulls away from the sides of the bowl. The exact amount of flour can vary based on humidity and how you measure, so trust the feel of the dough.
Step Three: Knead the Dough to Elastic Perfection
Kneading is a fundamental step that develops the gluten, giving your bread its structure and chewy texture. You can achieve excellent results whether you knead by hand or with a stand mixer. A stand mixer, fitted with a dough hook, makes quicker work of the process, typically 5-10 minutes. However, there’s a deeply satisfying, meditative quality to kneading dough by hand, which usually takes 10-15 minutes. Regardless of your chosen method, continue kneading until the dough transforms from a shaggy mass into a smooth, elastic, and slightly shiny ball that springs back when gently poked and is no longer sticky to the touch. This proper gluten development is key to a light, airy loaf.
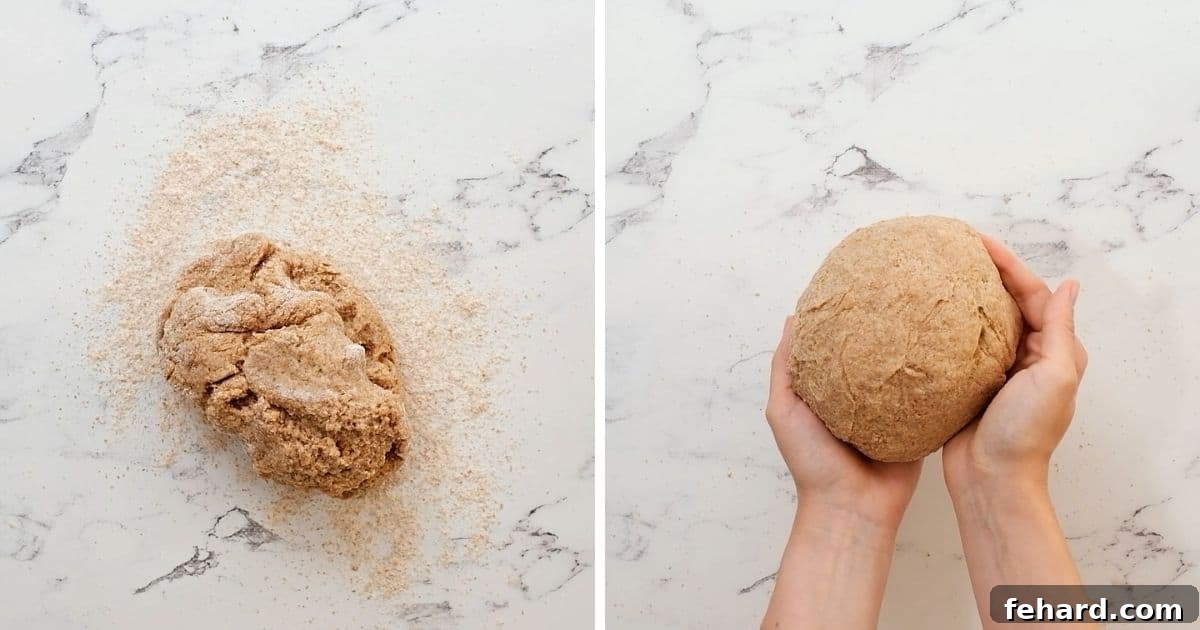
Step Four: The Crucial Double Rise
For an exceptionally light and fluffy whole wheat bread, a double rise is essential. The first rise allows the yeast to produce gas and develop flavor, while the second rise, after shaping, ensures a perfect final texture and volume. After kneading, place your dough ball in a large, lightly oiled bowl, turning it once to coat. Cover the bowl tightly with plastic wrap or a clean kitchen towel and place it in a warm, draft-free spot. Let it rise until it has visibly doubled in size, which typically takes about 1 hour. This time can vary based on your kitchen’s temperature and humidity. Once doubled, gently punch the dough down to release the air, then proceed to shape it into your desired loaf or loaves. After shaping and placing in greased loaf pans, cover again and allow for a second rise until doubled once more.
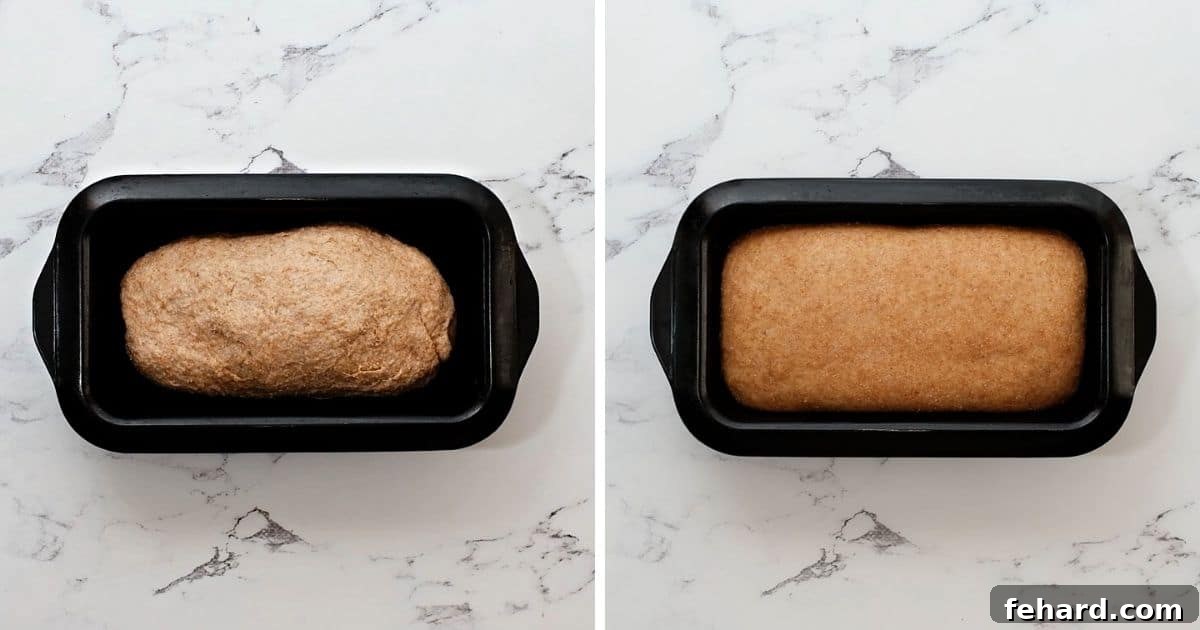
Step Five: Bake to Golden Perfection
Once your dough has completed its second rise and is beautifully plump, it’s ready for the oven. Bake until the crust turns a rich golden brown and, most importantly, the internal temperature of the bread reaches 190 degrees F (87 degrees C). Using an instant-read thermometer is the most reliable way to ensure your bread is perfectly cooked through, avoiding a doughy center. If you don’t have a thermometer, a hollow sound when tapping the bottom of the loaf is another good indicator of doneness. This precise temperature guarantees a fully baked, tender interior and a delightful crust.
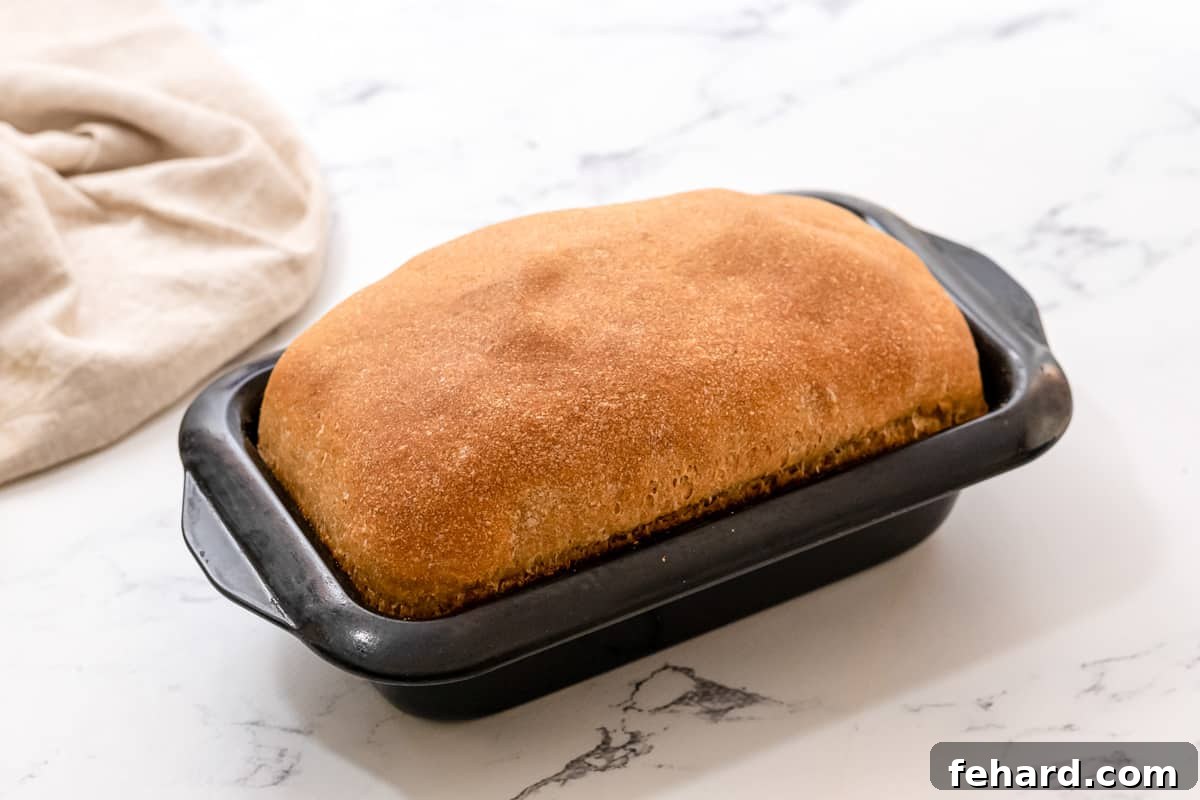
Effortless Baking with a Bread Machine
For those who prefer a hands-off approach or have busy schedules, this honey whole wheat bread recipe adapts beautifully to a bread machine. It simplifies the process by handling the kneading and rising cycles for you, making homemade bread incredibly convenient. This recipe is designed for standard bread machines that can accommodate loaves up to 2 pounds.
- Place the loaf pan, fitted with the dough hooks, securely into your bread machine.
- Pour the specified amount of warm water (1½ cups) into the loaf pan first. This helps ensure proper yeast activation and hydration.
- Add in the olive oil (⅓ cup) and then the honey (⅓ cup). Measuring the oil first allows the honey to slide out of the measuring cup easily, preventing sticky residue.
- Carefully add 3 cups of whole wheat flour over the liquid ingredients.
- Next, add the salt (2 teaspoons kosher salt) and vital wheat gluten (¼ cup). It’s important to add the salt at this stage, layered over the flour, so it doesn’t come into direct contact with the yeast initially. High concentrations of salt can inhibit or kill the yeast.
- Add the remaining 1½ cups of whole wheat flour, creating a second layer over the salt and vital wheat gluten. This brings your total flour to 4½ cups.
- Make a small, shallow well in the center of the top layer of flour. Carefully place the active dry yeast (1 tablespoon) into this well. This keeps the yeast separate from the salt until the mixing cycle begins.
- Close the bread maker lid and select the “Whole Wheat Bread” setting according to your manufacturer’s instructions. For a lighter, more tender crust that is easier to slice, I highly recommend selecting the “light crust” option if your machine offers it.
Storage and Freezing: Keep Your Homemade Bread Fresh
One of the wonderful benefits of homemade bread is the absence of artificial preservatives. While this makes for a healthier loaf, it also means your bread won’t last as long as store-bought varieties. To enjoy fresh bread consistently, consider baking two 1-pound loaves and freezing one for future enjoyment. Proper storage is key to maintaining its exquisite softness and flavor.
- Optimal Storage: It is absolutely crucial to allow your freshly baked bread to cool completely on a wire rack before attempting to store it. Storing warm bread in an airtight container will trap moisture, leading to condensation and rapid mold growth. Once fully cooled, place the loaf in an airtight bread box, sealed container, or a heavy-duty plastic bag. Store it in a cool, dry pantry for 4-5 days. If you live in a particularly humid or warm climate, or during warmer seasons, storing the wheat bread in the refrigerator can extend its freshness up to 5 days, though it might alter the texture slightly.
- Freezing for Long-Term Freshness: Freezing is an excellent way to preserve homemade bread for extended periods without compromising quality. After the bread has cooled completely, wrap the entire loaf tightly in a layer of plastic wrap, ensuring no air pockets remain. Then, wrap it again securely in aluminum foil. This double layer protects against freezer burn. Place the well-wrapped loaf into a freezer-safe bag, expelling as much air as possible, and store it in the freezer for up to 3 months. To defrost, simply transfer the wrapped loaf to the refrigerator overnight. Once thawed, use the bread within 5 days for the best flavor and texture. You can also slice the loaf before freezing, making it easy to grab a few slices for toast as needed.
Frequently Asked Questions About Homemade Whole Wheat Bread
The precise amount of flour needed for whole wheat bread can vary due to several factors, including the accuracy of your measuring method, the type of whole wheat flour used, and even the humidity levels in your kitchen. This recipe typically calls for 3 ¾ to 4 ½ cups of flour. Always start with the lower amount, 3 ¾ cups. After mixing, if your dough still feels excessively sticky and doesn’t pull away from the sides of the bowl easily, add more flour, ¼ cup at a time, until it reaches the desired non-sticky, elastic consistency. Trust your intuition and the feel of the dough rather than sticking rigidly to a single measurement.
For the most accurate results in baking, especially with bread, using a kitchen scale to measure flour by weight is highly recommended. This recipe typically requires between 510 to 576 grams of whole wheat flour. If you don’t have a kitchen scale, the “spoon and level” method is the next best option. Instead of scooping flour directly from the bag (which compacts it), gently spoon the flour into your dry measuring cup until it’s overflowing. Then, use a straight edge (like the back of a knife) to level off the excess, avoiding any packing. This method helps prevent using too much flour, which can lead to a dry, dense loaf.
Absolutely! Using freshly ground wheat berries will impart an even more robust flavor and incredible freshness to your homemade whole wheat bread. If you have a flour mill, you can grind either hard red wheat berries (for a more traditional, strong flavor) or hard white wheat berries (for a milder taste and lighter crumb). You will need to grind approximately 3 cups (or 576 grams) of wheat berries to yield the equivalent of 4 ½ cups of freshly milled whole wheat flour required for this recipe. Freshly ground flour can sometimes be more absorbent, so be prepared to adjust liquid amounts slightly if needed.
Yes, this recipe for whole wheat bread is already naturally dairy-free and egg-free, making it suitable for many dietary needs. To make it completely vegan, the only substitution required is replacing the honey. While honey is a natural sweetener, it is not considered vegan. You can easily substitute the honey with an equal amount of pure maple syrup. The bread will still be wonderfully sweet and moist, though it will adopt a subtle maple flavor instead of the characteristic honey notes. Maple Wheat Bread is a truly delicious alternative!
There are several reliable ways to determine if your bread is perfectly baked. Visually, the crust should be a deep, rich golden brown. Another classic test is to carefully remove the loaf from the pan and tap the bottom; if it sounds hollow, it’s usually a good sign of doneness. However, the most accurate and foolproof method is to use an instant-read thermometer. Insert the thermometer into the center of the loaf. Your bread is officially finished baking when it registers an internal temperature of 190 degrees F (87 degrees C). This ensures the interior is cooked through without being dry or gummy.
Patience is a virtue when it comes to slicing homemade bread! It is absolutely critical to allow the bread to cool completely on a wire rack for at least 1-2 hours (or even longer) before attempting to slice it. Slicing warm bread will result in a gummy, compressed texture and could cause it to tear or fall apart easily. Once it’s fully cooled, use a sharp serrated knife. A serrated knife’s teeth will saw through the crust and crumb cleanly without squishing the soft interior. Apply gentle, even pressure and use a back-and-forth sawing motion to cut into your desired ½-inch slices.
Explore More Homemade Bread Creations
If you’ve fallen in love with the art of bread making, there’s a whole world of delicious loaves waiting to be discovered. Expand your baking repertoire with these other fantastic homemade bread recipes:
- Easy Whole Wheat Cranberry Walnut Bread
- No-Knead Whole Wheat Dutch Oven Bread
- Whole Wheat Cinnamon Raisin Bread
- Classic Homemade Italian Bread
- Fluffy Homemade Whole Wheat Rolls
- Versatile Homemade Whole Wheat Pizza Dough
Give this extraordinary honey whole wheat bread recipe a try, and be prepared to fall head over heels – we firmly believe there isn’t a better-tasting, healthier whole wheat bread recipe out there! Your comments and reviews below are always appreciated; we love hearing about your baking successes!
Want more incredible recipes delivered straight to your inbox every week? Don’t miss out on new culinary inspirations and baking tips!
Click here to subscribe to our newsletter!
Honey Whole Wheat Bread
Rate
Ingredients
- 1½ cups warm water, 100-110℉/ 38-42℃
- ⅓ cup extra virgin olive oil
- ⅓ cup honey
- 4½ cups whole wheat flour, 576 grams
- ¼ cup vital wheat gluten, optional
- 2 teaspoons kosher salt, see note
- 1 tablespoon active dry yeast
US Customary – Metric (Manual conversion may be needed)
Instructions
Bread Machine Version
-
Start by adding 1½ cups warm water into the loaf pan fitted in the bread machine. Measure ⅓ cup extra virgin olive oil first and then ⅓ cup honey (this makes the honey slip out of the measuring cup) and add to water. Add 3 cups of flour, then 2 teaspoons kosher salt and ¼ cup vital wheat gluten Add the remaining 1½ cups flour (for a total of 4½ cups whole wheat flour) over the salt and vital wheat gluten.
-
Make a small well in the flour and place 1 tablespoon active dry yeast into that well.
-
Set the bread machine to the manufacturer’s instructions for wheat bread with a light crust.
Oven Version
-
Sprinkle 1 tablespoon active dry yeast over 1½ cups warm water and mix in the ⅓ cup honey. Let that sit for 5 minutes, or until the mixture gets creamy and a bit bubbly.
-
In a large mixing bowl or bowl fitted for a stand mixer, mix together 2 teaspoons kosher salt, ¼ cup vital wheat gluten, and 3 cups of flour.
-
Add ⅓ cup extra virgin olive oil to the water mixture. Make a well in the flour mixture and pour in the water mixture.
-
Mix by hand with a wooden spoon or on low speed using the stand mixer fitted with a dough hook, until the flour is completely moistened.
-
Stir in an additional ¾ cup of flour into the dough mixture. If the dough is still sticky add up to another ¾ cup of flour, adding only ¼ cup at a time, until the dough is not sticky and easily pulls away from the sides of the bowl. You likely will need a full 4½ cups whole wheat flour.
-
Turn the stand mixer to medium-low and knead the dough for 5-10 minutes, or until the dough is smooth and shiny. Alternatively, to knead the dough by hand, turn the dough out onto floured work surface. Fold the dough over itself and repeat, kneading for 10-15 minutes, or until the dough is smooth and elastic.
-
Place the kneaded dough into a large mixing bowl that has been lightly greased with oil. Cover the bowl with plastic wrap or a kitchen towel and let rise in a warm spot until doubled in size. This should take about 1 hour, depending on the temperature and humidity of your kitchen.
-
Once the dough has doubled, punch dough down and shape in one 2-pound loaf or into two 1-pound loaves. Place the loaf or loaves into a greased loaf pan. Use a 9×5″ pan for a 2-pound loaf, and two 8×4″ loaf pans for two 1-pound loaves. Cover the pans with a towel or plastic wrap, and let rise until doubled again.
-
Once doubled, bake the bread at 350 degrees F for 35-40 minutes for a 2-pound loaf and 25-30 minutes for a 1-pound loaf, or until your bread reaches an internal temperature of 190℉/87℃.
-
Allow the bread to cool in pan(s) for 10-15 minutes and then remove the bread from the pan and allow it to cool fully on a cooling rack.
Notes
Wheat Berries: If you have a flour mill, grind 3 cups (576 grams) of red or white wheat berries to make the equivalent of 4 ½ cups whole wheat flour.
Yeast: Be sure to use dry active yeast, not quick rise yeast, and check the expiration date to ensure the yeast is fresh.
Water: Be sure your water is not too hot (over 115 degrees), as that can kill the yeast.
Vital Wheat Gluten: This is an optional ingredient but helps whole wheat bread rise and stay soft and fluffy.
Salt: If you are using table salt instead of kosher salt, reduce it from 2 teaspoons to 1.5 teaspoons.
Vegan Wheat Bread: There are no eggs or dairy in my recipe for whole wheat bread. But honey is not considered vegan. You can substitute the honey for maple syrup and this whole wheat bread will be considered vegan.
Baking at high altitude? Check out these adjustments that you may need to follow.
Storage: Allow the bread to cool fully before storing it in an airtight sealed container. Store the bread in a cool pantry for 4-5 days, in a sealed container. If it is humid or warmer outside, I recommend storing wheat bread in the refrigerator for up to 5 days.
Freezing: Allow the bread to cool fully and then wrap the loaf of bread in a layer of plastic wrap, followed by foil. Place the wrapped bread into a freezer-safe bag and store in the freezer for up to 3 months. Defrost overnight in the refrigerator and use within 5 days.
Nutrition
Nutrition information is automatically calculated, so should only be used as an approximation.
This recipe was originally published in 2016 and has been updated in 2021 and 2024 with fresh pictures and enhanced instructions to ensure the best baking experience.