
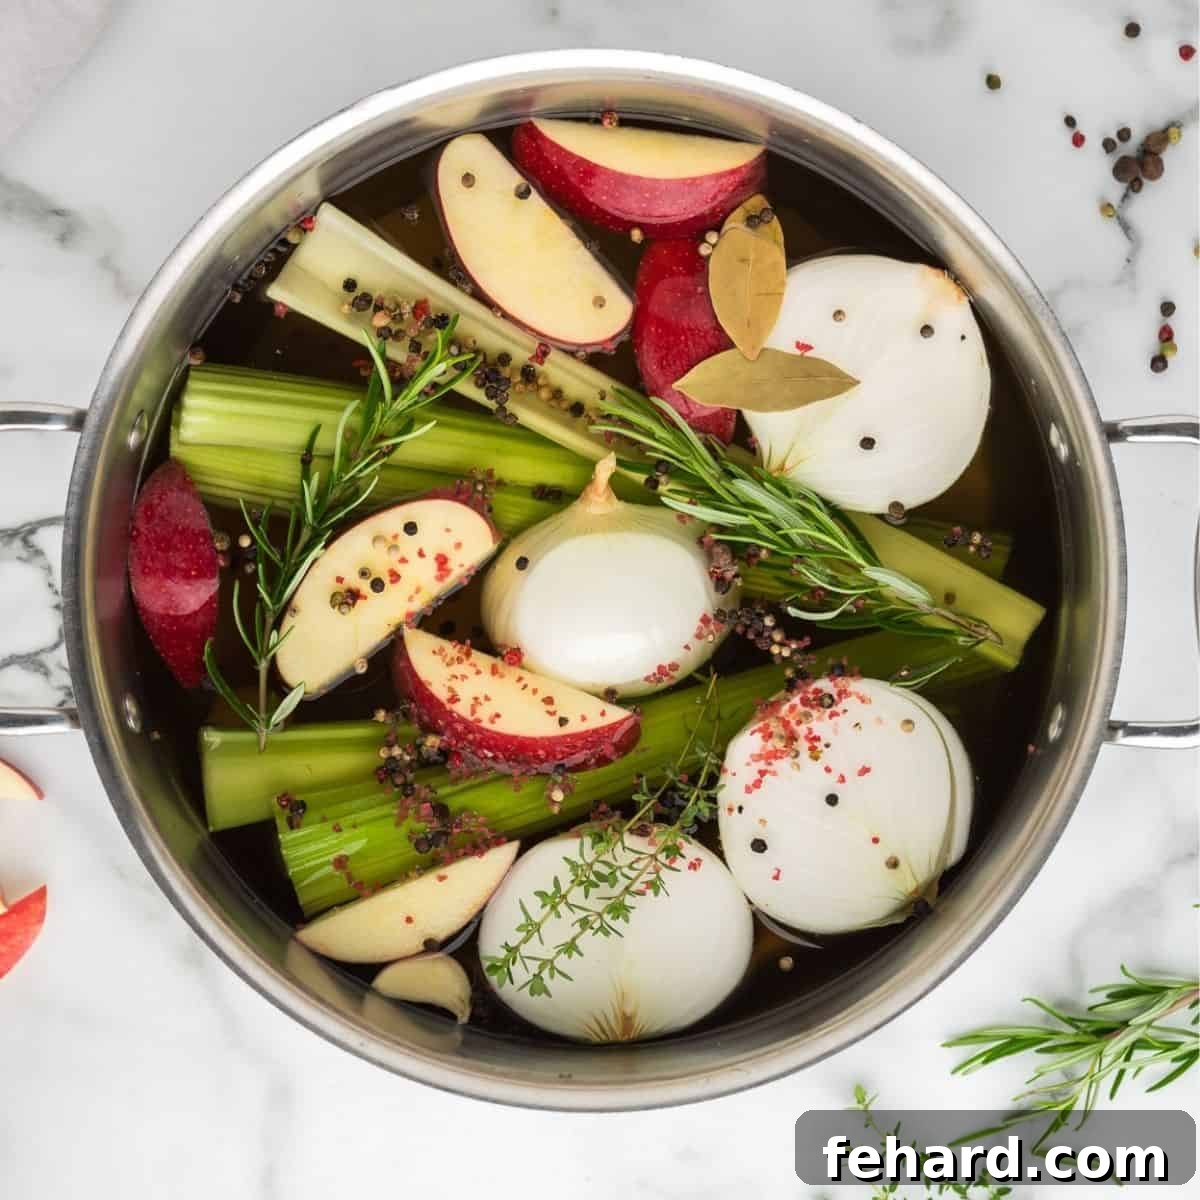
Prepare to transform your holiday meal with this unparalleled turkey brine recipe! Forget complex techniques or pricey gadgets; our method focuses on delivering what truly matters: an unbelievably juicy, profoundly flavorful, and consistently tender turkey. This isn’t just a recipe; it’s your secret weapon for culinary success.
Brining a turkey isn’t merely about enhancing flavor; it’s about building confidence. With one straightforward extra step, you can guarantee a Thanksgiving centerpiece that’s perfectly moist, exceptionally tender, and so delicious it will inspire requests for second and even third servings. Having prepared countless holiday meals over the years, this is the brining technique I trust implicitly every single time. I am genuinely excited for you to experience the remarkable difference this brine makes.
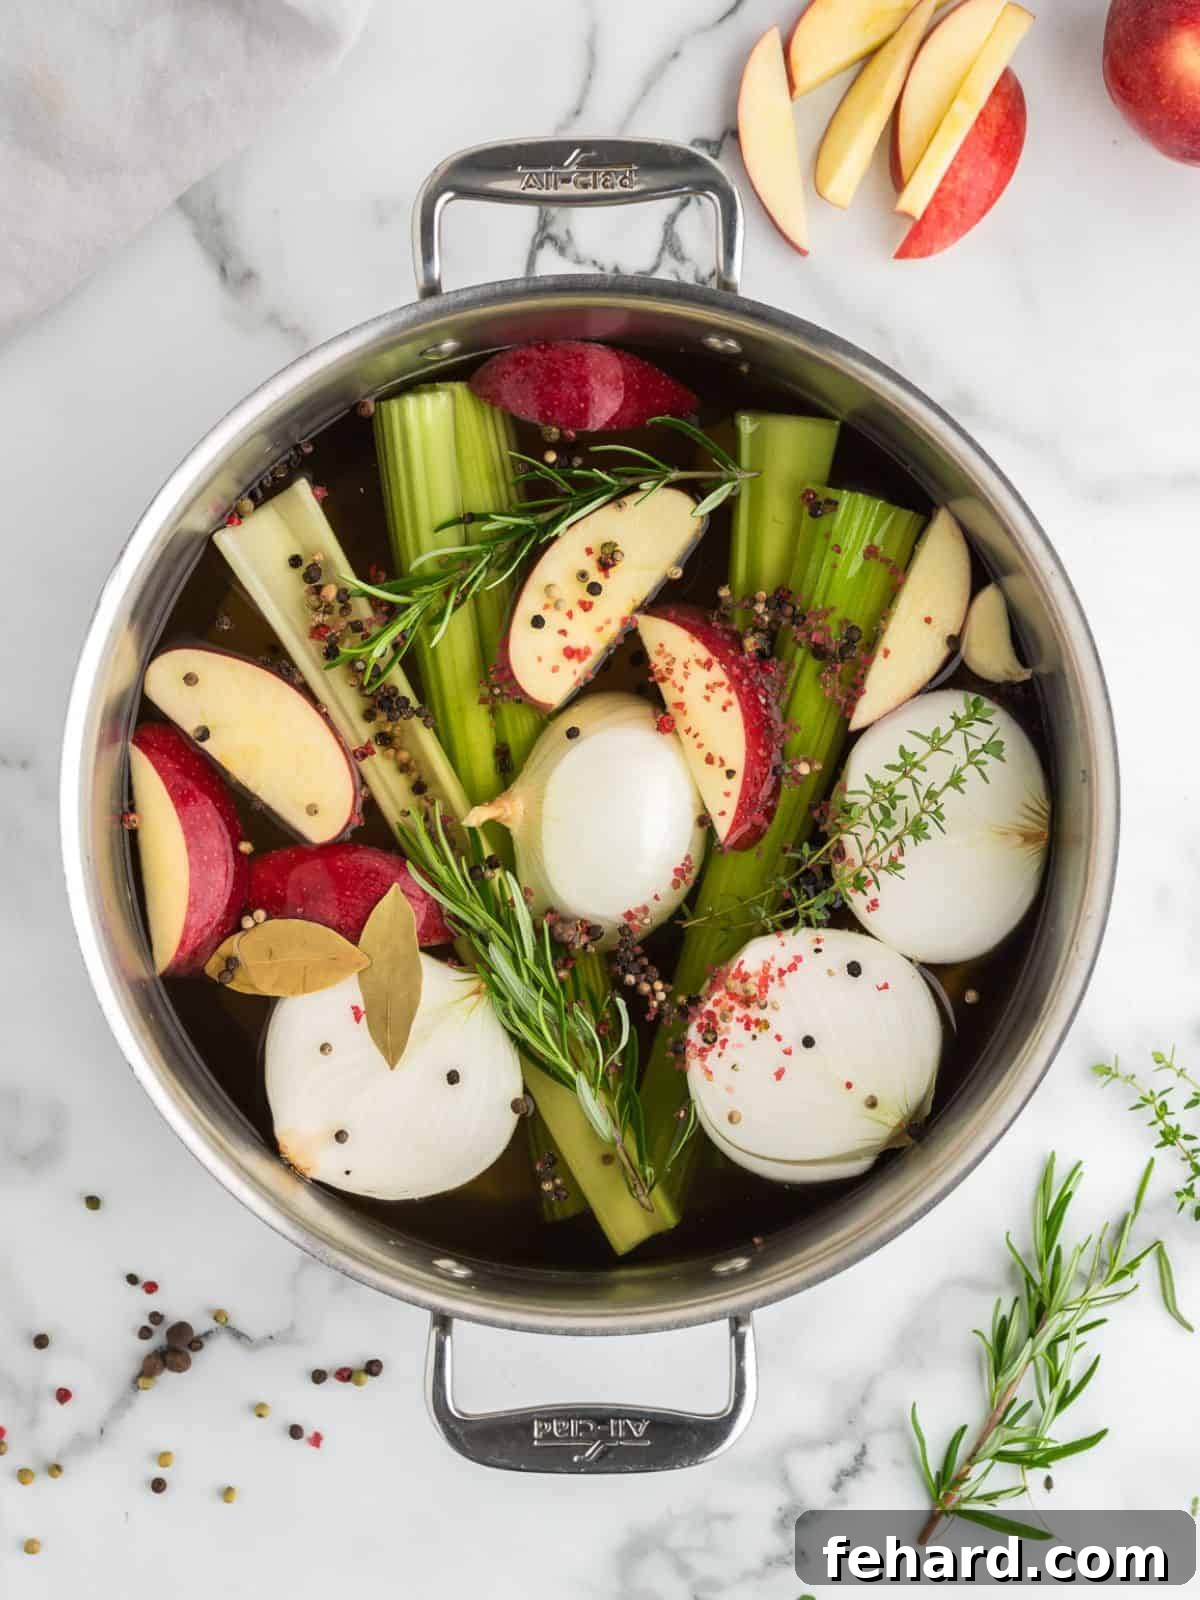
Why Brine Your Turkey? The Science of Succulence
Many home cooks shy away from brining, viewing it as an unnecessary extra step. However, understanding the magic behind brining reveals why it’s truly indispensable for a show-stopping turkey. When you immerse your turkey in a salty liquid, a process called osmosis occurs. The salt solution penetrates the turkey’s muscle fibers, causing them to absorb moisture. This isn’t just any moisture; it’s a flavorful liquid infused with herbs, aromatics, and a touch of sweetness.
Beyond moisture retention, brining also denatures the proteins in the turkey. This means the muscle fibers relax and unwind, leading to a much more tender texture after cooking. When cooked, unbrined turkeys often lose a significant amount of their natural moisture, resulting in dry, stringy meat. A brined turkey, however, locks in that moisture and flavor, ensuring every bite is succulent and tender, from the breast to the dark meat. It’s the ultimate insurance policy against a dry, disappointing bird, guaranteeing a truly memorable holiday feast.
Kristen’s Essential Keys for Perfect Turkey Brining
While brining a turkey might sound intricate, it’s quite straightforward and simply requires a bit of foresight. These expert tips will help ensure your brining process is as smooth, economical, and mess-free as possible, setting you up for holiday cooking triumph.
- Opt for a Fresh Turkey for Optimal Results: Fresh turkeys typically yield the best brining results because frozen turkeys are often pre-injected with a sodium solution by manufacturers. This pre-salting can impact how effectively the turkey absorbs additional brine. That said, even a fully defrosted frozen turkey will benefit significantly from brining, tasting far superior to an unbrined one. Always check the label for “enhanced” or “pre-salted” to know what you’re working with.
- Precision Timing is Crucial: Successful brining is all about planning. If starting with a frozen turkey, allow ample time for complete thawing in the refrigerator (typically 3-5 days for a large bird). Prepare your brine 1-2 days in advance to ensure it cools completely. Finally, allocate 8-18 hours for the turkey to properly soak in the brine. This staggered approach eliminates stress and ensures each step is done right.
- Ensure the Brine is Fully Chilled: This is a critical food safety step. Never pour warm brine over raw turkey, as this can create a dangerous environment for bacterial growth. Preparing the brine a day or two ahead allows it to cool naturally in the refrigerator. If you’re short on time, using a generous amount of ice (as detailed below) can rapidly bring the brine to a safe temperature.
- Double-Up on Brining Bag Security: While brining bags are designed to be sturdy, a leak can create a significant mess in your refrigerator and cross-contaminate other foods. To prevent this, always place the sealed brining bag containing the turkey and brine inside a large, robust pot, bucket, or a second heavy-duty bag. This acts as a reliable secondary containment system, safeguarding your fridge and peace of mind.
- Maintain the Ideal Brining Temperature: Temperature control is paramount for food safety and effective brining. The turkey and brine must consistently remain between 31°F and 40°F (0.5°C and 4.5°C). Any colder, and the brine or turkey could partially freeze, hindering the brining process. Any warmer, and harmful bacteria can multiply rapidly. Dedicate enough space in your refrigerator to ensure these safe temperatures are consistently met throughout the brining period.
5-Star Reader Review
“I’d give it 10 stars if I could! I’ve been making turkeys for holidays for over 50 years. One year, I spent over $10 on a fancy brine spice mix, but let me tell you, this simple recipe delivers the best-looking, juiciest, most delicious turkey I think I have ever made. I was so proud to share some with a neighbor! I followed the brine recipe and then used Kristen’s ‘How to Roast’ guide. THANK YOU, Kristen, for your marvelous recipes.” – Linda⭐⭐⭐⭐⭐
Crafting Your Flavorful Turkey Brine: The Key Ingredients
The foundation of any effective brine is kosher salt, which is essential for both tenderizing the meat and infusing it with flavor. Beyond this crucial component, the remaining ingredients are wonderfully simple, affordable, and adaptable, allowing you to customize your brine to your preference.
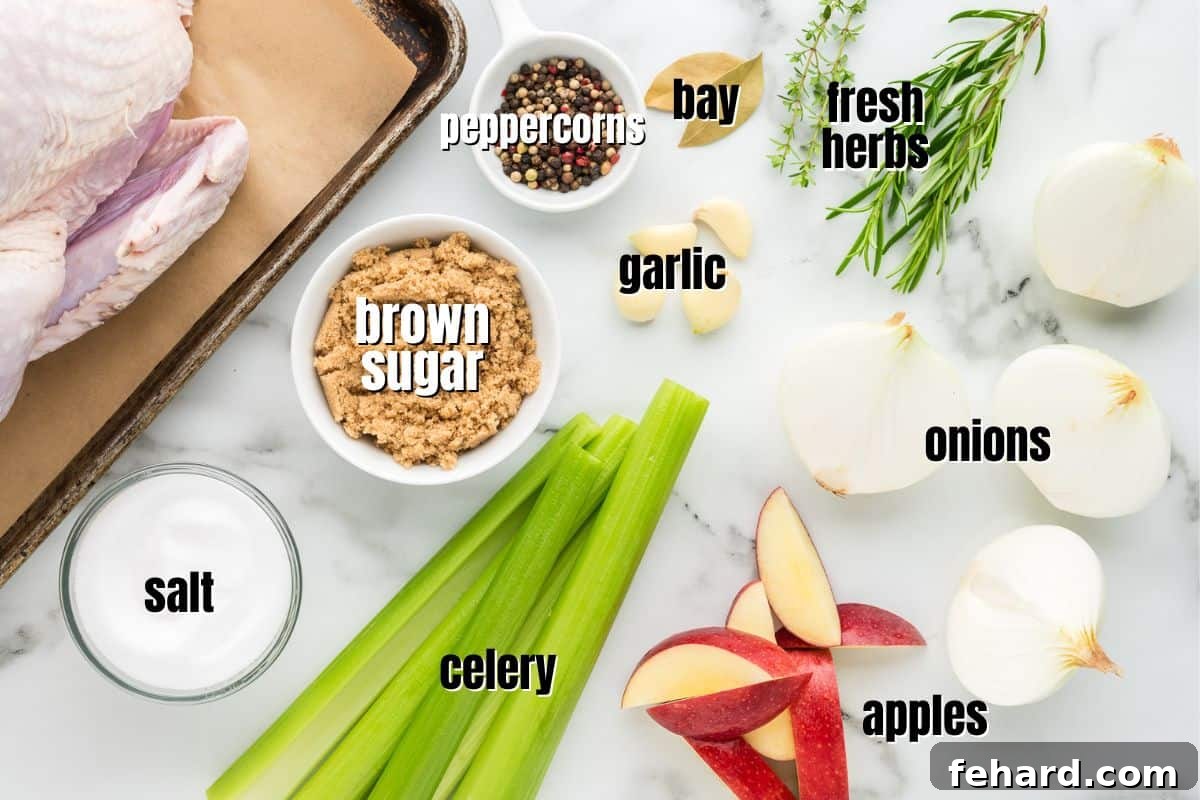
- Water: While many recipes call for apple juice, apple cider, chicken stock, turkey stock, or even vegetable broth as the liquid base for a turkey brine, I’ve found the ultimate difference in flavor to be quite negligible in the final roasted bird. To keep costs down and let the fresh aromatics and herbs truly shine, I prefer to stick with plain water. This allows those nuanced flavors to become the true heroes of your brine.
- Kosher Salt: This is the non-negotiable star! Unlike table salt or iodized salt, which can impart a harsh or metallic taste, kosher salt has larger, flakier crystals that dissolve beautifully and provide a clean, consistent seasoning. Ensure you’re using true kosher salt for the best results and flavor profile.
- Aromatics: A medley of fresh aromatics forms the backbone of this brine’s flavor. Celery, yellow onions, sweet apples (like Honeycrisp or Fuji), and garlic cloves work in harmony to infuse the liquid with fresh, slightly sweet, and pungent notes that will permeate the turkey. These simple additions bring depth without overpowering the natural turkey flavor.
- Herbs & Spices: Fresh garlic, along with fragrant sprigs of thyme and rosemary, are my absolute go-to choices for this brine. These classic poultry herbs contribute savory, earthy, and slightly piney notes that are synonymous with holiday flavors. A tablespoon of peppercorns adds a subtle, warming heat and aromatic complexity.
- Brown Sugar: A touch of brown sugar is dissolved into the wet brine, adding delicate sweet undertones that perfectly balance the saltiness. It also contributes to the beautiful caramelization of the turkey skin during roasting, creating that coveted golden-brown finish. Both light and dark brown sugar work wonderfully here.
Equipment Tip
Essential Equipment: Do You Need a Turkey Brine Bag?
For most average-sized holiday turkeys, a large enough pot that fits comfortably into your refrigerator might be hard to come by. This makes a dedicated turkey brining bag an incredibly useful, if not essential, piece of equipment for successfully brining your turkey. These bags are specifically designed to hold large birds and copious amounts of liquid.
However, if you can’t find a specialty brining bag that’s large enough for your turkey, or if you’re looking for a more budget-friendly alternative, an extra-large Ziploc storage bag can work as an excellent substitute. These are readily available in most grocery stores and are typically more inexpensive. Remember the crucial tip from Kristen’s Keys: always place the brining bag inside a large pot or bucket as a secondary containment measure to prevent any potential leaks from ruining your refrigerator. For smaller turkeys or turkey breasts, a large stock pot might suffice if it can hold the bird submerged and fit in your fridge.
Mastering the Brine: A Step-by-Step Guide to a Perfect Turkey
Brining a turkey, while it may initially appear daunting, is actually a remarkably simple process that yields consistently impressive results. Allow this detailed, step-by-step guide to walk you through each phase, building your confidence and ensuring your holiday turkey is a resounding success.
Step One: Thoroughly Thaw Your Turkey (3-5 Days in Advance)
If you’ve purchased a frozen turkey, the absolute first step is to ensure it is completely thawed before it ever touches the brine. Placing a partially frozen turkey into brine will result in uneven brining and potential food safety issues. Plan meticulously for this thawing period.
👉🏻How long does a frozen turkey typically need to thaw? A good rule of thumb is to allow approximately 24 hours of thawing time in the refrigerator for every 4-5 pounds of turkey. Therefore, a substantial 20-pound turkey will likely require a full 5 days in the refrigerator to thaw safely and thoroughly. Begin this process well in advance of your desired brining day.
Step Two: Prepare Your Flavor-Infused Brine (1-2 Days in Advance)
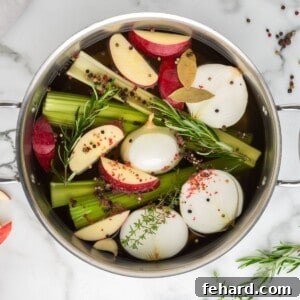
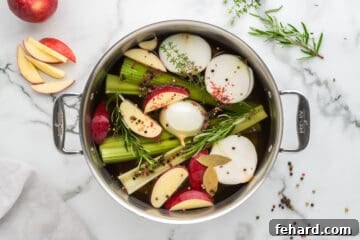
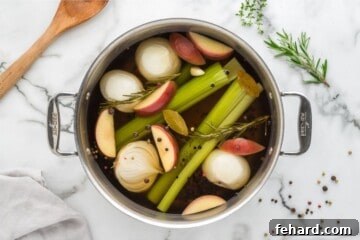
To create the aromatic brine base, combine the kosher salt, brown sugar, fresh herbs (rosemary, thyme, bay leaves), peeled garlic cloves, peppercorns, halved yellow onions, celery stalks, sliced apple, and 10-12 cups of water in a large stock pot. Bring this fragrant mixture to a rolling boil over high heat, stirring occasionally to ensure the salt and sugar fully dissolve. Once boiling, reduce the heat to a gentle simmer and let it cook for about 30 minutes, allowing all the flavors to meld beautifully. This simmering process extracts the maximum essence from your aromatics and herbs, creating a potent and delicious brine.
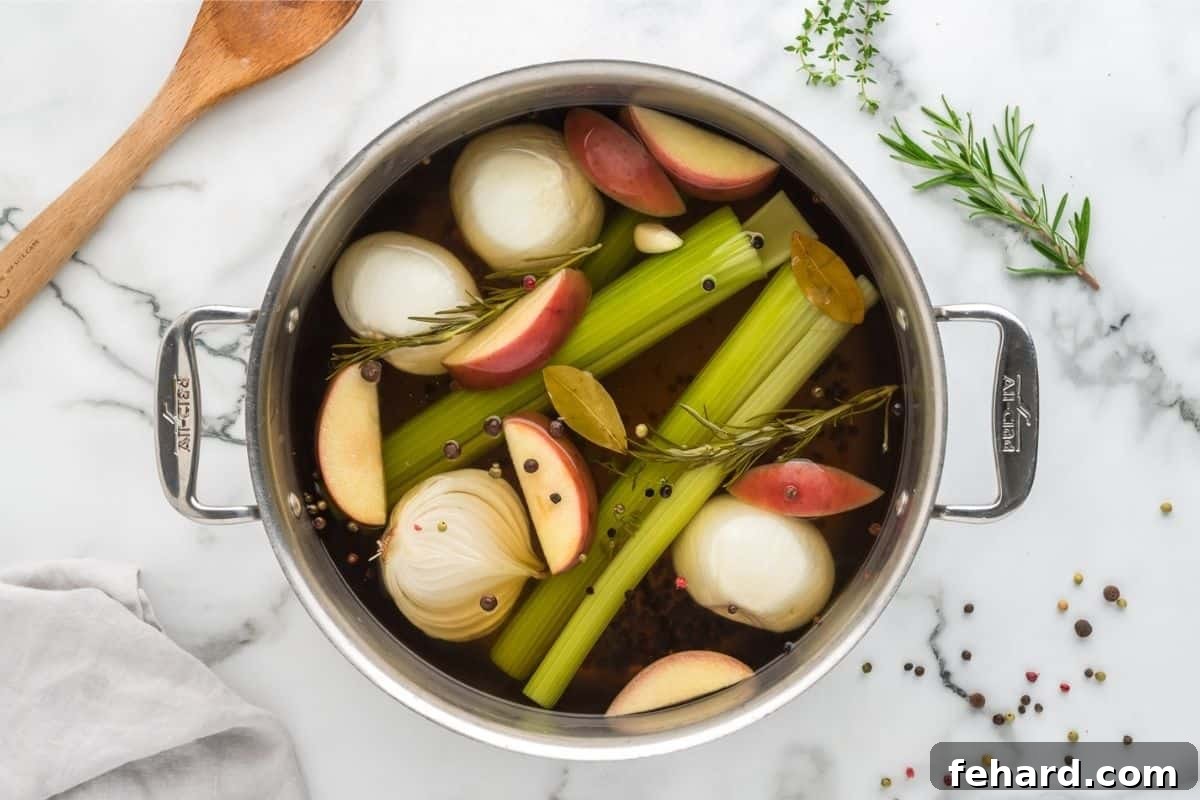
Step Three: Ensure the Brine is Completely Chilled
I cannot overstate the importance of this step: it is absolutely critical to fully chill the brine before it comes into contact with your raw turkey. Introducing warm brine to raw poultry poses a significant food safety risk, as it can encourage rapid bacterial growth. This is precisely why preparing your turkey brine 1-2 days ahead of time is highly recommended.
First, allow the hot brine to cool at room temperature for approximately 30 minutes. Then, cover the pot and transfer it to the refrigerator to cool completely. This chilling process can take several hours, so plan accordingly.
👉🏻Need to accelerate the cooling process? If time is of the essence, you can rapidly cool the brine by adding 10-12 cups of ice to the stock pot after it has simmered and cooled for 30 minutes at room temperature. Stir until the ice fully melts and the brine reaches a temperature between 31°F and 40°F.
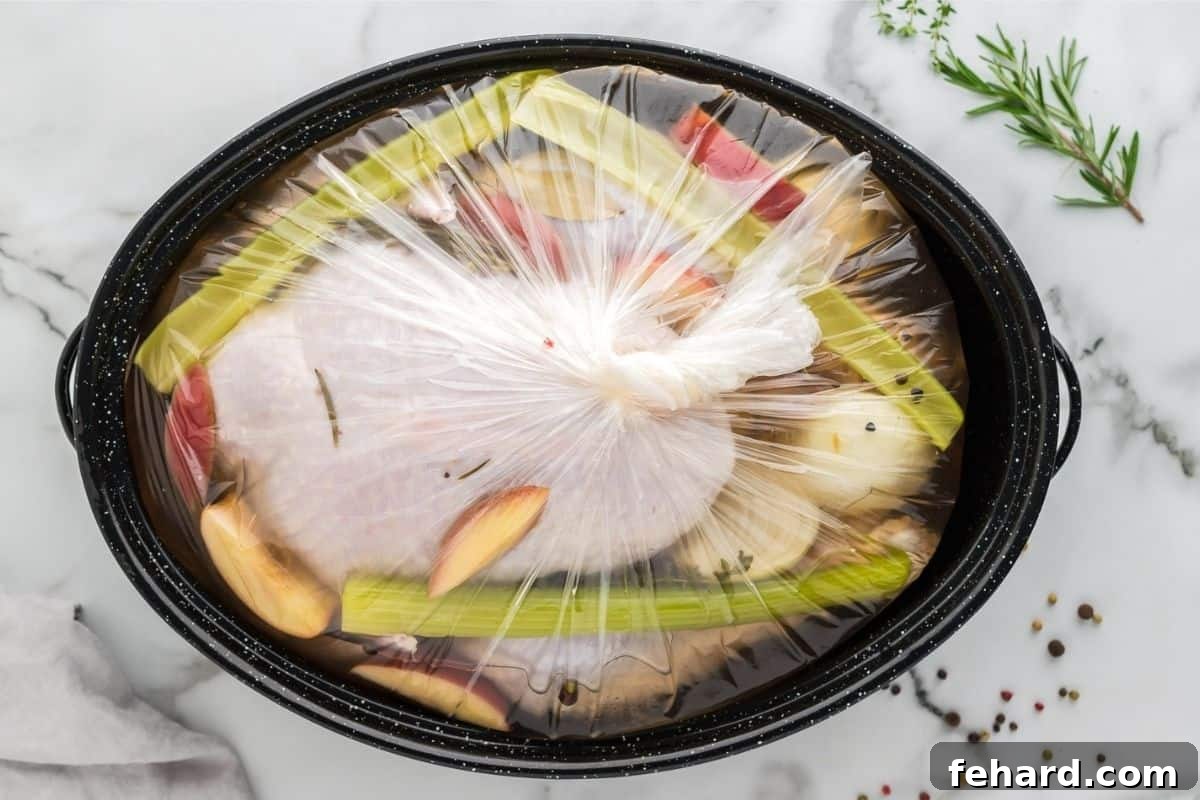
Step Four: Submerge and Brine the Turkey (8-18 Hours in Advance)
This prolonged soak in the chilled brine is the absolute cornerstone of achieving a truly tender, moist, and juicy turkey. Do not be tempted to skip or shorten this vital step! Aim for a minimum of 8 hours of brining, but no more than 18 hours. Brining for longer than 18 hours can actually have an adverse effect, causing the turkey’s proteins to break down too much, leading to a mealy or mushy texture rather than enhanced tenderness.
- Carefully remove the turkey from its original packaging. Locate and discard any giblets, the neck, and the plastic pop-up timer found within the turkey’s cavity.
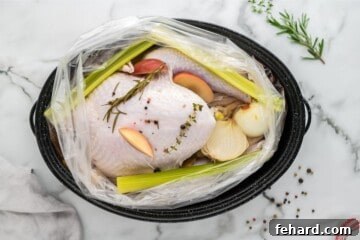
- Place the prepared turkey into your chosen brining bag or large, non-reactive food-grade container.
- Pour the completely chilled brine mixture over the turkey.
- Add enough additional cold water (approximately 1 gallon) to ensure the turkey is fully submerged in the liquid. This ensures even brining across the entire bird.
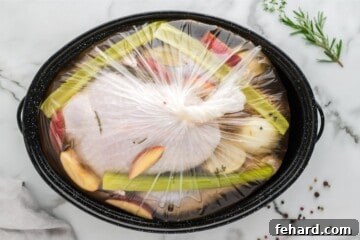
- Carefully seal the brining bag, ensuring no leaks. As an extra precaution, place the sealed brining bag inside a larger bucket or a deep pot. This secondary containment is crucial in case the bag unexpectedly develops a small leak, preventing a messy spill in your refrigerator.
- Place the turkey, fully submerged in brine and securely contained, into the refrigerator for the recommended 8-18 hours.
Step Five: Preparing the Brined Turkey for Roasting
Once your turkey has completed its brining soak, it’s time to prepare it for cooking! Before you begin, a few professional tips will ensure your kitchen remains clean and food-safe, making cleanup a breeze.
- Before touching the turkey, prepare your kitchen space. Clear any other food items or clean dishes away from your sink area and countertops. Position a trash can and your designated roasting pan conveniently near the sink to minimize movement of the raw turkey.
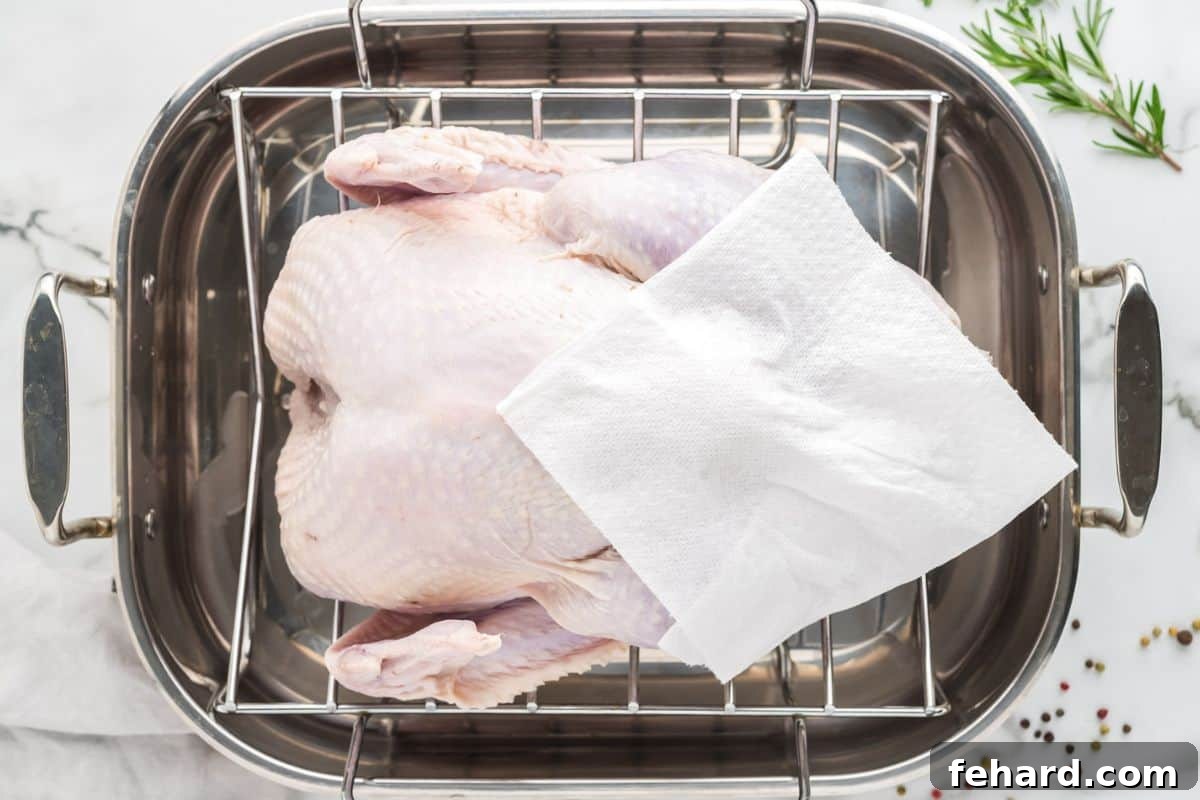
- Carefully transport the turkey and its brining container to the prepared sink area. Remove the turkey from the brine, allowing excess liquid to drain back into the bag. Lightly rinse the turkey under cold running water to remove any residual brine from the surface. This step is important to prevent the skin from becoming overly salty during cooking.
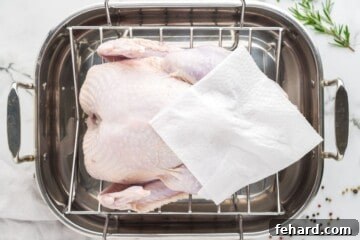
- Once rinsed, immediately place the turkey on the roasting pan. Use paper towels to thoroughly pat the turkey dry, both inside and out. A dry skin is crucial for achieving that coveted crispy, golden-brown exterior when roasted.
- Carefully strain the brining liquid into the sink, discarding all solid aromatics, herbs, and the used brining bag directly into the trash can.
👉🏻Sanitize Everything! After handling raw turkey, it is absolutely essential to thoroughly sanitize your sink, countertops, cutting boards, and any utensils that came into contact with the raw poultry. Use a bleach solution or an appropriate food-safe sanitizer to prevent any risk of food poisoning or cross-contamination. Hygiene is key when working with raw poultry.
Step Six: Perfectly Cook Your Brined Turkey
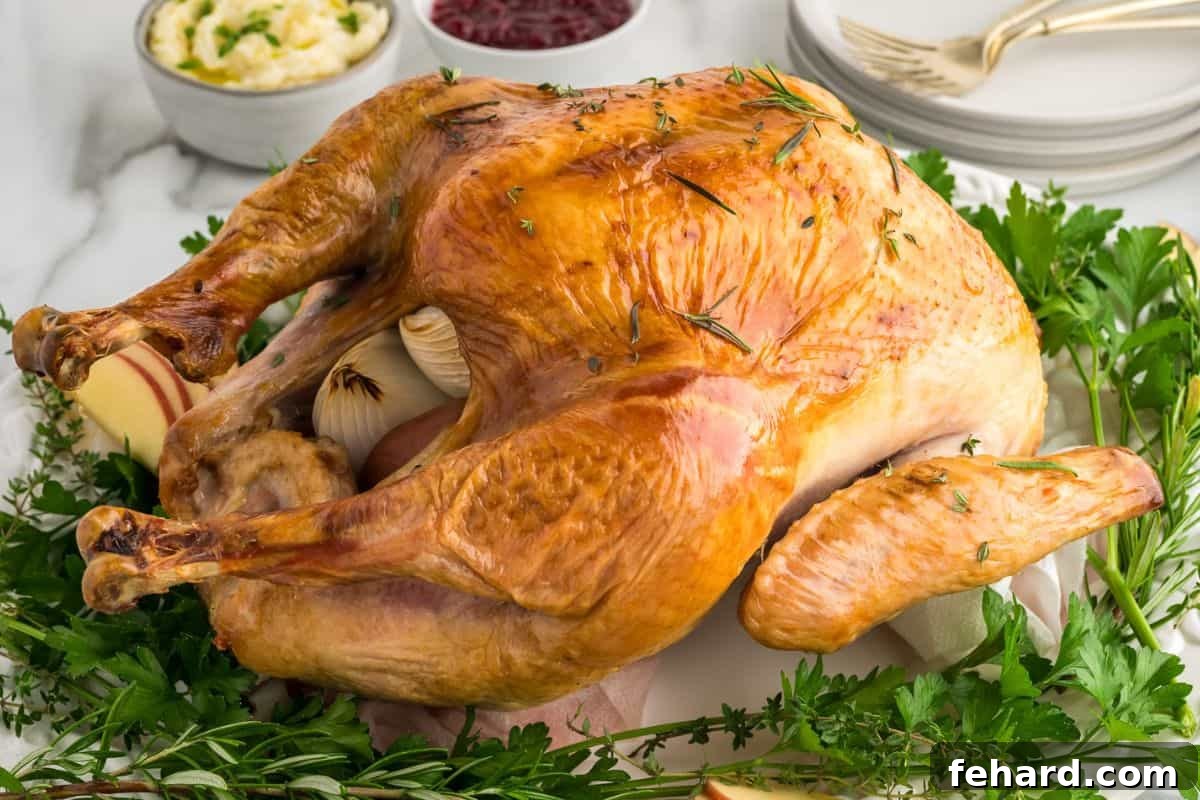
One of the many advantages of a properly brined turkey is its versatility! Whether you prefer to bake, smoke, pressure-cook, or slow cook, a brined turkey will adapt beautifully to almost any cooking method, emerging tender and flavorful. While I have a particular fondness for my roasted turkey recipe, feel free to use your preferred method.
The most important factor, regardless of your chosen cooking technique, is to cook the turkey to the correct internal temperature. Always use a reliable digital meat thermometer and insert it into the thickest part of the breast, ensuring it doesn’t touch any bone. Cook until the breast meat reaches at least 162°F (72°C). As the turkey rests (another crucial step!), its internal temperature will continue to rise to the perfectly safe and succulent 165°F (74°C).
👉🏻How can you confidently tell your turkey is fully cooked? The only truly reliable way is to insert an oven-safe digital probe thermometer into the thickest part of the breast. Cook the turkey until this thermometer registers at least 162°F (72°C). Remember, carryover cooking during the resting period is real – the temperature will naturally climb to the ideal 165°F (74°C) as the turkey rests, ensuring maximum juiciness and food safety before serving.
Frequently Asked Questions: Can You Brine a Frozen Turkey?
A common question is whether a frozen turkey, especially one that may have been “enhanced” with a sodium solution, can still be brined effectively. The answer is a resounding yes! Even if your turkey has been pre-injected with a mild sodium solution, our homemade brine will still significantly enhance its overall flavor and moisture content, far surpassing an unbrined bird.
The critical factor is ensuring the turkey is completely and thoroughly thawed before you introduce it to the brine. A partially frozen turkey will not absorb the brine evenly, leading to inconsistent seasoning and texture. Once your turkey is fully defrosted, meticulously remove the giblets and neck from its cavity, then proceed with the brining instructions as outlined in this guide. The results will still be wonderfully juicy and flavorful, making all your efforts worthwhile.
A Few Final Expert Tips for Brining Success
- Embrace a Budget-Friendly Brining Trick: Leading up to your holiday meal, start collecting vegetable and fruit scraps in a large freezer-safe bag. Onion peels, celery ends, apple peels and cores, and even wilted herbs (like rosemary or thyme stems) are perfect candidates. Simply toss them into the bag as you accumulate them. When it’s time to make your brine, use these saved scraps instead of fresh ingredients. This not only reduces food waste but also significantly cuts down on your overall cost, making a gourmet turkey more accessible.
- Alternative Brining Location (If Fridge Space is Limited): If your refrigerator is bursting at the seams with other holiday preparations and you simply can’t find room for a large brining turkey, an outdoor cooler can be a viable alternative. However, this method requires strict temperature monitoring. Ensure the outdoor temperature is reliably between 31°F (0.5°C) and 40°F (4.5°C). Any colder, and your brine could freeze; any warmer, and bacterial growth becomes a risk. Use a thermometer to continuously check the cooler’s internal temperature. Additionally, be highly mindful if you live in an area with curious critters – secure your cooler thoroughly to prevent unwanted guests from disturbing your turkey.
- A Note on Gravy with Brined Turkey: Due to the high salt content transferred from the brine into the turkey, it is generally not recommended to make gravy directly from the drippings of a brined turkey. The resulting gravy will likely be excessively salty. Instead, consider serving your wonderfully flavorful and juicy brined turkey with a turkey gravy made without drippings, or confidently skip the gravy altogether! Your brined turkey will be so inherently flavorful and moist that it truly won’t need any additional enhancement.
Complete Your Unforgettable Holiday Meal
Elevate your Brined Turkey into a truly magnificent holiday feast by pairing it with these complementary dishes. Serve alongside incredibly easy crockpot mashed potatoes, classic bread stuffing, a comforting sweet potato casserole, and a vibrant cranberry orange sauce. For an even more elaborate spread that everyone will rave about, consider adding one or more of these incredible side dishes:
- Green Bean Casserole from Scratch
- Twice Baked Butternut Squash
- Roasted Butternut Squash Salad
- Green Beans Almondine
- Corn Casserole
- Homemade Pumpkin Pie (for a sweet finish!)
Easy Turkey Brine Recipe
Kristen Chidsey
1 brine
5 mins
40 mins
12 hrs
45 mins
Rate
Ingredients
- 1 cup kosher salt, NO exceptions
- ½ cup brown sugar, light or dark
- 2 sprigs fresh rosemary
- 2 sprigs fresh thyme
- 2 bay leaves, fresh or dry
- 4-5 cloves garlic, peeled
- 1 tablespoon peppercorns
- 2 large yellow onions, peeled and cut in half
- 5 stalks celery
- 1 large apple, any variety, sliced
- 10-12 cups water, plus an additional 1 gallon of cold water for the brining process
Instructions
Turkey Brine Recipe (Prepare 1-2 Days Before Cooking Turkey)
-
Place the 1 cup kosher salt, ½ cup brown sugar, 2 sprigs fresh rosemary, 2 sprigs fresh thyme, 2 bay leaves, 4-5 cloves garlic, 1 tablespoon peppercorns, 2 large yellow onions, 5 stalks celery, and 1 large sliced apple into a large stock pot. Cover with 10-12 cups of water or chicken/turkey stock.

-
Bring the mixture to a boil, then reduce the heat to low and simmer for 30 minutes, or until the sugar and salt are fully dissolved into the brine, and flavors have melded.
-
Remove the brine from the heat and let it cool for 30 minutes at room temperature. Then, cover and transfer the pot to the refrigerator to cool completely. This cooling process is crucial for food safety.
-
At this stage, you have the option to strain off the solids from your brine for a clearer liquid. I typically prefer to leave them in the brine during the soaking period, then discard them along with the brining bag after the turkey is removed. The choice is entirely yours.
How to Brine a Turkey (8-18 Hours Before Cooking Turkey)
-
The night before you intend to roast your turkey, carefully remove it from its packaging. Locate and discard the packaging, any plastic pop-up thermometer, giblets, and the neck from the turkey’s cavity.
-
Place the prepared turkey into a large brining bag or a suitable large stock pot. Pour the completely chilled brine liquid over the turkey.
-
Add additional cold water, approximately 1 gallon, to ensure the turkey is fully submerged in the brining liquid.
-
Seal the brining bag securely. For added security and to prevent any leaks, place the sealed brining bag inside a larger secondary container (such as a large pan or bucket). Refrigerate the turkey in the brine for a minimum of 8 hours and up to 18 hours. Avoid brining for longer than 18 hours.
-
Before you begin roasting, remove the turkey from the brine. Lightly rinse off any excess salt from the turkey’s surface under cold water. Transfer the turkey to a large roasting pan and thoroughly blot it dry, both inside and out, with paper towels. A dry surface promotes crispy skin.
-
Cook the turkey using your desired method. For an excellent guide, I recommend following my detailed instructions for Roast Turkey.
-
Once the turkey is removed, strain off the remaining brining liquid and discard all solids and the used brining bag in the trash. Thoroughly clean and sanitize your sink and all surfaces that the raw turkey touched to prevent cross-contamination.
Equipment
-
Brining Bags
-
XL Ziploc Storage Bags (typically less expensive than brining bags, a good alternative)
-
Large Stock Pot (at least 12-quart capacity)
-
Digital Meat Thermometer
Notes
Choosing Your Turkey: For the absolute best results, it is ideal to brine a fresh turkey that has not been injected with any sodium solution. However, you absolutely CAN brine a frozen turkey; just ensure it is completely and thoroughly defrosted in the refrigerator before placing it into the brine.
Adjusting for Pot Size (Stock-Pan): If your largest stock pot is smaller than ideal, you can still make this brine work. Use just 4 cups of water to simmer with the salt, sugar, herbs, and aromatics. Once this concentrated brine is fully chilled, add an additional 1.5 gallons of cold water to the brining bag (instead of just one gallon) when you add the turkey. This ensures the correct overall liquid-to-salt ratio.
Money-Saving Tip (Pre-Harvested Scraps): To reduce waste and save money, start collecting vegetable and fruit scraps in the weeks leading up to your brining day. Onion peels, celery ends, apple cores and peels, orange peels, and wilted herb stems (like rosemary and thyme) are all excellent for flavoring your turkey brine. Store them in a large freezer-safe bag. When preparing the brine, use about 4 cups of these collected vegetable and fruit scraps in place of the fresh vegetables, herbs, and apples listed in the recipe.
Crucial Sanitation: Always exercise extreme caution when handling raw turkey. After all preparations are complete, be diligent in cleaning and sanitizing your workstation, sink, and any surfaces the turkey may have touched with a bleach solution or food-safe sanitizer. This prevents food poisoning and cross-contamination.
Feel free to adjust the quantities of vegetables, fruits, and herbs in the brine to suit your personal taste preferences. The salt and sugar, however, are fundamental to the success of this turkey brine recipe.
Note: Nutrition information provided is calculated based on the ENTIRE brine recipe and does not reflect the amount absorbed by the turkey or consumed. It should be used as an approximation.
Nutrition
Carbohydrates: 108g
Sodium: 113329mg
Potassium: 146mg
Sugar: 106g
Vitamin C: 1.6mg
Calcium: 236mg
Iron: 1.7mg
Nutrition information is automatically calculated, so should only be used as an approximation.
Tried this recipe?
Mention @amindfullmom or tag #amindfullmom!
This post was originally published in 2017 but has been extensively updated and revised in 2025 to provide the most current and comprehensive guide.