
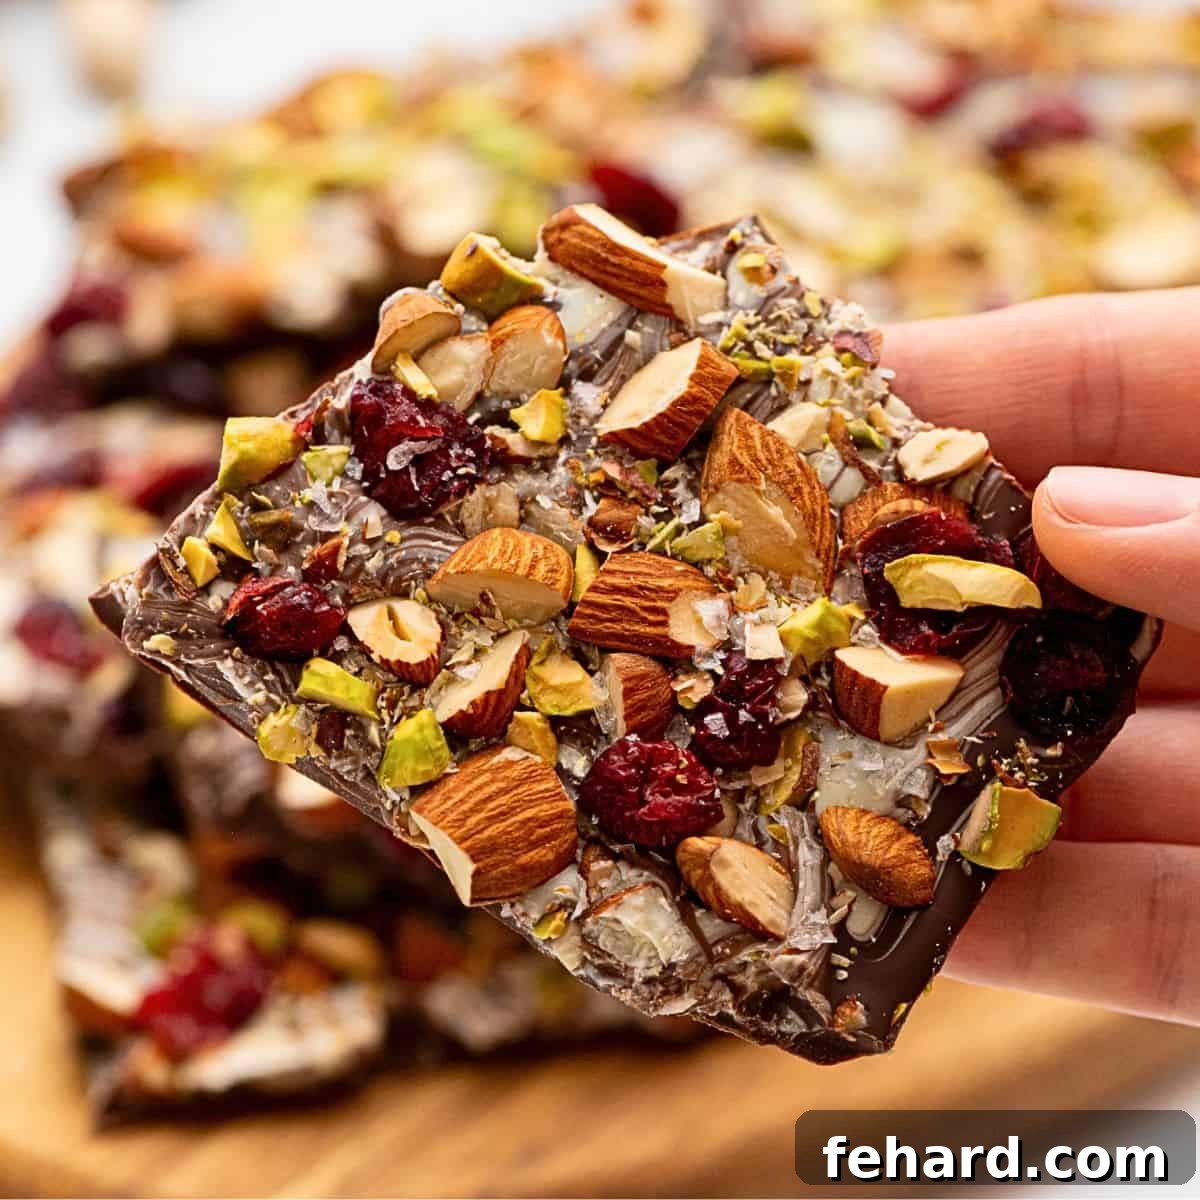
Prepare to amaze yourself with how effortlessly you can create dazzling, gourmet chocolate bark right in your own kitchen! Combining premium chocolate with your favorite toppings, this easy chocolate bark recipe is deceptively simple. It appears sophisticated and takes less than 10 minutes of active preparation. Whether you’re looking for a thoughtful homemade gift, a quick last-minute dessert to impress, or a delightful treat just for yourself, this versatile chocolate bark is the perfect solution. It’s a truly customizable confection that promises rich flavor and satisfying texture with every bite.
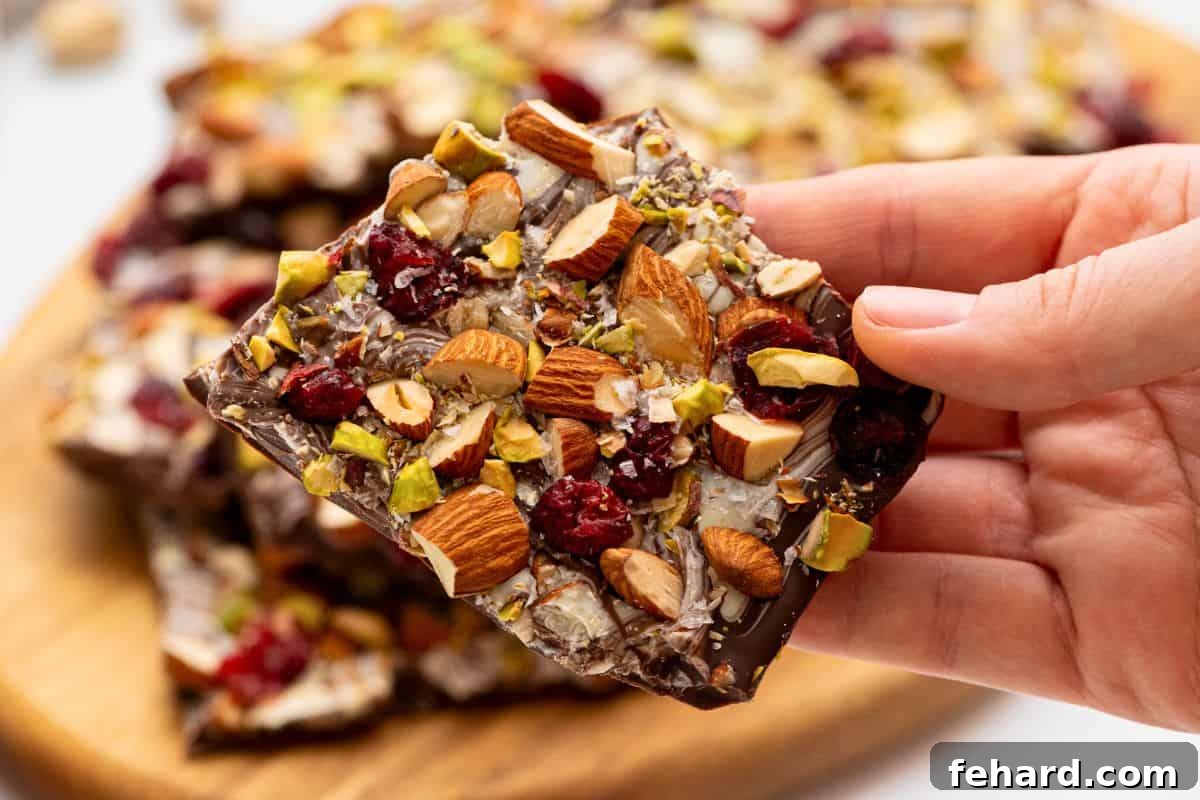
Unlock the Secrets to Perfect Chocolate Bark: Expert Tips
Achieving beautifully set, incredibly delicious chocolate bark is simpler than you might imagine. A few key details can significantly streamline the process and guarantee a professional-looking, delectable result every time. These foundational tips are designed to elevate your homemade chocolate bark from good to truly exceptional.
- Meticulous Preparation Before Melting: The golden rule for working with chocolate is speed and readiness. Once chocolate is melted, it cools and sets quickly, allowing little room for delay. Therefore, it’s essential to have your baking sheet meticulously lined, all your chosen toppings prepped and within reach, and your spreading tools (like a spatula or butter knife) ready. This ensures you can seamlessly pour, swirl, and sprinkle toppings while the chocolate is still warm and pliable, guaranteeing excellent adhesion and a smooth finish.
- Embrace High-Quality Chocolate: The foundation of exceptional chocolate bark lies in the quality of your chocolate. While you have the freedom to choose your preferred type – dark, semi-sweet, milk, or white chocolate – always opt for real, high-quality varieties. Steer clear of products labeled “candy coating” or “chocolate flavored.” For white chocolate, specifically seek out options made with cocoa butter (such as Guittard white baking chips) rather than hydrogenated oils. Real chocolate, with its superior melting properties and rich flavor profile, is truly the star of this dessert, ensuring your bark tastes as divine as it looks.
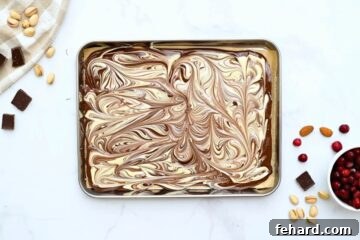
- To Swirl or Not to Swirl: The Marbled Effect: For a visually stunning, show-stopping presentation, consider using a combination of both white and dark chocolate to create an elegant marbled effect. This technique adds depth and contrast, making your bark truly stand out. If you prefer a more classic, uniform look or a single flavor profile, simply use one variety of chocolate. Both approaches yield delicious results, allowing you to tailor the aesthetic to your preference.
- Allow for Gradual Hardening at Room Temperature: Patience is a virtue when it comes to setting chocolate bark. While tempting to rush the process in the refrigerator or freezer, allowing your chocolate bark to harden slowly at room temperature is crucial. Rapid cooling can lead to unwanted cosmetic issues like “chocolate bloom” (white, streaky marks from fat or sugar separation) or condensation spots, which affect the appearance without compromising taste. A slow, natural setting ensures a perfectly smooth, glossy finish and optimal texture.
Crafting Your Own Chocolate Bark: A Step-by-Step Guide
Imagine me right beside you in the kitchen, guiding you through each simple step to create the most exquisite chocolate bark. This detailed walkthrough will ensure your homemade treat is nothing short of perfect, whether you opt for a classic single-chocolate design or an artful marbled masterpiece.
Step One: Prepare Your Pan and Gather Ingredients
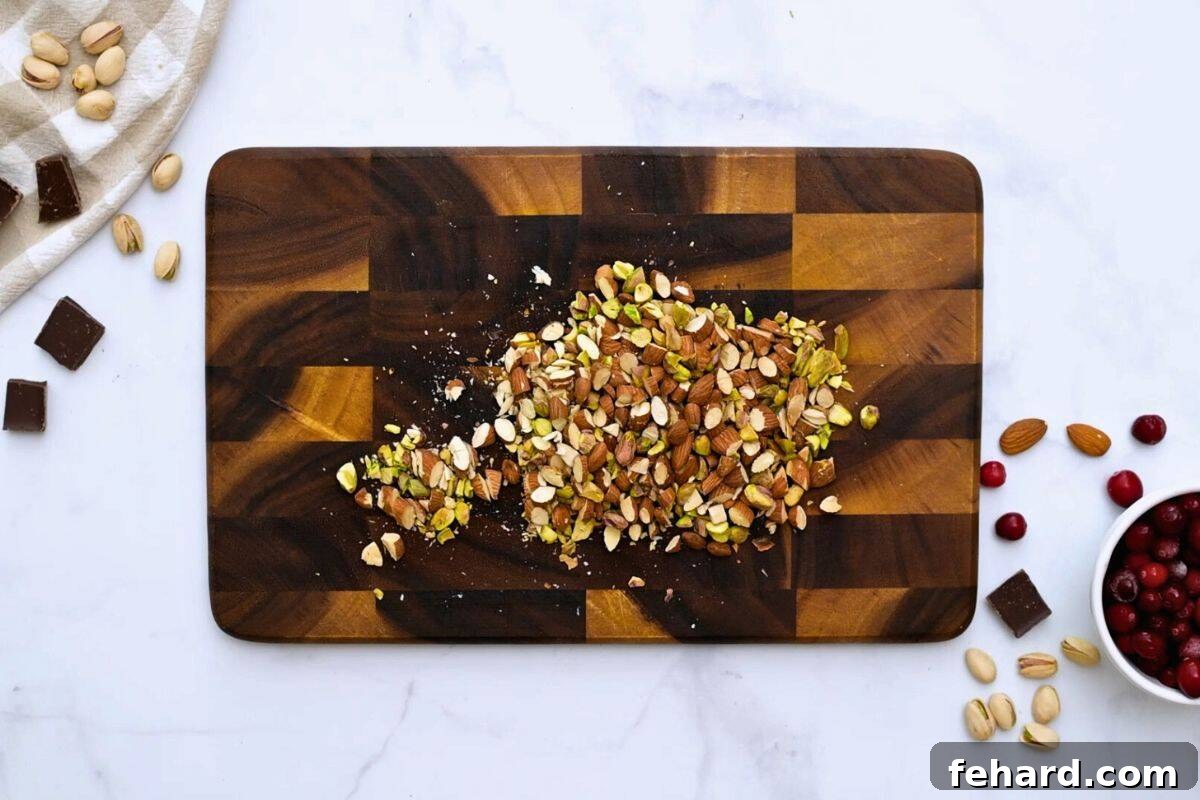
The secret to a seamless chocolate bark-making experience is thorough preparation. Begin by lining a sturdy baking sheet with parchment paper, ensuring it extends slightly beyond the edges for easy removal. This non-stick surface is vital. If your recipe calls for nuts, take the time to toast and chop them. Toasting significantly enhances their flavor and aroma, adding a layer of depth to your bark. You can achieve this by baking them at 350°F (175°C) for 6-8 minutes, or gently toasting them in a dry skillet over medium-low heat for 3-4 minutes until they become fragrant and lightly golden. Once toasted, let them cool slightly before chopping. Next, prepare any other desired toppings by chopping or crushing them as needed – think pretzels, candy canes, dried fruits, or mini candies. Finally, gather all your supplies and additional toppings like sprinkles, flaky sea salt, or orange zest. Having everything organized and ready before you start melting the chocolate prevents any frantic last-minute scrambling.
Step Two: Perfectly Melt Your Chosen Chocolate
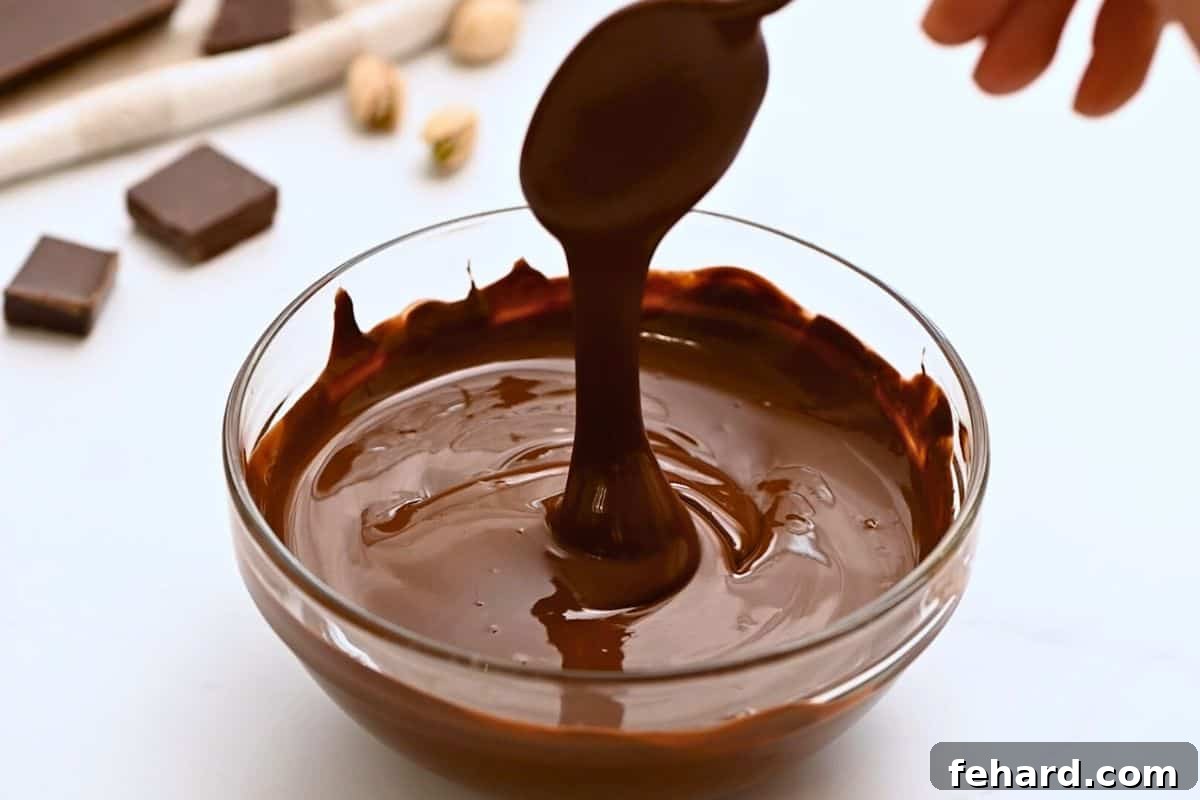
The melting process is critical for smooth, glossy chocolate bark. If you’re creating a marbled effect with both white and regular chocolate, melt them consecutively in separate, clean, heat-safe bowls. Otherwise, proceed with melting your single choice of chocolate.
- Melting Dark/Semi-Sweet/Milk Chocolate: Place your chopped dark, semi-sweet, or milk chocolate in a microwave-safe bowl. Heat in short 30-second intervals, stirring vigorously after each interval. This intermittent heating and stirring prevent scorching and ensure even melting. Continue this process until the chocolate is about 90% melted, with a few small lumps remaining. Remove from the microwave and continue stirring until the residual heat completely melts the remaining chocolate, resulting in a perfectly smooth, velvety consistency. This technique helps prevent overheating, which can cause chocolate to seize or become grainy.
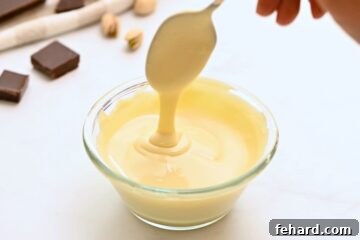
- Melting White Chocolate: For white chocolate, follow a similar approach. Place it in a separate microwave-safe bowl and heat in 30-second intervals, stirring well after each one. White chocolate tends to melt a bit faster and can scorch more easily due to its different composition (less cocoa solids, more milk solids and sugar). Keep a very close eye on it, stopping when it’s just shy of fully melted and stirring until completely smooth. You can also use a double boiler method for all chocolates: place a heat-safe bowl over a saucepan of simmering water (ensuring the bowl doesn’t touch the water), stirring frequently until melted.
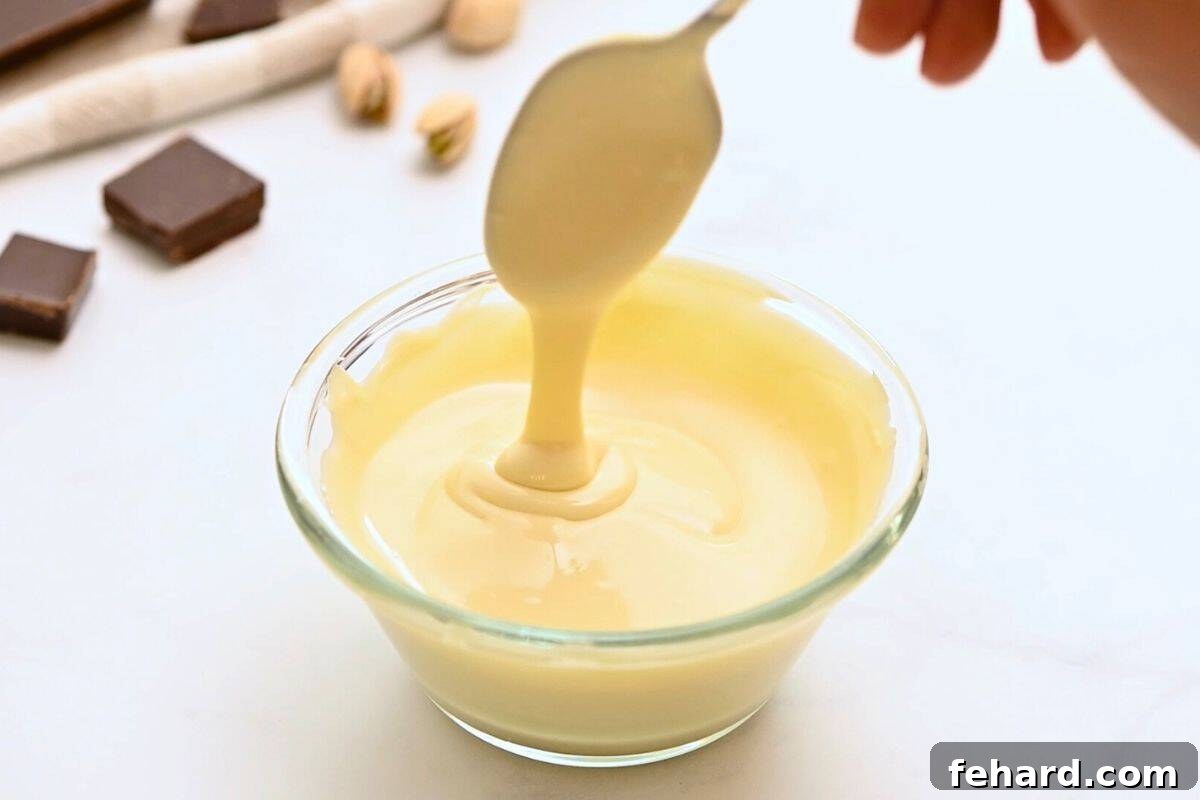
Step Three: Master the Art of Spreading and Swirling
Time is of the essence in this step! As soon as your chocolate is perfectly melted, quickly pour the primary chocolate (e.g., dark chocolate for a marbled bark) onto your prepared parchment-lined baking sheet. Using an offset spatula or the back of a spoon, swiftly spread the chocolate into a rough rectangle, approximately 9×13 inches and about ¼ to ½ inch thick. Aim for an even thickness to ensure uniform setting. If you’re creating a marbled effect, spoon dollops or thin streams of the melted white chocolate over the dark chocolate base immediately after spreading. Then, with a wooden skewer, a butter knife, or even the tip of your offset spatula, gently drag through the two chocolates in sweeping motions to create beautiful, artistic swirls and marbled patterns. Don’t overmix, as you want distinct streaks and patches of color for that captivating visual appeal.
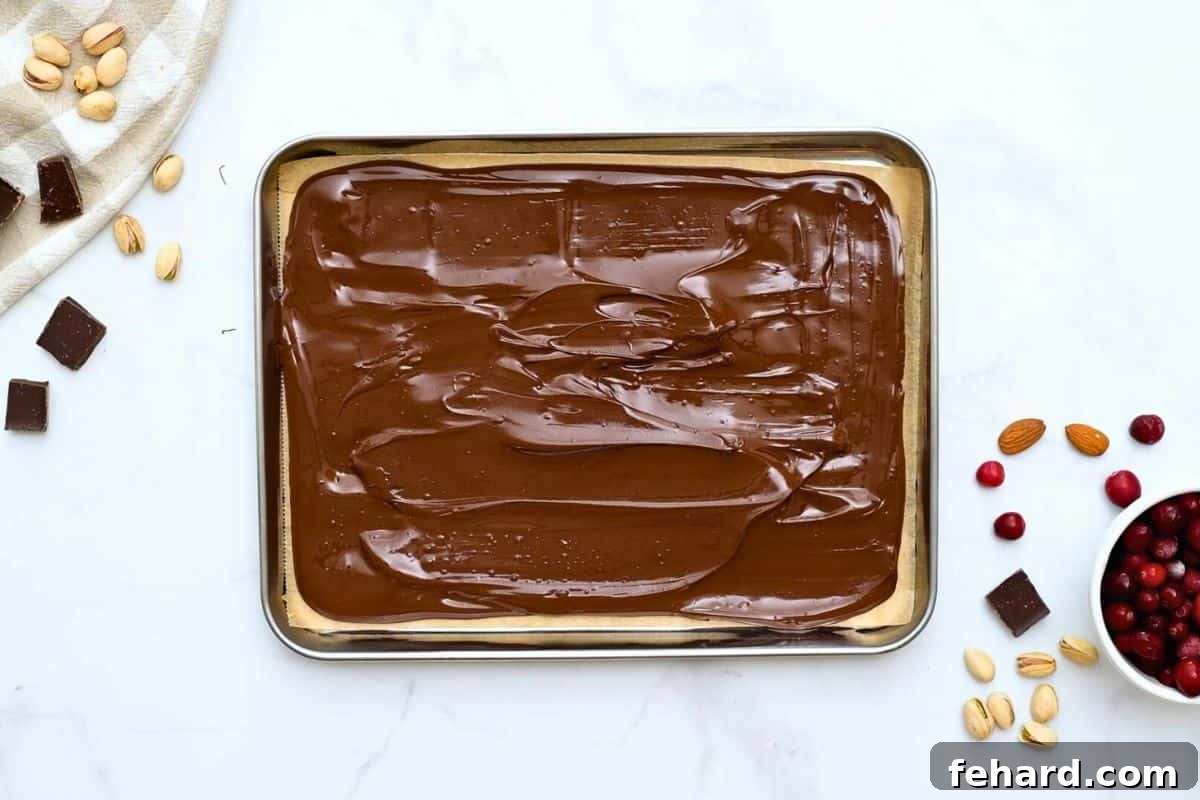
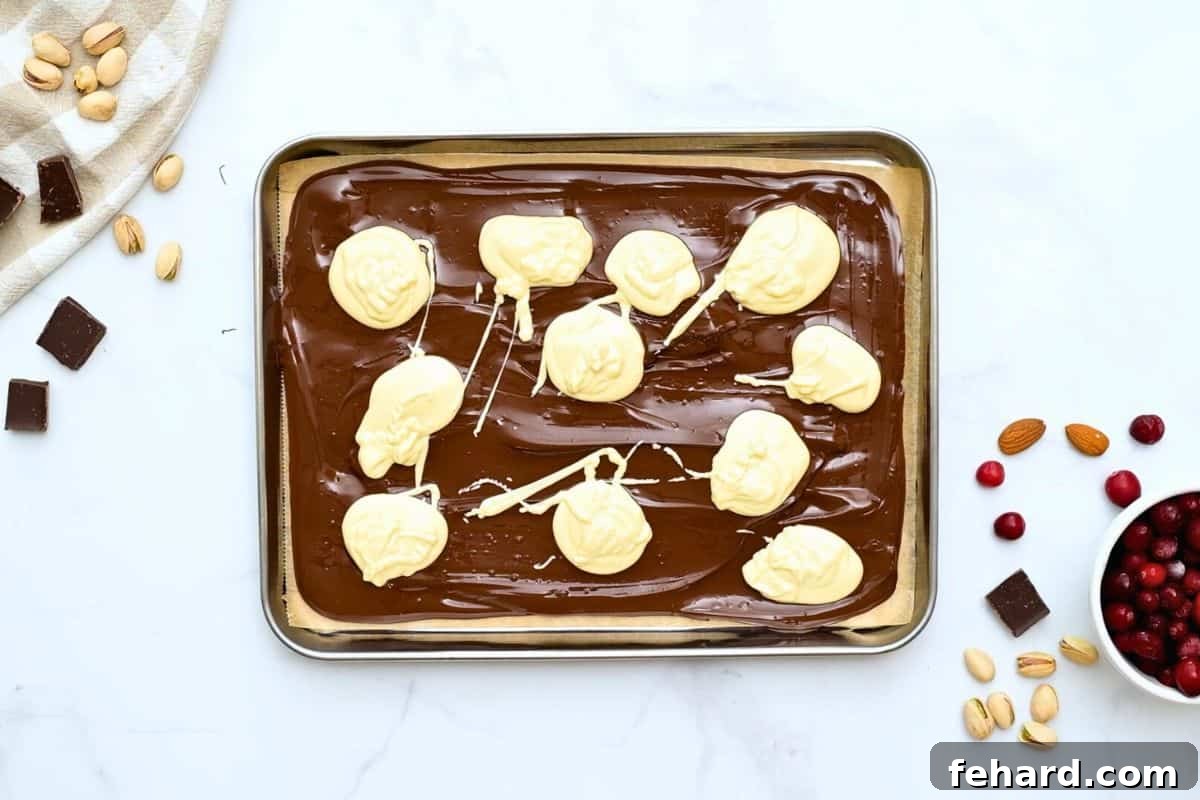
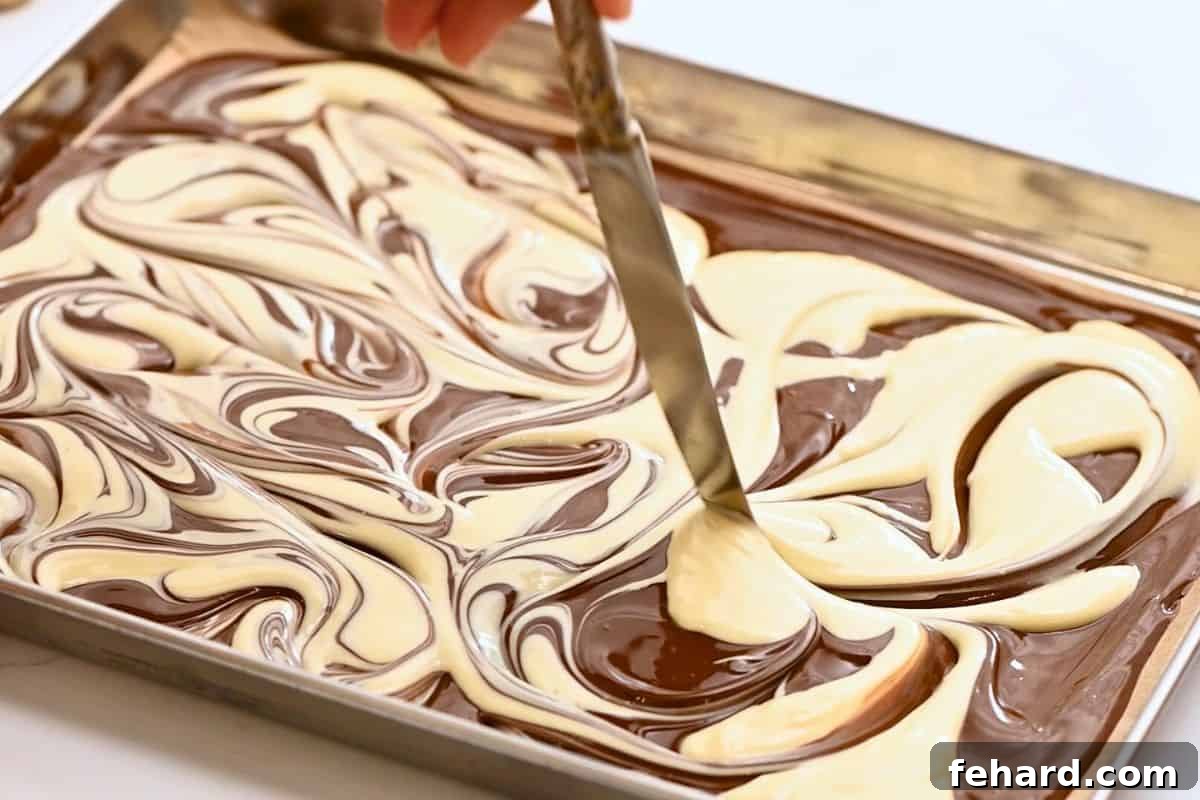
Step Four: Adorn with Your Favorite Toppings
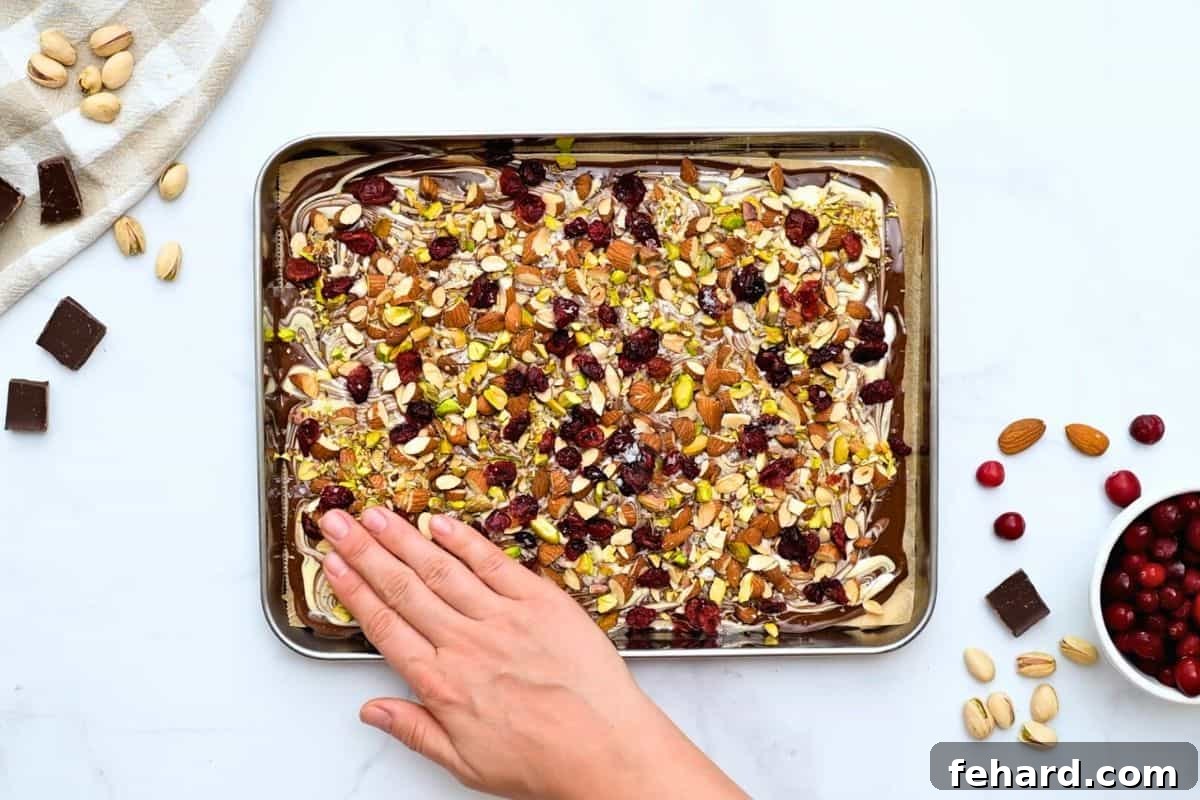
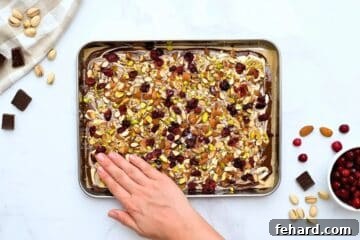
This is where your creativity shines! Immediately after spreading and swirling the chocolate, generously and evenly sprinkle your chosen toppings over the warm, unset chocolate. This ensures that the toppings adhere beautifully as the chocolate begins to cool. Distribute chopped nuts (like your toasted pistachios and almonds), vibrant dried cranberries, and a delicate pinch of flaky sea salt across the entire surface. If you’ve chosen larger toppings, gently press them into the chocolate with your fingertips or the back of a spoon to ensure they are securely embedded and won’t fall off once the bark hardens. Work efficiently, as the chocolate will start to set quickly.
Step Five: Allow Your Bark to Set and Enjoy
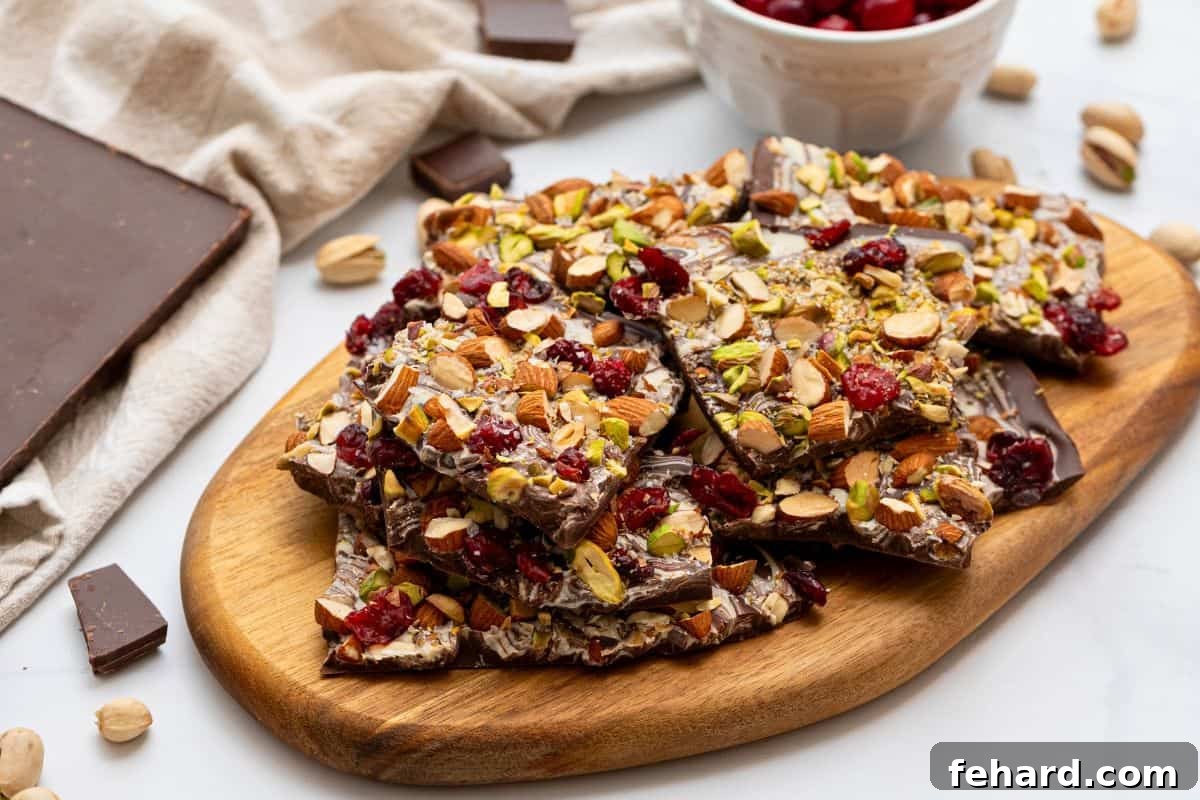
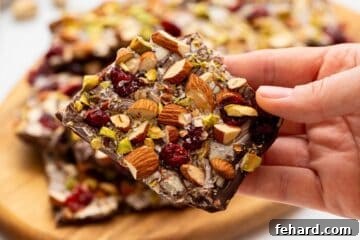
The final, crucial step is allowing your chocolate bark to harden completely. Resist the urge to place it in the refrigerator, as rapid cooling can lead to a dull finish or sugar bloom. Instead, let the bark set undisturbed at room temperature for 2-4 hours, or until it is completely firm and snaps cleanly. The exact time will depend on the temperature of your kitchen and the thickness of your bark. Once fully set, simply lift the parchment paper from the baking sheet and break the bark into large, rustic, irregular chunks. Alternatively, you can use a sharp knife to cut it into more uniform wedges or squares for a neater presentation. Both methods are perfectly acceptable and yield equally delicious results. Enjoy your stunning homemade chocolate bark, a testament to simple indulgence!
Endless Possibilities: Creative Chocolate Bark Variations
The beauty of chocolate bark lies in its incredible adaptability. You can effortlessly customize this recipe based on your personal preferences, seasonal ingredients, or whatever delightful items you have on hand. Let your imagination run wild and explore these exciting variations:
- Simplify with a Single Chocolate: If you prefer a simpler aesthetic or a more straightforward flavor profile, feel free to skip the marbled effect. Use a generous 18 ounces of your favorite single chocolate – whether it’s rich dark chocolate, sweet semi-sweet, creamy milk chocolate, or buttery white chocolate – to create a delicious, uniform base.
- Nutty Substitutions: While pistachios and almonds are fantastic, the world of nuts offers endless possibilities. Experiment with toasted cashews for a creamy crunch, walnuts for an earthy note, or pecans for a classic, buttery flavor. If you’re not a fan of nuts, you can omit them entirely or substitute with seeds like pepitas or sunflower seeds for texture.
- Dried Fruit Delights: Beyond cranberries, a wide array of dried fruits can add vibrant color and chewy sweetness to your bark. Consider using tart dried cherries, finely chopped apricots, sweet golden raisins, or even tropical mango pieces for an exotic twist.
- Sweetness Scale: Adjust the sweetness to your liking. For an extra sweet treat, opt for a milk chocolate base. If you prefer a more intense, less sugary experience, dark chocolate with a higher cocoa percentage is an excellent choice.
- Optional Toppings Extravaganza: Elevate your bark with up to ¾ cup of additional or alternative toppings. Some popular choices include:
- Citrus Zest: Fresh orange or lemon zest for a bright, aromatic lift.
- Salty Crunch: Crushed pretzels or salted caramel bits for a delightful sweet-and-salty contrast.
- Minty Freshness: Crushed peppermint candies (especially popular during holidays).
- Sprinkles: Colorful sprinkles for a festive look, perfect for celebrations.
- Candy Bites: Mini chocolate chips, chopped candy bars (like Snickers or M&Ms), or toffee bits for an added layer of indulgence.
Remember, if your chosen toppings are large, chop or crush them into smaller pieces to ensure they distribute evenly and adhere well to the chocolate.
- Seasonal & Holiday Bark: Transform your bark for any occasion! For the winter holidays, infuse festive spirit with seasonal candies, red and green sprinkles, or crushed candy canes to create classic peppermint bark or charming Christmas bark. Think themed colors and flavors for Halloween, Valentine’s Day, or Easter!
More Irresistible Easy Chocolate Desserts
If your sweet tooth is still calling after enjoying this chocolate bark, explore these other effortless chocolate-infused treats that are sure to satisfy:
- Saltine Cracker Toffee
- Microwave Fudge
- Homemade Hot Fudge Sauce
- Crockpot Candy
- Peanut Butter Buckeye Balls
Easy Chocolate Bark
Kristen Chidsey
12
5 mins
5 mins
10 mins
Ingredients
- ½ cup whole nuts, optional, any combination (e.g., pistachios, almonds, cashews)
- 12 ounces quality dark chocolate, chopped or chips
- 6 ounces quality white chocolate, chopped or chips (ensure it contains cocoa butter)
- ¼ cup dried cranberries, or other dried fruit/candies of choice
- ½ teaspoon flaky sea salt, optional, but highly recommended
Instructions
-
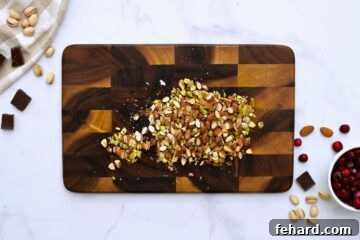
If using nuts, begin by toasting them to enhance their flavor. Preheat your oven to 350℉ (175°C). Spread the nuts evenly on a rimmed baking tray lined with parchment paper and bake for 6-8 minutes, or until they are fragrant and lightly golden. Alternatively, you can toast them in a dry skillet over medium-low heat for 3-4 minutes, stirring frequently. Let the toasted nuts cool slightly, then roughly chop them.

-
Line a separate, clean rimmed baking sheet with fresh parchment paper and set it aside. This will be your workspace for the chocolate. Chop your quality dark and white chocolates into small, uniform pieces (if using bars), and gather/prepare all other desired toppings, ensuring they are ready for immediate use.
-
Place the chopped dark chocolate in a microwave-safe bowl. Heat in short 30-second increments, stirring thoroughly after each interval. Continue until the chocolate is approximately 90% melted, with just a few small lumps remaining. Remove from the microwave and continue stirring until the residual heat completely melts the chocolate, resulting in a perfectly smooth and glossy consistency. This prevents overheating and keeps the chocolate from seizing.
-
Repeat the precise melting process with the white chocolate in a separate clean bowl. Remember that white chocolate melts faster and is more prone to scorching, so watch it closely and stir diligently after each 30-second burst.
-
Working quickly, pour the melted dark chocolate onto the prepared parchment-lined baking sheet. Use an offset spatula or the back of a spoon to spread it evenly into a rough 9×13-inch rectangle, aiming for a thickness of about ¼ to ½ inch. Immediately spoon dollops of the melted white chocolate randomly over the dark chocolate. Then, take a wooden skewer, butter knife, or even a toothpick and gently drag it through the two chocolates to create a beautiful, artistic marbled pattern. Do not over-swirl; less is often more for a striking effect.
-
Without delay, evenly sprinkle your prepared chopped nuts, dried cranberries, and flaky sea salt (or any other chosen toppings) over the still-wet chocolate surface. For larger toppings, gently press them into the chocolate with your fingertips to ensure they adhere firmly as the bark cools and hardens.
-
Allow the chocolate bark to cool and harden completely at room temperature for 2 to 4 hours. This slow setting prevents temperature shock and helps achieve a beautiful, smooth finish. Once the chocolate is fully firm and snaps easily, use your hands to break it into large, rustic, irregular pieces, or use a sharp knife to cut it into desired wedges or squares.

Equipment
-
Parchment Paper
Notes
Versatile Topping Options: Feel free to customize your bark with up to ¾ cup of various toppings. Fantastic options include crunchy pretzels, a medley of nuts (almonds, cashews, pistachios, peanuts, pepitas), aromatic sesame seeds, colorful sprinkles, an assortment of small candies, or chewy dried fruits (such as dried cranberries, cherries, apricots, or raisins). If you plan to add larger toppings, remember to chop or crush them into smaller pieces to ensure even distribution and firm adhesion.
Storage Recommendations: To maintain its freshness and snap, store your homemade chocolate bark in an airtight container at room temperature, in a cool, dark place. It will remain delicious for up to 2 weeks. If your home tends to be warm, refrigerating the bark is advisable. Be aware that refrigerated chocolate may develop a slight “bloom” (a whitish discoloration from cocoa butter rising to the surface) due to temperature changes, but rest assured, it will still taste wonderful.
Nutritional information provided is an approximation based on 18 ounces of chocolate without additional toppings, as these will vary.
Nutrition Facts
Calories: 246kcal
Carbohydrates: 21g
Protein: 3g
Fat: 17g
Saturated Fat: 10g
Polyunsaturated Fat: 1g
Monounsaturated Fat: 5g
Trans Fat: 0.01g
Cholesterol: 4mg
Sodium: 18mg
Potassium: 243mg
Fiber: 3g
Sugar: 15g
Vitamin A: 15IU
Vitamin C: 0.1mg
Calcium: 49mg
Iron: 3mg
Nutrition information is automatically calculated and should be used only as an approximation.
Tried this recipe?
Mention @amindfullmom or tag #amindfullmom!