

Perfect Instant Pot Ham: Your Go-To Recipe for Juicy, Tender Results
Are you tired of dry, disappointing ham? This Instant Pot Ham recipe is about to revolutionize your cooking! Say goodbye to tough, overcooked meat and hello to a sensationally juicy, tender, and incredibly flavorful ham. Glazed with a sweet and tangy honey-pineapple sauce and cooked in the high-moisture environment of your Instant Pot, this ham is guaranteed to be unbelievably succulent and ready in a fraction of the time compared to traditional methods. It’s the ultimate shortcut to a perfect main course.
Whether you’re planning an elaborate holiday spread, where it pairs exquisitely with creamy scalloped potatoes and crisp roasted asparagus, or simply seeking a hassle-free yet impressive weeknight meal, this Instant Pot Ham recipe delivers unparalleled ease and exceptional taste. Prepare to impress your family and friends with a ham that is consistently moist, perfectly cooked, and infused with irresistible sweet-savory notes.

Unlock the Secrets: Expert Tips for Foolproof Instant Pot Ham
After perfecting this Instant Pot Ham recipe over many years, I’ve distilled the process into a few critical tips that will ensure your success. Follow these guidelines for a consistently tender, flavorful, and perfectly cooked ham every single time.
- Choose the Right Ham Size for Your Pot: The capacity of your Instant Pot is a key consideration. A standard 6-quart Instant Pot is ideal for a ham weighing approximately 5-6 pounds, while a larger 8-quart model can comfortably accommodate a 7-8 pound ham. While any fully cooked ham—be it bone-in, boneless, smoked, or cured—can be used, I highly recommend a spiral-sliced ham. The pre-cut slices are fantastic for allowing the glaze to seep deep into the meat, ensuring every bite is saturated with flavor. This makes the ham incredibly easy to serve as well.
- Master the Foil & Trivet Technique: This method is the cornerstone of a perfect Instant Pot ham. By securely wrapping your ham and its rich glaze in heavy-duty aluminum foil and then placing it on a trivet above water, you create an optimal cooking environment. This not only ensures the ham stays incredibly moist and fully absorbs the delicious glaze as it steams, but it also acts as a crucial barrier. This barrier prevents the sugary glaze from directly touching the Instant Pot liner, thereby significantly reducing the chances of triggering a “BURN” notice, a common frustration with sticky sauces in pressure cookers.
- Understand Variable Cooking Times: Precision in timing is essential for achieving that desirable tender texture. The exact cooking duration will vary based on the ham’s weight, whether it’s spiral-sliced or unsliced, and even the thickness of the foil you use. Don’t worry, I’ve meticulously detailed the cooking times in the recipe section below to ensure you have clear, accurate guidance for consistent success. Paying close attention to these timings is your guarantee for a perfectly cooked ham, avoiding both undercooking and overcooking.
What Our Readers Are Saying:
“Absolutely delicious! Received lots of compliments. I tried this for the first time on Thanksgiving because my oven was completely full. It was a Gold Star success! Highly recommend! Ham isn’t usually my favorite, but I tasted this and it was wonderful!” – Susan ⭐⭐⭐⭐⭐
Effortless Perfection: How to Cook Delicious Ham in Your Instant Pot
Whether you’re taking your first steps into the world of pressure cooking or you’re a seasoned Instant Pot enthusiast, this comprehensive, step-by-step guide will help you create a tender, moist, and utterly delicious Instant Pot Ham. Get ready to master a recipe that’s as simple as it is satisfying!
Step One: Prepare Your Instant Pot for Optimal Cooking
Begin by pouring 1 cup of cold tap water into the inner pot of your 6-quart Instant Pot. If you’re using a larger 8-quart model, increase the water to 1½ cups. This liquid is essential for generating the steam needed for pressure cooking. Next, carefully place a trivet (the metal rack that usually comes with your Instant Pot) inside the inner pot, ensuring it rests securely above the water. The trivet keeps your ham elevated, preventing it from boiling in the liquid and allowing it to steam perfectly.
Pro Tip: Always use cold water! It might seem counter-intuitive, but starting with cold water is crucial for consistent results. Using warm or hot water will cause the Instant Pot to come to pressure much faster than anticipated, potentially skewing the carefully calculated cooking times and leading to an unevenly cooked ham. Cold water ensures the Instant Pot follows its intended pressure-building cycle, resulting in perfectly timed cooking.
Step Two: Mix Up Your Irresistible Honey Pineapple Glaze
In a small bowl or a glass measuring cup, combine the key ingredients for your flavorful glaze: vibrant 100% pineapple juice, rich golden honey, and classic brown sugar. Whisk these three ingredients together thoroughly until the brown sugar has completely dissolved and you have a smooth, well-integrated mixture. This simple glaze is where much of the ham’s incredible flavor comes from, offering a delightful balance of sweetness and a hint of tang.
Important Note: Double the glaze for larger hams! If your ham weighs 6 pounds or more, it’s highly recommended to double the glaze recipe. Larger hams have more surface area and depth, requiring more glaze to ensure every slice is equally flavorful and moist. Don’t hesitate to prepare extra – you’ll want every bit of that delicious flavor distributed throughout your ham!
Step Three: Glaze the Ham and Prepare for Pressure Cooking
Carefully unwrap your fully cooked ham, removing any plastic coverings or bone guards. Lay out a large sheet of heavy-duty aluminum foil on a clean surface. Place the ham directly onto the center of the foil. Now, fold up the edges of the foil around the ham to create a shallow, protective “bowl” shape. If you’re using a spiral-sliced ham, gently separate some of the slices; this clever technique allows the glaze to permeate deep into the ham, ensuring maximum flavor infusion throughout the cooking process. Generously pour your prepared honey-pineapple glaze over the entire ham, making sure it coats all visible surfaces and seeps into the separated slices. Finally, securely wrap the foil completely around the ham, sealing it tightly to trap all the moisture and flavor. Carefully place the foil-wrapped ham onto the trivet inside your prepared Instant Pot.
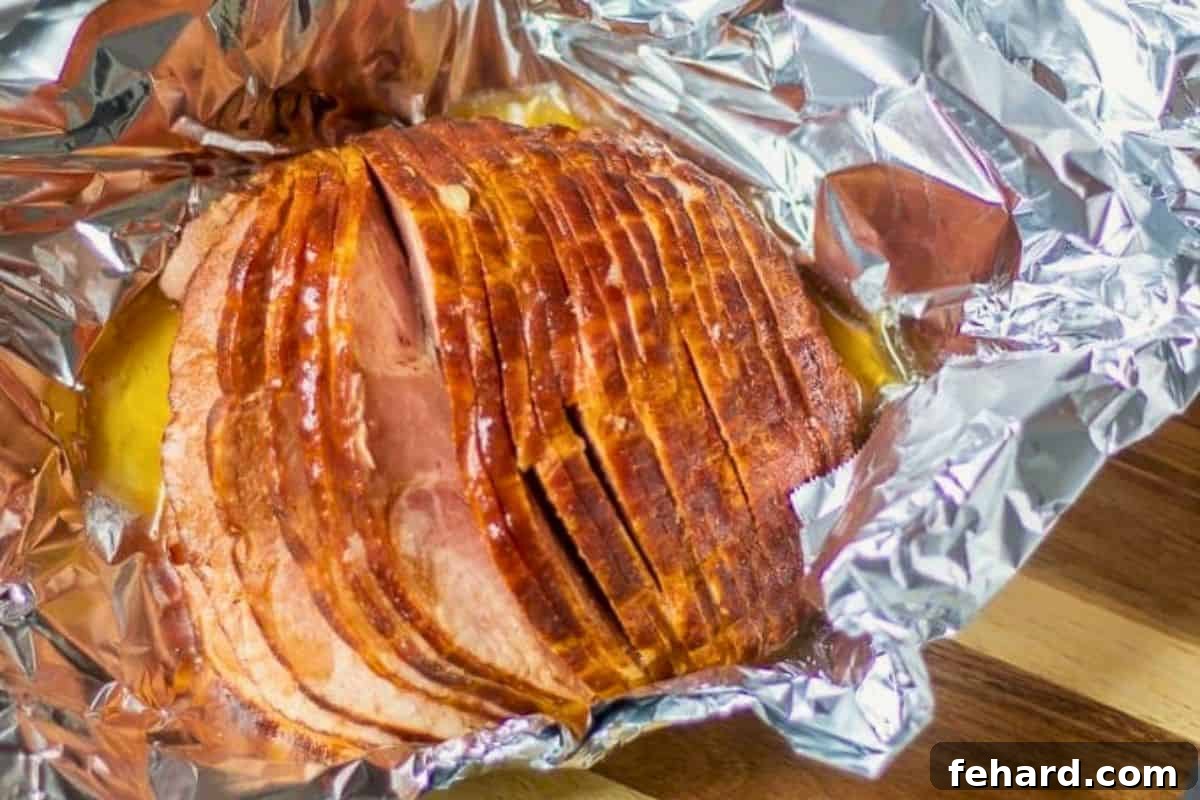
Step Four: Initiate the Pressure Cooking Cycle for Tender Ham
Once your ham is securely in place and the Instant Pot lid is locked, ensure that the steam release valve is set to the “Sealing” position. Now, select the “Manual” or “Pressure Cook” function on your Instant Pot (the exact button name may vary by model) and set the cooking time according to these essential guidelines:
- For Spiral-Sliced Ham: Cook for 2 minutes per pound on high pressure.
- For Unsliced Ham (Bone-in or Boneless): Cook for 3 minutes per pound on high pressure.
Crucial Adjustment: Don’t forget to account for the foil! The foil wrapping creates a layer of insulation around the ham, which means it takes slightly longer for the ham to reach the desired internal temperature under pressure. To ensure your ham is perfectly heated through, you must add extra time to your total cook duration: add 10 extra minutes to the cook time if you are using heavy-duty foil. If you are using standard, regular aluminum foil, add 5 extra minutes instead. This small adjustment is vital for a thoroughly warmed and delicious ham.
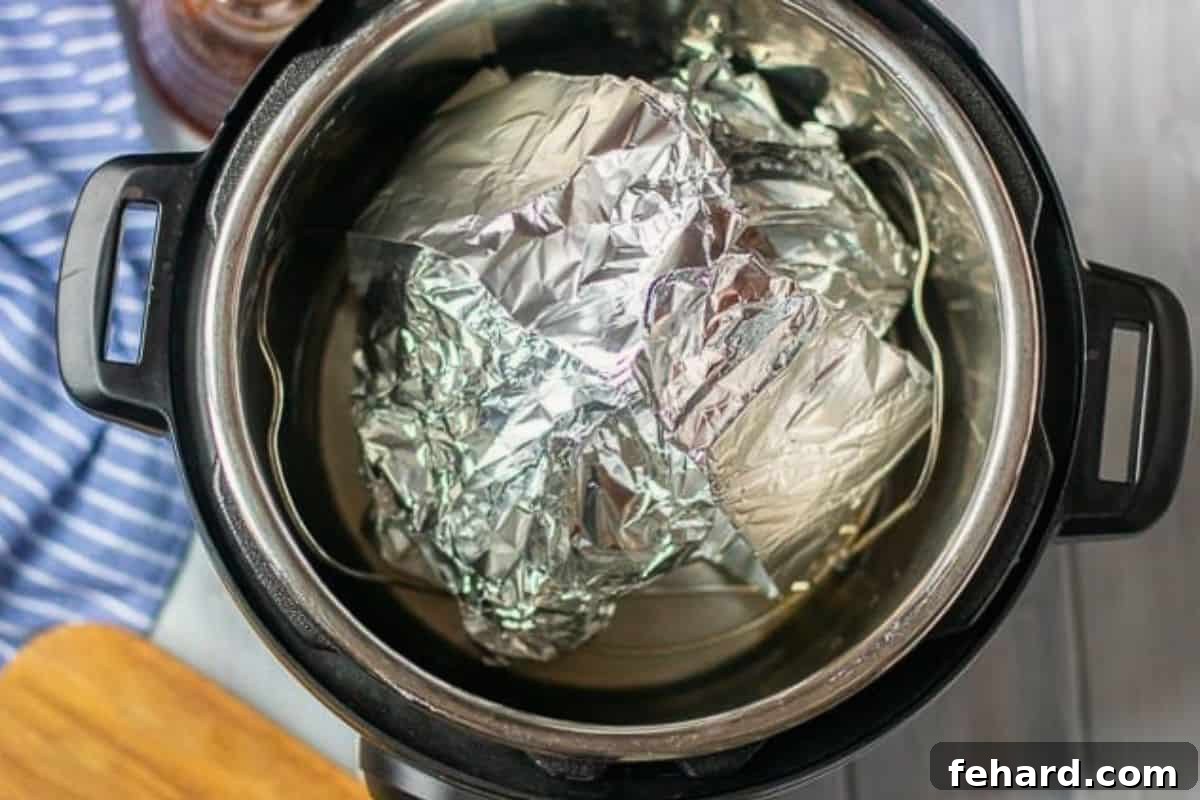
Step Five: Natural Pressure Release and Temperature Verification
Once the Instant Pot completes its cooking cycle, do not manually release the pressure immediately. Instead, allow for a full natural pressure release (NPR). This means letting the pressure dissipate on its own, which typically takes between 10 to 15 minutes. Natural pressure release is a critical step for keeping the ham incredibly juicy and tender, as it allows the internal temperature to stabilize gradually, preventing the meat fibers from contracting and becoming tough. You’ll know the pressure is fully released when the float valve drops.
Always Check the Internal Temperature: Since most hams are pre-cooked, our primary goal is to ensure it is thoroughly warmed through while absorbing maximum flavor. After the natural pressure release, carefully open the lid and use an instant-read meat thermometer to check the internal temperature. Insert the thermometer into the thickest part of the ham, being careful to avoid any bone. The ham is perfectly warmed and ready when its internal temperature reaches 145°F (63°C). If the temperature is lower, simply reseal the Instant Pot and pressure cook for an additional 3-5 minutes, then perform another quick natural release before rechecking.
Step Six: Slice, Serve, and Savor Every Flavorful Bite
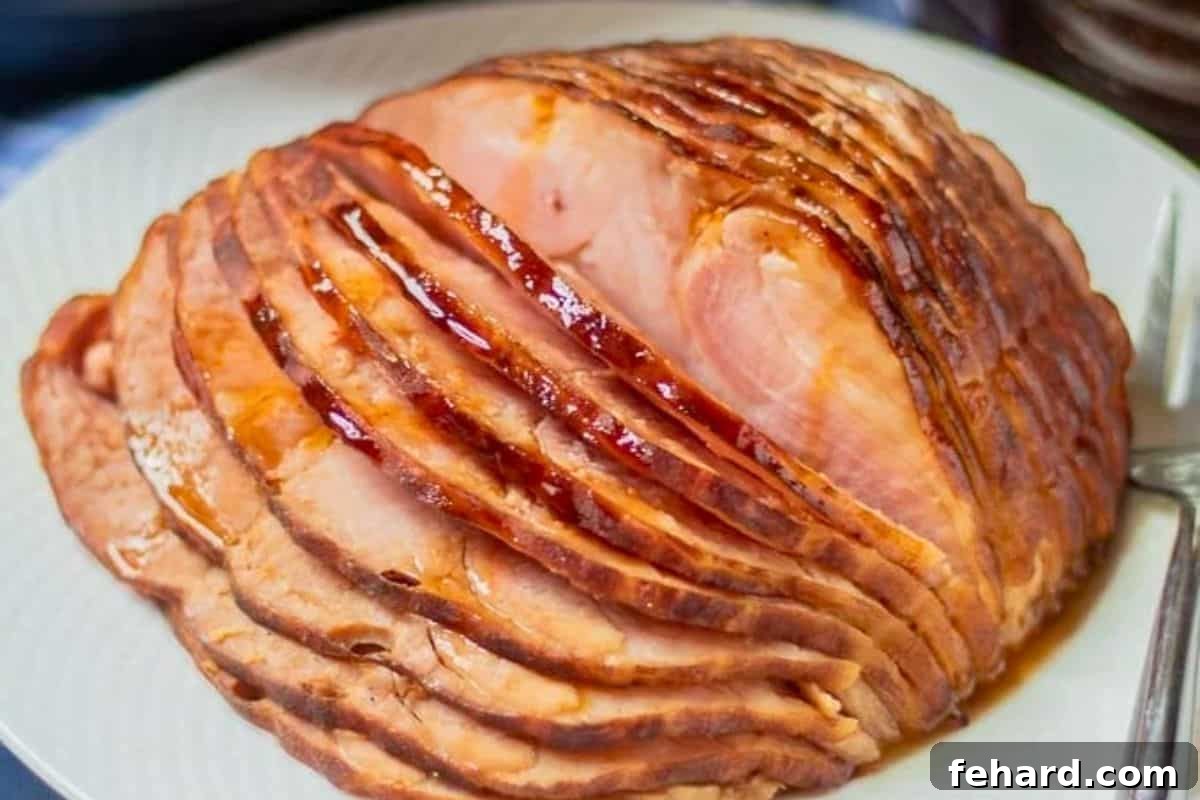
Once your ham has reached the perfect internal temperature, carefully remove it from the Instant Pot. Gently unwrap the foil, being sure to meticulously reserve all the accumulated cooking liquid left inside the foil. This flavorful liquid is pure gold! Transfer the ham to a clean cutting board and allow it to rest for at least 10 minutes. Resting is a non-negotiable step; it allows the juices within the ham to redistribute evenly throughout the meat, ensuring that every slice remains incredibly moist and succulent. After resting, slice your ham to your desired thickness, and for an extra burst of incredible honey-pineapple flavor, spoon some of that reserved cooking liquid over each serving.
Optional: For a thicker, richer glaze? If you prefer a more syrupy, decadent glaze to coat your ham, the reserved cooking liquid can be easily thickened. You’ll find detailed instructions in the recipe card below for creating a simple cornstarch slurry and utilizing the Instant Pot’s “Sauté” function to reduce and thicken the liquid to your desired consistency. While the natural pan juices are wonderfully flavorful on their own, this extra step provides a beautiful, glossy finish for those who enjoy a more pronounced glaze.
Creative Recipe Variations to Elevate Your Instant Pot Ham
While the classic honey pineapple glaze is undeniably delicious, this Instant Pot ham recipe is incredibly adaptable. Don’t hesitate to experiment with these exciting variations to customize the flavor profile to your liking, or to simply use ingredients you have readily available:
- Swap Honey for Maple Syrup: For a delightful change of pace, substitute an equal amount of pure maple syrup for the honey. This simple, straight swap creates a richer, more autumnal flavor that complements ham beautifully, offering a distinct and equally irresistible sweetness.
- Pineapple Juice Alternatives: If pineapple juice isn’t on hand or you prefer a milder fruit note, 100% apple juice is an excellent substitute. While pineapple juice provides enzymes that contribute to tenderization, apple juice still imparts a lovely sweetness and ensures ample moisture. Cranberry juice is another great option for a more tart, festive flavor.
- Reduce Sweetness: For those who prefer a less intensely sweet ham, you can easily omit the brown sugar from the glaze recipe. You’ll still achieve plenty of natural sweetness and deep flavor from the honey or maple syrup alone. This is an ideal choice for a more savory ham profile.
- Add Warming Spices to the Glaze: Infuse your ham with the classic, aromatic flavors of a traditional holiday ham by adding warming spices to your glaze. A fantastic blend includes ½ teaspoon ground cinnamon, ¼ teaspoon ground nutmeg, and a delicate ⅛ teaspoon of ground cloves. Whisk these spices into your liquid glaze ingredients for an extra layer of complexity and festive aroma.
- Experiment with Different Glaze Recipes: The beauty of the foil and trivet method is its versatility with glazes. It creates a contained environment that works with almost any pre-made or homemade glaze. Whether you prefer a zesty mustard glaze, a sweet cherry or apricot preserve glaze, or a unique blend of your own, simply prepare your chosen glaze and apply it as directed. The core cooking times for the ham will remain the same.
- Cooking Without Foil (Advanced): While wrapping in foil is highly recommended for consistent moisture and burn prevention, it is possible to cook ham without it if you prefer. However, this requires a few important modifications: replace the water in the inner pot with an equal amount of pineapple juice or apple juice to provide both steaming liquid and flavor. Glaze the ham directly with a very simple mixture, ideally equal parts honey and brown sugar. Place the glazed ham directly on the trivet over the juice. Pressure cook on high pressure for 2 minutes per pound for sliced ham or 3 minutes per pound for unsliced ham, followed by a natural pressure release. Be aware that cooking directly with sugary glazes carries a higher risk of a “BURN” warning, so keep the glaze thin and simple if choosing this method.
- When Your Ham is Too Large for the Instant Pot: Don’t fret if your ham is simply too big to fit inside your Instant Pot! You still have delicious options. In such cases, a traditional oven-baking method with a similar glaze will yield excellent results. My comprehensive recipe for Baked Ham will guide you through preparing a delicious ham, though it will require a longer cooking time.
Maximizing Your Meal: Storage and Reheating for Leftover Ham
Having leftover ham from your Instant Pot creation is truly a gift that keeps on giving! This ham maintains its exceptional moistness and delicious flavor for several days, making it perfect for delightful secondary meals. Here’s how to properly store and reheat your ham to ensure it’s as good as the first day, along with creative ideas for transforming it into new culinary adventures:
- Optimal Storage Practices: To preserve the freshness and quality of your leftover ham, ensure it is stored correctly. Place any remaining ham slices or chunks, along with any reserved cooking juices, in an airtight container. It will remain delicious in the refrigerator for up to 5 days. For longer-term storage, you can freeze the ham in a freezer-safe storage bag or container for up to 3 months. For best results when freezing, consider pre-slicing or cubing the ham, as this simplifies thawing and portioning for future meals.
- Reheating for Retained Juiciness: The key to reheating ham without drying it out is to do so gently and with added moisture. Arrange the ham slices in a shallow, heat-safe dish. Add a small amount of the reserved cooking liquid (if available) or a splash of fresh pineapple or apple juice to the dish. Cover the dish lightly with foil or a lid to trap steam, then reheat in the microwave at 50% power for 1-2 minutes, or until it’s warmed through. Alternatively, reheat gently in a covered skillet over low heat on the stovetop, or in an oven preheated to 300°F (150°C) until warmed through. Avoid high heat, which can quickly dry out the ham.
- Creative Culinary Transformations: Don’t let a single delectable piece of ham go to waste! Leftover ham is incredibly versatile and can be reborn into a variety of exciting dishes. Dice or slice it and incorporate it into any leftover ham recipe you cherish. Some beloved classics include the comforting Instant Pot Ham and Cheese Pasta, a hearty Ham and Egg Breakfast Casserole (perfect for weekend brunches), or the irresistibly cheesy and satisfying Cheesy Potatoes and Ham. Beyond these, consider adding ham to frittatas, sandwiches, split pea soup, quiches, stir-fries, or even pizzas for a quick and flavorful meal.
Elevate Your Feast: Perfect Side Dishes for Instant Pot Ham
A beautifully cooked ham deserves an equally impressive supporting cast of side dishes. The sweet and savory notes of your Instant Pot Ham pair wonderfully with a diverse range of flavors and textures. Here are some delectable suggestions to complete your meal and create a truly unforgettable dining experience:
- Sweet and Creamy Corn Casserole: A comforting, slightly sweet side that perfectly balances the savory ham.
- Decadent Mashed Potato Casserole: Rich and creamy, a classic pairing that provides a smooth contrast.
- Healthified Sweet Potato Casserole: A nutritious yet sweet option that complements the glaze.
- Comforting Funeral Potatoes: Cheesy and satisfying, these potatoes are always a crowd-pleaser.
- Cheesy Broccoli Rice Casserole: A wholesome and cheesy vegetable-infused side dish.
- Roasted Asparagus with Lemon Zest: Offers a fresh, slightly bitter counterpoint to the ham’s richness.
- Green Bean Almondine: A simple, elegant side with a lovely crunch from toasted almonds.
- Fresh Dinner Rolls with Honey Butter: Perfect for soaking up any delicious juices and a touch more sweetness.
Instant Pot Honey Glazed Ham Recipe
Kristen Chidsey
15 servings
5 minutes
16 minutes
25 minutes
46 minutes
Print Recipe
This recipe for Instant Pot Ham delivers a juicy, tender, honey-glazed ham in record time, perfect for any occasion!
Recipe Video
Ingredients
- 3-5 pound cooked ham, preferably spiral sliced
- ½ cup 100% pineapple juice
- ⅓ cup honey
- 2 tablespoons brown sugar
- 1 tablespoon cornstarch, optional, for thickening glaze
- 2 tablespoons cold water, for slurry + more for pressure cooking
Instructions
Instant Pot Honey Baked Ham
-
Place the trivet inside the inner pot of your pressure cooker. Pour 1 cup of cold tap water into the inner pot for a 6-quart model and 1½ cups of water for an 8-quart Instant Pot.
-
Prepare the glaze by whisking together pineapple juice, honey, and brown sugar in a small bowl or glass measuring cup until well combined.
-
Unwrap the ham, discard any plastic caps, and place it on a large sheet of heavy-duty aluminum foil. Fold up the sides of the foil to create a bowl-like shape around the ham. If using a spiral-sliced ham, gently separate a few slices to allow the glaze to penetrate better. Pour the prepared glaze generously over the ham.
-
Securely wrap the foil around the ham and place the foil-wrapped ham on the trivet inside the prepared Instant Pot. Secure the lid on the Instant Pot and ensure the venting knob is pointed towards the “Sealing” position.
-
Use the manual or pressure cook button to set the cooking time based on your ham type and weight:
- For Spiral-Sliced Ham: Cook for 2 minutes per pound on high pressure.
- For Unsliced Ham: Cook for 3 minutes per pound on high pressure.
Important: Add time for foil! Add 10 extra minutes to the total cook time if using heavy-duty foil. If using regular foil, add 5 extra minutes to the total cook time. This adjustment ensures the ham heats through properly.
-
Once the cooking time has elapsed, allow the pressure to release naturally. This typically takes about 10-15 minutes.
-
Once pressure has been released, carefully open the lid and check the internal temperature of the ham with an instant-read thermometer. Ensure it reaches at least 145°F (63°C). If not, reseal and cook for an additional 3-5 minutes on high pressure, followed by a quick release.
-
Remove the ham from the Instant Pot and carefully unwrap the foil, reserving all the delicious cooking liquid that has accumulated inside. Transfer the ham to a cutting board and let it rest for 10 minutes prior to slicing.
-
After resting, slice the ham and serve it with the accumulated liquid or the optional thickened glaze (instructions follow).
Optional: Honey Ham Glaze Reduction
-
Remove the trivet from inside the pressure cooker and carefully pour out the remaining water. Place the inner pot back inside the pressure cooker. Add the accumulated cooking liquid reserved from the foil into the inner pot, then select the “Sauté” function and bring the liquid to a gentle simmer.
-
In a small bowl, mix together 1 tablespoon of cornstarch and 2 tablespoons of cold water to create a slurry. Whisk this slurry into the simmering liquid in the inner pot. Continue whisking constantly until the glaze thickens and reduces to your desired consistency, usually within 3-5 minutes. Pour this rich, thickened glaze over your sliced ham just before serving.
Equipment
-
Electric Pressure Cooker (6 or 8 quart)
-
Heavy-Duty Aluminum Foil
-
Instant-Read Meat Thermometer (optional, but highly recommended for accuracy)
Recipe Notes & Expert Tips
Choosing Your Ham: This recipe is incredibly versatile and works with virtually any type of fully cooked ham (smoked, cured, uncured, boneless, or bone-in) as long as it fits into your Instant Pot. A 6-quart Instant Pot typically accommodates a ham weighing approximately 5 to 6 pounds, while an 8-quart Instant Pot can comfortably hold a larger 7-8 pound ham. Always check your Instant Pot’s specific capacity before purchasing your ham.
For Hams Over 6 Pounds: To ensure adequate flavor coverage and juicy results for larger hams, especially those over 6 pounds, it is strongly recommended to double the glaze ingredients. This ensures every bite is infused with the delicious honey-pineapple flavor.
Adding Spices to Your Glaze: For a more complex, traditional holiday ham flavor, consider adding warming spices to your honey glaze. A delightful blend includes ½ teaspoon ground cinnamon, ¼ teaspoon ground nutmeg, and ⅛ teaspoon ground cloves. Whisk these spices in with the other glaze ingredients for an aromatic boost.
Sweet and Tangy Glaze Alternative: If you’re looking for a glaze with a zesty and slightly more complex flavor profile, try this alternative: mix together ⅓ cup pineapple juice, ¼ cup apricot preserves, 1 tablespoon Dijon mustard, 1 tablespoon brown sugar, 1 teaspoon prepared horseradish, ¼ teaspoon cinnamon, and ⅛ teaspoon each of ground cloves, nutmeg, and allspice. Pour this vibrant glaze over the ham before wrapping it in foil.
Cooking Without Foil (Advanced Users): While the foil method is highly recommended for consistent moisture retention and preventing burn notices, it is possible to cook ham without it with a few important modifications. Instead of plain water, use an equal amount of pineapple juice or apple juice in the inner pot to provide both steaming liquid and flavor. Glaze the ham directly with a simple mixture of equal parts honey and brown sugar. Place the glazed ham directly on the trivet over the juice. Pressure cook on high pressure for 2 minutes per pound for sliced ham or 3 minutes per pound for unsliced ham, followed by a natural pressure release. Be mindful that cooking directly with sugary glazes carries a higher risk of a “BURN” warning, so keep the glaze thin and simple if you choose this method.
Storage Recommendations: Store any leftover sliced ham and reserved cooking juices in an airtight container in the refrigerator for up to 5 days. For longer preservation, freeze the ham in a freezer-safe bag or container for up to 3 months. Always thaw frozen ham in the refrigerator overnight before reheating for best results.
Nutrition Information
(Approximate values per serving, based on 15 servings)
Calories: 267 kcal | Carbohydrates: 8g | Protein: 32g | Fat: 10g | Saturated Fat: 3g | Cholesterol: 93mg | Sodium: 1795mg | Potassium: 446mg | Sugar: 8g | Vitamin C: 0.8mg | Calcium: 13mg | Iron: 1.4mg
Nutrition information is automatically calculated and should only be used as an approximation. Actual values may vary based on ingredients and preparation methods.
Loved this recipe? Share your culinary triumph!
Mention @amindfullmom or tag #amindfullmom on Instagram to show us your delicious creation!
This post was originally published in 2018 and comprehensively updated in 2025 to include even more expert tips and helpful information.