
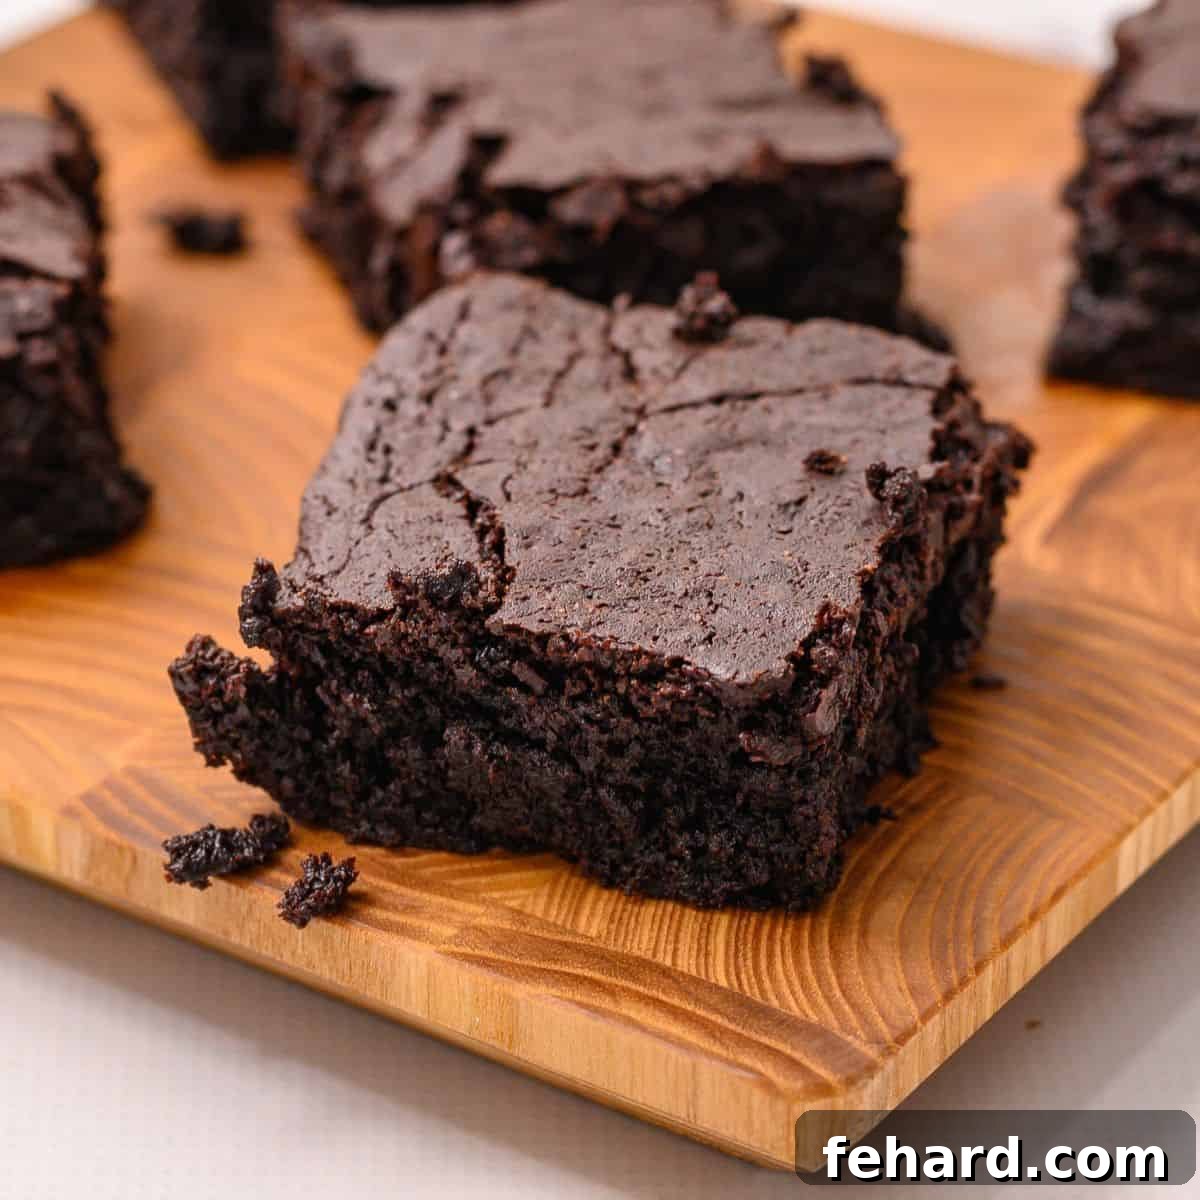
The Best Homemade Fudgy Brownies: A Ghirardelli Copycat Recipe
Prepare to permanently ditch that boxed mix! This incredibly rich, undeniably fudgy, and surprisingly easy recipe for Homemade Brownies will become your new favorite. Crafted with common pantry staples and requiring only minimal effort, this brownie recipe delivers a truly remarkable dessert that tastes just like a copycat version of Ghirardelli brownies – but without any artificial ingredients or preservatives.
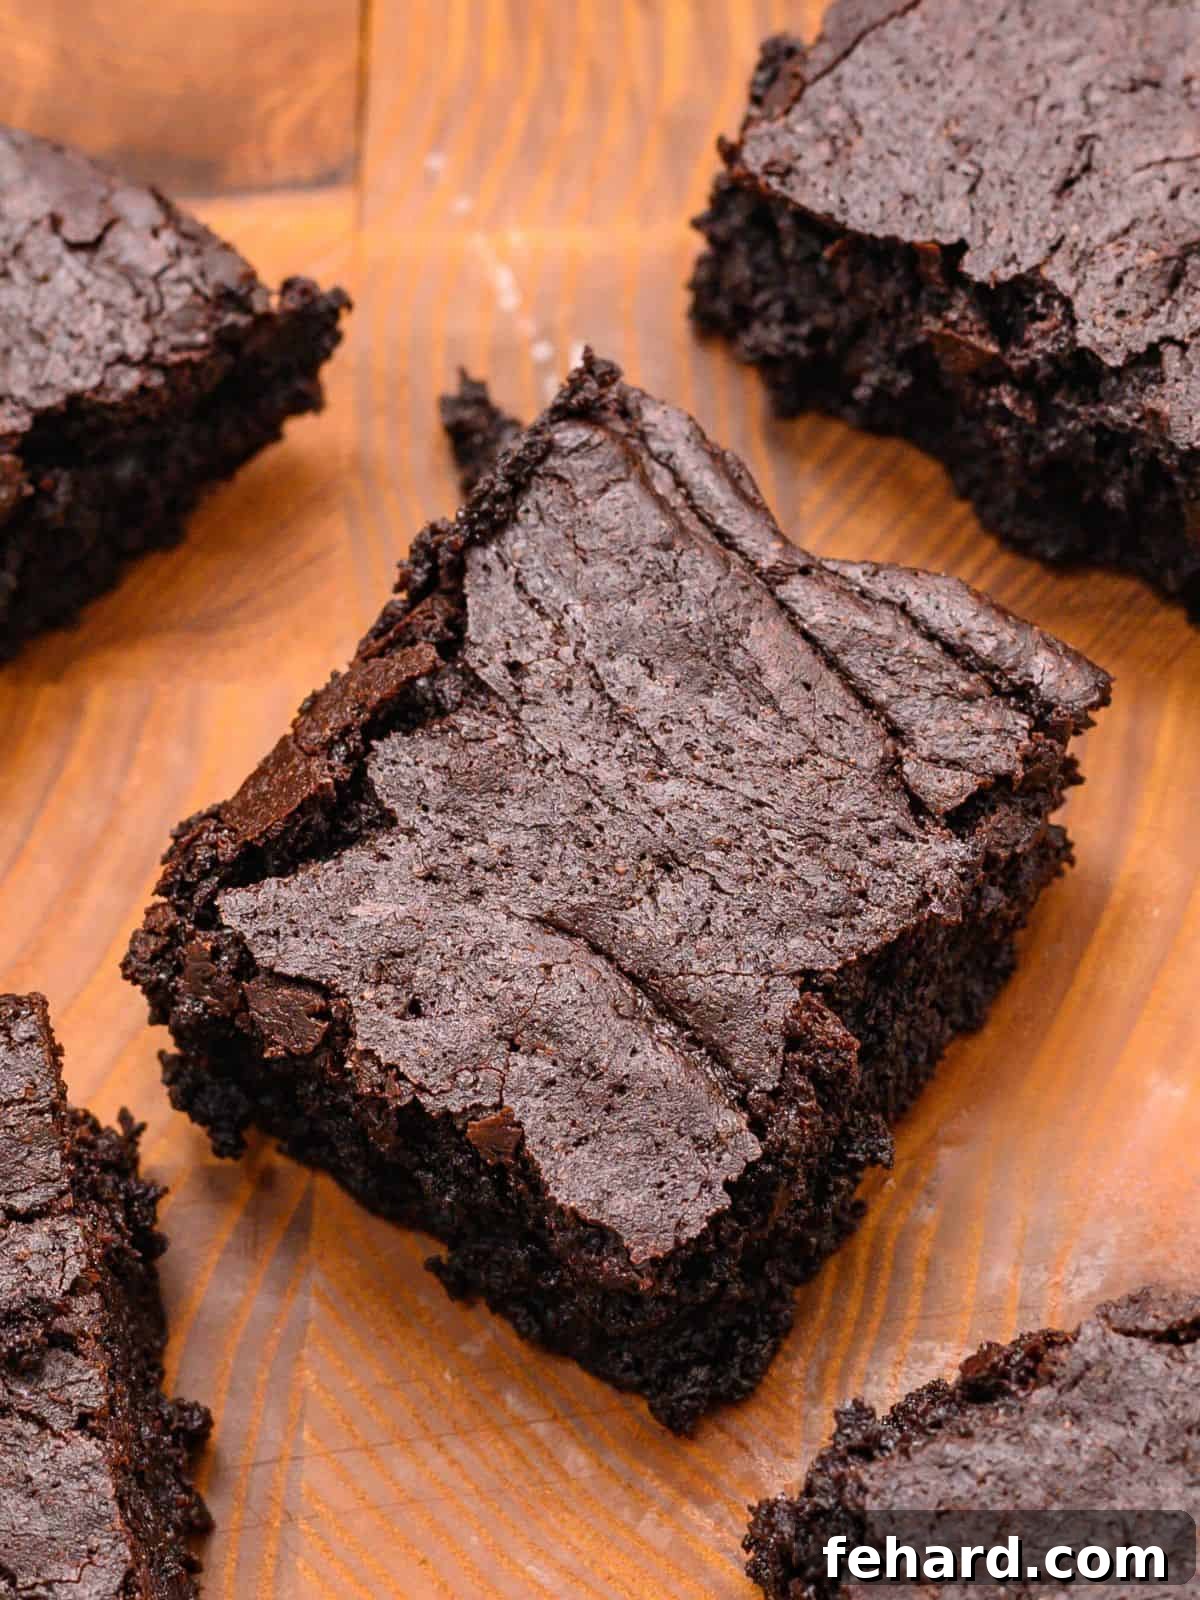
Unlocking the Ghirardelli Secret: A Family Recipe for Perfect Brownies
Truth be told, I never intentionally set out to create a copycat version of Ghirardelli’s popular brownie mix. Yet, time and again, when I shared my homemade brownies with friends and family, I’d hear the same delighted comment: “These are SO good, you must have used a box of Ghirardelli brownie mix!” It’s a compliment I’ve grown to cherish, as it speaks volumes about the incredible richness and texture of this cherished family recipe.
This recipe, passed down through generations from my Great Aunt Katherine, has graced our family kitchen for decades. It consistently produces homemade brownies that are luxuriously chewy, intensely rich, wonderfully gooey, and studded with irresistible pools of melted chocolate. The results are strikingly similar to those achieved with a premium boxed mix like Ghirardelli, but with the added satisfaction of knowing exactly what goes into them – no questionable oils or preservatives, just pure, wholesome ingredients. This means a superior taste and a healthier indulgence.
What makes this recipe even better? It’s remarkably simple to prepare, making it accessible for bakers of all skill levels. Even the most discerning brownie connoisseurs are guaranteed to be impressed by its deep chocolate flavor and perfect fudgy consistency. Get ready to bake a batch that will convert even the most loyal boxed-mix devotees!
Happy Cooking! xo Kristen
Essential Ingredients for Your Fudgy Brownies
Great brownies start with great ingredients. While this recipe uses pantry staples, selecting quality components will elevate your brownies from good to extraordinary. Here’s a closer look at what you’ll need and why each element is key:
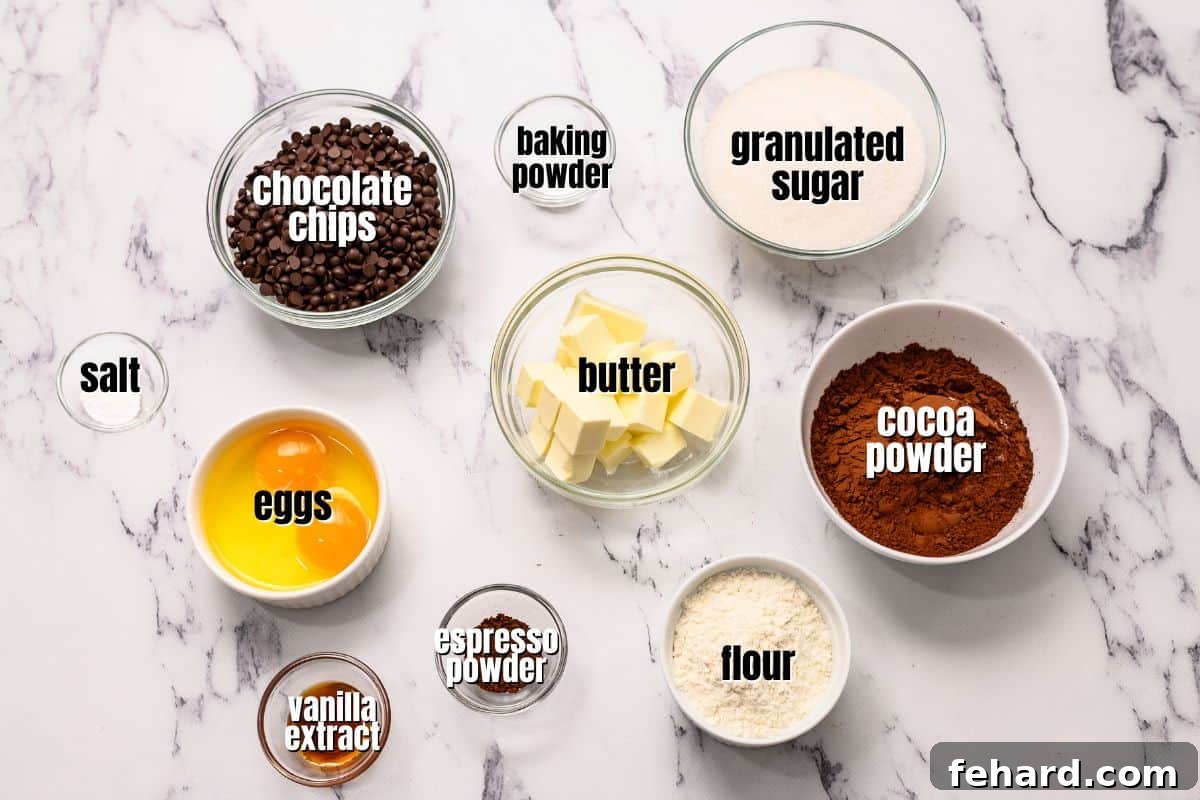
- Unsalted Butter: Using unsalted butter gives you control over the salt content in your brownies. Butter contributes to the rich flavor and fudgy texture. For the best results, use a good quality butter, as its flavor will shine through.
- Granulated Sugar: Sugar isn’t just for sweetness; it plays a crucial role in creating that signature crackly top and the chewy, fudgy texture. When melted with butter, it helps create a glossy, almost caramelized layer.
- Cocoa Powder: This is where the intense chocolate flavor comes from! Be sure to use a good-quality unsweetened cocoa powder, not hot cocoa mix (which contains sugar and milk solids). For an even richer, darker brownie, opt for Dutch-processed cocoa powder. Dutch-processed cocoa is less acidic, creating a darker color and a milder, smoother chocolate flavor that complements the brownies beautifully.
- All-Purpose Flour: Unlike cakey brownies that use more flour, our fudgy recipe uses just enough to provide structure without making them dry or dense. Measuring flour correctly (spooned into the cup and leveled, not scooped) is vital to avoid tough brownies.
- Baking Powder: A small amount of baking powder provides just enough lift to prevent the brownies from being overly dense, while still maintaining that desirable fudgy center.
- Table Salt: Salt is essential for balancing and enhancing the deep chocolate flavor. It prevents the brownies from tasting overly sweet and brings out the nuances of the cocoa.
- Chocolate Chips: Adding chocolate chips is the secret to achieving those outrageous, deep chocolate pools and an extra layer of decadence. You can use sweet, dark, milk chocolate chips, or even a mix! Good quality chocolate chips will melt more smoothly and provide a superior flavor. Alternatively, chop up a good bar of your favorite chocolate for varying textures throughout the brownie.
- Large Eggs: Eggs provide structure, moisture, and help bind the ingredients together. They contribute to the chewiness and moistness of the fudgy texture.
- Vanilla Extract: Pure vanilla extract is a non-negotiable flavor enhancer in chocolate desserts. It deepens and rounds out the chocolate flavor, adding a warm, aromatic note.
- Espresso Powder: This is my secret weapon for truly exceptional brownies! Espresso powder does not make your brownies taste like coffee. Instead, it acts as a flavor amplifier, intensifying the rich chocolatey taste without adding any discernable coffee flavor. Just a teaspoon makes a world of difference, making the chocolate notes sing louder and deeper. Don’t skip it if you want the best-flavored brownies!
Crafting Perfection: A Step-by-Step Guide to Fudgy Brownies
Creating these divine homemade brownies is simpler than you might imagine. Follow these detailed steps to ensure every batch is perfectly fudgy, rich, and irresistible. You’ll find the full ingredient quantities and precise instructions in the comprehensive recipe card below.
- Prepare Your Pan & Oven: Begin by preheating your oven to 325°F (165°C). This ensures your brownies bake evenly from the moment they enter the oven. Next, line an 8×8-inch square glass baking pan with parchment paper, leaving an overhang on two sides. This creates “handles” that make lifting the cooled brownies out of the pan incredibly easy, ensuring clean cuts and no sticking. Greasing the pan thoroughly is an alternative, but parchment is highly recommended for ease.
- Melt Butter with Sugar and Espresso: In a small, heavy-bottomed saucepan, melt the unsalted butter over low heat. Once the butter is completely melted and shimmering, add the granulated sugar and espresso powder. Whisk these ingredients constantly over low heat for 2-3 minutes. The goal here is for the sugar to begin dissolving into the butter, which is crucial for achieving that desirable glossy, crackly crust on top of your brownies. Remove the saucepan from the heat immediately and set it aside to cool slightly while you prepare your dry ingredients. This brief cooling period helps prevent the eggs from scrambling when added later.
- Sift Dry Ingredients for Lightness: Over a large mixing bowl, sift together the all-purpose flour, cocoa powder, baking powder, and table salt. Sifting is an important step that aerates the dry ingredients, removes any lumps, and ensures they are evenly distributed throughout the batter. This results in a lighter, more uniform brownie texture. After sifting, add your chocolate chips to the dry mixture and toss them gently to coat. Coating the chocolate chips with flour prevents them from sinking to the bottom of the pan during baking, ensuring delicious pockets of melted chocolate throughout every bite.
- Combine Wet and Dry Ingredients: Once the butter and sugar mixture has cooled slightly (it should still be warm but not hot), whisk in the two large eggs and vanilla extract. Whisk until just combined, creating a smooth wet mixture. Pour this wet mixture into the bowl with your sifted dry ingredients and chocolate chips. Gently combine the batter using a wooden spoon or a spatula. Mix only until there are no visible pockets of dry flour remaining. Do NOT overmix! Overmixing develops the gluten in the flour, which can lead to tough, cakey brownies rather than the fudgy, chewy texture we’re aiming for. A few small lumps are perfectly fine.
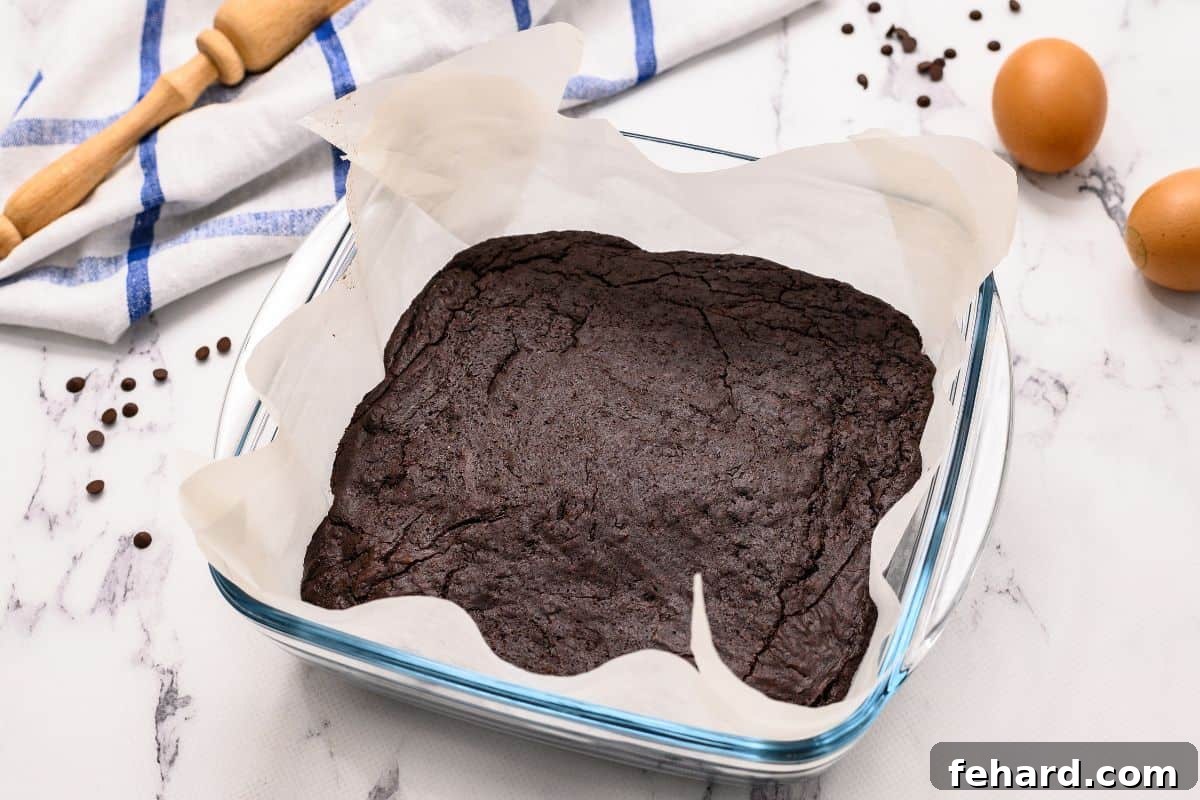
- Bake to Fudgy Perfection: Transfer the brownie batter into your prepared parchment-lined baking pan. Gently spread the batter evenly using your spatula, ensuring it reaches all corners of the pan. Place the pan in the preheated oven and bake for 30-35 minutes. Baking time can vary slightly depending on your oven, so keep an eye on them. The brownies are ready when the edges are set, but the center still looks slightly soft and fudgy. A toothpick inserted into the center should come out with moist crumbs attached, but not wet batter. Avoid overbaking, as this is the key to maintaining their moist, fudgy texture.
- Cool Before Slicing: While the aroma of warm, gooey brownies fresh from the oven is incredibly hard to resist, patience is a virtue here! To ensure your brownies hold their shape and slice cleanly, it is absolutely essential to allow them to cool. First, cool the brownies in the pan on a wire cooling rack for at least 10 minutes. Then, using the parchment paper overhangs, carefully lift the brownies out of the pan and transfer them to the cooling rack to cool for an additional 10 minutes, or even longer, before attempting to slice. Slightly warm brownies are divine, but a completely cooled brownie provides the best texture and clean cuts.
- Serve and Enjoy: Whether you prefer them plain, slightly warm, or completely cooled, you simply can’t go wrong with a rich, homemade fudgy brownie. Enjoy them as they are, or elevate your dessert experience by pairing a warm brownie with a generous scoop of homemade vanilla ice cream and a luscious drizzle of hot fudge sauce for a decadent brownie sundae.
Kristen’s Key Tips for Unforgettable Brownies
Achieving brownie perfection is within reach with a few simple guidelines. These insights, honed over years of baking, will help ensure your brownies are consistently amazing:
- Measure Accurately: Precision is paramount in baking, especially for flour and cocoa powder. Using too much of either can result in dense, dry, or cakey brownies instead of the desired fudgy texture. To measure flour correctly, spoon it into your measuring cup until overflowing, then level it off with a straight edge (like the back of a knife). Better yet, consider using a kitchen scale for the most accurate results, as it eliminates inconsistencies.
- The Right Baking Dish Matters: For baking brownies, a glass square 8×8 baking dish is highly recommended. Glass pans conduct heat more gently and evenly than metal pans, which can heat up quickly and cause the edges and bottom of your brownies to become crispier or even overbaked while the center remains undercooked. The even heat distribution of glass helps achieve that uniform fudginess throughout.
- Avoid Overbaking at All Costs: This is arguably the most crucial tip for fudgy brownies. Brownies continue to cook slightly even after they’ve been removed from the oven. Bake only until the edges are set and the center is just barely firm but still looks moist and slightly jiggly. A toothpick inserted into the center should come out with a few moist crumbs attached, but not wet batter. If it comes out completely clean, your brownies are likely overbaked and will be drier or cakey.
- Patience with Cooling: Resist the urge to slice warm brownies! While tempting, slicing hot brownies almost always results in a crumbly, messy affair. Allowing them to cool completely, or at least mostly, gives them time to set up properly. This allows the internal structure to firm up, making for clean, neat slices and that desirable dense, fudgy texture.
- Don’t Overmix the Batter: After combining the wet and dry ingredients, mix just until the flour streaks disappear. Overmixing develops the gluten in the flour, leading to a tougher, chewier texture more akin to a cake. For fudgy brownies, a delicate touch is best.
Customize Your Brownies: Delicious Variations and Dietary Adjustments
This brownie recipe is wonderfully versatile, allowing for numerous modifications to suit different tastes or dietary needs. Feel free to get creative and make them your own!
- Dairy-Free Brownies: To make these brownies suitable for a dairy-free diet, simply substitute your favorite non-dairy stick butter (such as a plant-based butter alternative) for the regular butter. Ensure you also use dairy-free chocolate chips. While the texture might be slightly less fudgy than the original, they will still turn out incredibly delicious and satisfying. Remember to omit the added salt if your non-dairy butter is salted.
- Gluten-Free Brownies: For a gluten-free version, replace the all-purpose flour with a high-quality 1:1 gluten-free all-purpose flour blend. Ensure the blend contains xanthan gum, or add a small pinch if it doesn’t, to help with structure and elasticity. The results are wonderfully rich and still maintain an excellent fudgy texture.
- Egg-Free Brownies: Crafting eggless fudgy brownies is possible! For the best fudgy texture, I recommend using 1 tablespoon of aquafaba (the liquid from a can of chickpeas) in place of each large egg called for in the recipe. Aquafaba provides a similar binding and emulsifying property to eggs, resulting in a superior fudgy texture compared to alternatives like applesauce or flax eggs, which can sometimes lead to a cakeier result.
- Add Nuts for Extra Crunch: If you enjoy the delightful crunch of nuts in your brownies, feel free to fold in up to ½ cup of chopped walnuts or pecans when you add the chocolate chips to the dry ingredients. For an enhanced flavor, consider toasting the nuts lightly before adding them to the batter.
- Spice It Up: For a hint of warmth, add a pinch of cayenne pepper or chili powder to the cocoa powder for a Mexican hot chocolate twist.
- Caramel or Peanut Butter Swirl: After pouring the batter into the pan, dollop spoonfuls of warmed caramel sauce or melted peanut butter over the top. Use a knife or skewer to gently swirl it through the batter before baking for beautiful marbling and added flavor.
- A Dash of Sea Salt: For a sophisticated touch that enhances the chocolate flavor, sprinkle a little flaky sea salt over the top of the brownies immediately after they come out of the oven. The salt crystals provide a lovely contrast and a subtle pop of flavor.
Serving tip
Elevate Your Dessert: How to Make the Best Brownie Sundae
While these homemade brownies are undeniably a rich and decadent dessert all on their own, they also form the perfect foundation for the BEST brownie sundaes imaginable! Imagine sinking your spoon into this heavenly creation:
Start with a warm, fudgy brownie, its chocolate aroma filling the air. Top it with a generous scoop of creamy homemade vanilla ice cream, allowing it to gently melt into the warm brownie. Drizzle liberally with warm, luscious hot fudge sauce, creating rivers of molten chocolate. Crown this masterpiece with a swirl of fluffy homemade whipped cream, a scattering of colorful sprinkles, and perhaps a cherry on top for that classic touch. This delightful combination of textures and temperatures – warm, cold, fudgy, creamy, sweet – makes for an unforgettable dessert experience. It’s truly my personal favorite dessert, a perfect indulgence for any occasion!
More Irresistible Chocolate Desserts to Explore
If you’re a chocolate lover, there’s always room for more! Once you’ve mastered these fudgy brownies, here are some other chocolate-centric treats you might enjoy:
- Classic Texas Sheet Cake
- Effortless Microwave Fudge
- Easy Crockpot Candy Clusters
- Decadent Instant Pot Lava Cakes
- Simple & Customizable Chocolate Bark
Homemade Fudgy Brownies Recipe
Yields: 16 servings
Prep time: 10 minutes
Cook time: 30-35 minutes
Total time: Approximately 40-45 minutes (plus cooling)
Ingredients
- ½ cup unsalted butter (1 stick)
- 1 cup granulated sugar
- 1 teaspoon espresso powder
- ¾ cup Dutch cocoa powder (or good quality unsweetened cocoa)
- ½ cup all-purpose flour
- ½ teaspoon baking powder
- ¼ teaspoon table salt
- 1 cup semisweet or milk chocolate chips
- 2 large eggs
- 2 teaspoons vanilla extract
Instructions
- Preheat the oven to 325℉/165℃. Line an 8×8-inch square glass baking pan with parchment paper, leaving an overhang on two sides for easy removal.
- In a small saucepan, melt the ½ cup unsalted butter over low heat. Once melted, add 1 cup granulated sugar and 1 teaspoon espresso powder. Whisk and simmer over low heat for 2-3 minutes until the sugar begins to melt into the butter, whisking often. Remove from the stove and set aside to cool slightly.
- Sift ¾ cup Dutch cocoa powder, ½ cup all-purpose flour, ½ teaspoon baking powder, and ¼ teaspoon table salt into a large mixing bowl. Add 1 cup semisweet or milk chocolate chips and toss gently to coat them with the dry mixture.
- Once the butter mixture has cooled, whisk in 2 large eggs and 2 teaspoons vanilla extract. Pour this wet mixture into the dry ingredients. Mix together with a wooden spoon or spatula until JUST combined. Be careful not to overmix, as this can lead to tough brownies.
- Pour the brownie batter into the prepared pan and gently spread it evenly.
- Bake brownies for 30-35 minutes, or until the center is set but still looks soft and slightly jiggly. A toothpick inserted into the center should come out with moist crumbs attached.
- Cool the brownies in the pan on a cooling rack for at least 10 minutes. Then, use the parchment paper overhangs to carefully lift the brownies out of the pan and transfer them to the cooling rack. Let them cool for an additional 10 minutes, or longer, before slicing.
Equipment
- 8×8 baking pan
- Parchment Paper
- Small saucepan
- Large mixing bowl
- Whisk
- Spatula or wooden spoon
Notes
- Cocoa Powder: Always use unsweetened cocoa powder, and check its expiration date for optimal flavor. Dutch-processed cocoa yields a darker, less bitter brownie.
- Espresso Powder: This ingredient is a flavor enhancer for chocolate, it will not make your brownies taste like coffee. It can be omitted or replaced with decaffeinated espresso powder if preferred.
- Parchment Paper: While recommended for easy removal, parchment paper is not strictly necessary. You can grease and flour the pan thoroughly as an alternative.
- Baking Dish: A glass baking dish is ideal for even heat distribution and a perfectly fudgy texture. A stainless steel pan can be used in a pinch, but baking times may vary slightly.
- Storage: Store cooled brownies in an airtight container at room temperature for 3-4 days. For longer storage, wrap individual brownies tightly in plastic wrap, then place them in an airtight freezer-safe container or bag. They can be frozen for up to 3 months. Thaw at room temperature.
- Chocolate Chips: Experiment with different types of chocolate chips – semisweet, dark, or milk chocolate. For a gourmet touch, chop up a high-quality bar of chocolate instead of using chips.
- Nuts: If desired, add ½ cup of chopped pecans or walnuts to the batter along with the chocolate chips to the flour mixture.
- Dairy-Free Brownies: Use your preferred non-dairy stick butter and dairy-free chocolate chips. If using unsalted non-dairy butter, add a pinch of salt to the recipe.
- Gluten-Free Brownies: Substitute the all-purpose flour with a 1:1 gluten-free all-purpose flour blend.
- Eggless Brownies: For the best fudgy texture without eggs, use 1 tablespoon of aquafaba (the liquid from a can of chickpeas) for each large egg. This works better than applesauce or flax eggs for achieving true fudginess.
Nutrition
(Please note: Nutrition information is automatically calculated and should be used as an approximation. Per serving based on 16 servings.)
- Calories: 174 kcal
- Carbohydrates: 22g
- Protein: 2g
- Fat: 9g
- Saturated Fat: 5g
- Cholesterol: 37mg
- Sodium: 103mg
- Potassium: 83mg
- Fiber: 1g
- Sugar: 19g
- Vitamin A: 230 IU
- Vitamin C: 0.1 mg
- Calcium: 28mg
- Iron: 0.8mg
Frequently Asked Questions About Fudgy Brownies
- Why are my brownies cakey instead of fudgy?
- Brownies often turn out cakey due to overmixing the batter or overbaking. Overmixing develops the gluten in the flour, leading to a lighter, more cake-like texture. Overbaking also dries out the brownies, robbing them of their moist, fudgy quality. Ensure you mix just until the ingredients are combined and watch your baking time carefully, looking for that slightly soft center.
- How do I get a shiny, crackly top on my brownies?
- The key to a beautiful crackly top lies in properly dissolving the sugar. When you melt the butter and sugar together, whisk them gently over low heat until the sugar crystals begin to dissolve. This creates a sugary crust that bakes into that desirable shiny, crackly layer. Using granulated sugar and not overmixing the batter also contribute to this effect.
- Can I freeze these homemade fudgy brownies?
- Absolutely! These brownies freeze exceptionally well. Once they are completely cooled, wrap individual brownies tightly in plastic wrap, then place them in an airtight freezer-safe container or a heavy-duty freezer bag. They can be frozen for up to 3 months. When ready to enjoy, simply thaw them at room temperature for a few hours, or warm them slightly in the microwave for a fresh-baked experience.
- How long do homemade brownies last at room temperature?
- When stored in an airtight container at room temperature, these homemade fudgy brownies will stay fresh and delicious for 3-4 days. For optimal freshness, you can also store them in the refrigerator, which can extend their shelf life slightly, though they are best enjoyed at room temperature or slightly warmed.
- What’s the best way to cut brownies neatly?
- For perfectly clean slices, ensure your brownies are completely cooled before cutting. Using the parchment paper overhangs to lift the entire slab of brownies out of the pan onto a cutting board helps. Then, use a large, sharp knife, warming it under hot water and wiping it clean between each cut. This technique helps prevent the brownies from sticking to the knife and creates smooth, defined edges.
Did you make this recipe?
If you enjoyed this recipe for the best homemade fudgy brownies, please consider leaving a comment and a 5-star review below. Your feedback helps others discover and enjoy this delicious treat!
This post was originally published in 2019 and has been comprehensively updated in 2025 with enhanced tips, detailed instructions, and additional recipe variations for the ultimate brownie experience.