
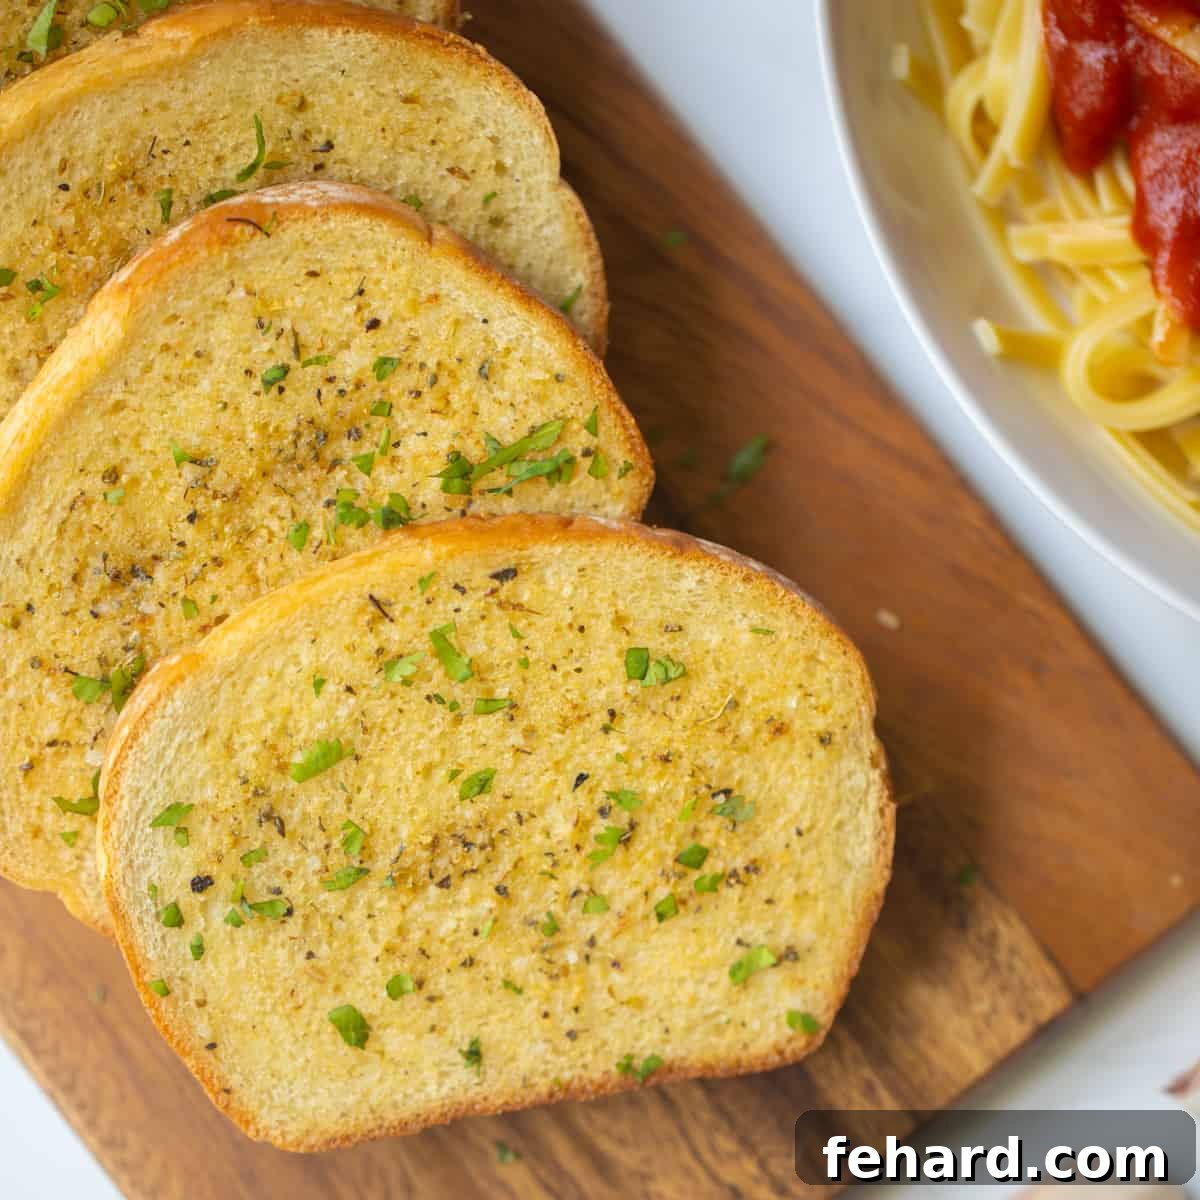
If you adore the classic taste of Garlic Texas Toast, prepare to be amazed by this incredibly simple yet utterly delicious Homemade Garlic Toast recipe! Not only does it deliver a flavor profile far superior to anything you’ll find in the frozen aisle, but it’s also astonishingly easy to prepare in your own kitchen.
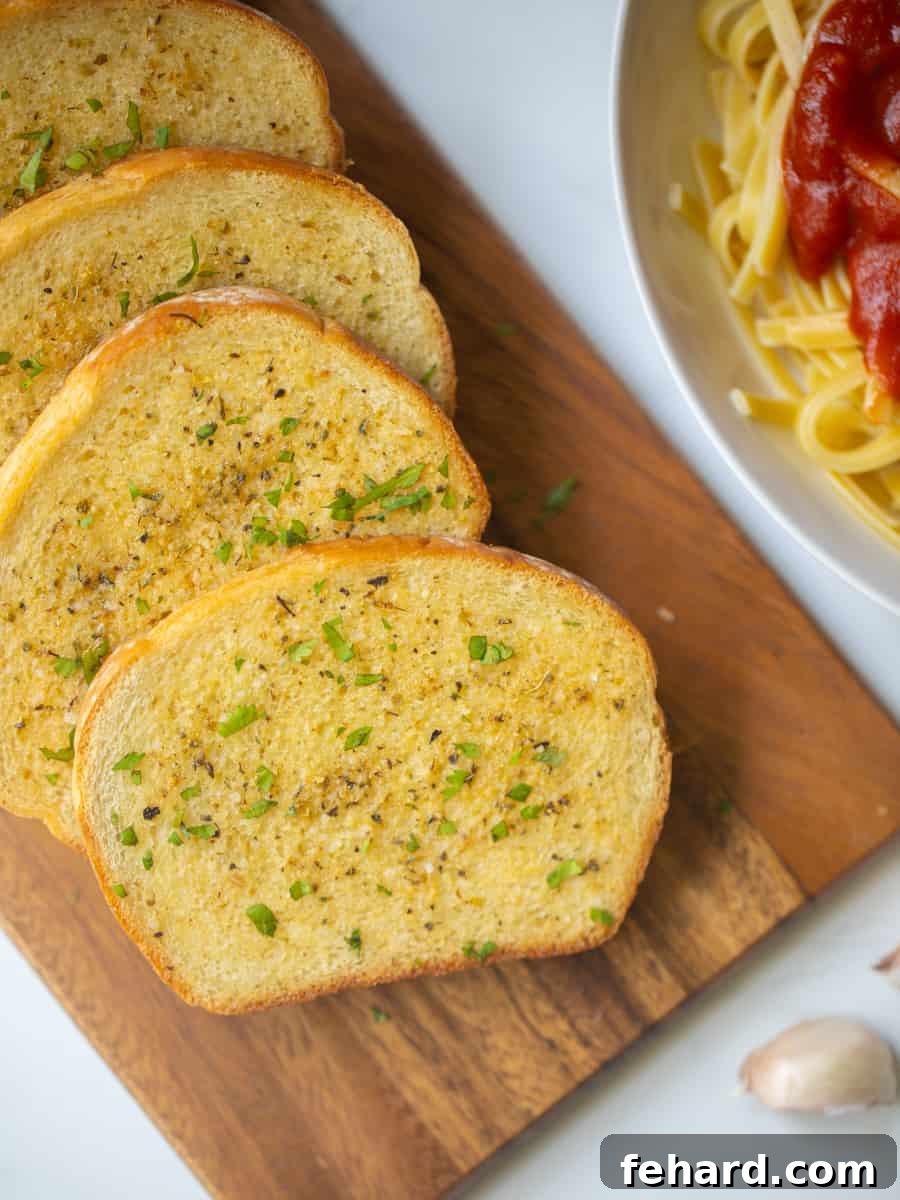
There’s an undeniable magic that garlic toast brings to the dinner table, transforming a simple meal into a delightful feast. Whether you’re enjoying hearty pasta dishes like Baked Rotini, flavorful Pasta Puttanesca, a comforting batch of Homemade Lasagna, or a quick Instant Pot Lasagna Soup, a side of warm, garlicky bread is simply non-negotiable for many.
While I certainly appreciate a good batch of Seasoned Breadsticks, I consistently find myself returning to THIS very recipe for Homemade Garlic Toast. It’s a perennial favorite, cherished for its simplicity and incredible taste.
In This Post: Everything About Homemade Garlic Toast
- Why Choose Homemade Garlic Toast?
- Essential Ingredients You’ll Need
- Recipe Modifications and Creative Variations
- How to Make Garlic Toast: A Simple Guide
- Serving Suggestions: Perfect Pairings
- How to Freeze Homemade Garlic Toast for Later
- Delicious Meals That Pair Well with Garlic Toast
- Printable Garlic Toast Recipe Card
Why Choose Homemade Garlic Toast Over Store-Bought?
You might be wondering if it’s truly worth making garlic toast from scratch when pre-made options are so readily available. Let me assure you, the difference is night and day! Here’s why this homemade garlic toast will become your new go-to:
- Unbeatable Flavor Profile: Forget bland, dry store-bought versions. This homemade garlic toast is a symphony of rich butter, aromatic garlic, and a satisfying crispness that truly elevates any meal. The fresh ingredients simply make it taste incredibly vibrant and robust. Each bite delivers that perfect balance of savory goodness that is simply impossible to replicate with frozen alternatives.
- Superior Quality Ingredients: Commercial garlic bread often contains a long list of additives, preservatives, and artificial flavors. Our recipe focuses on just five simple, wholesome ingredients you can pronounce, ensuring a healthier and more natural product for your family. You control exactly what goes into your food, guaranteeing freshness and quality.
- Effortlessly Easy & Quick: Don’t let the “homemade” tag intimidate you. This recipe is almost as quick to prepare as opening a package of frozen Texas Toast. With minimal hands-on time, you’ll have warm, fragrant garlic toast ready to enjoy in minutes. It’s perfect for busy weeknights when you want maximum flavor with minimum fuss.
- Infinitely Customizable: When you make garlic toast at home, the possibilities for customization are endless. You can easily adapt the recipe to suit dietary preferences, add extra herbs, or even sprinkle on some cheese for garlic cheese toast. This flexibility is something store-bought options simply can’t offer.
- Budget-Friendly: Making your own garlic toast is significantly more economical than consistently purchasing pre-made versions. A good loaf of bread, some butter, and a few spices go a long way, saving you money in the long run without compromising on taste.
- Fantastic Freezer-Friendly Option: This recipe is a meal prep dream! You can whip up a large batch and freeze it, having homemade garlic toast ready whenever a craving strikes or to complement quick dinners like Instant Pot Spaghetti. It’s convenience meets gourmet!
Essential Ingredients for Perfect Homemade Garlic Toast
Creating sensational garlic toast requires just a handful of staple ingredients, each playing a crucial role in achieving that perfect taste and texture:
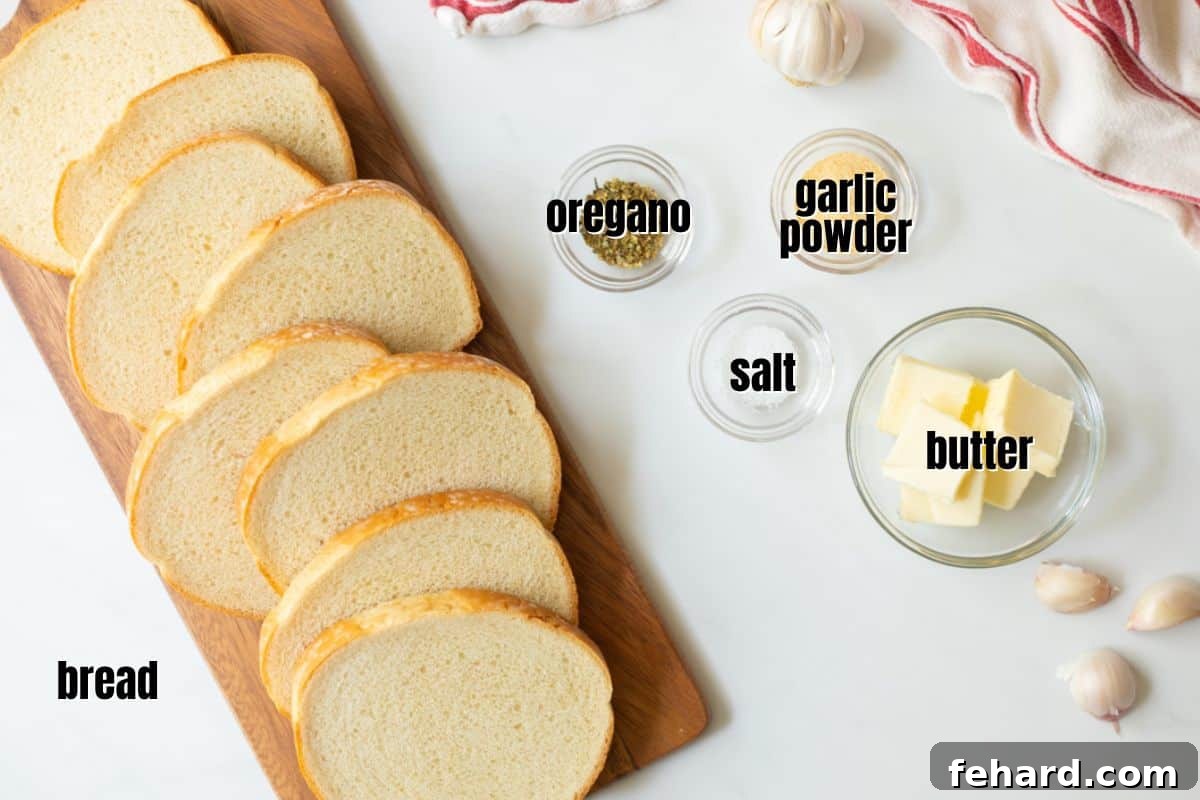
- Quality Bread: The foundation of great garlic toast is great bread. You can choose a rustic, crusty loaf of Italian bread, thickly sliced sourdough, or even a good quality white bread. Thick slices (around ¾ to 1 inch) work best as they absorb the butter without becoming soggy and offer a satisfying chew. For an extra touch, consider baking your own Homemade Italian Bread.
- Unsalted Butter, Softened: Using unsalted butter is key because it allows you to control the overall sodium content of your garlic toast. If you only have salted butter on hand, simply omit the added salt from the seasonings to prevent it from becoming too salty. Ensure your butter is softened to room temperature for easy mixing and spreading.
- Garlic Powder: While fresh garlic might seem like the obvious choice, garlic powder is actually preferred for this recipe. Fresh minced garlic can burn easily when toasted at high temperatures, leading to a bitter taste. Garlic powder, on the other hand, distributes evenly and infuses the toast with a delicious, mellow garlic flavor without the risk of scorching. It’s a secret weapon for consistent results!
- Dried Oregano: A pinch of dried oregano or Italian Seasoning adds a wonderful herbaceous depth that complements the garlic and butter beautifully. It’s optional, but highly recommended for an extra layer of authentic flavor.
- Kosher Salt: Kosher salt enhances all the other flavors without making the toast taste overly salty. Its larger crystals also provide a subtle textural crunch. Adjust the amount to your personal preference, especially if using salted butter.
Recipe Modifications and Creative Variations for Your Garlic Toast
One of the joys of homemade cooking is the ability to adapt recipes to fit your taste, dietary needs, or simply to experiment with new flavors. Here are some fantastic ways to modify your garlic toast:
- For a Lighter Option (Lower Fat): If you’re looking to reduce the fat content, you can spread the garlic butter mixture on only one side of the bread, effectively halving the amount of butter used. You’ll still get wonderful flavor, just with a little less richness.
- Dairy-Free Garlic Toast: For those following a dairy-free diet, simply substitute the unsalted butter with an equal amount of good quality olive oil. The result will be a delicious, rich, and aromatic dairy-free garlic bread. You can also find dairy-free butter alternatives that work wonderfully.
- Achieving Softer Garlic Toast: If you prefer your garlic toast less crispy and more tender, adjust the baking temperature. Instead of 400°F (200°C), bake your bread at 375°F (190°C) for about 4-6 minutes per side. This lower temperature will result in a softer, chewier texture while still developing a golden exterior.
- Add a Cheesy Twist: For garlic cheese toast, sprinkle your favorite grated cheese (like mozzarella, parmesan, or a blend of Italian cheeses) over the buttered bread during the last 2-3 minutes of baking. The cheese will melt and become golden and bubbly, adding another layer of irresistible flavor.
- Fresh Herb Boost: While dried oregano is excellent, don’t hesitate to finish your warm garlic toast with a sprinkle of freshly chopped parsley or chives for a burst of fresh flavor and vibrant color.
- Spicy Kick: For those who love a bit of heat, mix a pinch of red pepper flakes into your garlic butter mixture. It adds a subtle warmth that can be surprisingly delightful.
How to Make Homemade Garlic Toast: A Simple Guide
The process for crafting this delicious homemade garlic toast is remarkably straightforward, almost as easy as baking frozen Texas Toast, but with infinitely better results!
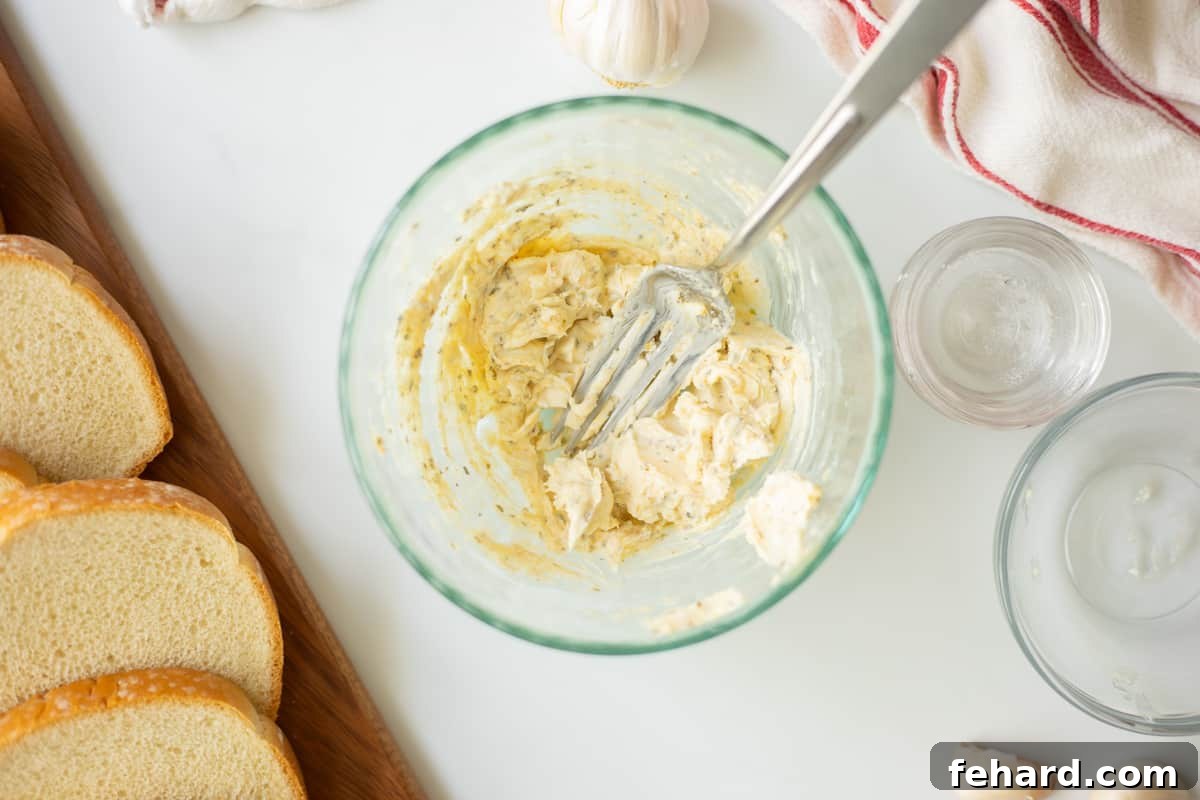
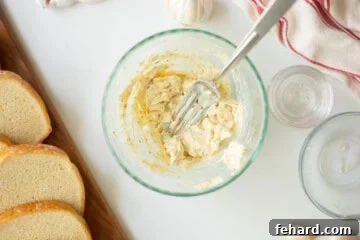
- Prepare the Aromatic Garlic Butter: In a small bowl, combine your softened unsalted butter with garlic powder, dried oregano, and kosher salt. Use a fork or a small spatula to mix everything thoroughly until all the ingredients are evenly incorporated. This ensures every bite of your toast is infused with flavor.
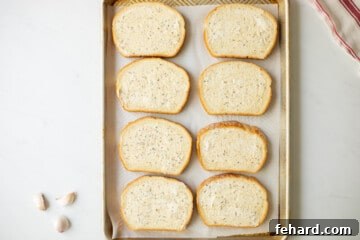
- Evenly Spread the Garlic Butter on Bread: Take your thick slices of bread and spread a thin, even layer of the prepared garlic butter mixture onto both sides of each slice. Ensure good coverage from edge to edge. Once buttered, arrange the bread slices in a single layer on a baking sheet that has been lined with parchment paper. Parchment paper prevents sticking and makes for easy cleanup.
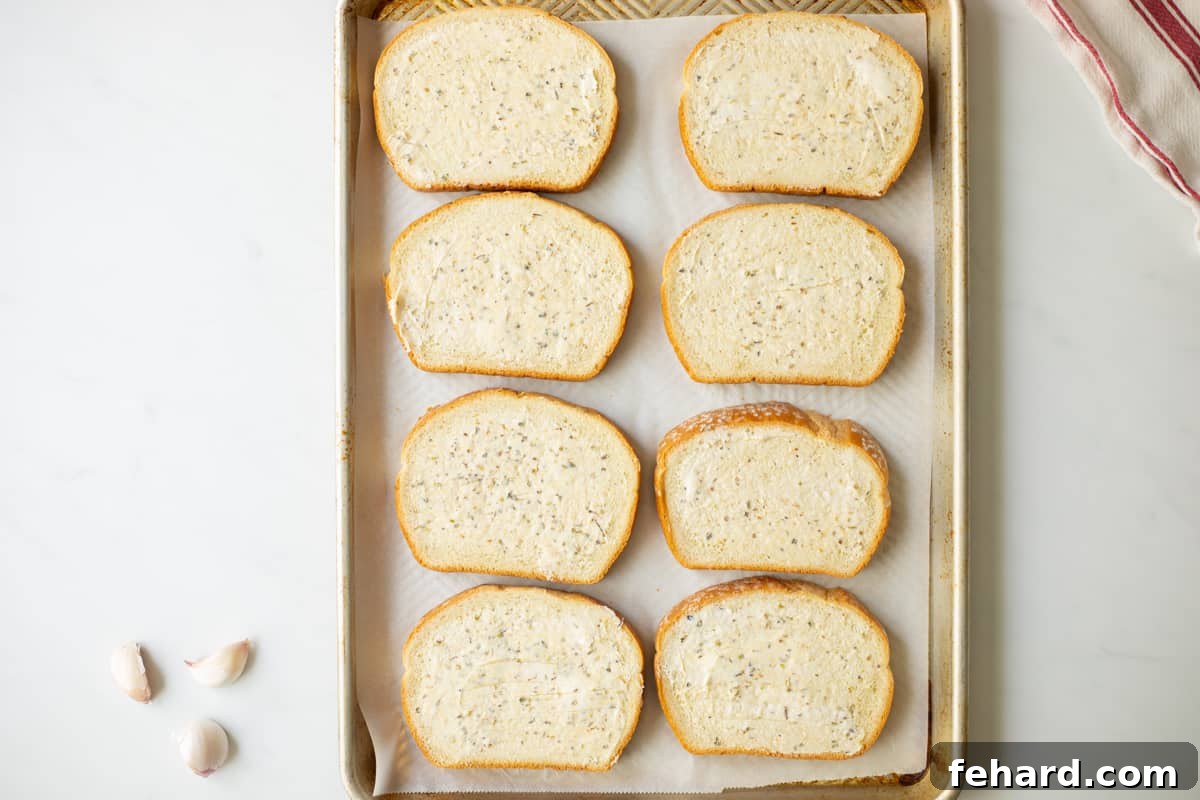
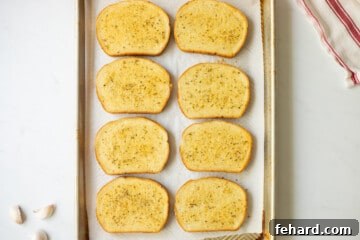
- Bake to Golden Perfection: Place your baking sheet with the buttered garlic bread into your preheated oven. Just like with frozen Texas Toast, you’ll want to flip the slices halfway through the baking process. This ensures that both sides become beautifully golden brown and achieve that irresistible crispy texture. Watch closely in the final minutes to prevent over-browning.
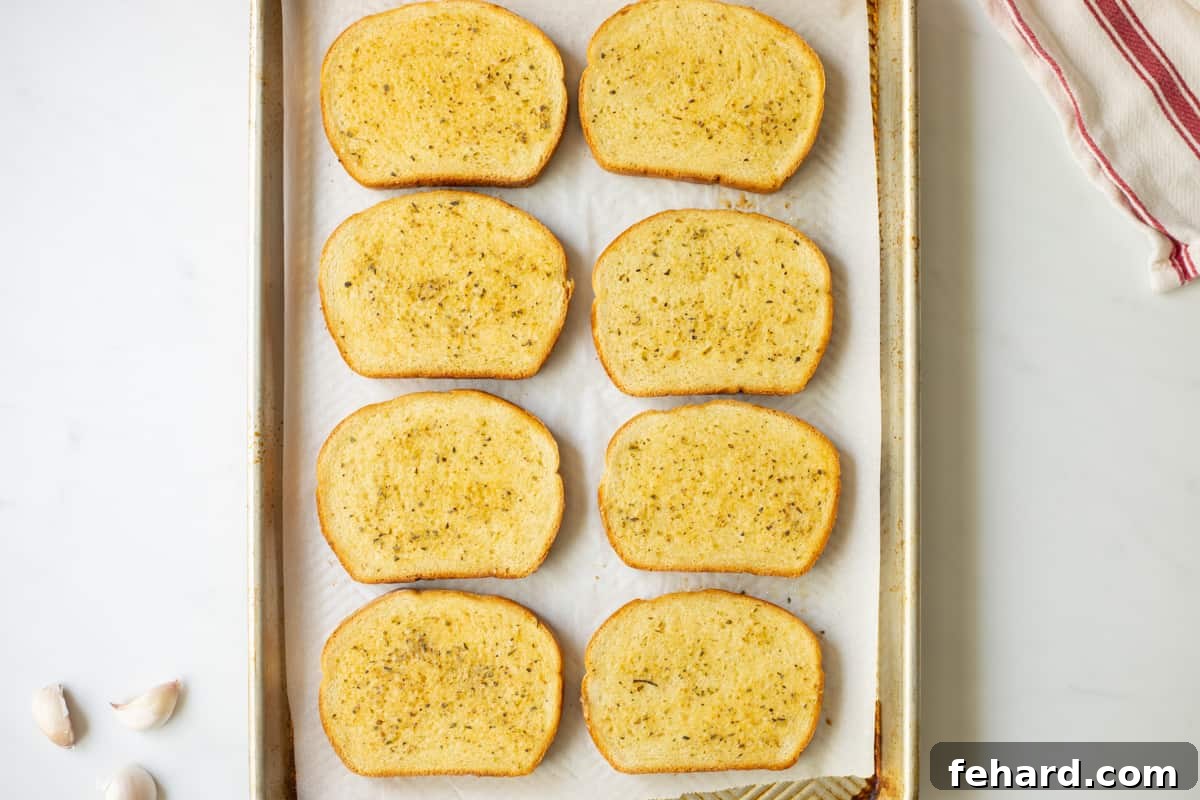
Serving Suggestions: Perfect Pairings for Your Homemade Garlic Toast
Homemade garlic toast is an incredibly versatile side dish that complements an almost endless array of meals. Its buttery, garlicky goodness makes it a welcome addition to so many different cuisines and meal types. Here are just a few ideas to get you started:
- Classic Pasta Dinners: Garlic toast is the quintessential accompaniment to any pasta dish. Think beyond traditional spaghetti and meatballs! It’s perfect with Skillet Lasagna, a vibrant Vegetable Pasta Primavera, or a creamy Instant Pot Fettuccine Alfredo. Its crispy texture and robust flavor perfectly mop up all those delicious sauces.
- Hearty Soups and Stews: There’s nothing quite like dipping a piece of warm, crusty garlic toast into a rich soup. It’s fantastic with comforting Broccoli Cheddar Soup, a simple Instant Pot Tomato Soup, or any lentil or bean stew.
- Creative Toppings & Sandwiches: Don’t limit garlic toast to just a side! Get creative:
- Top it with cooked Instant Pot Italian Beef for an open-faced sandwich.
- Serve it alongside tender Crockpot Pulled Pork for a unique BBQ experience.
- Use it as a base for bruschetta with fresh tomatoes and basil.
- Make mini pizzas by adding sauce, cheese, and your favorite toppings.
- Breakfast & Brunch: Yes, even breakfast! Serve it alongside scrambled eggs, or use it for a savory French toast twist.
- Salads: A crisp green salad often benefits from the addition of a savory bread component, and garlic toast is a perfect choice.
Your family will never tire of this recipe, and you’ll find endless ways to incorporate it into your meal rotation!
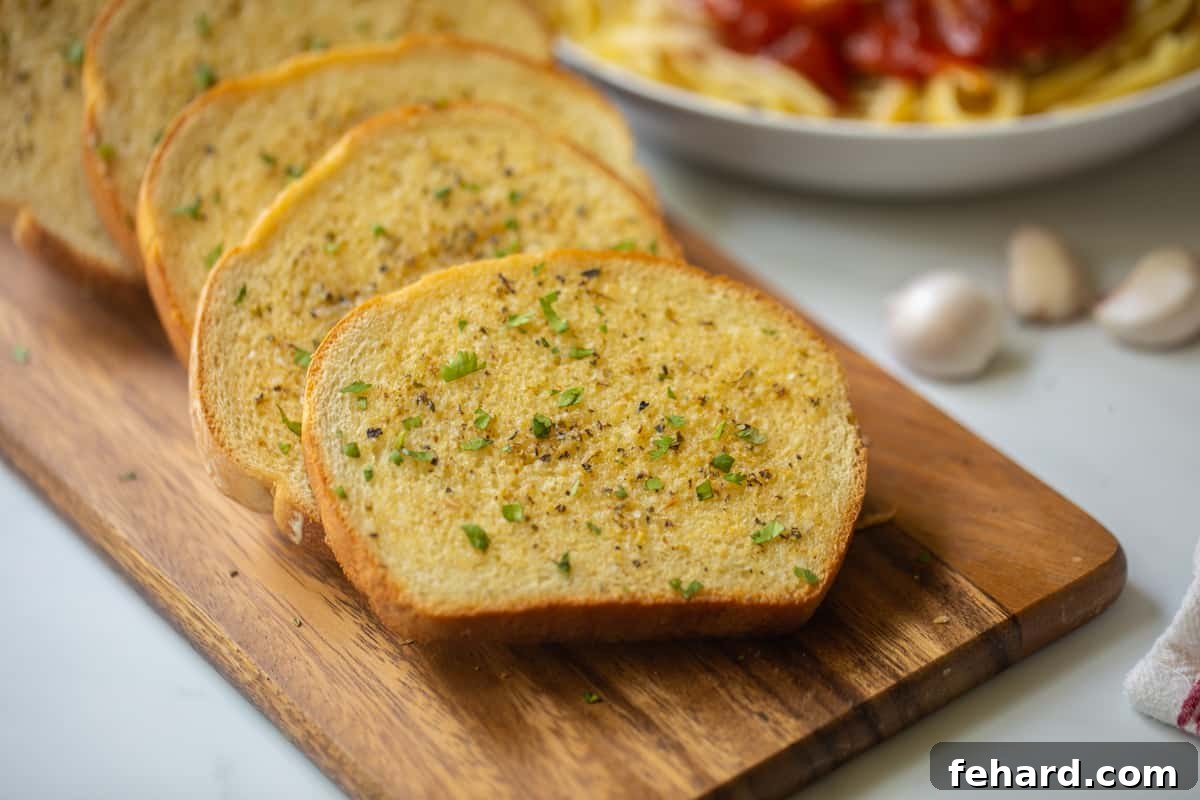
How to Freeze Homemade Garlic Toast for Future Meals
Don’t let any leftover bread go to waste! Transform it into a batch of homemade garlic toast to stock your freezer. This is an excellent meal prep strategy, ensuring you always have delicious garlic toast ready to enjoy whenever a craving strikes or an easy side is needed for dinner.
- Step-by-Step Freezing Instructions:
- Prepare your garlic toast as directed in the recipe, spreading both sides of the sliced bread with the garlic butter mixture.
- Arrange the buttered bread slices in a single layer on a baking sheet lined with parchment paper.
- Place the entire baking sheet into the freezer and freeze for 20-30 minutes, or until the surface of the garlic bread slices is frozen solid. This “flash freezing” prevents the slices from sticking together.
- Once frozen solid, remove the slices from the parchment paper and transfer them to a freezer-safe bag or airtight container.
- Store in the freezer for up to 3 months. Label with the date for easy tracking.
- How to Bake Garlic Toast Directly from Frozen:
- Preheat your oven to 400°F (200°C).
- Remove as many slices of garlic toast as you desire from the freezer. There’s no need to thaw!
- Place the frozen slices directly onto a baking sheet lined with parchment paper.
- Bake for approximately 7 minutes on one side.
- Flip the bread and continue to bake for an additional 5-7 minutes, or until the garlic toast is golden brown, perfectly crispy, and heated through.
Delicious Meals That Perfectly Pair with Garlic Toast
While garlic toast is a fantastic partner to any Italian-inspired dish, its versatility extends far beyond. Here’s a list of meals that truly shine when served with a side of crispy, buttery garlic toast:
- Easy Baked Rotini
- Hearty Bolognese Pasta
- Comforting Lasagna Soup
- Zesty Pasta Puttanesca
- Quick Instant Pot Lasagna
- Savory Oven-Baked Meatballs
- Creamy White Bean Pasta
- Nutritious Kale Pasta Recipe
- Classic Spaghetti and Meat Sauce
- Chicken Alfredo
- Minestrone Soup
- Cream of Mushroom Soup
- Shrimp Scampi
- Any robust salad with a vinaigrette dressing
Frequently Asked Questions About Homemade Garlic Toast
Here are answers to some common questions about making the best homemade garlic toast:
- What is the best type of bread for garlic toast?
The best bread is usually a thicker cut, sturdy loaf that can stand up to the butter and retain some chewiness. Italian bread, French bread, sourdough, Texas toast slices, or even a good quality sandwich bread can work. Avoid very soft, thin sliced bread as it can become soggy. - Can I use fresh garlic instead of garlic powder?
You can, but exercise caution. Fresh minced garlic can easily burn and become bitter in the oven. If you prefer fresh garlic, mix it very finely with the butter and consider baking at a slightly lower temperature (375°F/190°C) and for a shorter duration, or only spreading it on one side. Garlic powder offers more consistent flavor without the burn risk. - How do I make my garlic toast extra crispy?
For maximum crispiness, ensure your oven is fully preheated to 400°F (200°C). Don’t overcrowd the baking sheet, allowing space for air to circulate around each slice. Flipping halfway through baking is also crucial for even browning and crispness on both sides. - How long does homemade garlic toast last?
Freshly baked garlic toast is best enjoyed immediately. If you have leftovers, store them in an airtight container at room temperature for up to 1-2 days. To reheat and restore crispness, pop them back in a toaster oven or a regular oven at 350°F (175°C) for a few minutes. - Can I make the garlic butter ahead of time?
Absolutely! You can prepare the garlic butter mixture and store it in an airtight container in the refrigerator for up to a week. This makes assembling the garlic toast even quicker on busy days. Just let it soften slightly at room temperature before spreading.
If you’ve tried and enjoyed this simple yet delicious recipe for Homemade Garlic Toast, please consider leaving a comment and a review below! Your feedback helps other home cooks discover and enjoy this fantastic dish.
Homemade Garlic Toast Recipe
This Homemade Garlic Toast is incredibly easy to make at home with just a few ingredients and simple steps, yielding fantastic results that will impress every time.
Prep Time: 5 minutes
Cook Time: 10 minutes
Total Time: 15 minutes
Servings: 8 slices
Ingredients
- 8 slices thick white bread (Italian bread, French bread, or sourdough work great)
- 6 tablespoons unsalted butter, softened to room temperature
- 1 teaspoon garlic powder
- ¼ teaspoon kosher salt (adjust to taste)
- ½ teaspoon dried oregano (optional, but highly recommended)
Instructions
- Preheat your oven to 400°F (200°C) and line a baking sheet with parchment paper for easy cleanup.
- In a small bowl, combine the 6 tablespoons of softened unsalted butter with 1 teaspoon of garlic powder, ¼ teaspoon of kosher salt, and ½ teaspoon of dried oregano (if using). Mix well until all ingredients are evenly incorporated and smooth.

Ensure your garlic butter is well mixed for uniform flavor. - Generously spread an even, thin layer of the prepared garlic butter mixture onto both sides of each of the 8 slices of thick white bread. Place the buttered bread slices onto the prepared baking sheet, ensuring they are in a single layer without overlapping.
Spread the garlic butter evenly for the best results. - Place the baking sheet into the preheated oven and toast for 4-5 minutes. Carefully flip each slice of bread, and continue to bake for an additional 3-5 minutes, or until both sides of the bread are fully golden brown and wonderfully toasted.
Recipe Notes & Tips
- Dairy-Free Option: Substitute unsalted butter with an equal amount of olive oil or a dairy-free butter alternative for delicious dairy-free garlic bread.
- Softer Texture: For garlic toast that’s softer rather than super crispy, bake at 375°F (190°C) for 4-6 minutes per side.
- Lower Fat Modification: You can opt to spread the garlic butter on only one side of the bread, using half the amount called for in the recipe, for a lighter version.
- Freezing for Later: Spread sliced bread with garlic butter, then flash freeze on a parchment-lined baking sheet for 20-30 minutes. Transfer to a freezer-safe bag and store for up to 3 months.
- Baking from Frozen: Preheat oven to 400°F (200°C). Place frozen garlic toast slices on a parchment-lined baking sheet and bake for 7 minutes on one side. Flip and bake for an additional 5-7 minutes, or until golden and heated through.
- Add Fresh Herbs: Garnish with freshly chopped parsley or chives after baking for extra flavor and visual appeal.
Nutrition Information (Approximate Per Serving)
- Calories: 190 kcal
- Carbohydrates: 19g
- Protein: 3g
- Fat: 6g
- Saturated Fat: 3g
- Cholesterol: 7mg
- Sodium: 189mg
- Potassium: 85mg
- Fiber: 1g
- Sugar: 11g
- Vitamin A: 85IU
- Vitamin C: 0.2mg
- Calcium: 2mg
- Iron: 0.8mg
Nutrition information is automatically calculated and should only be used as an approximation. Actual values may vary based on specific ingredients and preparation methods.