


In This Post: Crafting Perfect Baked Tuna Patties
- The Ultimate Budget-Friendly & Delicious Meal
- Why Baked Tuna Patties are a Game-Changer
- Essential Ingredients & Smart Substitutions
- Step-by-Step: Crafting Your Crispy Tuna Patties
- Expert Tips for Ultra Crispy Results
- Creative Serving Suggestions for Tuna Patties
- Frequently Asked Questions (FAQs)
- Storage and Reheating Instructions
- More Affordable Seafood Recipes
- Crispy Baked Tuna Patties Recipe Card
Ultra Crispy Baked Tuna Patties: Your Healthy, Budget-Friendly Meal Solution
With just minutes of preparation and a handful of readily available, humble ingredients, these Ultra Crispy Baked Tuna Patties offer an incredibly easy and budget-friendly recipe that promises an explosion of flavor and a satisfying crunch with every bite. Say goodbye to greasy stovetop frying! By baking these delightful tuna cakes instead of pan-frying them, you significantly reduce fat and calories, making for a healthier meal that’s also incredibly simple to prepare—no standing over a splattering pan of hot oil required. This recipe transforms humble canned tuna into a dish that’s both wholesome and undeniably delicious, perfect for any day of the week.
The Ultimate Budget-Friendly & Delicious Meal

Are you searching for a recipe that elevates everyday canned tuna into a dish worthy of a gourmet restaurant, without breaking the bank? Look no further! This simple yet sophisticated recipe for tuna patties is designed to impress and satisfy. We’re talking about a super crispy exterior that gives way to a moist, flavorful filling. Imagine the rich creaminess of mayonnaise, the satisfying crunch of panko breadcrumbs, the bright zest of fresh lemon, and the aromatic punch of garlic, all coming together to make humble tuna truly shine. They evoke the decadent taste of crab cakes, but with the practical advantage of being incredibly affordable. Let’s be honest, fresh lump crab meat is a luxury for most of us, but canned tuna is a pantry staple that’s always within reach.
Whether you’re serving them as an elegant appetizer with a tangy homemade tartar sauce, tucking them into a bun for a unique sandwich, or placing them atop a bed of fresh greens for a protein-packed and satisfying salad, these tuna patties are a versatile winner. You simply can’t go wrong when something so economical tastes this incredibly good and offers so many culinary possibilities. Prepare to be delighted by how easy it is to create such a memorable meal.
Happy Cooking! xo Kristen
Why Baked Tuna Patties are a Game-Changer for Healthy Home Cooking
Opting to bake your tuna patties rather than pan-frying them is a choice that offers numerous benefits, transforming this dish into an even more appealing option for healthy and convenient home cooking. Firstly, baking significantly reduces the amount of added fat, as you only need a minimal amount of oil for the green onions and parchment paper. This results in patties that are lower in calories and fat, aligning perfectly with a health-conscious diet without sacrificing flavor or texture. The oven’s dry heat ensures a remarkably crispy exterior, often superior to what can be achieved on the stovetop, which sometimes leaves patties a bit greasy.
Beyond health advantages, baking simplifies the cooking process immensely. You avoid the constant attention required for stovetop frying, the messy oil splatters, and the lingering smell of fried food in your kitchen. Simply form the patties, pop them in the oven, and let the heat do its magic while you prepare side dishes or relax. This hands-off approach makes baked tuna patties an ideal choice for busy weeknights or when you’re entertaining and want to minimize kitchen stress. The consistent, even heat of the oven ensures each patty cooks uniformly, resulting in perfectly done, ultra-crispy tuna cakes every time.
Essential Ingredients & Smart Substitutions for Flawless Tuna Patties
The full list of ingredients, along with precise quantities, can be found in the comprehensive recipe card below. Here’s a quick overview of what you’ll need, along with expert tips to help you make the best ingredient selections and smart substitutions.
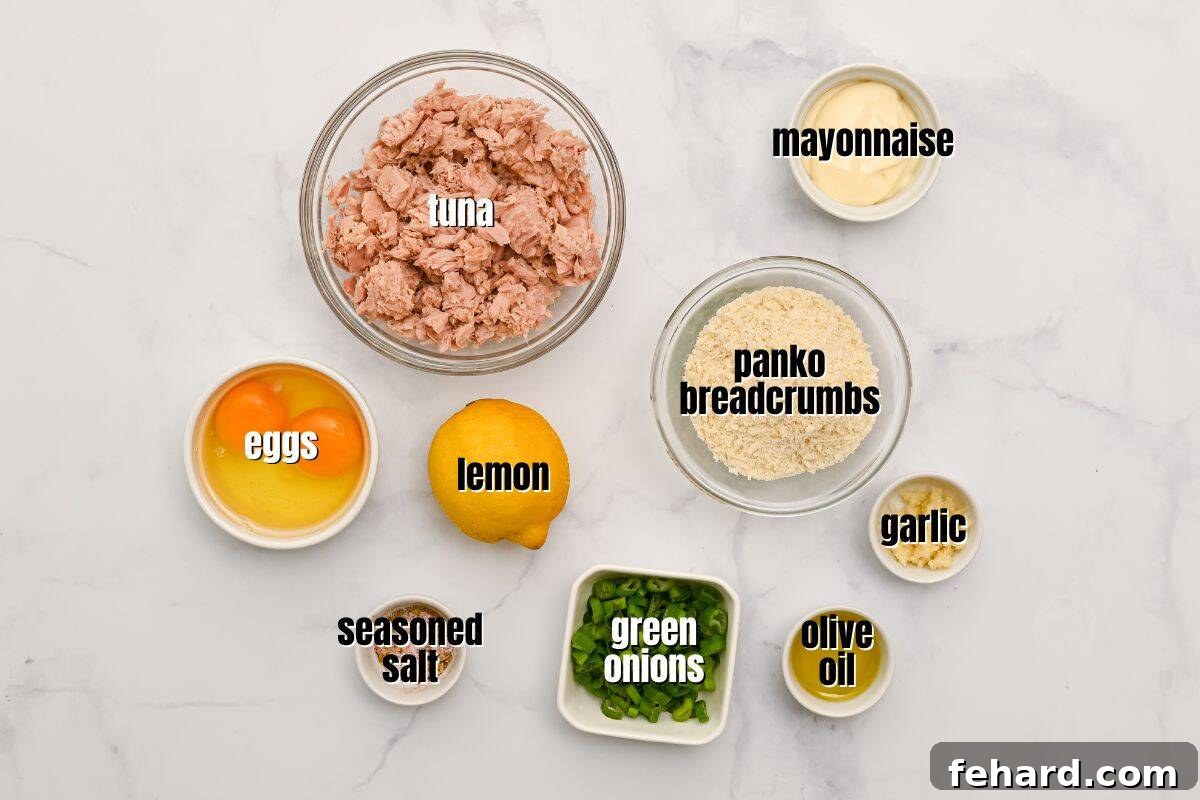
- Tuna: The foundation of our patties! Always opt for canned tuna or tuna in a pouch that has been packed in water, not oil. Water-packed tuna drains better and allows the other flavors to shine through without an oily residue. For the absolute best flavor and texture, I highly recommend using wild albacore tuna, known for its firmer flesh and milder taste.
- Mayonnaise: This is key for creating rich, creamy, and moist tuna cakes. It acts as a binder and a flavor enhancer, adding essential fat and tang. Be sure to use real mayonnaise—avoid “Miracle Whip” or similar salad dressings, as their flavor profile and consistency are quite different and will alter the final taste. If you’re looking to boost the protein content or reduce fat slightly, plain Greek yogurt can be an excellent substitute, offering a similar tang and binding quality.
- Eggs: Crucial binders that help hold the tuna mixture together, preventing the patties from falling apart during baking. Use large eggs for consistent results.
- Lemons: Fresh lemon zest and juice are indispensable here. The zest provides a bright, aromatic citrus note that awakens the flavors, while the juice adds essential acidity to balance the richness of the mayonnaise and tuna. Always use fresh lemons for the most vibrant taste.
- Seasoned Salt: Elevate the flavor beyond simple salt. Using a good quality homemade seasoned salt or a store-bought blend introduces a complex layer of dried spices and herbs, adding depth that plain salt alone cannot achieve. This small addition makes a big difference.
- Panko Breadcrumbs: The secret to that incredible crispiness! Panko breadcrumbs are lighter, flakier, and coarser than traditional breadcrumbs, allowing the tuna patties to remain light and airy while developing an exceptionally crispy, golden crust during baking. They also absorb moisture beautifully, preventing soggy patties.
- Minced Garlic: Freshly minced garlic adds a foundational layer of savory aroma and taste that complements the tuna and other ingredients.
- Green Onions: These provide a delicate, fresh onion flavor that enhances the tuna without overpowering it. Unlike stronger yellow or red onions, green onions contribute a subtle sweetness and mild pungency that are perfect for these patties. Sautéing them briefly mellows their flavor and improves their texture.
Step-by-Step: Crafting Your Crispy Baked Tuna Patties
Follow these detailed instructions carefully to achieve perfectly crispy and flavorful tuna patties. You’ll find all ingredient quantities and precise timings in the recipe card at the very end of this post.
- Preheat Oven and Prepare Baking Sheet: Begin by preheating your oven to a consistent 400°F (205°C). This ensures the oven is at the optimal temperature for even cooking and maximum crispiness. Line a sturdy baking sheet with parchment paper. Parchment paper is essential here as it prevents sticking and helps create that desirable ultra-crispy exterior without adding extra fat.
- Sauté Green Onions for Enhanced Flavor: Heat 1 teaspoon of extra virgin olive oil in a small saucepan over medium heat. Add the ¼ cup of minced green onions and sauté for 3-4 minutes, or until they have softened and become fragrant. Resist the temptation to add raw green onions, as their texture can be a bit sharp and off-putting in the final patty. Sautéing them mellows their flavor and ensures they blend seamlessly into the mixture. Remove from heat and allow to cool slightly while you prepare the other ingredients.
Time-saving Swap
If you’re truly short on time, or prefer a milder, raw onion flavor, you can substitute the sautéed green onions with an equal amount of finely minced chives. Chives are delicate enough that they do not require sautéing and can be added directly to the tuna mixture.

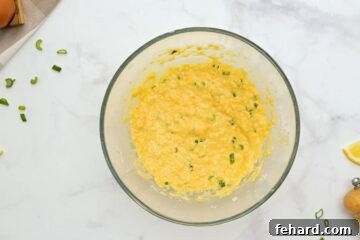
- Combine the Flavorful Base: In a medium-sized mixing bowl, thoroughly whisk together the 2 large eggs, ½ cup panko breadcrumbs, 2 tablespoons mayonnaise, 1 teaspoon seasoned salt, 1 teaspoon minced garlic, the slightly cooled sautéed green onion mixture, and the zest and juice of 1 medium lemon. Just as you would when making meatballs or meatloaf, it’s crucial to combine all the binders and flavorings thoroughly before introducing the main ingredient. This ensures everything is perfectly incorporated and evenly dispersed throughout the tuna cakes, guaranteeing consistent flavor in every bite.
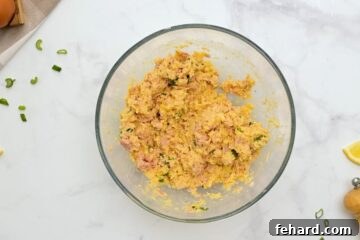
- Gently Fold in the Tuna: Add the well-drained 10 ounces of flaked albacore tuna to the mayonnaise mixture. Using a spoon or your hands, gently fold the tuna into the mixture until it is just combined. Be careful not to overmix, as this can break down the tuna too much and lead to a tougher patty. A light hand ensures the tuna retains some texture.
- Form the Tuna Patties: Scoop out approximately ⅓ cup of the tuna mixture for each patty onto your parchment paper-lined baking sheet. Then, using your hands, gently pat and shape the mounds into uniform patties.
Thick or Thin? Crafting Your Ideal Patty
For an optimal crunch factor and more surface area perfect for dipping, I highly recommend making your tuna patties on the thinner side. For this, aim for 6 patties, using about ⅓ cup of mixture for each. If you prefer a heartier, thicker patty, you can form 3 larger patties, using roughly ⅔ of the mixture for each, and simply increase the baking time by an extra 2 minutes per side to ensure they cook through evenly and achieve the desired crispness.
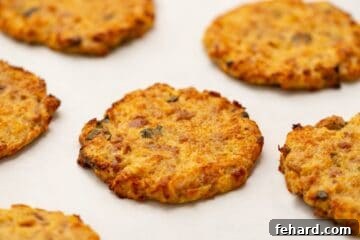
- Bake to Golden Perfection: Place the baking sheet into the preheated oven.
- For thinner tuna patties (approx. ½ inch thick): Bake for 10 minutes. Carefully flip each patty with a spatula and continue baking for an additional 6-8 minutes, or until they are beautifully browned and wonderfully crispy.
- For thicker tuna patties (approx. 1 inch thick): Bake for 12 minutes. Flip and continue baking for 8-10 minutes, or until deeply golden brown and crispy.
The exact timing will vary slightly based on your oven and desired level of crispiness—I love mine extra crispy!
- Serve and Savor: Once baked, allow the tuna cakes to cool on the baking sheet for about 5 minutes. This brief resting period helps them firm up and enhances their crispiness. Serve immediately with fresh lemon wedges for a burst of citrus, your favorite hot sauce for a kick, and a generous dollop of Homemade Tartar Sauce or any other preferred dipping sauce.


Expert Tips for Ultra Crispy, Perfect Tuna Patties Every Time
- Drain Tuna Extremely Well! This is perhaps the most critical tip for avoiding soggy tuna patties. Excess moisture is the enemy of crispiness. After opening your canned tuna, transfer it to a fine-mesh strainer and press down firmly with the back of a spoon to squeeze out as much liquid as possible. For an extra measure, pat the drained tuna with a paper towel to remove any residual moisture before adding it to your mayonnaise mixture.
- Use an Ice Cream Scoop for Uniformity. Achieving evenly sized patties isn’t just for aesthetics; it’s crucial for even cooking. An ice cream scoop (specifically one that holds about ⅓ cup for thin patties or ⅔ cup for thick ones) is your best friend here. It’s an effortless way to portion out the tuna mixture consistently, ensuring all your patties cook at the same rate and reach that perfect golden crispness simultaneously.
- Parchment Paper is Your Best Friend. Don’t skip lining your baking pan with parchment paper. This simple step is the absolute best way to prevent the tuna patties from sticking to the baking sheet, making flipping effortless and clean-up a breeze. It also contributes to the beautiful browning and crisp texture by preventing moisture from pooling underneath the patties.
- Don’t Skimp on the Lemon Zest. While lemon juice adds essential acidity, the zest provides a powerful burst of aromatic citrus oils that infuse the patties with a brighter, fresher flavor. Always zest your lemon before juicing it for ease, and be sure to use only the yellow part of the rind, avoiding the bitter white pith.
- Consider Additional Mix-ins for Flavor Boost. While this recipe is fantastic as is, feel free to experiment with other finely minced ingredients like fresh dill, capers, finely diced bell peppers, or a pinch of cayenne pepper for a subtle heat. Just remember to keep the additions minimal to maintain the patty’s structure and ensure crispiness.
Creative Serving Suggestions for Your Delicious Tuna Patties
These Ultra Crispy Baked Tuna Patties are incredibly versatile and can be enjoyed in a multitude of ways, making them a fantastic addition to your meal rotation. Here are some creative ideas to inspire your next tuna patty meal:
- Classic Platter Presentation: Serve them warm on a platter garnished with fresh lemon wedges, a sprinkle of chopped fresh parsley or green onions, and an assortment of dipping sauces like tartar sauce, sriracha aioli, or a simple lemon-dill yogurt sauce. Perfect for a light lunch or elegant appetizer.
- Tuna Patty Burgers or Sliders: Transform your patties into hearty burgers! Serve them on toasted brioche buns or slider rolls with lettuce, tomato, red onion, pickles, and a generous spread of your favorite sauce. They make a fantastic, healthier alternative to traditional meat burgers.
- Protein-Packed Salads: Crumble or slice a warm tuna patty over a bed of crisp mixed greens. Add cherry tomatoes, cucumber, avocado, and a light vinaigrette for a satisfying and nutritious main course salad. The crispy texture adds a wonderful contrast.
- Appetizer Bites: For a party, make smaller, bite-sized patties. Serve them with toothpicks alongside individual ramekins of various dipping sauces for an easy-to-eat finger food that’s sure to be a crowd-pleaser.
- Tuna Patty Melt: Place a warm patty on a slice of toasted bread, top with a slice of your favorite cheese (cheddar or Swiss work wonderfully), and broil until bubbly and golden. Serve open-faced for a comforting meal.
Frequently Asked Questions (FAQs) About Tuna Patties
Can I use fresh tuna instead of canned tuna for this recipe?
While this recipe is specifically developed for canned tuna, you can certainly use fresh tuna. If using fresh, ensure it’s cooked (baked or pan-seared) and then flaked before mixing with the other ingredients. Keep in mind that fresh tuna has a different moisture content and flavor profile, so you might need slight adjustments to the binders (like a touch more panko or mayo) to achieve the desired consistency. The beauty of this recipe, however, lies in its simplicity and reliance on affordable pantry staples like canned tuna.
How do I make these tuna patties gluten-free?
Making these tuna patties gluten-free is very simple! The primary ingredient containing gluten is the panko breadcrumbs. Simply substitute regular panko breadcrumbs with gluten-free panko breadcrumbs. Most major grocery stores now carry excellent gluten-free panko options that will provide the same crispy texture. All other ingredients in this recipe are naturally gluten-free.
Can I freeze baked tuna patties?
Yes, absolutely! Baked tuna patties freeze wonderfully, making them excellent for meal prep. Allow the patties to cool completely after baking. Then, place them in a single layer on a baking sheet and freeze until solid. Once frozen, transfer them to an airtight freezer-safe bag or container, separating layers with parchment paper to prevent sticking. They can be stored in the freezer for up to 2-3 months. Reheat from frozen in a 400°F (205°C) oven for about 15-20 minutes, or until heated through and crispy.
What are the best sauces to serve with tuna patties?
The classic choice is a tangy tartar sauce, which complements the tuna perfectly. Other fantastic options include a zesty lemon-dill yogurt sauce, a spicy sriracha aioli, a simple squeeze of fresh lemon juice, hot sauce for a kick, a creamy avocado dressing, or even a sweet and spicy chili sauce. Don’t be afraid to experiment with your favorite condiments!
Can I pan-fry these patties instead of baking them?
While this recipe is designed for baking to achieve a healthier, less messy, and ultra-crispy result, you can certainly pan-fry them if you prefer. To pan-fry, heat about 1-2 tablespoons of olive oil or butter in a large skillet over medium heat. Carefully place the patties in the hot oil, ensuring not to overcrowd the pan. Cook for 3-5 minutes per side, or until golden brown and cooked through. Be aware that pan-frying will add more fat and calories compared to baking.
Storage and Reheating Instructions
Proper storage and reheating ensure your delicious tuna patties remain flavorful and crispy for future enjoyment.
Storing Leftover Tuna Patties:
Once your tuna patties have cooled completely to room temperature, they can be stored in an airtight container in the refrigerator for up to 3 days. For best results, place a piece of parchment paper between layers of patties to prevent them from sticking together and to absorb any excess moisture.
Reheating Tuna Patties for Optimal Crispiness:
To revive their delicious crunch, reheating in the oven is highly recommended. Preheat your oven to 400°F (205°C). Place the chilled tuna patties on a baking sheet lined with parchment paper. Bake for approximately 10-15 minutes, or until they are warmed through and the exterior has regained its desired crispiness. Avoid reheating in the microwave, as this can make the patties soggy.
Freezing Tuna Patties (for longer storage):
As mentioned in the FAQs, these patties freeze beautifully. After baking and cooling, arrange them in a single layer on a baking sheet and freeze until solid (about 1-2 hours). Once frozen, transfer them to a freezer-safe bag or container, again using parchment paper between layers. They will keep well in the freezer for up to 2-3 months. Reheat directly from frozen in a 400°F (205°C) oven for 15-20 minutes.
More Affordable Seafood Recipes You’ll Love
- Instant Pot Tuna Noodle Casserole
- Avocado Tuna Salad
- Fish Veracruz
- Pan-Seared Tilapia
- Homemade Fish Sticks
Did you make this recipe?
If you enjoyed this recipe, please leave a comment with a 5-star review at the bottom of the post. Your feedback is greatly appreciated!
Crispy Baked Tuna Patties
Kristen Chidsey
3
5 mins
20 mins
25 mins
Rate This Recipe
Print Recipe

Ingredients
- 1 teaspoon extra virgin olive oil
- ¼ cup minced green onions
- 2 large eggs
- ½ cup panko breadcrumbs
- 2 tablespoons mayonnaise
- 1 teaspoon seasoned salt
- 1 teaspoon minced garlic
- 1 medium lemon, zest and juice
- 10 ounces flaked albacore tuna, drained well
Instructions
-
Preheat the oven to 400℉/205℃ and line a baking sheet with parchment paper.
-
Heat 1 teaspoon extra virgin olive oil in a small saucepan over medium heat. Add ¼ cup minced green onions and sauté for 3-4 minutes over medium-high heat, until softened. Remove from the heat and allow to cool slightly.
-
In a medium mixing bowl, mix together 2 large eggs, ½ cup panko breadcrumbs, 2 tablespoons mayonnaise, 1 teaspoon seasoned salt, 1 teaspoon minced garlic, the green onion mixture, and zest and juice of 1 medium lemon until well combined.
-
Add 10 ounces flaked albacore tuna to the mayonnaise mixture and mix gently until just combined.
-
Scoop the tuna mixture out onto the prepared sheet pan and using your hands gently pat into a patty-like shape. For thin, crispy tuna patties, form 6 patties using ⅓ cup of mixture for each patty. For thicker tuna patties, form 3 patties, using about ⅔ of the mixture for each patty.
-
For thin tuna patties, bake for 10 minutes, flip and continue to bake for an additional 6-8 minutes, or until browned and crispy. For thicker patties, bake for 12 minutes, flip and continue to bake for 8-10 minutes, or until browned and crispy.
-
Allow to cool for 5 minutes and then serve with lemon wedges, tartar sauce, and hot sauce, as desired.
Equipment
-
Parchment Paper
-
Baking Sheet
-
Small Saucepan
-
Mixing Bowls
Notes
Mayonnaise: Do not use miracle whip. If you want to save on calories, use plain greek yogurt in place of mayonnaise if desired.
Gluten-Free Modification: Use gluten-free panko breadcrumbs in place of regular breadcrumbs for a gluten-free version.
Storage: Let cool, then place the tuna between layers of parchment paper in an airtight container, and store in the refrigerator for up to 3 days. Reheat in a 400℉/205℃ oven for 10 minutes, until warmed through.
Nutrition
Calories:
297
kcal
Carbohydrates:
11
g
Protein:
28
g
Fat:
15
g
Saturated Fat:
3
g
Polyunsaturated Fat:
6
g
Monounsaturated Fat:
5
g
Trans Fat:
0.03
g
Cholesterol:
168
mg
Sodium:
539
mg
Potassium:
345
mg
Fiber:
1
g
Sugar:
2
g
Vitamin A:
213
IU
Vitamin C:
19
mg
Calcium:
62
mg
Iron:
2
mg
Nutrition information is automatically calculated, so should only be used as an approximation.
Tried this recipe?
Mention @amindfullmom or tag #amindfullmom!
Originally shared in 2018 and updated in 2025.