
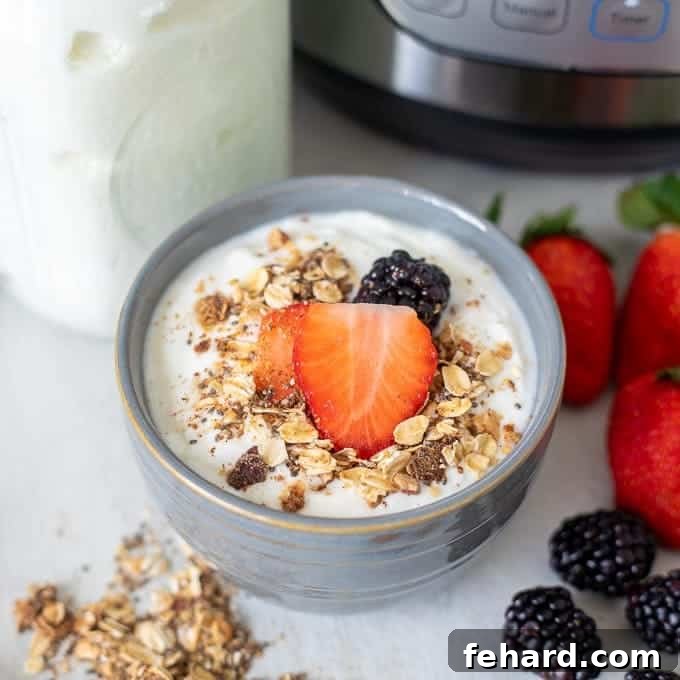
Effortless Homemade Yogurt: The Ultimate Guide to Cold Start Instant Pot Yogurt
Discover the incredibly simple world of homemade yogurt with this game-changing Cold Start Instant Pot Yogurt recipe. Say goodbye to complicated steps, thermometers, and endless waiting. With just two basic ingredients and your Instant Pot, you can create perfectly creamy, thick, and delicious yogurt right in your own kitchen. This method simplifies the process, making it an ideal choice for both beginners and seasoned home cooks looking for a foolproof way to enjoy fresh, wholesome yogurt every week.
While our traditional Instant Pot Yogurt recipe offers a fantastic way to make yogurt using ultra-pasteurized milk, this cold start approach takes convenience to a whole new level. For those eager to explore more ways to utilize their versatile pressure cooker, be sure to check out our collection of Instant Pot Recipes.
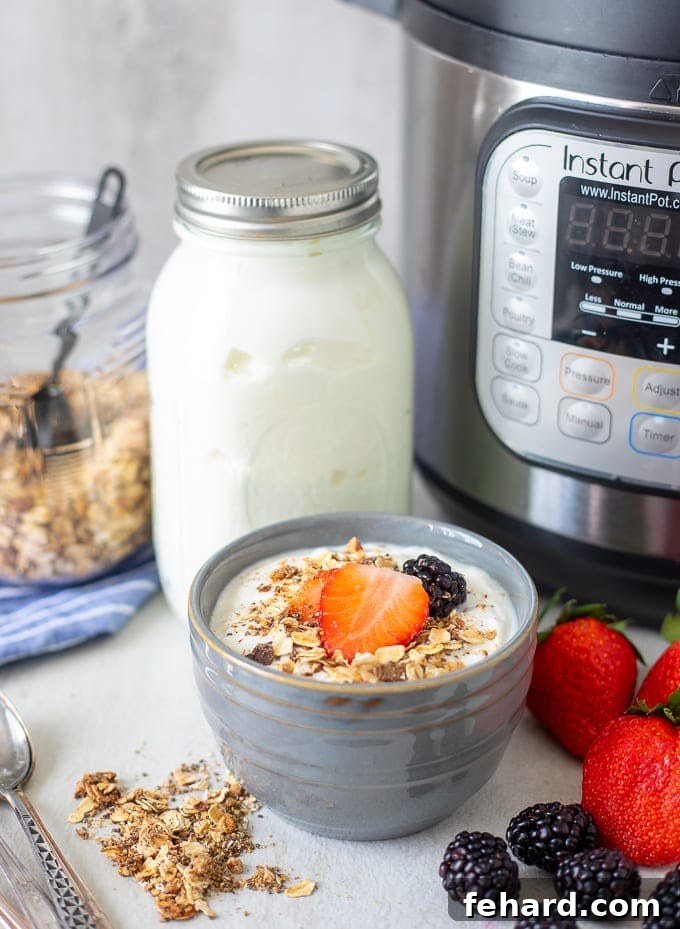
Making homemade yogurt was one of the first culinary skills I mastered with my pressure cooker, and it quickly became a weekly ritual. The satisfaction of knowing exactly what goes into your food, coupled with the incredible taste and texture of freshly made yogurt, is truly unmatched. However, many people are curious about the “cold start” method, and I’m thrilled to share that Instant Pot Cold Start Yogurt is even simpler and more forgiving than my initial recipe.
Why Choose Cold Start Instant Pot Yogurt?
The Cold Start method for making yogurt is truly revolutionary in its simplicity, making it almost impossible to fail. Unlike traditional yogurt-making, which often involves meticulous temperature monitoring and lengthy preparation, this approach streamlines the entire process. Here’s why it stands out as the easiest and most reliable way to achieve perfect yogurt:
- No Thermometer Needed: Forget about constantly checking temperatures. The beauty of cold start yogurt lies in its ability to bypass this often-intimidating step.
- No Boiling Milk: Traditional methods require scalding milk to a high temperature and then cooling it down. With cold start, this crucial step is eliminated, saving you significant time and effort.
- No Guesswork on Temperature: You won’t have to wonder if your milk reached the precise temperature needed for optimal culturing. The cold start method removes this variable, ensuring consistent results every time.
- Naturally Thick Yogurt: One of the most common challenges with homemade yogurt is achieving a thick, creamy consistency. This method consistently produces yogurt that’s thick and rich, often comparable to Greek yogurt, without the need for straining. This means less equipment and less cleanup!
- Minimal Ingredients, Maximum Flavor: You only need two simple ingredients and your Instant Pot to create this delicious, wholesome cold start yogurt.
Essential Ingredients for Perfect Cold Start Yogurt
Achieving perfect Cold Start Instant Pot Yogurt is surprisingly simple, primarily thanks to its minimal ingredient list. The key to this foolproof method lies in selecting the right type of milk and a reliable starter culture. Here’s what you’ll need:
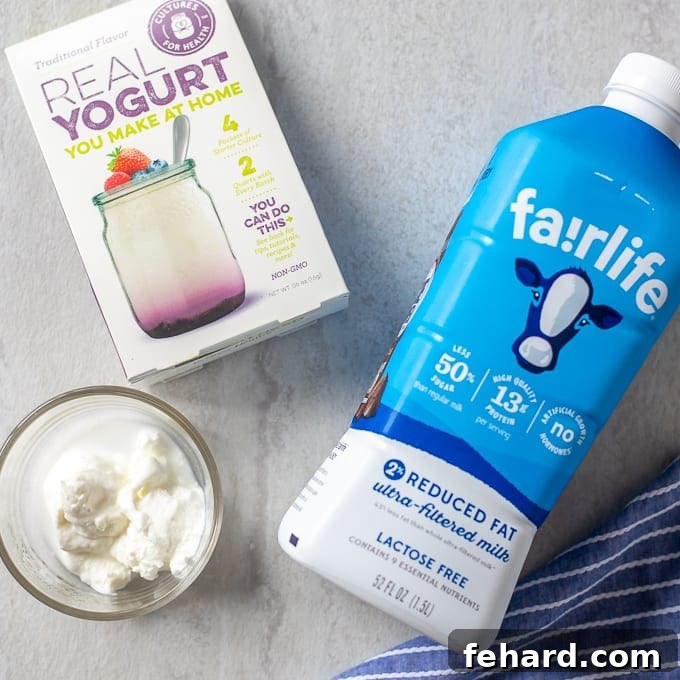
- Ultra-Pasteurized Milk or Ultra-Filtered Milk
- 2 tablespoons plain yogurt with active live cultures or a dedicated yogurt starter
Understanding Your Milk: Ultra-Pasteurized vs. Ultra-Filtered
The secret to the “cold start” method lies entirely in the type of milk you use. Regular pasteurized milk requires a boiling step to denature its proteins, allowing for a thicker yogurt. However, ultra-pasteurized or ultra-filtered milk has already undergone a high-heat treatment that denatures these proteins, making the pre-boiling step unnecessary. This is what makes the cold start method so quick and easy.
- Ultra-Pasteurized Milk: This milk has been heated to a much higher temperature than regular pasteurized milk for a shorter duration. This process kills more bacteria and denatures proteins sufficiently for yogurt making without additional boiling. Most organic milks are ultra-pasteurized, but always double-check the label to ensure it explicitly states “ultra-pasteurized.”
- Ultra-Filtered Milk: For the creamiest, thickest, and most foolproof results, ultra-filtered milk is highly recommended. While still pasteurized, this milk undergoes an additional special filtration process. The result is milk with typically 50% more protein, 30% more calcium, and half the sugar compared to regular milk. It’s also often lactose-free, which is a bonus for those with sensitivities. This enhanced nutritional profile directly translates into a yogurt that is incredibly rich, thick, and has a higher protein and calcium content with less sugar – perfect for health-conscious individuals. Brands like Fairlife are excellent examples of ultra-filtered milk that yield exceptional cold start yogurt.
While both types of milk work, ultra-filtered milk consistently produces a superior texture and is less prone to issues. If you choose standard ultra-pasteurized milk, you might find the yogurt a bit thinner, though still delicious. For a super thick result with ultra-pasteurized milk, you may consider straining it after refrigeration.
Selecting Your Starter Culture
The other crucial ingredient is your starter culture. This introduces the beneficial bacteria that ferment the milk and turn it into yogurt. Without active live cultures, your milk won’t transform into yogurt.
- Plain Yogurt with Active Cultures: The easiest and most common starter is a small amount of plain, store-bought yogurt that clearly states “contains active and live cultures” on its label. Greek yogurt varieties often work best due to their thicker consistency and robust cultures. Avoid flavored yogurts or those with added sweeteners, as these can interfere with the fermentation process.
- Yogurt Starter Culture: You can also purchase powdered yogurt starter cultures, which offer a consistent and reliable way to begin your batch. Follow the package instructions for the specific amount needed.
A smart tip for continuous yogurt making is to reserve a small amount of your fresh homemade yogurt from each batch to use as the starter for your next. This can save you money and ensure you always have an active culture on hand. Just ensure it’s unflavored and stored correctly.
Step-by-Step Guide: Making Cold Start Instant Pot Yogurt
Making Cold Start Yogurt in your Instant Pot is a straightforward process that anyone can master. Follow these simple steps for perfectly creamy and delicious homemade yogurt every time.
Step 1: Sanitize Your Instant Pot
Cleanliness is paramount when making yogurt to ensure successful fermentation and prevent unwanted flavors or bacteria. You definitely don’t want your fresh yogurt tasting like the chili you made last week!
- Thoroughly wash your Instant Pot’s inner pot with soap and water, then rinse well.
- For an extra layer of sanitation, wipe down the inner pot with white vinegar, then rinse it thoroughly and dry completely.
- Consider investing in a separate silicone sealing ring exclusively for yogurt making. Silicone can absorb odors, and a dedicated ring will prevent your yogurt from picking up savory smells from other Instant Pot dishes. While not strictly necessary, it’s a highly recommended practice for optimal yogurt flavor.
Step 2: Combine Milk and Starter to Pressure Cooker
This is where the magic begins. Preparing your milk and starter correctly ensures an even distribution of cultures for consistent fermentation.
- In a separate bowl, whisk together 1 cup of your ultra-pasteurized or ultra-filtered milk with 2 tablespoons of your chosen yogurt starter (or plain yogurt with active cultures) until thoroughly combined and smooth. This helps to evenly disperse the live cultures into a smaller volume of milk first.
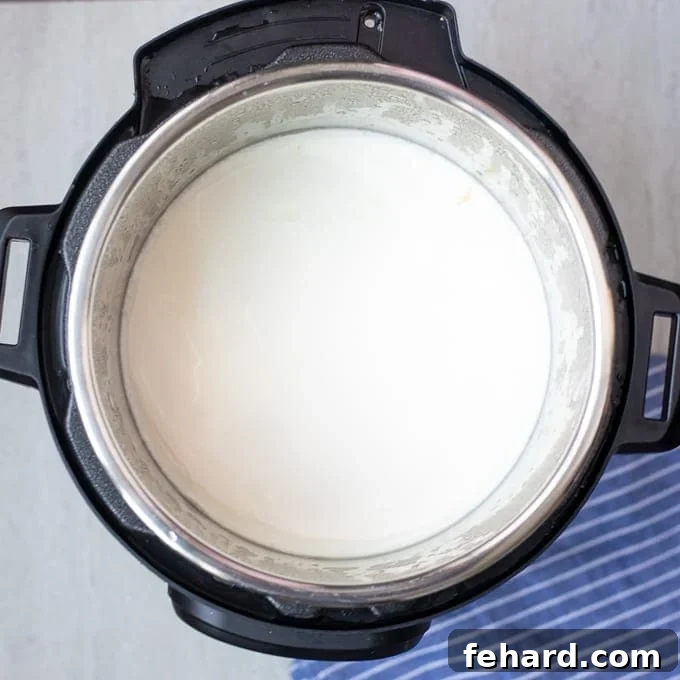
- Pour the remaining 52 ounces (or desired amount) of milk into the clean inner pot of your Instant Pot.
- Add the starter mixture to the milk in the inner pot and whisk gently but thoroughly to ensure the cultures are evenly distributed throughout all the milk.
Step 3: Incubate Yogurt
The Instant Pot’s “Yogurt” function is specially designed to maintain the optimal temperature for bacterial growth, making incubation effortless.
- Place the lid on your Instant Pot. There is no need to seal the venting knob; simply ensure the lid is properly aligned and closed.
- Press the “Yogurt” button on your Instant Pot. The display should typically show “8:00” (for 8 hours) and indicate “NORMAL” heat. If it shows “LOW” heat, press the “Yogurt” button again until “NORMAL” is lit up. The “NORMAL” setting provides the correct temperature for incubation.
- Allow the Instant Pot to begin its incubation cycle. It will maintain a warm, consistent temperature, allowing the bacteria in your starter to multiply and transform the milk into yogurt.
Step 4: Refrigerate Yogurt
After incubation, a crucial chilling period helps the yogurt set further, develop its flavor, and halt the fermentation process.
- Once the 8-hour incubation period is complete, carefully remove the inner pot from your Instant Pot.
- Cover the inner pot tightly with plastic wrap or a fitted lid.
- Place the covered pot in the refrigerator and chill for at least 8 hours. This refrigeration period is essential for the yogurt to fully set and achieve its thick, creamy texture. It also allows the flavors to meld and mellow.
- After refrigeration, transfer your homemade yogurt into clean glass jars or airtight containers for storage. It’s now ready to enjoy!
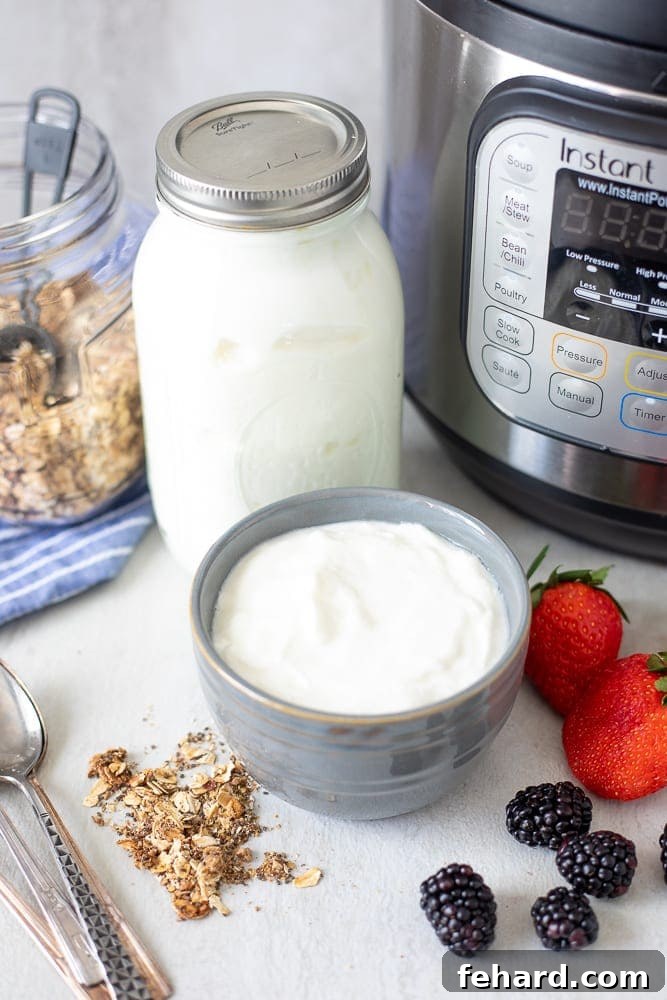
Expert Tips for Your Best Homemade Yogurt
Mastering homemade yogurt is simple, but a few expert tips can elevate your results from good to absolutely fantastic. Keep these pointers in mind for consistent success and customizable deliciousness.
- Milk Type is Non-Negotiable: Remember, the “cold start” method relies entirely on ultra-pasteurized or ultra-filtered milk. There is no direct substitution if you want to skip the boiling step. If you use regular pasteurized milk, you must follow a traditional yogurt recipe that includes a boiling and cooling phase, such as our original Instant Pot Yogurt recipe. Always check your milk label for “ultra-pasteurized” or “ultra-filtered.”
- Fat Content for Creaminess: The fat percentage of your milk directly impacts the final creaminess of your yogurt. Higher fat milk (like whole milk) will yield a richer, thicker yogurt, while lower fat options (like 2% or skim) will produce a lighter, yet still delicious, version. I personally find 2% ultra-pasteurized milk offers a wonderful balance of creaminess and lightness.
- Scaling the Recipe: This recipe is incredibly flexible! You can easily cut the recipe in half for a smaller batch. Conversely, if you own an 8-quart Instant Pot, you can double the ingredients to make a larger quantity of homemade yogurt, perfect for bigger families or meal prepping.
- Starter Culture is Key: For successful fermentation, you must use a yogurt starter or plain yogurt containing active live cultures. Look for brands that explicitly state “live and active cultures” on the label. Plain Greek yogurt (like Chobani or store brands) often works well as a starter due to its robust culture content.
- Flavoring Your Yogurt: For best results, always sweeten or flavor your yogurt after the incubation and refrigeration process. Adding sweeteners or fruit before culturing can interfere with the bacterial activity. Get creative with vanilla extract, honey, maple syrup, fresh fruit purees, or even a dash of cinnamon for a delightful treat.
- Saving Your Starter for Future Batches: To ensure you always have a starter on hand, freeze a portion of your freshly made homemade yogurt immediately after it’s set. An ice cube tray is perfect for this; each cube can hold approximately 1 tablespoon of yogurt. Simply defrost the required number of cubes in the refrigerator before your next batch to preserve the live cultures.
- Adjusting Tanginess: The longer your yogurt incubates, the tangier it will become. For a milder flavor, stick to the recommended 8 hours. If you prefer a more pronounced tartness, extend the incubation period to 10 hours.
- Storage and Shelf Life: Properly stored homemade yogurt will typically last for 10 to 14 days in your refrigerator. Keep it in airtight glass jars or containers to maintain freshness and prevent it from absorbing other odors.
- Troubleshooting Thin Yogurt: If your yogurt turns out thinner than desired, especially when using ultra-pasteurized milk (not ultra-filtered), you can easily strain it. Line a colander with cheesecloth and place it over a bowl. Pour the yogurt into the cheesecloth and let it sit in the refrigerator for a few hours. The longer it strains, the thicker your yogurt will become, yielding a consistency similar to Greek yogurt. The liquid collected is whey, which can be used in smoothies or baking.
The Health Benefits of Homemade Yogurt
Beyond its delicious taste and economical advantages, homemade yogurt offers a wealth of health benefits that make it a superior choice over many store-bought alternatives. By making it yourself, you control the ingredients, avoiding unnecessary sugars, artificial flavors, and preservatives.
- Rich in Probiotics: Homemade yogurt is teeming with live and active cultures, beneficial bacteria known as probiotics. These probiotics are crucial for a healthy gut microbiome, which plays a vital role in digestion, nutrient absorption, and immune function.
- Improved Digestion: The probiotics in yogurt can help balance the good bacteria in your gut, aiding in digestion, reducing bloating, and alleviating symptoms of common digestive issues like irritable bowel syndrome (IBS) and constipation.
- Boosted Immunity: A healthy gut is directly linked to a strong immune system. Regular consumption of probiotic-rich yogurt can help fortify your body’s defenses against illness.
- Excellent Source of Calcium and Protein: Yogurt is naturally rich in calcium, essential for strong bones and teeth, and a great source of high-quality protein, which supports muscle growth and repair, satiety, and overall body function. Ultra-filtered milk varieties enhance these benefits even further.
- Weight Management Support: The combination of protein and healthy fats in yogurt helps you feel fuller for longer, potentially reducing overall calorie intake and supporting weight management goals.
- Customizable and Allergen-Friendly: Making your own yogurt allows you to tailor it to your dietary needs. You can choose lactose-free milk (like ultra-filtered varieties) or use specific cultures to meet your preferences.
Creative Ways to Enjoy Your Homemade Yogurt
Once you’ve mastered the art of making Cold Start Instant Pot Yogurt, a world of culinary possibilities opens up! Its creamy texture and mild tang make it incredibly versatile. Here are some delightful ways to incorporate your homemade goodness into your daily meals:
- Breakfast Power Bowls: The most classic way to enjoy yogurt! Top it with granola, fresh berries, sliced bananas, nuts, seeds, a drizzle of honey or maple syrup, or even a sprinkle of cocoa nibs for an energizing start to your day.
- Smoothies and Shakes: Add a generous scoop of yogurt to your favorite fruit smoothies for extra creaminess, protein, and probiotics. It also helps to thicken the consistency naturally.
- Healthy Dressings and Dips: Replace mayonnaise or sour cream with plain yogurt in salad dressings, creamy dips, or sandwich spreads for a lighter, tangier, and more nutritious alternative. Think cucumber dill dip (tzatziki!) or a creamy ranch dressing.
- Marinades for Meats: The acidity in yogurt is a fantastic tenderizer and flavor enhancer for chicken, lamb, or fish. It creates incredibly juicy and flavorful results, especially in Indian and Middle Eastern cuisine.
- Baking Substitute: Use plain yogurt as a substitute for buttermilk, sour cream, or even oil in baked goods like muffins, quick breads, or cakes. It adds moisture, tenderness, and a subtle tang.
- Frozen Yogurt Treats: Blend homemade yogurt with fruit, a touch of sweetener, and freeze for a refreshing and healthy dessert. You can even make yogurt popsicles!
- Savory Sides: Serve it alongside spicy dishes to cool the palate, or dollop it onto chilis and soups for a creamy finish.
More Instant Pot Essentials
Your Instant Pot is a powerhouse beyond yogurt! Explore these other foundational recipes that make weeknight meals and meal prep a breeze:
- Instant Pot Chicken Stock
- Instant Pot Spaghetti Sauce
- Instant Pot Chicken Breasts
- Instant Pot Beans
- Perfect Instant Pot Hard Boiled Eggs
- Instant Pot Steel Cut Oats
Recipe Card: Instant Pot Cold Start Yogurt
Instant Pot Cold Start Yogurt
By: Kristen Chidsey
Servings: 10
Prep Time: 5 mins Cook Time: 8 hrs Refrigerate: 8 hrs Total: 16 hrs 5 mins
Homemade Yogurt has NEVER been easier than with this Cold Start Instant Pot Yogurt. Two ingredients and time is all you need to have perfect, creamy, thick yogurt.
Ingredients
- 52 ounces Ultra Pasteurized Milk (Ultra-Filtered is BEST – see notes)
- 2 tablespoons prepared yogurt with live cultures, or yogurt starter
Instructions
- Whisk 1 cup of milk with 2 tablespoons prepared yogurt with live cultures (or starter) until well combined.
- Pour the remaining 52 ounces Ultra Pasteurized Milk into the inner pot of pressure cooker and then whisk in starter mixture.
- Place lid on the pressure cooker. There is no need to seal.
- To set the incubation time, hit the yogurt function and then adjust the function until the time reads 8:00 (be sure pressure is at normal and not low – if at low, hit yogurt again). *See recipe notes on using a Duo Plus Model.
- After the 8-hour incubation period, remove the inner pot from the pressure cooker. Cover with plastic wrap and place in the refrigerator for 8 hours.
- After refrigeration, store yogurt in glass containers for 10-14 days.
Equipment
- Electric Pressure Cooker with Yogurt Function
Notes
- Fairlife milk is ultra-filtered, meaning it has more protein and less sugar, producing a thicker yogurt than just ultra-pasteurized milk. If you use ultra-pasteurized milk (not ultra-filtered), you may want to strain your yogurt for a super thick result.
- Ultra-filtered vs Ultra-pasteurized: Ultra-filtered milk seems to be more foolproof than ultra-pasteurized milk, as a couple of brands of the latter have not set up as well for some.
- For Custom Temp (Instant Pot Evo Duo Plus): Select custom temperature using the yogurt function and set to 110 degrees Fahrenheit. For a standard Duo Plus, hit Yogurt, then hit the down button on temperature until the screen reads “8:00” medium. That will skip the boil section.
- The nutrition information was calculated using 2% milk, and each serving size is 4 ounces.
Nutrition
Calories: 70kcal | Carbohydrates: 4g | Protein: 8g | Fat: 3g | Saturated Fat: 1g | Cholesterol: 11mg | Sodium: 69mg | Potassium: 206mg | Sugar: 3g | Vitamin A: 150IU | Vitamin C: 0.3mg | Calcium: 221mg
Nutrition information is automatically calculated, so should only be used as an approximation.
Final Thoughts
Embarking on your homemade yogurt journey with the Cold Start Instant Pot method is an incredibly rewarding experience. It simplifies what once seemed like a complex culinary task into an easy, enjoyable process that yields consistently delicious results. From the convenience of minimal ingredients and no boiling to the rich, creamy texture you’ll achieve without straining, this recipe truly transforms yogurt making. Enjoy the satisfaction of knowing exactly what goes into your food, and delight in creating a versatile, probiotic-rich staple that can be customized to your heart’s content. Happy yogurt making!
This instant pot yogurt method was named “Cold Start” by Freida Loves Bread to the best of my knowledge.