

Ditch the store-bought processed meals and whip up a batch of these incredibly delicious Homemade Hot Pockets instead! This easy copycat recipe offers a world of customization with endless filling options, making it a truly versatile and family-friendly meal. Not only are they bursting with flavor, but they’re also wonderfully freezer-friendly, providing a perfect, quick, and satisfying on-the-go meal for busy schedules.
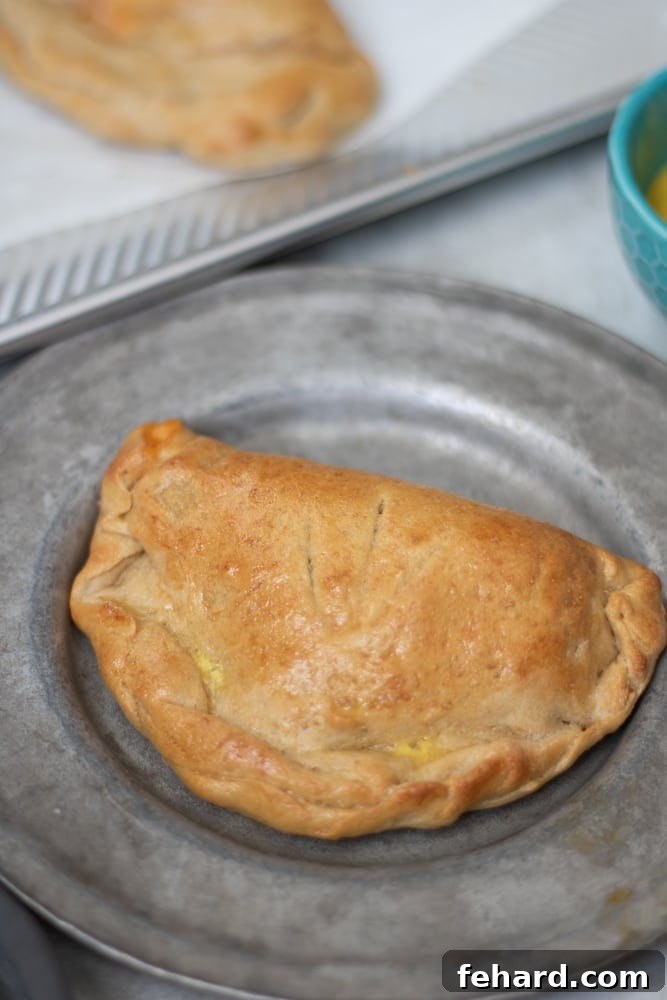
Do you remember growing up with store-bought Hot Pockets? For many, including myself, they were a college staple – a convenient, inexpensive, and quick grab-and-go meal during those hectic years. While the concept of a hot, savory pocket filled with cheesy goodness was undeniably appealing, the actual flavor and the long list of unpronounceable ingredients often left much to be desired.
That’s precisely why I embarked on a mission to create the ultimate homemade Hot Pocket recipe. This version is not only incredibly easy to prepare but also tastes a million times better than anything you’ll find in the frozen food aisle of your local grocery store. With fresh ingredients and complete control over what goes in, you’ll discover a new appreciation for this classic comfort food, reimagined for modern, health-conscious palates.
Why Homemade Hot Pockets Are a Game Changer
Once you try these homemade hot pockets, you’ll wonder why you ever settled for the store-bought versions. Here’s why they’ll quickly become a favorite in your kitchen:
- Unmatched Versatility. While the classic ham and cheese remains a beloved option, the beauty of homemade hot pockets lies in their adaptability. You are limited only by your imagination! Experiment with a vast array of fillings to truly make a hot pocket YOUR way, catering to every craving and dietary preference. From breakfast to dinner, the possibilities are endless.
- Remarkably Freezer-Friendly. Just like their store-bought counterparts, these homemade hot pockets are designed for convenience. Prepare a large batch ahead of time and freeze them, allowing you to pull one out whenever a craving strikes. They reheat beautifully, maintaining their delicious texture and flavor, making meal prep a breeze for busy weekdays.
- Significantly Better for You. When you make hot pockets at home, you eliminate unnecessary added preservatives, artificial flavors, and excessive sodium often found in commercial products. YOU are in complete control of the quality of ingredients, allowing you to choose fresh, wholesome components, whole grain dough, and lean proteins, transforming a guilty pleasure into a nutritious and satisfying meal.
- Cost-Effective and Economical. Crafting your own hot pockets can be surprisingly budget-friendly. Utilizing common pantry staples and leftover ingredients, you can create a substantial amount of delicious meals for a fraction of the cost of regularly purchasing frozen hot pockets. This makes them an excellent option for feeding a family or managing a tight food budget.
- Freshness You Can Taste. There’s simply no comparison to the taste of freshly baked dough encasing warm, melty cheese and savory fillings. The aroma alone will make your kitchen feel like a gourmet bakery, delivering a sensory experience that pre-packaged versions simply cannot replicate.
Essential Ingredients & Customization Tips
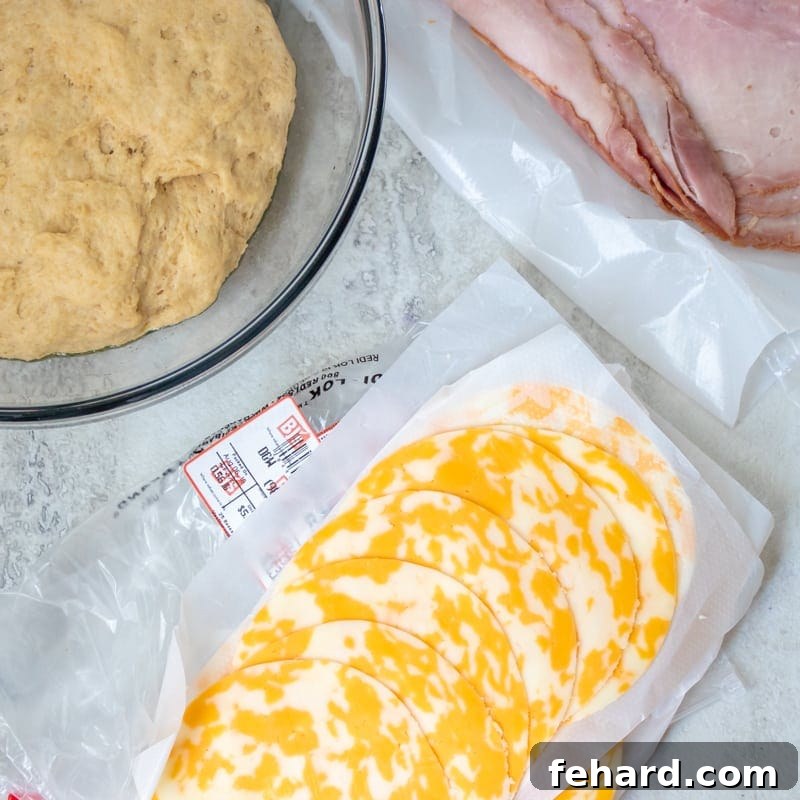
Crafting the perfect homemade hot pocket starts with choosing the right ingredients. Here’s a closer look at what you’ll need and how to make the most of each component:
- Pizza Dough: The foundation of your hot pocket! For the absolute best flavor and texture, consider using a homemade pizza dough. It’s surprisingly easy to make and yields a wonderfully tender crust. However, for ultimate convenience, any good quality store-bought pizza dough will work beautifully. Look for dough in the refrigerated section of your grocery store. Allow it to come to room temperature before rolling for easier handling.
- Egg Wash: This simple mixture of a whisked egg and a tablespoon of water is crucial for achieving that beautiful, golden-brown crust and a slightly crispy exterior. It also helps to seal the edges more securely. If you need an egg-free alternative, you can brush the dough with a little olive oil or milk for a similar effect.
- Endless Filling Options: This is where the fun truly begins! Simply roll out your dough as instructed, then top each oval with your desired combination of flavors. Remember to be mindful not to overfill, as this can make sealing difficult and lead to leaks during baking. Get creative with these suggestions or invent your own unique fillings:
- Classic Ham and Cheese: A timeless favorite. Use thinly sliced deli ham for even distribution, or make use of leftover Instant Pot Ham or Baked Ham. Pair it with thinly sliced Colby, cheddar, Swiss, or even provolone cheese for a perfectly gooey center.
- Savory Pizza Hot Pockets: Transform your hot pockets into mini pizzas! Spread 2 teaspoons of your favorite pizza sauce on each dough section, then sprinkle with 2-3 tablespoons of shredded mozzarella cheese. Add ½ tablespoon of mini pepperoni or chopped regular pepperoni for that classic pizza experience. Don’t forget a sprinkle of Italian herbs!
- Hearty Ham and Broccoli Hot Pockets: A great way to sneak in some veggies! Combine 1 slice of ham, 2 tablespoons of shredded cheddar cheese, and 1 tablespoon of finely diced, cooked broccoli florets. Ensure the broccoli is cooked and cooled to avoid excess moisture.
- Comforting Chicken Parmesan Hot Pockets: A fantastic way to use leftover chicken! Top the dough with 2 teaspoons of rich spaghetti sauce, 2-3 tablespoons of shredded mozzarella cheese, and 1 tablespoon of chopped cooked chicken. A sprinkle of Parmesan cheese can elevate the flavor.
- Robust Meatball Hot Pockets: A filling and flavorful option. Start with 2 teaspoons of marinara orspaghetti sauce. Cut cooked meatballs in half (or quarters if they are large) and add 3-4 halves to each piece of dough. Finish with a generous sprinkle of 2-3 tablespoons of mozzarella cheese.
- Morning Delight Egg and Sausage Hot Pockets: Perfect for breakfast or brunch! Crumble ½ tablespoon of cooked breakfast sausage over each piece of dough. Top with ¼ cup of fluffy scrambled eggs and 1 tablespoon of shredded cheddar cheese. A dash of hot sauce inside could add a kick!
- Spinach and Feta (Vegetarian): A Mediterranean-inspired delight! Mix cooked spinach (squeezed dry) with crumbled feta cheese and a hint of garlic powder.
- Philly Cheesesteak Pockets: Sautéed thinly sliced steak with onions and bell peppers, topped with provolone cheese.
- BBQ Chicken Pockets: Shredded cooked chicken mixed with your favorite BBQ sauce and a little cheddar cheese.
How To Make Homemade Hot Pockets: A Step-by-Step Guide
Creating these delicious homemade hot pockets is simpler than you might think. Follow these detailed steps to ensure perfect, flavorful results every time. You will find the precise ingredient quantities and comprehensive instructions in the recipe card at the bottom of this post.
- Prepare Your Dough: Begin by preparing a batch of homemade pizza dough, or for a quicker option, use 1 pound of your preferred store-bought pizza dough. Ensure the dough is at room temperature, as this makes it much easier to work with and roll out.
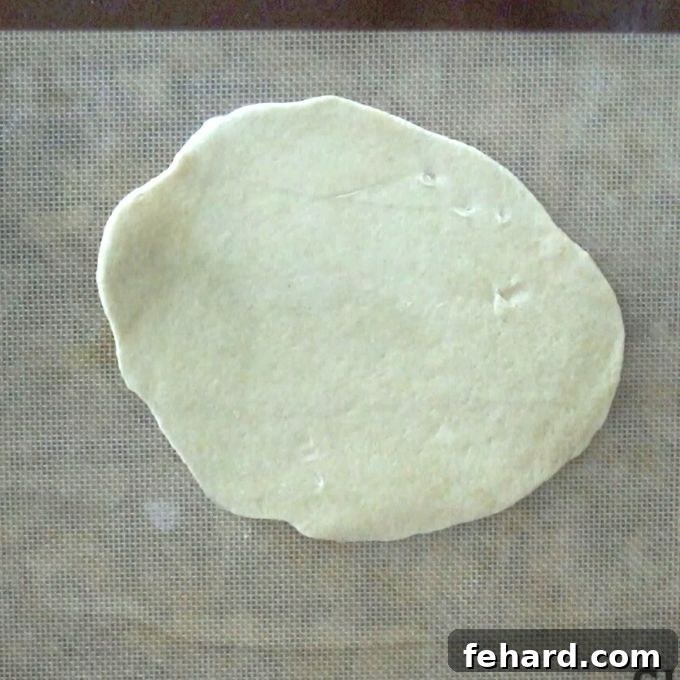
- Divide and Shape: On a lightly floured surface, divide the pizza dough into 8 equal pieces. Take each piece and roll it out into an oval shape, approximately 8 inches long. Aim for an even thickness, not too thin that it tears, and not too thick that it becomes bready.
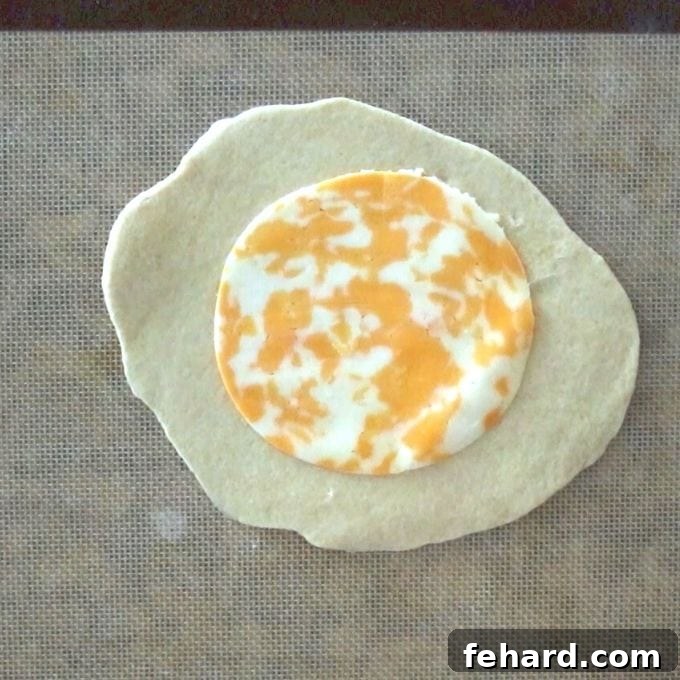
- Add Your Chosen Fillings: Evenly divide your chosen fillings (such as ham and cheese, or any of the exciting variations mentioned above) among the 8 dough ovals. Place the fillings slightly off-center on one half of each oval, leaving a clear border around the edges. This is crucial for proper sealing.
- Fold and Seal Securely: Carefully fold the empty half of the dough over the filling, creating a crescent or half-moon shape. Gently press down around the edges to seal the dough. To ensure a tight, leak-proof seal (just like you would for a calzone), use your fingers to crimp the edges, or press them firmly with the tines of a fork. A good seal prevents your delicious filling from escaping during baking.
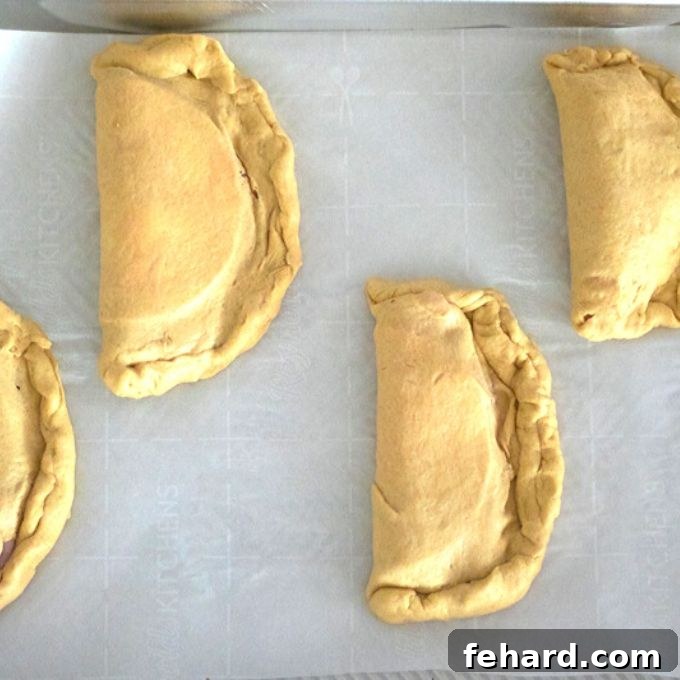
- Prepare for Baking: Carefully transfer the sealed hot pockets onto a baking sheet that has been lined with parchment paper or is well-greased. This prevents sticking and makes cleanup easier.
- Vent for Steam: Using a sharp knife or kitchen shears, cut 2-3 small slits across the top of each hot pocket. These vents are essential as they allow steam to escape while baking, preventing the pockets from bursting and ensuring an evenly cooked interior.
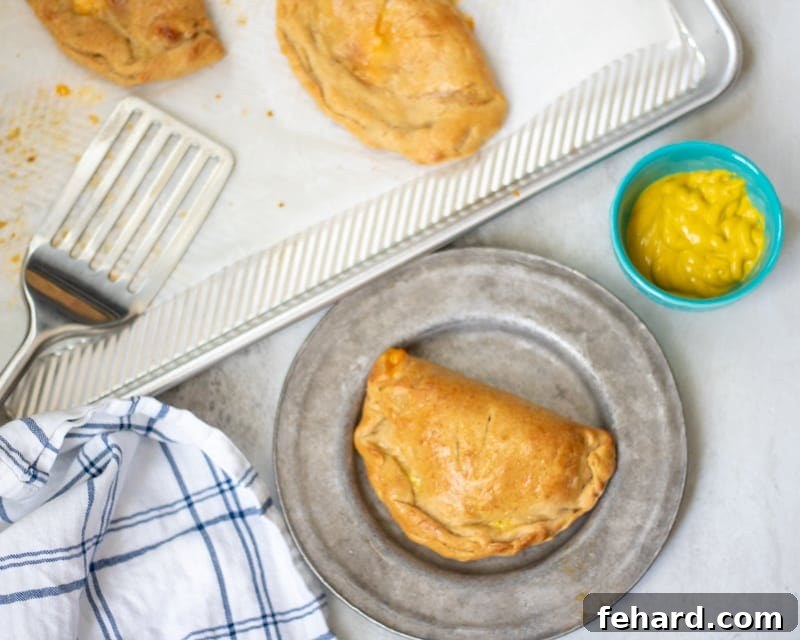
- Bake to Golden Perfection: Bake the hot pockets in a preheated oven for 12-15 minutes, or until the dough is beautifully golden brown and the filling is hot and bubbly. The exact baking time may vary slightly depending on your oven and the thickness of your dough.
- Cool and Serve: Once baked, remove the hot pockets from the oven and let them cool for a few minutes on the baking sheet before serving. The filling will be extremely hot, and a short cooling period allows it to set slightly, preventing burns and making them easier to handle.
Storage & Reheating for Maximum Convenience
One of the best features of homemade hot pockets is their incredible versatility for meal prep. Properly stored, they can provide quick and delicious meals whenever you need them.
- Refrigerate: Leftover hot pockets can be stored in an airtight container in the refrigerator for 3-4 days. Ensure they are completely cooled before storing to prevent condensation.
- Freeze for Longer Storage: To freeze, first allow the fully cooked and cooled hot pockets to come to room temperature. Then, place them in a single layer on a baking sheet and transfer the baking sheet to the freezer. Freeze until they are solid, which usually takes about 30-60 minutes. Once solid, transfer the frozen hot pockets to a freezer-safe bag or container, removing as much air as possible to prevent freezer burn. They can be stored in the freezer for up to 3 months. Don’t forget to label the bag with the date and filling type!
- Reheat from Refrigerated: To reheat a hot pocket from the refrigerator, place it on a microwave-safe plate and microwave for 45 seconds to 1 minute, or until warmed through. Alternatively, for a crispier crust, bake it in a preheated oven at 400 degrees F (200 degrees C) for 5-8 minutes. Always let it cool for 1-2 minutes before eating, as the filling can be very hot.
- Reheat from Frozen: For reheating from frozen, you have a couple of options. You can place an individual frozen hot pocket on a microwave-safe plate and microwave for 2-3 minutes, rotating halfway through, until heated through. For best results and a delicious crispy crust, bake frozen hot pockets on a baking sheet in a preheated oven at 400 degrees F (200 degrees C) for 12-18 minutes. The exact time will depend on your oven and the thickness of the hot pocket. Always check that the internal temperature is thoroughly heated. Again, allow to cool for 2-3 minutes before enjoying.
Packing Homemade Hot Pockets for Lunch
Homemade hot pockets are an excellent choice for a satisfying and easy lunch at school or work. Here are a couple of convenient ways to pack them:
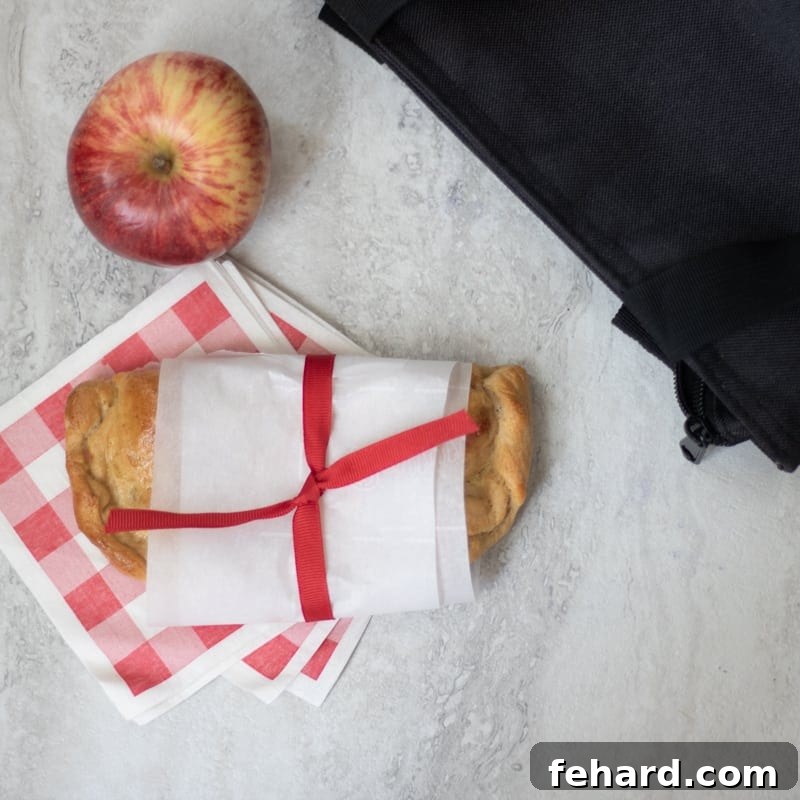
- With Microwave Access: If your office or school has a microwave, pack a homemade hot pocket (either frozen or refrigerated) wrapped in parchment paper in your lunch bag, along with an ice pack to keep it cool. When lunchtime arrives, simply heat the hot pocket right on the parchment paper in the microwave for 1-2 minutes until warm.
- Without Microwave Access: If you don’t have access to a microwave, heat a hot pocket thoroughly in the morning before you leave for school or work. Once hot, place it immediately into an insulated food thermos. Your hot pocket will stay warm and be ready for you to enjoy at lunch.
More Delicious Recipes Featuring Leftover Ham
If you’re making ham and cheese hot pockets and find yourself with extra ham, don’t let it go to waste! Explore my full collection of leftover ham recipes for more culinary inspiration, or check out these fantastic ideas below:
- Cheesy Ham and Scalloped Potatoes
- Ham and Cheese Stromboli
- Ham and Egg Breakfast Casserole
- Instant Pot Ham and Cheese Pasta
- Instant Pot Split Pea Soup
- Ham and Cheese Sliders
Did you make this recipe?
If you enjoyed this recipe, please consider leaving a comment with a 5-star review at the bottom of the post. Your feedback is greatly appreciated!
Homemade Hot Pockets
Rate

Ingredients
- 1 recipe homemade pizza dough, or store bought dough
- 1 pound ham, thinly sliced
- ½ pound sliced cheddar or Colby cheese
- 1 large egg
- 1 tablespoon water
Instructions
-
Preheat the oven to 450℉ (230℃). Line a baking sheet with parchment paper that can tolerate heat up to 450℉ (230℃).
-
Divide the pizza dough into 8 equal pieces and roll each piece into about an 8-inch oval.
-
Place 1 slice of cheese in the middle of each oval. Place 3-4 slices of the thinly sliced ham on each slice of the cheese.
-
Fold the dough over, creating a crescent shape. Using your fingers or the prongs of a fork, tightly seal the edges of the “hot pocket.”
-
Whisk the egg with 1 tablespoon water and brush each hot pocket evenly with the egg wash. Cut 2-3 slits on top of each hot pocket to let steam escape while baking.
-
Bake for 12-15 minutes until the hot pocket is nicely golden brown.
-
Serve warm or cool and store.
Notes
Cheese: Colby Jack Cheese was my family’s preferred cheese for this, but Swiss, cheddar, and provolone are all good options.
Pizza Dough: Homemade pizza dough or store-bought pizza dough both work for this recipe.
To make EGG FREE Hot Pockets, brush with olive oil before baking instead of the egg wash.
Different Filling Suggestions
- Pizza Hot Pockets: Top each hot pocket dough with 2 teaspoons pizza sauce, 2-3 tablespoons shredded mozzarella cheese, and ½ tablespoon pepperoni if desired.
- Ham and Broccoli Hot Pockets: Top each hot pocket with 1 slice of ham, 2 tablespoons shredded cheddar cheese, and 1 tablespoon cooked diced broccoli florets.
- Chicken Parmesan Hot Pockets: Top each hot pocket dough with 2 teaspoons marinara sauce, 2-3 tablespoons shredded mozzarella cheese, and 1 tablespoon chopped cooked chicken.
- Meatball Hot Pockets: Top each piece of dough with 2 teaspoons marinara sauce. Cut cooked meatballs in half. Add 3-4 halves to each piece of dough and sprinkle with 2-3 tablespoons mozzarella cheese.
- Egg and Sausage Hot Pockets: Crumble ½ tablespoon of cooked breakfast sausage over each piece of dough. Top with ¼ cup scrambled eggs and 1 tablespoon shredded cheddar cheese.
To Freeze Hot Pockets: Place fully cooked hot pockets on a baking sheet and place them in the freezer and freeze until solid. Place frozen Hot Pockets in a freezer-safe bag for up to 3 months. Reheat by microwaving for 2 minutes or baking at 400 degrees for 12-15 minutes.
Nutrition
Carbohydrates: 28g
Protein: 19g
Fat: 15g
Saturated Fat: 7g
Cholesterol: 47mg
Sodium: 1686mg
Potassium: 280mg
Fiber: 5g
Vitamin A: 285IU
Calcium: 219mg
Iron: 1.9mg
Nutrition information is automatically calculated, so should only be used as an approximation.
This post was originally published in 2016 but was updated in 2021 with new tips and expanded information for a better reader experience.