
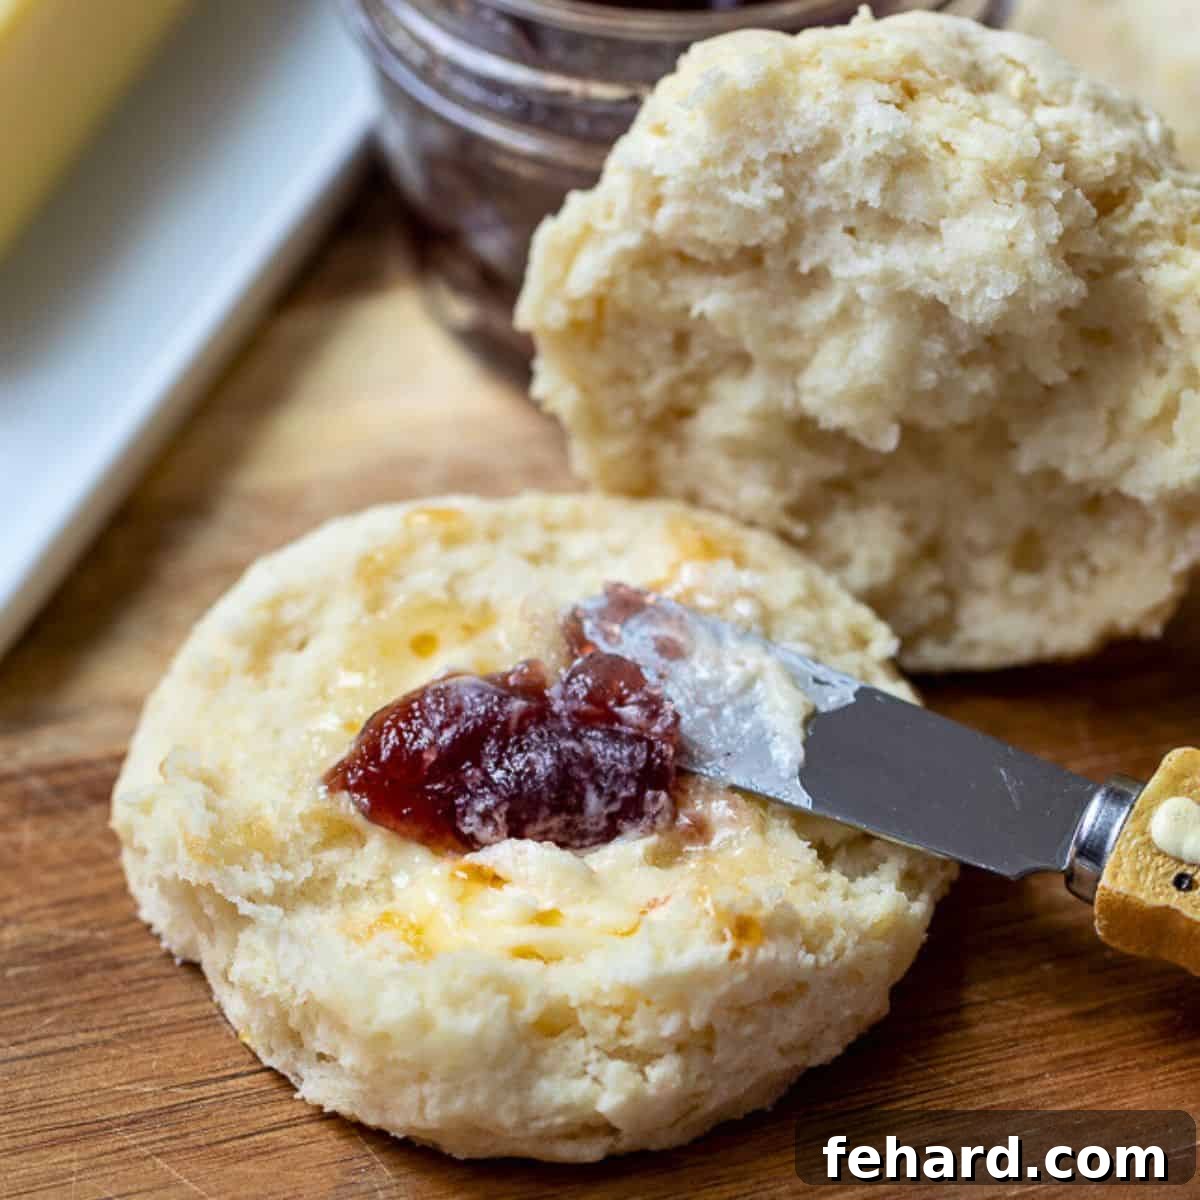
The Ultimate Guide to Flaky, Buttery Homemade Buttermilk Biscuits
There’s nothing quite like the warmth, aroma, and melt-in-your-mouth texture of a freshly baked, homemade buttermilk biscuit. Forget the bland, store-bought cans; this easy recipe unlocks the secret to biscuits that are a million times better, boasting delicate, flaky layers and an irresistible buttery flavor. Whether you’re a seasoned baker or a kitchen novice, preparing these tender buttermilk biscuits from scratch is a rewarding experience that will elevate any meal.
Imagine a biscuit so light it practically floats, yet rich enough to satisfy. These golden wonders are incredibly versatile. Slather them with a vibrant homemade chia jam, a sweet and tangy Instant Pot apple butter, or simply a pat of softened butter. They are the perfect companion to a hearty bowl of soup or stew, and, of course, absolutely essential for soaking up every last drop of rich, homemade sausage gravy. This recipe is your ticket to biscuit perfection.
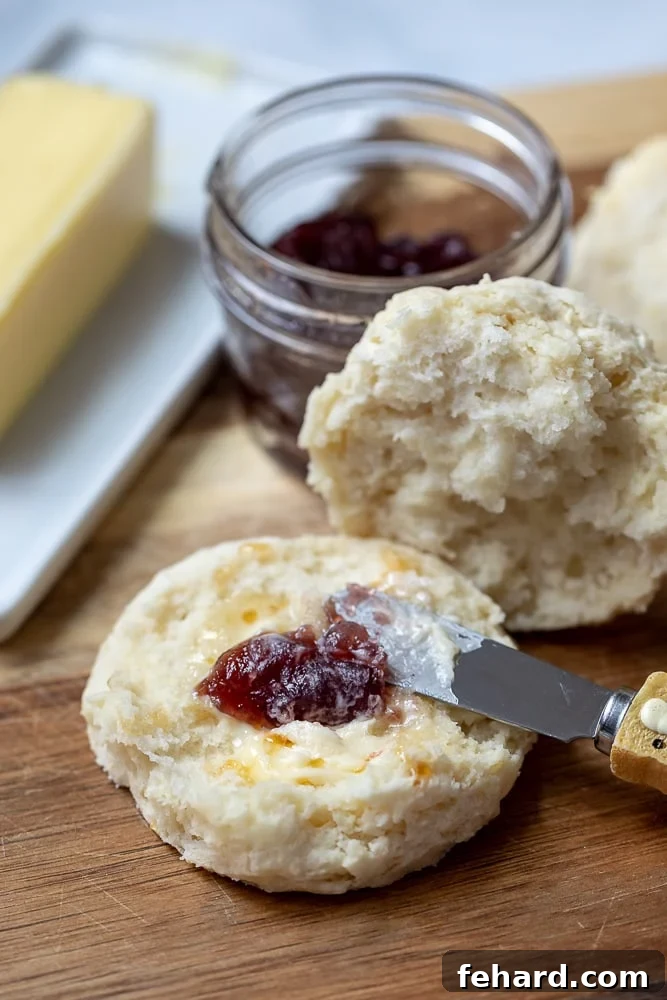
Why This Buttermilk Biscuit Recipe is Simply Perfect
You might wonder, what does a girl from Ohio, raised on light and airy homemade rolls, know about crafting authentic southern biscuits? Well, after living in the South for over two decades, I’ve made it my culinary quest to master the art of the perfect, buttery, flaky buttermilk biscuit. This wasn’t just a personal indulgence; my ‘little southern belle’ daughter considers biscuits her all-time favorite food, inspiring me to achieve true biscuit brilliance.
My daughter and all my southern friends agree: these biscuits are exceptional. Unlike many recipes that rely on shortening, my recipe uses only cold butter, which is key to achieving that exquisite crumb, light texture, and rich flavor. With my carefully refined tips and straightforward instructions, you too can conquer the challenge of baking perfectly fluffy buttermilk biscuits right in your own kitchen. Prepare to impress everyone with your newfound baking prowess!
Happy Cooking! xo Kristen
Recipe Highlights: Quick Navigation
- Buttermilk Biscuit Recipe Card
- Step-By-Step Walkthrough: Achieving Biscuit Perfection
- Delightful Serving Suggestions
- Storage & Make-Ahead Tips for Convenience
- Common Biscuit Troubleshooting
- Ingredient Insights & Variations
How to Make the Best Flaky Buttermilk Biscuits: A Detailed Guide
While homemade buttermilk biscuits are surprisingly easy to make, a few crucial tips will ensure you achieve perfect, flaky, and tender results every single time. The detailed measurements and steps are provided in the comprehensive recipe card below.
- Chill EVERYTHING for Ultimate Flakiness! This is perhaps the most critical secret to truly flaky biscuits, much like making a superb homemade pie crust. Ensuring all your ingredients – especially the butter and buttermilk – are ice-cold is paramount. Cold butter creates pockets of steam as it melts in the hot oven, which then expand to form those desirable, airy layers. I take this a step further by chilling my food processor bowl (or large mixing bowl) in the freezer for about 10-15 minutes before I begin. This extra chill factor makes a noticeable difference in the final texture of your biscuits.
- Prepare Homemade Buttermilk (If Needed). Don’t have buttermilk on hand? No problem! You can easily make a homemade substitute. Simply add 1 teaspoon of lemon juice or white vinegar to a glass measuring cup, then fill it up to the ¾ cup line with regular milk or cream. Stir it gently and place the mixture in the refrigerator. Allow it to sit for 5-10 minutes, giving the acid time to curdle the milk, creating a perfect, cold buttermilk substitute. This ensures your buttermilk is nice and cold, aligning with our ‘chill everything’ rule.
- Properly Prepare Your Cold Butter. For impeccable biscuits, using intensely COLD butter is non-negotiable. As the butter melts during baking, it releases steam, creating internal air pockets that contribute to the biscuits’ light and fluffy texture. To achieve the best incorporation into the flour, I highly recommend grating your butter using a cheese grater or a food processor fitted with a grating disc. Once grated, pop the butter back into the freezer for an additional 10-15 minutes. Alternatively, you can cube the butter into ¼-inch pieces and freeze them as well. The smaller, colder pieces integrate better without melting into the flour too quickly.
- Combine Dry Ingredients and Cut in Butter. With all your ingredients prepped and chilled, the biscuit dough comes together remarkably fast. In your large, cold mixing bowl or food processor, combine the all-purpose flour, baking powder, salt, and granulated sugar. Once mixed, add your super-cold, grated or cubed butter. Using a pastry cutter, two forks, or by pulsing in a food processor, quickly cut the butter into the dry ingredients until the mixture resembles coarse meal with some pea-sized butter pieces still visible. It’s crucial not to overmix here; you want distinct butter pieces to remain.
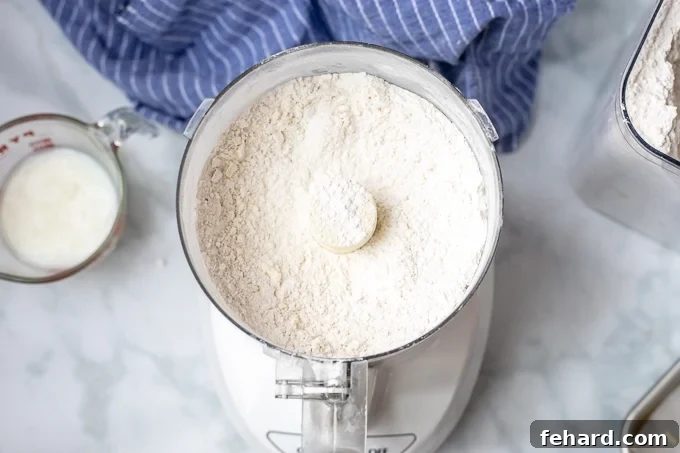
- Gently Add Buttermilk to Form Dough. Now, add your cold buttermilk to the flour-butter mixture. If using a food processor, pulse 2-3 times, just until the dough begins to come together. If mixing by hand, use a wooden spoon to stir until the ingredients barely combine. The key is minimal handling; overmixing will develop the gluten in the flour, resulting in tough, dense biscuits instead of light, tender ones. The dough should look shaggy and somewhat sticky, not smooth and uniform.
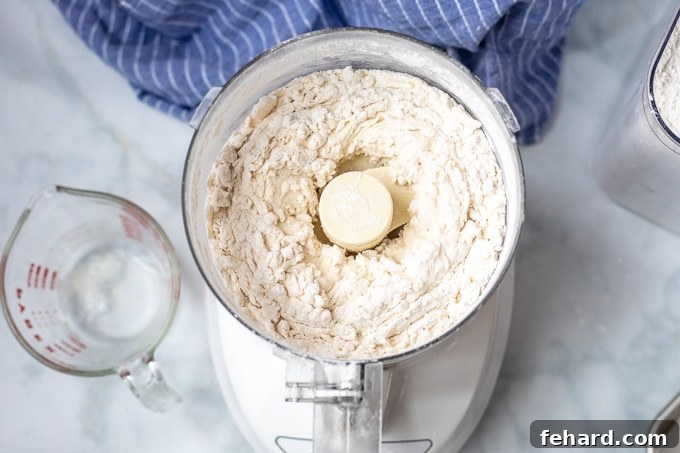
- Shape the Dough with a Gentle Touch. Instead of vigorously using a rolling pin, which can compact the dough and reduce flakiness, gently shape the dough. Turn it out onto a lightly floured surface. Using lightly floured hands, gently pat and fold the dough over itself 3-4 times. This technique creates natural layers without overworking the gluten. Then, gently pat it into a thick rectangle or disk, approximately 1 inch thick. This gentle handling is another crucial trick to achieving fluffy, tender homemade biscuits.
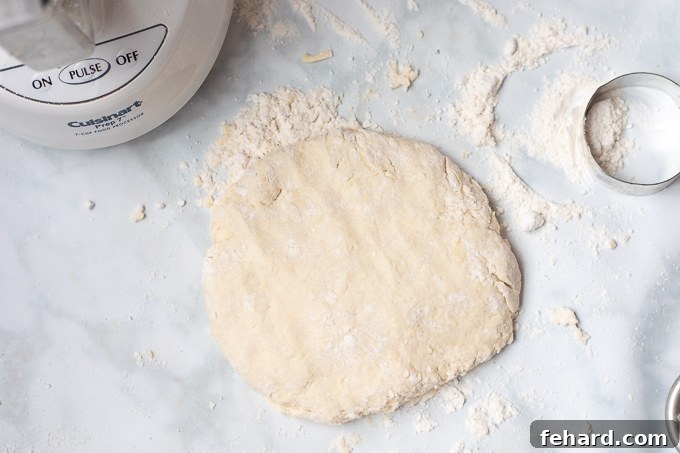
- Cut Biscuits for Even Baking. You can use a traditional biscuit cutter (a 2 ¾-inch round cutter is ideal for classic biscuits). Press straight down without twisting to ensure a clean cut and proper rise. Alternatively, for a rustic look and less scrap dough, simply cut the dough into evenly sized squares or rectangles with a sharp knife or bench scraper. Arrange the cut biscuits about 2 inches apart on a baking sheet.
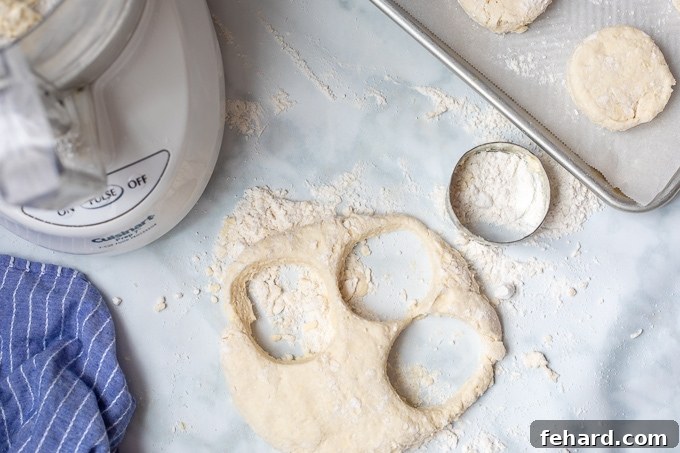
- Final Chill Before Baking. Once the biscuits are cut and arranged on your baking sheet, don’t rush them into the oven. Pop the entire sheet pan with the prepared biscuits back into the fridge. Let them chill while your oven preheats to the specified temperature. This extra chill helps firm up the butter one last time, ensuring maximum flakiness. I like to line my baking sheet with parchment paper, but make sure your brand is heat-safe up to 450 degrees F. Otherwise, a clean, ungreased baking sheet will work just fine.
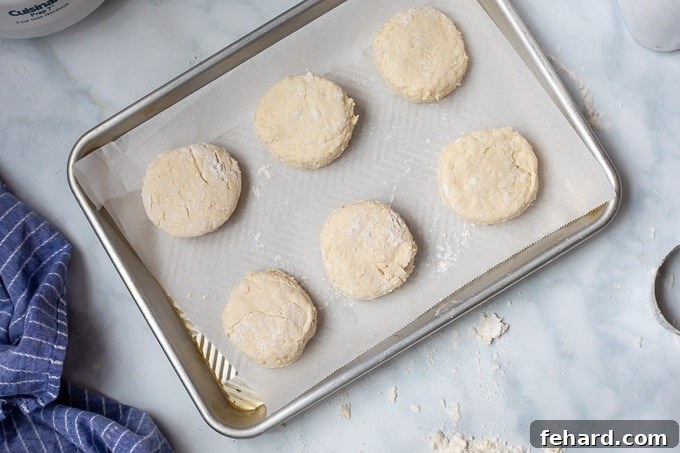
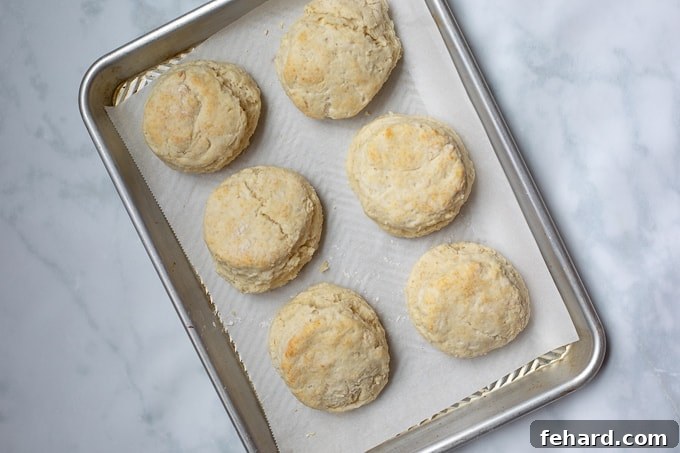
- Bake to Golden Perfection. Once your oven is fully preheated, remove the chilled biscuits from the refrigerator. For a beautiful golden-brown top, you can lightly brush each biscuit with a little extra buttermilk, milk, or even a touch of melted butter. Bake them until they are just golden brown on top and cooked through. Be vigilant and avoid overbaking, as this is a common culprit for dry, crumbly biscuits. The goal is a tender interior and a slightly crisp exterior.
Common Biscuit Troubleshooting
Even with the best recipe, baking can sometimes present challenges. Here are solutions to common biscuit problems:
- Tough Biscuits: This is almost always a sign of overworking the dough. Too much kneading develops gluten, making biscuits chewy instead of tender. Mix until just combined.
- Flat Biscuits: Lack of rise can be due to old baking powder (check its freshness!), not enough leavening, or butter that wasn’t cold enough (it melted too quickly before creating steam). Ensure ingredients are cold and baking powder is active.
- Dry Biscuits: Overbaking is the main culprit. Keep an eye on them and remove them from the oven as soon as they’re lightly golden. Insufficient buttermilk can also lead to a dry dough.
- Biscuits Not Flaky: This usually comes back to butter temperature and incorporation. The butter needs to be very cold and cut into distinct pieces (pea-sized) so it can create steam and layers. If butter melts into the flour too much, you won’t get those flaky layers.
- Unevenly Browned Biscuits: Your oven might have hot spots. Consider rotating the baking sheet halfway through baking. Also, ensure biscuits are spaced adequately on the pan for even air circulation.
Ingredient Insights & Variations for Your Biscuits
Understanding the role of each ingredient can help you achieve consistent results and even inspire creative variations:
- Flour: All-purpose flour is standard. For a slightly different texture, you could experiment with a mix of all-purpose and pastry flour, or for a heartier biscuit, some whole wheat pastry flour. Ensure your flour is fresh.
- Butter: Unsalted butter is preferred as it gives you control over the salt content. The quality of your butter significantly impacts flavor. Always use cold butter!
- Buttermilk: The acidity in buttermilk reacts with baking powder to create lift, resulting in tender, fluffy biscuits. It also adds a subtle tang that enhances flavor. If making homemade buttermilk, ensure your milk isn’t expired.
- Baking Powder & Salt: These leavening agents are crucial for rise and flavor balance. Check their expiry dates regularly. Granulated sugar adds a touch of sweetness and helps with browning.
Creative Variations:
- Herb & Cheese Biscuits: Fold in ¼ cup of shredded cheddar cheese and 1-2 tablespoons of fresh chopped herbs like chives, rosemary, or thyme with the dry ingredients.
- Sweet Biscuits: Increase sugar to 1-2 tablespoons and add ½ teaspoon of cinnamon or a pinch of nutmeg. These are delicious with fruit compotes.
- Garlic & Parmesan Biscuits: Add 1 teaspoon of garlic powder and ¼ cup of grated Parmesan cheese to the dry mix.
- Using Self-Rising Flour: If you use self-rising flour, omit the baking powder and salt from the recipe, as these are already included in self-rising flour. You might need to adjust the buttermilk slightly as self-rising flour can absorb liquids differently.
Delightful Serving Suggestions for Your Homemade Biscuits
Biscuits are undeniably best enjoyed warm, especially when simply adorned with butter or your favorite jam. However, the possibilities for incorporating homemade biscuits into your meals are truly endless. Below are some of my most cherished pairings that transform a simple biscuit into a culinary star:
- The Ultimate Breakfast Spread: Create a magnificent breakfast feast by serving your warm biscuits alongside savory homemade breakfast sausage or crispy oven-baked bacon. Add a perfectly oven-poached egg and a light, refreshing simple fruit salad for a delicious and hearty start to your day.
- Gourmet Breakfast Sandwiches: Elevate your morning routine by replacing the traditional English muffin with a soft, homemade biscuit for an effortlessly portable and incredibly flavorful breakfast sandwich. Fill with egg, cheese, and your choice of meat.
- Classic Southern Comfort: For an unforgettable, soul-satisfying breakfast, generously ladle rich, creamy Homemade Sausage Gravy over split, warm biscuits. This iconic dish is pure comfort food.
- Soup’s Best Friend: These buttermilk biscuits are the ideal accompaniment to a steaming bowl of warm soup. Pair them with comforting favorites like Potato Corn Chowder, a robust Instant Pot Vegetable Soup, or a hearty Vegetable Beef Soup for a complete and satisfying meal.
- BBQ Sandwich Sensation: Move beyond ordinary buns! Serve succulent Slow Cooker Pulled Pork or tender Grilled BBQ Chicken Breast on a biscuit for an out-of-this-world BBQ sandwich experience. The biscuit’s buttery texture beautifully complements the rich, smoky flavors.
- Decadent Appetizer: For an impressive and indulgent appetizer, skip the crackers and serve creamy baked brie alongside freshly baked biscuits. This sophisticated pairing is guaranteed to make your guests swoon!
Storage & Make-Ahead Instructions for Freshness
Planning ahead or managing leftovers is easy with these simple storage and make-ahead tips, ensuring you can enjoy delicious homemade biscuits whenever the craving strikes.
- Storing Baked Biscuits: To keep baked biscuits fresh, allow them to cool completely to room temperature. Once cooled, store them in an airtight container at room temperature for up to 48 hours. For longer storage, you can freeze baked biscuits by wrapping them tightly in foil and then placing them in a freezer-safe bag for up to 2-3 months. Reheat in a warm oven or microwave.
- Freezing Unbaked Biscuit Dough: This is a fantastic make-ahead option! Prepare the biscuits following the recipe up to the point of cutting them. Place the unbaked, cut biscuits onto a parchment-lined cookie sheet, ensuring they don’t touch. Transfer the cookie sheet to the freezer and freeze the biscuits until they are solid, typically about 2 hours. Once frozen, transfer the solid biscuits into a resealable freezer bag, squeezing out as much air as possible. They can be frozen for up to 3 months.
- Baking Frozen Biscuits: To bake frozen biscuits, preheat your oven to 450°F (230°C). Arrange the frozen biscuits on an ungreased baking sheet, leaving at least 2 inches between each. If desired, brush the tops with a little buttermilk or milk. Bake for 5 minutes at 450°F. After 5 minutes, lower the oven temperature to 425°F (220°C) and continue baking for another 10-15 minutes, or until the biscuits are lightly golden brown and cooked through. Baking from frozen takes slightly longer but yields equally delicious results!
More Favorite Breakfast Recipes to Explore
If you loved making these buttermilk biscuits, be sure to check out these other fantastic breakfast recipes:
- Whole Wheat Pancakes
- French Toast Casserole
- Whole Wheat Waffles
- Baked Oatmeal Cups
- Hash Brown Breakfast Casserole
- Breakfast Tacos
Did you make this recipe?
If you enjoyed this recipe and baked your own batch of delicious buttermilk biscuits, please take a moment to leave a comment with a 5-star review at the bottom of the post. Your feedback is greatly appreciated!
Rate this recipe!
Buttermilk Biscuits
Kristen Chidsey
6
10
12
22
Rate This
Print Recipe
Video Tutorial
A video tutorial for this recipe can be found here.
Ingredients
- 6 tablespoons unsalted butter (very cold, grated or cubed)
- 2 cups all purpose flour
- ½ teaspoon kosher salt
- ½ tablespoon granulated sugar
- 1 tablespoon baking powder
- ¾ cup buttermilk (cold, see notes for homemade buttermilk)
Instructions
- Prepare Butter. Grate or cube 6 tablespoons of very cold unsalted butter into ¼-inch pieces. Place the prepared butter into the freezer for 10-15 minutes to ensure it’s intensely cold.
- Combine Dry Ingredients. In a medium-sized bowl, whisk together 2 cups of all-purpose flour, ½ teaspoon of kosher salt, ½ tablespoon of granulated sugar, and 1 tablespoon of baking powder. Alternatively, pulse these dry ingredients together in a cold food processor fitted with a plastic dough blade or metal s-blade.
- Cut Butter Into Dough. Remove the chilled butter from the freezer and add it to the dry flour mixture. Using a pastry cutter, two forks, or by pulsing briefly in a food processor, cut the butter into the flour until it resembles coarse meal with distinct pea-sized pieces of butter distributed throughout. Do not overmix.
- Add Buttermilk. Pour ¾ cup of cold buttermilk into the dough mixture. Mix with a wooden spoon until the dough just begins to combine, or pulse in a food processor 3-5 times until the buttermilk is evenly distributed and the dough looks shaggy. Be careful not to overwork the dough to ensure tender biscuits.
- Shape the Dough. Lightly flour a clean working surface. Turn the shaggy dough out onto the surface. Using lightly floured hands, gently fold the dough over itself 3-4 times. This creates layers without compacting the dough. Then, gently pat the dough into a 1-inch thick rectangle or disk.
- Cut Biscuits. Using a 2 ¾-inch round biscuit cutter, press straight down without twisting to cut out 4 biscuits, placing them as close together as possible. Gently gather the dough scraps, pat them back together (again, avoid overworking), and cut out another 2 biscuits, for a total of 6 biscuits. Alternatively, you can simply cut the dough into 6 or 8 square biscuits using a knife for a rustic look.
- Preheat Oven & Chill Biscuits. Place the cut biscuits onto a rimmed baking sheet (preferably lined with parchment paper, ensuring it’s oven-safe to 450°F), spacing them about 2 inches apart. Place the entire baking sheet with biscuits into the refrigerator to chill thoroughly while your oven preheats to 450°F (230°C).
- Bake. Once the oven has fully preheated, remove the chilled biscuits from the refrigerator. For a golden top, lightly brush each biscuit with a bit of extra milk or buttermilk. Bake for 12-14 minutes, or until the biscuits are lightly golden on top and cooked through. Avoid overbaking, as this will result in dry biscuits; they may not brown as deeply as rolls.
Equipment
-
Food Processor (optional, for grating butter and mixing dough)
-
Parchment Paper (optional, ensures even baking and prevents sticking)
-
2¾ inch biscuit cutter (optional, or use a knife for square biscuits)
-
Large Mixing Bowl or Pastry Cutter (if not using a food processor)
-
Baking Sheet
Notes & Expert Tips
The Crucial Chill: It is absolutely paramount for all your ingredients, especially the butter and buttermilk, to be thoroughly chilled before making the biscuits. This is the key to achieving those coveted light, flaky, and fluffy layers.
Homemade Buttermilk: If you don’t have buttermilk on hand, easily make your own. Pour 1 teaspoon of lemon juice or white vinegar into a glass measuring cup, then fill the cup with regular milk (or cream) until it reaches the ¾ cup mark. Stir gently and let it sit for 5-10 minutes in the refrigerator before using; the acid will curdle the milk, creating a perfect substitute.
Parchment Paper Benefits: Using parchment paper not only prevents your biscuits from sticking to the baking sheet but also helps prevent them from over-browning on the bottom. If you don’t have parchment paper, a clean, ungreased nonstick baking sheet will suffice. Always ensure your parchment paper is certified oven-safe up to 450°F (230°C).
To Freeze Biscuits (Unbaked): For convenient make-ahead options, transfer the unbaked, cut biscuits to a parchment-lined cookie sheet. Place the cookie sheet in the freezer and freeze until the biscuits are solid (about 2 hours). Once frozen, transfer them to a resealable freezer bag, removing as much air as possible, and store for up to 3 months.
To Bake Frozen Biscuits: Preheat your oven to 450°F (230°C). Arrange the frozen biscuits on an ungreased baking sheet, leaving at least 2 inches between each. Brush with buttermilk or milk if desired. Bake for 5 minutes at 450°F. Then, lower the heat to 425°F (220°C) and continue cooking for another 10-15 minutes, or until they are just slightly golden brown and cooked through.
Nutrition Information (per biscuit)
Calories: 276 kcal
Carbohydrates: 35 g
Protein: 5 g
Fat: 13 g
Saturated Fat: 8 g
Cholesterol: 33 mg
Sodium: 229 mg
Potassium: 287 mg
Fiber: 1 g
Sugar: 3 g
Vitamin A: 399 IU
Calcium: 131 mg
Iron: 2 mg
Nutrition information is automatically calculated and should only be used as an approximation. Actual values may vary.
Tried this recipe?
Share your culinary creations! Mention @amindfullmom or tag #amindfullmom on Instagram!