
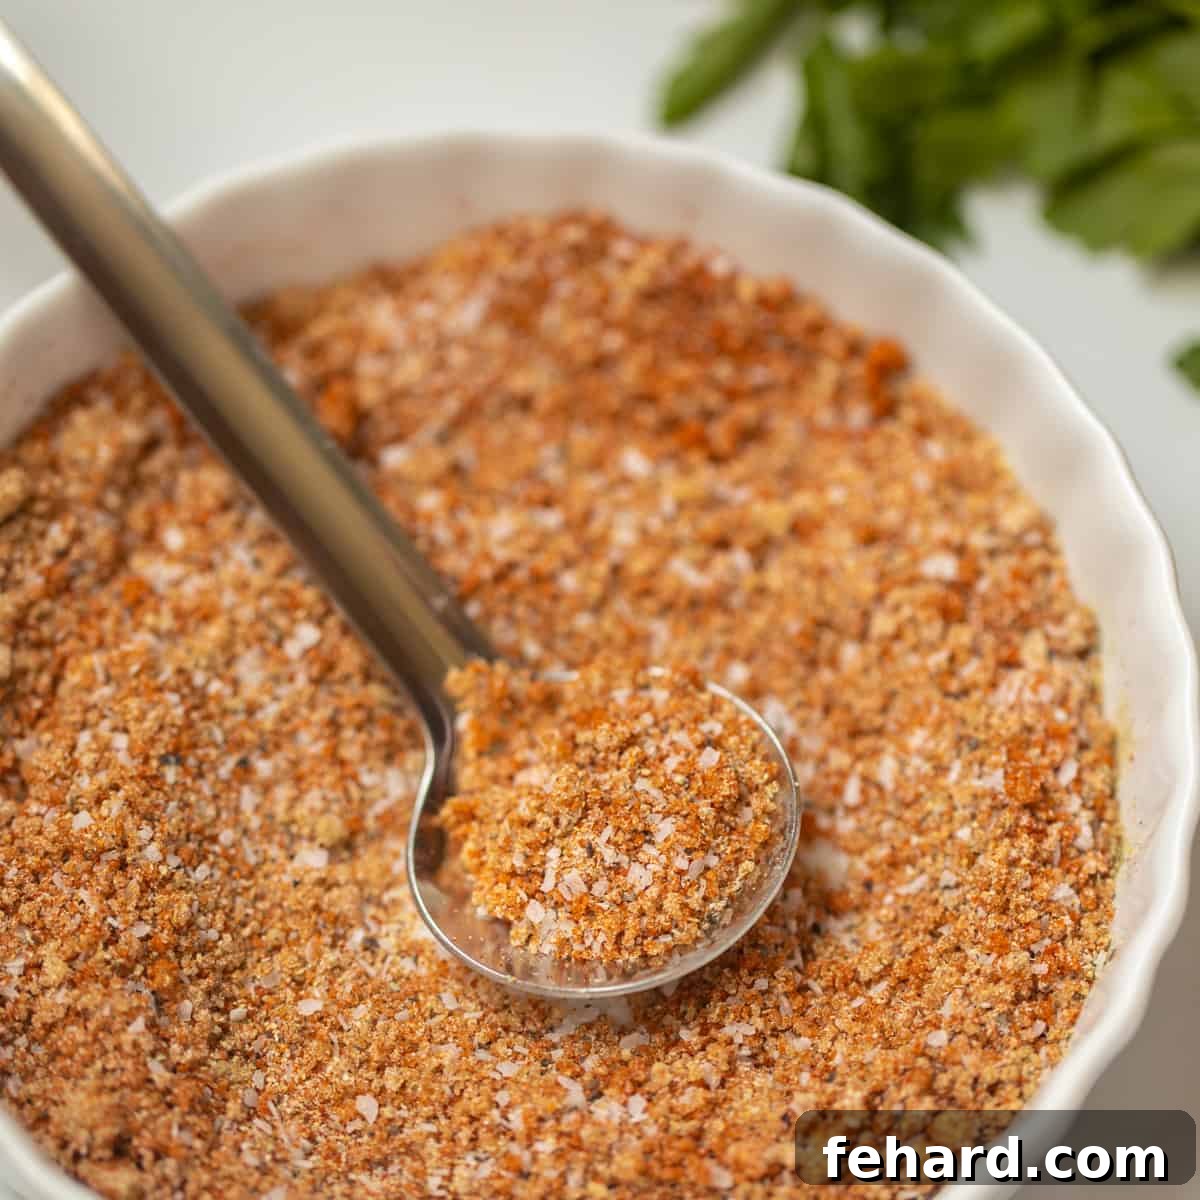
Transform your cooking with this incredible homemade dry rub, crafted from simple ingredients to deliver a perfect balance of sweet, savory, and spicy flavors. It’s the ultimate seasoning solution for elevating both meats and vegetables.
Unlock an irresistible depth of flavor for your favorite dishes, from succulent Chicken Bites to tender Instant Pot Ribs, crispy Air Fryer Chicken Wings, or classic Slow Cooker Pulled Pork. This versatile dry rub is your secret ingredient for culinary success.
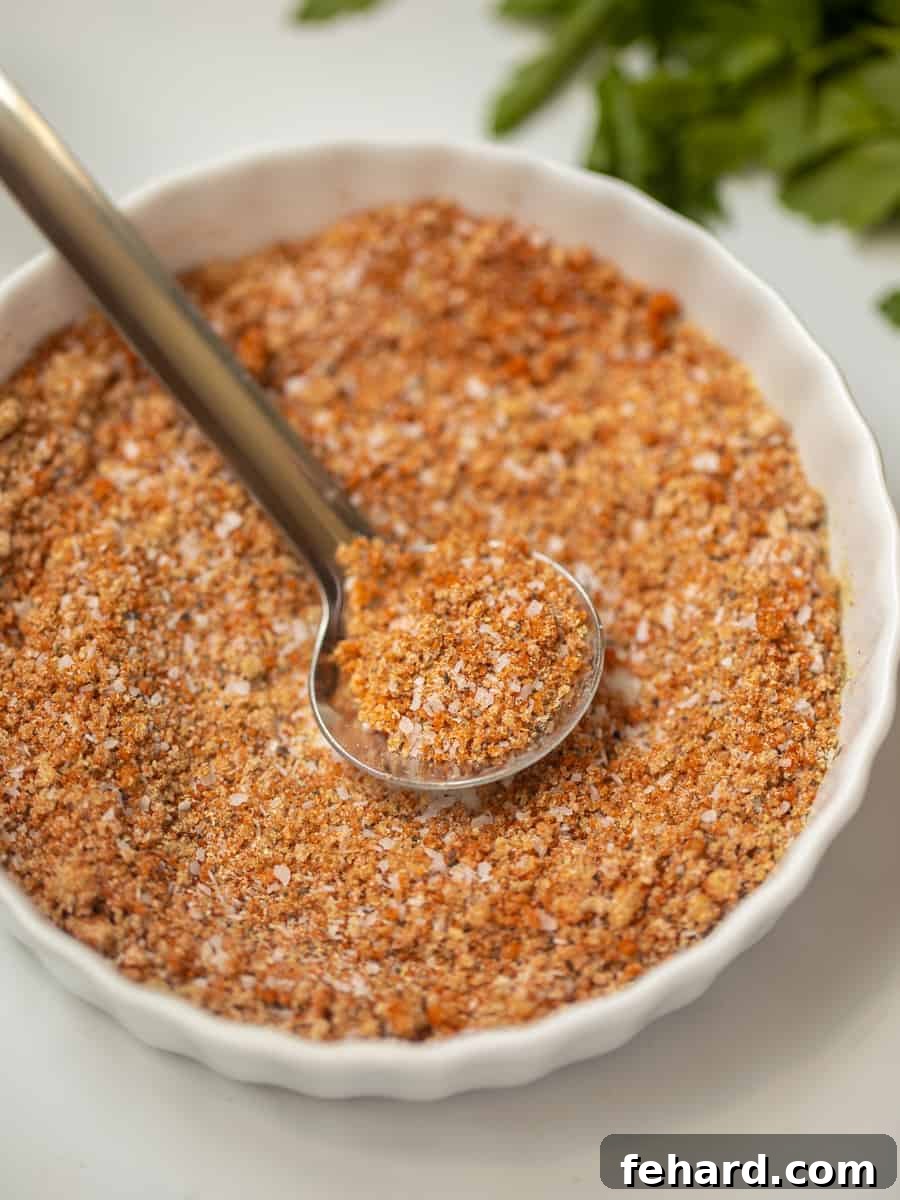
The Ultimate All-Purpose Dry Rub Recipe

Using a dry rub is one of the most effective and quickest ways to infuse intense flavor into your cooking. It simplifies the process: simply rub your chosen protein or vegetable with this aromatic blend and cook as desired. Unlike marinades, there’s no lengthy waiting time involved, allowing you to achieve rich, complex flavors with minimal effort.
My unique recipe for this all-purpose dry rub stands out from the rest, offering a harmonious symphony of tastes. It boasts a delightful sweetness from brown sugar, a deep, inviting smokiness courtesy of smoked paprika, and a gentle kick of heat from cayenne pepper. These elements are expertly rounded out by the savory depth of garlic powder and onion powder, creating a truly perfect contrast of sweet, savory, and spicy that will tantalize your taste buds.
This incredibly versatile spice blend is perfectly suited for nearly any ingredient you can imagine. From tender chicken breasts and robust beef steaks to flavorful pork roasts, delicate fish fillets, plant-based tofu, and even a vibrant array of roasted vegetables, this dry rub guarantees exceptional, restaurant-quality results every single time. Prepare to elevate your meals and impress everyone at the table!
Happy Cooking! xo Kristen
Table of Contents
- The All-Purpose Dry Rub Recipe
- What is a Dry Rub?
- Why This Dry Rub Recipe Stands Out
- How to Make Homemade Dry Rub
- Mastering Dry Rub Application
- Endless Culinary Possibilities: Suggested Uses
- Storing Your Homemade Dry Rub
- Customize Your Rub: Creative Variations
- Frequently Asked Questions About Dry Rubs
- More Homemade Spice Blends
What is a Dry Rub? The Secret to Instant Flavor
A dry rub is essentially a mixture of ground spices, herbs, and sometimes sugar and salt, designed to be rubbed onto the surface of food before cooking. Unlike marinades, which involve soaking food in a liquid, dry rubs adhere directly to the exterior, creating a flavorful crust that seals in juices and intensifies taste. This method is particularly popular in BBQ and grilling, as the sugars caramelize and the spices toast, adding incredible depth and texture to meats and vegetables.
The beauty of a dry rub lies in its simplicity and efficiency. It eliminates the need for lengthy marinating times, making it an ideal choice for busy cooks who still want to achieve impressive results. The concentrated blend of spices delivers a powerful flavor punch directly where it counts, ensuring every bite is seasoned to perfection. This makes dry rubs a fantastic tool for enhancing anything from a quick weeknight chicken dinner to a slow-cooked weekend feast.
Why This Homemade Dry Rub Recipe Stands Out
What makes this particular dry rub recipe truly exceptional is its thoughtfully crafted balance of ingredients, designed to create a complex and addictive flavor profile. Each component plays a crucial role in achieving the perfect harmony of sweet, savory, spicy, and smoky notes:
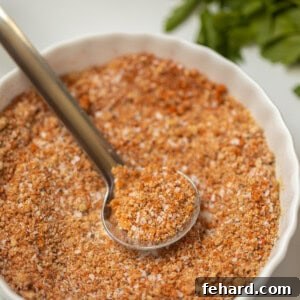
- Brown Sugar: This isn’t just for sweetness; brown sugar is key for achieving that beautiful, caramelized crust when cooking. Its molasses content also adds a subtle depth that white sugar simply can’t replicate, balancing the more intense spices and tenderizing the surface of your food.
- Smoked Paprika: The cornerstone of the rub’s smoky character. Smoked paprika (pimentón ahumado) brings a rich, deep, and slightly sweet smokiness that permeates your dish, reminiscent of slow-cooked BBQ. It also contributes a vibrant color to your food, making it visually appealing. While regular paprika offers color, the smoked variety is truly transformative here.
- Garlic Powder & Onion Powder: These two aromatic powerhouses form the savory backbone of the rub. They provide a foundational umami depth that complements nearly any ingredient, adding a layer of classic savory flavor without the moisture of fresh garlic or onion, which can burn.
- Kosher Salt: Essential for seasoning and flavor enhancement. Kosher salt has a larger grain size than table salt, which makes it easier to distribute evenly and control the saltiness. It also adheres better to surfaces, ensuring every inch of your food is seasoned. It draws out moisture from the surface, aiding in the crisping process during cooking.
- Black Pepper: A classic spice that adds a pungent, woody heat and a complementary aroma. Freshly ground black pepper is always recommended for the best flavor, contributing a subtle sharpness that brightens the overall profile.
- Cayenne Pepper: This is where the “spicy” element comes in, and it’s completely customizable. Cayenne pepper adds a clean, warm heat that lingers pleasantly without overpowering the other flavors. You can easily adjust the amount to suit your personal preference, from a mild tingle to a fiery kick.
Together, these ingredients create a robust and versatile dry rub that enhances, rather than masks, the natural flavors of your food, making it truly exceptional for any culinary adventure.
How to Make Your Homemade Dry Rub: A Simple Guide
Crafting this incredible dry rub is remarkably straightforward, requiring only a minute or two of your time. The following tips are provided to help you achieve perfect results. You will find the precise ingredient quantities and detailed instructions in the recipe card further down this post.
Unlike some of my other popular spice blends, like Taco Seasoning and Chili Seasoning, I generally recommend preparing this particular dry rub right before you intend to use it. The primary reason for this recommendation is the brown sugar content. If stored for an extended period, especially in humid conditions, the brown sugar can absorb moisture and begin to clump up and cake together, making the rub harder to use effectively.
However, the good news is that this homemade dry rub recipe is so incredibly quick to assemble that it’s genuinely no hassle to whip up a fresh batch whenever inspiration strikes! The process couldn’t be simpler: just combine the brown sugar with the salt and all the dried spices in a small bowl. Whisk or stir them thoroughly until every ingredient is well combined and evenly distributed. Ensure there are no large lumps of brown sugar remaining, breaking them up with the back of a spoon if necessary. This simple step guarantees a uniform flavor in every application.
Kristen’s Key Tip
Mastering Dry Rub Application for Optimal Flavor
To truly get the most out of this homemade dry rub recipe and ensure your dishes turn out incredibly delicious, there’s one crucial step before application: **always pat your meat or vegetables thoroughly dry.** Use paper towels to remove any excess surface moisture. This seemingly small detail is vital because it ensures the spice mixture adheres properly to the surface, creating that desirable flavorful crust and preventing the rub from turning into a paste or sliding off during cooking. A dry surface allows the spices to stick evenly and deeply infuse their flavors.
Once your food is dry, generously sprinkle and then gently rub the spice mixture over the entire surface. For meats, don’t be shy; aim for an even coating, and for larger cuts, you can even massage the rub in. For vegetables, a lighter coating is usually sufficient. Allow the seasoned food to rest for at least 15-30 minutes at room temperature (or longer in the fridge for larger cuts) before cooking. This resting period allows the flavors to penetrate and for the salt to begin its work, enhancing the overall taste and texture.
Endless Culinary Possibilities: Suggested Uses for Your All-Purpose Dry Rub
This all-purpose dry rub is incredibly versatile and can elevate almost any dish. Its balanced flavor profile makes it a fantastic addition to a wide range of proteins and vegetables. Here are just a few ideas to inspire your next meal:
For Meats:
- Chicken: Perfect for Chicken Bites, Air Fryer Chicken Wings, roasted whole chicken, grilled chicken breasts, or sautéed chicken thighs. The rub creates a beautiful, crispy skin and juicy, flavorful meat.
- Pork: A match made in heaven for Instant Pot Ribs, Slow Cooker Pulled Pork, pork chops, pork tenderloin, or even a pork shoulder roast. The brown sugar helps with caramelization, creating a delicious bark.
- Beef: Sprinkle generously on steaks (ribeye, sirloin, flank), beef roasts, brisket, or even ground beef for incredible burgers and meatloaf. It adds a smoky, savory depth that enhances the natural richness of beef.
- Lamb: Rub on lamb chops or a leg of lamb for a unique, flavorful twist.
For Seafood:
- Salmon: A light dusting on salmon fillets before baking or grilling can add a wonderful smoky and savory note.
- Shrimp: Toss shrimp with a small amount of rub before sautéing or grilling for quick, flavorful seafood tacos or skewers.
For Vegetables:
- Roasted Vegetables: Sprinkle on potatoes (roast or sweet), carrots, broccoli, cauliflower, or Brussels sprouts before roasting for an extra layer of flavor and a slightly crispy texture.
- Corn on the Cob: A delicious alternative to plain salt and butter.
- Grilled Vegetables: Perfect for bell peppers, onions, zucchini, or asparagus.
Unexpected Uses:
- Tofu or Tempeh: For plant-based meals, this rub can transform bland tofu or tempeh into flavorful, savory bites.
- Popcorn: A pinch of this rub on freshly popped popcorn makes for a surprisingly addictive snack.
- Scrambled Eggs or Omelets: Add a dash for a savory morning kick.
Storing Your Homemade Dry Rub for Optimal Freshness
While this dry rub is wonderfully quick to prepare fresh, I understand the convenience of having a batch on hand. Due to the hygroscopic nature of brown sugar, which readily absorbs moisture, storing this dry rub requires a little consideration to prevent it from clumping and hardening. For the best flavor and ease of use, making smaller batches to use within a few days is ideal.
However, if you wish to store a larger batch, you certainly can! Transfer the completely cooled dry rub into an airtight container. A glass jar with a tight-fitting lid or a spice jar works perfectly. Store it in a cool, dark, and dry place, such as your pantry or a kitchen cabinet away from heat and light. To further combat clumping, you can add a few dry rice grains or a small food-grade silica gel packet to the container; these will absorb excess moisture. Properly stored, this homemade dry rub can maintain its quality for up to 2 weeks. While it might last longer, the aromatic compounds in the spices will gradually diminish over time, impacting the intensity of the flavor. For peak potency, fresh is always best, but a two-week window offers plenty of flexibility.
Customize Your Rub: Creative Variations for Unique Flavors
The beauty of making your own dry rub is the freedom to customize it to your exact preferences. This base recipe is fantastic as is, but don’t hesitate to experiment and make it your own! Here are a few ideas to inspire your creative culinary adventures:
- Herbal Boost: Incorporate dried herbs like thyme, rosemary, oregano, or sage for an earthier, more fragrant rub. Start with ½ teaspoon of your chosen herb and adjust to taste.
- Spice Expansion: Deepen the spice profile with additions like cumin (for warmth), coriander (for citrusy notes), or mustard powder (for a subtle tang). A ¼ to ½ teaspoon of any of these can significantly alter the rub’s character.
- Heat Level Adjustment: If you love a serious kick, increase the cayenne pepper or introduce chipotle powder for a smoky, spicier heat. For a milder rub, simply omit the cayenne entirely.
- Citrus Zest: For a bright, zesty aroma, add a tablespoon of dried lemon or orange zest (ensure it’s completely dry before adding to the rub to prevent clumping). This works especially well with chicken and fish.
- Coffee Infusion: For a truly unique and robust flavor, particularly great with beef or pork, try adding 1-2 teaspoons of finely ground coffee. It adds a wonderful dark, earthy note.
Remember to taste and adjust as you go. A small batch test can help you find your perfect blend!
Frequently Asked Questions About Dry Rubs
- Q: Can I use regular table salt instead of kosher salt?
- A: While you can, it’s not recommended without adjustment. Table salt has finer grains and is denser than kosher salt, making it saltier by volume. If you must use table salt, reduce the amount by about one-third to half to avoid over-salting.
- Q: How long should I leave the dry rub on before cooking?
- A: For most applications, 15-30 minutes at room temperature is sufficient for the flavors to begin penetrating. For larger cuts of meat, you can apply the rub several hours or even overnight (up to 12-24 hours) in the refrigerator for deeper flavor infusion. Always pat the food dry first!
- Q: Can I use this dry rub on vegetarian or vegan dishes?
- A: Absolutely! This dry rub is fantastic on firm tofu, tempeh, chickpeas, and a wide variety of roasted or grilled vegetables. It adds a delicious savory and smoky depth to plant-based meals.
- Q: My brown sugar is clumping in the dry rub. What can I do?
- A: This is a common issue due to brown sugar’s moisture content. To minimize clumping, ensure all spices are thoroughly mixed and store the rub in an airtight container in a cool, dry place. Adding a few dry rice grains or a small marshmallow to the container can help absorb excess moisture. If it does clump, simply break it up with a fork or mortar and pestle before use.
- Q: What’s the difference between a dry rub and a marinade?
- A: A dry rub is a blend of dry spices and seasonings applied to the surface of food, forming a crust and seasoning the exterior. A marinade is a liquid mixture (often oil, acid, and spices) that food is soaked in, aiming to tenderize and flavor from the outside in. Dry rubs often contribute more to crust formation and surface flavor, while marinades can offer deeper penetration and tenderization over time.
More Delicious Homemade Spice Blends
Once you discover the ease and superior flavor of homemade dry rubs, you’ll want to explore even more DIY spice blends. Creating your own seasonings allows you to control the ingredients, avoid unwanted additives, and tailor flavors precisely to your liking. Expand your culinary repertoire with these other fantastic homemade mixes:
- Fajita Seasoning
- Adobo Seasoning
- Cajun Seasoning
- Chili Seasoning
- Seasoned Salt
- Dried Onion Soup Mix
- Dill Seasoning
Did you make this recipe?
If you enjoyed crafting and cooking with this homemade dry rub, please consider leaving a comment below with a 5-star review. Your feedback helps other home cooks discover and enjoy this recipe! Thank you!
⭐
⭐
⭐
⭐
All-Purpose Dry Rub
Kristen Chidsey
8 Servings
5 mins
5 mins
Print Recipe
Ingredients
- 1 tablespoon light or dark brown sugar
- 1 teaspoon smoked paprika
- 1 teaspoon garlic powder
- 1 teaspoon onion powder
- 1 teaspoon kosher salt
- ½ teaspoon black pepper
- ⅛ teaspoon cayenne pepper, optional
Instructions
-
Combine the 1 tablespoon light or dark brown sugar, 1 teaspoon smoked paprika, 1 teaspoon garlic powder, 1 teaspoon onion powder, 1 teaspoon kosher salt, ½ teaspoon black pepper, and ⅛ teaspoon cayenne pepper together in a small bowl until everything is well combined. Ensure there are no lumps.
-
Use immediately for best results, or store in an airtight container in a cool, dark place for up to 2 weeks.
-
Before applying the dry rub, it is essential to pat the meat or vegetables dry with a paper towel. This step ensures that the rub sticks evenly and adheres well to the surface, creating a delicious crust and maximizing flavor absorption.
Notes
Cayenne Pepper: This ingredient allows you to customize the heat level. Increase or decrease the amount to perfectly match your preference for spice.
Salt: For optimal flavor and texture, use kosher salt. Avoid using table salt or iodized salt, as their finer grain and different density can lead to an overly salty taste if not adjusted.
Storage: Due to the brown sugar content, this dry rub recipe is ideal when prepared in smaller batches just before use. If you need to store it, keep the spice blend in an airtight container for up to 2 weeks in a cool, dark pantry.
Nutrition
Carbohydrates: 1g
Protein: 0.1g
Fat: 0.05g
Saturated Fat: 0.01g
Polyunsaturated Fat: 0.03g
Monounsaturated Fat: 0.01g
Sodium: 49mg
Potassium: 15mg
Fiber: 0.2g
Sugar: 0.1g
Vitamin A: 137IU
Vitamin C: 0.1mg
Calcium: 2mg
Iron: 0.1mg
Nutrition information is automatically calculated and should only be used as an approximation.
Tried this recipe?
Mention @amindfullmom or tag #amindfullmom!