
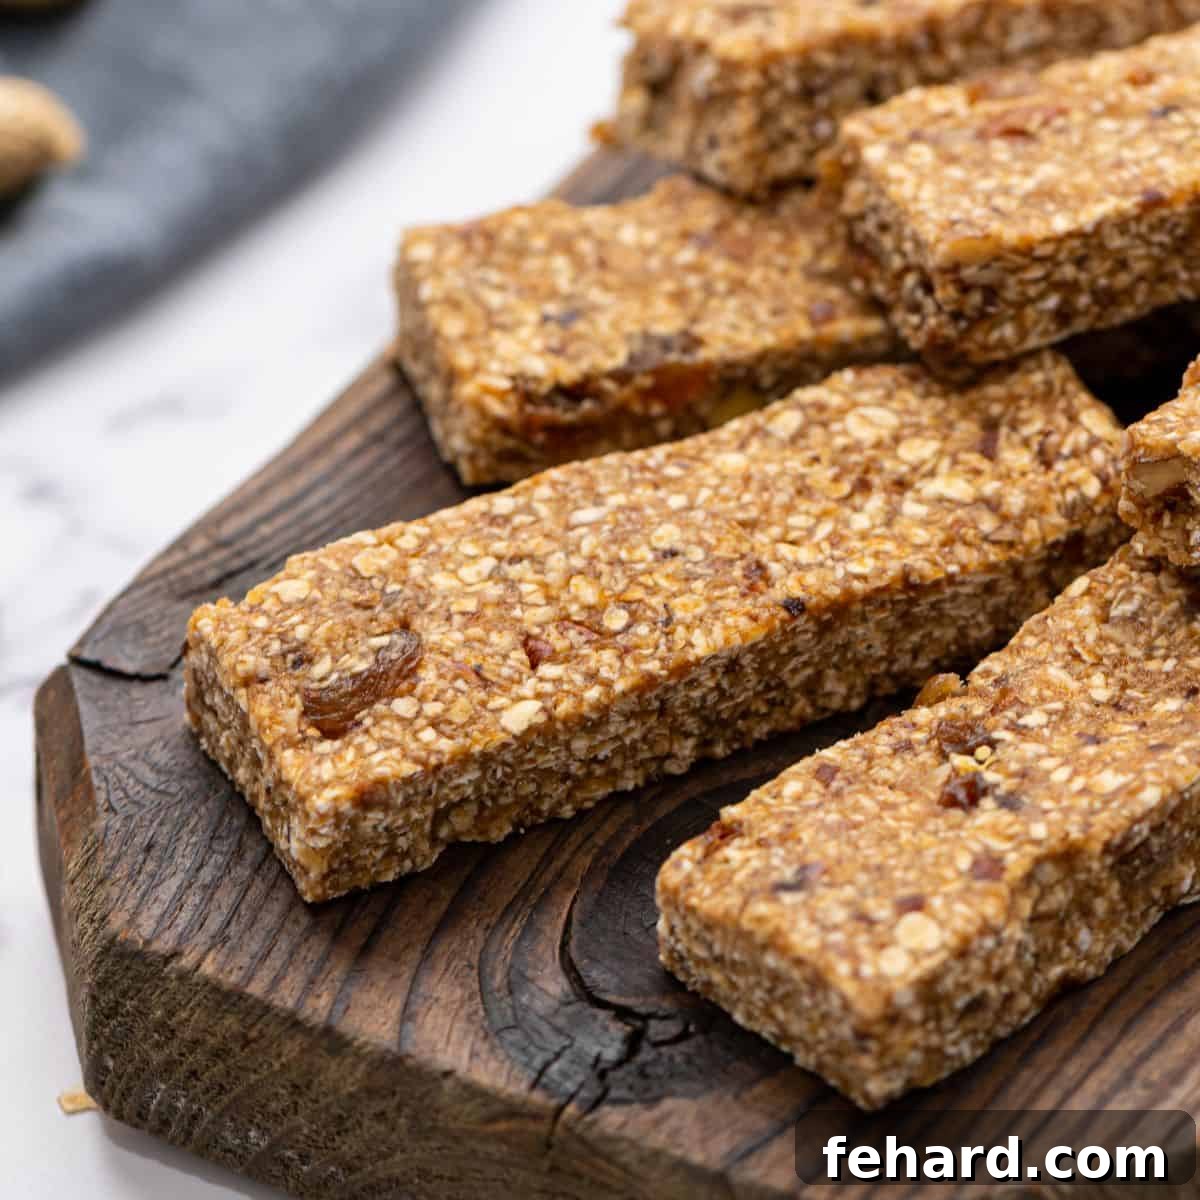
Craving a delightful snack that’s both wonderfully soft and satisfyingly chewy? Look no further than this incredible recipe for **no-bake granola bars**! Packed with wholesome oats and naturally sweetened with the goodness of dates and rich maple syrup, these **homemade granola bars** come together in mere minutes. Forget processed store-bought options; you’re about to discover a truly divine treat that’s perfect for any time of day, offering both convenience and superior nutrition.
Searching for more effortless no-bake snack ideas that are quick and healthy? Be sure to explore our recipes for Copycat Larabars, Peanut Butter Oat Bars, and Oatmeal Date Energy Balls. These companion recipes offer diverse flavors and textures, ensuring your snack pantry is always stocked with healthy, convenient options for the entire family.
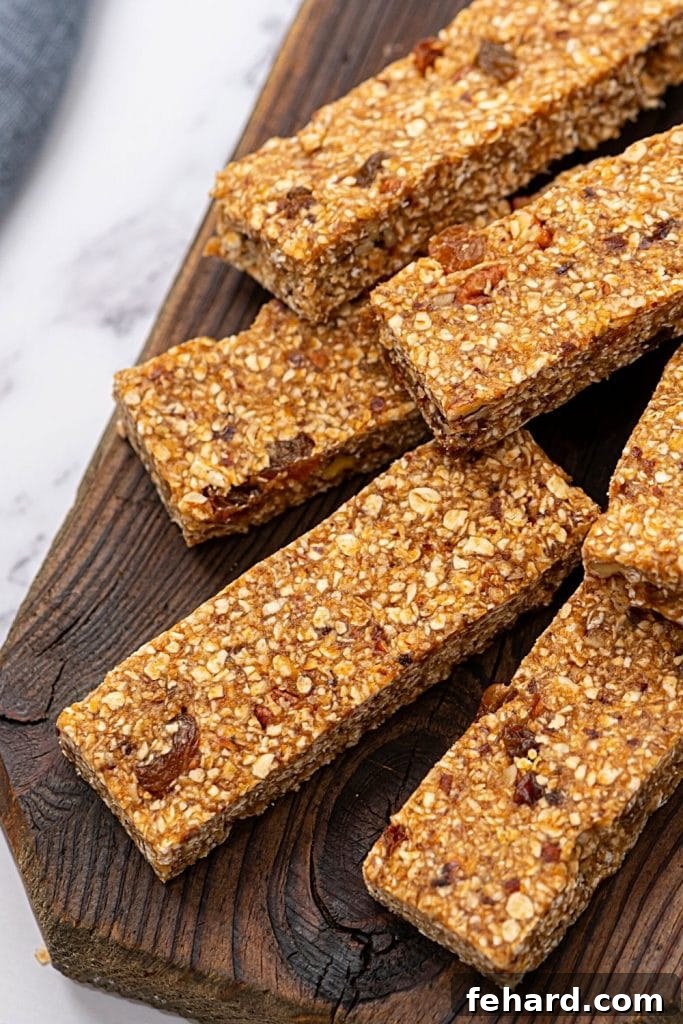
Why These No-Bake Granola Bars Are a Family Favorite
If your household is anything like ours, granola bars are a highly requested snack item. They are convenient, portable, and often marketed as healthy. However, the reality of many commercially produced granola bars can be quite disheartening. A quick glance at the ingredient list of popular brands often reveals a surprising amount of refined sugars, artificial flavors, hydrogenated oils, and a host of unpronounceable preservatives that detract significantly from their supposed health benefits. Moreover, when you do manage to find a truly healthy, clean-label alternative at the grocery store, it typically comes with a hefty price tag, making it an unsustainable option for regular family consumption and a budget-buster.
This challenge led me on a mission to create my own solution: making granola bars right here at home. My primary goal was to develop a genuinely wholesome, cost-effective, and utterly delicious alternative to the expensive and often less nutritious store-bought varieties. What emerged from this quest is a recipe that has become a permanent fixture in our kitchen and a beloved staple in our snack routine. These no-bake granola bars are everything we wished for and more: perfectly sweet, wonderfully soft, incredibly chewy, and truly divine in every single bite. They provide sustained energy without the sugar crash, making them ideal for school lunches, after-school snacks, or a quick breakfast on the go.
The absolute best part? They come together in just minutes, requiring no baking and minimal cleanup. This quick preparation time is especially fortunate because my family absolutely cannot get enough of them! Preparing a batch is so quick and simple that it fits easily into even the busiest schedules, ensuring a healthy, satisfying snack is always on hand. Enjoy the simplicity, the superior taste, and the peace of mind that comes with knowing exactly what’s in your homemade treats. They truly taste better than any store-bought bar on the market, hands down.
Happy Cooking! xo Kristen
Essential Ingredients for Wholesome Homemade Granola Bars
Crafting these delectable and nutritious granola bars requires only a handful of straightforward, nutrient-dense ingredients that are readily available in most grocery stores. While exact quantities are detailed in the comprehensive recipe card below, the following guidance will help you choose the finest components for the best possible outcome. Each ingredient plays a crucial role in achieving the perfect balance of flavor, texture, and nutritional value, making these bars both delicious and genuinely good for you.
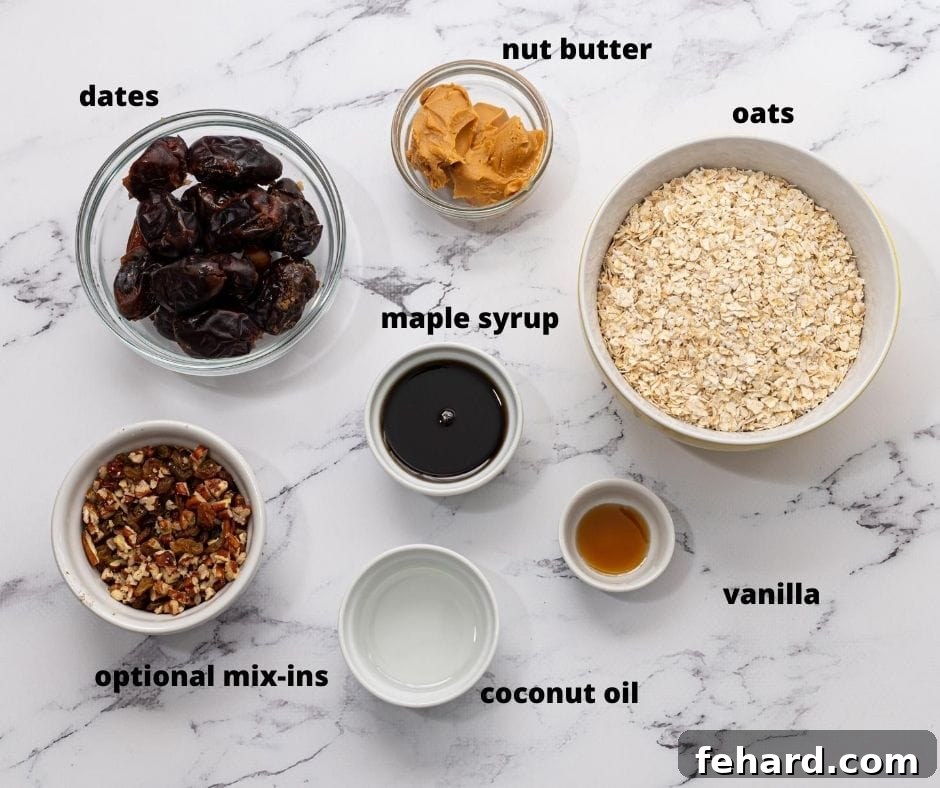
- Dates: The secret to the irresistibly chewy texture and natural, caramel-like sweetness of these bars lies in good quality dates. We highly recommend using either dried pitted Deglet Nour Dates or dried Medjool dates. Both varieties offer an excellent rich flavor and a wonderfully sticky consistency when processed, which is crucial for binding the bars together. It’s vital to select whole pitted dates, not the pre-chopped kind, as chopped dates are almost always coated in added sugars, which we want to avoid for a truly healthy snack. Dates are also a fantastic source of dietary fiber, potassium, and other essential minerals, making them a powerhouse ingredient.
- Oats: The wholesome foundation of any great granola bar! For this no-bake recipe, stick exclusively to rolled oats – either quick-cooking or old-fashioned varieties will work beautifully. Rolled oats provide that classic hearty texture without being overly tough, and they absorb moisture well, contributing to the bars’ softness. Avoid steel-cut oats, as their dense, un-processed texture requires cooking and will not integrate properly into a raw, no-bake mixture. Oats are universally celebrated for their high soluble fiber content, particularly beta-glucans, which contribute to a feeling of fullness, help regulate blood sugar, and support cardiovascular health. If you require a gluten-free option, be sure to use certified gluten-free rolled oats to prevent any cross-contamination.
- Coconut Oil: This ingredient is key for helping the granola bars bind together firmly and maintain their shape without crumbling, especially when chilled. It also imparts a subtle, tropical richness that elevates the flavor profile, giving these homemade treats a taste reminiscent of some premium store-bought bars. Opt for virgin coconut oil for a more pronounced coconut flavor, or refined coconut oil if you prefer a more neutral taste that won’t overshadow other ingredients. Ensure it’s melted (but not hot) and then slightly cooled before adding it to the mixture, as very hot oil could alter the texture of other ingredients.
- Maple Syrup: While honey is a viable and often used alternative, we strongly prefer the distinctive and complex flavor of pure maple syrup in these bars. Maple syrup lends a rich, warm, and sophisticated sweetness that perfectly complements the dates and oats, creating a nuanced flavor profile. It’s also a natural, unrefined sweetener packed with antioxidants. If using honey, be aware that its flavor can be more pronounced and may alter the final taste slightly; choose a mild-flavored honey if possible. Always choose 100% pure maple syrup for optimal flavor and nutritional benefits.
- Nut Butter: A vital binding agent that not only helps hold all the ingredients together but also provides healthy fats, protein, and a creamy texture. All-natural peanut butter or almond butter are excellent choices. Look for brands that contain only nuts (and possibly a touch of salt) without any added sugars, hydrogenated oils, or excessive emulsifiers. The natural oils in the nut butter are crucial for the bars’ pliability and binding. For those with nut allergies or preferences, please refer to our modification section for excellent nut-free alternatives.
- Vanilla Extract: A small addition with a huge impact! A touch of pure vanilla extract elevates and harmonizes all the other flavors, adding a hint of warmth, sweetness, and complexity that makes these bars truly irresistible and taste professionally made. Don’t skip this small but impactful addition.
- Sea Salt: A pinch of fine sea salt is essential for balancing the sweetness from the dates and maple syrup and enhancing all the underlying flavors. It prevents the bars from tasting overly sweet and adds a subtle savory depth. If your chosen nut butter is already salted, you might want to reduce the added sea salt to ¼ teaspoon or omit it entirely to avoid an overly savory or salty taste.
Crafting Your Homemade Granola Bars: A Simple Step-by-Step Guide
Making homemade granola bars is an incredibly straightforward and rewarding process – truly one of the easiest recipes you’ll ever master. To ensure your success and to create perfect soft and chewy bars every time, we’ve provided detailed steps and helpful photos. Always refer to the recipe card for precise measurements and comprehensive instructions, but consider these tips for extra guidance throughout the process.
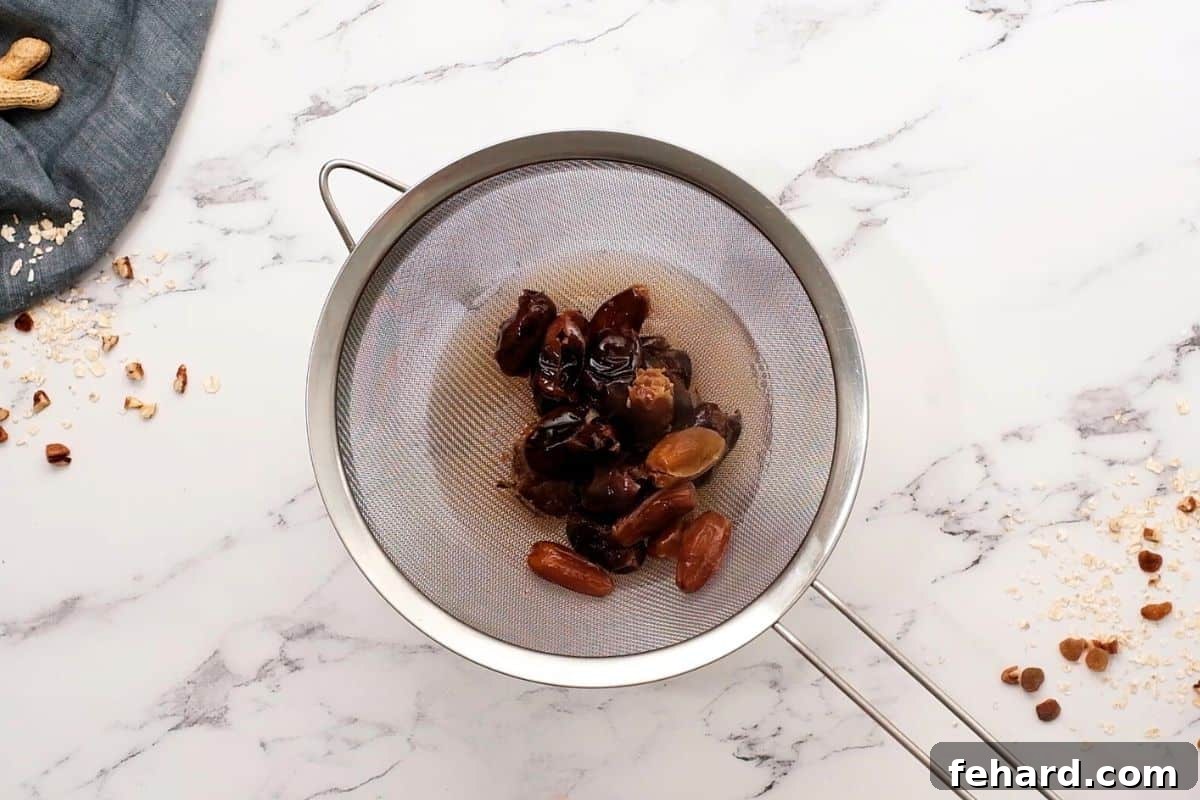
- Prepare the Dates for Optimal Blending. The crucial first step is to ensure your dates are exceptionally soft and pliable. If they feel firm or dry to the touch, place them in a small bowl and cover them completely with very hot water. Let them soak for about 5 to 10 minutes for moderately soft dates, or up to 30 minutes for particularly dry or hard dates. This softening process is absolutely crucial, as it makes them much easier to blend into a smooth, consistent paste, which is the foundation of these no-bake bars. Once softened, thoroughly drain the liquid, but make sure to reserve about two tablespoons of it – you might need a small amount later to adjust the mixture’s consistency if it appears too dry.
- Process the Wet Ingredients to Form the Flavorful Base. For an effortlessly smooth and cohesive mixture, a high-quality food processor fitted with an S-blade is your most valuable tool. Begin by adding the thoroughly drained, softened dates to the food processor work bowl. Pulse the dates until they break down and form a thick, uniform, and sticky paste. This date paste will serve as the natural sweetener and primary binder for your bars. Next, add the pure maple syrup (or honey), the melted and slightly cooled coconut oil, your chosen all-natural nut butter, the vanilla extract, and the sea salt. Continue to pulse all these ingredients together until they are thoroughly combined and create a wonderfully creamy, aromatic, and cohesive mixture. Scrape down the sides of the bowl as needed to ensure everything is fully incorporated.
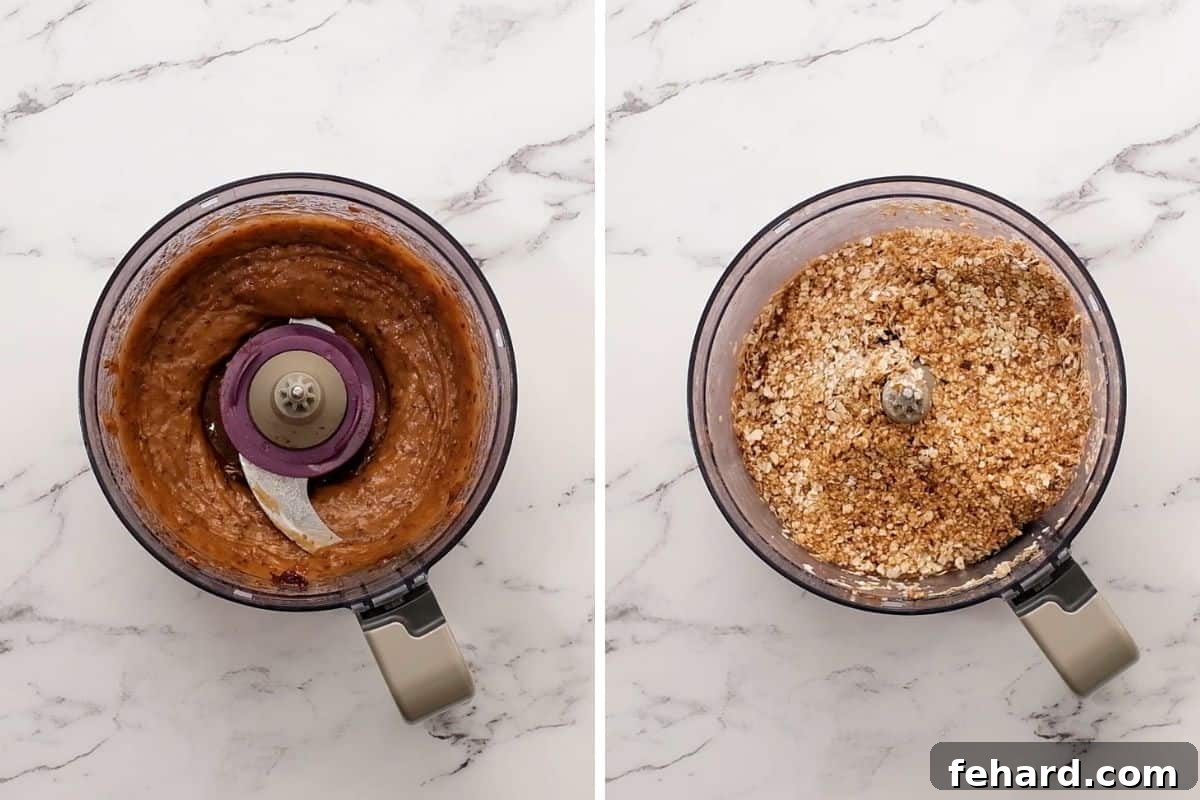
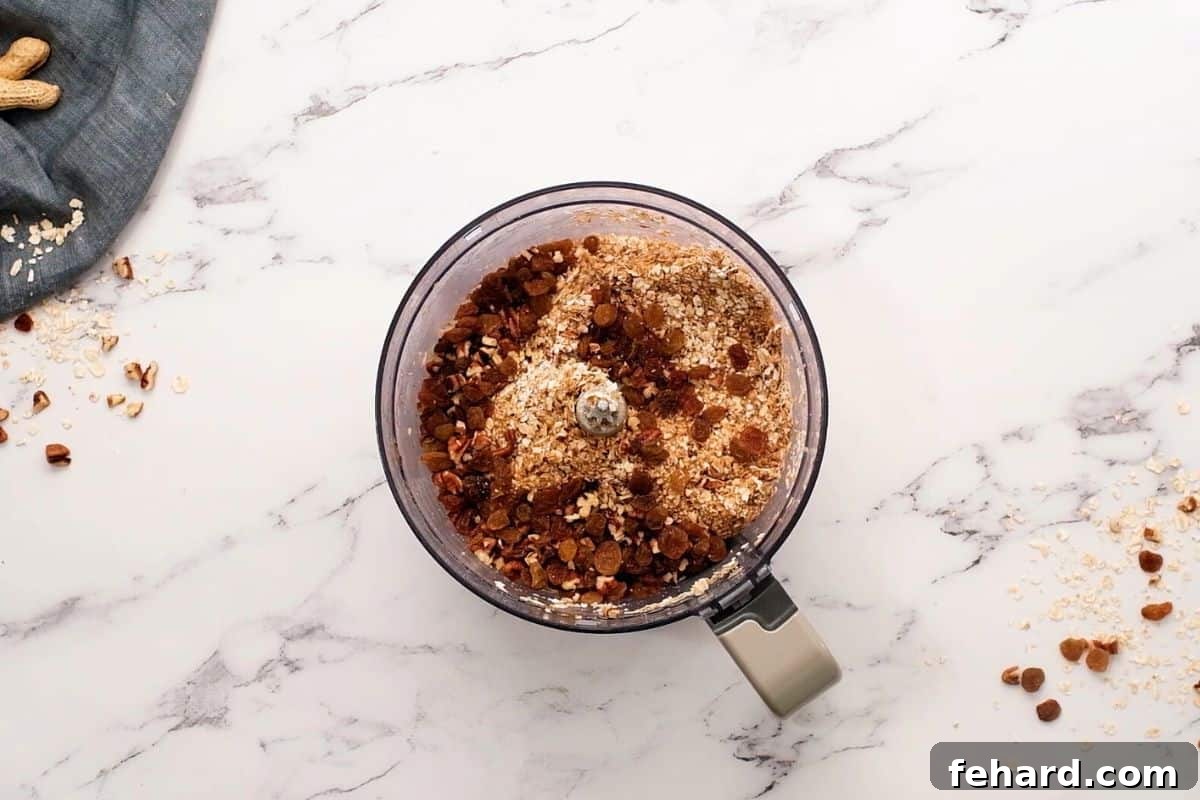
- Incorporate the Oats and Any Desired Optional Add-Ins. Now it’s time to add the rolled oats to the food processor with the wet mixture. Pulse just until the oats are evenly moistened and integrated into the date-nut butter mixture. The goal here is to combine, not pulverize, so be careful not to over-process at this stage; you want to maintain some delightful texture from the oats. If, after pulsing, the mixture seems too dry and isn’t coming together to form a cohesive ball when pressed, add one to two tablespoons of the reserved date soaking liquid (or a tiny bit of water) incrementally until the desired sticky consistency is achieved. Once the oats are combined, transfer the entire mixture to a large mixing bowl. This is the perfect moment to gently fold in any optional ingredients you desire, such as chopped nuts, dried fruits (like raisins or cranberries), mini chocolate chips, or various seeds. Mixing them in manually at this stage prevents them from being over-processed by the food processor and ensures they retain their appealing shape and texture.
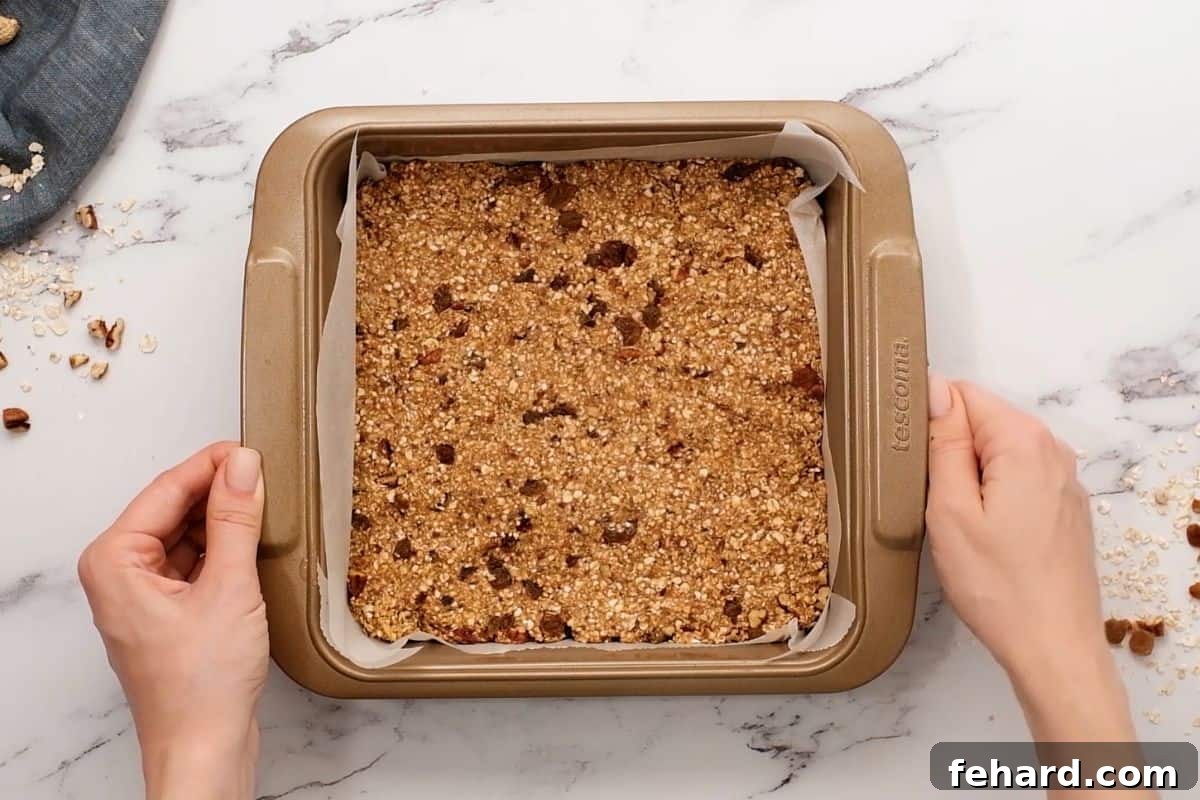
- Press the Mixture Firmly into a Prepared Pan. For optimal results and effortless removal of your finished granola bars, thoroughly line an 8×8 inch baking pan (or a similar size, like a 9×5 inch loaf pan for thicker bars) with parchment paper. Ensure you leave a generous overhang on the sides – this parchment paper sling will be your best friend for easily lifting the set bars out of the pan. Spoon the entire granola mixture into the lined pan. To prevent the mixture from sticking to your hands and to ensure an even, compact layer, lightly moisten your hands with water or place another piece of parchment paper directly over the mixture before pressing down firmly. Press with consistent pressure until the surface is smooth and the mixture is tightly packed, reaching evenly into all corners of the pan. The firmer you press, the better your bars will hold together when sliced.
- Chill Thoroughly Before Slicing for Perfect Bars. This is a crucial, non-negotiable step for achieving perfectly formed, non-crumbly bars. Once the mixture is pressed into the pan, transfer it to the refrigerator or freezer. Chill for a minimum of 30 minutes in the refrigerator, or 10-15 minutes in the freezer, until the bars are completely firm to the touch. This essential hardening period allows all the ingredients to fully set and bind together, making the bars much easier to cut cleanly without sticking, falling apart, or squishing. Once firm, use the parchment paper overhang to gently lift the entire slab of granola out of the pan onto a clean cutting board.
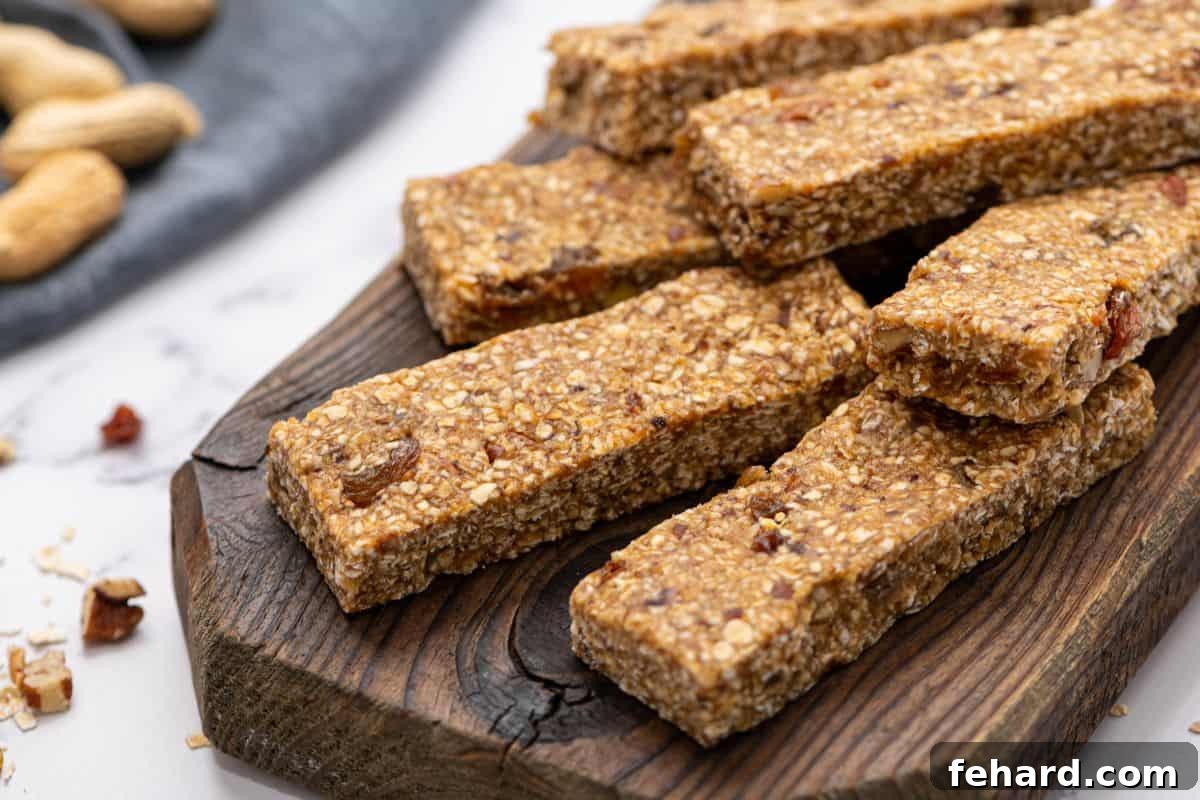
Finally, with a sharp knife, slice the chilled slab into your desired bar size. Whether you prefer smaller bites or larger, more substantial bars, they will hold their shape beautifully. Enjoy your delicious, homemade, wholesome, and perfectly chewy granola bars!
Creative Recipe Modifications and Dietary Adaptations
One of the many fantastic advantages of making your own granola bars is the complete freedom to customize them. This base recipe is incredibly versatile and can be easily adapted to suit various dietary preferences, allergy concerns, and to simply experiment with different flavor profiles. Here are some popular and practical modifications you can try:
- Gluten-Free Granola Bars: To ensure these delicious bars are completely gluten-free and safe for those with sensitivities, simply use certified gluten-free rolled oats. While oats are naturally gluten-free, they can often be processed in facilities that also handle wheat, barley, or rye, leading to potential cross-contamination. Always check the label to confirm they are certified gluten-free if you have a severe sensitivity or celiac disease. All other ingredients in this recipe are typically naturally gluten-free.
- Oil-Free Granola Bars: If you prefer to avoid coconut oil or are looking for an oil-free snack, it can be easily replaced. Simply substitute the two tablespoons of coconut oil with an equal amount (two additional tablespoons) of your chosen nut butter. This will maintain the necessary binding properties and add extra richness to the bars, making them slightly denser but equally delicious. Alternatively, if being vegan is not a concern, you can use melted unsalted butter in place of coconut oil.
- Nut-Free Granola Bars: For those with nut allergies or who simply prefer a nut-free snack, adapting this recipe is straightforward. Replace the peanut butter or almond butter with an equivalent amount of a quality nut-free spread, such as soy butter (popular brands like Wowbutter work well) or sunflower seed butter (like SunButter). These alternatives work exceptionally well, providing the necessary binding, creamy texture, and healthy fats without any tree nuts or peanuts. Always ensure all other ingredients, especially oats, are also certified nut-free if severe allergies are a concern to prevent cross-contamination.
- Optional Add-Ins for Flavor and Texture: This is where you can truly let your culinary creativity shine and make these bars uniquely yours! Once the base mixture is prepared and before pressing into the pan, gently stir in up to ½ cup of your favorite additions. Consider:
- Mini Chocolate Chips: For a delightful touch of indulgence and sweetness. Both dark and semi-sweet varieties work well.
- Toffee Bits: Adds a sweet, buttery, and slightly crunchy caramel note.
- Dried Fruit: Such as plump raisins, tangy dried cranberries, finely chopped apricots, sweet dried blueberries, or even finely diced dried mango. These add extra chewiness, natural sweetness, and a burst of fruity flavor.
- Spices: A dash of ground cinnamon, pumpkin pie spice, or even a hint of nutmeg can significantly enhance the warm, comforting flavors of the oats and dates.
- Chopped Nuts: If not making nut-free, incorporate chopped walnuts, pecans, almonds, or cashews for added crunch, healthy fats, and protein boost.
- Seeds: Boost the nutritional profile with chia seeds, ground flax seeds, hemp seeds, or sesame seeds for an extra dose of omega-3 fatty acids, fiber, and subtle crunch.
- Shredded Coconut: Toasted or untoasted shredded coconut adds a wonderful texture and a delightful tropical twist.
These versatile additions not only change up the flavor profile but also introduce delightful new textures, ensuring you never get bored with your homemade granola bars.
Explore More Wholesome and Easy Snack Recipes
If you’ve enjoyed the simplicity, health benefits, and deliciousness of these homemade no-bake granola bars, you’re in for a treat! We have a wide array of easy and healthy snack ideas perfect for kids and adults alike, designed to keep your family energized and satisfied. Browse all my favorite healthy snack recipes or check out a few of our top picks below to keep your snack game strong, nutritious, and always exciting:
- Wholesome Banana Breakfast Cookies
- Effortless 2-Ingredient Homemade GoGurts
- Nutritious Oatmeal Chocolate Chip Muffins
- Easy Homemade Fruit Roll-Ups
- Hearty Oatmeal Dark Chocolate Bars
- Energizing Chocolate Peanut Butter Power Smoothie
Loved this recipe?
We’d be absolutely thrilled to hear your feedback! If you enjoyed making and tasting these wholesome homemade granola bars, please consider leaving a comment and a 5-star review at the bottom of the post. Your valuable support helps us continue to share more delicious, healthy, and family-friendly recipes with our wonderful community. Thank yourself for cooking with us!
Average Rating: 4.96 from 22 votes
Homemade No-Bake Granola Bars
Kristen Chidsey
12 delicious bars
5 minutes
5 minutes active, plus 30 minutes chilling
Print Recipe
These incredibly easy no-bake granola bars are crafted from simple, wholesome ingredients, resulting in a perfectly soft, chewy, and genuinely healthy snack. Ideal for busy families, they offer a nutritious alternative to store-bought options and come together in just minutes!
Ingredients
- 1 cup pitted dates (Deglet Nour or Medjool, ensure they are very soft)
- ¼ cup pure maple syrup (or substitute with honey)
- 2 tablespoons coconut oil, melted and cooled (or extra nut butter for oil-free)
- 3 tablespoons all-natural peanut butter, almond butter, or sunflower seed butter (for nut-free)
- ½ teaspoon pure vanilla extract
- ½ teaspoon sea salt (omit if using salted nut butter)
- 2 cups rolled oats (quick-cooking or old-fashioned; use certified gluten-free if needed)
- ½ cup optional add-ins (e.g., chopped nuts, raisins, mini chocolate chips, dried fruit, chia seeds, shredded coconut)
Instructions
- Soften Dates: Ensure your pitted dates are soft. If firm, soak them in hot water for 5-30 minutes, then drain thoroughly, reserving up to 2 tablespoons of the liquid.
- Prepare Pan: Line an 8×8 inch baking pan with parchment paper, leaving an overhang on the sides for easy removal.
- Process Dates: In a food processor fitted with an S-blade, process the softened dates until a thick, uniform paste forms.
- Combine Wet Ingredients: Add maple syrup, melted (and cooled) coconut oil, nut butter, vanilla extract, and sea salt to the food processor. Pulse until the mixture is well combined and creamy, scraping down sides as needed.
- Add Oats: Add the rolled oats to the food processor. Pulse briefly until the oats are just moistened and evenly incorporated into the date mixture. If the mixture seems too dry to stick together, add 1-2 tablespoons of the reserved date soaking liquid, or water, until it comes together.
- Fold in Add-ins: Transfer the mixture to a large bowl and gently stir in any optional add-ins you desire (e.g., chocolate chips, dried fruits, nuts).
- Press into Pan: Press the mixture very firmly and evenly into the prepared pan. Use moistened fingers or a piece of parchment paper to help spread and compact the mixture tightly.
- Chill to Set: Chill the pan in the refrigerator for at least 30 minutes (or freezer for 10-15 minutes) until the bars are completely firm. This step is essential for clean slicing.
- Slice & Serve: Lift the chilled slab out of the pan using the parchment paper overhang and slice into 12 even bars using a sharp knife.
- Store: Store these homemade granola bars individually wrapped in wax paper or in an airtight container in the refrigerator for up to 5-7 days. For longer storage, freeze individual bars for up to 3 months.
Equipment
- Food Processor
- Parchment Paper
- 8×8 inch baking pan
Notes
Storage: To maintain optimal freshness and because these granola bars contain no artificial preservatives, they are best stored in an airtight container in the refrigerator. They can be enjoyed within 5-7 days of preparation. For extended storage, individual bars can be wrapped and frozen for up to 3 months, then simply thawed at room temperature or in the fridge before eating.
Gluten-Free Modification: If you or your family require a gluten-free diet, it is essential to use certified gluten-free rolled oats. This prevents any potential cross-contamination that can occur in processing facilities handling gluten-containing grains.
Substitution for Coconut Oil: If you do not have coconut oil on hand or prefer an oil-free option, you can substitute it with an equal amount of additional nut butter (e.g., 2 extra tablespoons). This will result in a slightly denser bar. Alternatively, if being vegan is not a concern, melted unsalted butter can also be used.
Important Note on Dates: Both dried pitted Deglet Nour Dates and dried Medjool dates work wonderfully in this recipe. Just ensure they are pitted before processing. It is highly recommended to avoid purchasing pre-chopped dates, as they are typically coated in added sugar or flour to prevent sticking, which goes against the natural sweetness we aim for.
Nutrition Facts (Approximate, per bar)
Calories: 147kcal | Carbohydrates: 23g | Protein: 3g | Fat: 5g | Saturated Fat: 2g | Sodium: 116mg | Potassium: 170mg | Fiber: 2g | Sugar: 12g | Calcium: 21mg | Iron: 0.8mg
Nutrition information is automatically calculated and should only be used as an approximation. Actual values may vary based on specific ingredient brands, preparation methods, and serving sizes.
Tried this delicious recipe?
Share your delightful creations on Instagram! Mention @amindfullmom or tag #amindfullmom. We absolutely love seeing your homemade treats and sharing them with our community!
This wholesome no-bake granola bar recipe was originally shared in 2016 and meticulously updated in 2025 to provide the most current information, best possible experience, and clearest details for our cherished readers.