

Are you tired of cut-out sugar cookies that lose their shape in the oven or taste bland despite all your effort? Look no further! This exceptional recipe delivers truly soft, wonderfully flavorful cut-out sugar cookies that flawlessly hold their intricate shapes. They’re sturdy enough to handle even the most elaborate icing designs without crumbling, making them perfect for any occasion.
You’ll fall in love with this easy cut-out sugar cookie recipe because of several key factors: the dough is incredibly forgiving and stands up beautifully to re-rolling, a subtle hint of almond extract elevates the flavor profile, and our proven method prevents your carefully cut shapes from melting into disappointing puddles in the oven. Whether you adorn them with a shower of colorful sprinkles or lavishly slather them with our luscious sugar cookie frosting, these cookies are destined to become a year-round favorite for holidays, celebrations, or simply as a sweet indulgence.

Kristen’s Essential Keys for Flawless Cut-Out Sugar Cookies
From bustling bake sales to elegant holiday cookie platters and simple after-school delights, this is the go-to sugar cookie recipe I rely on time and time again. Over the years, I’ve gathered invaluable tips and tricks that are crucial for achieving consistently perfect results. Pay close attention to these details, and you’ll master the art of the cut-out sugar cookie!
- Use Room-Temperature Butter and Eggs: This seemingly small detail makes a significant difference. When butter and eggs are at room temperature, they cream together much more effectively with sugar, creating a light and airy base. This aeration is what contributes to a tender, melt-in-your-mouth cookie texture, preventing them from becoming dense or crumbly.
- Roll Dough Before Chilling: While it might seem counterintuitive, rolling the dough into uniform disks *before* chilling is a game-changer. It’s significantly easier to achieve an even thickness when the dough is pliable. More importantly, this method reduces the amount of handling required once the dough is cold, which in turn helps your cookies maintain their precise shapes during baking by minimizing gluten development.
- Plan for at Least 12 Hours of Chilling: Patience is a virtue when it comes to these cookies! A minimum of 12 hours of chilling time (or up to 36 hours) is essential. This extended chill time allows the flavors to fully develop and the butter to firm up completely. A firm, cold dough is less likely to spread in the oven, ensuring your intricate cut-out shapes remain perfectly defined. You can even prepare the dough a day or two in advance, making your baking day much smoother.
- Opt for Powdered Sugar When Rolling: Forget all-purpose flour for dusting your workspace! Powdered sugar is the secret weapon for rolling out sugar cookie dough. It effectively prevents sticking without leaving a gritty, floury taste on your finished cookies. As the cookies bake, the powdered sugar melts seamlessly into the dough, adding an extra kiss of sweetness and contributing to a delicate crust.
- Limit Re-rolling to Three Times: While this dough is commendably forgiving, overworking it is a common pitfall. Excessive re-rolling develops gluten, which can lead to tough, chewy cookies that are also more prone to burning. To ensure every cookie remains tender and delightful, gather your scraps and re-roll them no more than three times. After the third re-roll, the dough might become too elastic for optimal texture.
A 5-Star Reader Review!
“This is absolutely my favorite sugar cookie recipe! I’m already planning to bake and freeze a big batch soon, so they’ll be ready for our cherished Christmas Eve Day cookie decorating tradition with the grandkids. And let me tell you, the accompanying sugar cookie frosting recipe is simply perfect. Highly recommend!” -Jean⭐⭐⭐⭐⭐
How to Craft Perfect Cut-Out Sugar Cookies: A Step-by-Step Guide
Consider this detailed, step-by-step process as if I’m right there in the kitchen with you, guiding you through each stage to achieve truly perfect, bakery-quality results. We’ll ensure every cookie is a masterpiece!
Step One: Cream Wet Ingredients for Light, Tender Cookies
The foundation of any great sugar cookie lies in properly creaming your wet ingredients. Utilizing a stand mixer or a robust handheld mixer is highly recommended for this stage. The powerful mixing action helps to incorporate a significant amount of air into the butter and sugar mixture, resulting in a smooth, aerated batter. This critical step directly translates into the remarkably light and tender texture that these sugar cookies are renowned for.
- Cream Butter and Granulated Sugar Together: In a large mixing bowl, combine the softened unsalted butter and granulated sugar. Using your stand mixer fitted with the paddle attachment, or a handheld mixer, beat these ingredients together on medium-high speed. Continue mixing until the mixture transforms into a pale, fluffy, and light consistency. This typically takes 3-5 minutes, allowing ample air to be incorporated.
- Incorporate Eggs and Extracts: Once your butter and sugar mixture is light and airy, add the large room-temperature eggs, one at a time. Mix on low speed, just until each egg is fully combined before adding the next. Overmixing here can lead to a dense cookie. Finally, introduce the vanilla extract and almond extract. Mix again on low speed until they are just incorporated, ensuring the delicate flavors are evenly distributed throughout the batter.

Step Two: Sift Dry Ingredients for Uniform Distribution
Sifting your dry ingredients is another often-overlooked step that significantly impacts the final texture of your cookies. By sifting together the all-purpose flour, baking powder, and salt before adding them to your creamed wet ingredients, you ensure that these leavening agents and seasonings are perfectly distributed. This prevents pockets of unmixed ingredients and reduces the need to overmix the dough later, which is crucial for achieving truly tender cookies.
Step Three: Gently Fold Dry and Wet Ingredients Together
Once your dry ingredients are perfectly sifted, it’s time to combine them with your wet mixture. Add half of the flour mixture to the creamed butter and eggs, and mix on the lowest speed of your mixer until *just* combined. Then, add the remaining dry ingredients and mix again, still on low speed, until there are no visible streaks of flour remaining in the dough. The key here is minimal mixing.
👉🏻Important Tip: Avoid Overmixing! Once you introduce the flour, exercise a light hand and keep your mixer speed on low. Our goal is solely to incorporate the dry and wet ingredients until they form a cohesive dough. Mixing for too long, or at too high a speed, rapidly develops gluten in the flour. This development results in tough, dense cookies, rather than the soft, delicate texture we’re aiming for. Stop mixing as soon as the flour disappears!
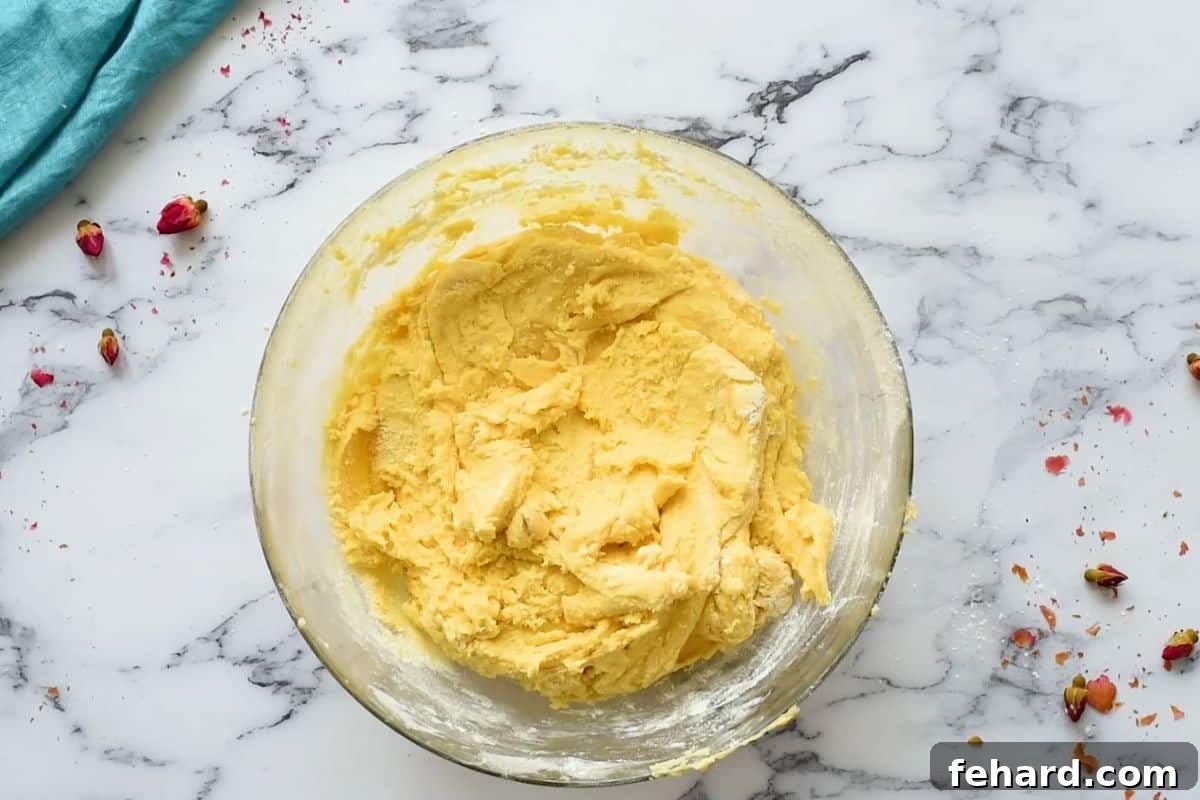
Step Four: Roll Dough Before Chilling for Perfect Uniformity
This is a pivotal step that many recipes skip, but it’s absolutely vital for consistent, beautifully shaped cookies. Divide your freshly mixed dough into four equal disks. Working with one disk at a time, place it between two sheets of parchment paper that have been lightly dusted with powdered sugar. Using a rolling pin, roll the dough to a precise ¼-inch thickness. Repeat this process for all four dough disks.
👉🏻Pro Tip for Uniform Cookies: To ensure every cookie bakes evenly and has the same delightful texture, use dowels or the handles of wooden spoons as guides alongside your rolling pin. Place them on either side of your dough as you roll; when your rolling pin glides smoothly over them, you know you’ve achieved perfect, consistent ¼-inch thickness across the entire sheet of dough.
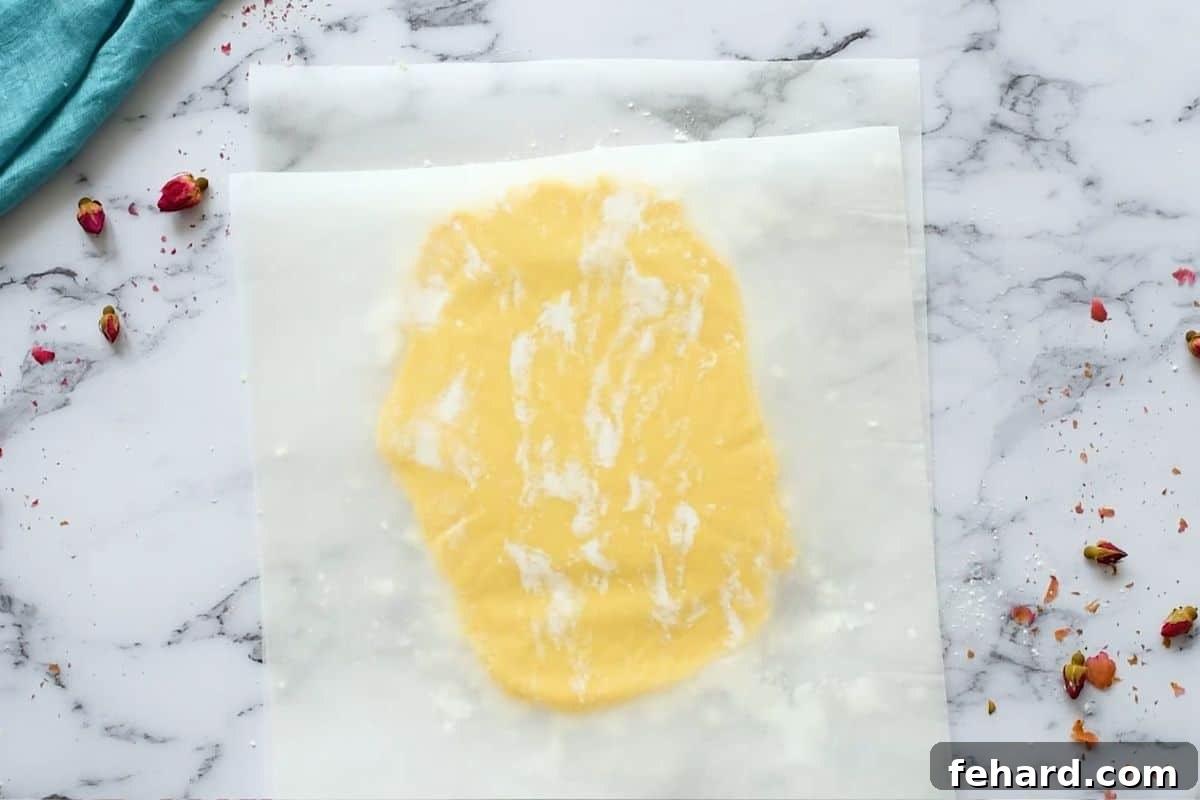
Step Five: Chill Dough for Optimal Stability and Flavor Development
This step is non-negotiable for cut-out sugar cookies that truly hold their shape. Stack your rolled-out dough disks on a baking pan or tray that comfortably fits into your refrigerator. Make sure to separate each layer with fresh sheets of parchment paper to prevent sticking. Once stacked, cover the entire pan tightly with plastic wrap to prevent the dough from drying out. Now, comes the waiting game: chill the dough for a minimum of 12 hours, and ideally up to 36 hours. This extended chilling period allows the butter to solidify completely, making the dough stable and easy to work with, while also deepening the rich flavors within the cookies.
Step Six: Cut Out Your Beautiful Cookie Shapes
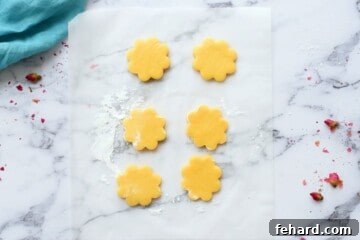
When you’re ready to bake, remove one disk of chilled dough from the refrigerator at a time, keeping the others cold until needed. Lightly dust your chosen cookie cutters with powdered sugar to prevent any sticking, ensuring clean, crisp edges on your shapes. Place the freshly cut cookies onto a baking sheet lined with fresh parchment paper, ensuring there’s about 2 inches of space between each cookie to allow for slight expansion during baking.
👉🏻Adding Sprinkles? Do it Now! If your vision includes delightful sprinkles, now is the perfect moment to add them. Gently press them onto the surface of the cut-out dough. Applying sprinkles before baking ensures they adhere beautifully to your cookies and don’t fall off once baked and cooled.

Step Seven: Bake to Golden Perfection
Preheat your oven to 400°F (200°C) and position an oven rack in the center. Once hot, carefully place your baking sheet filled with cut-out cookies into the oven. Bake them until the tops of the cookies are just set and appear dry, typically for 6-7 minutes. It’s crucial not to let the bottoms brown too much, as this will cause your sugar cookies to lose their signature softness and become crisp. A pale, barely golden edge is what you’re looking for.
👉🏻For a Truly Perfect and Even Bake: Always ensure your oven is fully preheated to the correct temperature before introducing your cookies. More importantly, only bake one tray of cookies at a time. Baking multiple trays simultaneously can lead to uneven cooking due to inconsistent heat distribution. While one batch is in the oven, use that precious time efficiently to roll and cut out your next batch, ensuring a continuous and smooth baking process.

Step Eight: Cool Completely and Ice if Desired
Once baked, remove the cookie sheet from the oven and place it on a wire cooling rack. Allow the cookies to rest directly on the baking sheet for 1-2 minutes. This brief resting period helps them firm up and prevents them from breaking when transferred. After this initial rest, carefully transfer the cookies to the wire rack to cool completely. It’s essential that they are fully cooled before you begin icing or decorating, as warm cookies will cause the frosting to melt and slide off.
👉🏻Ready to Ice Your Masterpieces? For truly stunning and delicious results, I highly recommend using my favorite cream cheese sugar cookie icing. Its rich flavor perfectly complements these tender cookies, and its consistency is versatile enough for both simple, smooth glazes and intricate, detailed decorating work. Get ready to unleash your creativity!

Storage & Make-Ahead Instructions for Your Sugar Cookie Creations
Planning ahead makes baking a breeze! Here’s how to store your sugar cookie dough and baked cookies to enjoy them fresh or prepare them in advance:
- Storing Sugar Cookie Dough: The dough is wonderfully versatile for make-ahead baking. Prepare the dough as directed, then cover it tightly and chill in the refrigerator for up to 36 hours before baking. For longer storage, divide the prepared dough into disks, wrap them tightly in plastic wrap, then place them in a freezer-safe storage bag or container. It can be frozen for up to 3 months. When ready to use, defrost the dough slowly in the refrigerator overnight, then roll into disks, chill again if needed (to ensure it’s firm), and bake as directed.
- Storing Uniced Sugar Cookies: Once your cookies are baked and completely cooled, you can stack them in an airtight container. Store them at room temperature for up to 5 days, where they will maintain their soft texture. For longer preservation, freeze the cooled, uniced cookies. Layer them with parchment paper in a freezer-safe container, and they will stay fresh for up to 2 months. Thaw at room temperature before serving or icing.
- Storing Iced Sugar Cookies: If you’ve decorated your cookies, ensure the icing is fully set before storing (this usually takes about 1 hour at room temperature or 30 minutes in the refrigerator, depending on the frosting type). Once the icing is firm, stack the cookies gently in an airtight container, separating layers with parchment paper. Store them in the refrigerator for up to 5 days. For longer storage, these iced cookies can also be frozen for up to 1 month. Thaw in the refrigerator, then bring to room temperature before serving for the best flavor and texture.
More Irresistible Cookie Recipes to Explore
If you loved this sugar cookie recipe, you’re sure to enjoy these other beloved cookie classics from my kitchen to yours:
- Legendary Neiman Marcus Cookies – A truly decadent treat.
- Delicate Snowball Cookie Recipe – Perfect for winter celebrations.
- Classic Buttery Shortbread Cookies – Simple elegance.
- Warm & Chewy Snickerdoodle Cookies – A cinnamon-sugar delight.
- Festive Candy Cane Cookies – Fun and flavorful for the holidays.
- Classic Peanut Butter Blossoms – A timeless favorite with a chocolate kiss.
- No-Chill Chocolate Chip Cookies – Instant gratification for chocolate lovers!
★
★
★
★
Perfect Cut-Out Sugar Cookies
Kristen Chidsey
60 cookies
30
6
12
12 36
Print Recipe

Video Tutorial
Ingredients
- 1½ cups unsalted butter, softened (3 sticks)
- 2 cups granulated sugar
- 4 large eggs, room temperature
- ½ teaspoon vanilla extract
- ¼ teaspoon almond extract
- 5 cups all-purpose flour, spooned and leveled
- 2 teaspoons baking powder
- 1 teaspoon table salt
- powdered sugar for rolling
Instructions
-
In a large mixing bowl (or your stand mixer), beat together 1½ cups unsalted butter and 2 cups granulated sugar until light in color and fluffy on medium-high speed (about 3-5 minutes).

-
Add 4 large eggs, one at a time, with the mixer running on low speed. Beat until just combined for each egg, then increase speed to medium and beat for 2-3 minutes until well incorporated. Add the ½ teaspoon vanilla extract and ¼ teaspoon almond extract, mixing on low until just combined.
-
In a separate large mixing bowl, sift together the 5 cups all-purpose flour, 2 teaspoons baking powder, and 1 teaspoon table salt. Whisk thoroughly to ensure all dry ingredients are evenly distributed.
-
Slowly add the sifted dry ingredients to the butter mixture, beating on low speed until just combined. It’s crucial to use caution and not overmix the dough to maintain tenderness. Stop as soon as no dry streaks of flour remain.
-
Divide the dough into four equal portions. Take one portion (about 1 cup), place it onto a sheet of parchment paper or wax paper dusted with powdered sugar, and cover with another sheet of parchment paper. Using a rolling pin, roll the dough evenly to ¼-inch thickness. Repeat this process for the remaining three dough portions.
-
Stack the rolled-out dough disks on a plate or in a shallow dish, ensuring each layer is separated by parchment paper. Cover the stack tightly with plastic wrap and refrigerate for a minimum of 12 hours, or up to 36 hours. This chilling step is vital for preventing the cookies from spreading.
-
When you are ready to bake, position an oven rack to the center of your oven and preheat the oven to 400℉ (200°C). Line several cookie sheets with fresh sheets of parchment paper.
-
Remove one disk of dough at a time from the refrigerator. Lightly dust your chosen cookie cutters with powdered sugar to prevent sticking, then cut the dough into your desired shapes. Carefully place the cut-out cookies onto the prepared cookie sheets, leaving approximately 2 inches of space between each cookie. If you plan to add sprinkles, do so now, gently pressing them onto the dough. Note on Scraps: Gather any dough scraps, gently press them together, re-roll up to 3 times, and cut out more shapes. Refrigerate briefly if the dough becomes too warm to handle.
-
Bake for 6-7 minutes, or until the tops of the cookies are just set and appear dry, but not yet browned. Remove the cookies from the oven, place the cookie sheet on a cooling rack, and allow the cookies to sit on the baking sheet for 2-3 minutes to finish setting up and prevent breakage.
-
After 2-3 minutes, gently remove the cookies from the baking tray and transfer them to a wire cooling rack. Allow them to cool completely before icing, decorating, or enjoying.





Essential Equipment
-
Baking Sheets (having more than one is highly recommended for this recipe)
-
Parchment Paper
-
Stand Mixer or Handheld Mixer
-
Rolling Pin
-
Cookie Cutters
-
Wire Cooling Rack
Chef’s Notes & Tips
Accurate Flour Measurement: To avoid dense or dry cookies, do not simply scoop the flour directly from its container or bag with your measuring cup. For the most accurate measurement, use a spoon to lightly scoop the flour into your measuring cup, then use the flat back of a knife to level off the top. Do not pack the flour down.
Storing Uniced Sugar Cookies: Once completely cooled, stack your uniced cookies in an airtight container. They will remain wonderfully soft at room temperature for up to 5 days. For longer storage, you can freeze them, layered with parchment paper, for up to 2 months.
Storing Iced Sugar Cookies: After decorating, ensure the icing is fully set (approximately 1 hour). Then, store the iced cookies in an airtight container, separating layers with parchment paper, in the refrigerator for up to 5 days or in the freezer for up to 1 month.
Nutrition Facts
Serving Size: 6g
Calories: 108kcal
Carbohydrates: 14g
Protein: 1g
Fat: 5g
Saturated Fat: 3g
Cholesterol: 23mg
Sodium: 83mg
Potassium: 29mg
Sugar: 6g
Vitamin A: 160IU
Calcium: 10mg
Iron: 0.2mg
Nutrition information is automatically calculated and should be used as an approximation.
Tried this recipe?
Mention @amindfullmom or tag #amindfullmom!
This beloved recipe was originally published in November 2017 and thoroughly updated in 2025 to provide the most current and helpful information.