
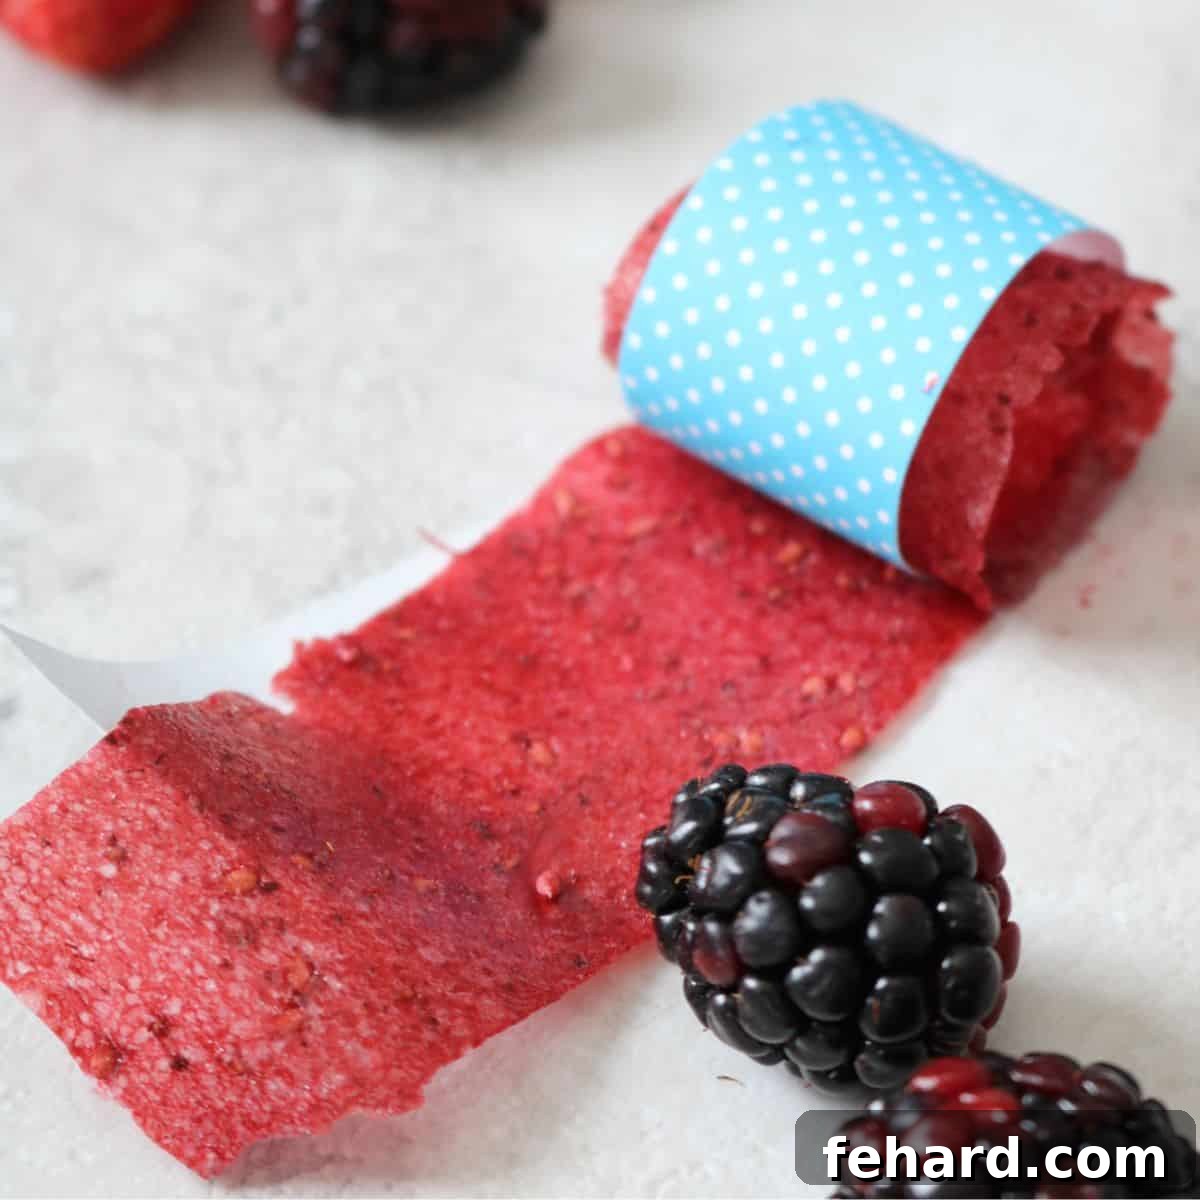
Craving a sweet, chewy snack that’s bursting with natural fruit flavor without any artificial additives? Look no further! This incredibly simple recipe for Homemade Fruit Roll-Ups will permanently replace those store-bought versions you grew up with. Made with just 3 wholesome ingredients and requiring no special equipment like a dehydrator, these fruit leathers are a parent-approved delight that kids absolutely adore. Get ready to create a healthier, tastier treat right in your own kitchen!
Why Choose Better-For-You Homemade Fruit Roll-Ups?

Do you remember “Fruit-by-the-Foot” or other similar overly sugary fruit snacks from your childhood? While they offered a fun, chewy experience, they were often loaded with artificial flavors, colors, and an alarmingly small amount of actual fruit. This recipe is a game-changer, designed to replace those nostalgic but less-than-ideal treats with a truly wholesome and delightful alternative.
Our homemade fruit roll-ups are crafted from real fruit – and plenty of it! This not only makes them incredibly delicious but also a much healthier choice for the entire family. Parents universally agree that this recipe stands out for several compelling reasons:
- Naturally Allergen-Friendly: These homemade fruit roll-ups are inherently gluten-free, dairy-free, nut-free, soy-free, corn-free, and egg-free. This makes them an ideal snack for children with common food allergies or sensitivities, ensuring everyone can enjoy a sweet treat without worry. They can also be effortlessly made vegan-friendly by choosing a plant-based sweetener like maple syrup or agave.
- Pure and Unadulterated Goodness: Say goodbye to questionable ingredients! Our recipe contains absolutely no food coloring, no artificial flavors, no preservatives, and certainly no high-fructose corn syrup. What you get is the pure, concentrated essence of fruit, allowing its natural sweetness and vibrant taste to shine through. You’ll know exactly what’s going into your family’s snacks.
- No Dehydrator? No Problem!: Many fruit leather recipes call for a specialized food dehydrator, which can be an expensive and space-consuming piece of kitchen equipment. This ingenious recipe simplifies the process by utilizing a standard oven set to its lowest temperature. This method effectively dries out the fruit puree into a perfectly pliable fruit leather, making homemade fruit roll-ups accessible to every home cook.
- Economical and Sustainable: Making your own fruit roll-ups is often more cost-effective than repeatedly buying expensive organic or “natural” store-bought versions. It also allows you to utilize seasonal fruit gluts or slightly overripe fruit, reducing food waste and making the most of nature’s bounty.
- Customizable Flavors: The beauty of homemade snacks lies in their versatility. You have complete control over the flavor profile! Experiment with different single fruits or create exciting combinations to discover your family’s favorite blends. From tangy berries to sweet tropical mango, the possibilities are endless.
Happy cooking, and enjoy these wonderfully wholesome treats! Warmly, Kristen
Recipe Overview and Highlights
- The Wholesome Homemade Fruit Roll-Ups Recipe
- Essential Ingredients & Equipment for Fruit Roll-Ups
- Step-By-Step Guide: How to Make Perfect Fruit Roll-Ups
- Tips for Success & Creative Variations
- Storage & Serving Suggestions
What You Need to Make Homemade Fruit Roll-Ups
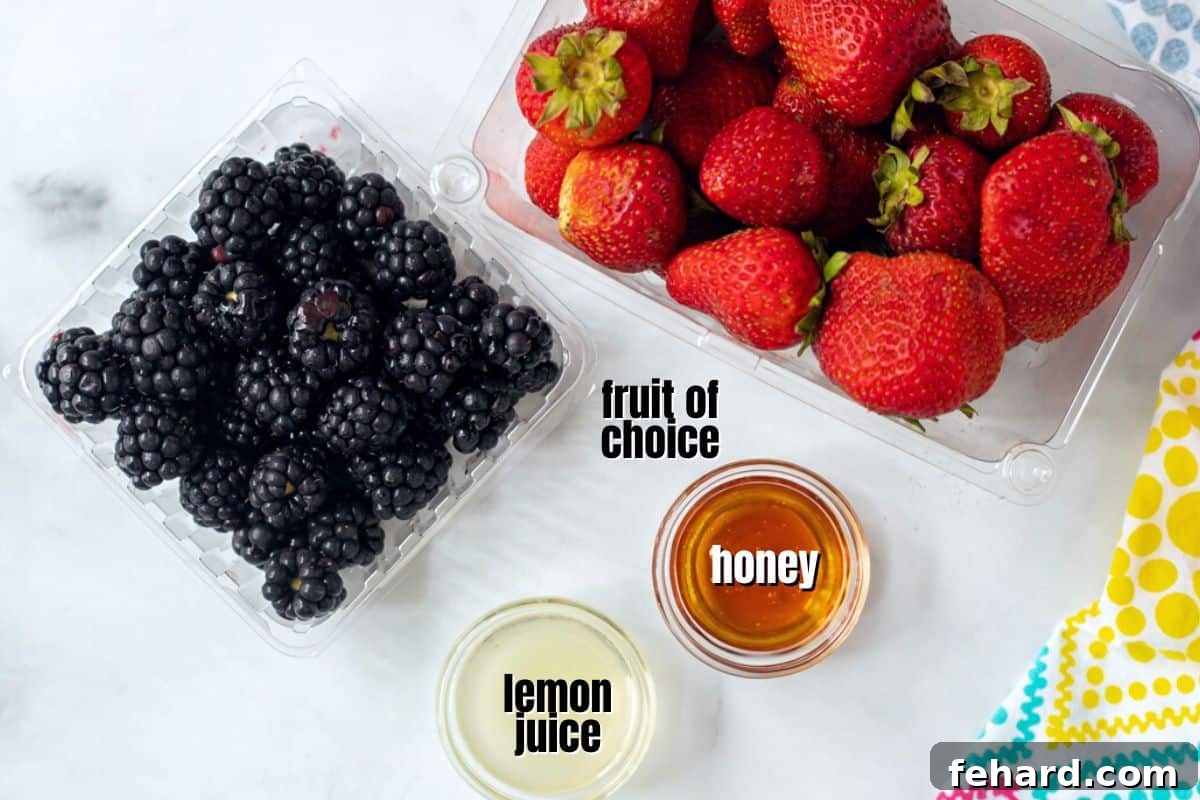
Crafting these delectable fruit roll-ups requires only a few fundamental ingredients and basic kitchen tools. The simplicity ensures that anyone can whip up a batch with ease.
- Fresh or Frozen Fruit: This is the star of your fruit roll-ups! Almost any fruit can be used, but certain varieties work exceptionally well for their flavor, texture, and natural pectin content.
- Recommended Fruits: Berries (strawberries, raspberries, blueberries, blackberries), mango, kiwi, peaches, apricots, plums, cherries. These fruits tend to have a good balance of sweetness and moisture and maintain appealing colors when dried.
- Fruits to Approach with Caution: While delicious, some fruits might not yield the best results for a visually appealing roll-up. Bananas and apples, for example, can brown easily during the drying process, leading to a less vibrant color. Melons also have a very high water content, which can significantly extend drying time and result in a thinner, less flavorful leather.
- Applesauce Addition: For a thicker texture or to stretch your fruit supply, you can incorporate up to 1 cup of unsweetened applesauce into your fruit puree. It blends beautifully with other fruits and helps create a consistent, smooth leather.
- Natural Sweetener (Optional): The need for sweetener depends entirely on the ripeness of your fruit and your personal preference.
- Suggested Sweeteners: Honey, maple syrup, or agave syrup are excellent choices. Their liquid consistency ensures they blend seamlessly into the fruit puree, preventing any grainy texture in the final product.
- Avoid Granulated Sugar: Granulated sugar might not fully dissolve in the fruit puree, potentially leaving a gritty residue in your fruit roll-ups.
- Sweetener-Free Option: If your fruit is perfectly ripe and naturally sweet, feel free to omit any added sweetener. Taste your puree before spreading it – you might be surprised by how much natural sugar is present!
- Lemon Juice: A small amount of fresh lemon juice plays a crucial dual role in this recipe.
- Flavor Brightener: It enhances and brightens the natural flavors of the fruit, making them pop.
- Natural Preservative: Lemon juice acts as a natural antioxidant, helping to prevent the fruit from browning during processing and drying, thus preserving its vibrant color and extending the shelf life of your fruit roll-ups.
- Essential Equipment: The beauty of this recipe is its minimal equipment requirement.
- Oven: A standard kitchen oven is all you need. We’ll be using its lowest setting to gently dehydrate the fruit.
- Rimmed Baking Pan: A standard baking sheet with raised edges is essential to contain the fruit puree.
- Parchment Paper or Silicone Mat: This is crucial for preventing the fruit leather from sticking to the pan and makes for easy removal once dried. Ensure it’s oven-safe.
- Food Processor or Blender: To achieve a perfectly smooth fruit puree.
- Offset Spatula (Recommended): For spreading the fruit puree evenly.
- Kitchen Scissors or Pizza Cutter: For easily cutting the cooled fruit leather into strips.
Using Frozen Fruit?
Don’t let frozen fruit go to waste! To use frozen fruit for homemade fruit roll-ups, simply defrost your chosen fruit in the refrigerator overnight or at room temperature. Once thawed, it’s vital to drain off any excess liquid thoroughly. Pat the fruit dry with paper towels to remove as much surface moisture as possible. This step helps ensure a consistent drying time in the oven. After draining and patting dry, proceed with the recipe as directed.
How to Make Homemade Fruit Roll-Ups: A Simple Walkthrough
Achieving perfect homemade fruit roll-ups is straightforward with these detailed steps. You’ll find specific ingredient quantities and precise instructions in the recipe card at the bottom of this post, but these tips will guide you to success.
- Prepare Your Oven and Pan: Begin by preheating your oven to its lowest possible setting, typically between 150-180°F (65-82°C). This low temperature is key to gently dehydrating the fruit without cooking it. Line a rimmed baking sheet with a sheet of oven-safe parchment paper or a silicone baking mat. This step is crucial to prevent sticking and allows for easy removal of the fruit leather.
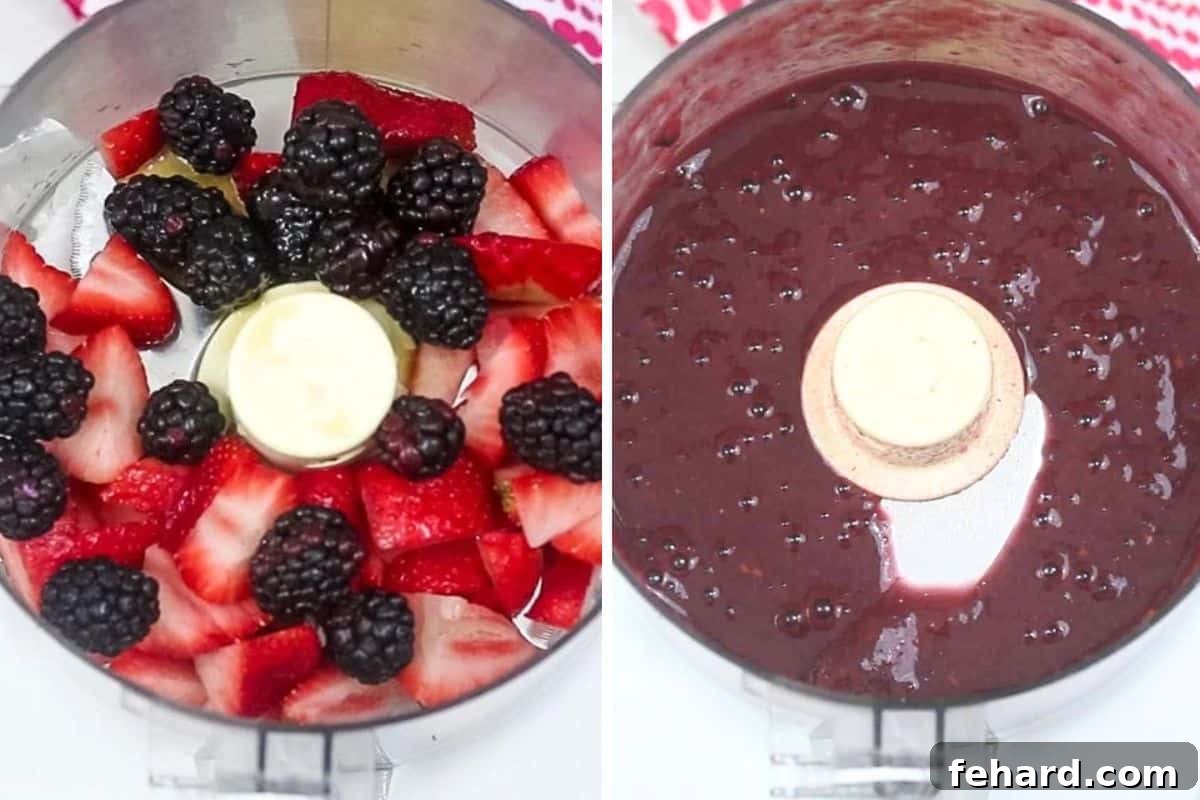
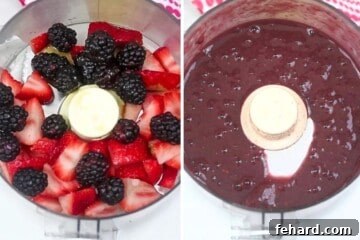
- Puree the Fruit Mixture: Place your chosen fresh or properly thawed and drained frozen fruit into a food processor or a high-speed blender. Add your preferred liquid sweetener (if using) and the fresh lemon juice. Process until the mixture is perfectly smooth, with no noticeable chunks of fruit remaining. The consistency should be like a thick smoothie or a pourable jam.
Kristen’s Tip: Seedless Fruit Roll-Ups
For children (or adults!) with sensitive digestive systems who need to avoid seeds, there are a couple of approaches. You can use naturally seedless fruits like peaches, mangoes, or applesauce. Alternatively, if you wish to use seedy fruits like berries, puree the fruit as directed, then carefully press the puree through a fine-mesh strainer or sieve to remove all the small seeds before spreading it onto the baking sheet. This extra step ensures a completely smooth and seed-free fruit leather.
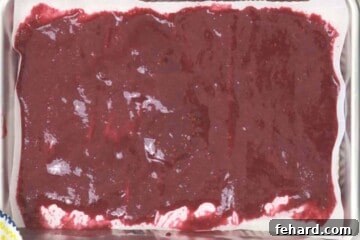
- Spread the Pureed Fruit Evenly: Carefully pour the smooth fruit puree onto your prepared baking pan. Using an offset spatula (or the back of a spoon), gently spread the mixture into a very thin, even layer across the parchment paper. Aim for a thickness of about ⅛-inch (approximately 3mm). It’s essential to spread it as uniformly as possible to ensure even drying. Be sure to leave a ½-inch border along all sides of the pan; this prevents the fruit leather from sticking to the pan itself and makes for easier peeling later. Avoid leaving any holes or thin spots, as these areas can over-dry and become brittle.
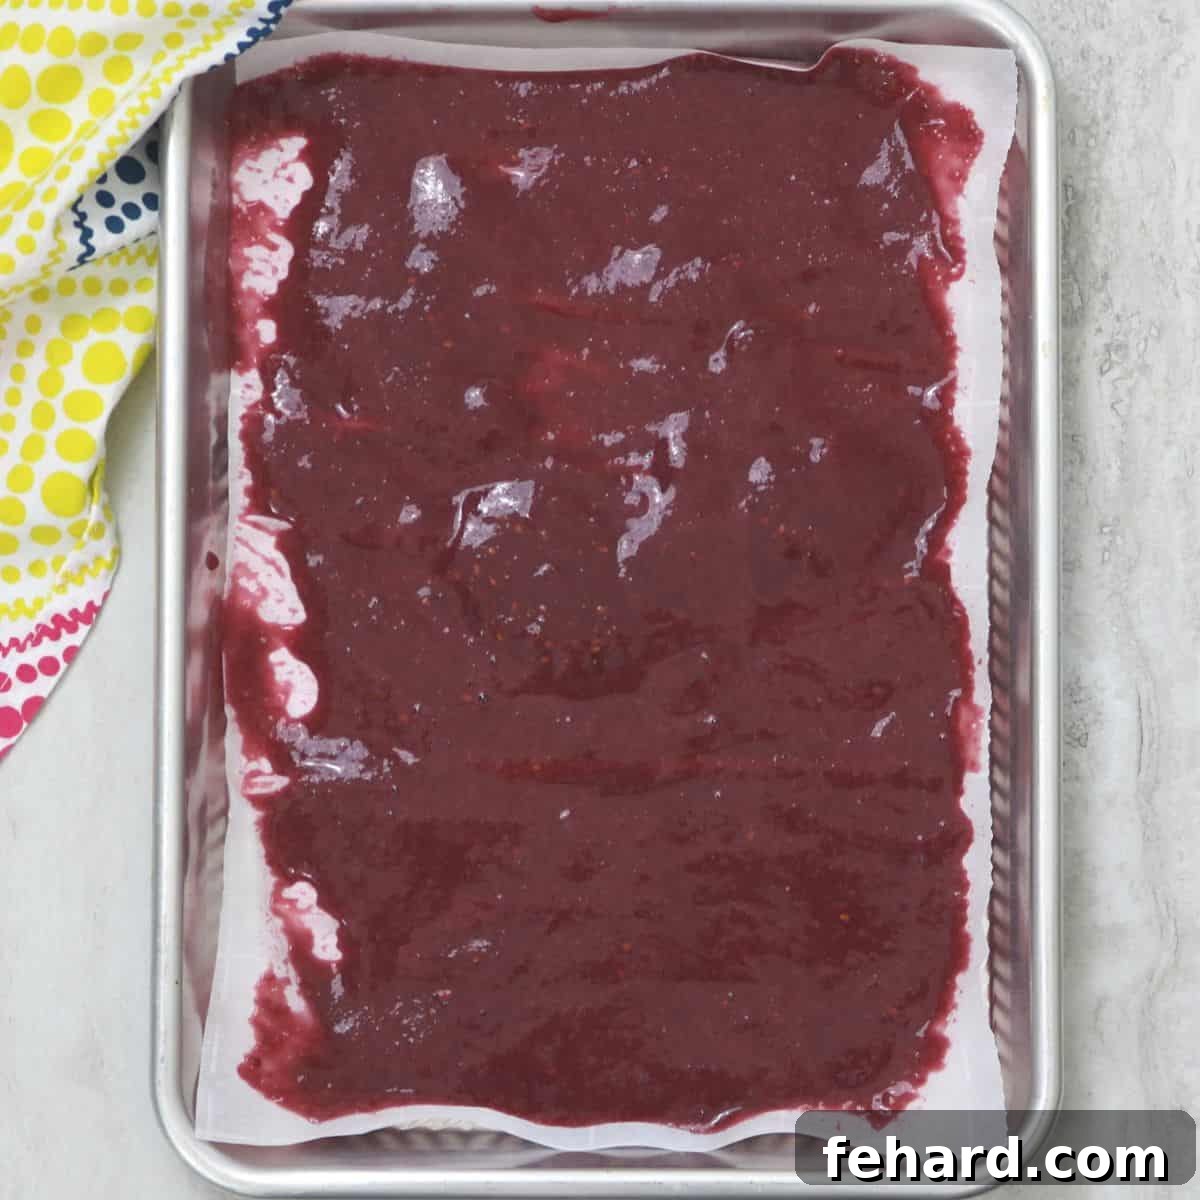
- Bake (Dehydrate) the Fruit Leather: Place the baking sheet with the fruit puree into your preheated oven. Bake the fruit leather for a duration that can range from 4 to 8 hours. The exact timing will significantly depend on your oven’s specific temperature (even at its lowest setting) and, more importantly, the moisture content of the fruit you used. After about 4 hours, begin checking the fruit leather every 30 minutes. It’s ready when the mixture is no longer sticky to the touch and feels pliable and slightly tacky, like soft leather, rather than wet or brittle. It should peel away from the parchment paper without leaving any residue.
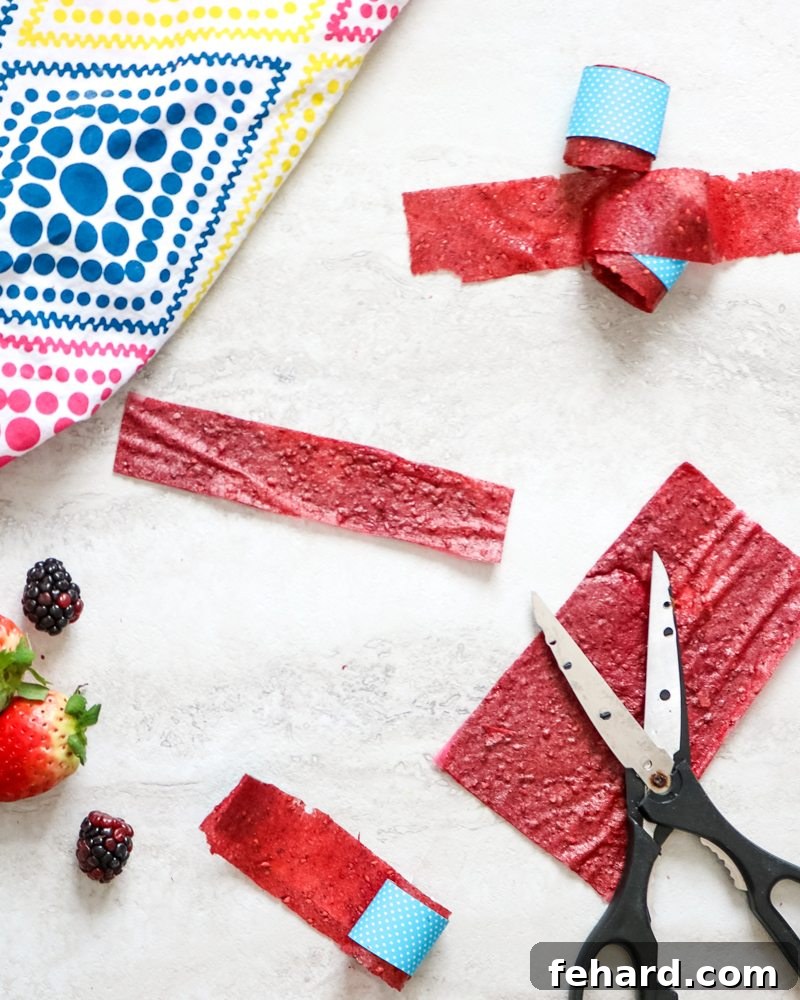
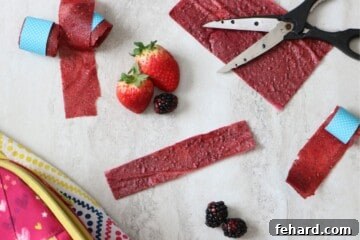
- Cool and Slice Your Fruit Roll-Ups: Once the fruit leather is perfectly dried, remove the pan from the oven. Allow the entire sheet of fruit leather to cool completely to room temperature directly on the baking sheet. This cooling period helps it firm up and makes it easier to handle and cut. Once cooled, use clean kitchen scissors or a pizza cutter to cut the fruit leather into desired strips, typically about 1-inch wide. You can then carefully peel the fruit leather away from the parchment paper.
Tips for Success and Creative Variations
Making Your Fruit Roll-Ups Extra Cute and Fun
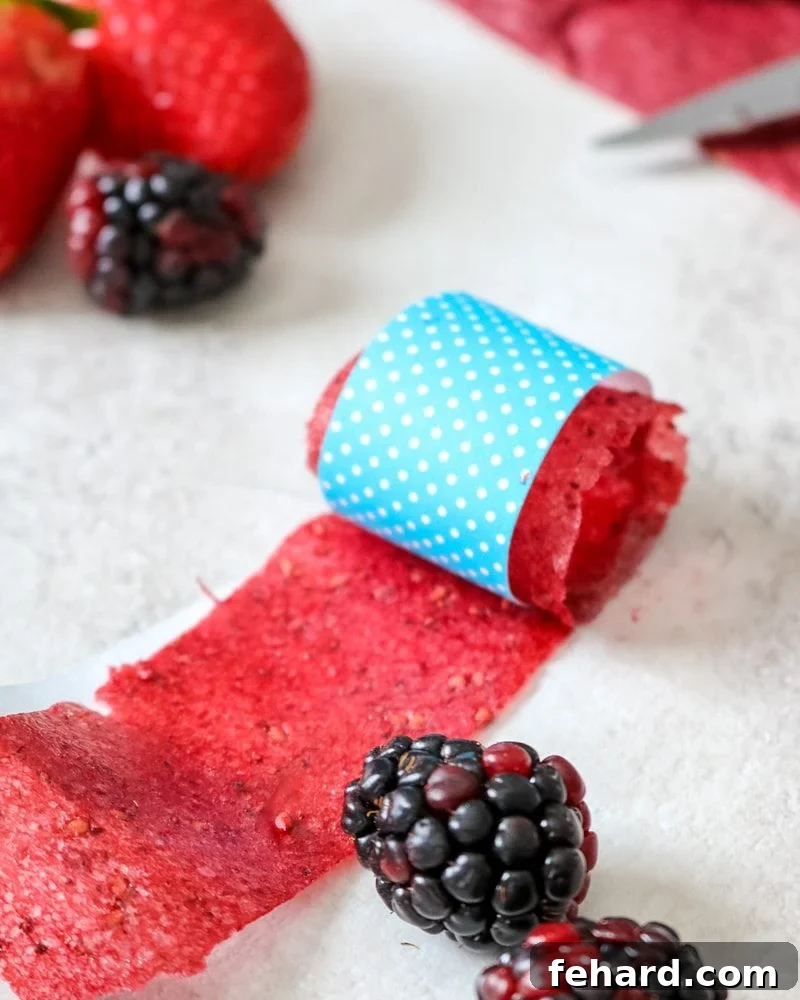
While rolling your fruit leather directly with its original parchment paper is perfectly functional, adding a strip of craft paper can elevate the experience, especially for kids. It mimics the classic store-bought look and adds a fun unwrapping element.
- Prepare Craft Paper Strips: Cut strips of craft paper (wax paper or even plain parchment paper works too) that are slightly narrower than your fruit leather strips. This ensures the fruit leather is visible and doesn’t stick to the outer paper.
- Roll Them Up: Gently peel the fruit leather away from the parchment paper it was baked on. Place the fruit leather strip onto your chosen craft paper strip.
- Secure and Enjoy: Tightly roll the fruit leather and craft paper together into the familiar spiral shape. Secure the roll with a fun sticker, a small piece of tape, or even a ribbon. This small touch of presentation can make snack time feel extra special and exciting for children, turning a simple treat into a magical moment of unwrapping!
Creative Fruit Combinations and Flavor Boosts
Don’t be afraid to experiment with different fruit combinations to find your family’s favorites! Here are some ideas:
- Tropical Bliss: Mango and pineapple for a sweet, tangy burst.
- Berry Medley: Strawberries, raspberries, and a hint of blueberry for a vibrant, antioxidant-rich roll-up.
- Peach Perfection: Sweet peaches with a touch of vanilla extract.
- Apple Cinnamon: Apples (though they brown, the flavor is classic) with a pinch of cinnamon for a comforting taste. Add a tablespoon of water if the puree is too thick.
- Spice It Up: A tiny pinch of cinnamon, nutmeg, or even ginger can add a warm, complex note to your fruit leathers, especially with apple or pear bases.
- Citrus Zest: A little orange or lime zest can brightenthe flavor profile of many fruits.
Troubleshooting Common Issues
- Too Sticky: If your fruit roll-ups are too sticky even after cooling, they likely need more drying time. Return them to the oven for another 30-60 minutes, checking frequently. High humidity in your kitchen can also contribute to stickiness.
- Too Brittle/Cracking: This indicates the fruit leather was over-dried or spread too thinly in certain spots. Next time, try reducing the baking time slightly or spreading a thicker, more even layer. Slightly brittle parts can still be eaten, but they won’t roll as nicely.
- Uneven Drying: If some areas are dry and others sticky, your fruit puree wasn’t spread evenly. Use an offset spatula to get a consistent thickness across the pan.
Storage Instructions and Creative Serving Ideas
Proper storage is key to maintaining the freshness and chewiness of your homemade fruit roll-ups.
- Airtight Container: Once completely cooled and cut, store your homemade fruit roll-ups in an airtight container. This prevents them from drying out further or absorbing moisture from the air, which could make them sticky.
- Cool, Dry Spot: Keep the container in a dry, cool spot in your pantry or on your countertop. Avoid direct sunlight or warm areas, as this can affect their texture and shelf life.
- Shelf Life: Stored correctly, these delightful homemade treats will stay fresh and delicious for up to 2 weeks. For longer storage, you can freeze them in an airtight container for up to 3 months. Thaw at room temperature before enjoying.
- Packing for On-the-Go: Homemade fruit roll-ups are an excellent addition to school lunches or for quick snacks when you’re out and about. Simply place a rolled-up fruit leather (with or without craft paper) into a small plastic bag, a reusable snack bag, or a small container to keep it fresh and prevent it from sticking to other items. They are robust enough to withstand a bit of jostling and make for a healthy, convenient grab-and-go option. Consider packing them alongside other wholesome lunchbox favorites like a Veggie Wrap or other healthy lunch ideas.
- Creative Serving Ideas:
- Dessert Garnish: Cut into fun shapes with cookie cutters and use as a colorful garnish for yogurt, ice cream, or fruit salads.
- Trail Mix Addition: Chop into smaller pieces and add to homemade trail mixes for a burst of natural sweetness.
- Breakfast Topper: Snip over oatmeal or smoothie bowls.
Explore More Kid-Friendly Recipes from Our Kitchen
If your family loves these healthy homemade fruit roll-ups, be sure to check out some of our other popular kid-friendly recipes:
- Easy Ranch Veggie Wraps
- Wholesome Homemade Cheese Crackers
- Gluten-Free No-Bake Granola Bars
- 2-Ingredient Homemade GoGurts
- Fun DIY Butterfly Snack Bags
- Refreshing Frozen Yogurt Bark
- Quick Turkey Club Wrap
- Simple English Muffin Pizzas
Made this delicious recipe?
If you enjoyed making these homemade fruit roll-ups, we would love to hear from you! Please consider leaving a comment and a 5-star review at the bottom of this post. Your feedback helps other home cooks discover and enjoy this recipe too. Thank you for your support!
Homemade Fruit Roll-Ups Recipe Card
Rate
Video
Ingredients
- 3 cups fresh or frozen fruit, (see notes for fruit recommendations)
- 2 tablespoons natural sweetener, (maple syrup, agave, or honey; optional, adjust to taste and fruit sweetness)
- 1 teaspoon fresh lemon juice
Instructions
-
Preheat your oven to the lowest temperature setting it allows, ideally between 150-180°F (65-82°C). Line a large, rimmed baking sheet with parchment paper or a silicone baking mat, ensuring it covers the entire surface for easy removal.
-
In a food processor or high-speed blender, combine the 3 cups of chosen fruit (fresh or thawed/drained frozen), 1-2 tablespoons of natural sweetener (if using), and 1 teaspoon of fresh lemon juice. Blend until the mixture is perfectly smooth, with no remaining fruit chunks.

-
Pour the pureed fruit mixture onto the prepared baking pan. Using an offset spatula or the back of a spoon, spread the fruit puree into a very thin, even layer, approximately ⅛-inch (3mm) thick. Ensure there are no holes or excessively thin spots. Leave a ½-inch border around the edges of the pan to prevent sticking.
-
Carefully place the baking sheet into the preheated oven. Bake for 4-8 hours, or until the fruit leather is set and no longer sticky to the touch. The exact drying time will vary based on your oven’s temperature and the fruit’s moisture content. After 4 hours, check the fruit leather every 30 minutes. It should be pliable but dry, peeling cleanly from the parchment paper.
-
Once fully dried, remove the pan from the oven and let the fruit leather cool completely to room temperature on the baking sheet. This step is important for it to firm up and become easier to cut.
-
Once cooled, use kitchen scissors or a pizza cutter to cut the fruit leather into 1-inch wide strips. Gently peel each strip away from the parchment paper. For storage and presentation, roll each fruit leather strip into a spiral, either with a fresh strip of craft paper or the original parchment paper, and secure with tape or a small sticker.
Equipment
-
Parchment Paper
-
Rimmed Baking Sheet
-
Food Processor or Blender
-
Offset Spatula (optional but recommended)
-
Kitchen Scissors or Pizza Cutter
Recipe Notes & Pro Tips
Using Frozen Fruit: If opting for frozen fruit, ensure it is thoroughly defrosted in the refrigerator first. After thawing, it is crucial to drain off any excess liquid well. Gently pat the defrosted fruit dry with paper towels to minimize moisture content before pureeing. This step helps in achieving optimal drying times and prevents a soggy fruit leather.
Seedless Option: For those who prefer a completely smooth fruit leather or have sensitive digestive systems, consider using naturally seedless fruits such as peaches, mangoes, or applesauce. If you’re using seedy fruits like berries, you can puree them as instructed and then pass the puree through a fine-mesh strainer or sieve to remove all the small seeds before spreading it onto the baking sheet.
Storage: To maintain their optimal chewiness and prevent them from becoming too sticky or brittle, store homemade fruit roll-ups in a tightly sealed, airtight container. Keep the container in a dry, cool spot in your pantry at room temperature. They will typically remain fresh for up to 2 weeks. For longer preservation, you can also freeze them in an airtight container for up to 3 months.
Nutrition Information (per serving)
Carbohydrates: 16g
Sodium: 4mg
Potassium: 90mg
Fiber: 1g
Sugar: 13g
Vitamin A: 270IU
Vitamin C: 2.3mg
Calcium: 10mg
Iron: 0.3mg
Nutrition information is automatically calculated and should be used as an approximation only. Actual values may vary based on ingredients and preparation methods.
This post was originally published in 2017 and has been updated with enhanced details, tips, and improved formatting for a better user experience.