
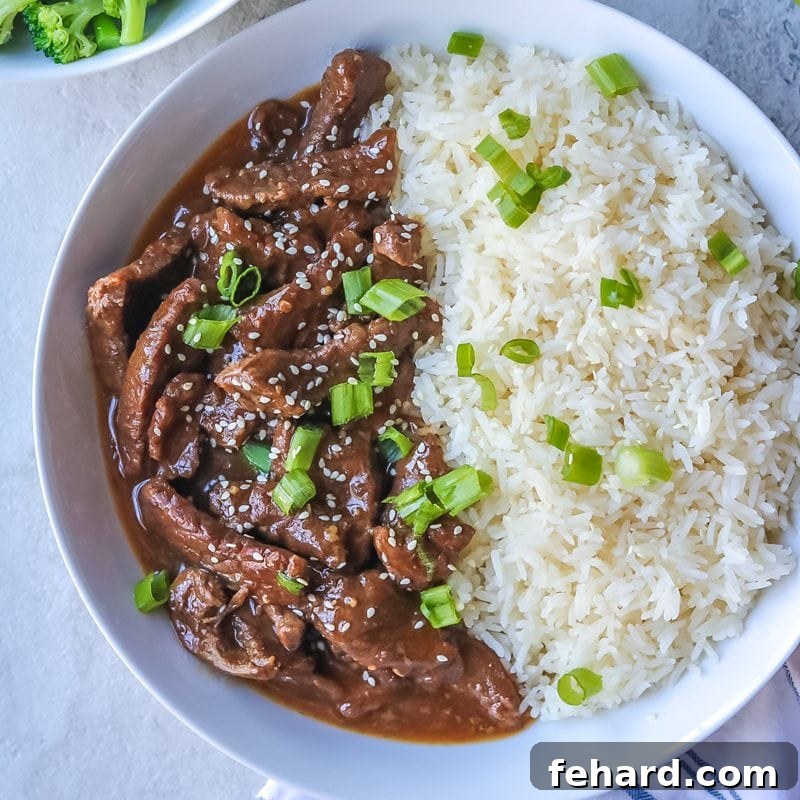
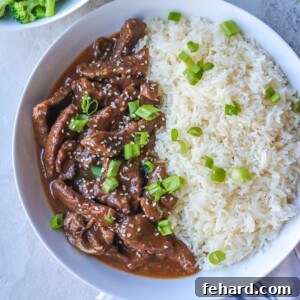
Transform your weeknight dinner with this incredible Instant Pot Mongolian Beef recipe – a healthier, quicker, and utterly delicious rendition of your favorite takeout classic! Crafted with everyday ingredients, this dish delivers unbelievably tender beef enveloped in a rich, sweet, and savory sauce that promises an explosion of unforgettable flavors. Say goodbye to long cooking times and hello to a culinary triumph ready in minutes.
Just like our popular recipes for Instant Pot Orange Chicken, Instant Pot Sweet and Sour Chicken, and Instant Pot Beef and Broccoli, this Instant Pot Mongolian Beef recipe harnesses the power of your pressure cooker to bring a wholesome and flavorful dinner to your table with unparalleled speed. It’s the perfect solution for busy evenings when you crave restaurant-quality taste without the fuss or the unknowns of commercial kitchens.
In This Post: A Quick Overview
- Mastering Instant Pot Mongolian Beef: Key Insights
- Essential Ingredients for Authentic Mongolian Beef
- How to Make Instant Pot Mongolian Beef: A Detailed Guide
- Storage and Reheating Instructions
- More Delicious Takeout-Inspired Recipes
- Full Instant Pot Mongolian Beef Recipe Card
Mastering Instant Pot Mongolian Beef: Key Insights for Success

- Pineapple Juice: The Ultimate Tenderizer and Flavor Enhancer! A secret weapon in many of my Instant Pot recipes, pineapple juice isn’t just for sweetness. Its natural enzymes work wonders in breaking down tough meat fibers, ensuring your beef is incredibly tender, while also adding a bright, subtle tang that perfectly balances the savory sauce. This ingredient truly elevates the dish, making it restaurant-worthy.
- Unlock Tenderness with Less Expensive Beef Cuts. Forget the need for premium cuts! While flank steak is traditionally preferred for Mongolian Beef, the magic of the Instant Pot allows you to achieve fork-tender results with more economical options like sirloin steak. The high-pressure cooking environment rapidly tenderizes the beef, making it a budget-friendly yet luxurious meal.
- Searing the Beef: A Crucial Step for Flavor and Texture. Don’t skip this step! While it adds a few extra minutes to your prep, searing the beef before pressure cooking creates a beautiful browned crust, locking in rich, deep flavors. This caramelization adds a delightful textural contrast to the tender interior and significantly enhances the overall complexity of the dish, reducing the required pressure cooking time for perfect results.
Happy Cooking! xo Kristen
Essential Ingredients for Authentic Instant Pot Mongolian Beef
Crafting the perfect Instant Pot Mongolian Beef starts with selecting the right ingredients. Below is a detailed look at what you’ll need, along with tips to ensure the best flavor and texture. For precise quantities, please refer to the comprehensive recipe card at the end of this post.
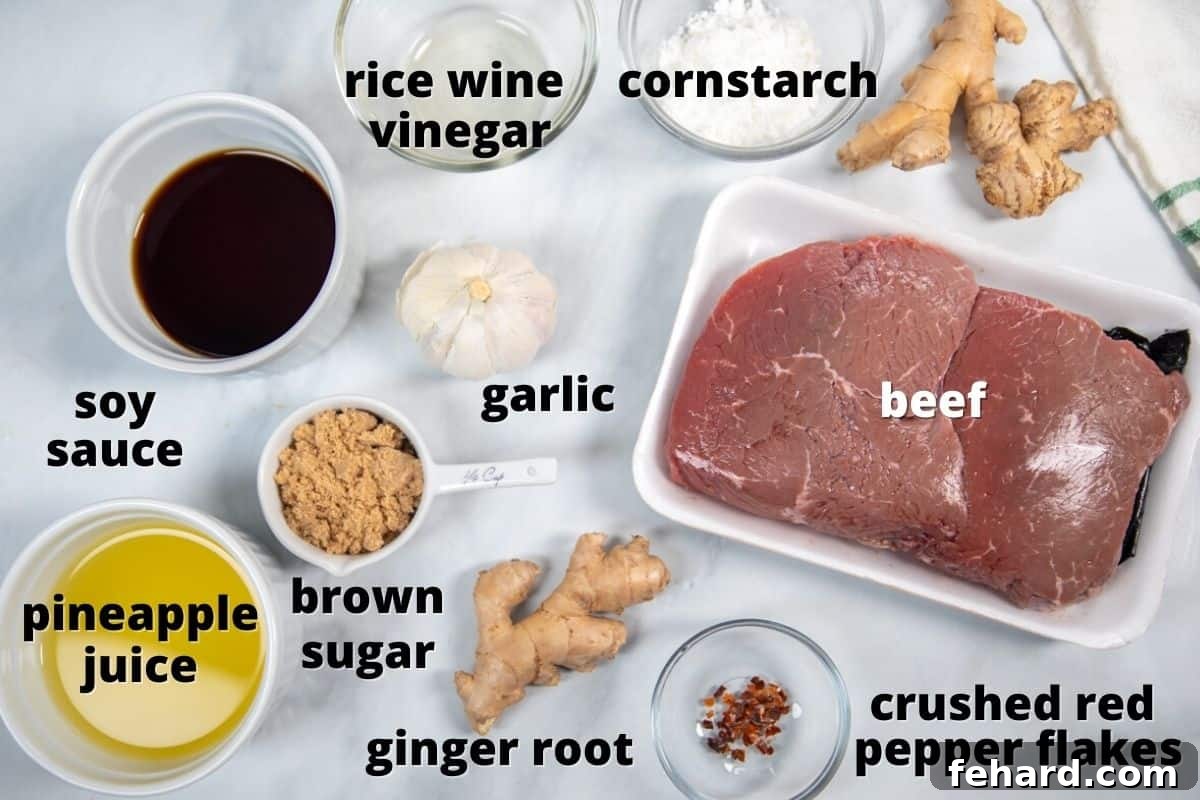
- Beef: For optimal results, flank steak, skirt steak, or hanger steak are excellent choices due to their lean profile and ability to tenderize beautifully under pressure. However, as noted, sirloin steak is a fantastic, more affordable alternative that will still yield incredibly tender results thanks to the Instant Pot. The key is thin slicing against the grain, regardless of the cut.
- Pineapple Juice: Always opt for canned pineapple juice, ensuring it’s 100% juice and not packed in syrup. The concentrated flavor and enzymatic properties of canned juice are superior for this recipe. You can even use the juice drained from a can of pineapple chunks if they are in 100% juice.
- Low-Sodium Soy Sauce: To maintain control over the saltiness of your dish and make it healthier than traditional takeout, reduced-sodium soy sauce is highly recommended. If you’re gluten-intolerant, tamari makes an excellent gluten-free substitute without compromising flavor.
- Brown Sugar: This provides the signature sweetness and helps create that glossy, caramelized finish on the sauce. Dark brown sugar will offer a richer molasses flavor, while light brown sugar is subtly sweet. For alternative sweeteners, honey or maple syrup can be used, though they may slightly alter the flavor profile.
- Freshly Grated Ginger & Minced Garlic: Fresh aromatics are non-negotiable for authentic taste. They provide a vibrant, pungent foundation for the sauce that dried versions simply can’t replicate. Use a microplane for easy ginger grating.
- Rice Wine Vinegar: This ingredient adds a crucial touch of acidity and brightness, cutting through the sweetness and richness of the sauce. Its flavor is mellow and complex, distinct from regular white vinegar. Ensure you use rice wine vinegar, not seasoned rice vinegar, which often contains added sugar and salt.
- Red Pepper Flakes: These offer a customizable kick. Add more for a spicier dish or reduce for a milder version. They contribute a subtle warmth that complements the sweet and savory notes beautifully.
- Cornstarch: Used to thicken the sauce to that perfect, glossy consistency that clings to the beef. A cornstarch slurry (cornstarch mixed with water) is essential for a smooth, lump-free sauce. Tapioca starch or arrowroot powder can be used as alternatives in equal parts.
- Extra Virgin Olive Oil: A small amount is needed for searing the beef, which is a vital step for developing deep flavor and texture. Any neutral cooking oil with a high smoke point will also work.
How to Make Instant Pot Mongolian Beef: A Detailed Guide
Embark on your journey to homemade takeout perfection with these easy-to-follow steps. If you’re new to the world of Instant Pot cooking or need a refresher on its various functions, I highly recommend consulting my comprehensive guide for using an Instant Pot to ensure flawless results every time. The full recipe details, including precise measurements, are available in the recipe card below.
Preparing Your Beef for Maximum Tenderness and Flavor
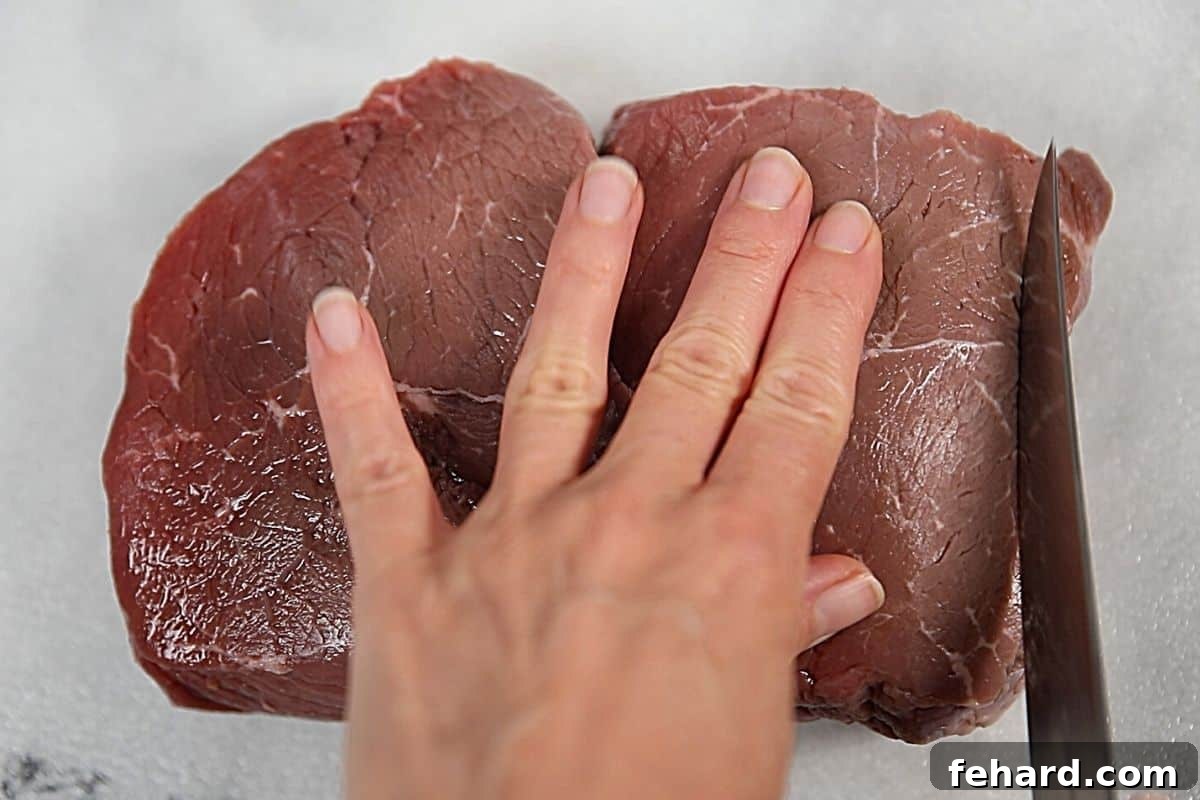
- Thinly Slice the Beef Against the Grain. This is arguably the most crucial step for achieving that melt-in-your-mouth, restaurant-quality tenderness. Slicing against the grain shortens the muscle fibers, making the beef easier to chew. For effortless thin slicing (aim for ¼-inch strips), pop the beef into the freezer for about 10-15 minutes prior to cutting. This firming-up process makes it much easier to get uniform, thin slices.
Searing for Depth of Flavor and Texture
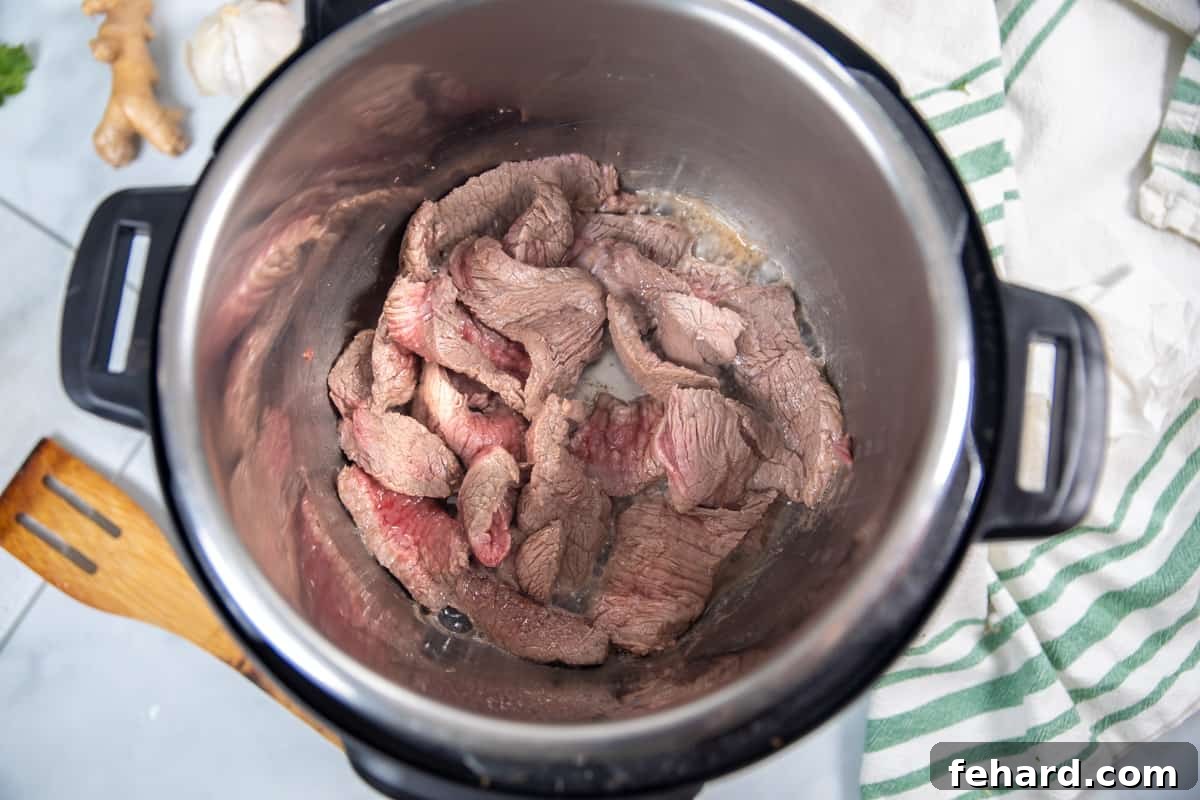
- Sauté the Beef to Develop Rich Flavors. Turn on your Instant Pot’s “Sauté” function and allow it to heat for a minute or two before adding the olive oil. Once the oil is shimmering, add your thinly sliced beef in a single layer (you may need to do this in batches to avoid overcrowding) and sear until it’s lightly browned on all sides. This browning creates a Maillard reaction, developing complex, savory flavors that form the backbone of the dish. After searing, hit “Cancel” to turn off the Sauté function. This quick sear typically takes only about 2 minutes per batch.
Crafting the Signature Sweet and Savory Sauce
- Prepare Your Irresistible Mongolian Sauce. In a separate small bowl, combine the pineapple juice, low-sodium soy sauce, rice wine vinegar, freshly grated ginger, minced garlic, brown sugar, and red pepper flakes. Whisk all these ingredients thoroughly until the brown sugar is fully dissolved, ensuring a perfectly balanced sweet and savory profile.
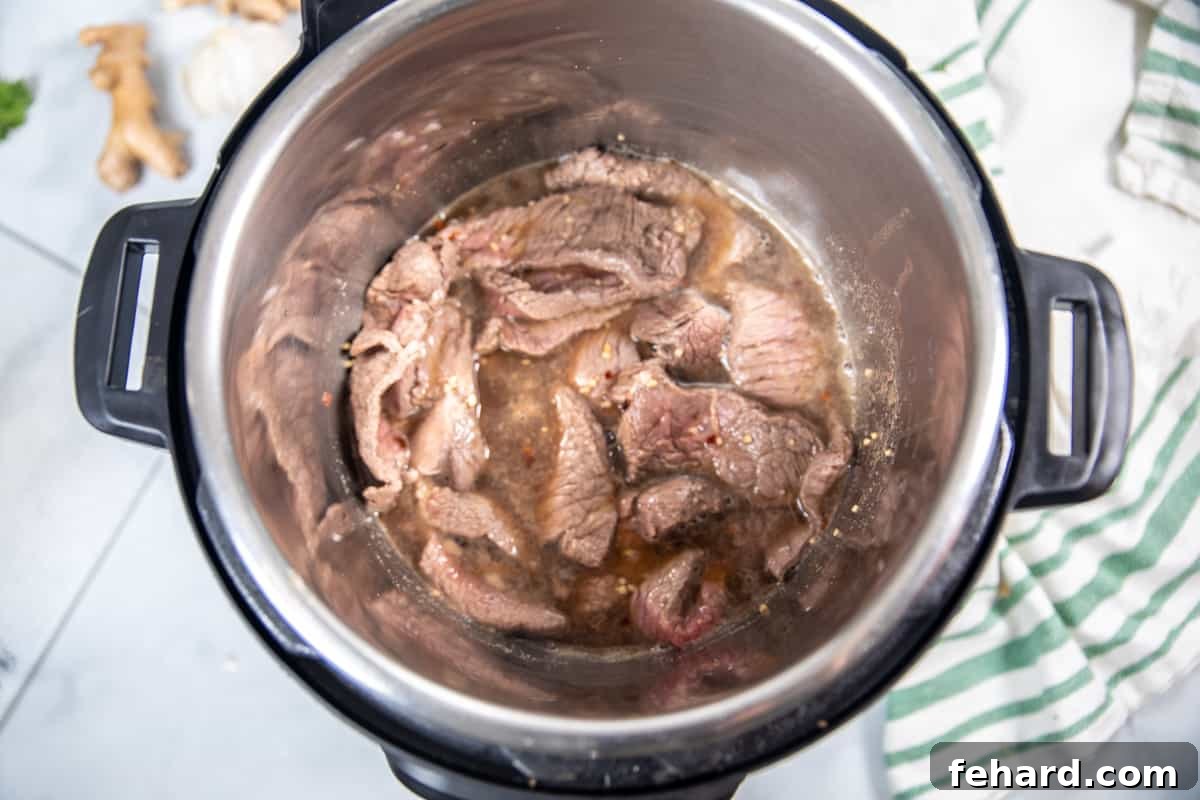
- Deglaze the Inner Pot with the Sauce. Pour the prepared Mongolian sauce directly into the Instant Pot over the seared beef. Immediately use a wooden spoon or spatula to scrape up any browned bits that may be stuck to the bottom of the inner pot. This is a vital step to prevent a “burn notice” and incorporates all those delicious caramelized flavors into your sauce.
Pressure Cooking to Perfection and Thickening the Sauce
- Pressure Cook for Ultimate Tenderness with Natural Release. Secure the lid on your Instant Pot, ensuring the venting knob is set to the “Sealing” position. Select the “Manual” or “Pressure Cook” function and set the cooking time to 3 minutes on high pressure. If you’re using sirloin steak, increase this to 10 minutes to achieve optimal tenderness. Once the cooking cycle is complete, allow the pressure to release naturally for at least 10 minutes before performing a quick release of any remaining pressure. This natural release method helps keep the beef incredibly tender and juicy.
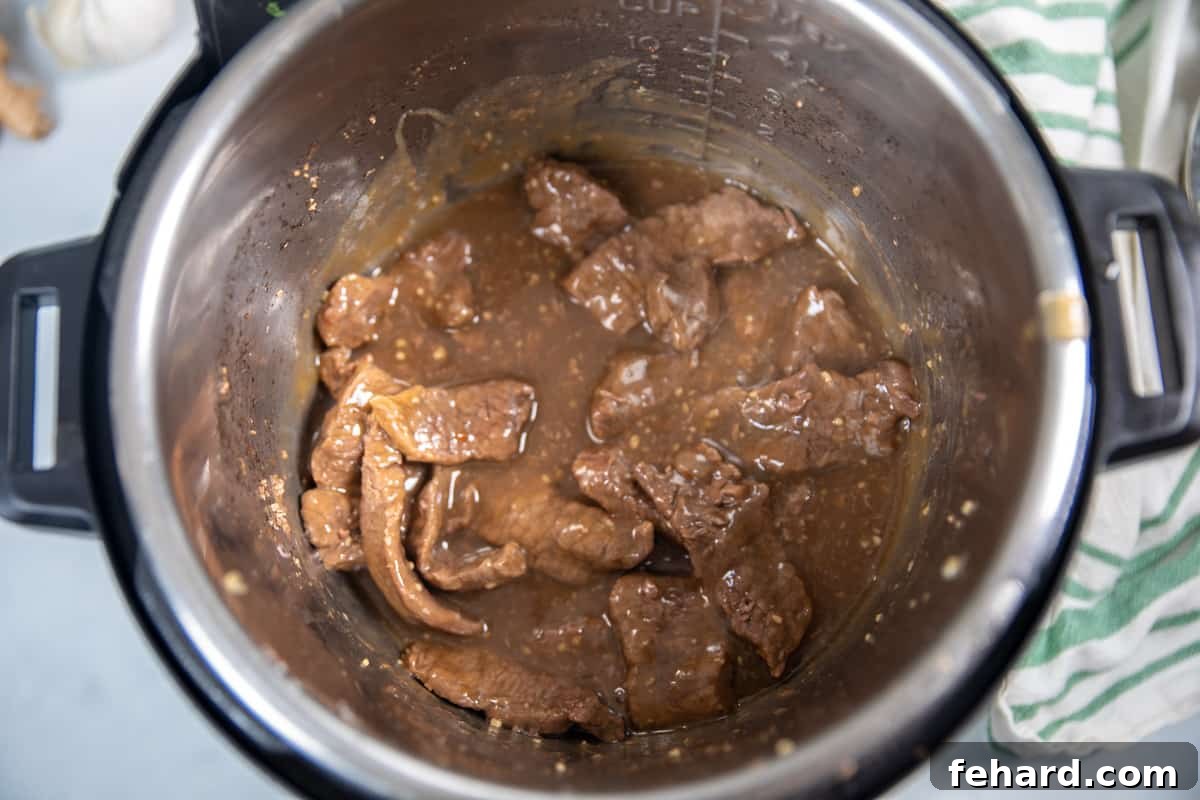
- Thicken the Sauce to a Perfect Glossy Consistency. After the pressure has been released, carefully remove the lid. You’ll notice a thin, flavorful liquid. To transform this into the signature thick, glossy sauce, turn the Instant Pot back to the “Sauté” function. In a small separate bowl, create a cornstarch slurry by whisking together 2 tablespoons of cornstarch with ¼ cup of cold water until smooth. Pour this slurry into the simmering sauce in the Instant Pot, stirring constantly. Continue to cook for just 1-2 minutes, or until the sauce has thickened to your desired consistency, beautifully coating the beef.
Serving Your Homemade Takeout Delight
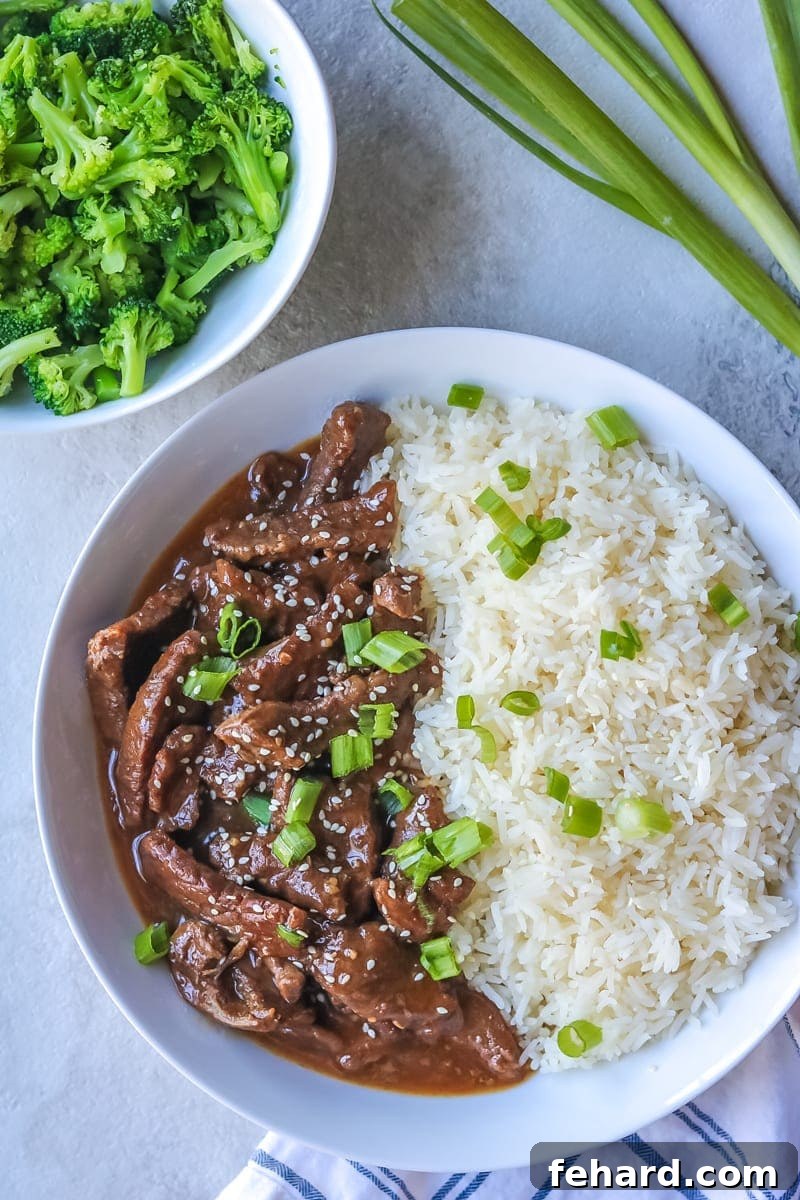
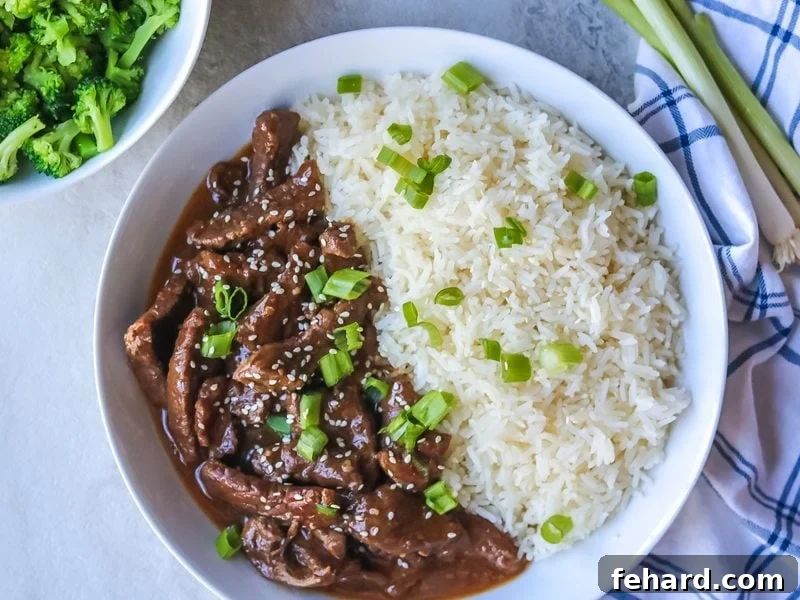
- Serve with Your Favorite Sides and Garnishes. Turn off the Instant Pot and transfer your glorious Mongolian Beef and its rich sauce to a serving platter. It pairs perfectly with fluffy white rice, Instant Pot brown rice, or Instant Pot jasmine rice, which will beautifully soak up every drop of that incredible sauce. For a low-carb option, serve it over cauliflower rice. Elevate the presentation and flavor by garnishing with thinly sliced green onions and a sprinkle of toasted sesame seeds for added texture and a burst of freshness. Add some steamed broccoli or snap peas for a complete, nutritious meal.
Storage and Reheating Instructions for Your Leftovers
This Instant Pot Mongolian Beef is so delicious, you might not have leftovers! But if you do, here’s how to properly store and reheat them to enjoy that amazing flavor again.
- Refrigerate: Allow the Mongolian beef to cool completely to room temperature (this is important for food safety). Once cooled, transfer it to an airtight container and store it in the refrigerator for up to 3 days. The flavors often meld even further overnight, making it just as delicious the next day!
- Freeze: For longer storage, transfer the fully cooled leftovers to a freezer-safe container or heavy-duty freezer bag. Ensure there’s minimal air to prevent freezer burn. Store in the freezer for up to 3 months. Label with the date for easy tracking.
- Reheat:
- From Refrigerator: For individual servings, place the Mongolian beef in a heat-safe bowl, cover it with a damp paper towel (to help retain moisture), and microwave in 30-second intervals, stirring in between, until it is thoroughly warmed through. You can also reheat gently on the stovetop in a skillet over medium-low heat until heated.
- From Freezer: If frozen, it’s best to defrost the Mongolian beef overnight in the refrigerator. Once thawed, follow the reheating instructions for refrigerated leftovers. If reheating directly from frozen, you may need to add a splash of water or broth to loosen the sauce and microwave in longer intervals, stirring frequently, until heated through.
Explore More Delicious Takeout-Inspired Recipes
If you love the convenience and flavor of homemade takeout, be sure to try these other fan favorites:
- Moo Goo Gai Pan – A light and healthy chicken and mushroom stir-fry.
- Easy Fried Rice – A versatile side or main dish that’s perfect for using up leftover rice.
- Shrimp Lo Mein – Quick and flavorful noodles with succulent shrimp.
- Chicken and Broccoli – A classic combination, simple yet satisfying.
- Stir-Fried Chicken and Bok Choy – A fresh and vibrant stir-fry with tender chicken and crisp bok choy.
Did you make this recipe?
If you enjoyed this Instant Pot Mongolian Beef, please take a moment to leave a comment with a 5-star review at the bottom of the post. Your feedback helps other home cooks discover and enjoy this recipe! Thank you!
Instant Pot Mongolian Beef
Kristen Chidsey
4
15
5
10
30
Rate
Ingredients
- 1 pound flank steak, or skirt steak or hanger steak (see recipe notes for sirloin steak option)
- 1 tablespoon extra virgin olive oil
- ⅔ cup pineapple juice
- ⅓ cup reduced sodium soy sauce
- ¼ cup packed light brown sugar
- 2 teaspoons freshly grated ginger
- 1 tablespoon minced garlic
- 1 teaspoon red pepper flakes (adjust to taste)
- ½ tablespoon rice wine vinegar
- 2 tablespoons cornstarch
- ¼ cup cold water (for slurry)
- Optional garnishes: sliced green onions, sesame seeds.
Instructions
-
Prepare the Beef: Thinly slice 1 pound flank steak against the grain into ¼-inch strips. For easier slicing, freeze the beef for about 10-15 minutes before cutting. Set aside.
-
Sear the Beef: Turn your Instant Pot to the “Sauté” function and allow it to heat up. Add 1 tablespoon extra virgin olive oil to the pot. Once hot, add the sliced beef in a single layer (work in batches if necessary to avoid overcrowding) and sauté until lightly browned on all sides, about 2 minutes per batch. This step is crucial for flavor development. Once seared, hit “Cancel” to turn off the Sauté function.
-
Prepare the Sauce: In a small bowl, whisk together ⅔ cup pineapple juice, ⅓ cup reduced sodium soy sauce, ¼ cup brown sugar, 2 teaspoons freshly grated ginger, 1 tablespoon minced garlic, 1 teaspoon red pepper flakes, and ½ tablespoon rice wine vinegar. Ensure the brown sugar is fully dissolved.
-
Deglaze the Pot: Pour the prepared sauce over the seared beef in the inner pot. Use a wooden spoon or spatula to scrape up any browned bits stuck to the bottom of the pot. This prevents a “burn notice” and adds rich flavor to your sauce.
-
Pressure Cook: Secure the lid on the Instant Pot and ensure the sealing valve is set to “Sealing.” Select the “Manual” or “Pressure Cook” function and set the cooking time to 3 minutes on HIGH pressure. (If using sirloin steak, set to 10 minutes.)
-
Natural Pressure Release: Once the cooking time has elapsed, allow the pressure to release naturally for at least 10 minutes. This helps ensure the beef remains tender. After 10 minutes, carefully quick release any remaining pressure by turning the sealing valve to “Venting.”
-
Thicken the Sauce: Carefully remove the lid. Turn the Instant Pot back to “Sauté” (or “Less” for a gentler simmer) and bring the sauce to a gentle simmer. In a small bowl, prepare a cornstarch slurry by mixing together 2 tablespoons cornstarch with ¼ cup cold water until fully combined and lump-free. Slowly whisk the cornstarch slurry into the simmering sauce in the Instant Pot. Continue to cook, stirring constantly, for 2-4 minutes until the sauce has thickened to a glossy consistency that coats the beef.
-
Serve: Turn off the Instant Pot. Serve the tender Mongolian beef and its rich sauce generously over steamed white rice, brown rice, or cauliflower rice. Garnish with sliced green onions and sesame seeds if desired for an authentic touch.
Equipment
-
Electric Pressure Cooker (6 or 8 quart)
-
Sharp Knife and Cutting Board
-
Small Mixing Bowls and Whisk
Notes for Perfect Mongolian Beef
Sweetener Alternatives: Brown sugar provides a classic flavor, but you can substitute it with equal parts honey or maple syrup for a slightly different sweet profile. Adjust to your personal preference.
Using Sirloin Steak: If opting for a less expensive cut like thinly sliced sirloin steak, increase the pressure cooking time to 10 minutes on high pressure to ensure maximum tenderness. Follow all other steps as directed.
Cooking from Frozen Beef: If using pre-sliced frozen beef, eliminate the searing step and the olive oil. Add the frozen sliced beef directly to the inner pot with the Mongolian sauce. Increase the pressure cooking time to 6 minutes on high pressure, followed by natural pressure release and sauce thickening.
Adjusting Spice Level: The amount of red pepper flakes can be easily adjusted to suit your preferred level of heat. For a spicier kick, add more; for a milder flavor, reduce the quantity or omit entirely.
Leftovers & Storage: Store cooled leftovers in an airtight container in the refrigerator for up to 3 days. For longer storage, freeze in a freezer-safe container for up to 3 months. To reheat, thaw overnight in the refrigerator if frozen. Reheat individual servings in the microwave, covered with a damp paper towel, in 30-second intervals until warmed through, or gently on the stovetop.
Adding Vegetables: For a more complete meal, consider adding vegetables such as sliced bell peppers, broccoli florets, or snap peas during the last minute or two of sauce thickening. They’ll cook quickly and add color and nutrients.
Nutrition
Carbohydrates: 25g
Protein: 27g
Fat: 6g
Saturated Fat: 2g
Polyunsaturated Fat: 1g
Monounsaturated Fat: 3g
Trans Fat: 1g
Cholesterol: 67mg
Sodium: 785mg
Potassium: 535mg
Fiber: 1g
Sugar: 18g
Vitamin A: 150IU
Vitamin C: 5mg
Calcium: 51mg
Iron: 3mg
Nutrition information is automatically calculated and should be used as an approximation. Actual values may vary based on specific ingredients and preparation methods.
Tried this recipe?Mention @amindfullmom or tag #amindfullmom!
Why Choose Homemade Instant Pot Mongolian Beef?
There are countless reasons to swap your usual takeout order for this homemade Instant Pot Mongolian Beef. Beyond the incredible flavor and the sheer joy of cooking, this recipe offers significant benefits:
- Healthier Alternative: When you cook at home, you control the ingredients. This recipe uses reduced-sodium soy sauce and allows you to adjust the sugar and oil, making it considerably healthier than many restaurant versions that are often loaded with excessive salt, sugar, and unhealthy fats.
- Budget-Friendly: Eating out, especially for a family, can quickly add up. Making Mongolian Beef in your Instant Pot is a cost-effective way to enjoy a gourmet meal without breaking the bank. You can even opt for more affordable cuts of beef, knowing the Instant Pot will still make them incredibly tender.
- Time-Saving Convenience: The Instant Pot truly shines here. What typically takes hours to slow-cook or involves multiple steps of deep-frying and stir-frying is condensed into a quick, hands-off pressure cooking process. You get complex flavors and tender meat in a fraction of the time.
- Customization at Your Fingertips: Love more spice? Add extra red pepper flakes. Prefer it less sweet? Dial back the brown sugar. Want to sneak in some veggies? Easily add them to the pot. Homemade allows for endless customization to suit your family’s tastes and dietary needs.
- Freshness You Can Taste: Using fresh ginger and garlic makes a world of difference. The vibrant, aromatic flavors are unmatched, resulting in a dish that tastes incredibly fresh and authentic.
Customizing Your Instant Pot Mongolian Beef Experience
One of the best parts of cooking at home is the ability to adapt recipes to your liking. This Instant Pot Mongolian Beef is incredibly versatile:
- Spice it Up (or Down): The red pepper flakes are your friend here. Start with a teaspoon for a mild warmth, increase to two or three for a noticeable kick, or add a pinch of dried chili peppers for serious heat. If serving to kids or those sensitive to spice, you can easily reduce or omit them.
- Add Your Favorite Vegetables: While traditionally served with just beef, adding vegetables can make this a complete one-pot meal. Broccoli florets, sliced bell peppers (red, yellow, orange), snap peas, or even thinly sliced carrots can be added to the Instant Pot during the sauce thickening stage. They’ll cook quickly to a tender-crisp perfection.
- Protein Swaps: Not a fan of beef? This sauce is so delicious it works beautifully with other proteins. Try thinly sliced chicken breast or thighs for Instant Pot Mongolian Chicken, or even firm tofu for a vegetarian option. Adjust cooking times accordingly; chicken will cook faster, while tofu might just need to simmer in the sauce.
- Sweetness Adjustment: The recipe calls for brown sugar, but feel free to tweak the amount to your taste. You can use a bit less for a less sweet profile or substitute with honey or maple syrup for different undertones.
- Garnish Galore: Beyond green onions and sesame seeds, consider fresh cilantro, a drizzle of sesame oil for extra nutty flavor, or a squeeze of lime juice for brightness right before serving.
With these tips and customizations, your Instant Pot Mongolian Beef will not only be a speedy weeknight meal but also a perfectly tailored culinary creation that everyone at your table will adore. Enjoy the journey of making your favorite takeout dish even better at home!
This recipe was originally published in 2017 but updated in 2025 to include expanded tips, detailed instructions, and enhanced SEO optimization for an even better cooking experience.